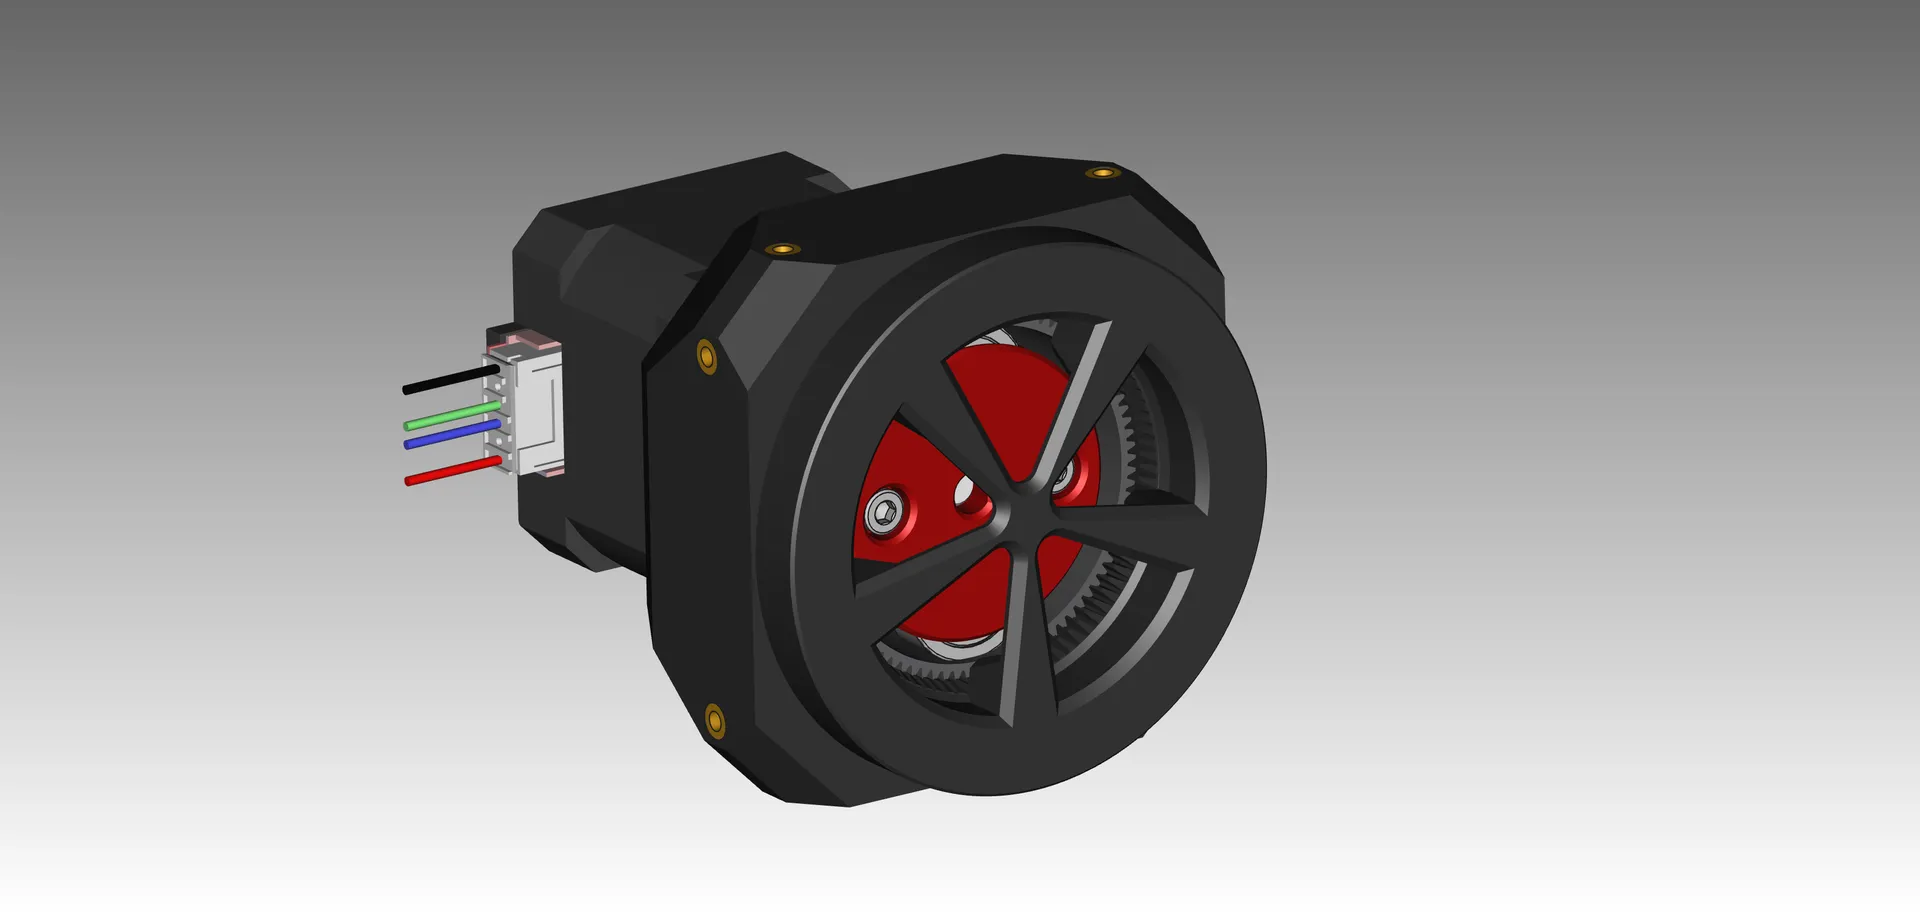
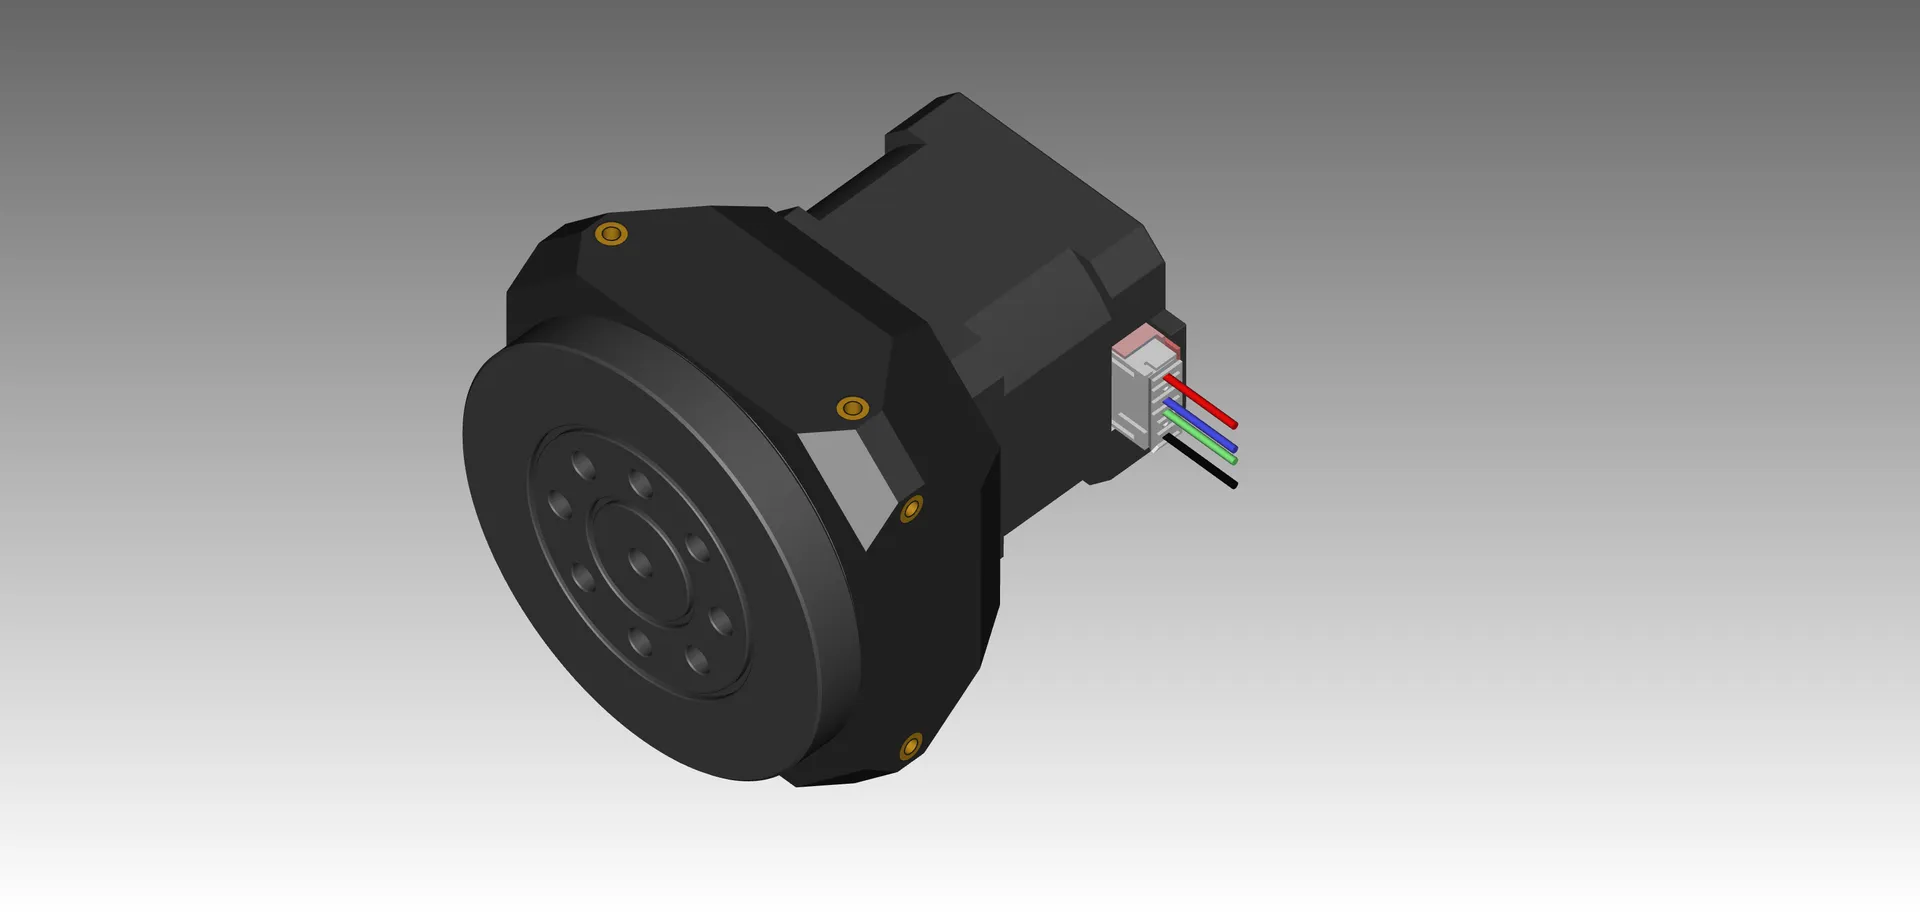
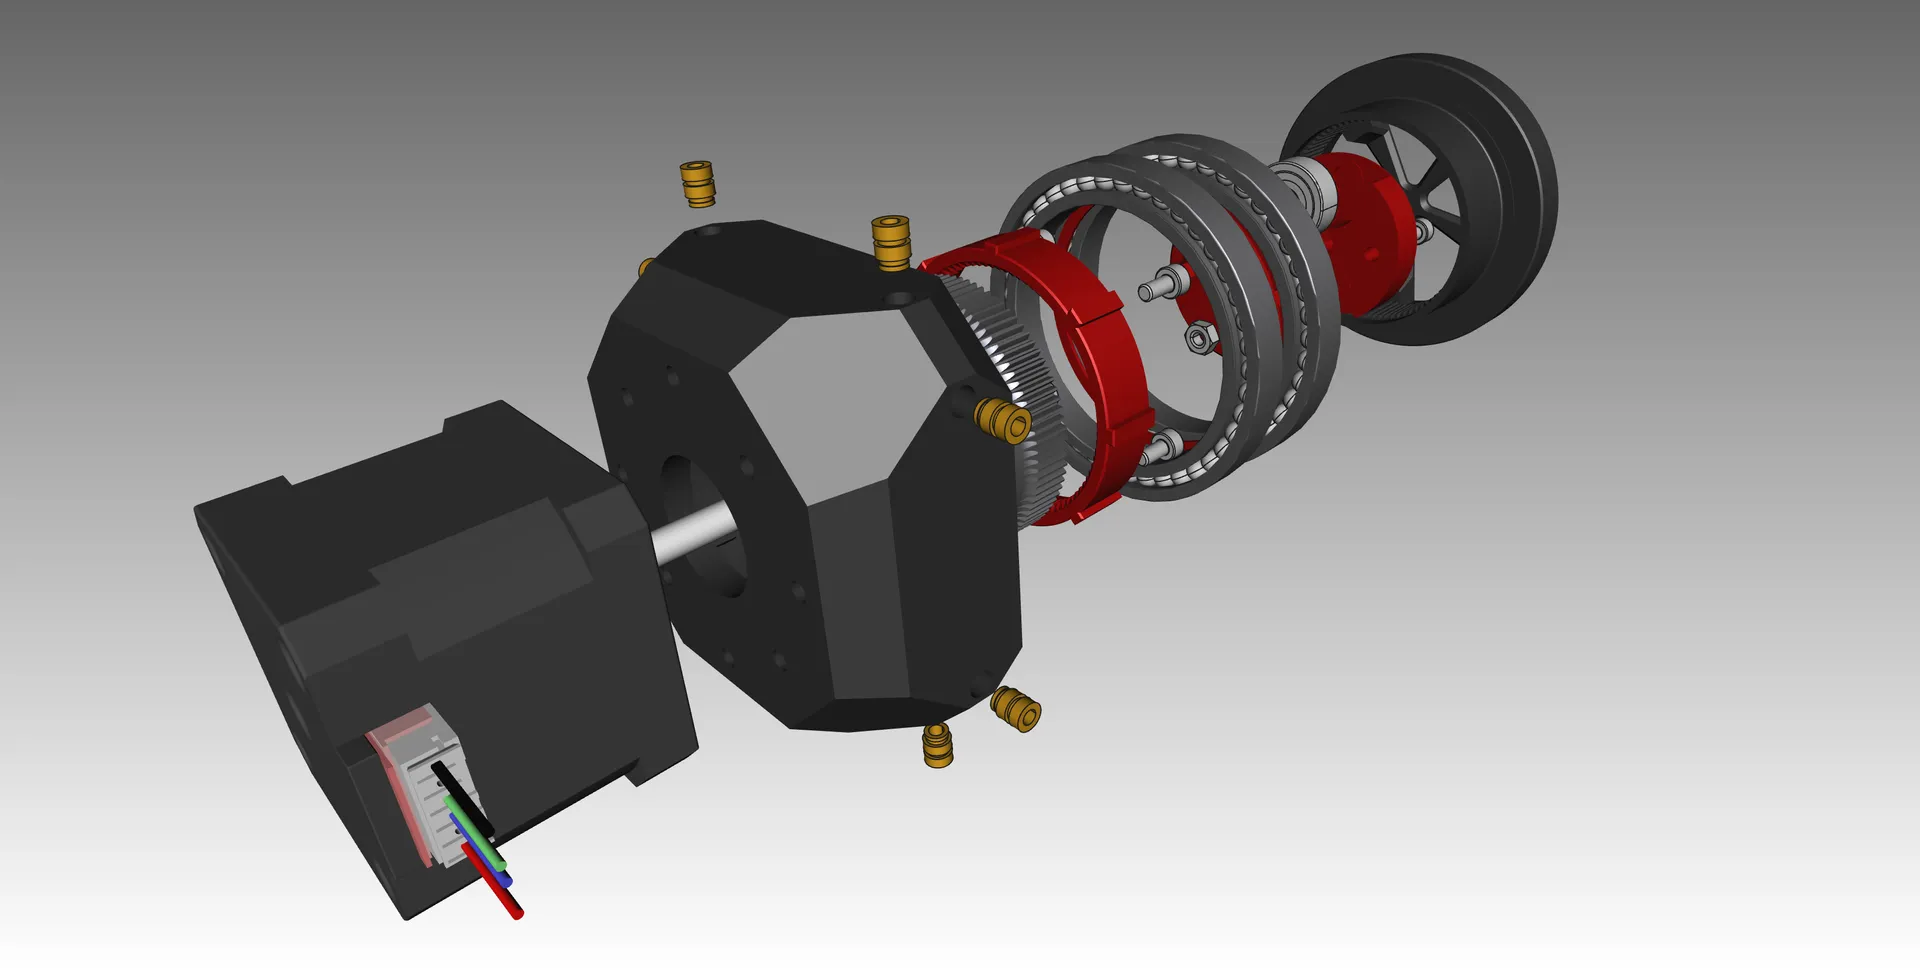
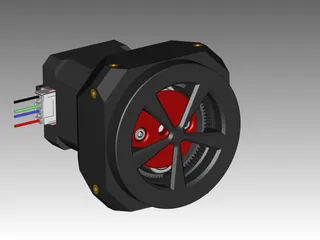
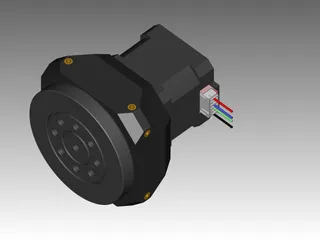
Compact 44:1 Harmonic Drive


Description
PDF44:1 compact harmonic drive
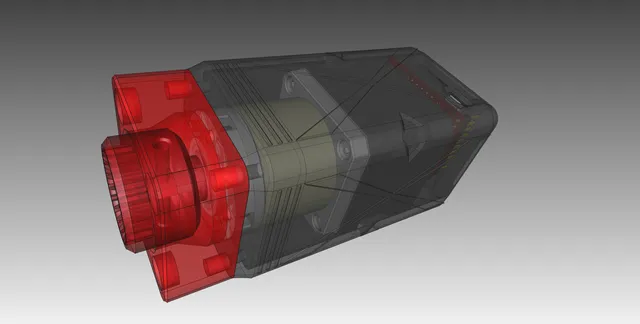
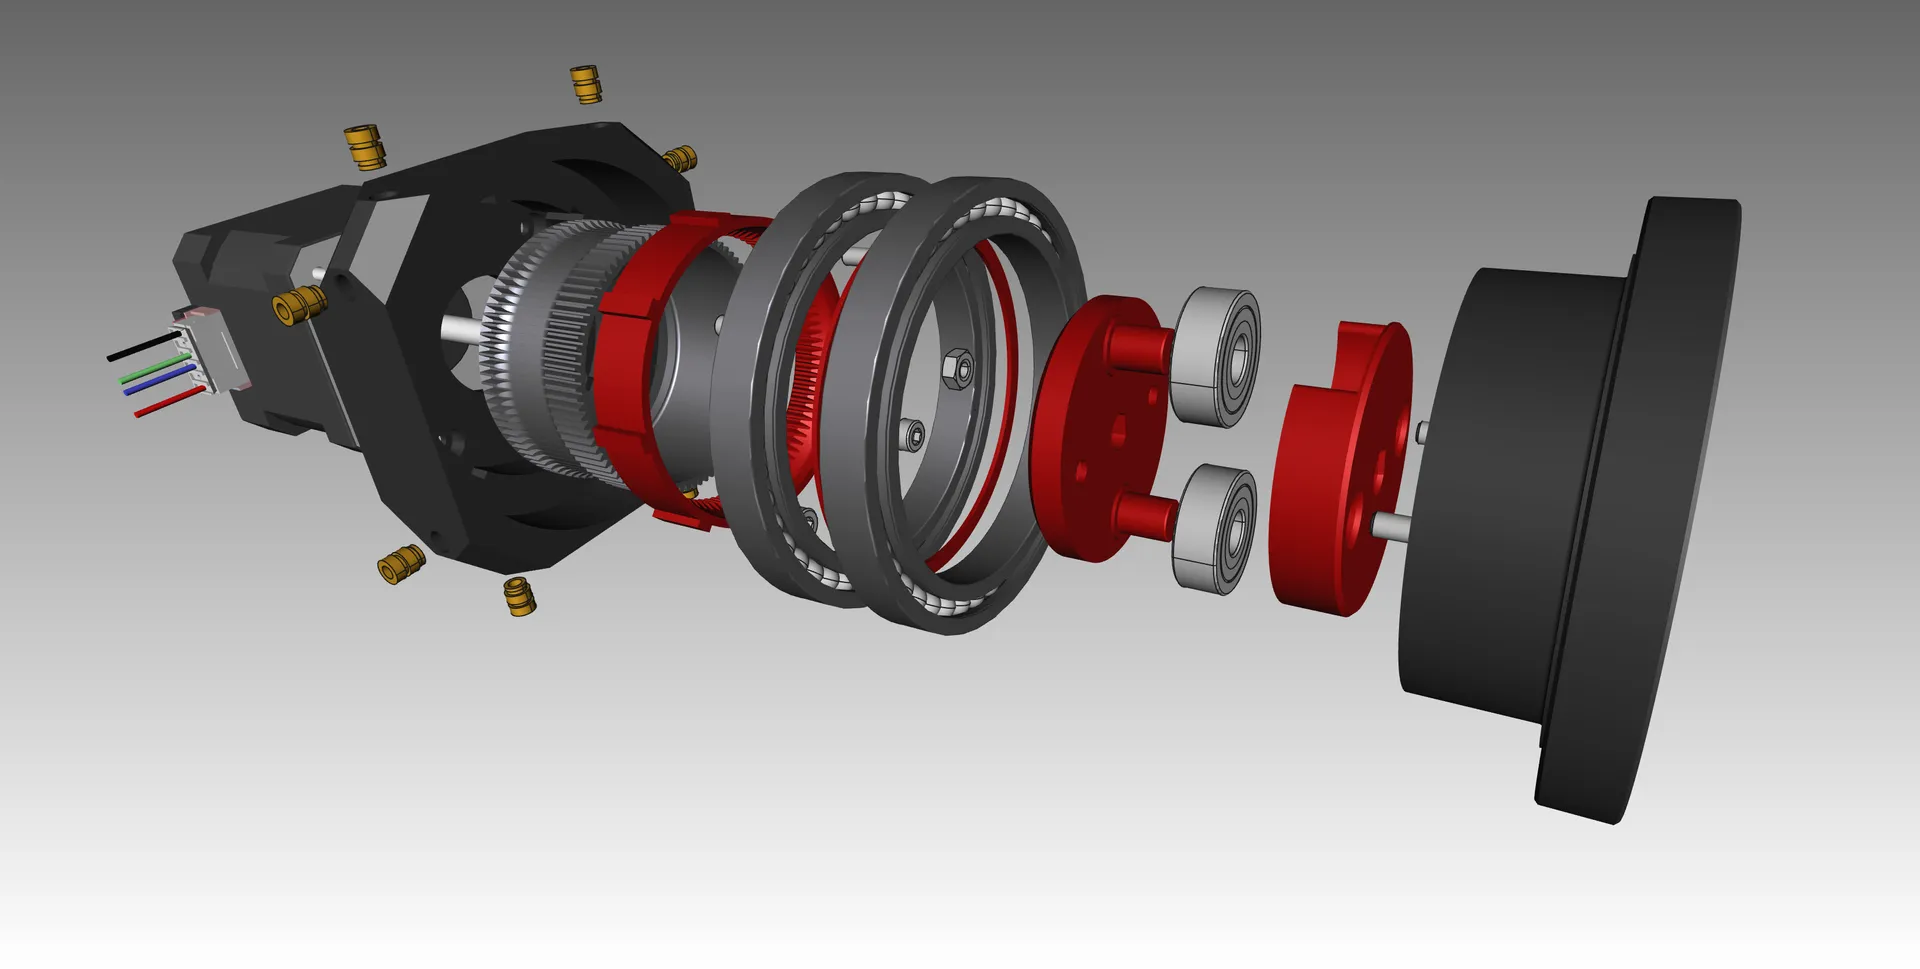
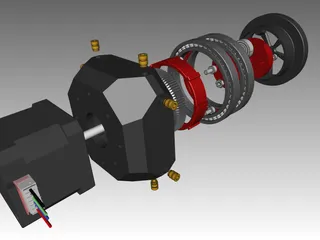
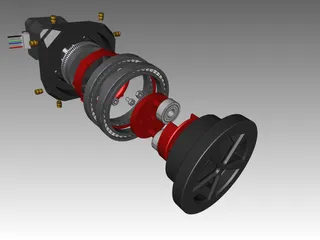
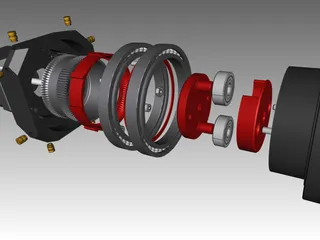
I wanted to build a Harmonic Drive gearbox that was as small as possible and had the highest possible gear ratio, and that's what came out of it. Another goal was to design a flexspline that works almost stress-free. Here, the Flexspline was loosely inserted into a toothing that is connected to the housing with no play and torsion-proof.
The circular spline (output shaft) is held stable in ball bearings, so it does not deform under load. Last but not least, the direction of rotation is the same as that of the motor.
BOM:
- 2x Bearing 6810 2RS https://amzn.eu/d/19QKWSp
- 2x Bearing 606 ZZ https://amzn.eu/d/fdh3d0U
- 1x NEMA17 Motor with 5mm D-Cut shaft
- 4x M3x6 allen screws (for motor mounting)
- 2x M3x8 allen screws (for wavegenerator)
- 2x M3 hex nut
- 8x M3 Heatset inserts (optional)
- Grease
Printsettings:
- Flexspline: 0.25mm nozzle, layerheight 0.12mm, PETG
- Flexspline_Outer_Ring: 0.25mm nozzle, layerheight 0.12mm
- Circular_Output: 0.25mm nozzle, layerheight 0.12mm
- all other parts: you can use a 0.4mm nozzle and a strong material like ABS
!!! Important !!!
These are precision parts with very tight tolerances, so the printer has to be set very well.
In order to ensure dimensional accuracy, you must first calibrate your printer best possible. Flow, pressure advance (klipper) linear advance (marlin) and including the shrink factor of the filament, because that makes the difference between success and failure.
To calibrate your shrinkfactor, use this: https://www.printables.com/de/model/308591-shrinkfactor-calibation
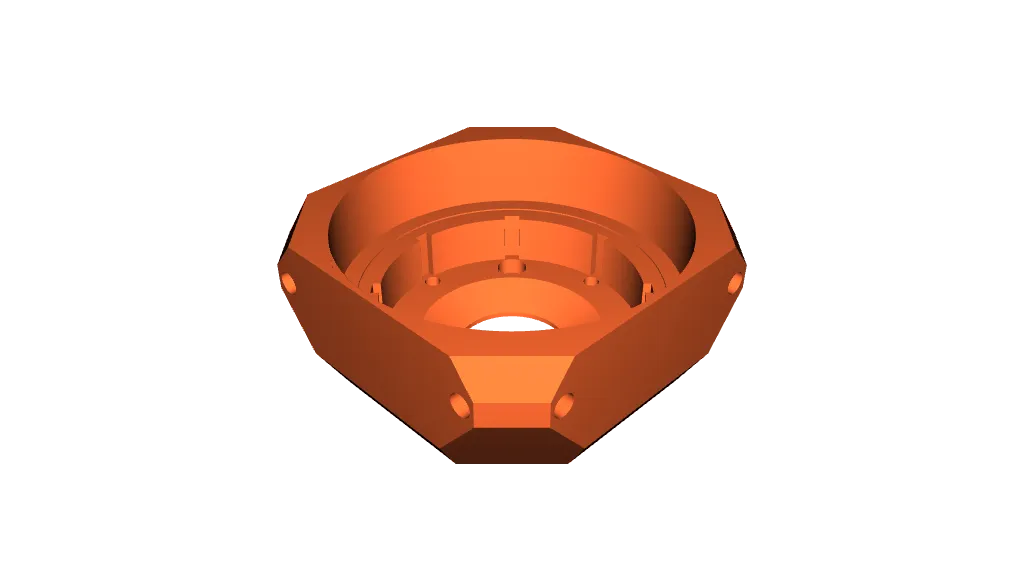
A disadvantage is that the output shaft is not stable in the Z-axis, you can pull it out. If you want to use this drive, you still have to plan for a bearing for the shaft. To facilitate centering, there are 2 centering aids on the front panel.
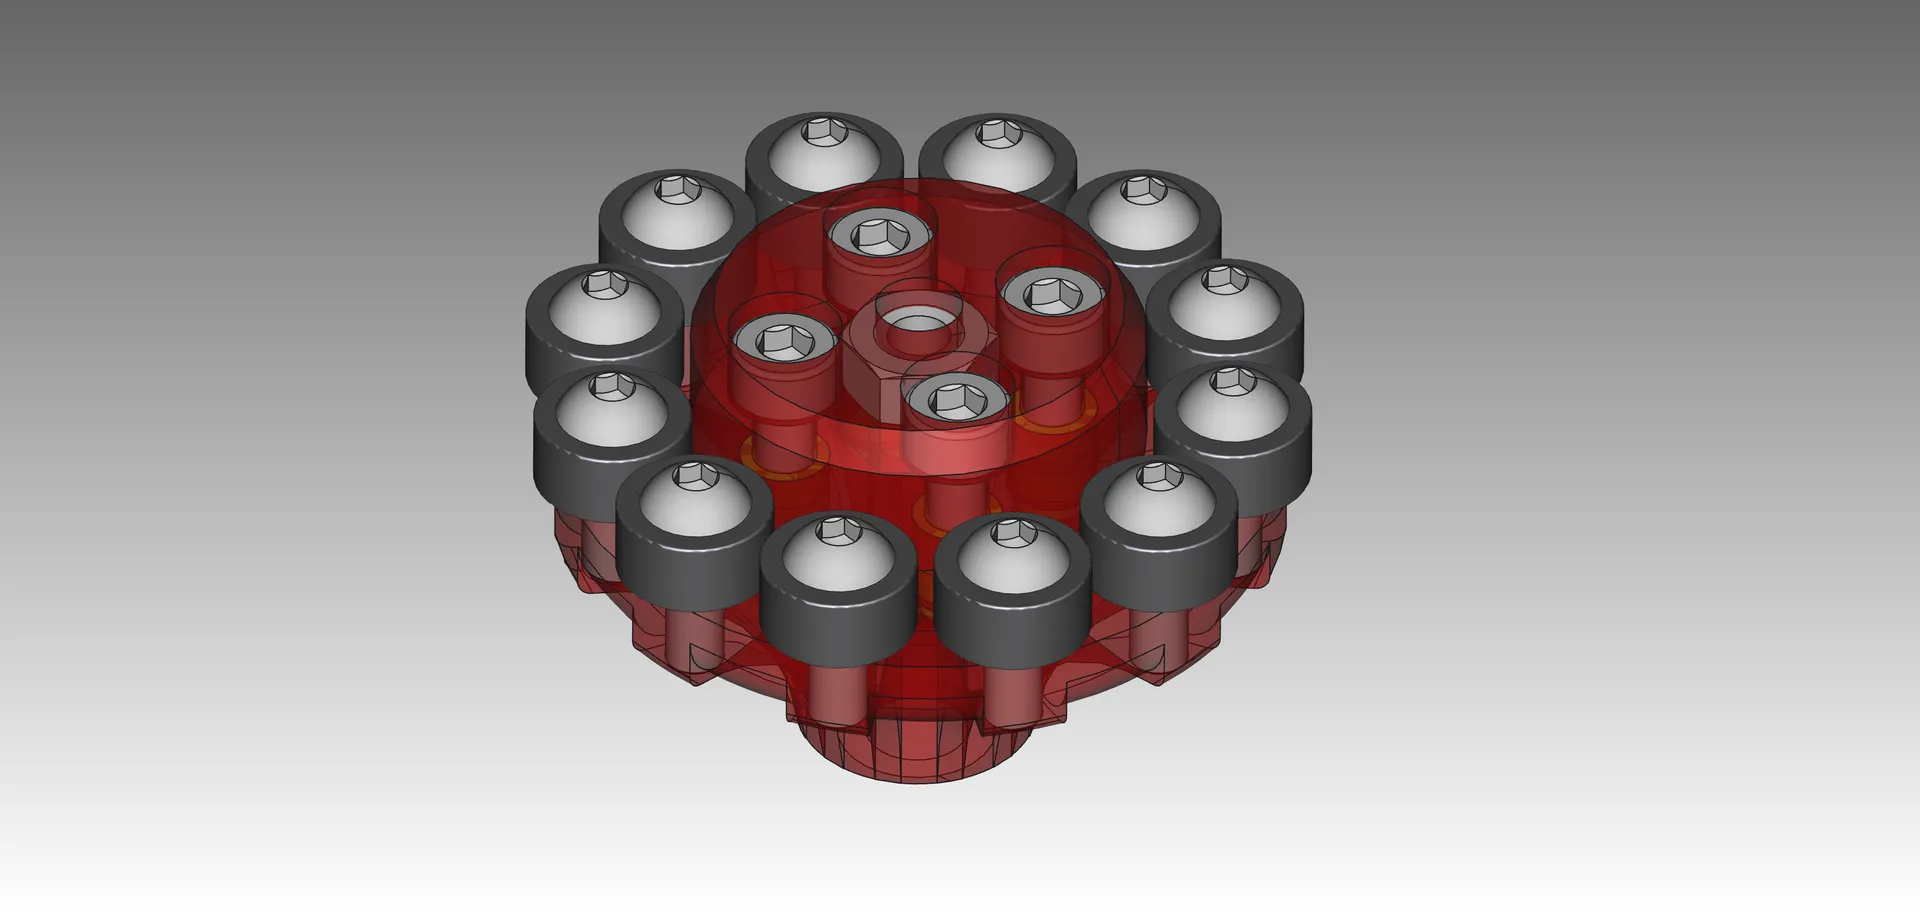
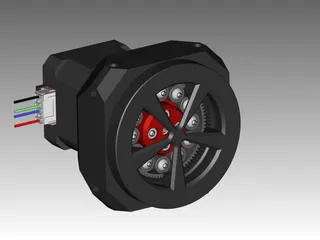
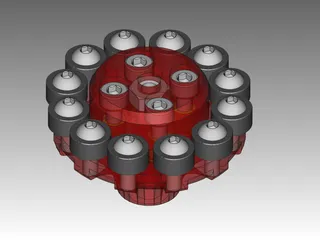
Alterntive wavegenerator for more torque
2023-05-06
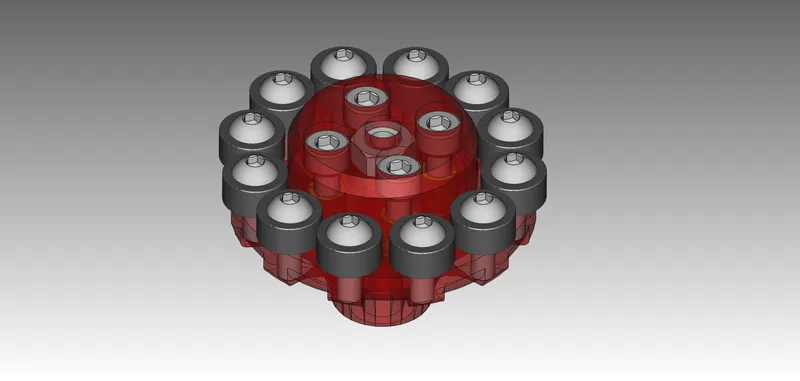
At higher loads, the flexspline deforms in the free spaces, which has a negative effect on the mechanics. To solve this problem, the Flexspline must be supported and guided at many points, resulting in a precisely defined ellipse with no degrees of freedom. This achieves maximum power transmission.
The new wavegenerator is now also guided along the entire motor shaft, which enables more precision and torque.
The M4 nut in the middle is used to pull the wave generator off the motor shaft again. To do this, simply screw in an M4 screw.
The 12 small bearings are attached with 12 M3x10 screws. You have to drill the threads into the wave generator with a tap beforehand. Place a shim under each of these ball bearings.
New parts:
- ElipticBearings_WaveGenerator.stl
- ElipticBearings_WaveGenerator_Cap.stl
BOM:
- 12x Bearing 693ZZ (3x8x4) https://amzn.eu/d/gG0BfGJ
- 12x M3x8 allen screws
- 12x M3 shim, or better DIN 988 3x6x0.5
- 1x M4 Hexnut
- 4x M3x8 allen screw
- 4x M3 heatset insert 5x4
This project is still under development
Tags
Model origin
The author marked this model as their own original creation.