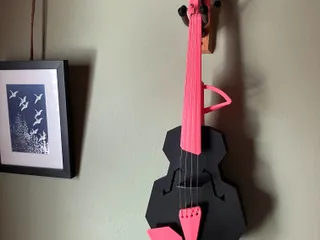
Modular Fiddle 4-String Violin V4


Description
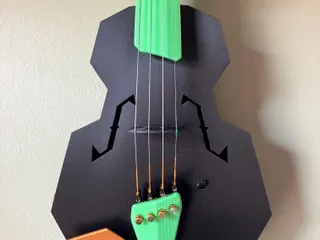
PDFThe Modular Fiddle is a platform for violin-family instruments.

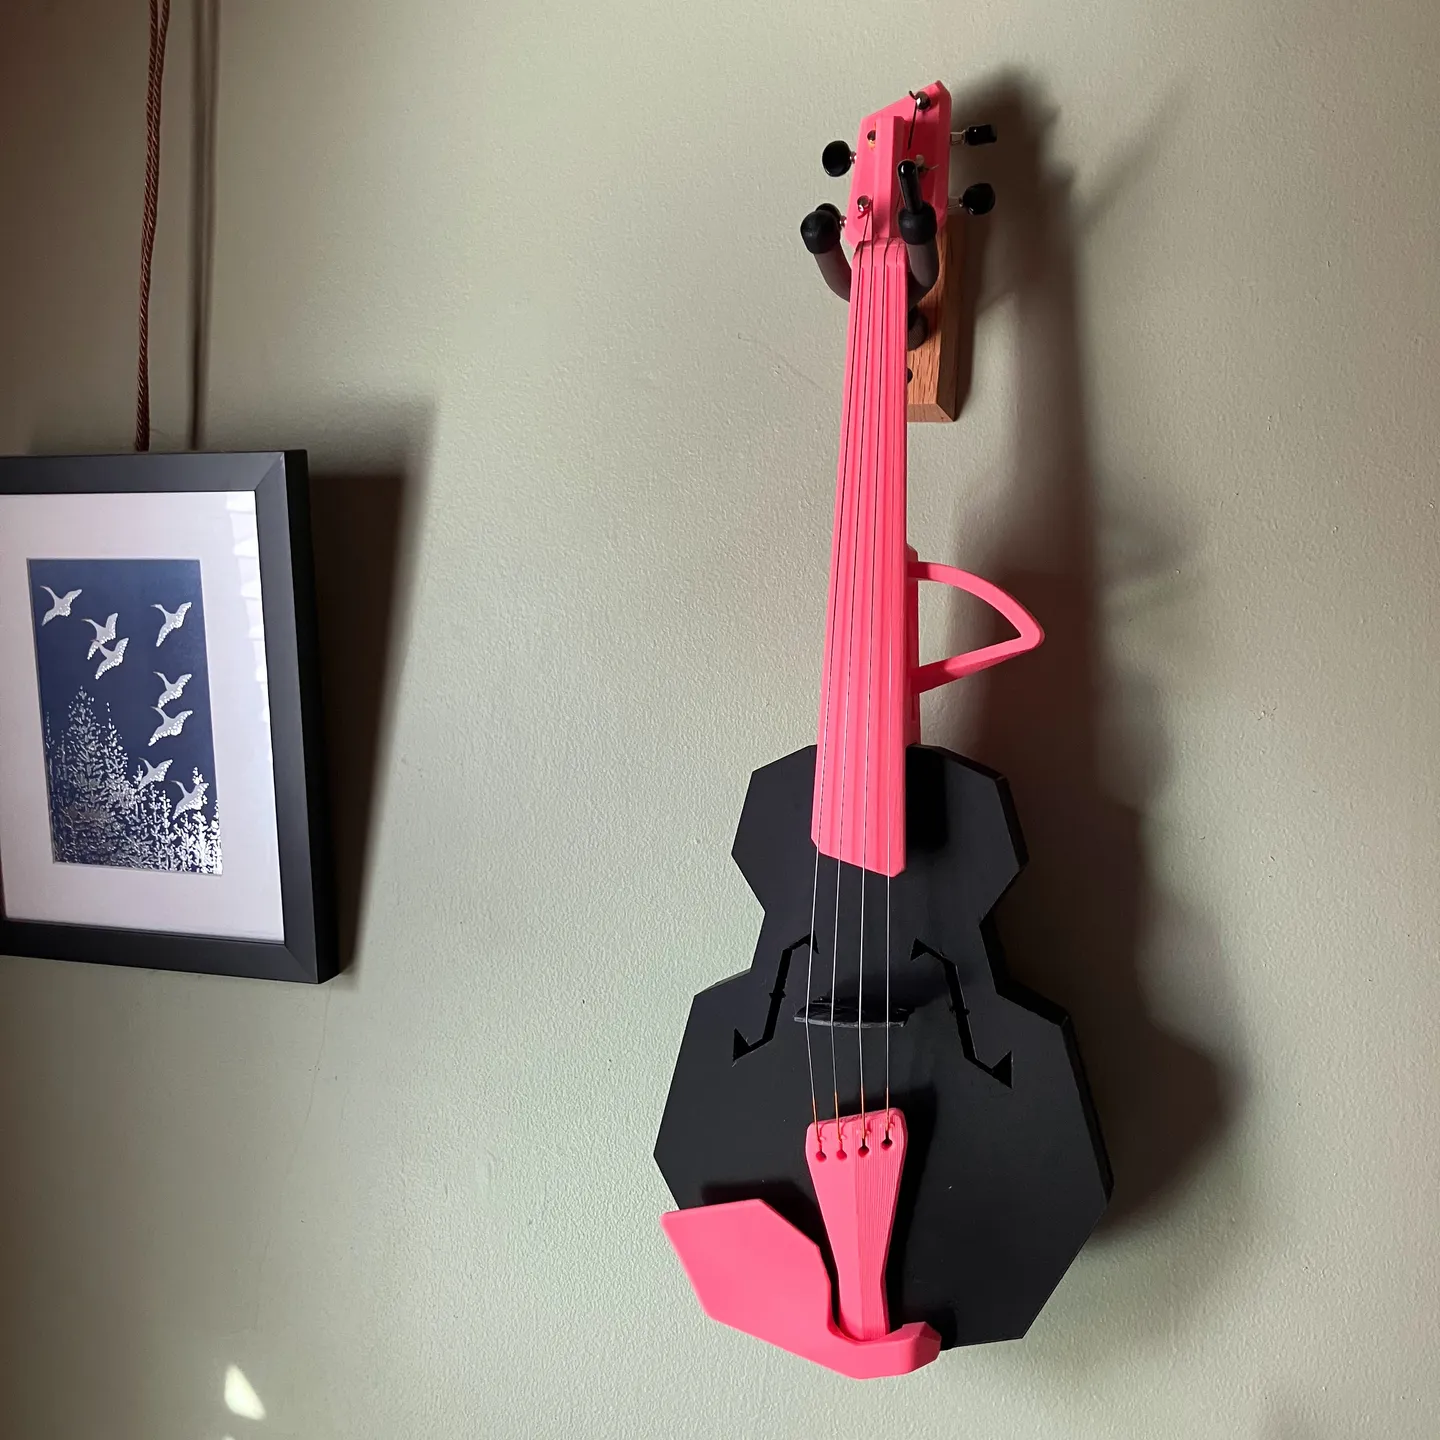
I make professional quality electric violins using the Modular Fiddle platform. The files listed here make the latest-and-greatest 4-string acoustic Modular Fiddle.

V4 is the easiest-to-make version of the Modular Fiddle EVER. I got rid of all dovetail joints, so there is no more filing and sanding to fit parts, or broken parts due to stress at the joints. Everything slides together on truss rods and bolts with M3 fasteners and heat-press inserts. The result is a remarkably easy build that gives you a durable 3D printed violin with surprisingly good tone.
This is the 4-string acoustic version. I also have variations that are acoustic-electric, solid-body electric, 5-string, fretted, hardanger fiddle, and more! You can get full access to all print files for all variations by becoming a Patreon patron.
The files listed here are all of the latest V4 4-string Modular Fiddle files including a STEP file of everything. You'll need to comb through and make some decisions about what you'd like to print. Or print everything and then decide. :-)
Watch Kyle @JazzyJellyfish make his older V2 Modular Fiddle. He can play it way better than I can!
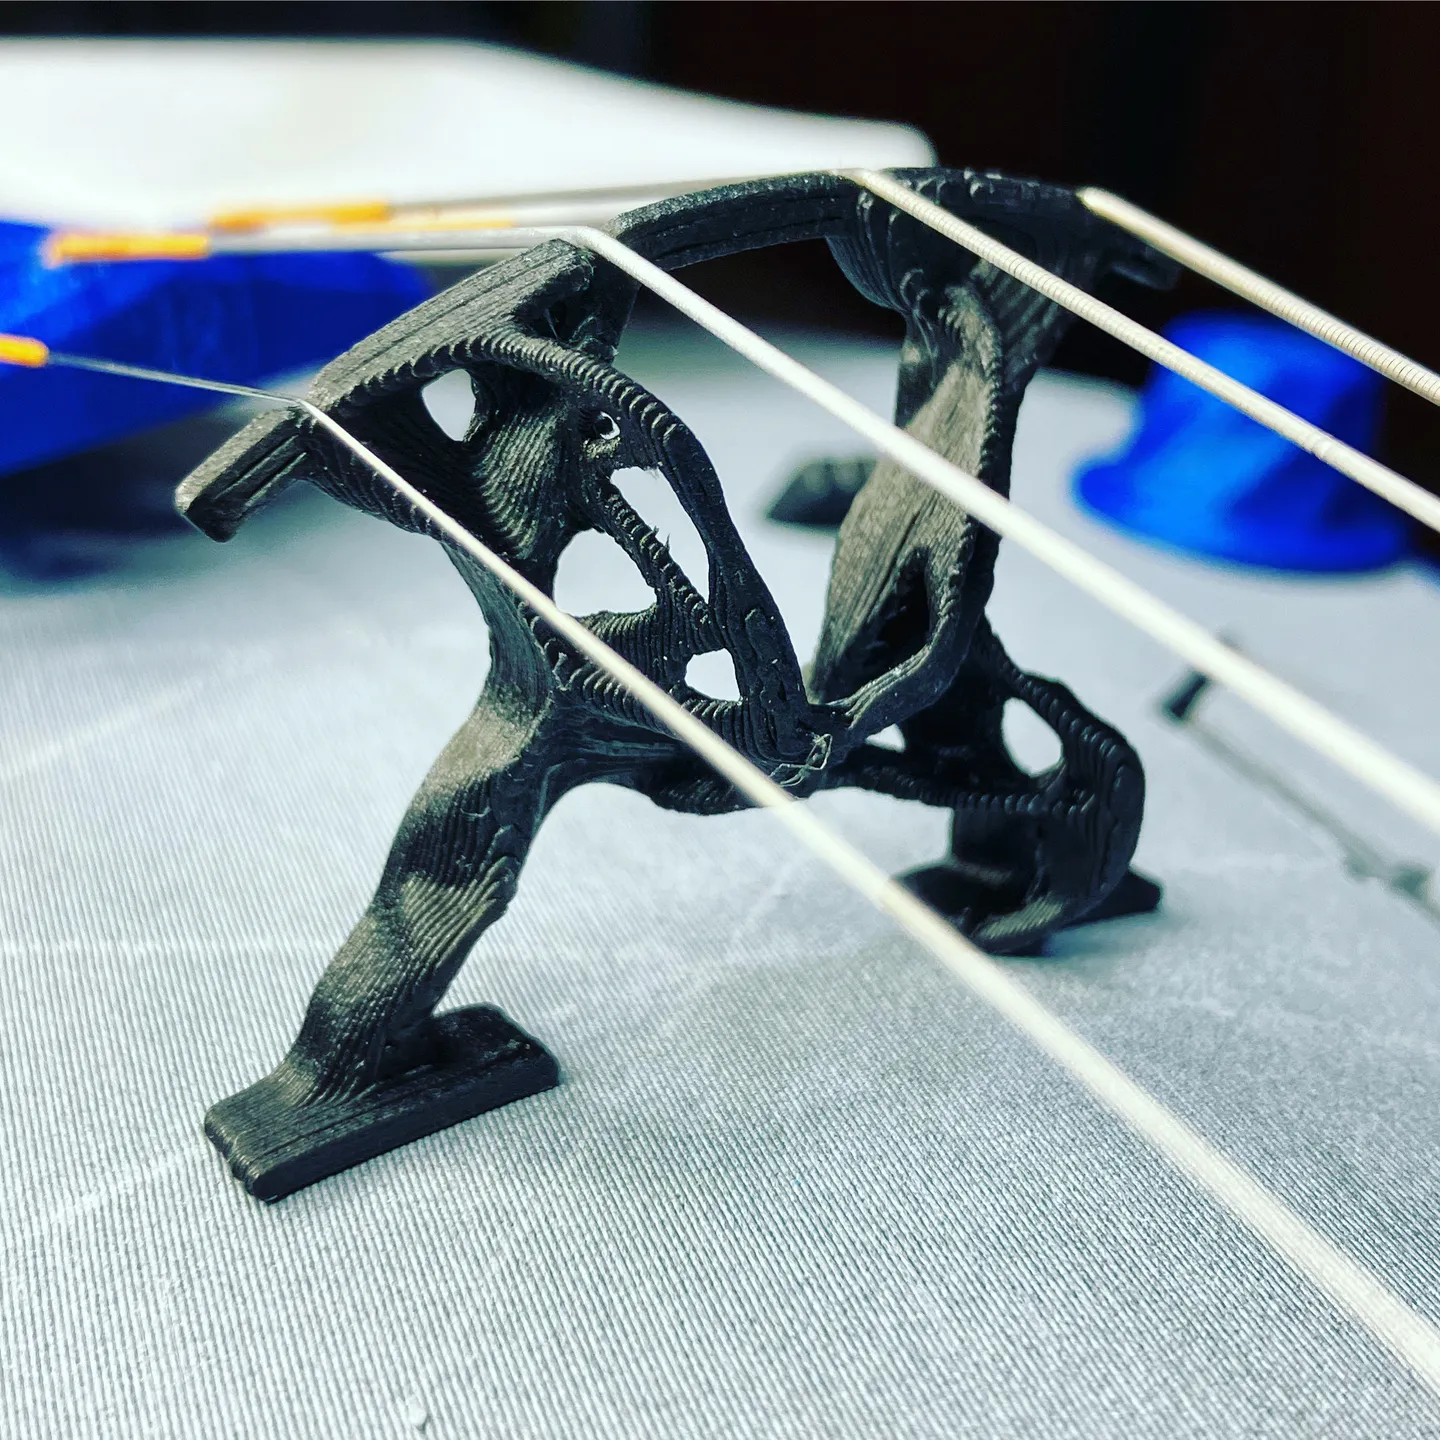
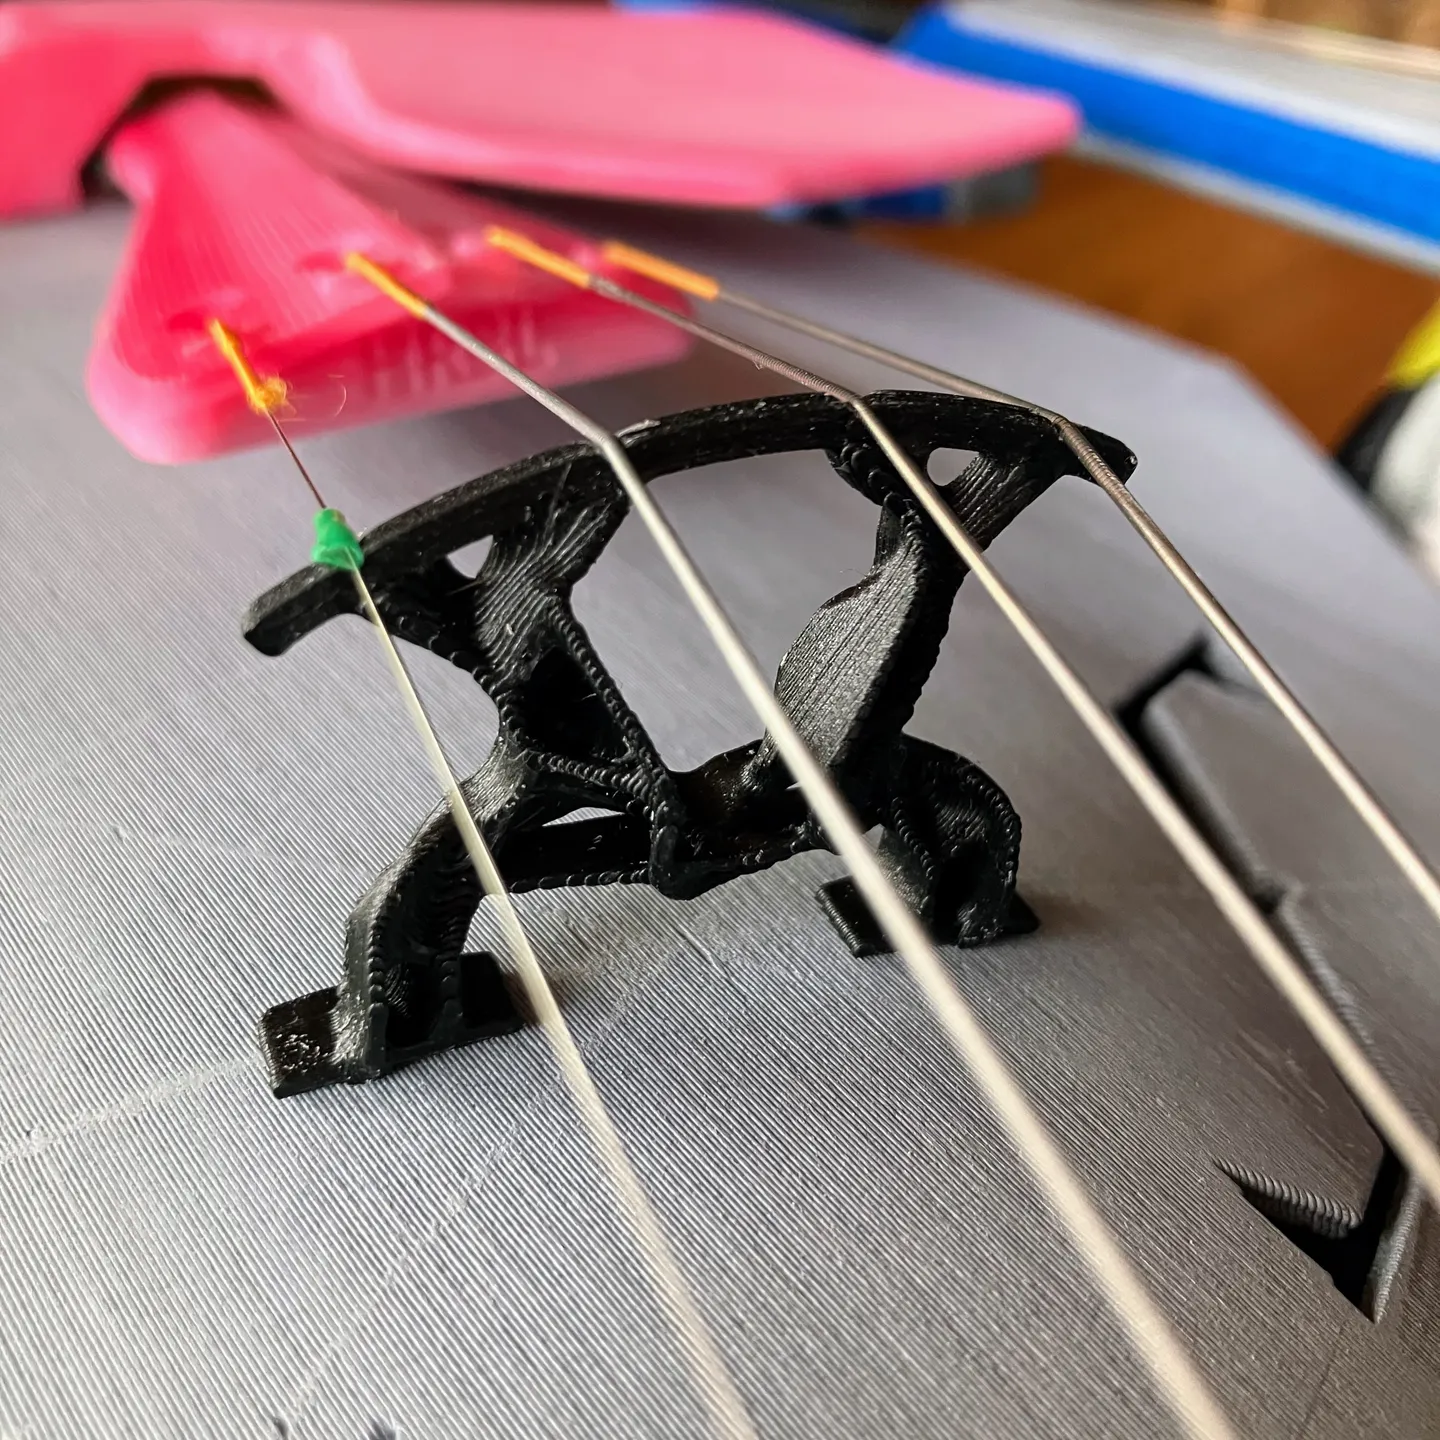
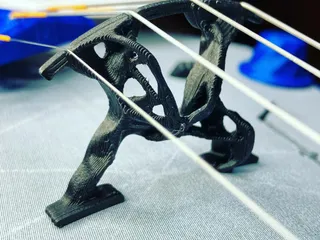
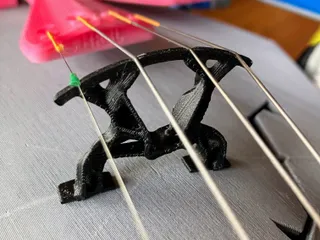
Also included here are the newest bridges!
Don Corson (his website) shared his latest bridge design with me and I was blown away by the improvement in tone. I updated his design to fit the Modular Fiddle, and then used it as a template for some generative design in Fusion 360. The result are some new, ultra-lightweight, and very excellent sounding bridges. Test them out, they are truly amazing.
Community
Lots of activity on the Discord server. Hop in!
Purchased Parts
You will need the following purchased parts (vitamin kits are available here, and they are 2X the cost plus a little extra to support my ongoing design efforts):
- 6x M3 heat press inserts
- 4x M3x12 socket head cap screws
- 2x M3x45 flat head machine screws (for printed chin rest, you may use an off-the-shelf Guarneri chin rest if desired)
- One set of 4/4 strings (I use D'addario Ascente strings for my kits)
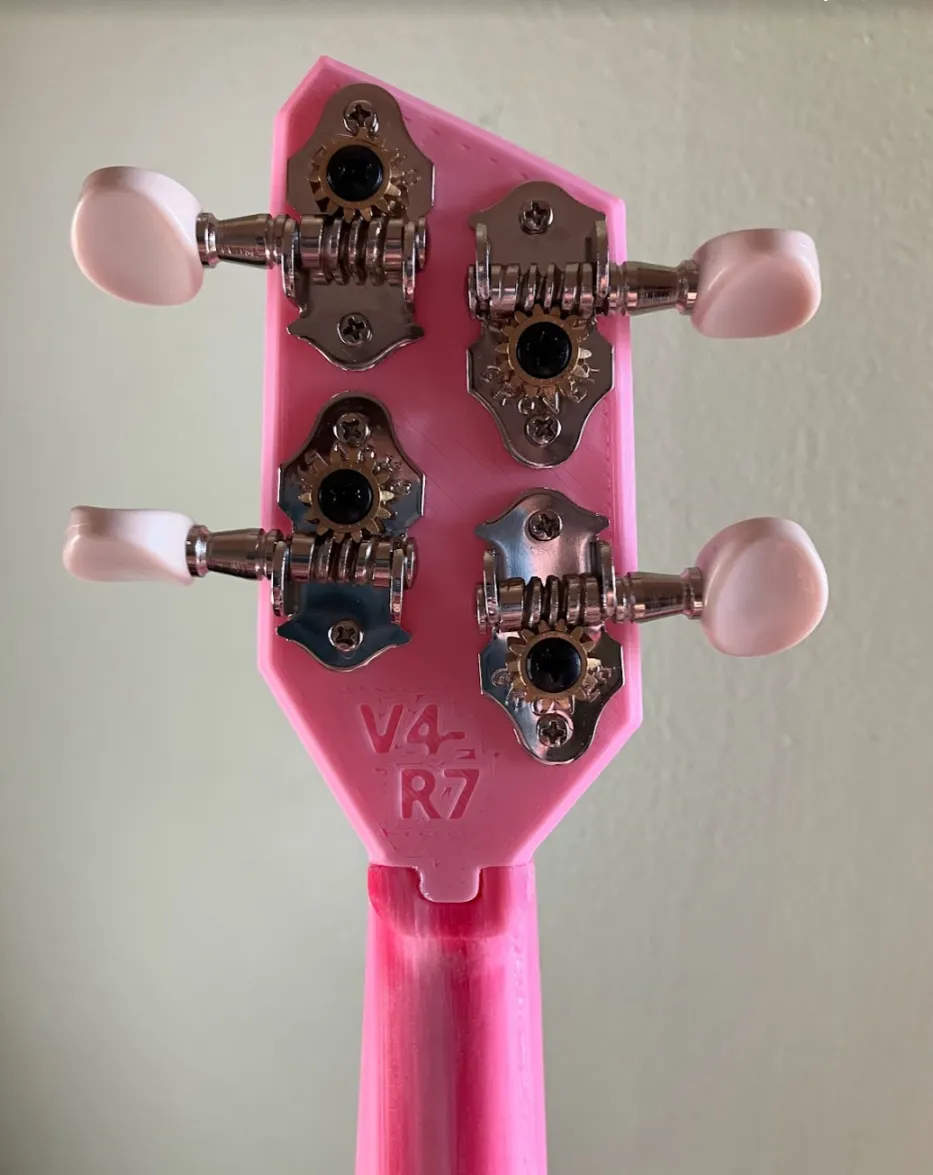
- One set of these Grover Uke tuners
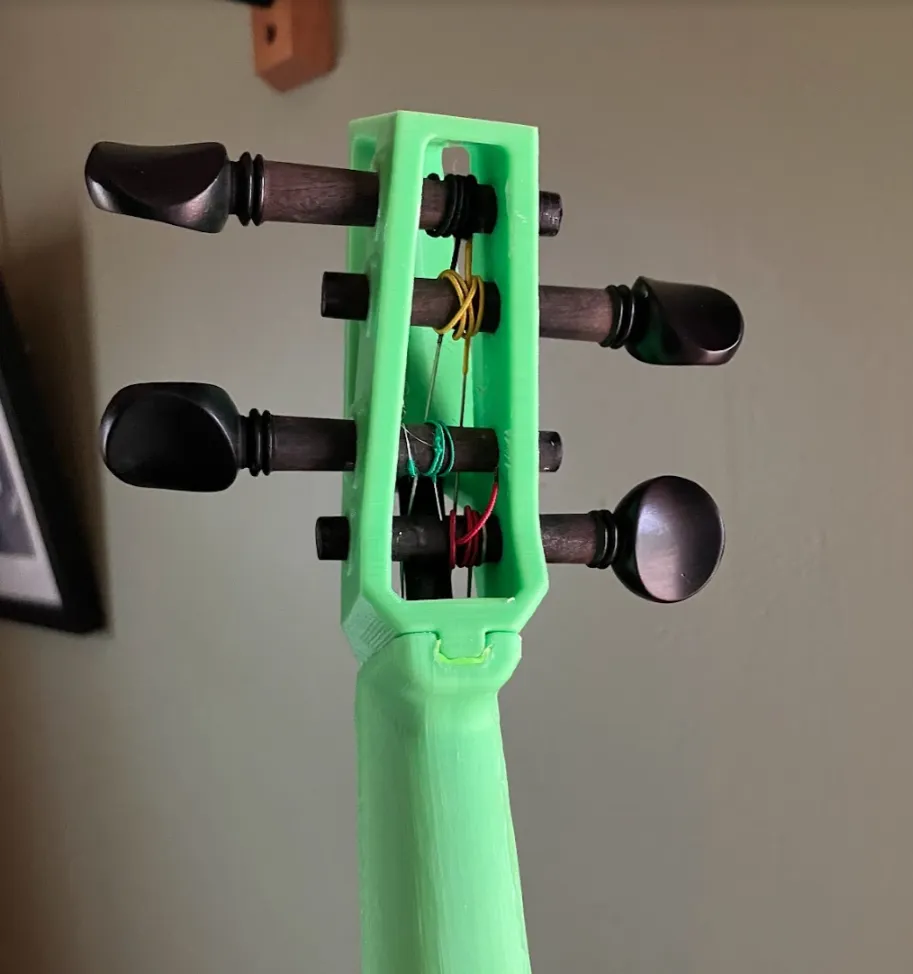
- OR friction pegs (good luck), Wittner geared pegs, or Perfection geared pegs
- One 8x6x330mm carbon fiber tubes (select the right size on this customized Arris product or find them elsewhere)
- One 8x6x320 carbon fiber tube (for pegs pegbox) or 8x6x280 (for guitar style pegbox), or just buy two 8x6x330 and leave it sticking out or cut it down to size as needed
- 4/4 violin tailgut (usually nylon)
Recommended Build Printed Parts
I recommend using the Grover Uke tuners. They are a bit heavy, but will get you a truly useful and playable instrument that is easy to tune and at a good price point. Here are the printed parts you need for my ‘recommended’ build. Print the body and bridge in carbon fiber PLA, the rest of the parts in standard PLA (carbon fiber PLA is OK for these, too).
- Body-CFPLA (printed with carbon fiber PLA of your choice)
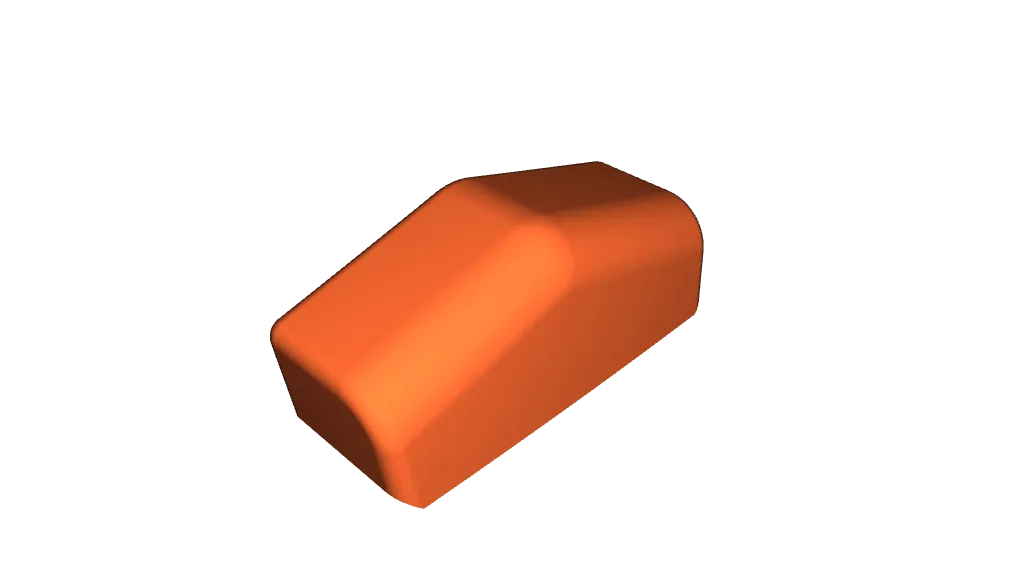
- Print all three endpins to see which fit best
- Print the 2.5mm saddle (the only one uploaded here)
- Neck-4S-V4-R8 (the ‘bout’ is a reference point for advanced players and makes a good handle for the rest of us)
- The R8 neck is updated to NOT have ‘scoop’ modeled into the fingerboard. For most prints in standard PLA the neck will bend enough to provide the right amount of scoop. Better to have less than more, as too much scoop will make your instrument harder to play.
- Tailpiece-4String-HR3S
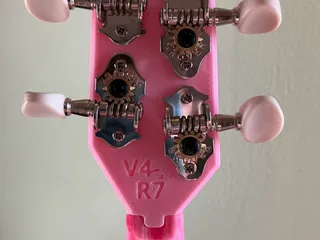
- Pegbox-GuitarStyle-V4-R7
- Chinrest-R4
- Bridge – print them all (with carbon fiber PLA) and try the new ones!
Recommended Materials
PLA is a naturally stiff resin that works great and lasts a long time if the instrument is kept cool. If the instrument reaches heat upwards of 100F it will fail quickly. At 130F failure happens within seconds. Watch it happen in this YouTube video.
I recommend carbon fiber PLA for the body and bridge. The added stiffness of the carbon will improve the acoustic tone. Standard PLA works well for everything else.
I use Proto-Pasta materials almost exclusively. They are local for me, I know their material like my own child, and they are good people that I have known since the early days. If you would like to use Proto-Pasta material, here is an affiliate link to their shop that gives me some money to buy filament if you make a purchase.
Annealed HTPLA is awesome. It resists creep, it resists very high temperatures. But annealing large parts is difficult. I have made molds out of HTPLA-CF that I use to anneal necks. I have a special body design (available to patrons) that has external ribs to keep the body in shape during the annealing process.
PETG is OK, but not great. A body made of PETG will sound yucky. Even carbon fiber petg is not great. Other parts made of PETG are OK, but may require more material to be stiff enough. I don't like PETG. It feels lifeless and dead inside and makes instruments that don't have the right soul. Real technical engineering logic right there.
Glass filled or carbon filled nylons may work well. Some builders have had good results, but most are unsatisfied for one reason or another.
ABS is OK but not great. ASA is OK but not great.
Carbon fiber polycarbonate has made some good Modular Fiddles. I have no personal experience with it, and I like to avoid polycarbonate because PC production comes at a high environmental cost.
Print Settings
Recommended print settings and troubleshooting tips are in this blog post, but let me tell you what you need to know right here. I use a 0.5mm nozzle and 0.6mm extrusion width. My parts are generally designed for this.
Body
Settings are very important. Print with 1 perimeter at 0.3mm layer height (2 perimeter and 0.25mm layers for .4mm nozzle). I use hexagonal infill at 45%. Three solid layers top and bottom. Slicer generated supports are generally not needed, or use them only from build plate.
Endpin
Print solid.
Saddle
Print sturdy, with 4-6 perimeters and 30% infill.
Neck
Settings are very important. Print with 3 perimeters and 0.25mm layer height (4 perimeters and 0.2mm layers for 0.4mm nozzle). 25% hexagonal infill. Three solid layers top and bottom. Slicer generated supports are not needed.
Tailpiece
Settings are very important. Print with 6 perimeters (maybe 8 for 0.4mm nozzle). 60% infill. 6 solid layers top and bottom. No support material needed.
Chinrest
Settings are not that important. Print with 2-3 perimeters, 20% infill. Use support material from build plate if you would like.
Bridge
Settings are very important. Print with 6 perimeters, 0.2mm layer heights max, 30-50% infill, 3 solid layers top and bottom. Generative bridges should print solid. No supports, except maybe on one of the generative bridges.
Pegbox
Settings are not that important. Print with 3 perimeters, 0.2-0.3mm layer heights, ~30% infill, and 3 solid layers top and bottom. No supports, or only from build plate for -pegs pegbox if you would like.
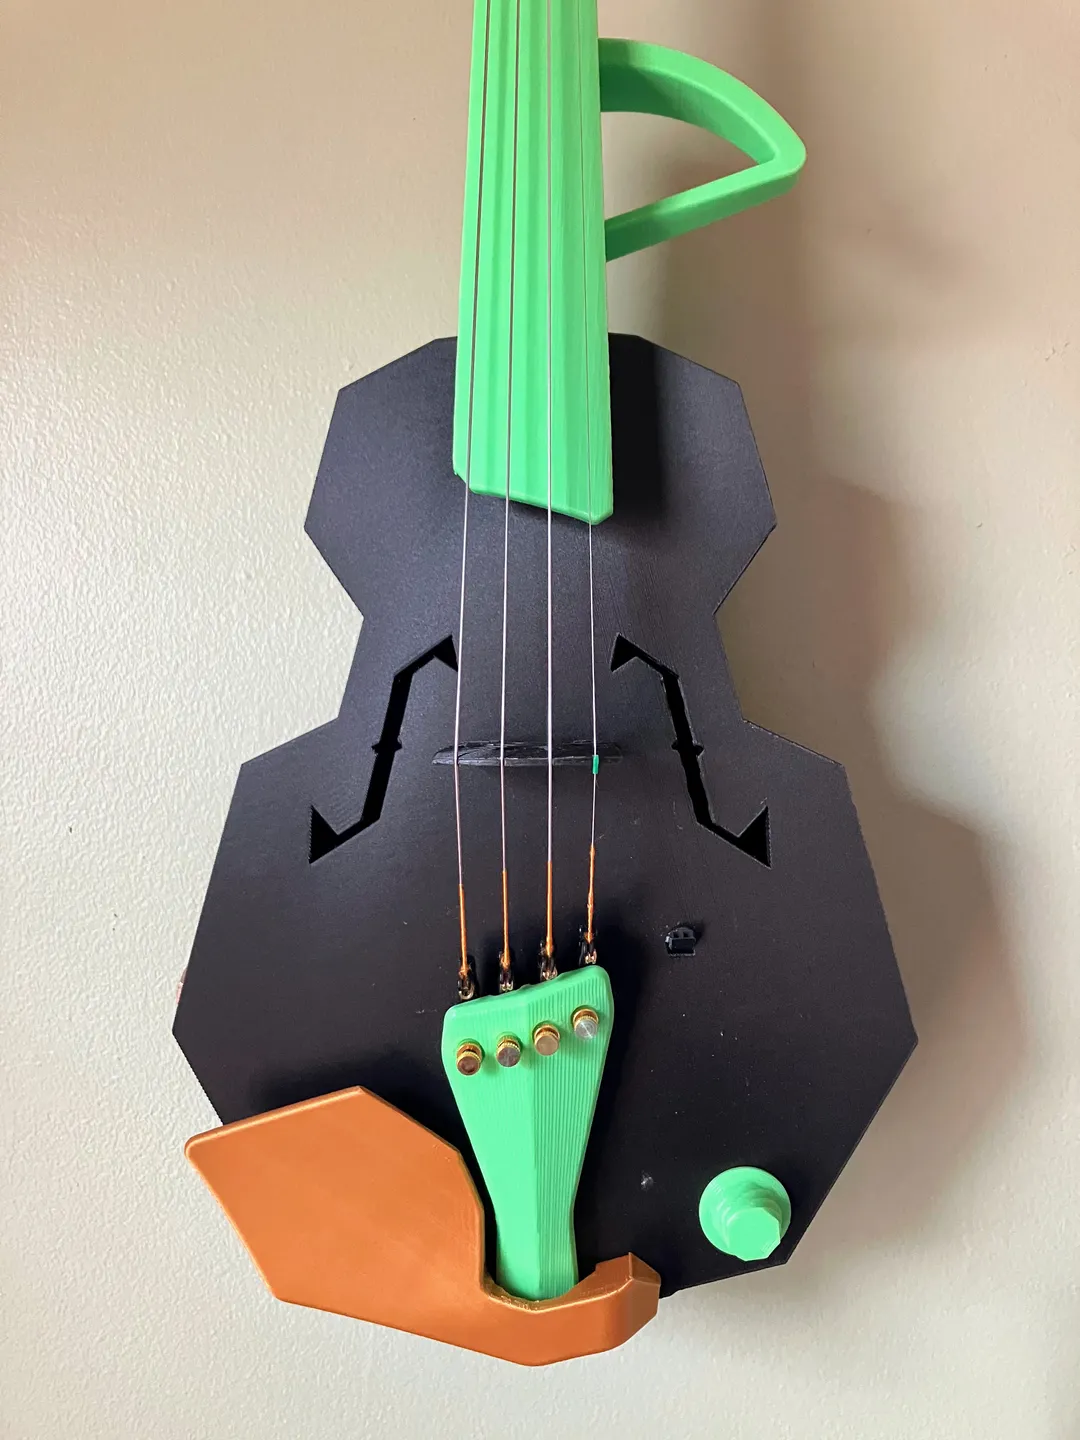
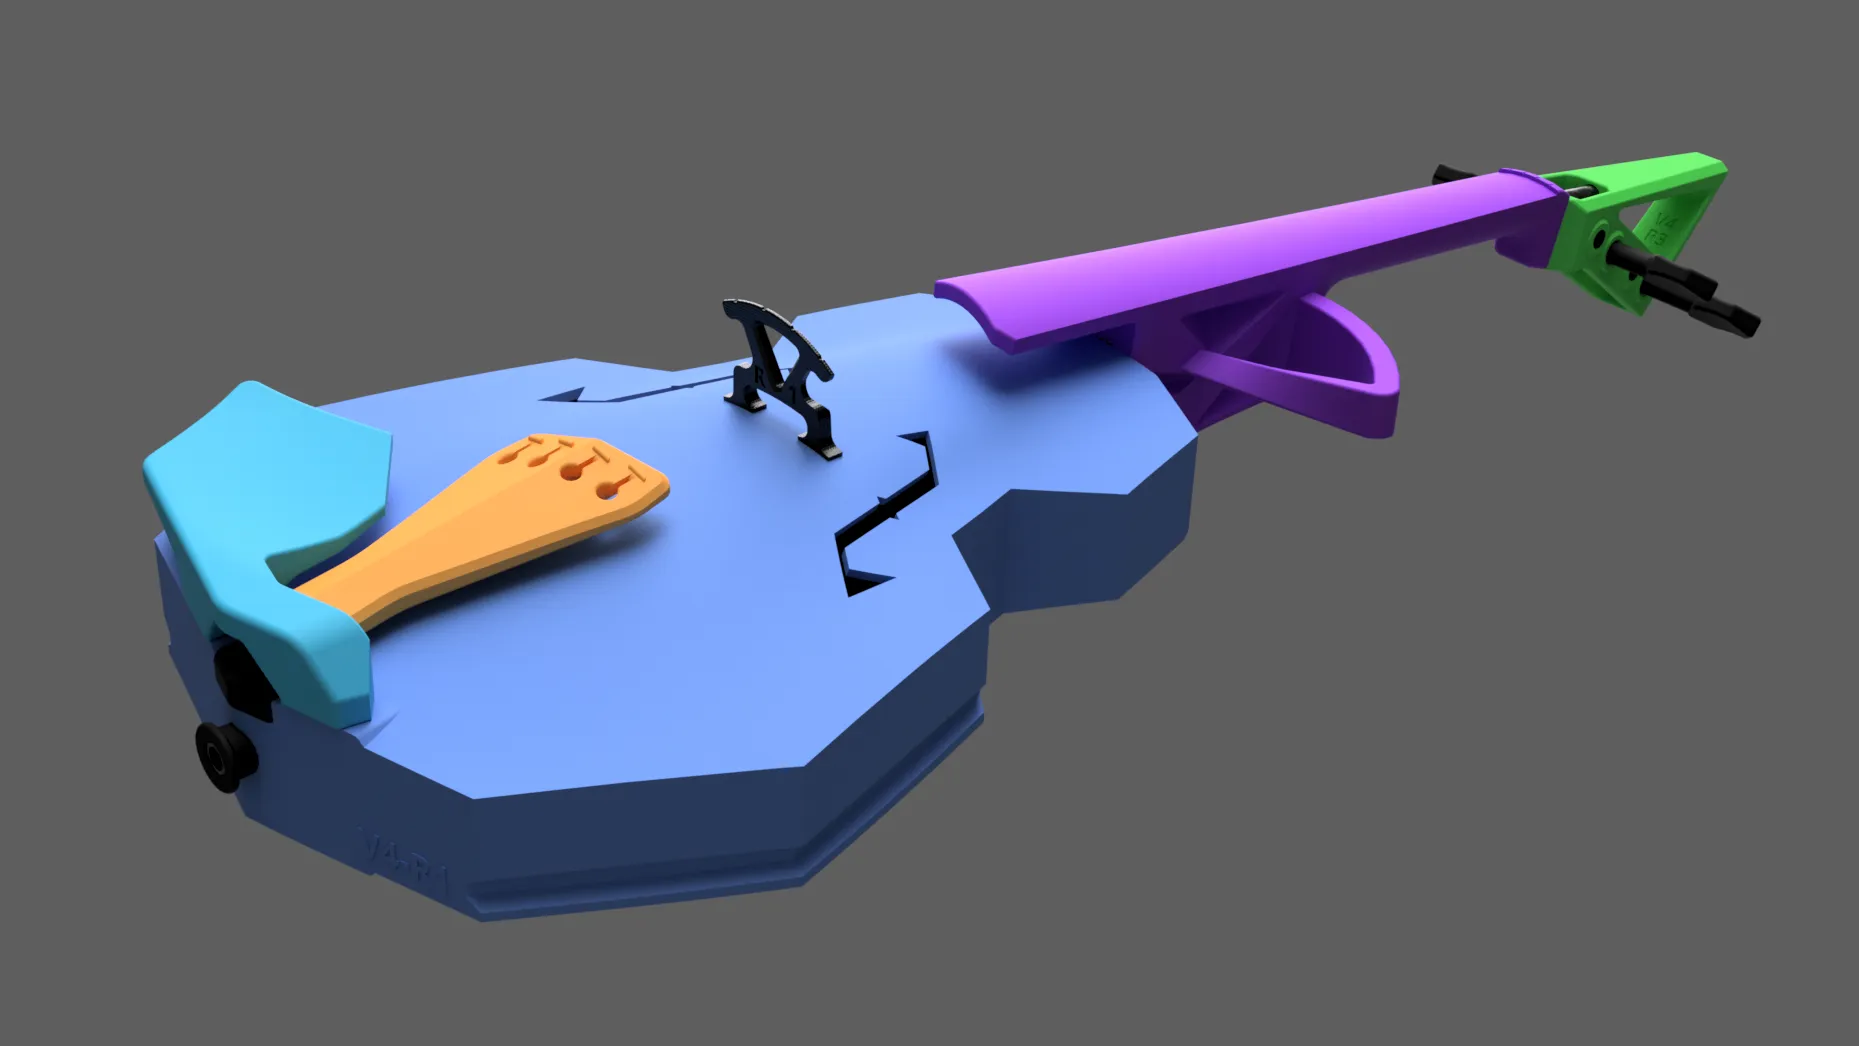
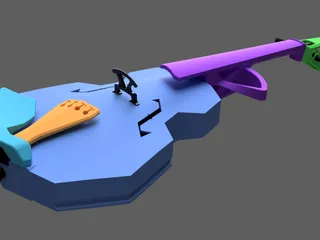
Assembly Instructions
These images, below, provide an overview of how parts are assembled. Detailed assembly instructions can be found on the bottom of this page of my website.
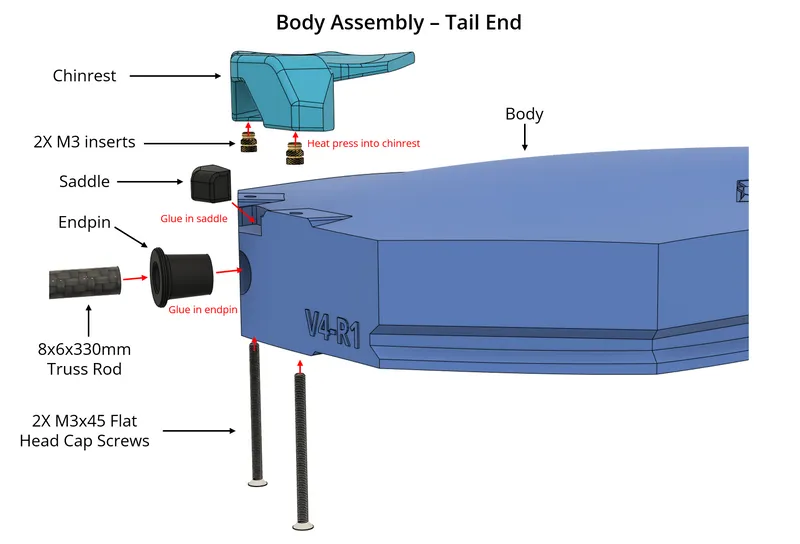
In general, start by assembling the body.

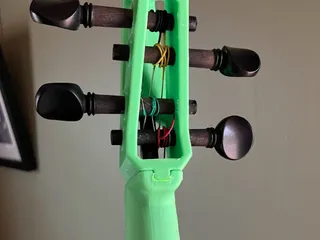
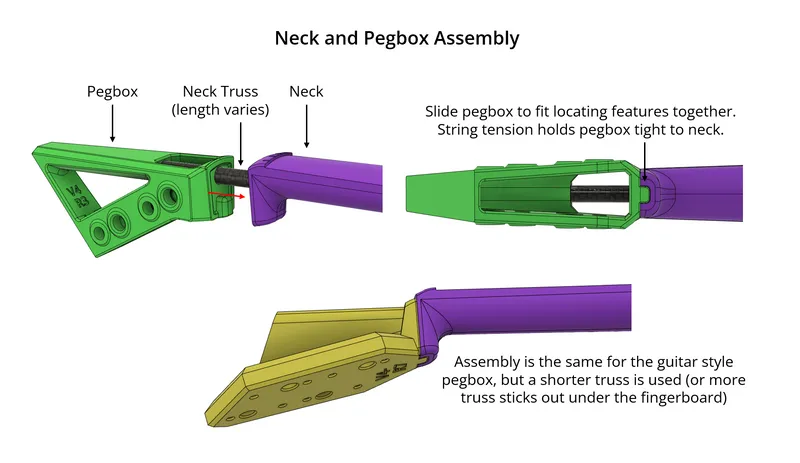
Next, prepare the pegbox. Make sure it fits on the truss rod, drill out as needed. Install your tuners of choice. If you buy the Grover uke tuners from the internet (not from me) you will need to modify two of them to reverse the knob orientation. Just unscrew the gear, remove the gear and spindle, pull out the handle, put it back in reversed, and re-assemble the tuner.
The pegbox simply slides on the truss and mates to the neck with the locating features. File a bit if needed to get a good fit for those features.
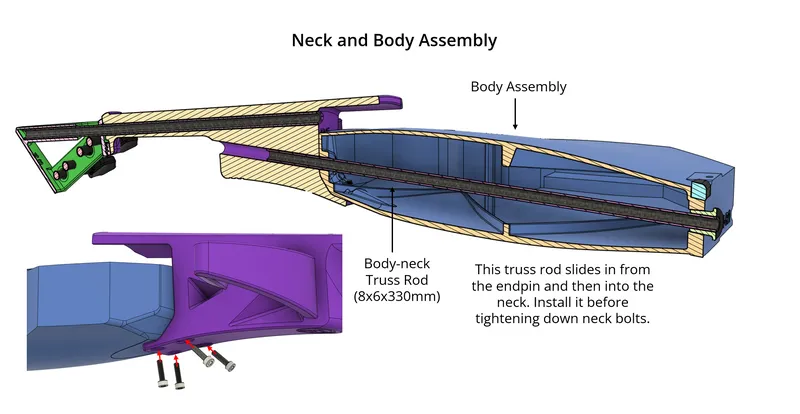
Now you can attach the neck assembly to the body assembly. Slide onto the body truss, then gently tighten the four neck screws.
Install the tailgut onto the tailpiece.
Loop tailgut over the endpin.
You will need to file the string path into the nut (at the top of the neck, where there are four light string grooves). The existing grooves are not enough, but file carefully and sparingly with your smallest file. Getting the right action (string height from fingerboard) is the single most important thing you will do. If you do it wrong, your fiddle will be no fun to play. For more information, see the detailed instructions at the bottom of this page.
Prepare the bridge by filing/sanding any sharp edges that the strings might touch. Lightly sand the bridge feet where they contact the instrument to make sure you get good, even contact.
String the instrument!
Detailed assembly instructions can be found on the bottom of this page of my website.
Tags
Model origin
The author remixed this model.


