Irising Door Dice Holder (Updated)

Description
PDFEasily store your standard DnD or other dice in this novel container that uses a mechanical iris on the top, which can be opened or closed by simply twisting the knurled outer knob.
Printing Tips:
This model has been carefully designed so that all parts can be printed without supports (including a hidden chamfer inside the case), and the top uses a threaded design so that no glue is required.
You'll need to print five of the “blade” parts, and just one each of the others. Have fun with your color choices for the different parts!
I printed the one shown in the pictures using PLA, a layer height of .2 mm, and a nozzle width of .4 mm - but other materials and layer heights should work fine. I also set the “Vertical Shells → Perimeters” setting in the Prusa Slicer to 3, just to give the threads a little more strength. I'd certainly recommend slicing the STLs on your own, but I've also attached the “.gcode” files I used to print the one shown in the pictures on my Prusa Mini.
Update (2023-04-04):
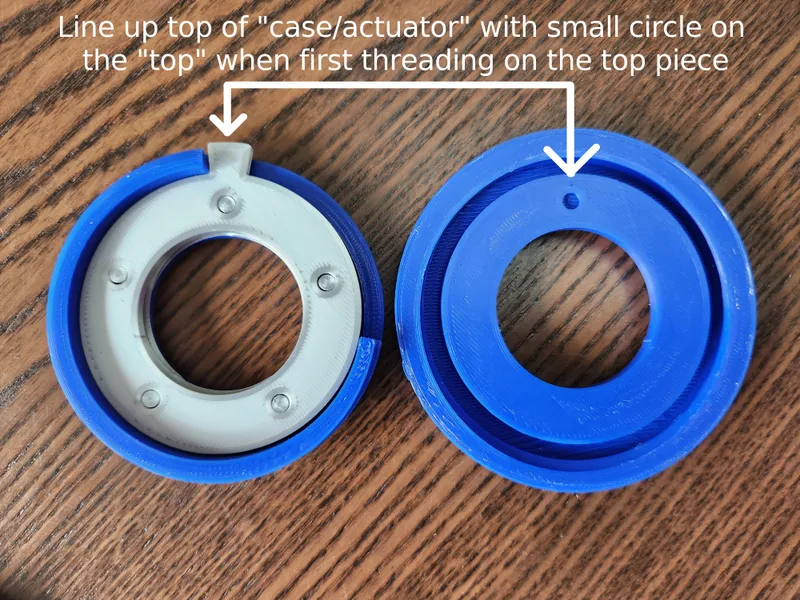
With much thanks to the great feedback from some early makers I've now updated the threading on the top to use a 4 mm pitch (the original used a 2 mm pitch) as well as add about .4 mm of vertical clearance, so that the top can thread on and off much more easily now. In addition, I added a small circular marker on the hidden underside of the “top” piece, which can be used to know where to start the top when you're threading it on for the first time (see note in step #5 and final picture below.)
Note that the primary “Top.stl” file is designed with about .1 mm of tolerance around the threads, but I've also uploaded a “.2 mm” and “.3 mm” tolerance version that you can use if the regular top is too tight given how your printer/filament behaves.
Assembly Tips:
I found the easiest way to assemble was to take the following steps (see pictures related to each step number below):
- Set the actuator on a table, and then put the pegs of the five blades into the holes onto the actuator. Make sure the blades are situated so that they line up perfectly with the inner circle of the actuator.
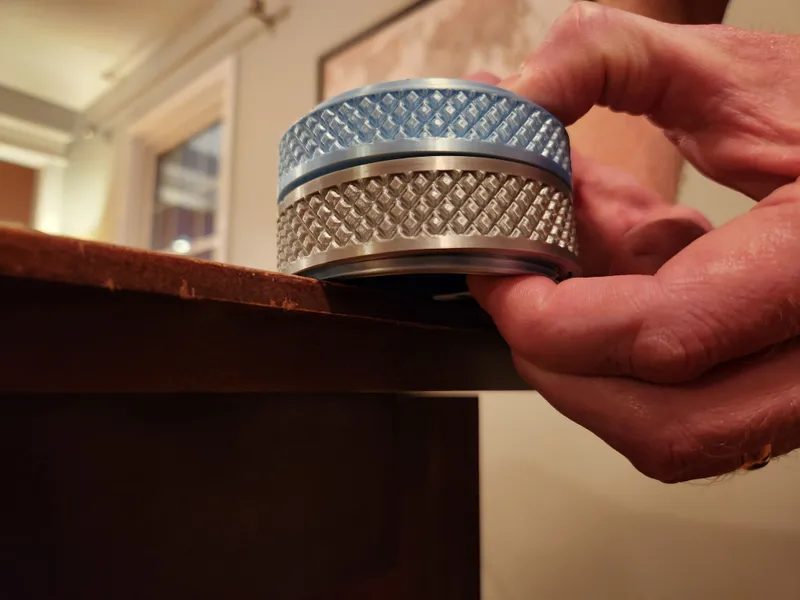
- Flip the case (with the knob on it) upside down, and place it on top of the actuator & blade assembly (note the orientation of how you want it to line up using the pictures below; the parts should line up like the picture in step #4 - just upside down.)
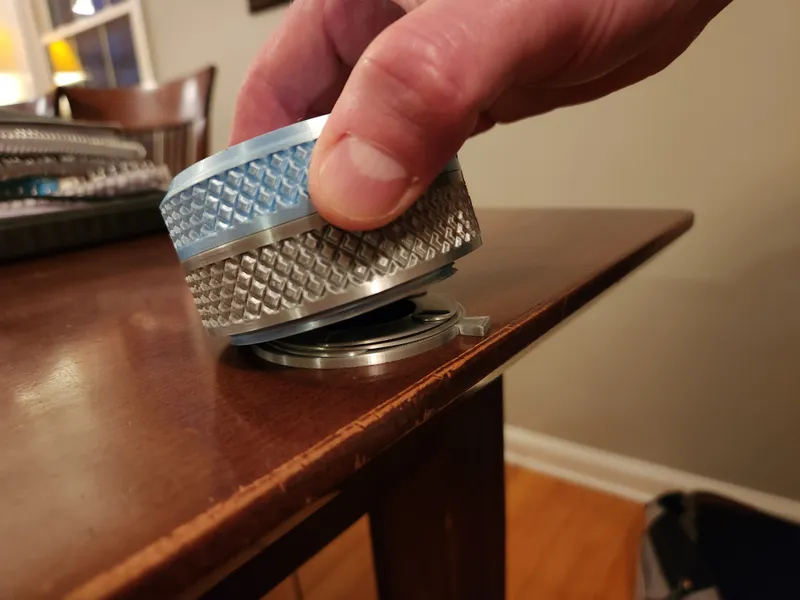
- Slide the whole thing slightly off the table and press the actuator firmly up into the case.
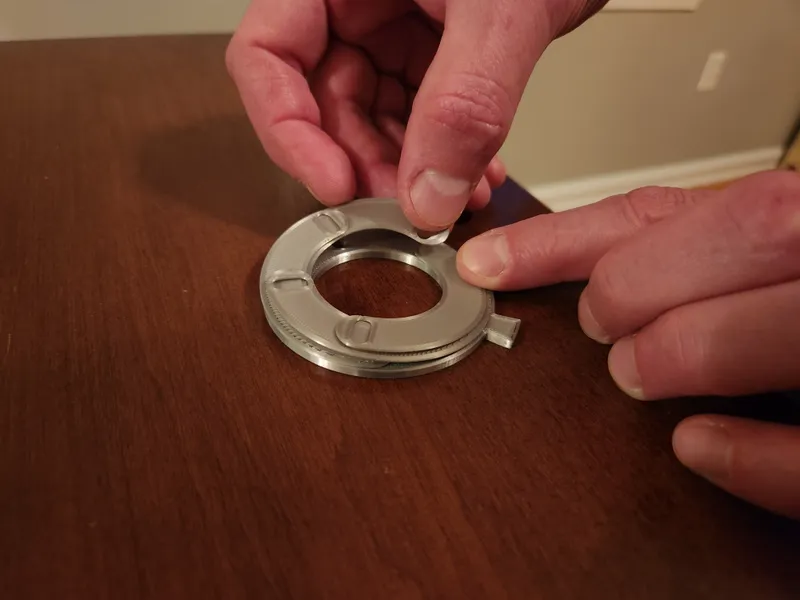
- While holding the actuator & blades in place, flip the whole thing over and slightly press down on & wiggle the actuator a little to get the “cut outs” on the blades aligned over the pegs in the case.
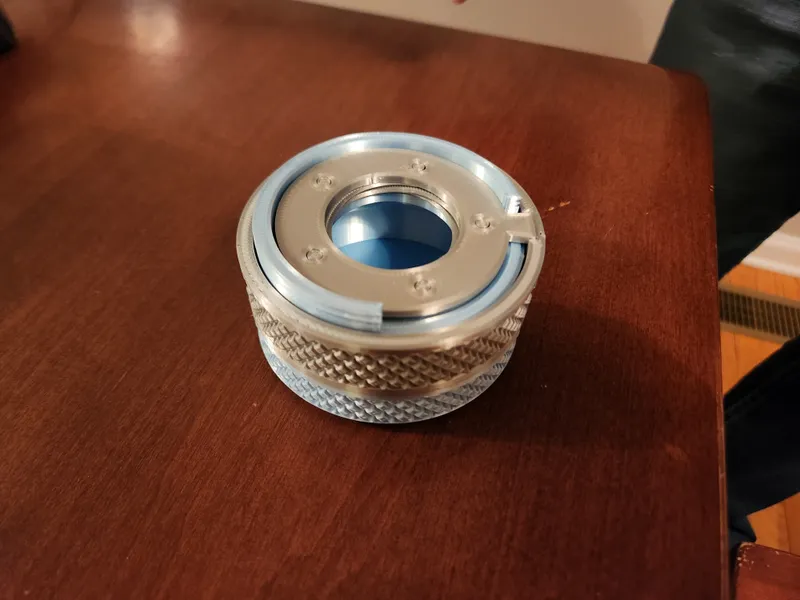
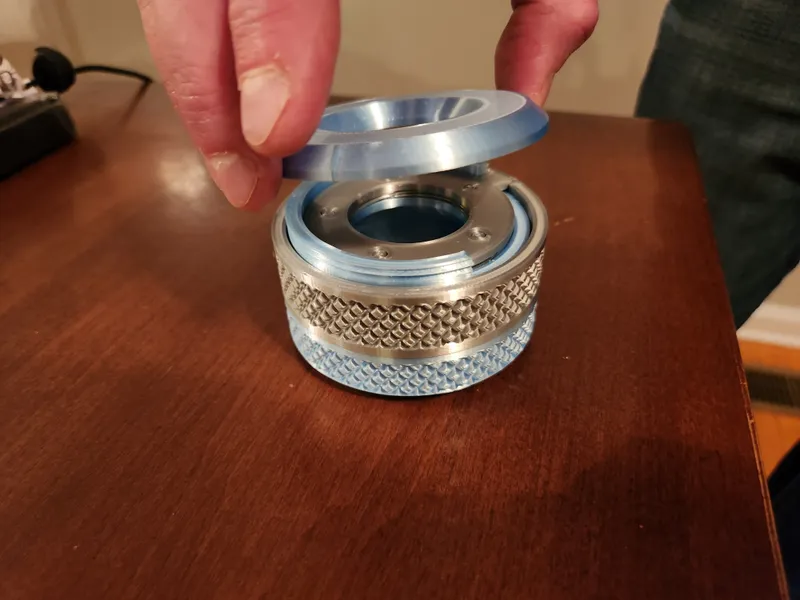
- Once you know the blades are all lined up with the pegs, then thread the top onto the case (line up the hidden circular marker on the “top” piece with the handle on the “actuator” before you start rotating) and enjoy!
If anything goes wrong, no biggie, you can just un-thread the top and try again (yay, for no glue!) Also, if you find that you have a small amount of space above the knob when first assembled that you'd like to eliminate, you can print the “Jaine's Belt - Optional.stl” file and place it below the knob.
Step #1:

Step #2:
Step #3:
Step #4:
Step #5:
Tags
Model origin
The author marked this model as their own original creation.