Ultimate Battery Dispenser UPDATED
Description
PDFV2 UPDATE!! - Using a Cray supercomputer to come up with the best, most efficient way to insert batteries into the holder, we have a solution. Several weeks of the supercomputer calculations and greasing of computer gears, we now have version 2.
The v2 files have a new battery channel that eliminates batteries falling down vertically. It will keep the batteries horizontal to the channel so that eliminates any “clogs” when inserting batteries.
My team also added some small rounding of the edges to get rid of the elephant foot.
TEST MODELS!! - The models with the word “TEST” are for using 1.75mm filament as a way to secure the side onto the base. I have not had a full round of testing to make sure it is the best way, but if you like to live in the “danger zone”, go for it.
As always, you can print the one-piece model or glue the side on if you want.
-----
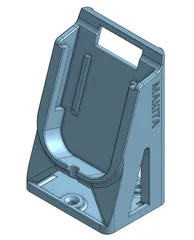
The Battery Dispenser I was using was created by someone else and I printed it out a long time ago, but I cannot find it anywhere. So, I remade the Ultimate Battery Dispenser… dispenser…. dispenser… in OnShape and added features like the side view windows and I also made it longer and taller to hold more batteries. If anyone finds the dispenser that looks like this, let me know and I will credit them.
This print fits on a Prusa Mini build plate just fine. I printed with 2 perimeters, .25 layer height, 4 solid layers top and bottom. NO supports needed.
The cover part, needs to be flipped on the bed so that the grooves side is facing up.
A couple dabs of super glue will lock the side cover on… but depending on your printer/print settings, it may just snap on and hold by itself.
If you want to mount the Ultimate Battery Dispenser…dispenser…dispenser to the wall, the screw holes are 30mm apart on center. That equals a foot and a half in standard measuring, I think.
If you want to tweak this model, you can copy it or download it from OnShape here - https://cad.onshape.com/documents/178be44cb67e4c3be1a9816c/w/39f94990719152b9bd3f5d4e/e/eab59af5033d055353933bc0?renderMode=0&uiState=64278cb2bb5a502808ae9b2d
If you want to print the 1 piece model, just make sure to print with the side windows side down. That is needed to do the bridging on the top side. Again, no supports are needed on any of the parts.
Also, there are little break away tabs in the screw holes in the back. They are there to help with printing in thin air.
Print it out. Leave a comment or a picture. I would like to see it in other colors, since I pretty much only print things in black. I am a bit like Henry Ford.
Tags
Model origin
The author marked this model as their own original creation.


