Mxx60 R2 - 60% Gasket Mount Mechanical Keyboard Case

An overall improvement of the Mxx60 with better internals, lower front height/typing angle and more compatibility.
20
109
0
2107
updated June 11, 2023
Description
PDFUpdate: Added Wooting 60HE compatible plates
This keyboard is purposefully designed to be 3d printed with a 2-3-2 design so that it is printable on standard size 3d printers and creates a solid assembly with only screws and no glue.
Improvements from r1:
- lower front height (about the same as a tofu)
- lower typing angle
- more layout options with 7u or 6.25u bottom row
- 6 different plate options
- more mounting point options (you can make it more or less stiff)
- enlarged enter stab cutout to work with the DZ60
- more clearance between parts so they fit together better
- more screw points to make it more solid and allow for full isolation gasket mount
- deeper gasket grooves to allow for thicker gaskets
- one piece plates provided incase you would like to get a plate made with a different material such as aluminum.
Plate options:
- Normal: All mounting points, the most stiff typing experience
- Flex: Omits the mounting points on the spacebar to give a more bouncy typing experience and less harsh bottom out
- OG: Mounting points from the r1, the most flexy typing experience. Would not recommend with a hotswap pcb.
Plate Layout options:
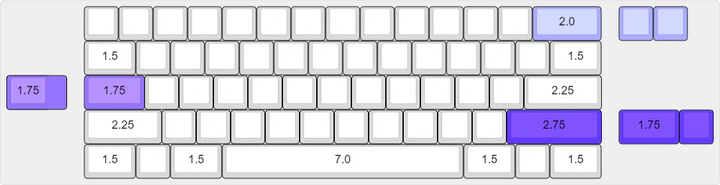
- 7u: works with either the WK top or the WKL top (required for WKL)
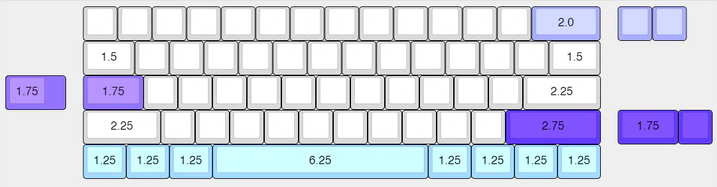
- Ansi: works only with WK top (not compatible with WKL)
7u plate layout compatibility:
Ansi plate layout compatibility:
Configuration Shown:
- Overture Clear Blue Petg
- 7u Normal Plate
- WKL Top
- Instant60 Tsangan Pcb
- Gateron Cj's
- GMK White on Black
- TX stabs
For this Keyboard you will need:
- A standard 60% pcb:
Compatible pcbs include: DZ60, AN-Cv2, Instant60(Ansi/Tsangan), KeebsRGB 60% PCB, H60 USB, DZ60RGB-ANSI, DZ60RGB-WKL, any other 60% pcb with left side usb.
- 1/16 in thick Neoprene foam (you can choose other foam if you want it to be softer this stuff is pretty hard)
- 20 x m3*8 screws
- 4 x m3*6 screws
- Stabilizers
- Mx compatible Switches
- Mx compatible Keycaps
- Bump-on feet (optional)
- For Wooting plate you will need standoffs
To assemble:
- Cut gasket foam to size of gasket grooves (if you use a plate that omits mounting points you can skip those grooves)
- install gasket foam into grooves (if using neoprene foam linked to use two layers on the bottom case and one layer on the top case)
- connect bottom case parts together with ramp pieces with 4x m3*6 screws for the thinner parts and 4x m3*8 screws for the thicker parts
- install stabs into pcb (would recommend lubing)
- install switches into plate and pcb (7u plate will work for both wk top and wkl top. Ansi plate only works for wk)
- I would recommend putting on keycaps before installing keyboard assembly due to flex
- place keyboard assembly into the bottom case
- place either wk or wkl top case onto the bottom case and plate
- screw in top case to bottom case with 16x m3*8 screws (sorry a lot I know)
- Begin typing ;)
Tags
Model origin
The author marked this model as their own original creation.


