Description
PDFThis is a device to take better panoramic photos using a smartphone's camera. Most of the ones I take by hand are shit, because I can't hold the phone vertically while also rotating it slowly and consistently. I made this so I can mostly just concentrate on holding this rig still. I can usually manage that, LOL. This utilizes a selfie stick to hold the phone. Specifically, I made it to use this one, but any other kind with a 30mm handle diameter, and a similarly sized remote work fine.
BOM
| ITEM | QTY | Link/Note |
|---|---|---|
| selfie stick | 1 | Amazon |
| DC motor controller | 1 | Amazon |
| DC motor | 1 | Amazon. I chose the 3RPM model, but 6 could also work |
| momentary switch | 1 | Amazon |
| SPST switch | 1 | from HomeDepot? |
| DPDT switch | 1 | Amazon |
| 8x AA battery holder | 1 | Amazon |
| F696 bearing | 1 | Amazon |
| Digital Voltmeter | 1 | Amazon |
| M5x15mm SHCS | 4 | anything 15-50mm should work |
| M5x15mm BHCS | 4 | |
| M5 threaded insert | 8 | Amazon |
| M3x6mm FHCS | 14 | |
| M3x14mm FHCS | 2 | |
| M3x5mm SHCS | 6 | |
| M3x14mm SHCS | 4 | |
| M2x6mm Philips head screw | 3 | |
| 6mm neoprene sheet | n/a | optional. basically anything will work |
NOTES
Printing
The body should probably be printed upside down to minimize the use of supports. I also found conical supports helped.
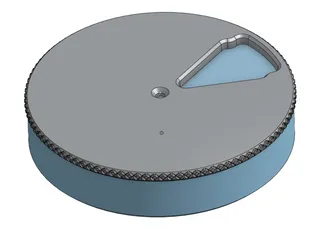
The sleeve should be printed upside down. This is to get a better texture on the bottom. I did not try conical supports here, but I suspect they would not be as useful.
The trigger housing should probably be printed with the flange pointing up.
The orientation of the rest should be fairly obvious.
For the handles, I got them from here, and I printed them with Cura's fuzzy skin mode. It adds a nice texture, IMO. I uploaded them here just in case that page goes missing. I take no credit for their design.
The remote mount should probably be printed in something like ABS or PETg for their flexibility. I'm guessing PLA may crack eventually. I printed everything in ABS, other than the handles, where I used some wood PLA.
Assembly
I assembled the circuit for the motor first, to more easily troubleshoot it. But in order to install it in the case, I had to unsolder the motor wires first. You could opt to wire it in from the start, or to add a JST connector or something.
- Install m3 and m5 inserts into parts
- The M3 inserts are used to hold the bottom and electronics covers on, and in the recess where the motor mount fits
- The M5 inserts go on the outside of the body, and in the long end of the handle mount
- Motor assembly:
- Install the bearing into the motor mount. An M5 bolt and nut may help pressing it into the part
- Install the motor into the mount using 2x M3x14mm FHCS. You may have to sand the motor shaft a bit in order to get it to fit w/o too much force.
- Check the clearance of the sleeve and the tube. You may have to sand the sleeve to get it to fit properly. You're looking for it to slide in and rotate smoothly, but not be overly loose.
- Press the sleeve onto the motor shaft. It should require some pressure to get it on, and should not slip off
- Install the motor assembly into the case using 4x M3x14mm SHCS from the bottom into the motor mount, and 1 M3x6mm FHCS into the motor from the electronics compartment.
- Install the electronics into the case. The motor controller, and Voltmeter use the M3x5mm SHCS. The battery pack can be padded with some neoprene. I also chose to secure the battery wire using some kapton tape.
- Install the panels using the M3x6mm FHCS, and handles using the M5 bolt. The handle adapters are to be able to use M5 hardware. The handles were designed for ¼" hardware, I think.
- It is probably easier to install the handle mounts before the handles.
- Trigger:
- Press the housing into the slot on the top of the handle. It is a friction fit.
- Install the trigger switch into the housing.
- Screw the panel on using the M2 screws. They should self-tap into the print.
- The remote holder installs similarly to the trigger housing.
Misc.
The DPDT switch is wired to switch the polarity to the motor. this lets it spin either direction.
I chose the 3RPM motor, but I think the 6 might also work.
It should be obvious, but THIS IS NOT WATERPROOF. I'd hesitate to even call it water resistant.
I haven't given too much thought to how to carry this while not actively taking a picture. I'm thinking some paracord wrapped around the handle mount attached to some kind of a shoulder strap would work. I'm not a photographer, lol. I basically intend to use this while in Iceland. Probably mostly while hiking.
I designed this around the fasteners I already had. if you already have them, and some rechargeable AA batteries, it should be about $70 worth of components.
Tags
Model origin
The author marked this model as their own original creation.


