New and Improved Pull or Drill Powered Propeller Launcher


Description
PDFWARNING
Attaching a power drill to this model will create a dangerous amount of spin that could shatter some of the parts. Eye protection should be worn and additional precautions should be taken when observers are a part of its operation. Be overly cautious or just use the pull rod which limits the spin.
Check out the other propellers for this project here:
https://www.printables.com/model/416692-better-propellers-for-drill-and-pull-launcher
Overview
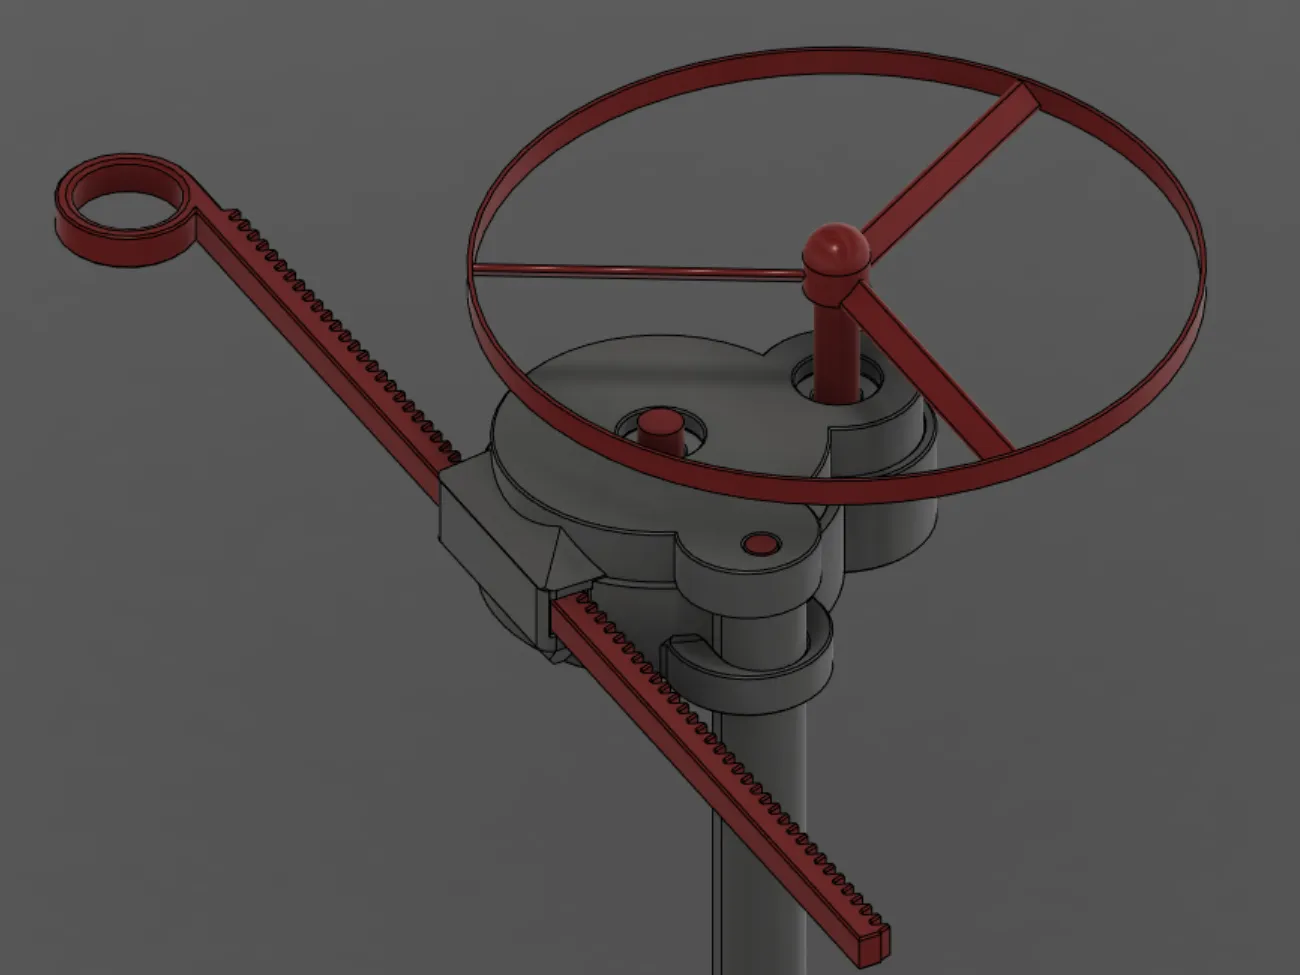
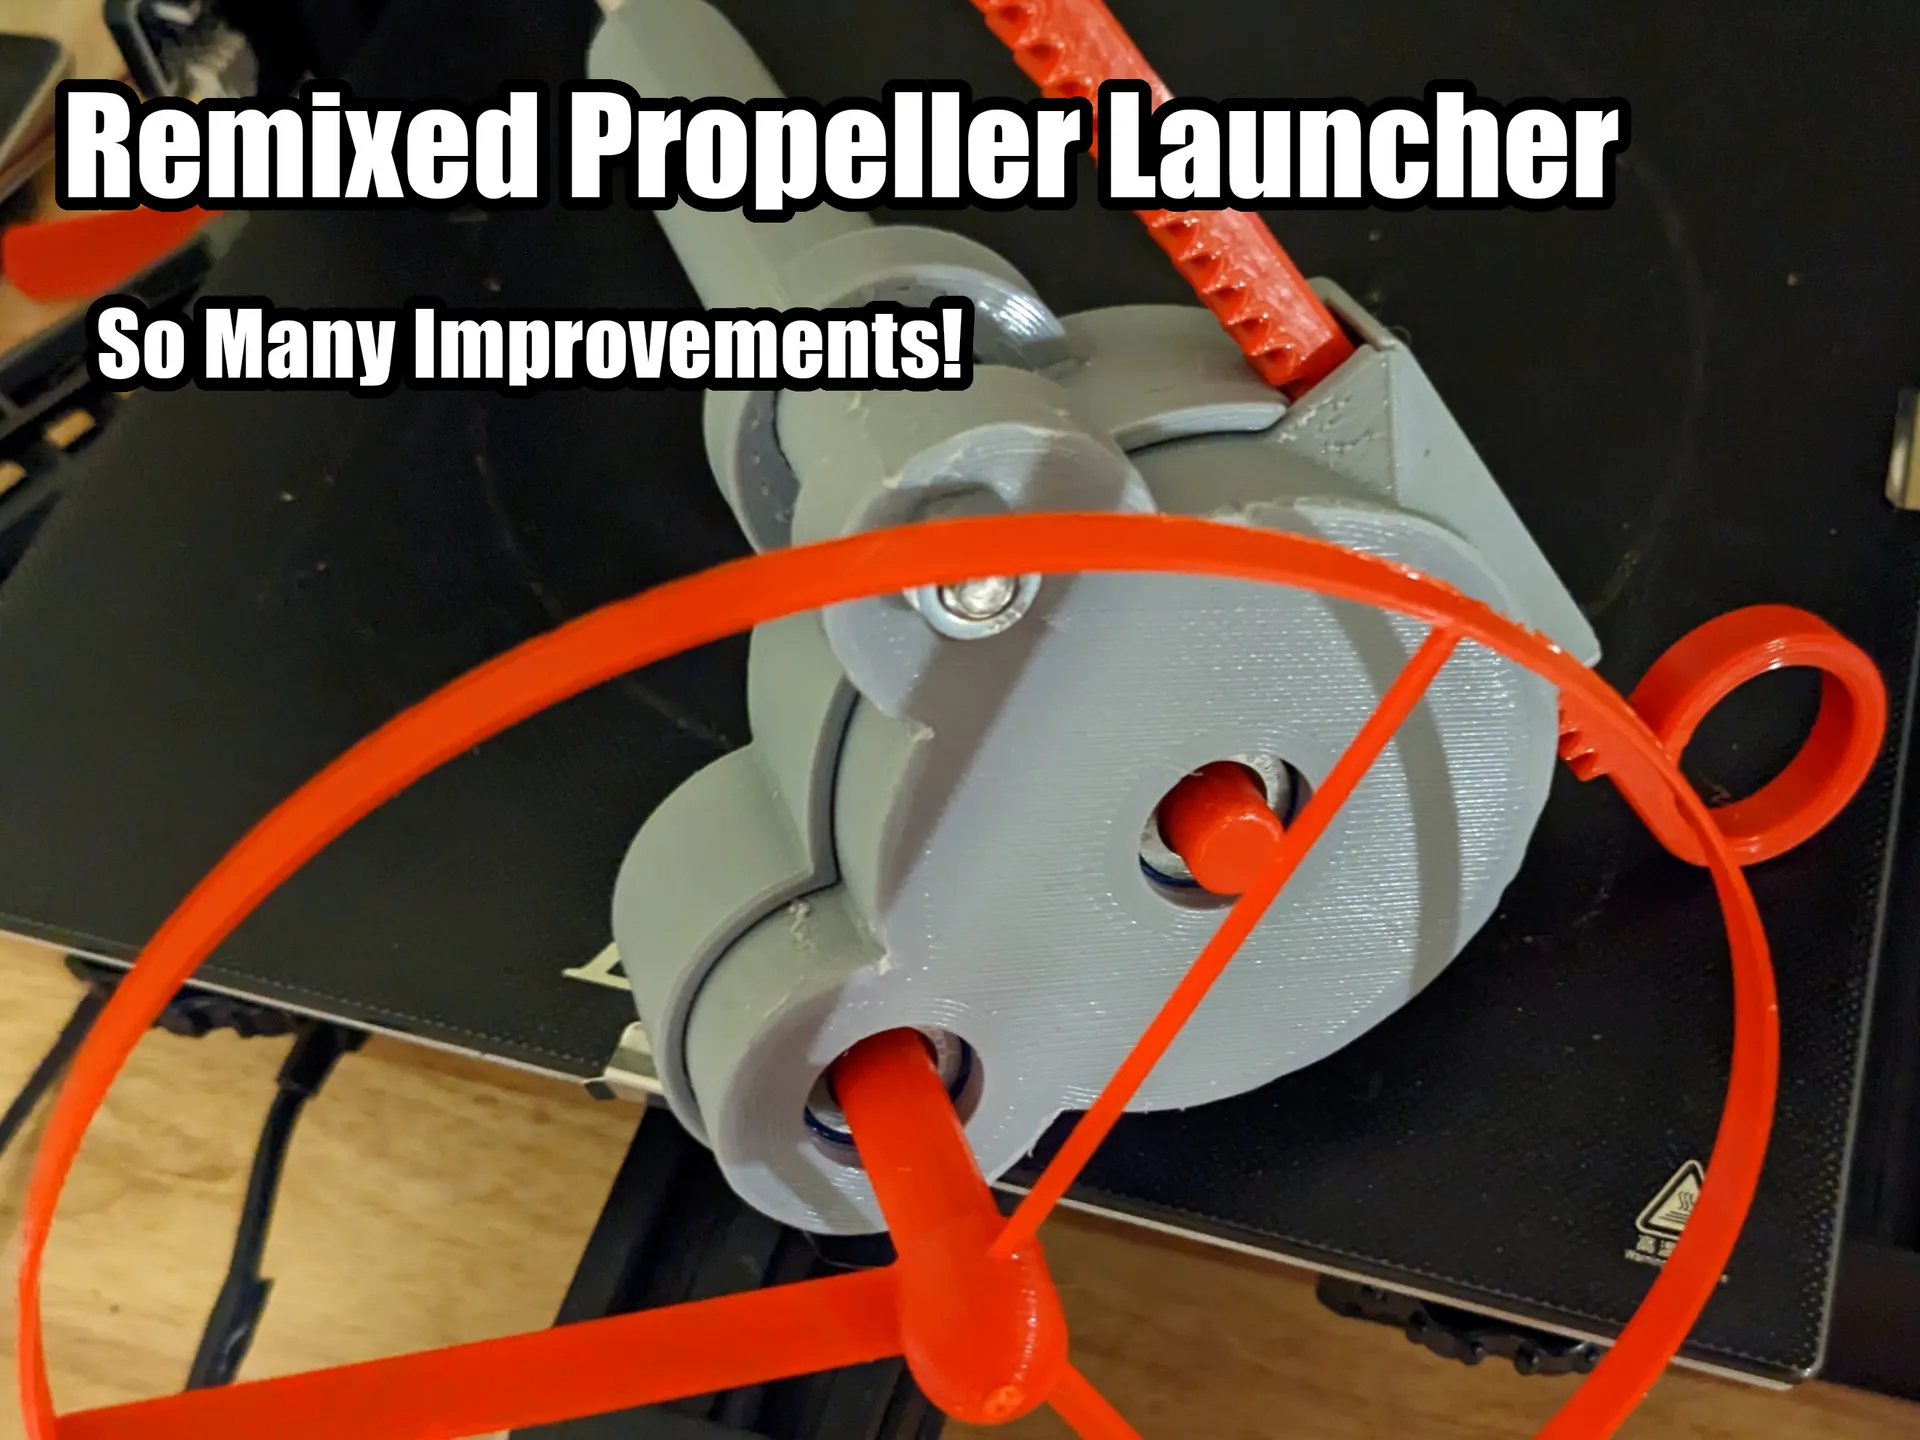
This is my next iteration of a more powerful and resilient toy for my son. After similar store bought toys didn't last or were underwhelming, I decided to harness the power of 3D printing for entertainment of primarily children but also adults with a penchant for overpowering things. A child can use the pull rod to launch the propeller. An adult can attach battery powered drill to send the propeller into low earth orbit. The gearing provides a 4:1 mechanical advantage which will multiply the output speed of a drill so use caution.
Changes from the original model include:
- Integrated handle
- Gear pitch adjustment to reduce binding and allow smoother pull
- Discrete spacers/Washers rather than integrated shaft spacers
- Removed some areas of the print that were unnecessary reducing filament usage
- Fixed minor shaft key alignment issue
A STEP file has been added if you would like to modify this model in any way.
Print Settings
- Material: PETG (PLA should also work)
- Nozzle: 0.6mm (0.4mm will work but there will be more supports where necessary)
- Layer Height: 0.28mm (others should work)
- Shafts and Reinforcing Rod
- Infill: 100%
- Supports: Yes
- Top, Bottom, and Gears
- Infill: 50%
- Walls: 4
- Supports: Yes (only used in the slots on the top)
- Propellers
- Infill: 10%
- Walls: 2
- Supports: No
Required and Optional Parts
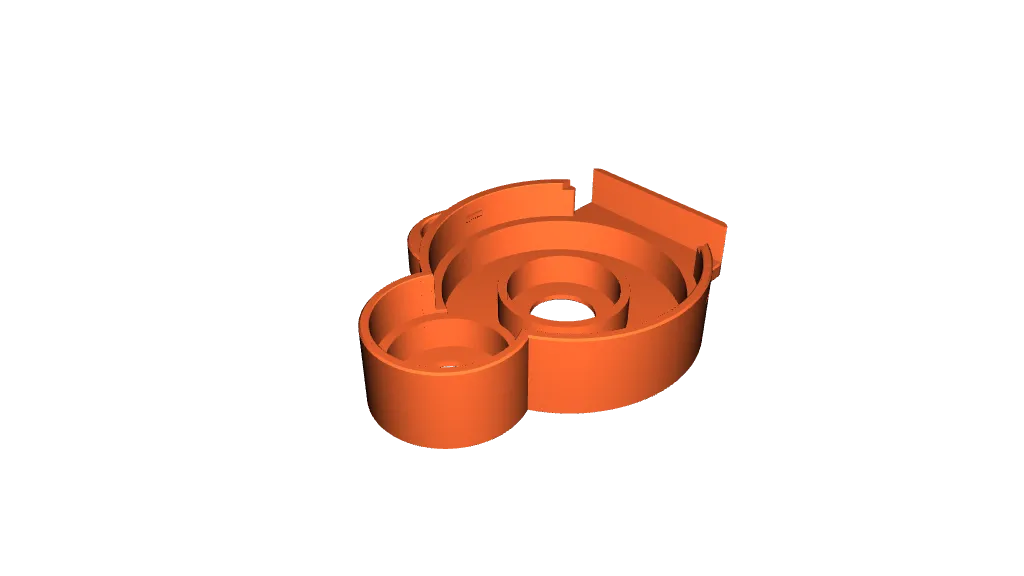
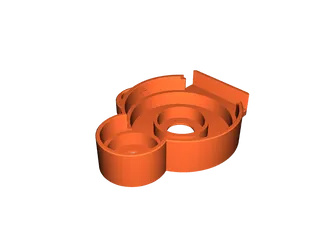
Top, Bottom, and Retaining Rod
There are two versions of the top and bottom: v36 and v37. V36 uses a retaining clip to snap the top and bottom together but this clip is prone to failure causing glue to be necessary. V37 uses a the Retain Rod part as a pin snuggly join the two together. I would use the v37 if you don't want to risk using glue. Use caution when insert the pin so as not to crack either the top or bottom.
Shafts
If you never intend to use a drill with this, use the optional input shaft model with the label of “no drill” that is shorter and easier to operate without a drill.
Reinforcing Rod
The reinforcing rod is inserted into the handle/top but can be replaced with a ¼-20 threaded rod. It is also possible to not use anything but I have not tested this configuration exhaustively. The rod’s print orientation is perpendicular to that used by the handle with the intent of adding additional strength much like plywood adds strength by alternating layer orientations.
Propellers
Any of the propellers will work but the smaller ones are generally better for a pull rod and children while the larger are better for adults.
Rack Gear/Pull Rod
Two variations of the rod and included. One rod is in one piece for larger printers while the other is in two pieces for small printers.
Spacers
The spacer should be printed 4 times although it is only included as one model.
Required Hardware
- 4 x 6200-2RS ball bearings
Parts Post Processing
Supports should be cleaned from the shafts and rods.. If using v36, The top will have supports within the slots used to snap into the bottom.
Assembly
Follow the animation below for assembly. If using v36, please note that you will need to apply pressure to the sides of the top to get it to snap into the bottom. The propeller is meant to be loose for easy launching so work it in and out as much as it takes to ensure as little friction as possible. CA glue can be used on the reinforcing rod and the seam between the top and bottom if parts are loose.
V36 Assembly
V37 Assembly
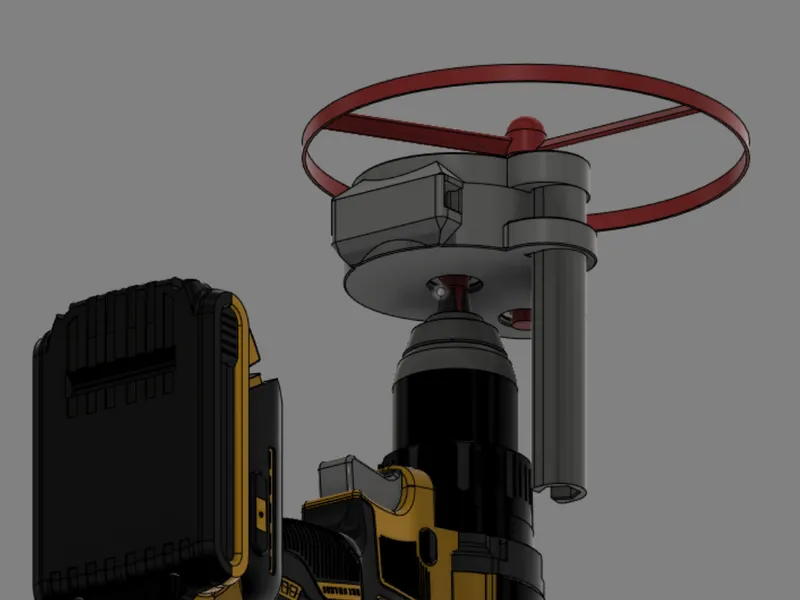
Attaching a Drill
Attach the collet of the drill to the input shaft. See the example below. Make sure to remove the pull rod prior to using the drill or plastic chaos will ensue.
Change Log
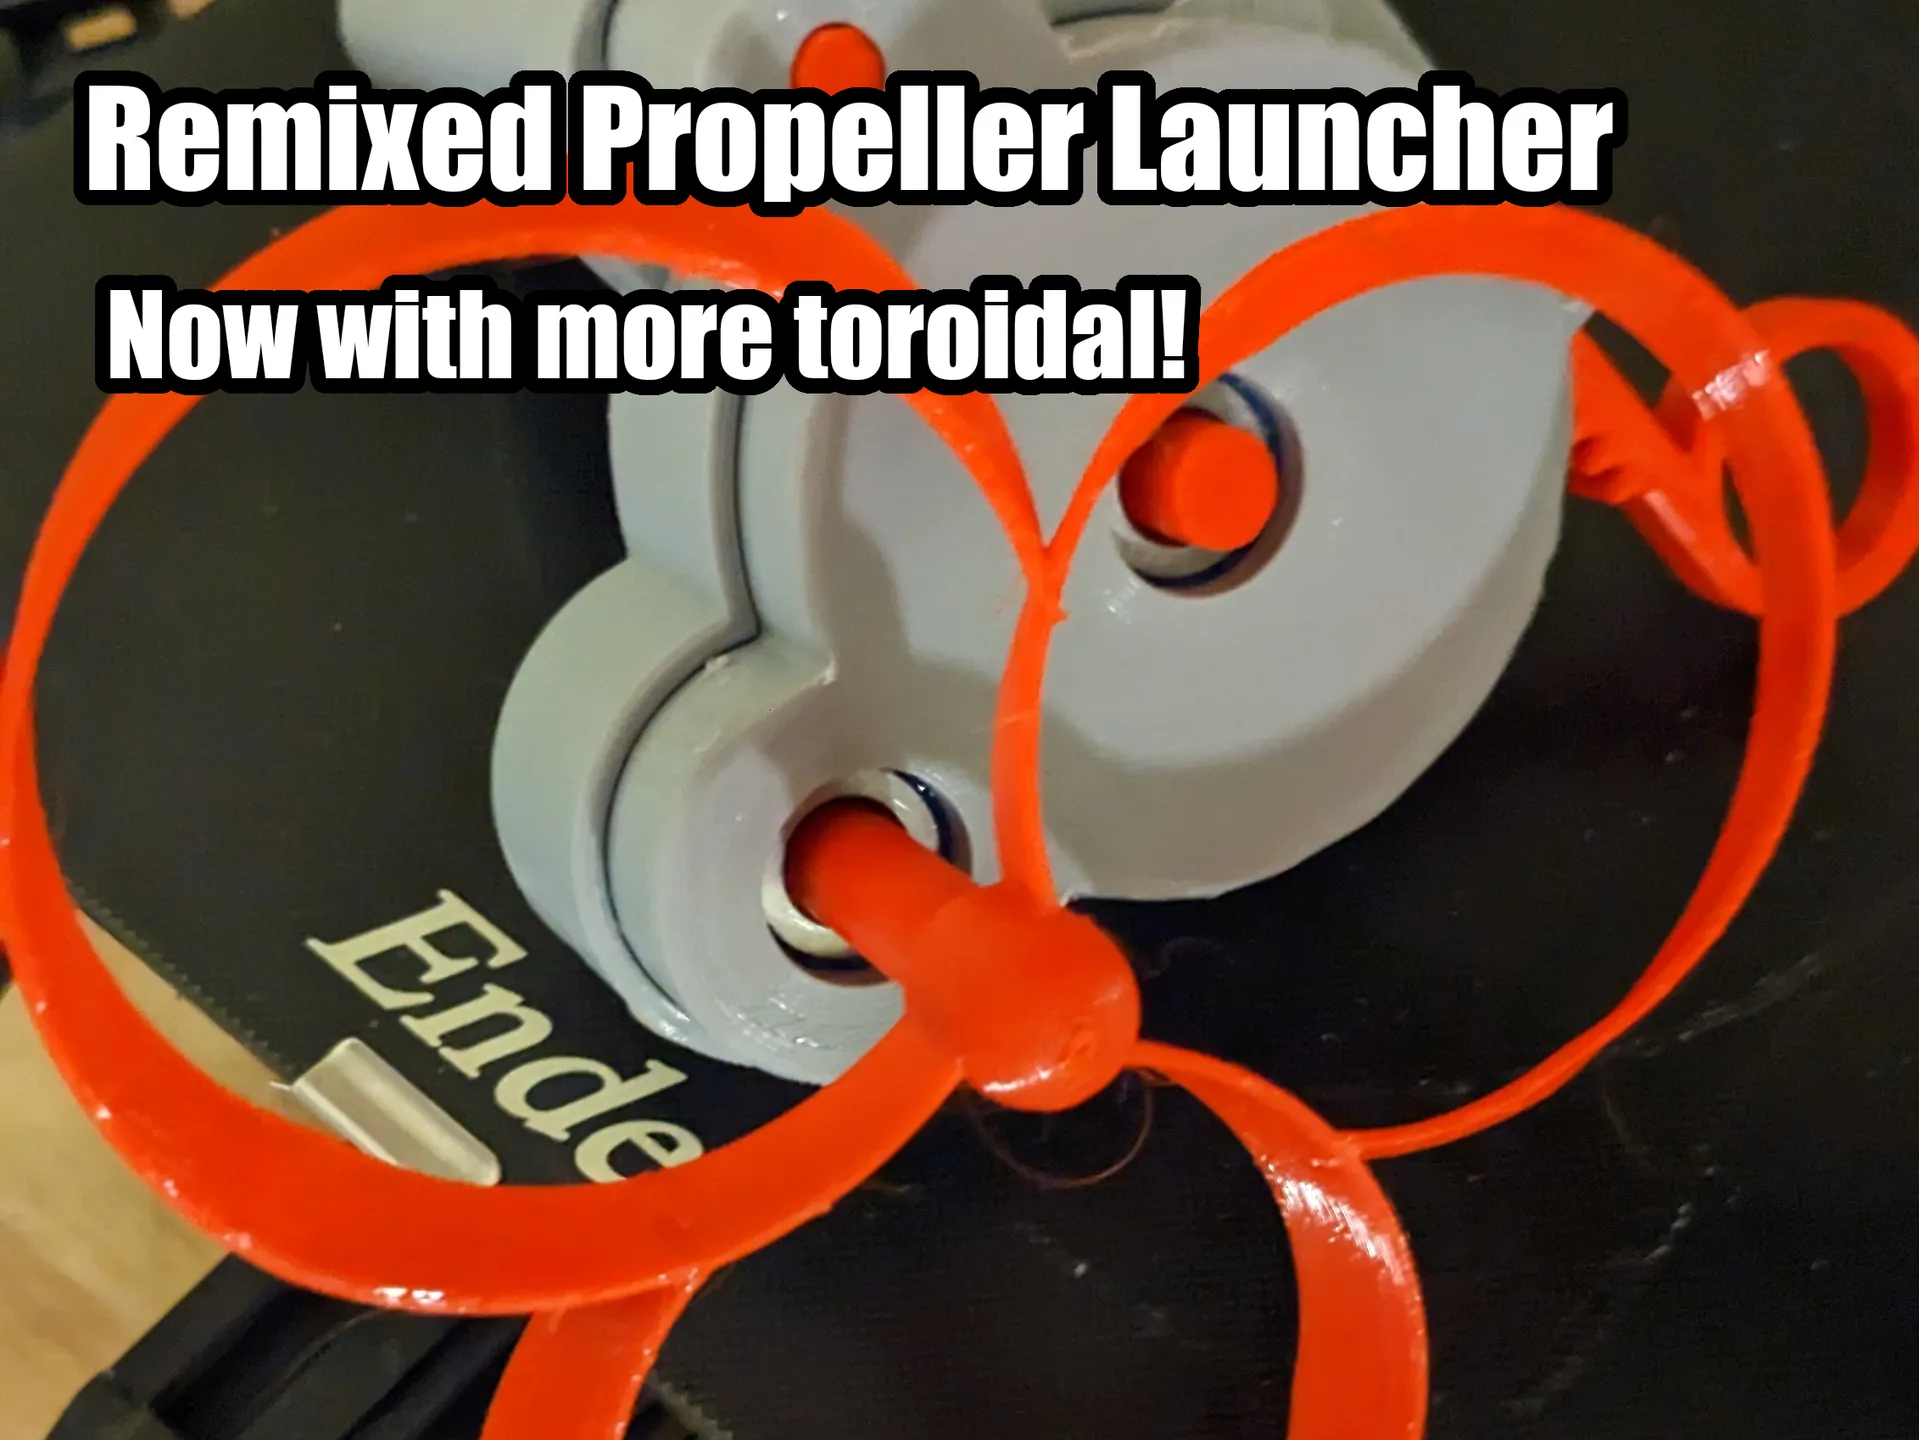
3/3/2023
Succumbed to the trend and added a toroidal prop. Worked better than I expected but a much more difficult shape to model. No supports necessary.
3/4/2023
Added 6 blade prop. Reduced prop walls to 2.
3/23/2023
I'm tired of the retaining clips not attaching the top and the bottom or having them snap off when they do. I've uploaded a version of the top and bottom with a retaining rod that will fit snug between the two parts instead. This should finalize this model. Any further changes will come as a remix. I'm keeping the old parts in this model for those whose retaining clips do work between the top and bottom or would just prefer to use CA glue. The new parts have the label v37 in their name.
Tags
Model origin
The author remixed this model.


