Yard Butler - Rake to Handle Coupler

Description
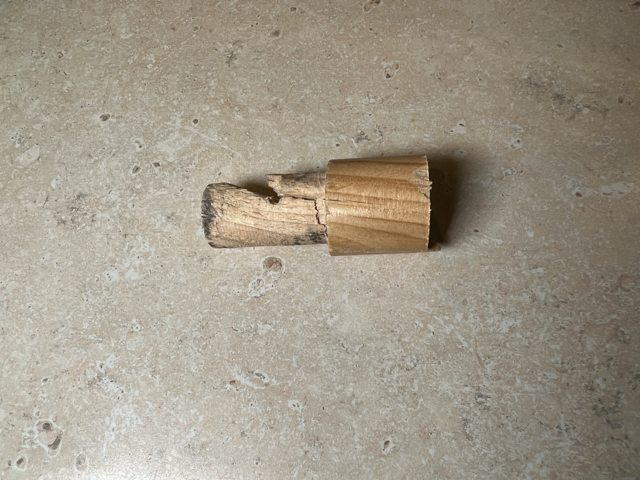
PDFThe “Worlds Greatest Rake”, had a defect in the wood where it joined into the steel pipe. This coupler repairs the joint.
I appreciate the irony that the "Worlds Greatest Rake" has been broken, but consider this. I may be the “Worlds Craziest Raker”.
If you don't shy away from the Great Canadian Maple leaf, or have the tenacity to tackle the Live Oak leaves of Texas, then you're a person who needs a rake. And not a broken one.
This is the First Printable model I've created.
I used Blender and the 3D Print Plugin. I followed the excellent Precision Modeling tutorials from Maker Tales. Thank you Maker Tales. You keep making videos, and I'll keep raking.
Measurements were made using a Mitutoyo Caliper. The fit and hole alignment was perfect on my first print.
Sadly, it didn't make it onto the rake. It rolled off the counter and cracked at the thin end of the bevel. I had only increased the perimeters setting to 3, with 30% in-fill and that wasn't enough. I increased the perimeters setting to 10, and increased in-fill to 40%. I'm sure the in-fill wasn't my main problem here, but I didn't like the limited “connective tissue” in the failed part. The joint will likely experience forces beyond compression.
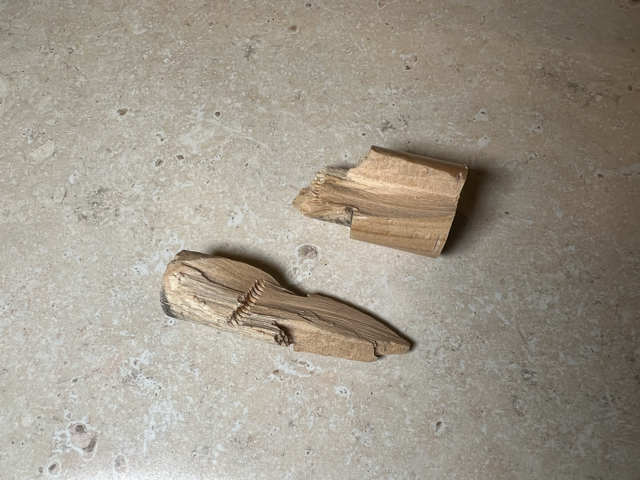
The Problem
This is how my handle broke. The failure line was with the wood grain.
Parts and Assembly
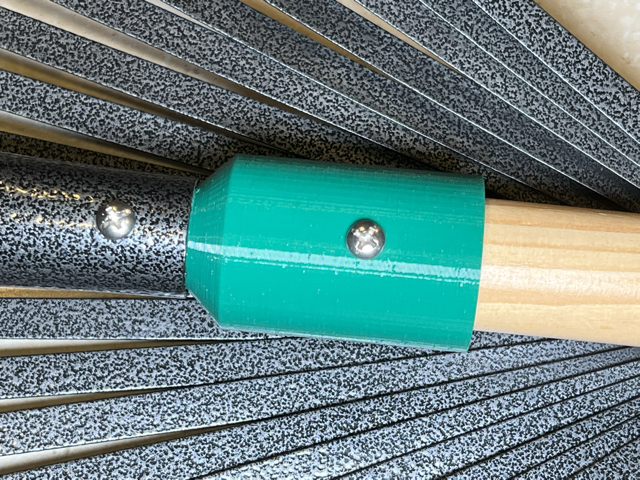
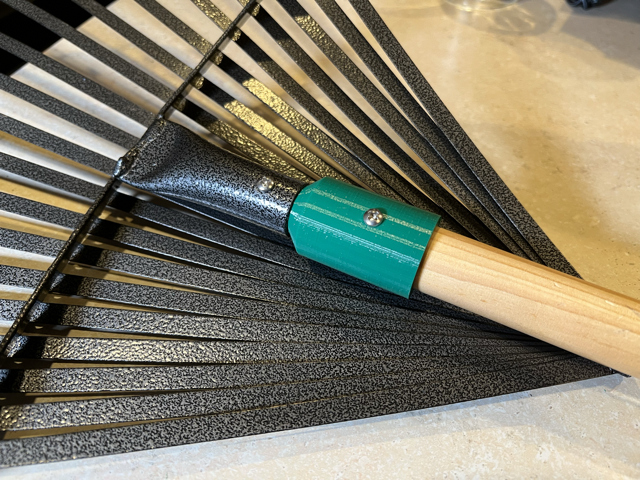
I used 2 x Stainless Steel #6 x ¾ in PAN Head Phillips Sheet Metal Screws.
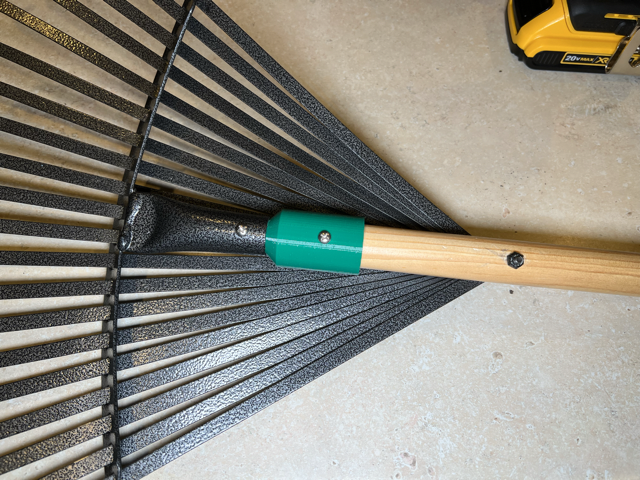
NOTE: I did have to cut away the top bit of wood, as the coupler was designed for the diameter of the rake handle, and it was all damaged anyway. I re-used the same bolt-hole where the tines are gathered for the fan-out.
My Assembly technique.
- Attach the wooden handle into the coupler, and slide the coupler into the rakes pipe. Reminder, to check that the rake-handle hole is facing away from the tines.
- Next attach the tine gathering bolt back into the rake handle and fasten the nut.
- Fasten 1 screw through the rake pipe into the coupler. It doesn't need to be too tight.
- Drill a pilot hole into the wood handle accessed through the coupler hole. Fasten the second screw through the coupler into the wood.
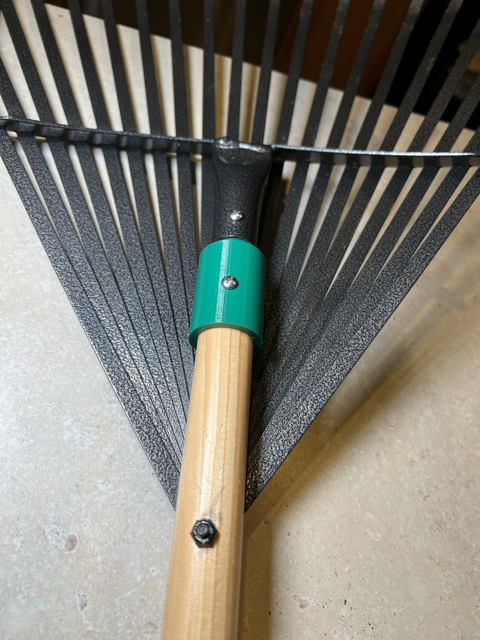
And here is the mk2 Coupler Installed.
Tags
Model origin
The author marked this model as their own original creation.