8 button MS Teams USB keyboard

8 buttons to control Microsoft Teams and the speaker volume of your MS Windows pc. Very easy build. No soldering needed!
12
28
0
695
updated March 8, 2023
Description
PDFFunctions of this 8 button MS Teams USB keyboard:
- 8 buttons to control Microsoft Teams and the speaker volume of your MS Windows pc:
- Answer audio call
- Answer video call
- Toggle video camera usage
- Toggle mute function of your microphone
- Speaker volume down
- Speaker volume up
- Toggle raise hand symbol
- Quit meeting
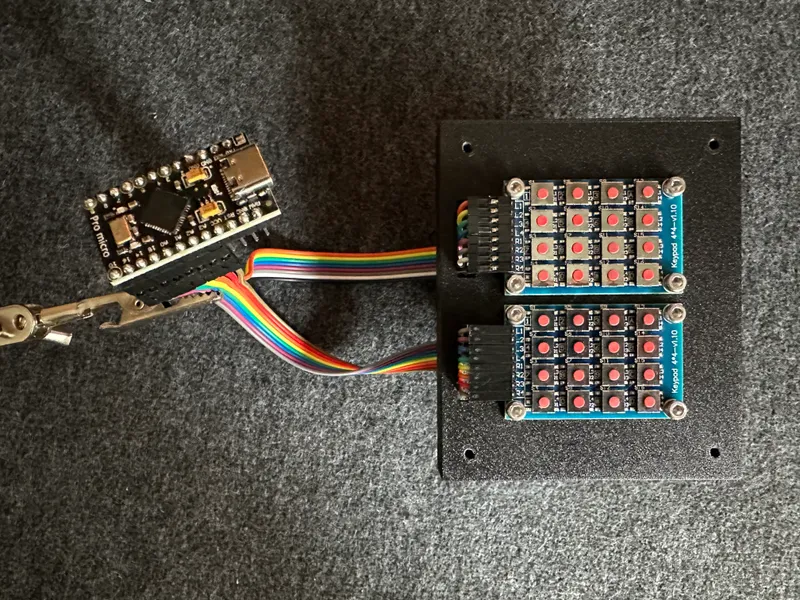
- Very easy build. No soldering required. The components are stacked together only.
- The device is recognised as a keyboard and should not be blocked even if you can not attach other USB devices to your (working) computer.
- The keyboard strokes are send to your computer like you would do this manually on the computers own keyboard. So the MS Teams window has to have the focus to receive the commands. The only exception to this are the 2 volume control buttons. They work system wide.
- Easy change of the printed buttons possible and the code can be changed to your needs very easy to with some additional not used examples in the code as well.
- The case is thick enough to stand up right to face the buttons in front of you to be easy in reach.
- The buttons are a bit harder to press, to avoid unwanted inputs.
- Yes, the case could be generated way smaller, but this would have required, that you need to unsolder the pre-mounted pins from the 2 matrix and controller and you would have to solder the 16 cables to the connections afterwards. Many could do this, but i thought it might open this project to many more users if they did not have to solder at all… Also there are much nicer cherry keys to use out there, yes, but they would require a special generated PCB and soldering work again… =)
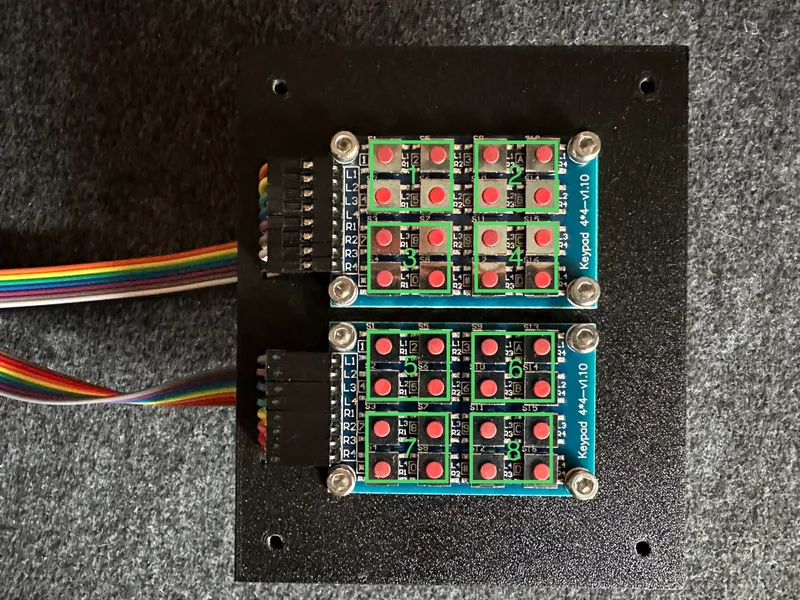
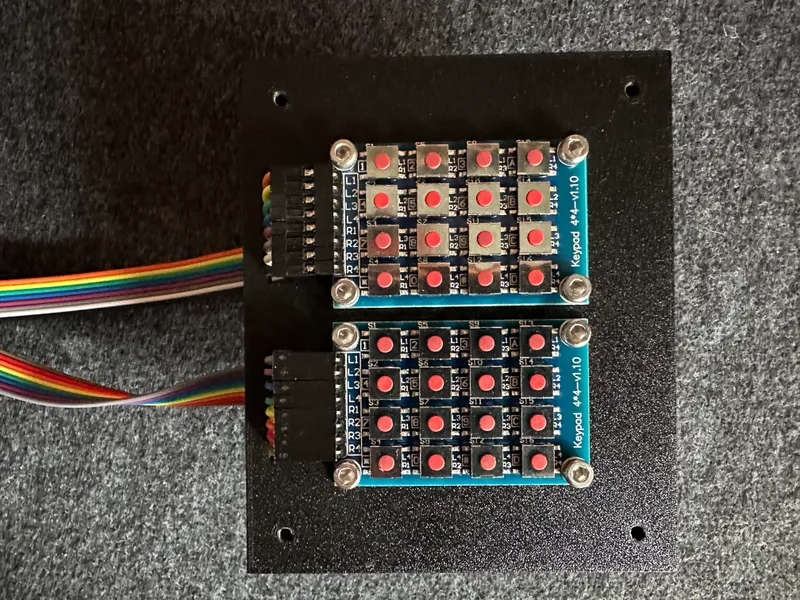
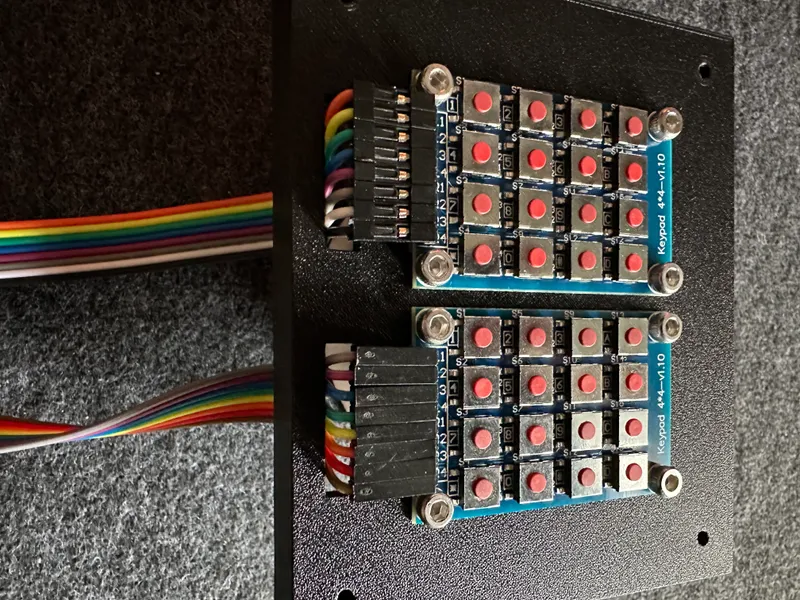
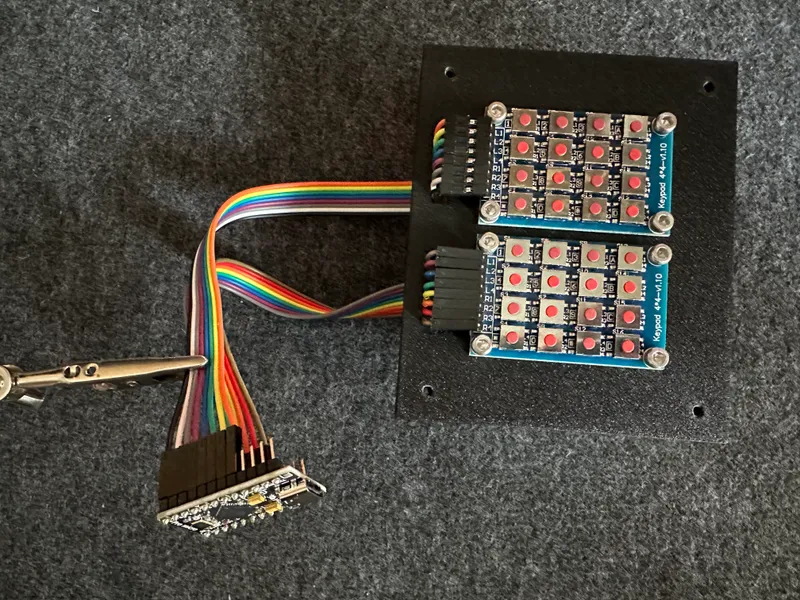
- Each 4 buttons of the 2x 16 buttons matrix are grouped together to get 8 bigger and better usable buttons. Possible would be up to 32 buttons in a smaller size, but they looked way to small for a daily use to me…
Parts used:
- 2x 4x4 button matrix
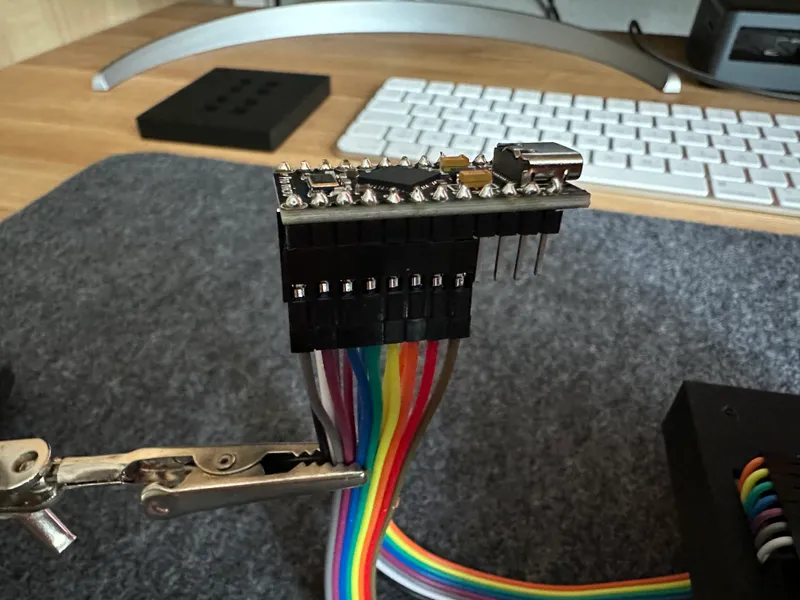
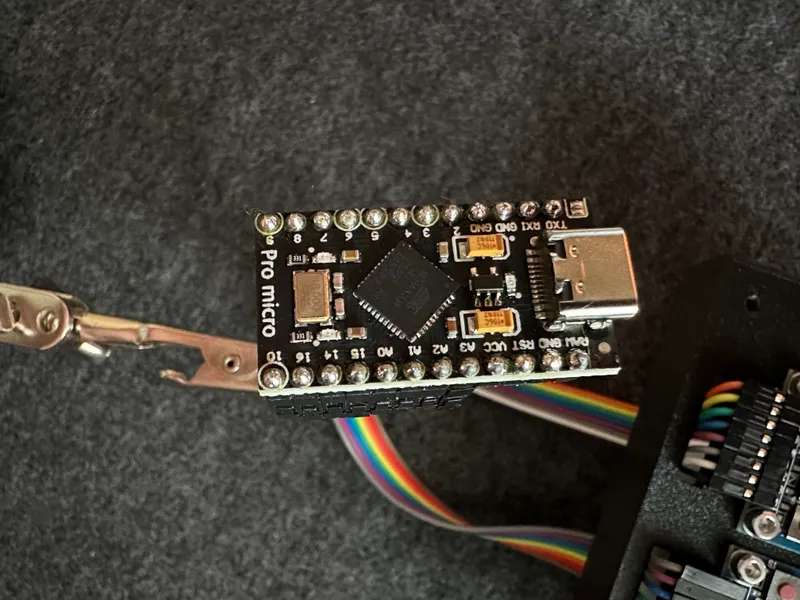
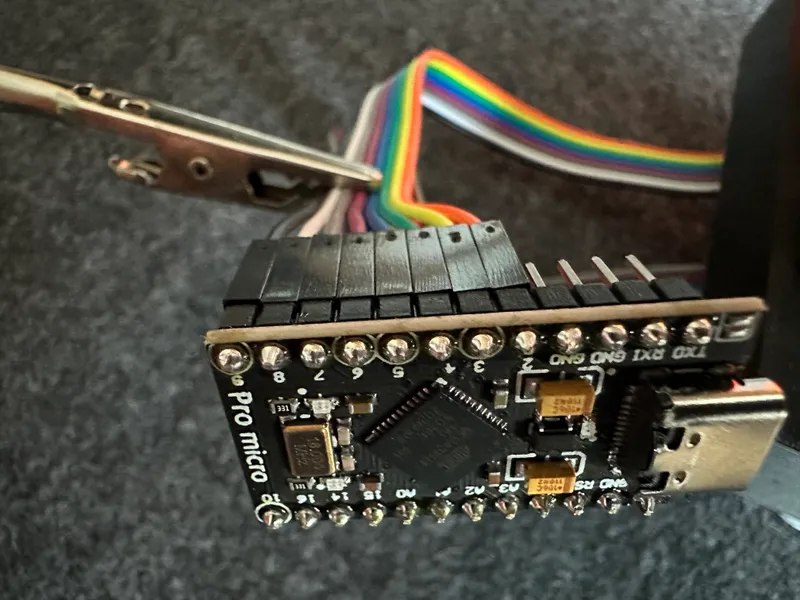
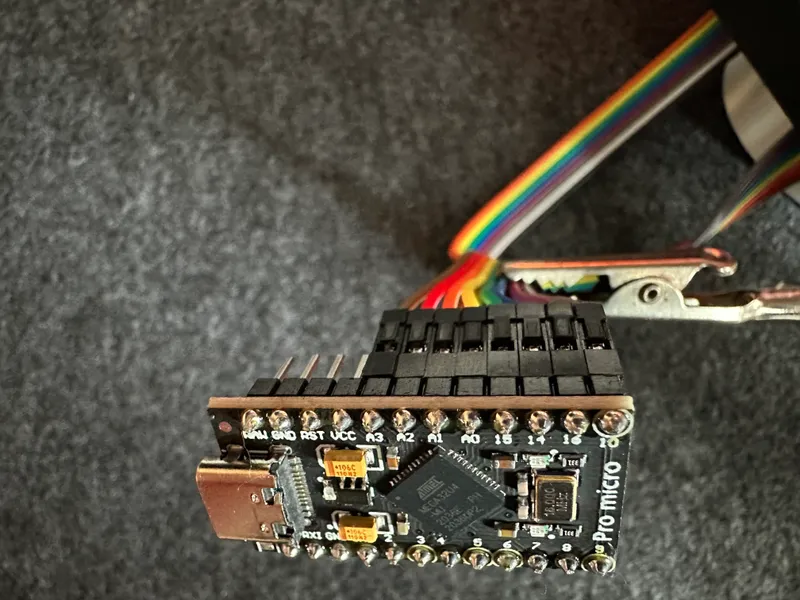
- 1x Arduino Pro Micro with ATMEGA32U4 (! It is mandatory to use this chip !)
- 16x Jumper wire cables - female to female
- 1x USB-C to USB-A cable
- 8x M3 6mm screw
- 8x M3 35mm screw
- 8x M3 nut
- Some small cable ties to fix the cables in the case
Code:
- The code can be found in my GitHub repository.
- You will find some extra examples at the end of the code in case you want to have other functions on the buttons.
Notes:
- You have to use the named micro controller or at least one with the named ATMEGA32U4 chip to get the keyboard function that this project is based on. Other chips will not work, as far as i know.
- Please try to use the named 2 matrix boards. There are others out there that look similar but the pins are not in the same order, which would require a few changes to the code.
- There are also other 4x4 matrix out there that would be faster to order, but I wanted to use these to be easily able to screw then into the case. My order arrived after about 1 week, so it was ok for me.
Changing the buttons layout:
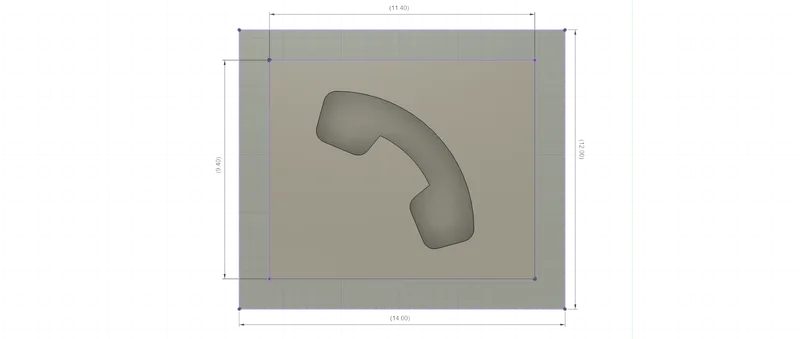
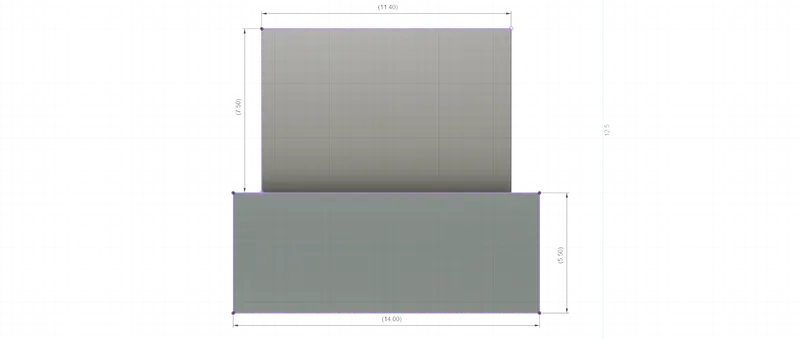
- The buttons design are kept really easy to be able to change them easy in case you want to have other logos on them.
- I used free icons from https://fontawesome.com/icons for this project.
- You will find the measurements in the pictures:
Wiring:
- As you can see in the pictures the wiring is very easy. You just use 2x 8 of the jumper wires that usually come sticked together and stick them on the pins as shown.
- In addition you can follow this table in case it does not get clear out of the pictures:
| Pro Micro: | 2 | 3 | 4 | 5 | 6 | 7 | 8 | 9 |
| Keyboard 1: | L1 | L2 | L3 | L4 | R1 | R2 | R3 | R4 |
| Pro Micro: | 10 | 16 | 14 | 15 | A0 | A1 | A2 | A3 |
| Keyboard 2: | L1 | L2 | L3 | L4 | R1 | R2 | R3 | R4 |

Printing instructions:
- 0.3 draft profile
- No brim
- No supports
- Textured sheet used
- The buttons require a color change to get the logo in a different color at 1mm height
Happy printing =)
Tags
Model origin
The author marked this model as their own original creation.


