Ultimate Concrete Mixer Truck

Description
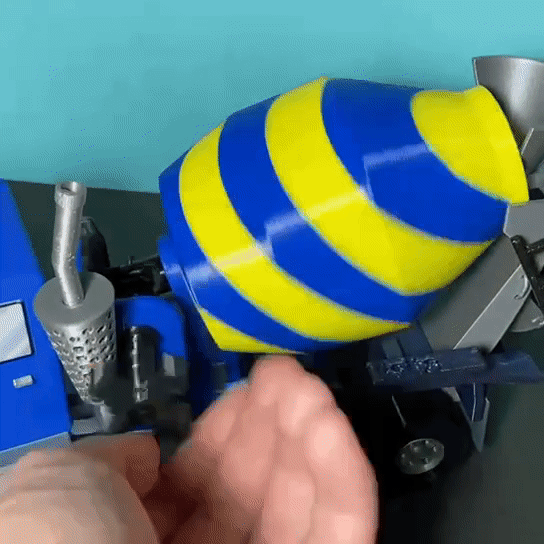
PDFI wanted to model a somewhat cartoonish version of a concrete/cement mixing truck. They're my favorite kind of trucks.

FEATURES:
- Fully printed bearing wheels (they are very loose but they roll and spin!)
- Handle for spinning the barrel
- Lots of parts - a little too many
- Chute/Funnel thing
- No extra hardware required (you will need something to cut filament for assembly)
Printing
Refer to 3mfs for printing orientation, resolution, etc.
For the large objects, you can get away with 0.3mm, but 0.2mm works a lot better for angled parts.
FYI: this is very involved, lots of active time attending the printer.
Example: the Barrel. SO MANY FILAMENT CHANGES AHHHHHH
But I sped it up to be quicker (Barrel o3). However, this barrel is kind of fragile and has bad bridging. Use Barrel o2 reinforced for a stronger barrel but slightly longer print.
Assembly
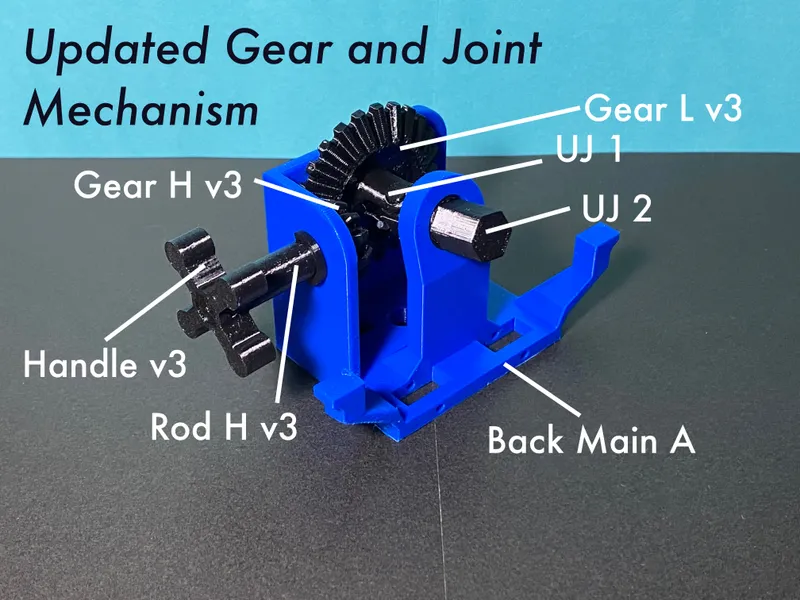
IMPORTANT: The gear mechanism has been fixed! Took three iterations to get it right. I found out that reducing # of gears from 3 to 2, as well as using much larger gears, helps tremendously with preventing jamming. I ended up using a 1:2 bevel gear ratio to drive a universal joint at 165 degrees.
UPDATE 2/10: didn't realize I forgot to upload the Tire Rubber files. Thanks to Benoît for pointing this out
I would include a full assembly tutorial, but I have noticed that people tend not to make my more complicated models. Which I totally understand! But I guess this is more for show/my design capabilities/what you can do with lots of different filament colors.
EDIT: I have included a brief labelling of all of the parts. Assembly is pretty straightforward. Details are packed into 4 large components:
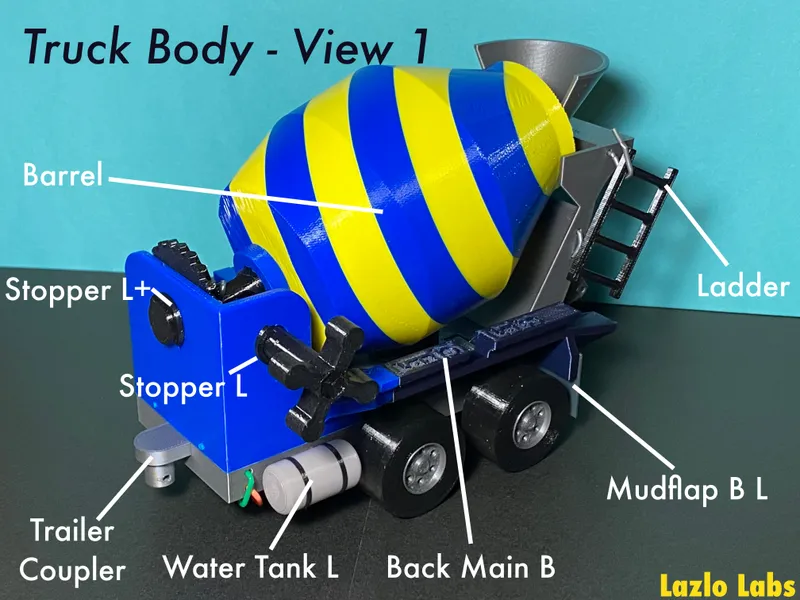
- Truck Front (lots of details and front 2 wheels)
- Back Main A (this holds the gear mechanism and the handle)
- Back Main B (the funnel/chute and barrel sit on this)
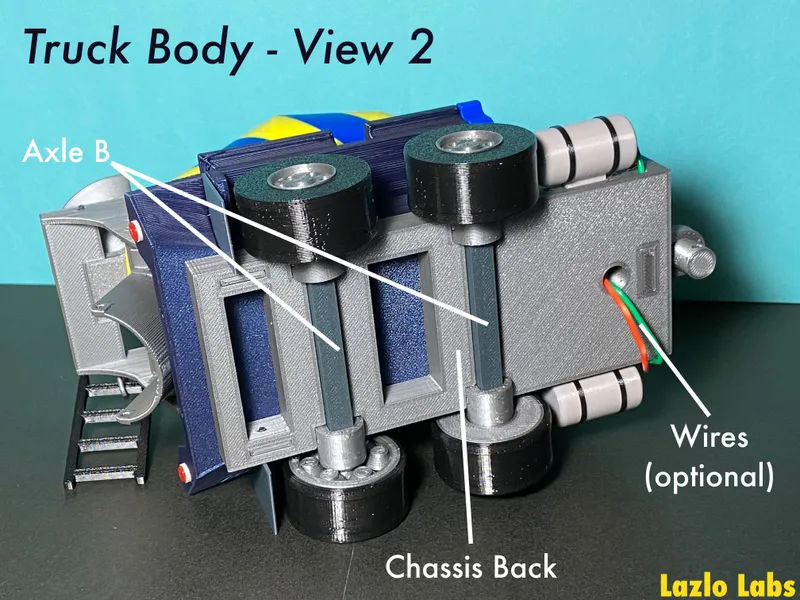
- Back Chassis (back 4 wheels along with the tanks and optional wires).
Tips
If anything is loose, you don't need to use glue, You can just crimp at least 2 parallel edges with pliers and the part will be much less loose.
Also, I use filament to hold components together. NOT glue (🤮)
The Rundown
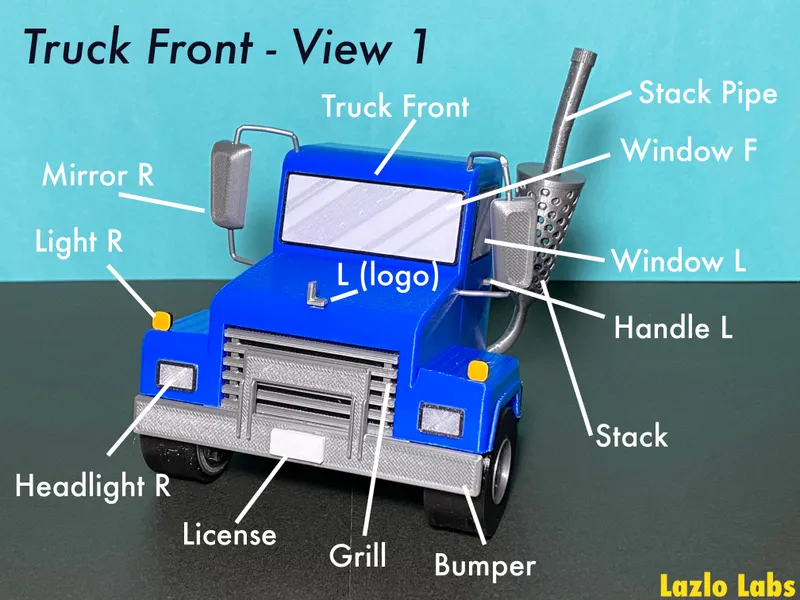
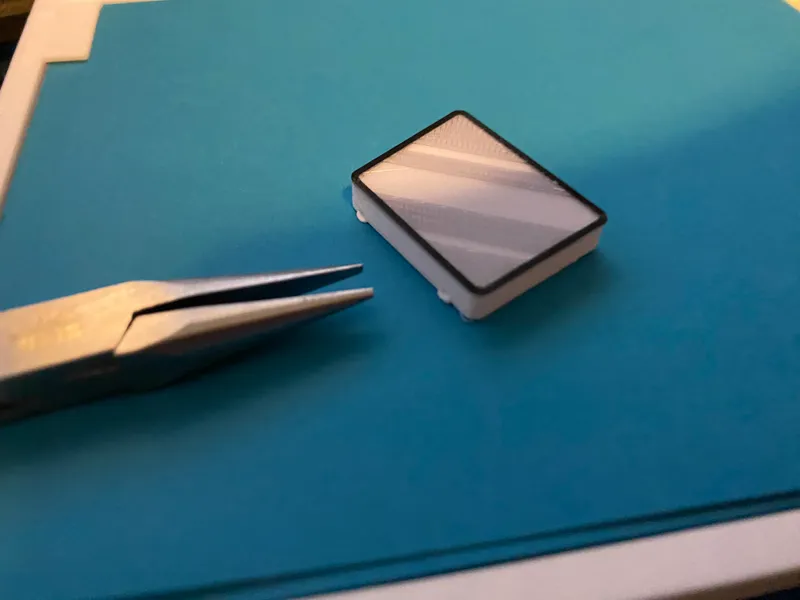
The mirrors are a pain, so feel free to just eyeball it.
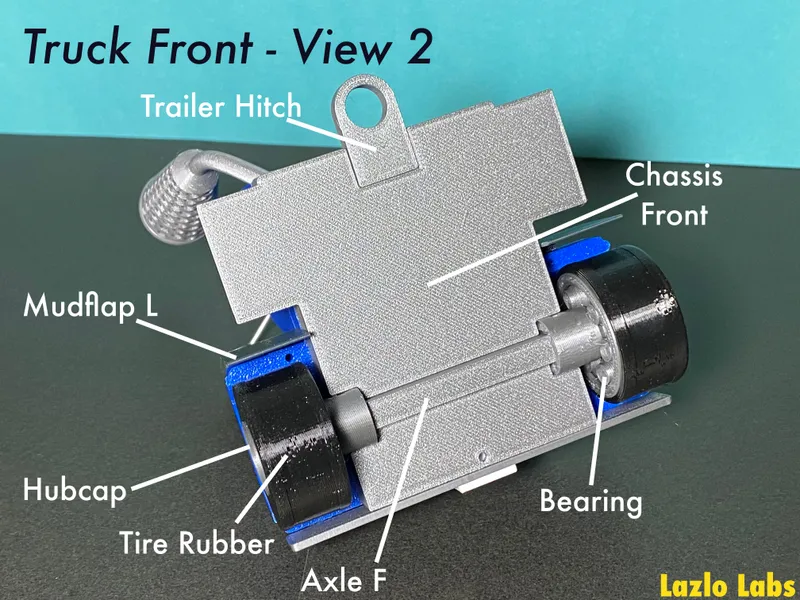
The Axle, Truck Front, and Chassis Front are all tied together with filament.
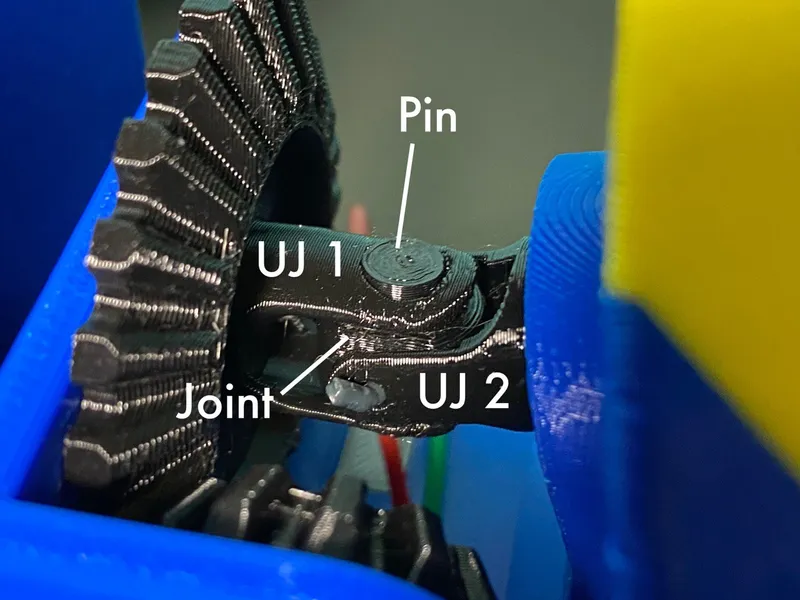
Modified handle and more robust gear system. Use filament to hold the whole joint together.
There are optional wire and two options for water tanks
Notice the two small pieces of filament used to hold the Main Chute to the back chassis.
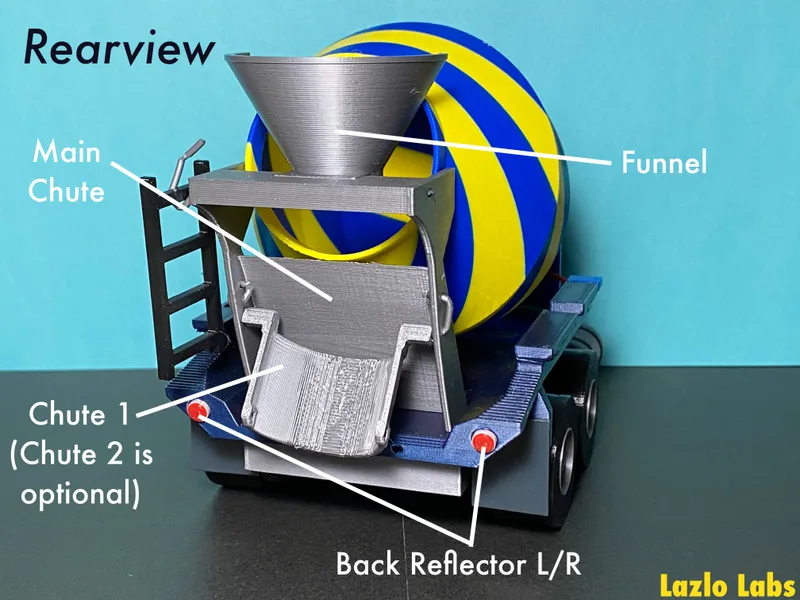
Do this part LAST. makes it easier to attach the barrel. Also, Chute 2 is not here because it broke. It extends off of Chute 1.
Conclusion
If you make this I will love you and we can go out on valentine's day, dinner is on me. Do you like Wendy's?
Tags
Model origin
The author marked this model as their own original creation.