Description
PDFGerman:
Lampe für 360° Lithophane.
Lithophane erstellen:
Seite: http://3dp.rocks/lithophane/ aufrufen
Bild hochladen
!!!(Bild sollte max ca. 78mm hoch sein.)!!!
Da ich mehrere Bilder verwendet habe, hab ich einfach ein Word Dokument erstellt und dort die Bilder eingefügt und so arrangiert, dass die Bilder nicht höher als 78mm und breiter als 300mm sind.
"Outer Curve" wählen
Settings - Model settings - Maximum size (MM) auf 300 mm einstellen
Settings - Model settings - Thickness 2mm
Settings - Model settings - Curve - auf 360 stellen
Settings > Image settings > positive image einstellen, sofern es sich nicht um ein Negativ handelt
"Model" in der oberen Auswahl wählen
"Refresh" drücken
"Download" klicken um das Lithophane herunterzuladen.
Elektronik:
Weiße LEDs (z.B. https://bit.ly/2yH6wmI)
Langsam wechselnde RGB LEDs (z.B. https://bit.ly/2AeUiUm)
9V Block Batterie
9V Block Anschluss (z.B. https://bit.ly/2RYFsrI)
Widerstände
An/Aus/An Schalter (6mm Hals) (z.B. https://bit.ly/2CQn0xh)
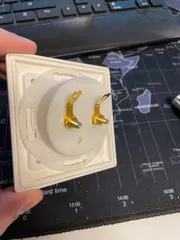
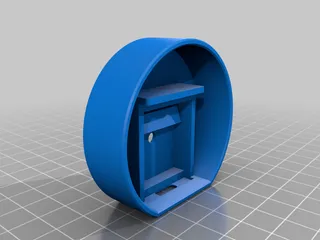
Der Sockel für die LEDs kann so verwendet werden wie auf dem Bild.
Beleuchtung kann natürlich auch anders umgesetzt werden.
Alle Teile können ohne Support gedruckt werden.
Da es mein erstes selbst erstelltes Modell mit Fusion360 ist, freue ich mich über Feedback, wenn ich noch was verbessern kann.
Die Gewinde haben bei mit auf Anhieb zusammengepasst.
Gedruckt mit:
5 Wände
5 Boden
5 Decken
50mm/s
205°C/195°C Nozzle
60°C/55°C Heizbett
Infill 50%
Auflösung 0,14
Druckzeit zusammen lag bei mir um die 25h ca.
--------------------------------------------------------------------------------------------------------
English:
Lamp for 360° lithophane.
Create lithophane:
Go to page: http://3dp.rocks/lithophane/
Upload picture
!!!(Image should be max about 78mm high.)!!!
Since I used multiple images, I just created a Word document and pasted the images there and arranged them so that the images are not higher than 78mm and wider than 300mm.
"Select "Outer Curve
Settings - Model settings - Maximum size (MM) set to 300 mm
Settings - Model settings - Thickness 2mm
Settings - Model settings - Curve - set to 360
Settings > Image settings > set positive image, if it is not a negativ
Select "Model" in the upper selection
"Press "Refresh
"Download" click to download the lithophane.
Electronics:
White LEDs (e.g. https://bit.ly/2yH6wmI)
Slow changing RGB LEDs (e.g. https://bit.ly/2AeUiUm)
9V block battery
9V block connector (e.g. https://bit.ly/2RYFsrI)
Resistors
On/Off/On switch (6mm neck) (e.g. https://bit.ly/2CQn0xh)
The socket for the LEDs can be used as shown on the picture.
Lighting can of course be implemented differently.
All parts can be printed without support.
Since it is my first self-made model with Fusion360, I am happy about feedback, if I can improve something.
The threads fits together nicely.
Printed with:
5 Walls
5 Top
5 Bottom
50mm/s
205°C/195°C Nozzle
60°C/55°C Heatbed
Infill 50%
Resolution 0,14
Printtime was about 25h.
Model origin
The author marked this model as their own original creation.


