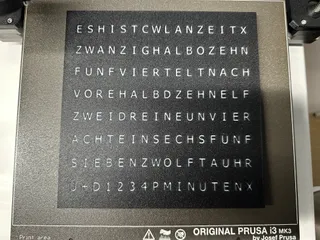
WordClock 16x8 LED matrix (2023-V2)


Description
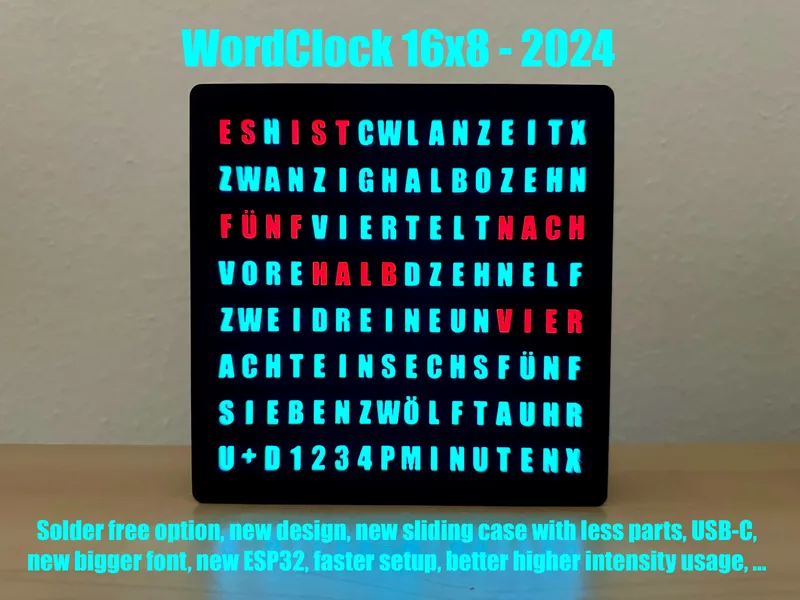
PDFWordClock 2024 variant of this model is available too.
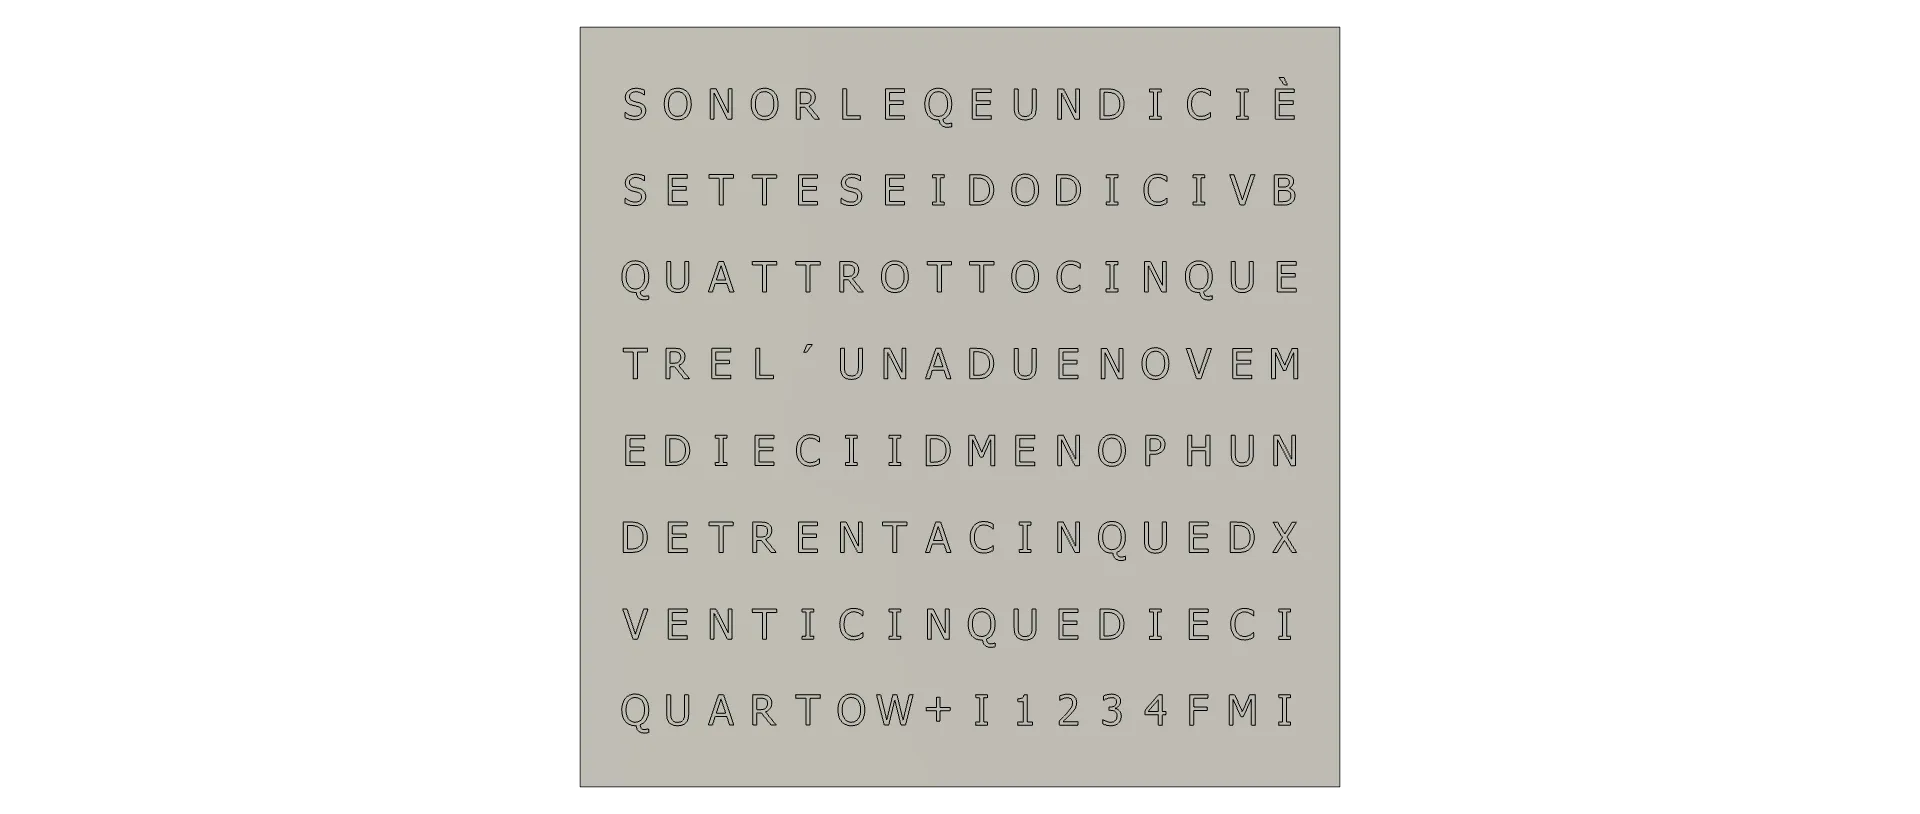
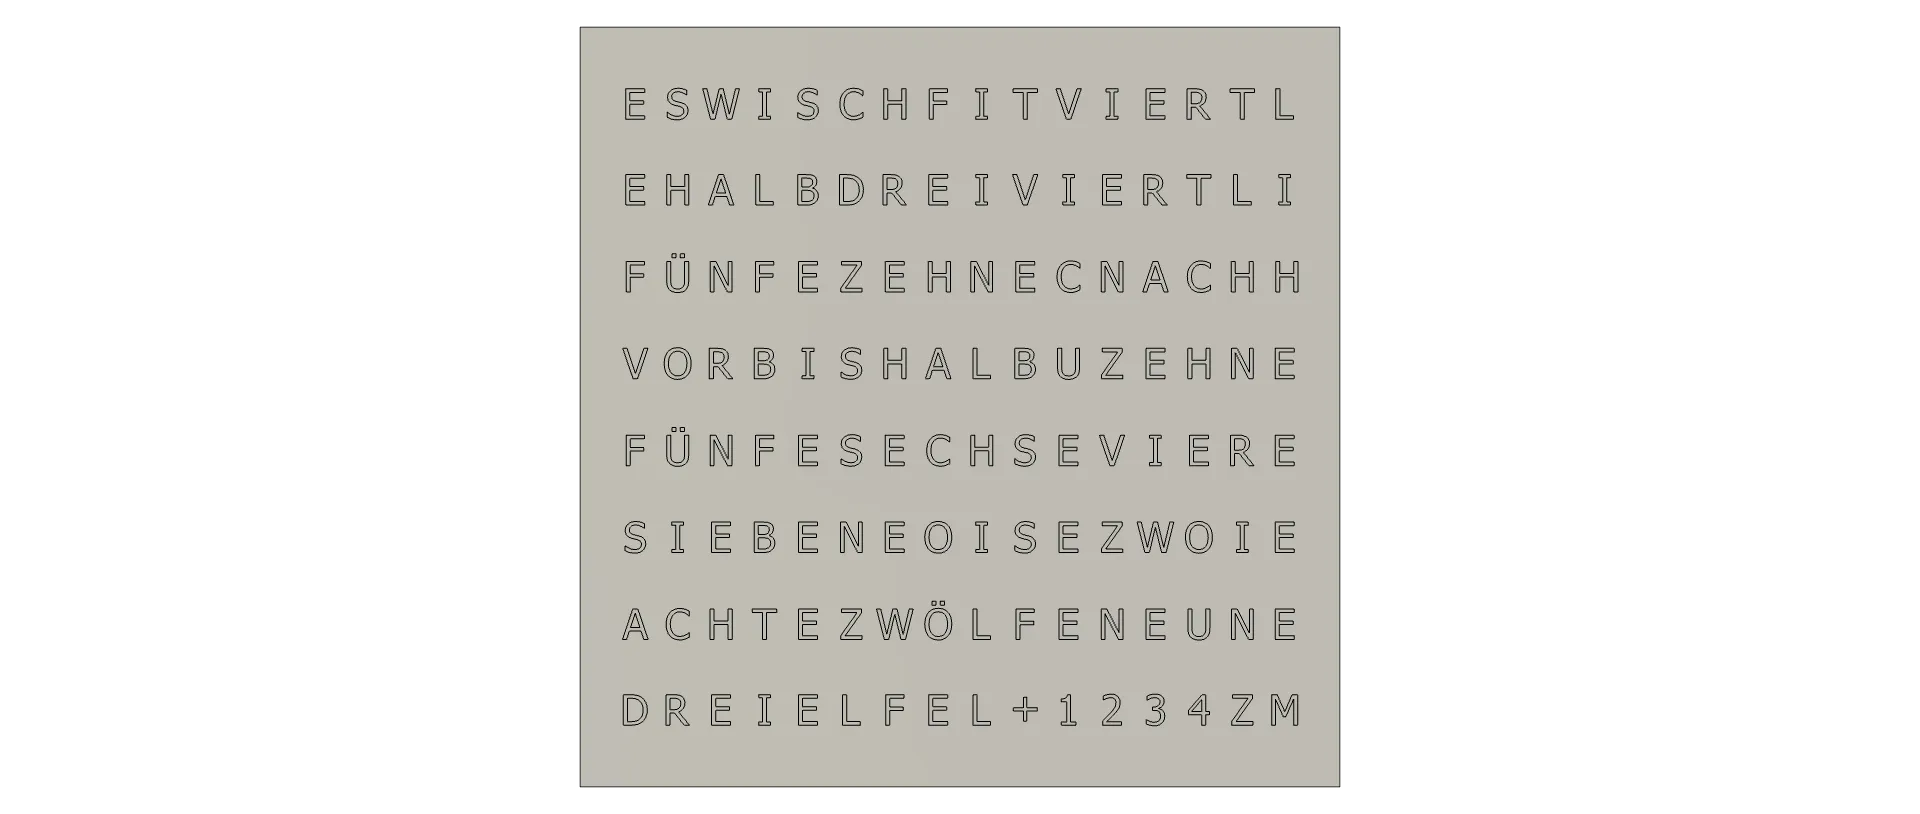
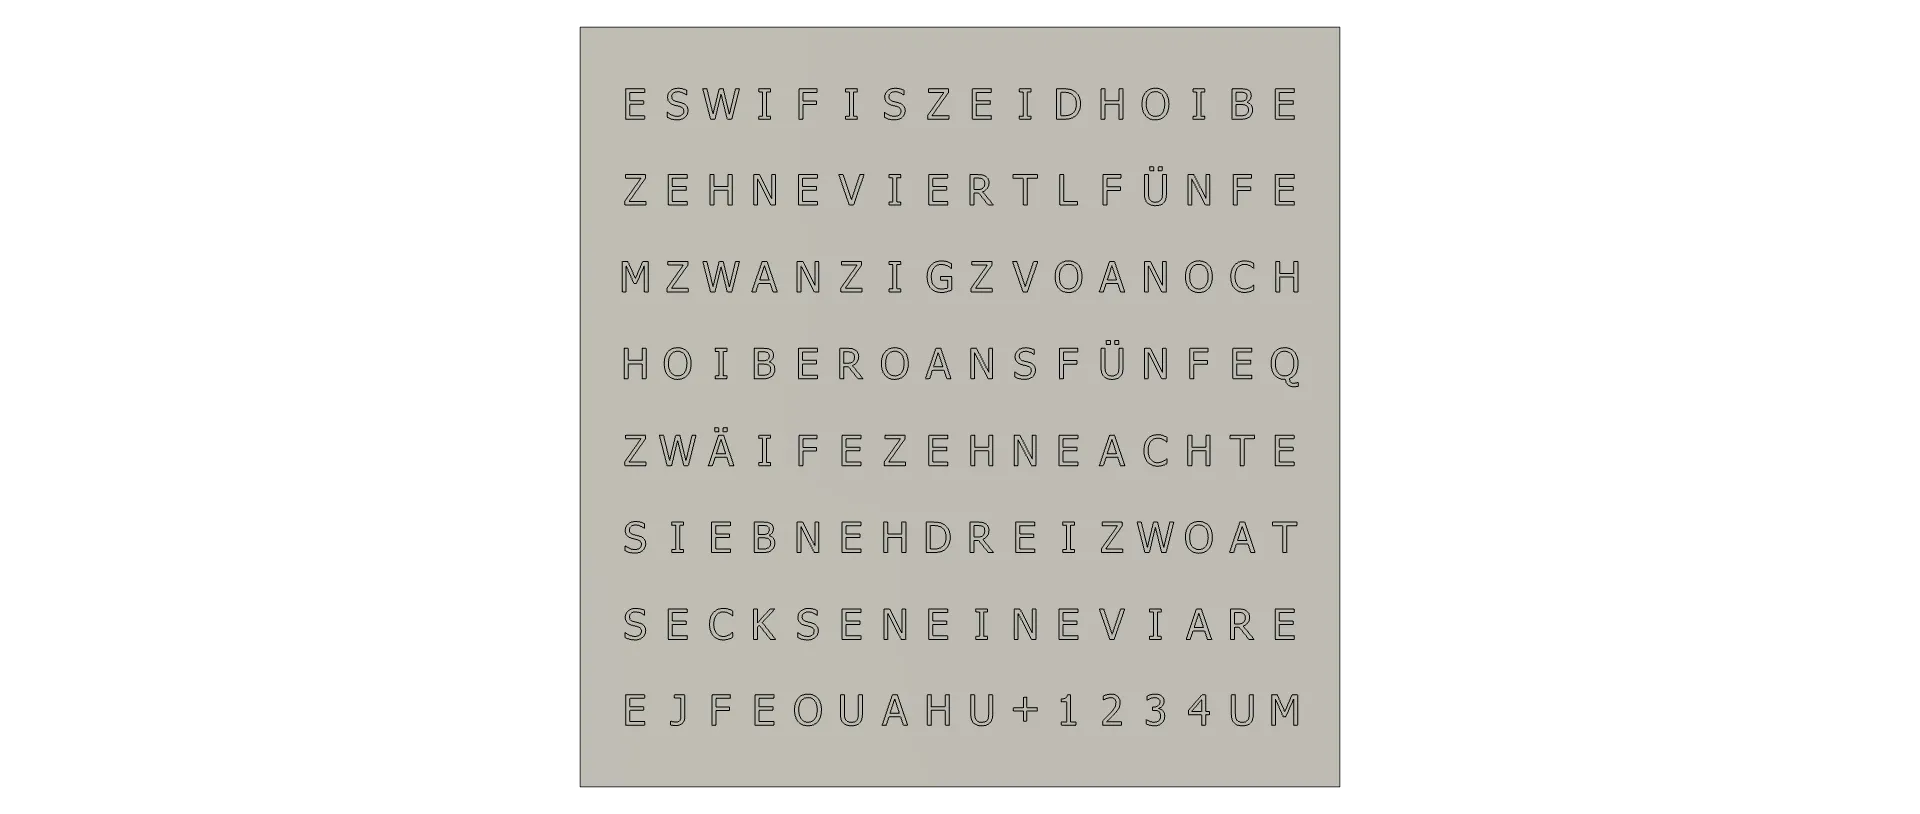
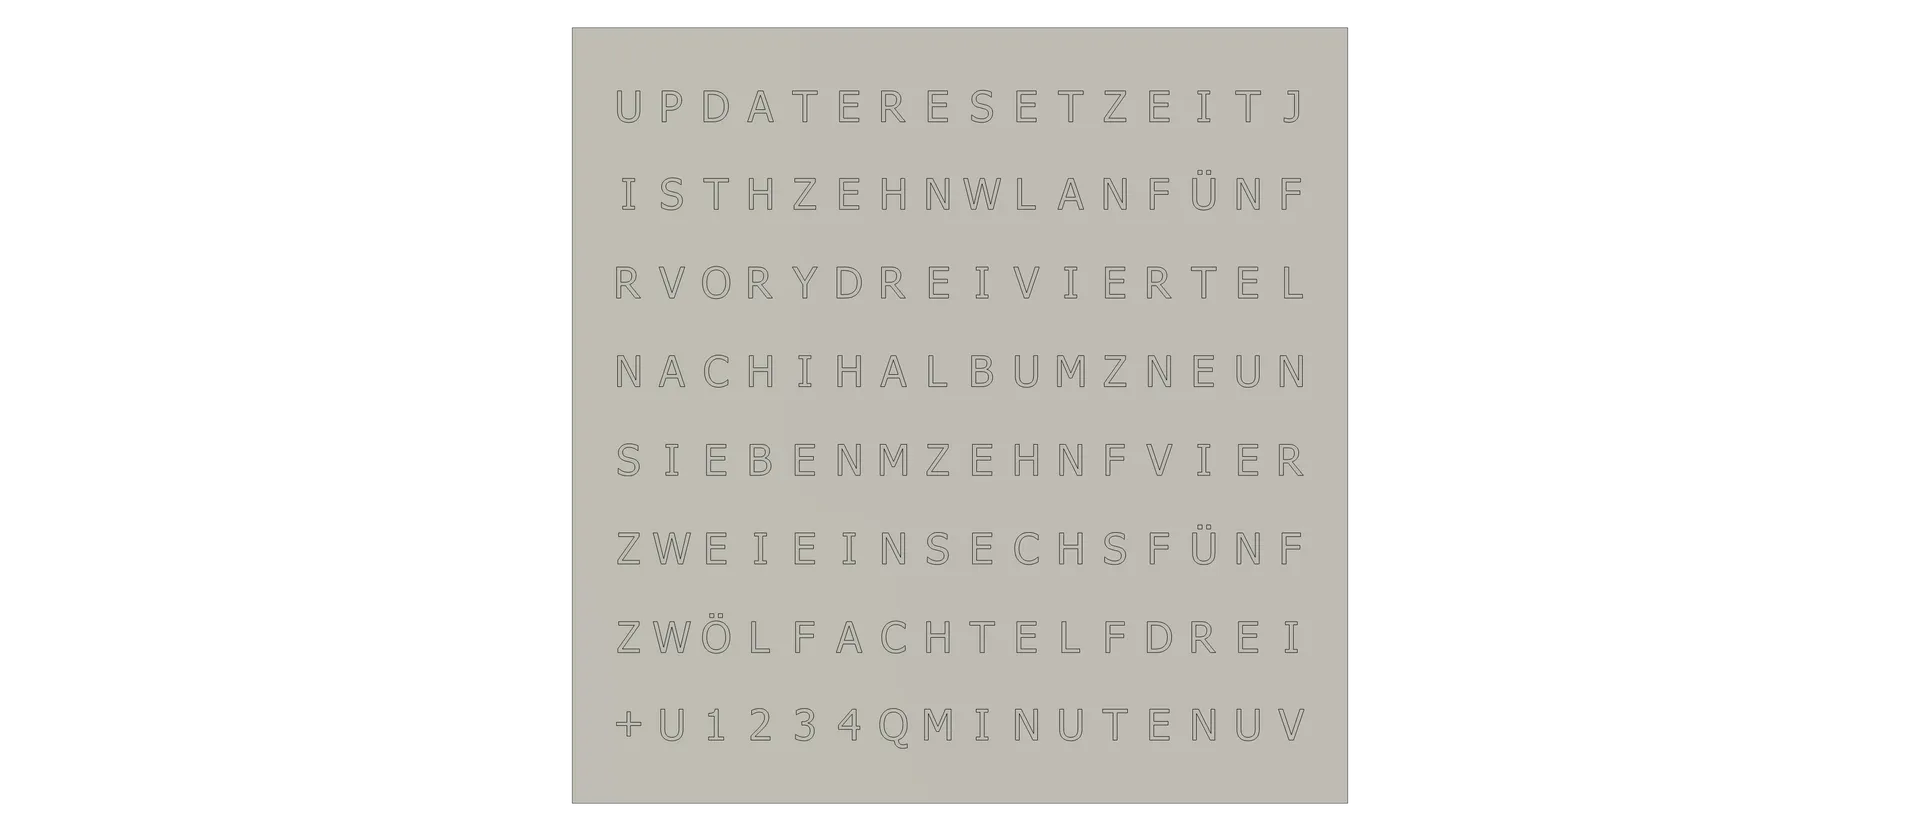
You can choose between 4 different fonts. Click here for details. =)
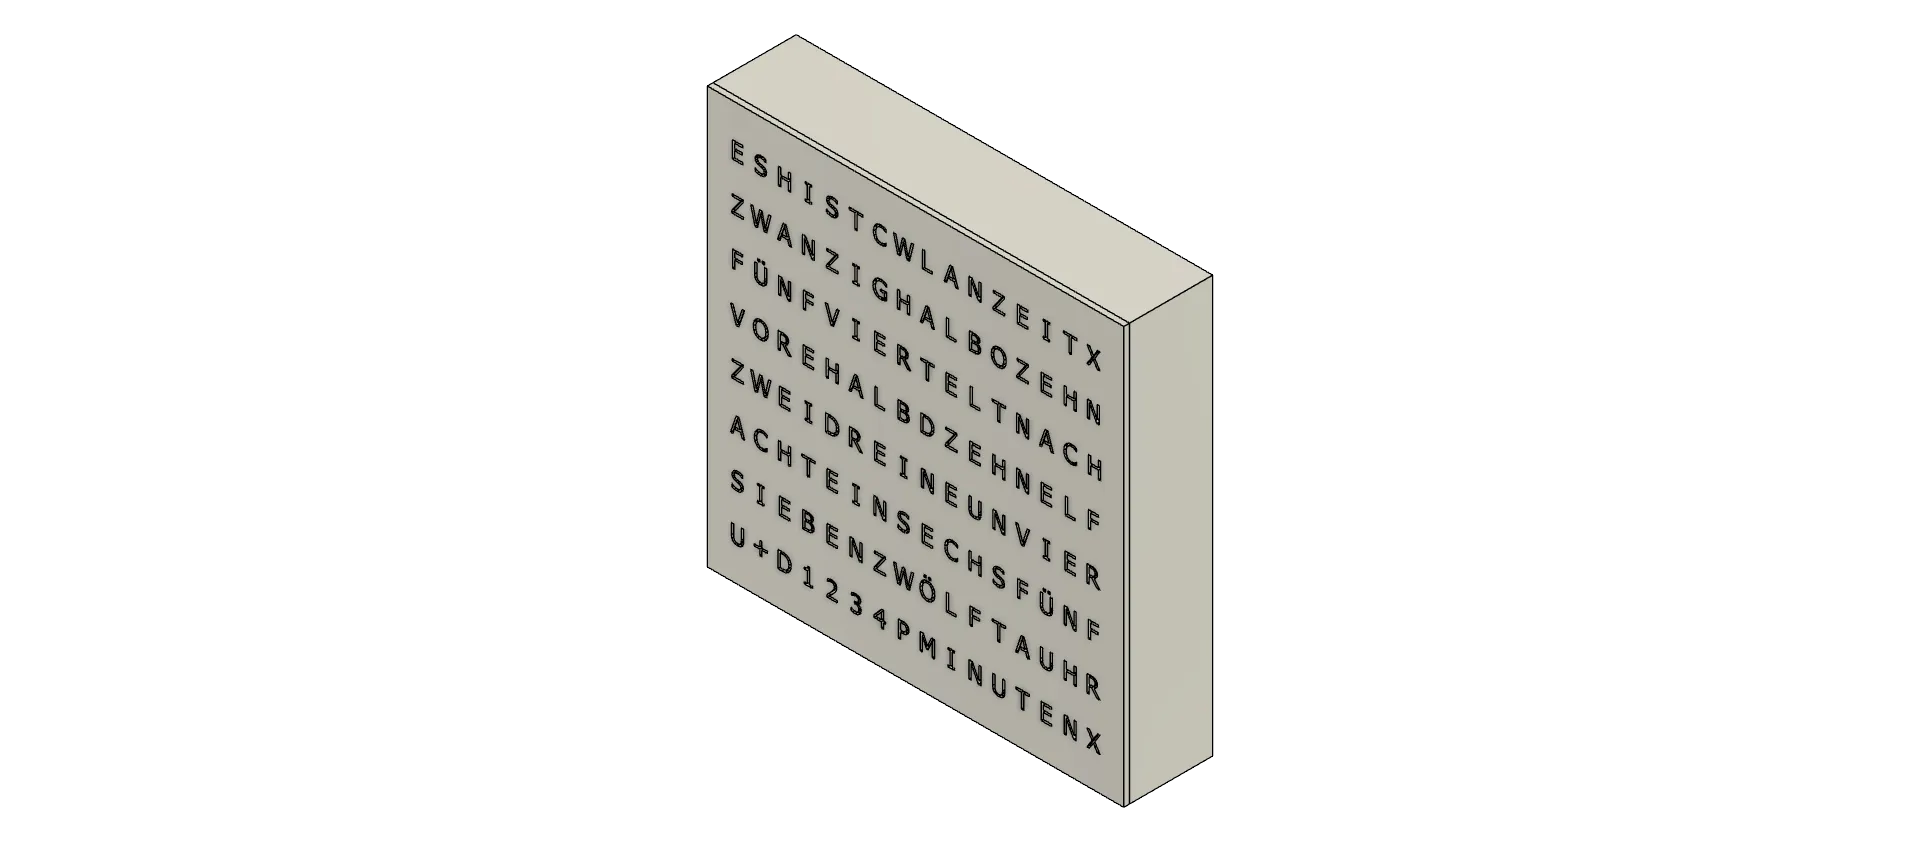
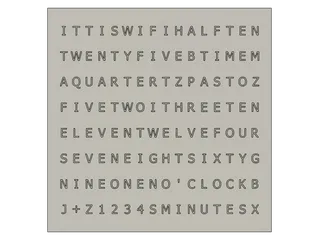
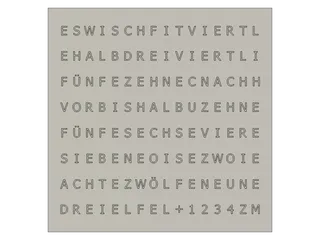
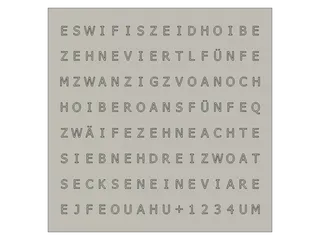
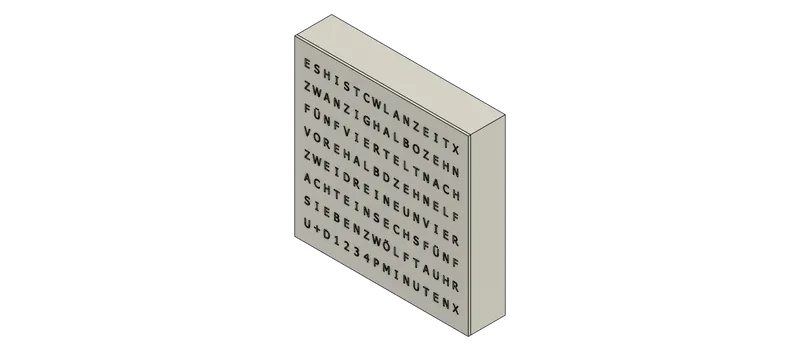
WordClock using a 16x16 LED matrix and a regular font.
Super easy print and build, 3 wires to solder only.
Video instructions available to help you with the code setup.
These languages are available:
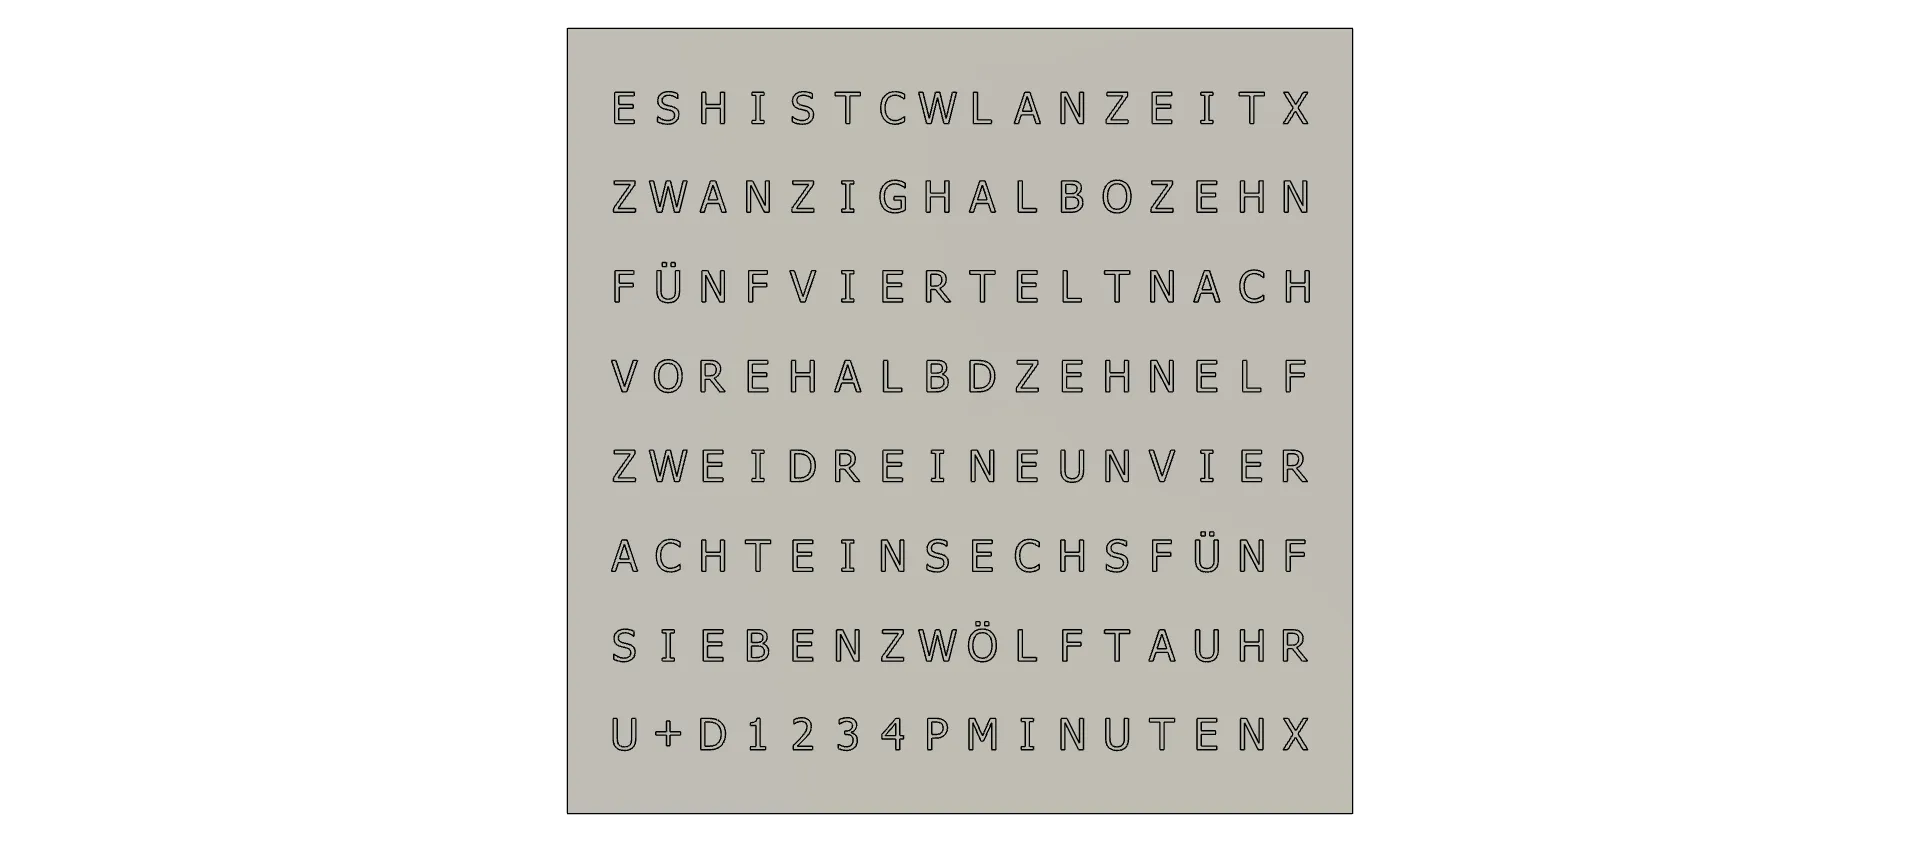
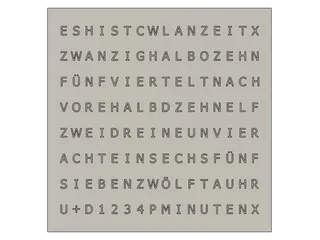
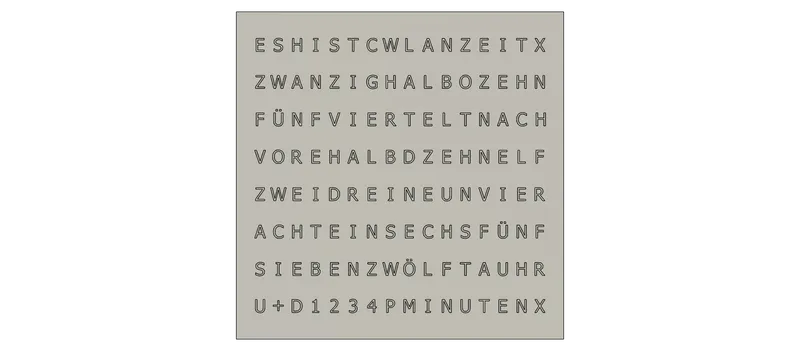
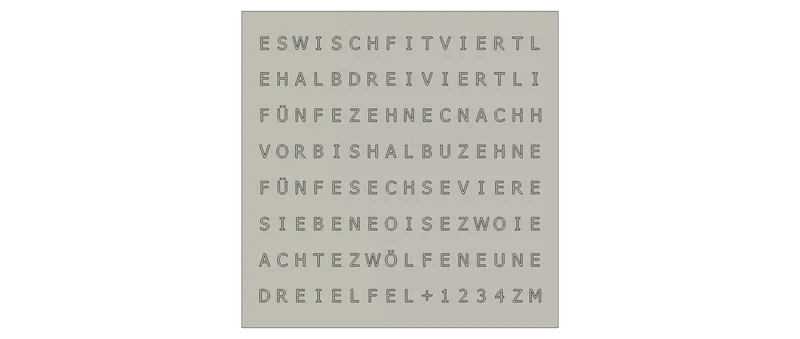
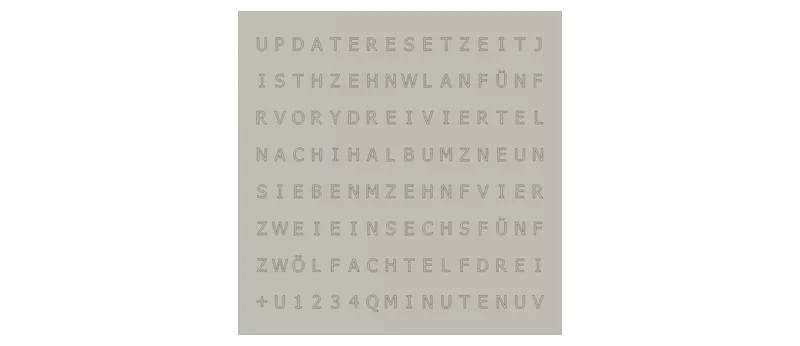
- German
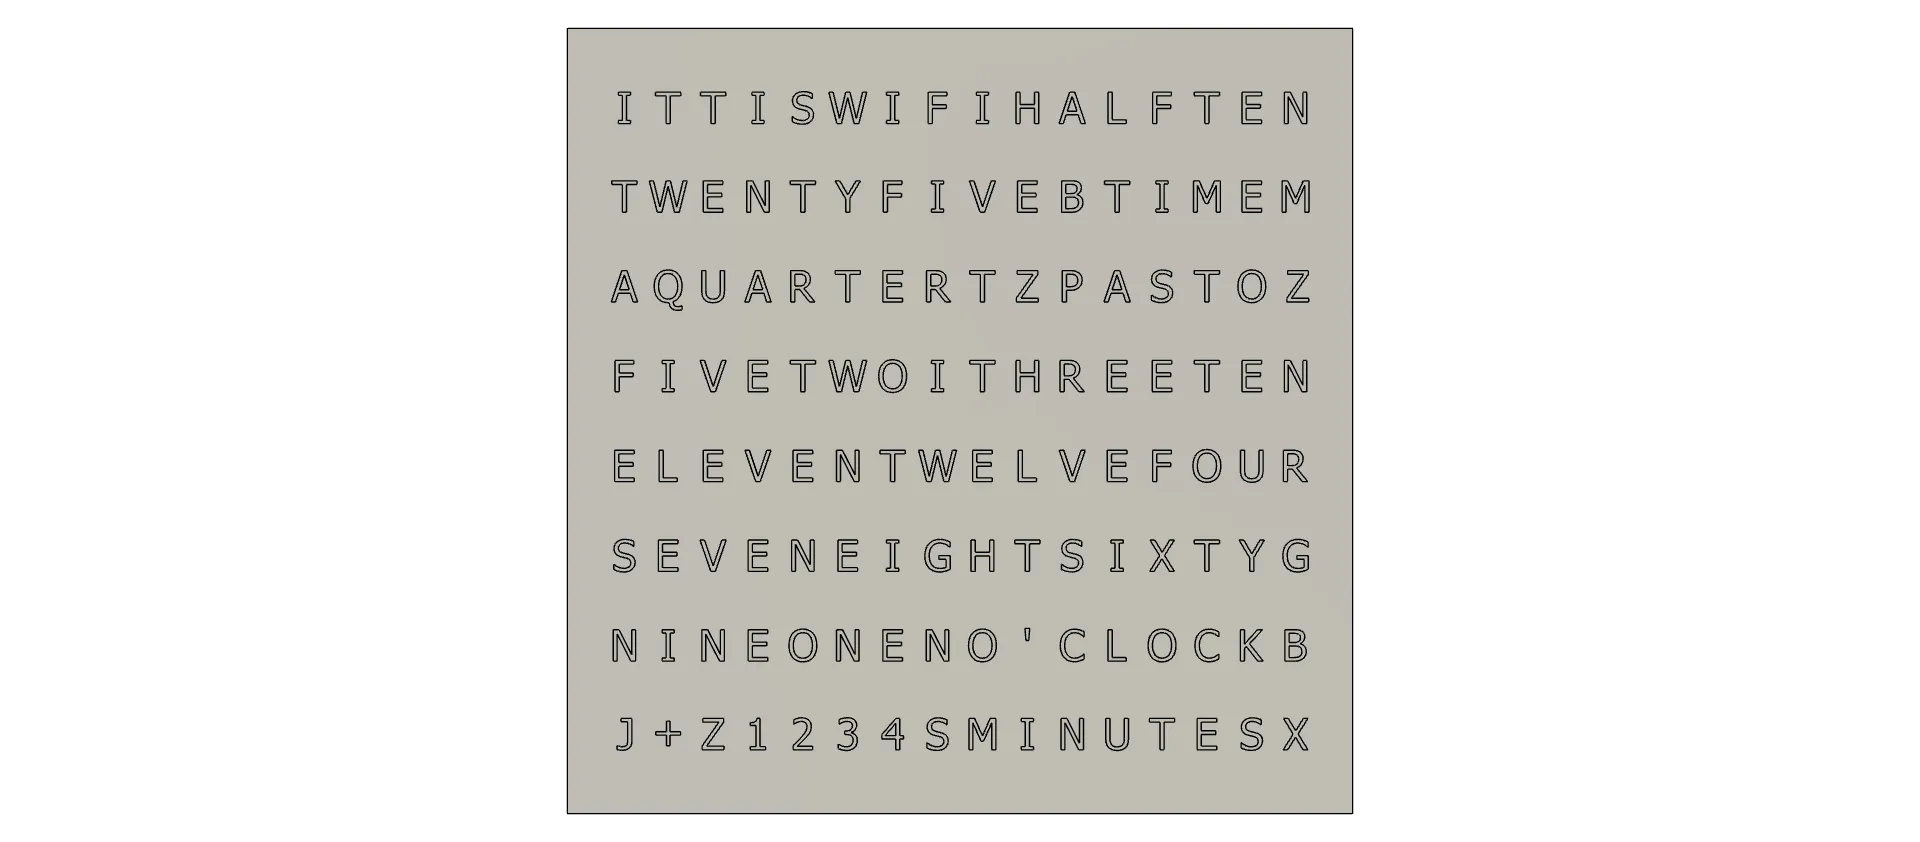
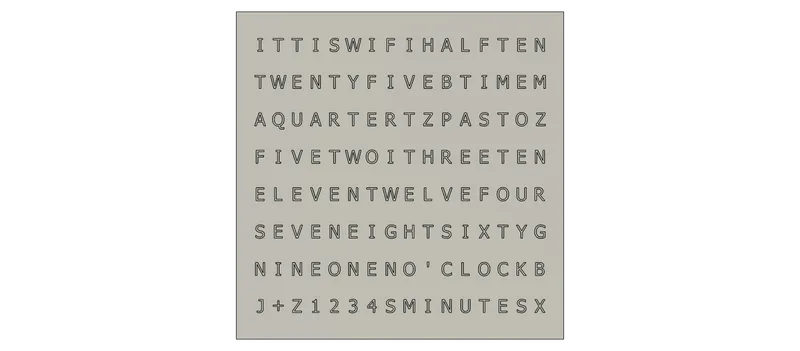
- English
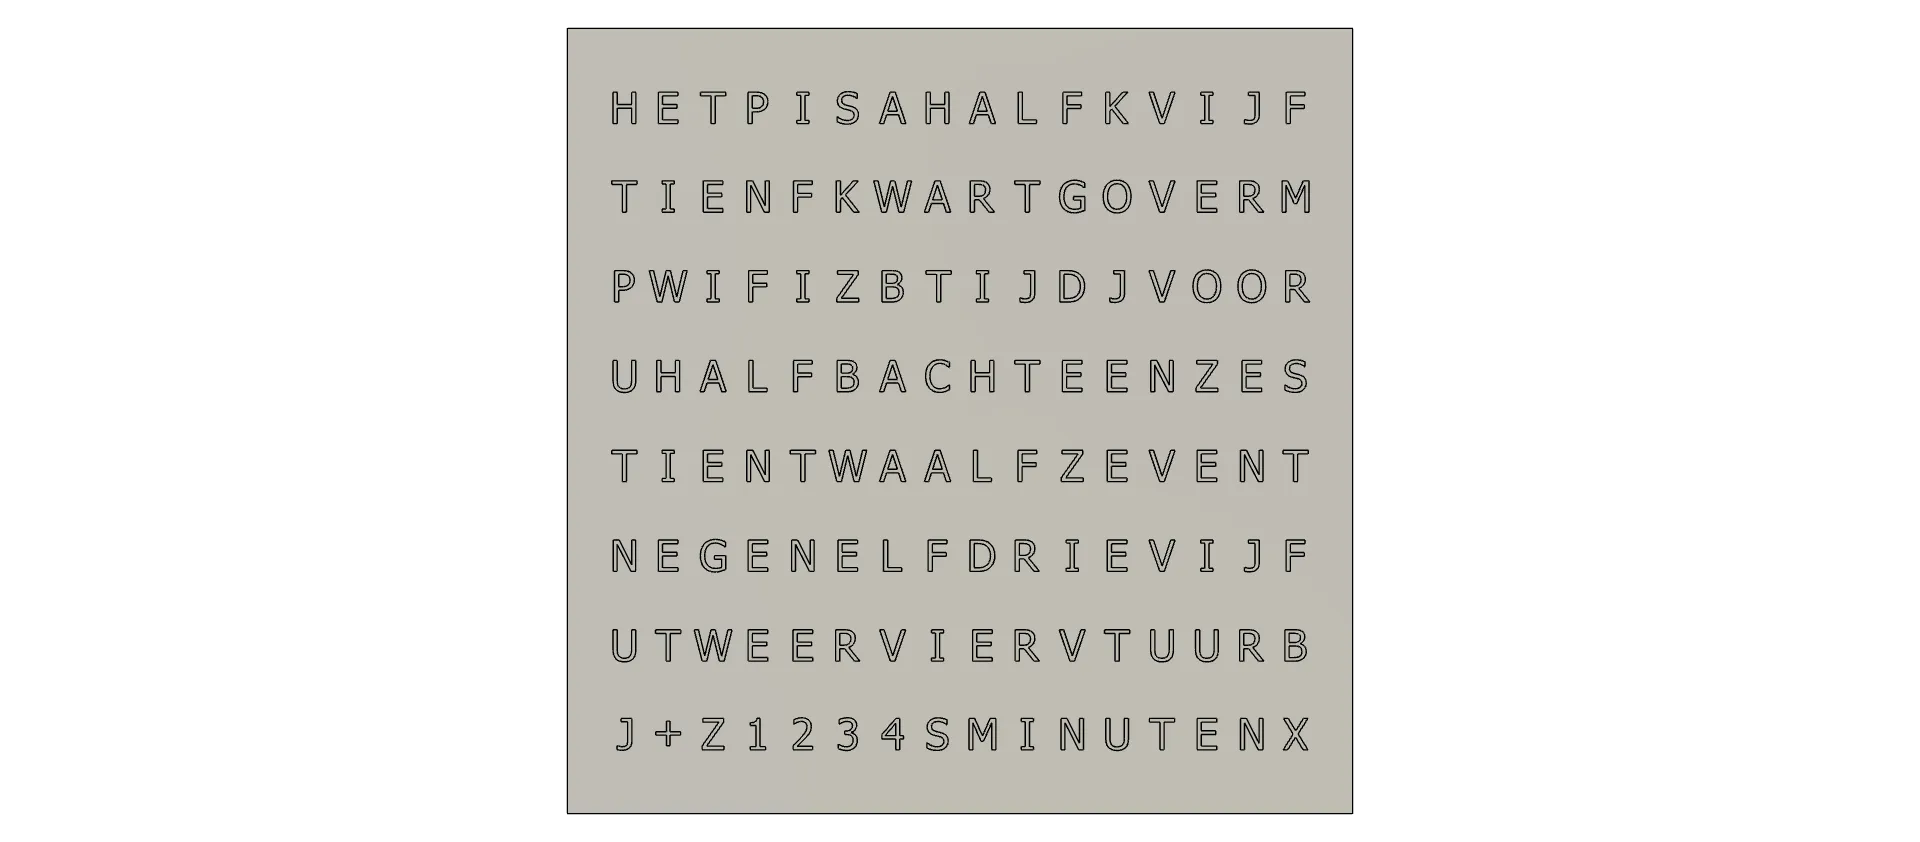
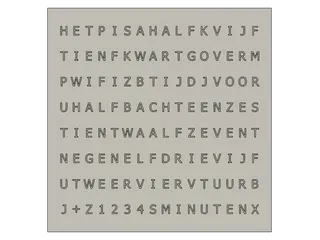
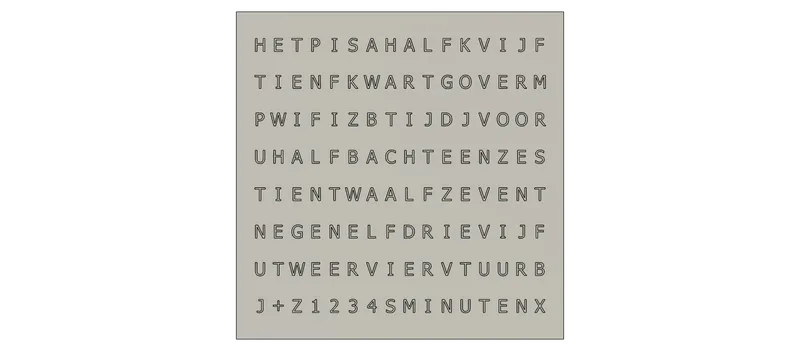
- Dutch
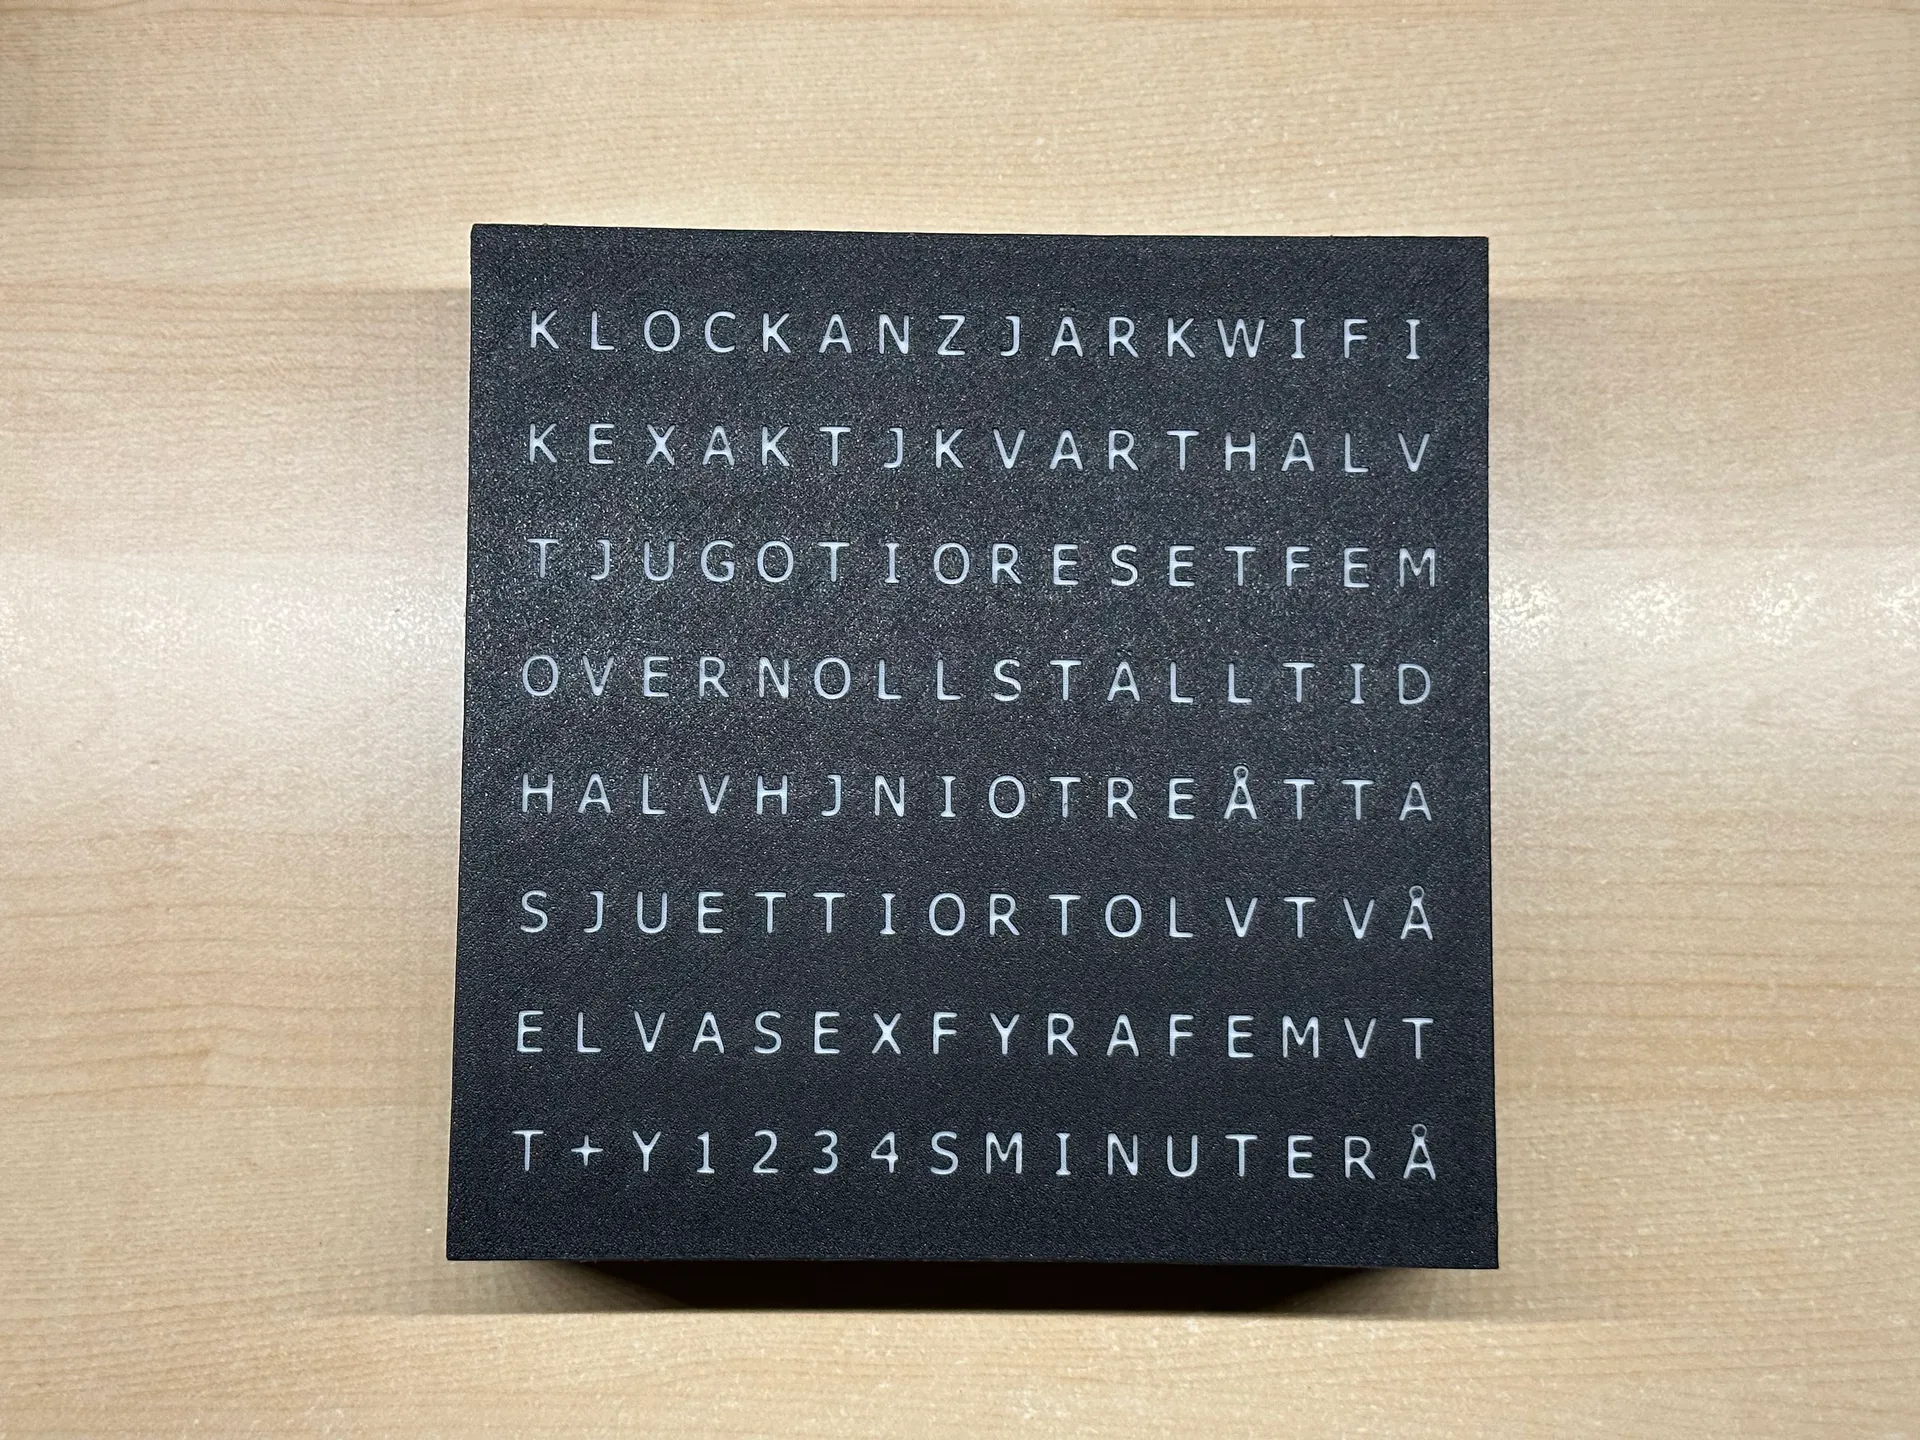
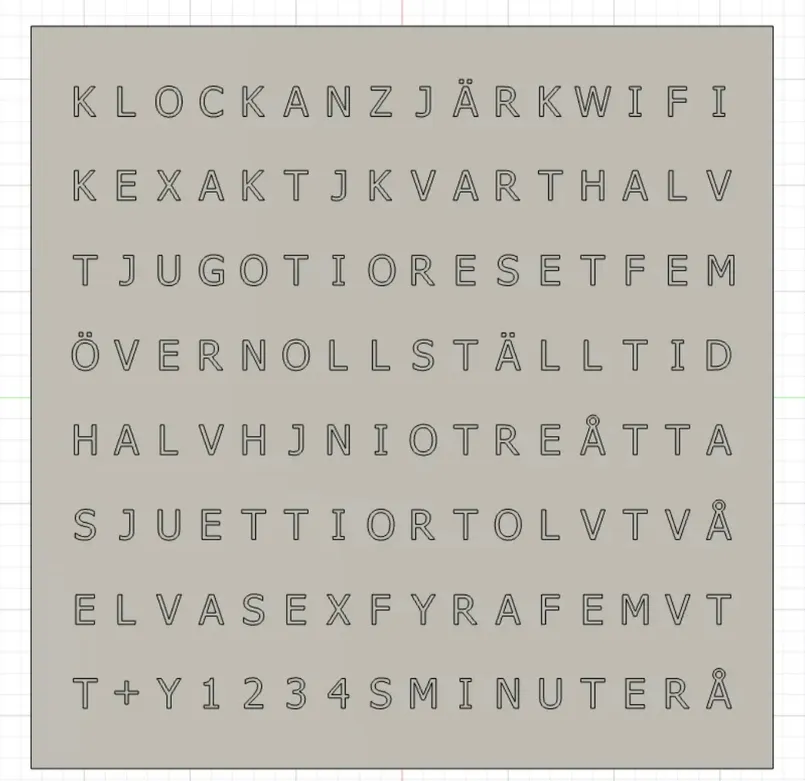
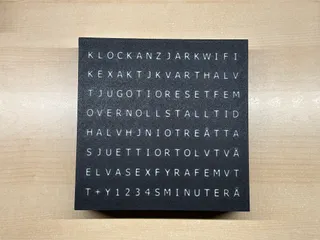
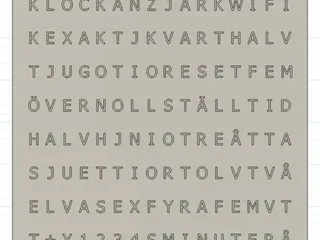
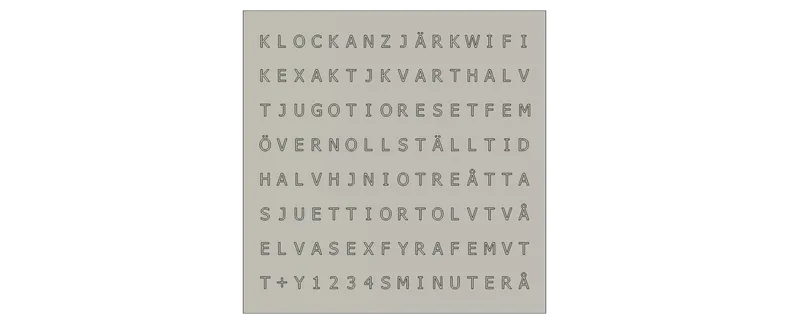
- Swedish
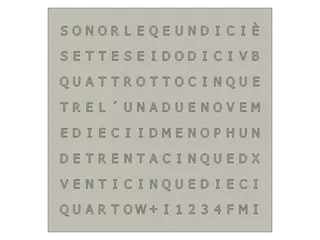
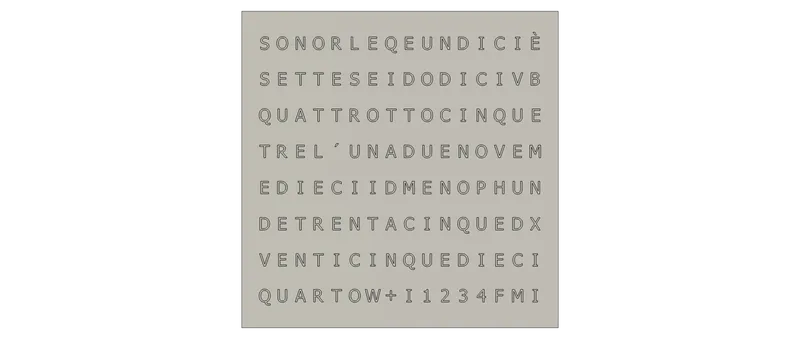
- Italian
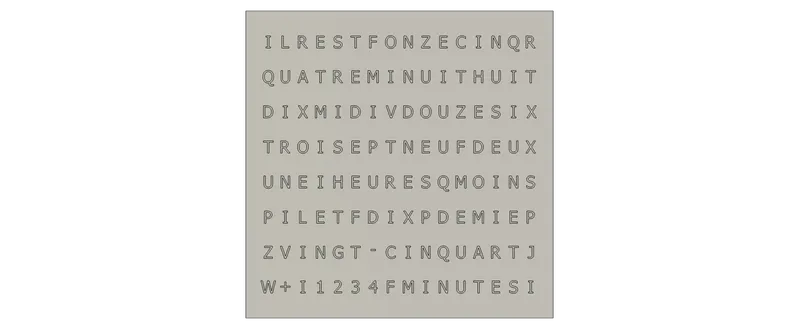
- French
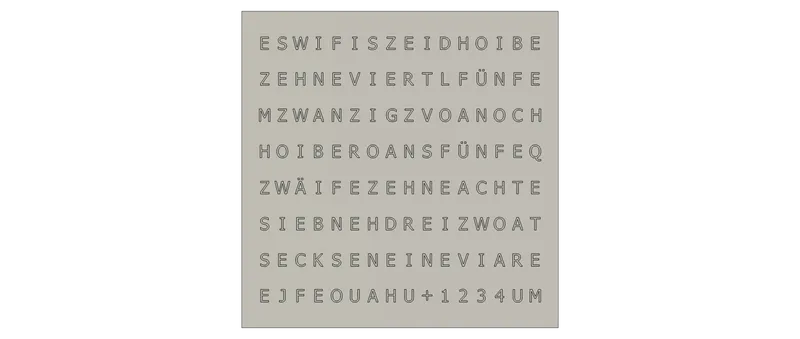
- Swiss German
- Chinese
- Swabian German
- Bavarian
- Luxemburgish
- East German
Note: New upcoming languages might be added to the 2024 model only. Click here for details.
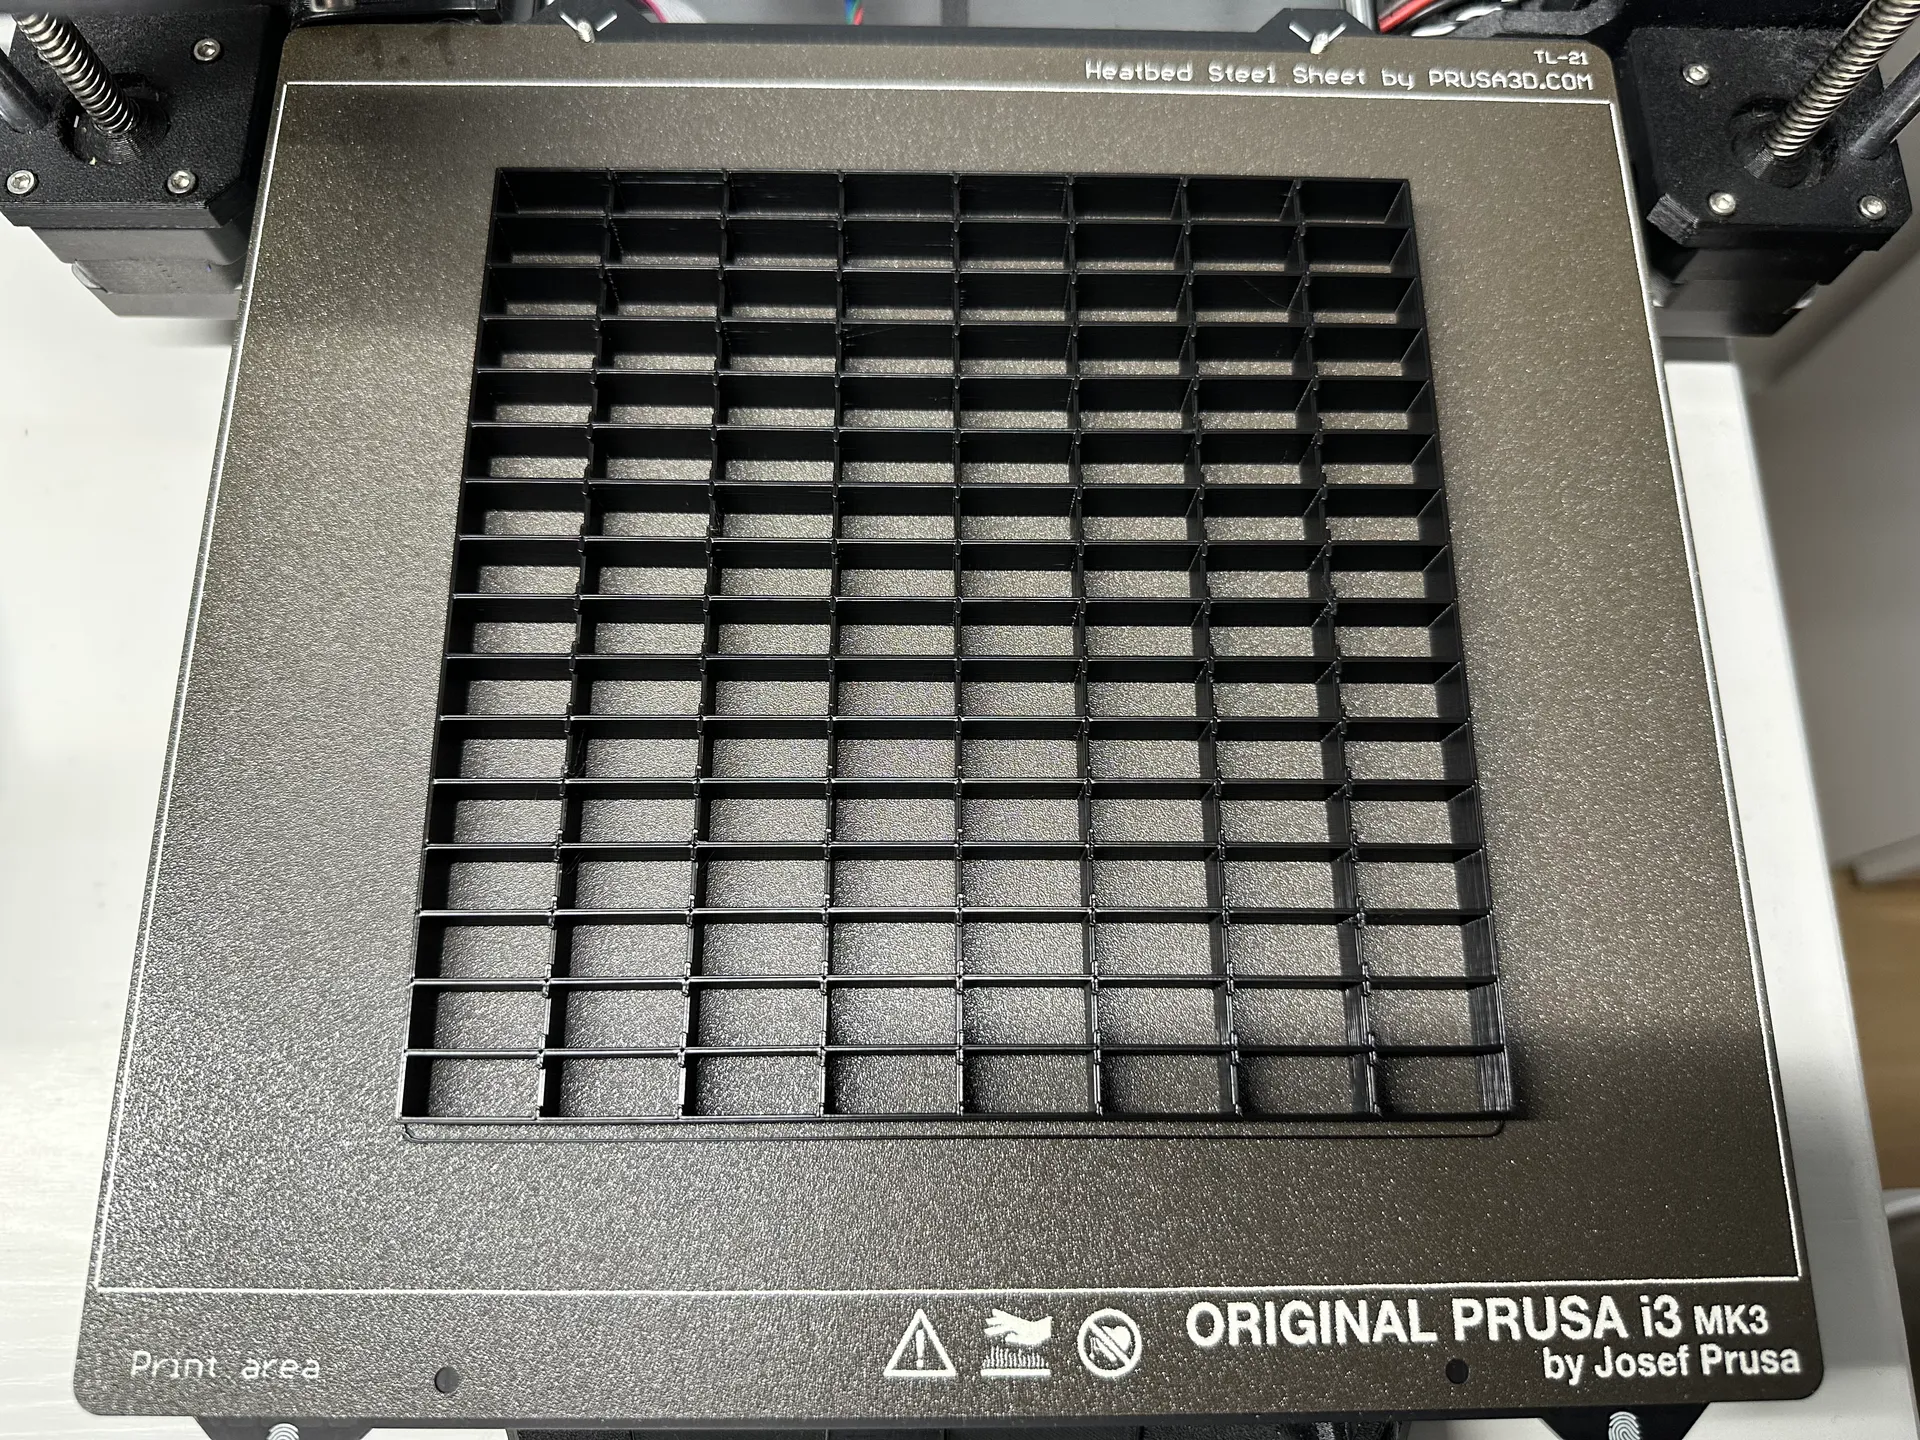
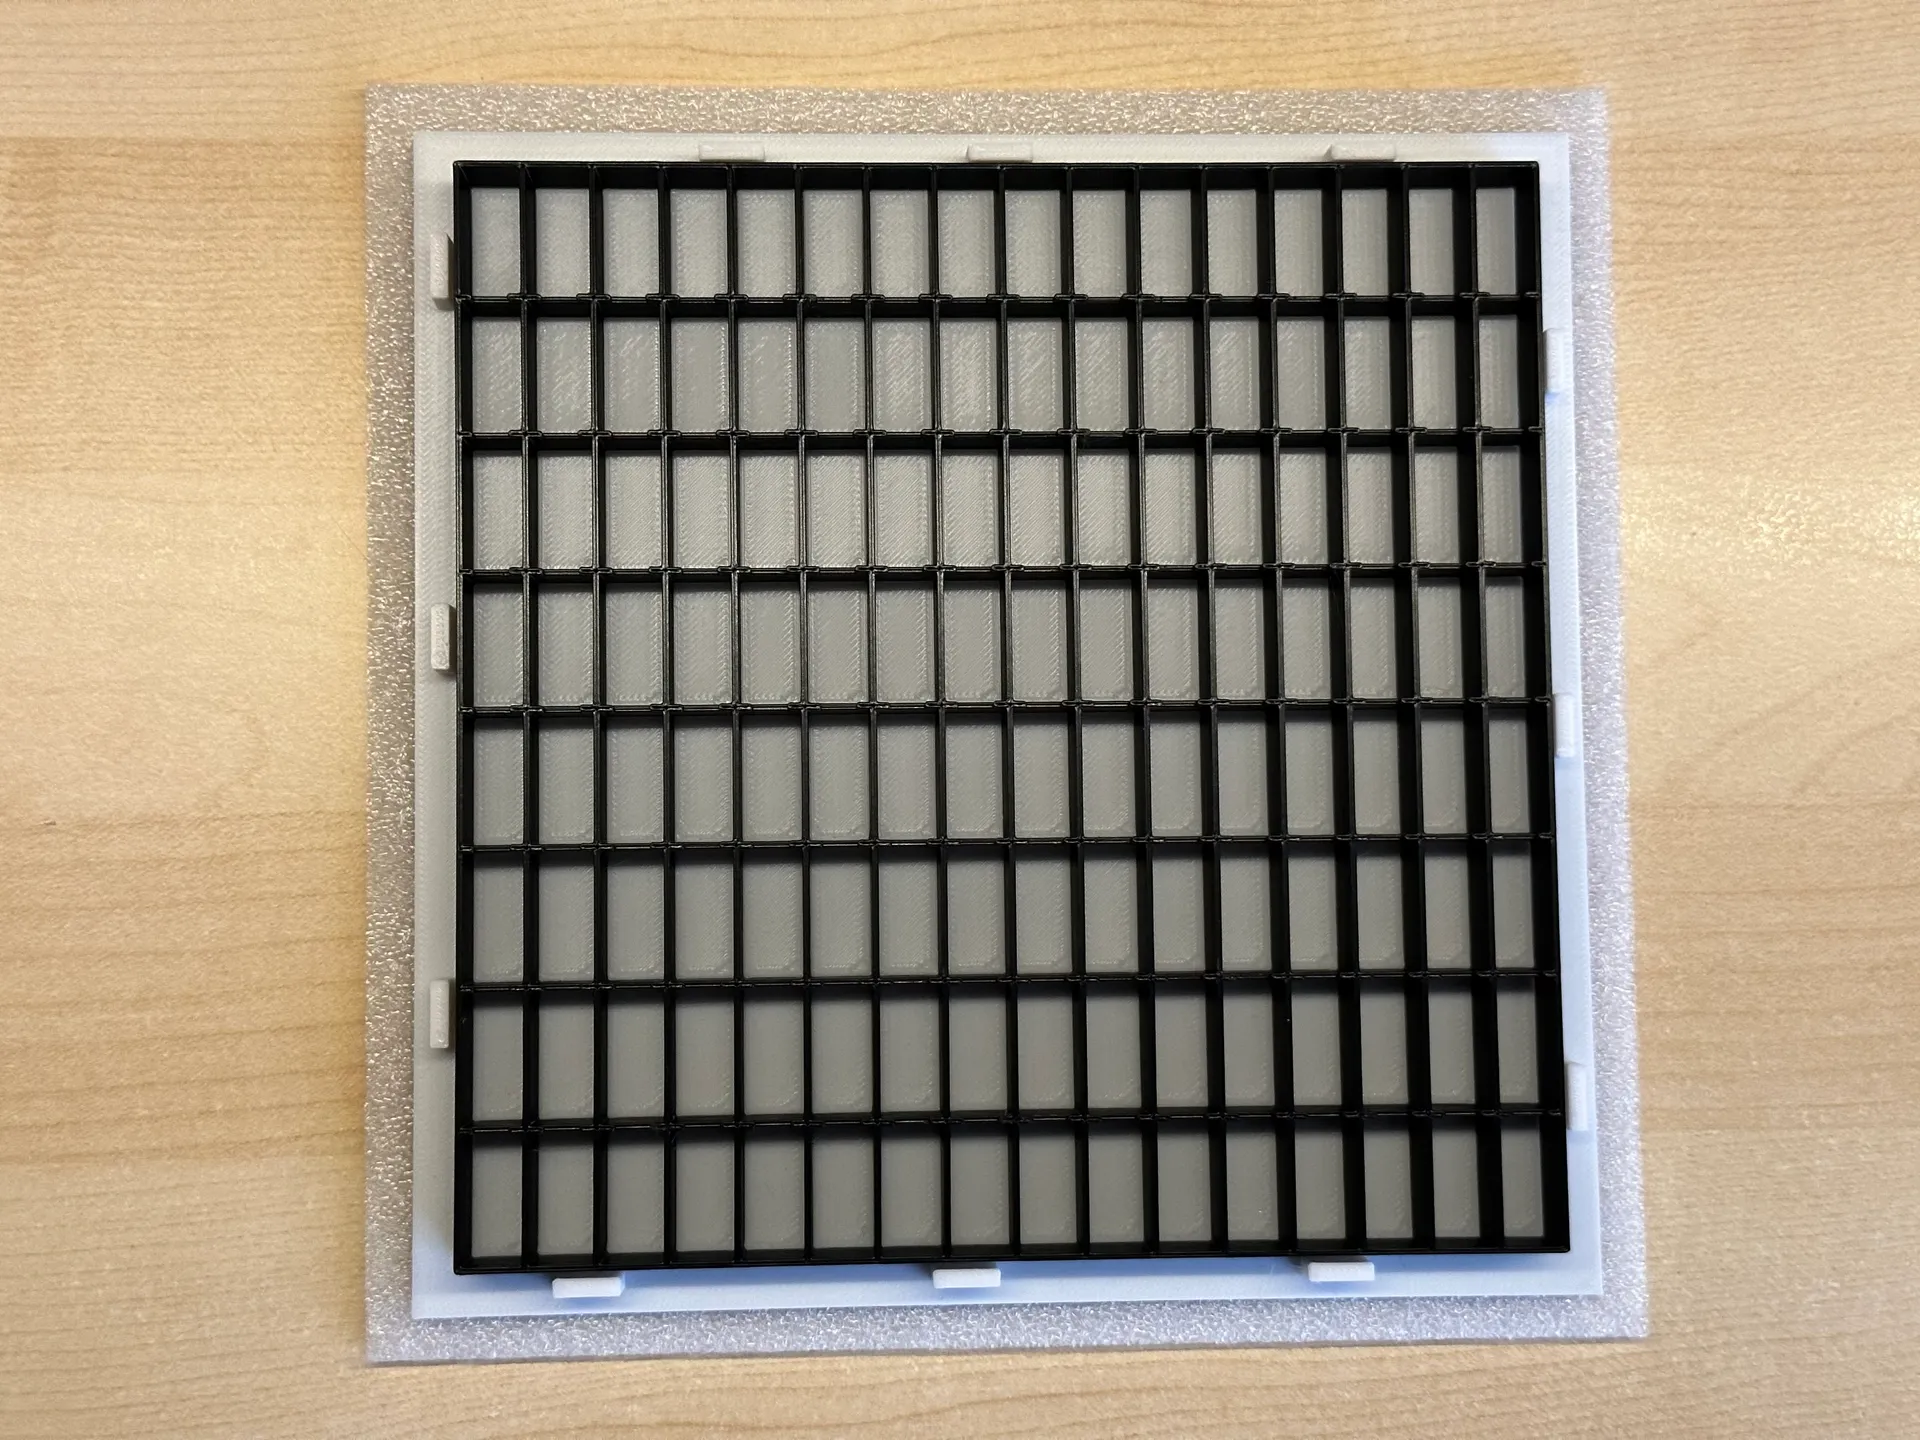
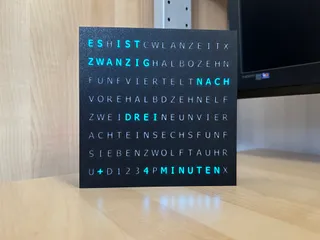
For those who don’t like the stencil font from the 1st new WordClock variant of 2023 here is a new 2nd variant using a regular free font as version 2023-V2. All features and the code are the same as for 2023-V1. So “just“ the design is changed and needed quite a few changes to make this work. It uses a printed diffuser instead of the piece of paper like 2023-V1 does. This also requires 1 color change during printing of the front part. To avoid that the currently set off neighbour letters would light a bit as well, the matrix part was redesigned too and “cuts” into the front part to separate the letters. The lid part was changed a bit as well to make it look cleaner when placed on a desk. All in all this does increase the print time again, yes, but I think this is a 1 time print for most of you and will give you an even better design and should be worth it…
There is also a 3rd variant with this model: 2023-V3 with the same features. Please have a look. =)
Hope you like these new variants =)
NOTES:
- For older notes have a look at the end of the page.
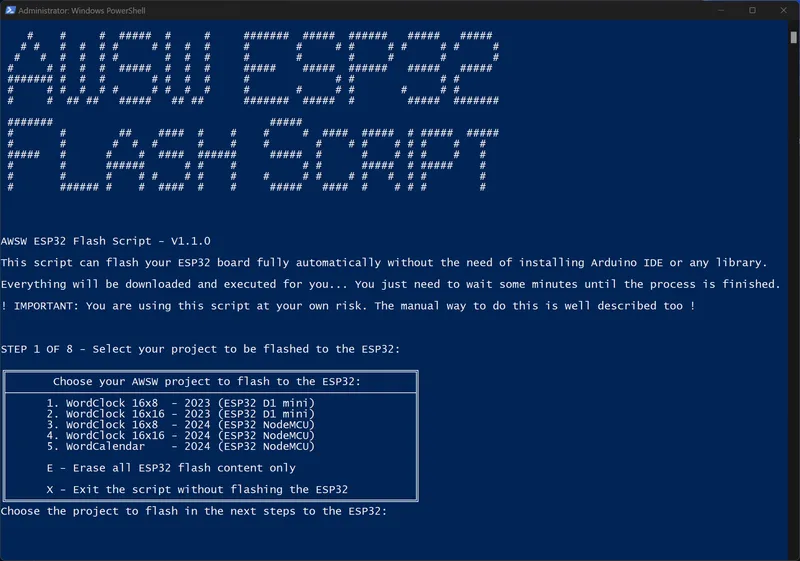
- 10.11.2024: Added a new script to flash the ESP32 without the need of the Arduino IDE:
- 25.12.2024: Software update V4.0.0 is now available including several new functions:
- Direct software update without the need of an computer or the Arduino IDE as introduced with WordCalendar 2024 before. Watch this video for details. You will need to select the used ESP32 board after the update to this version to download the correct files for your used ESP32 in future. A new page asking for this information will be shown when you enter the web configuration portal after the update.
- Faster startup on reboot.
- Added a “test mode” in the “Maintenance” section to check all time word output texts faster.
- Lots of small changes to the web configuration portal to make the device better.
- To update to this new version from older software versions you will need to use the ESP32 flash script once to get the new software update variant. If you just new installed your WordClock you will get the newest version with the script already. =)
- 05.01.2025: You will now find the ESP32 flash script as a variant of the known MS Windows script for the usage in macOS too. Thanks a lot to John (Rave Props) @JohninNL_289006 for adding this macOS variant! This should make it even more simple to setup the project for macOS users. =)
Hope you will like the new update. It was quiet some work and allows making the code better in future even more! =)
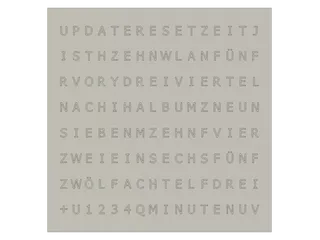
Some examples:
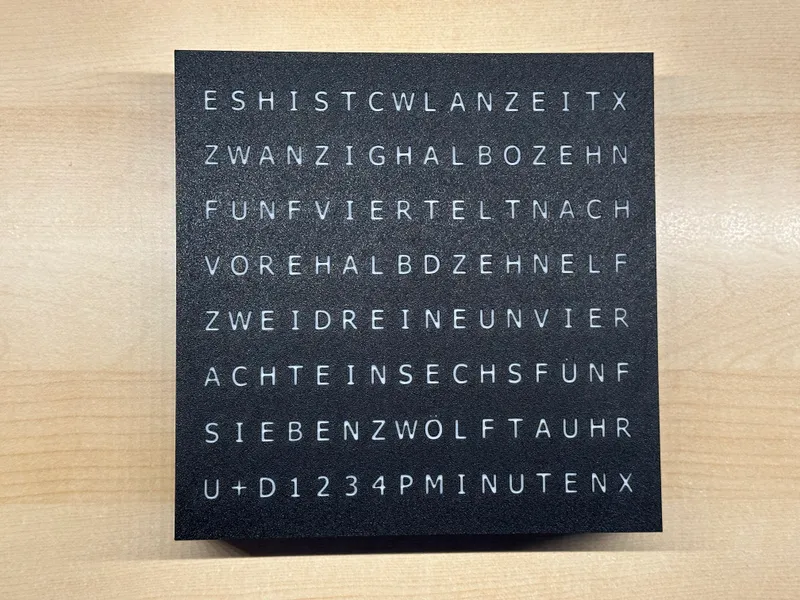
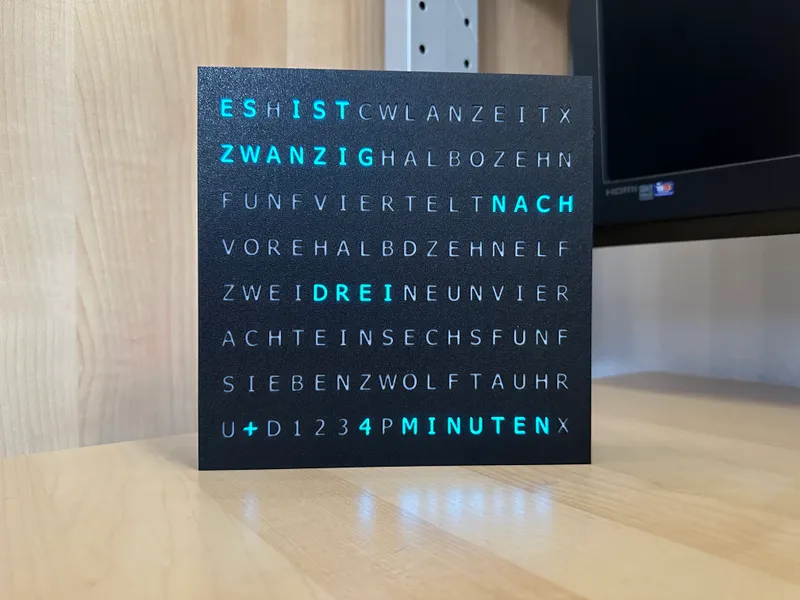
Here are some more pictures:

Functions:
- Small print size to fit well on the MK3S+ or any 200x200mm printer. It should fit on the Prusa MINI good as well. Size is 175.5x175.5mm in height and width.
- The above named language variants are available using the same code for all of them.
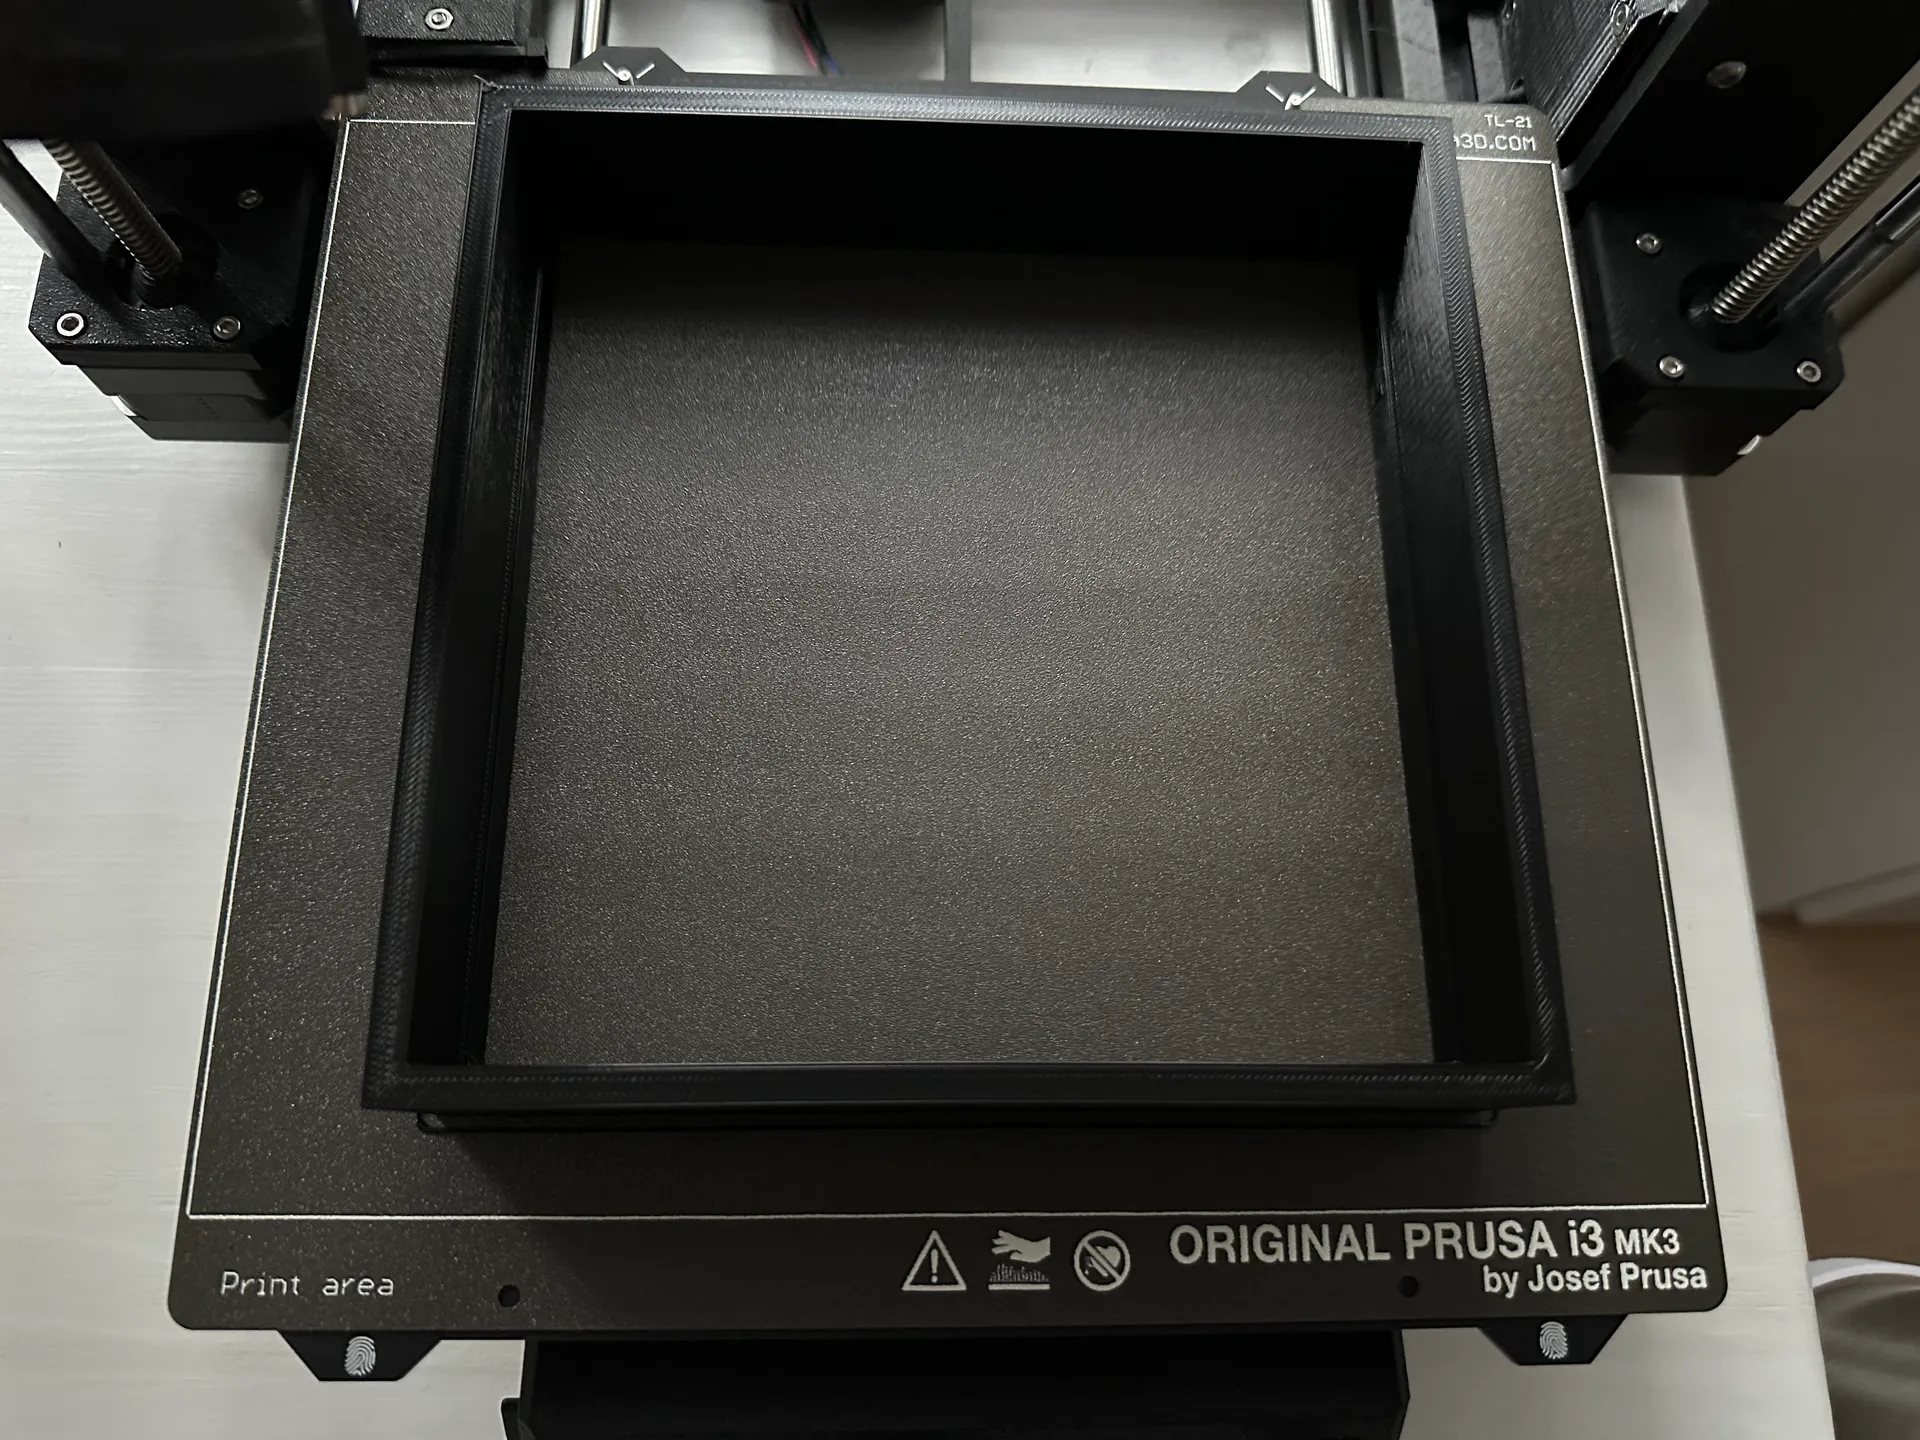
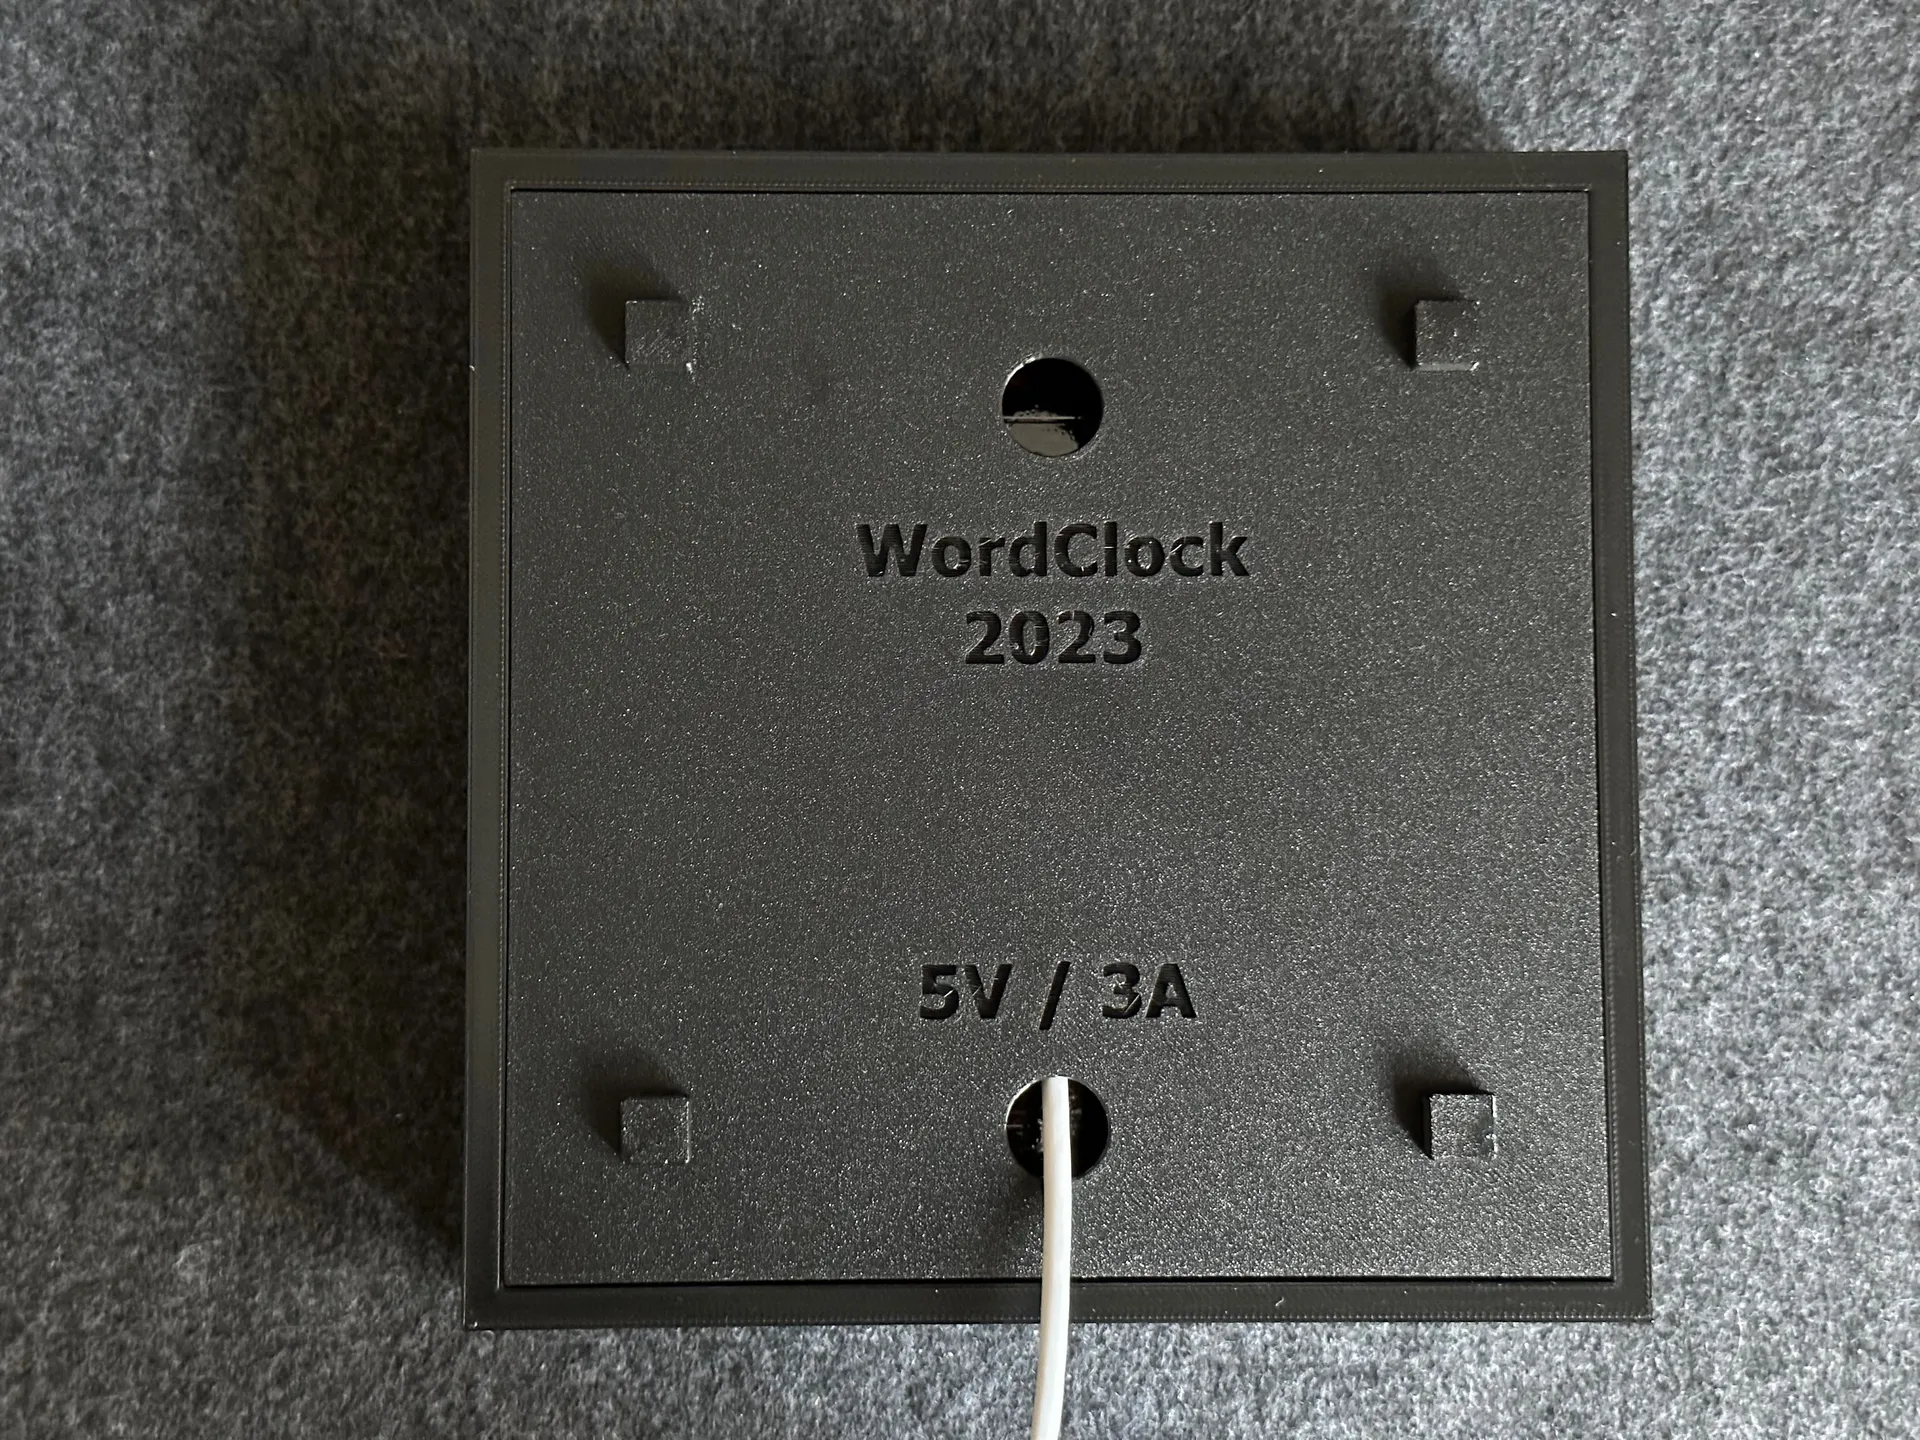
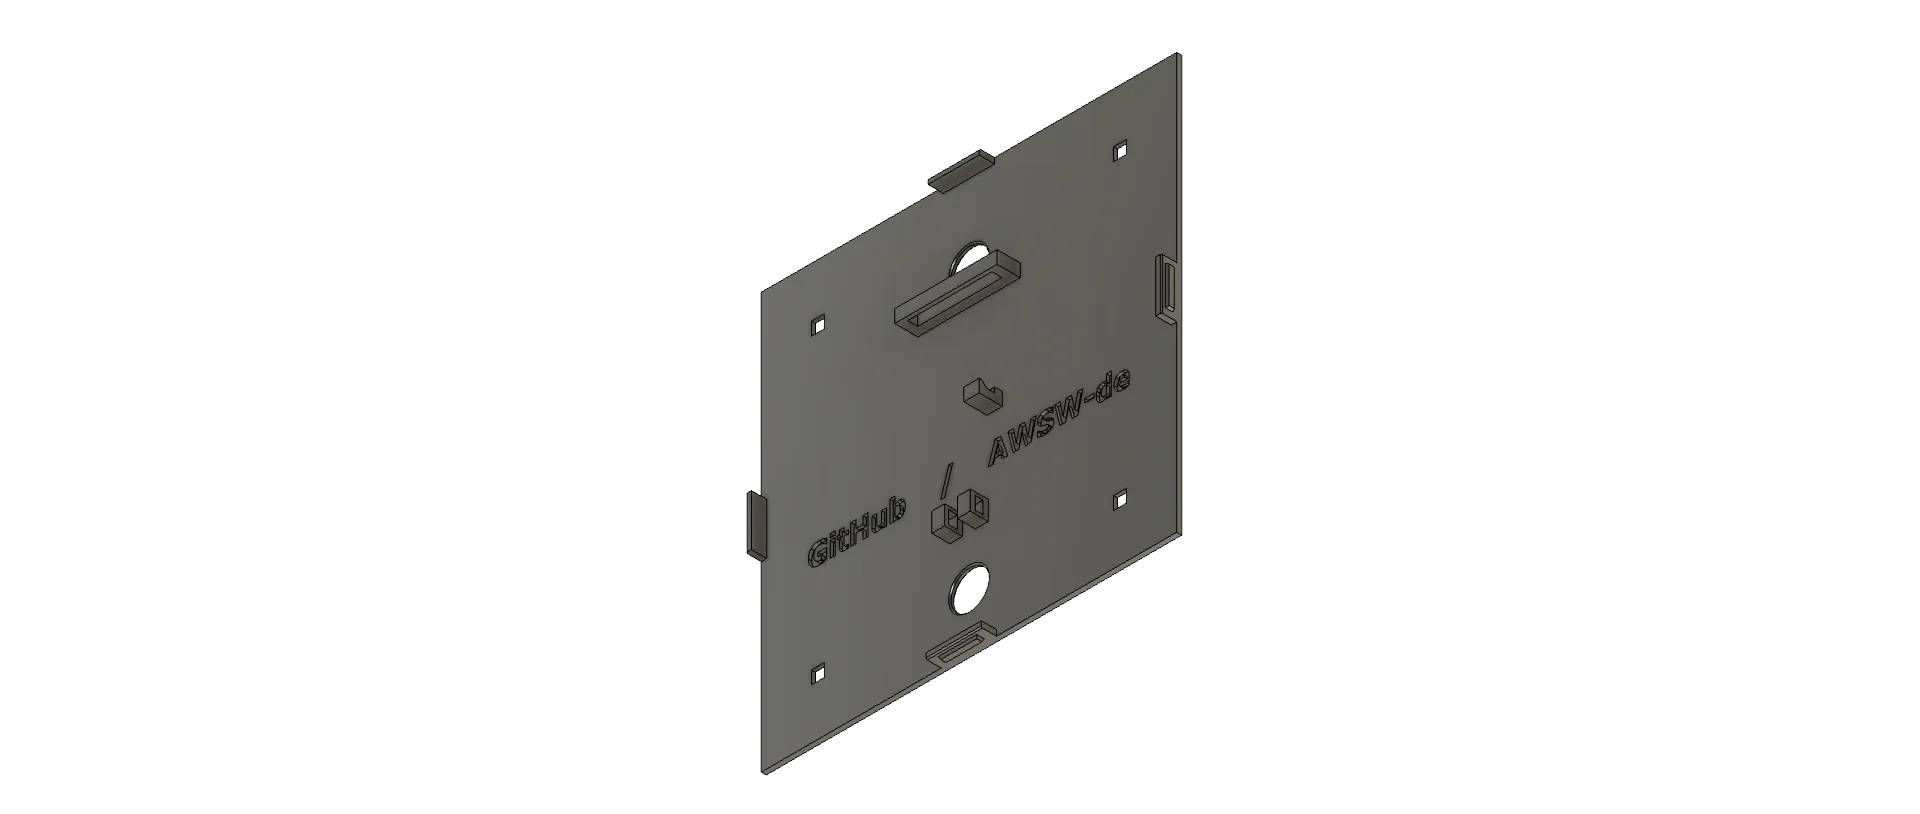
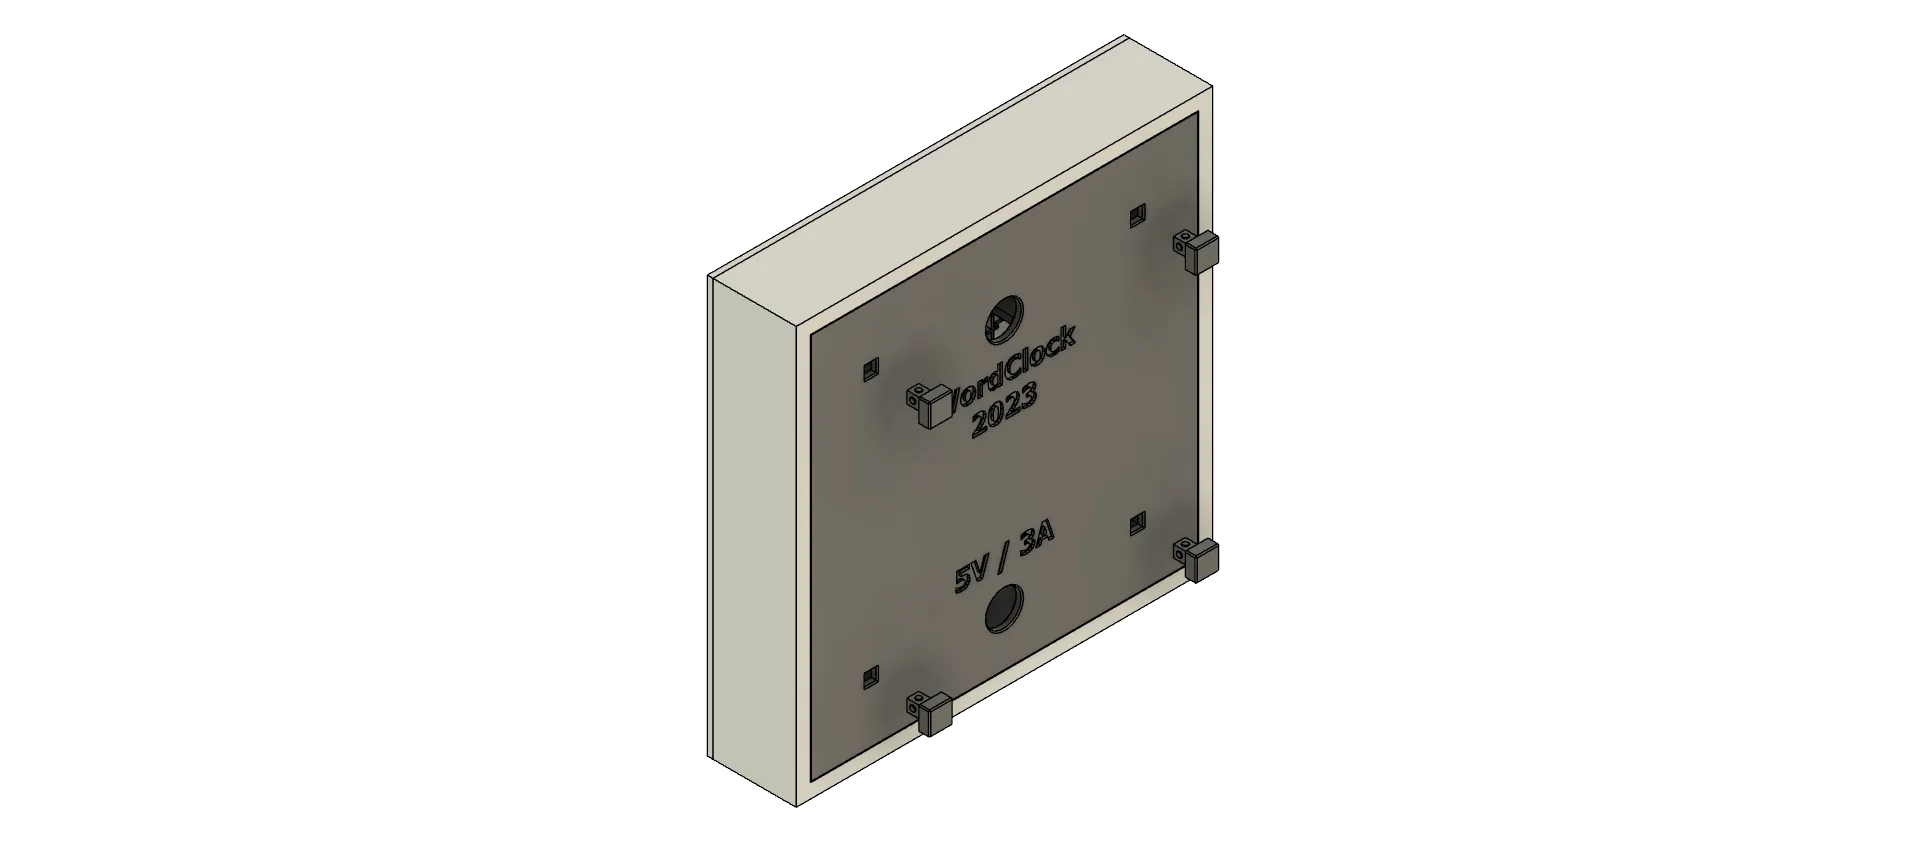
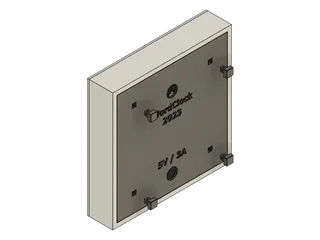
- The case can be placed on a desk without a stand or on your wall. The 4 foots generate a gap between the wall and the case to get the power cable out straight and to get air in the case from the back.
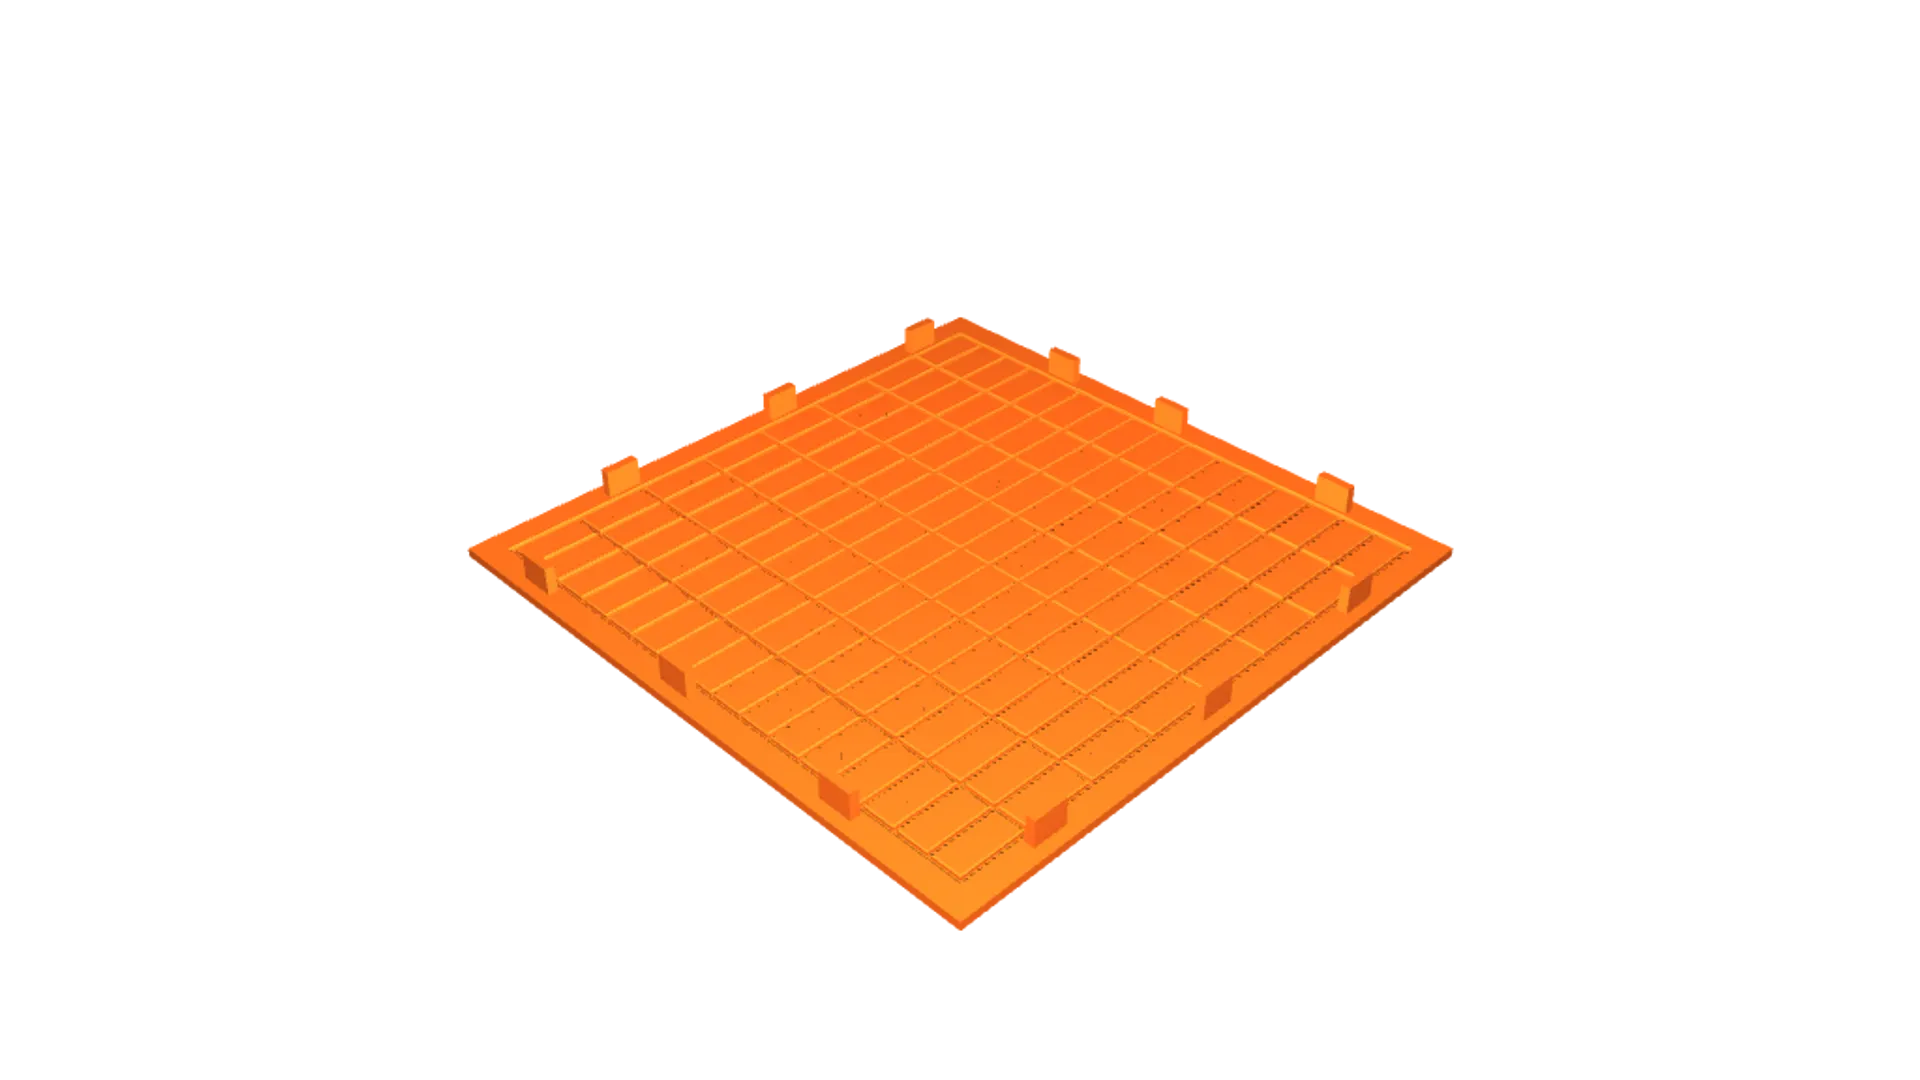
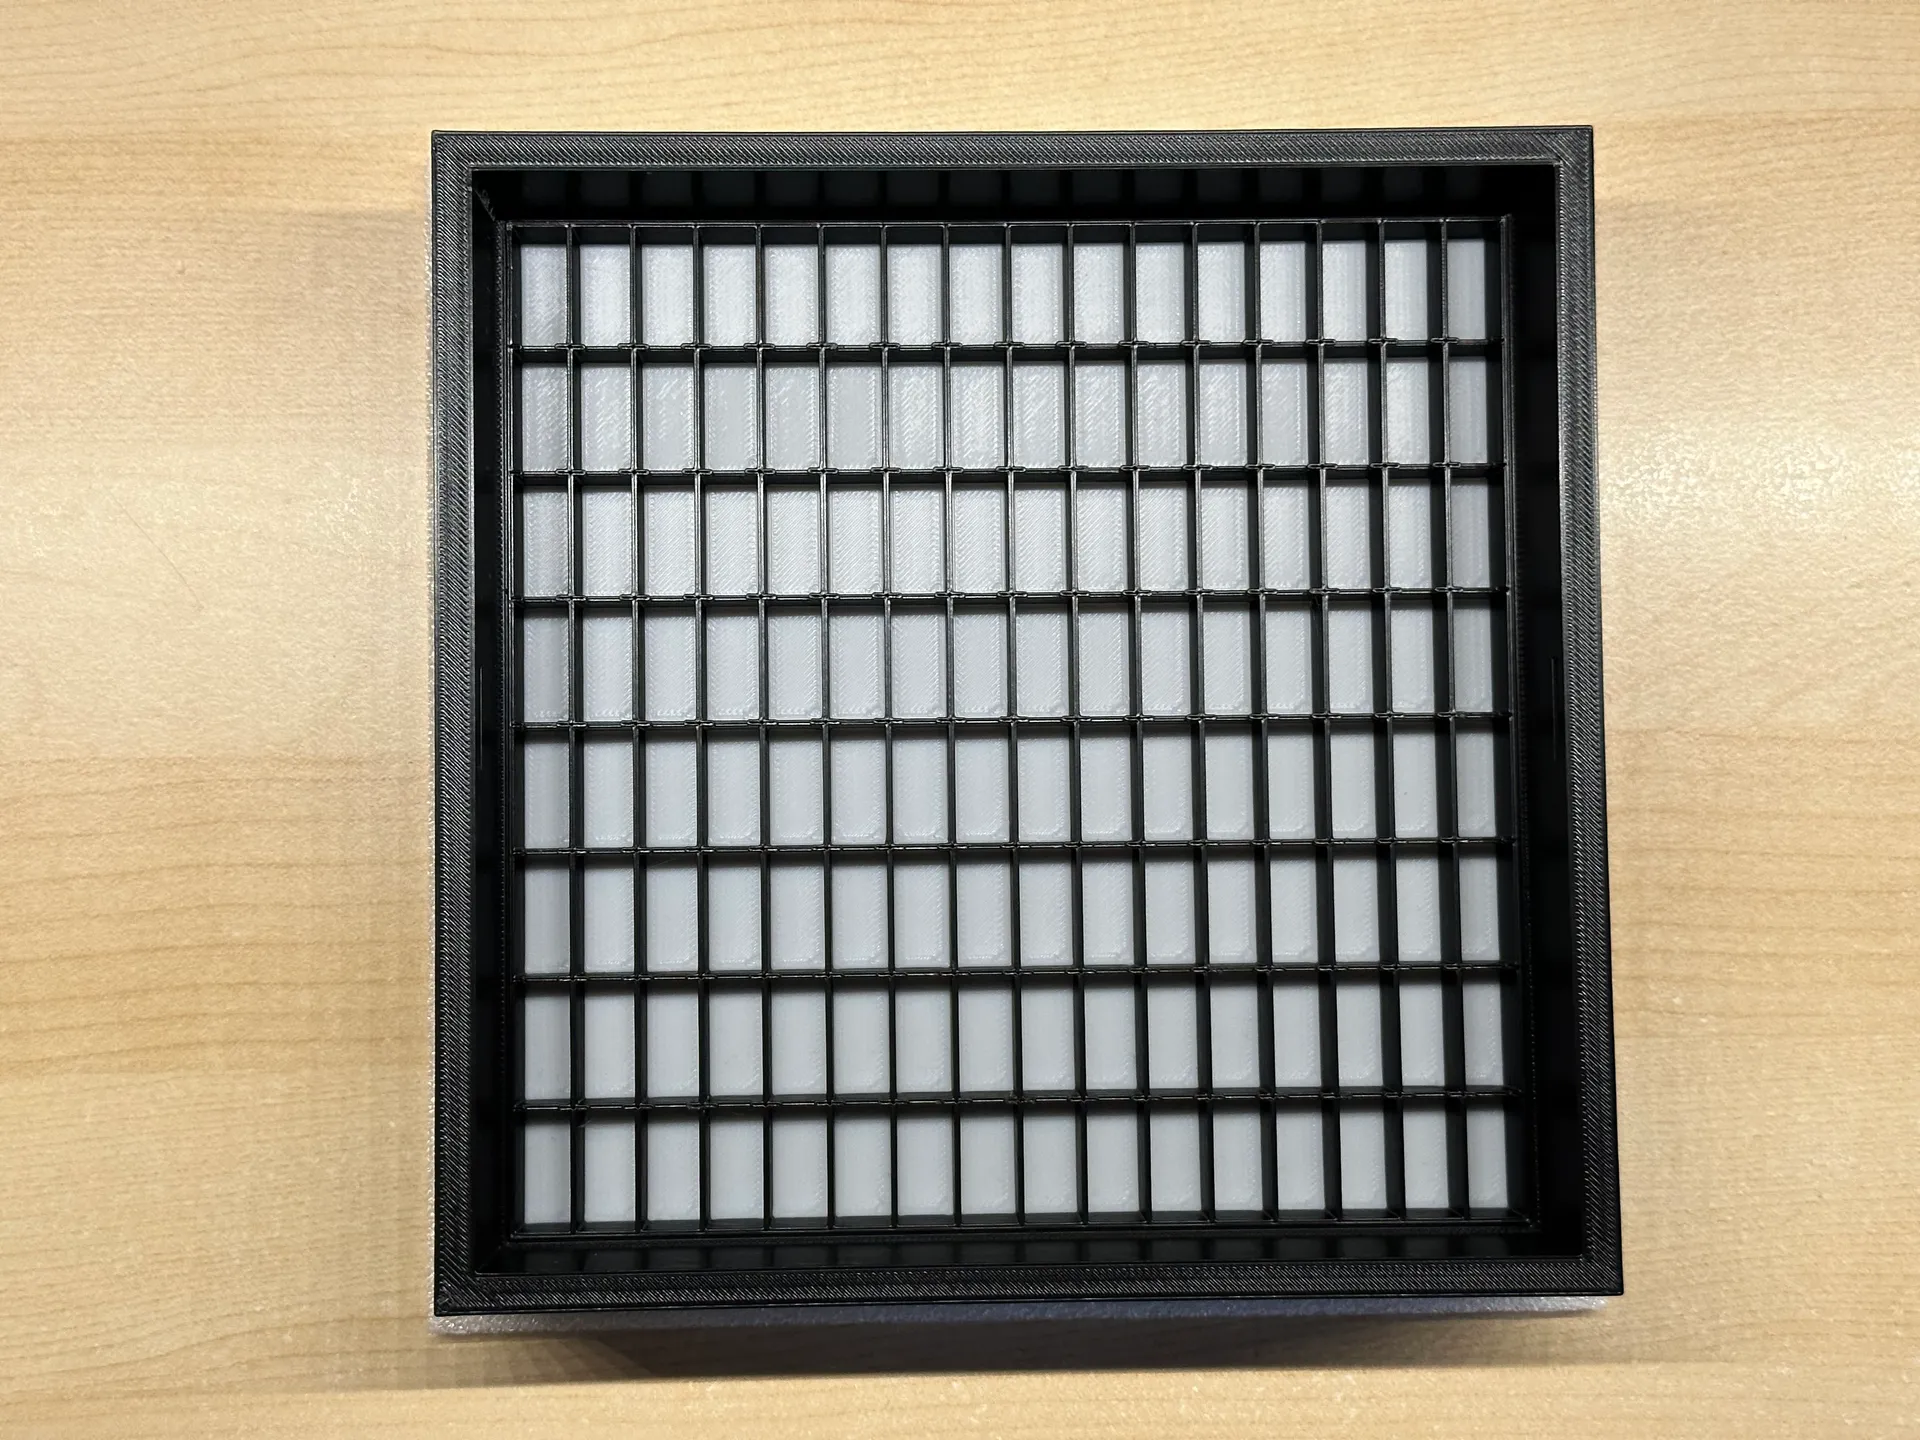
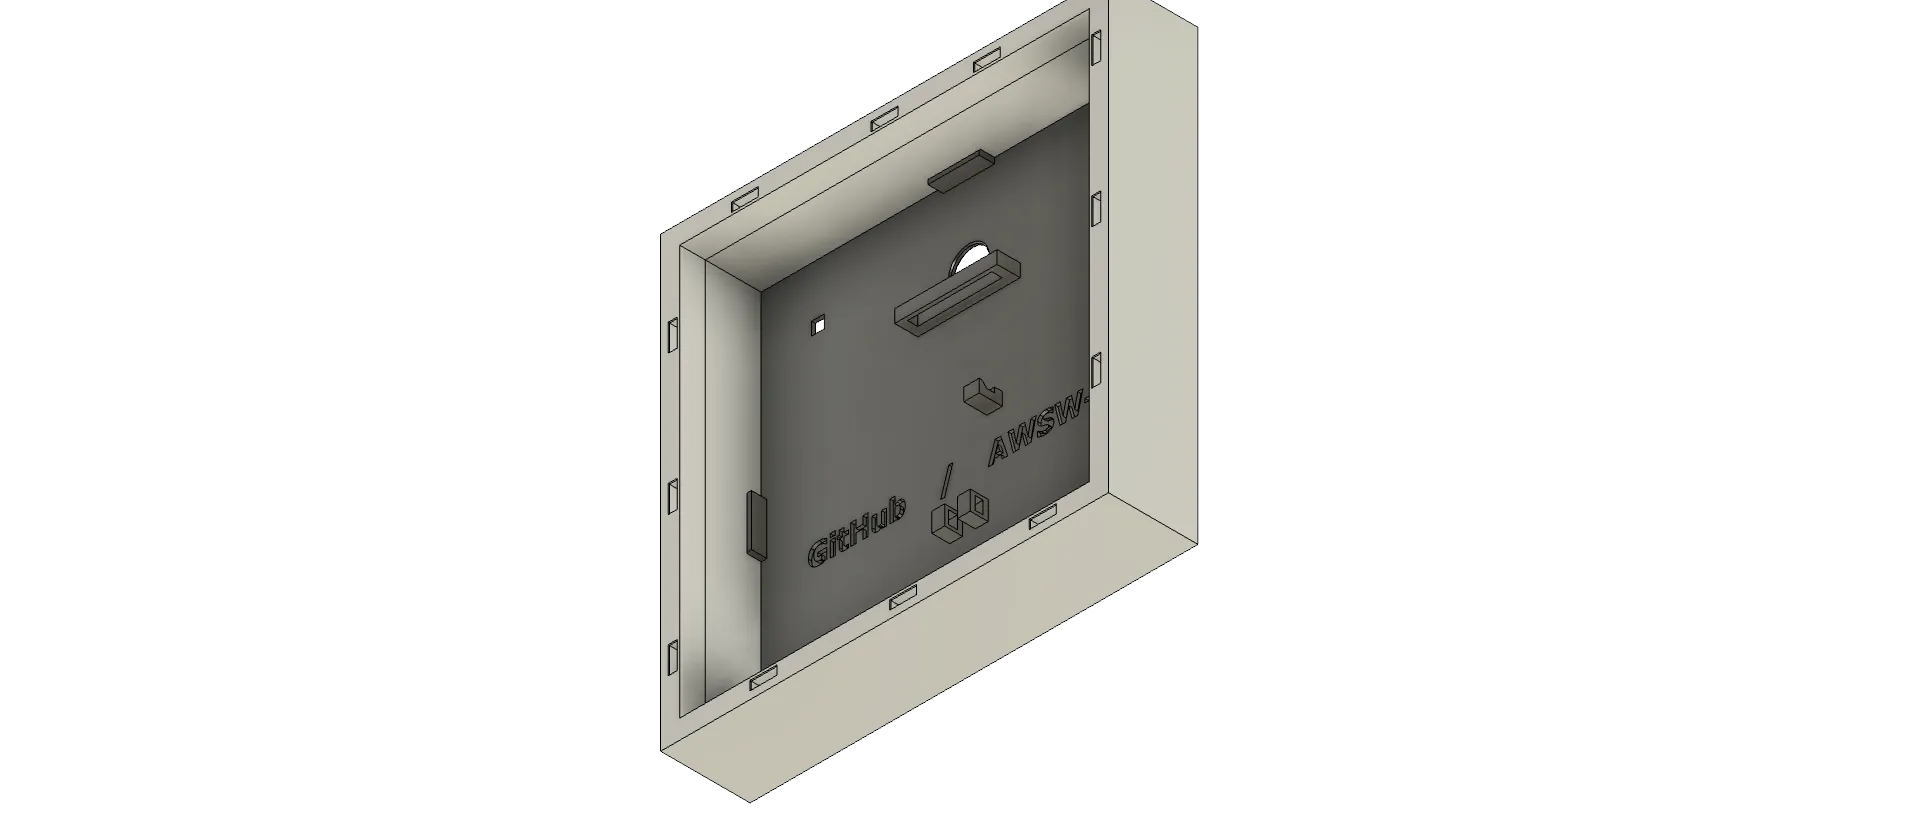
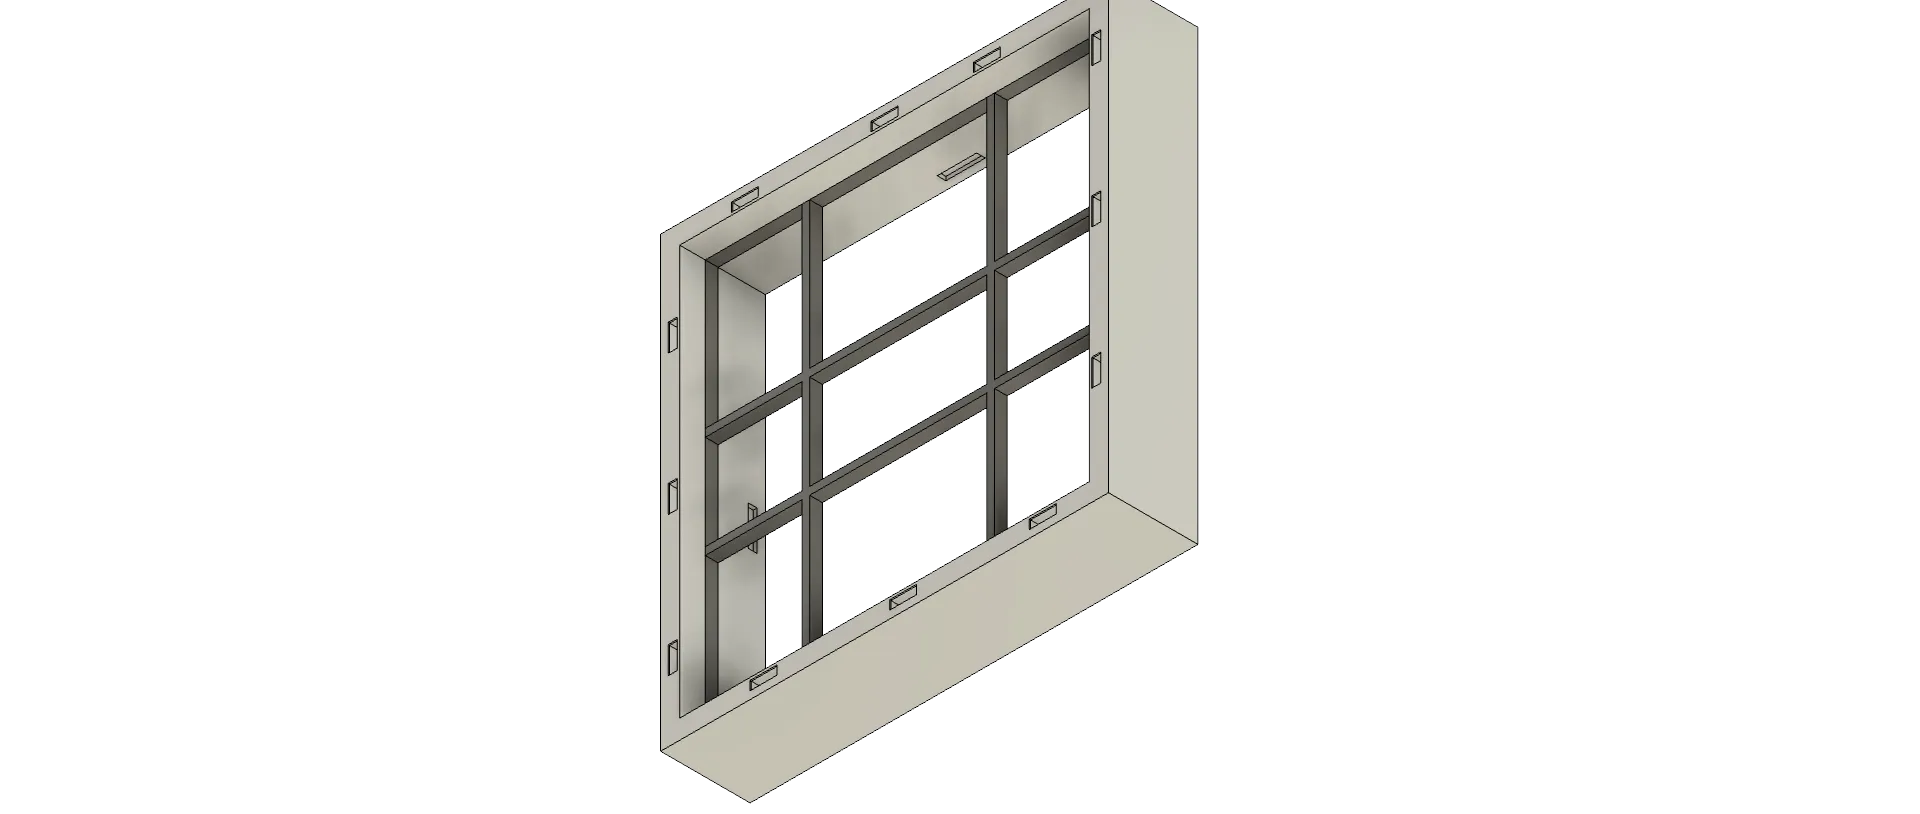
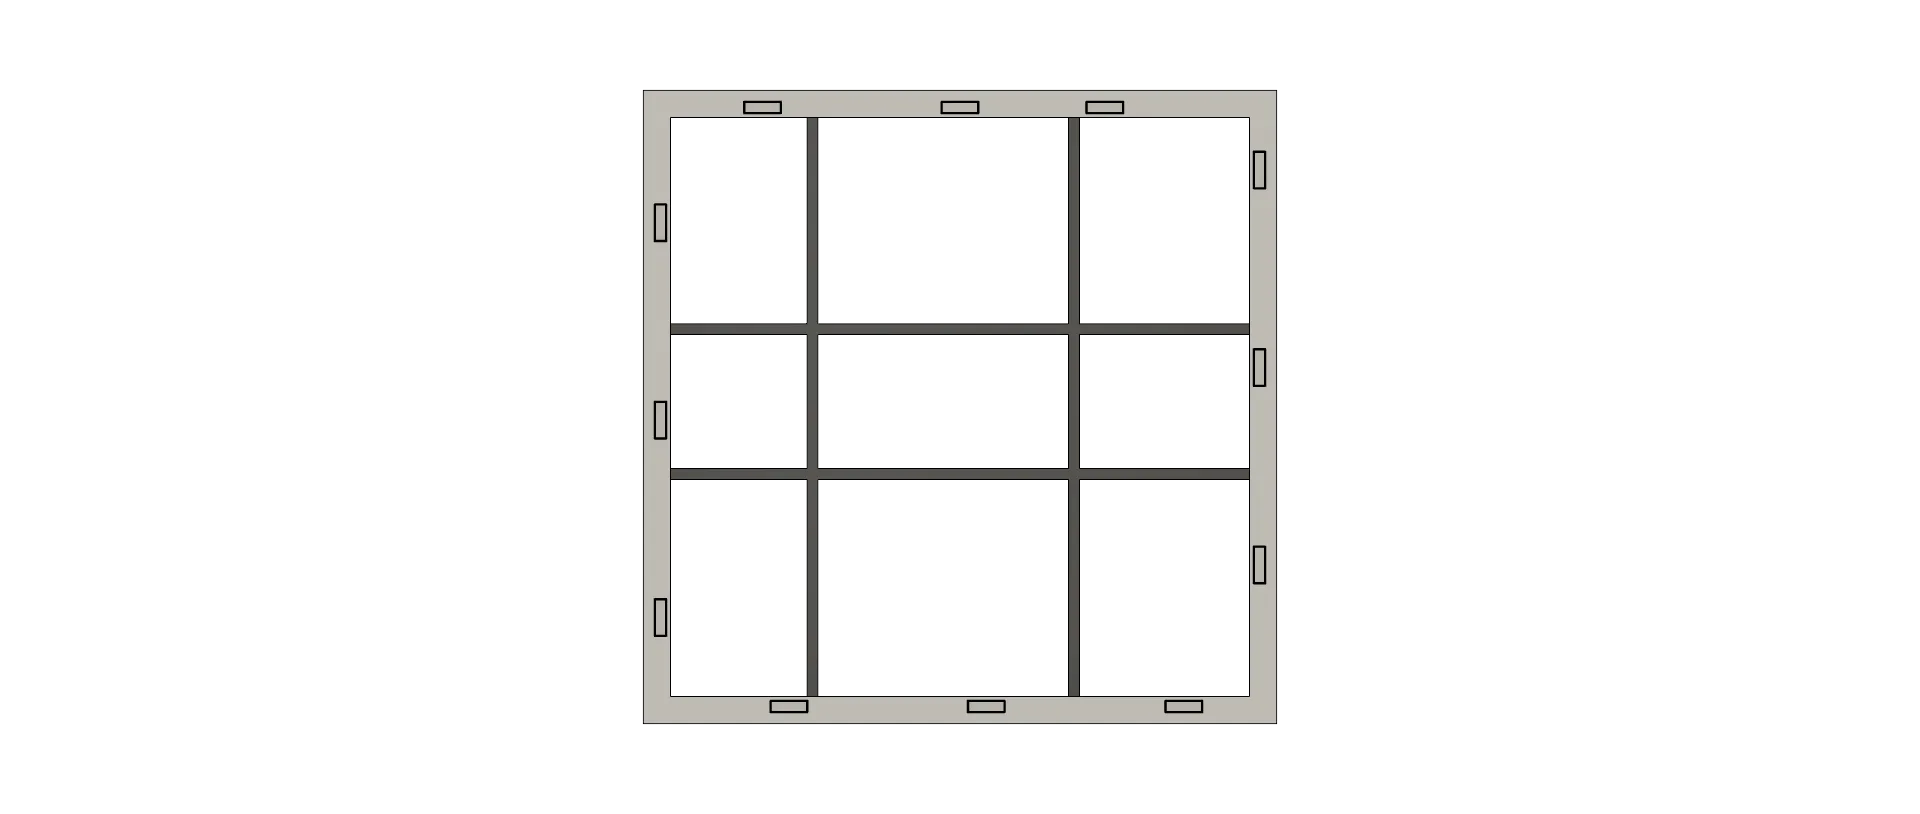
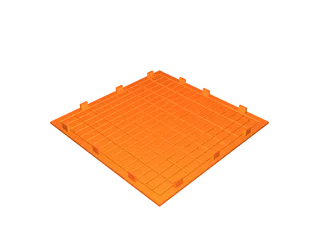
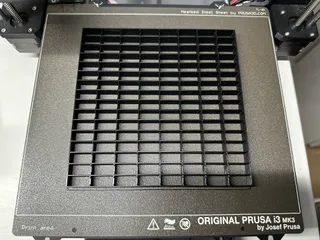
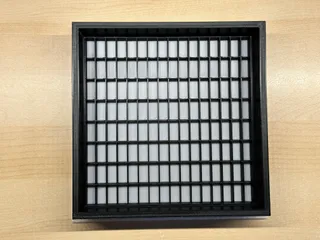
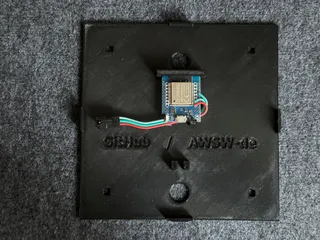
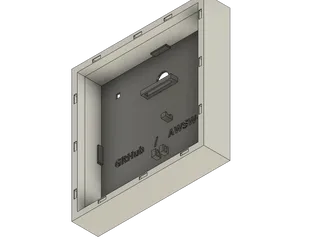
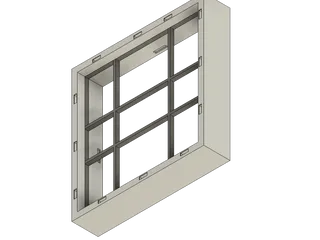
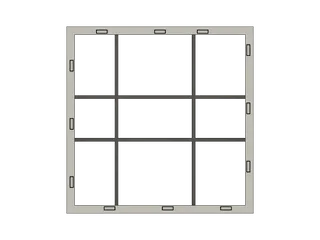
- The case is provided in 5 main parts in general to hold the 16x16 matrix and the ESP32 board inside. The 4 foots are optional.
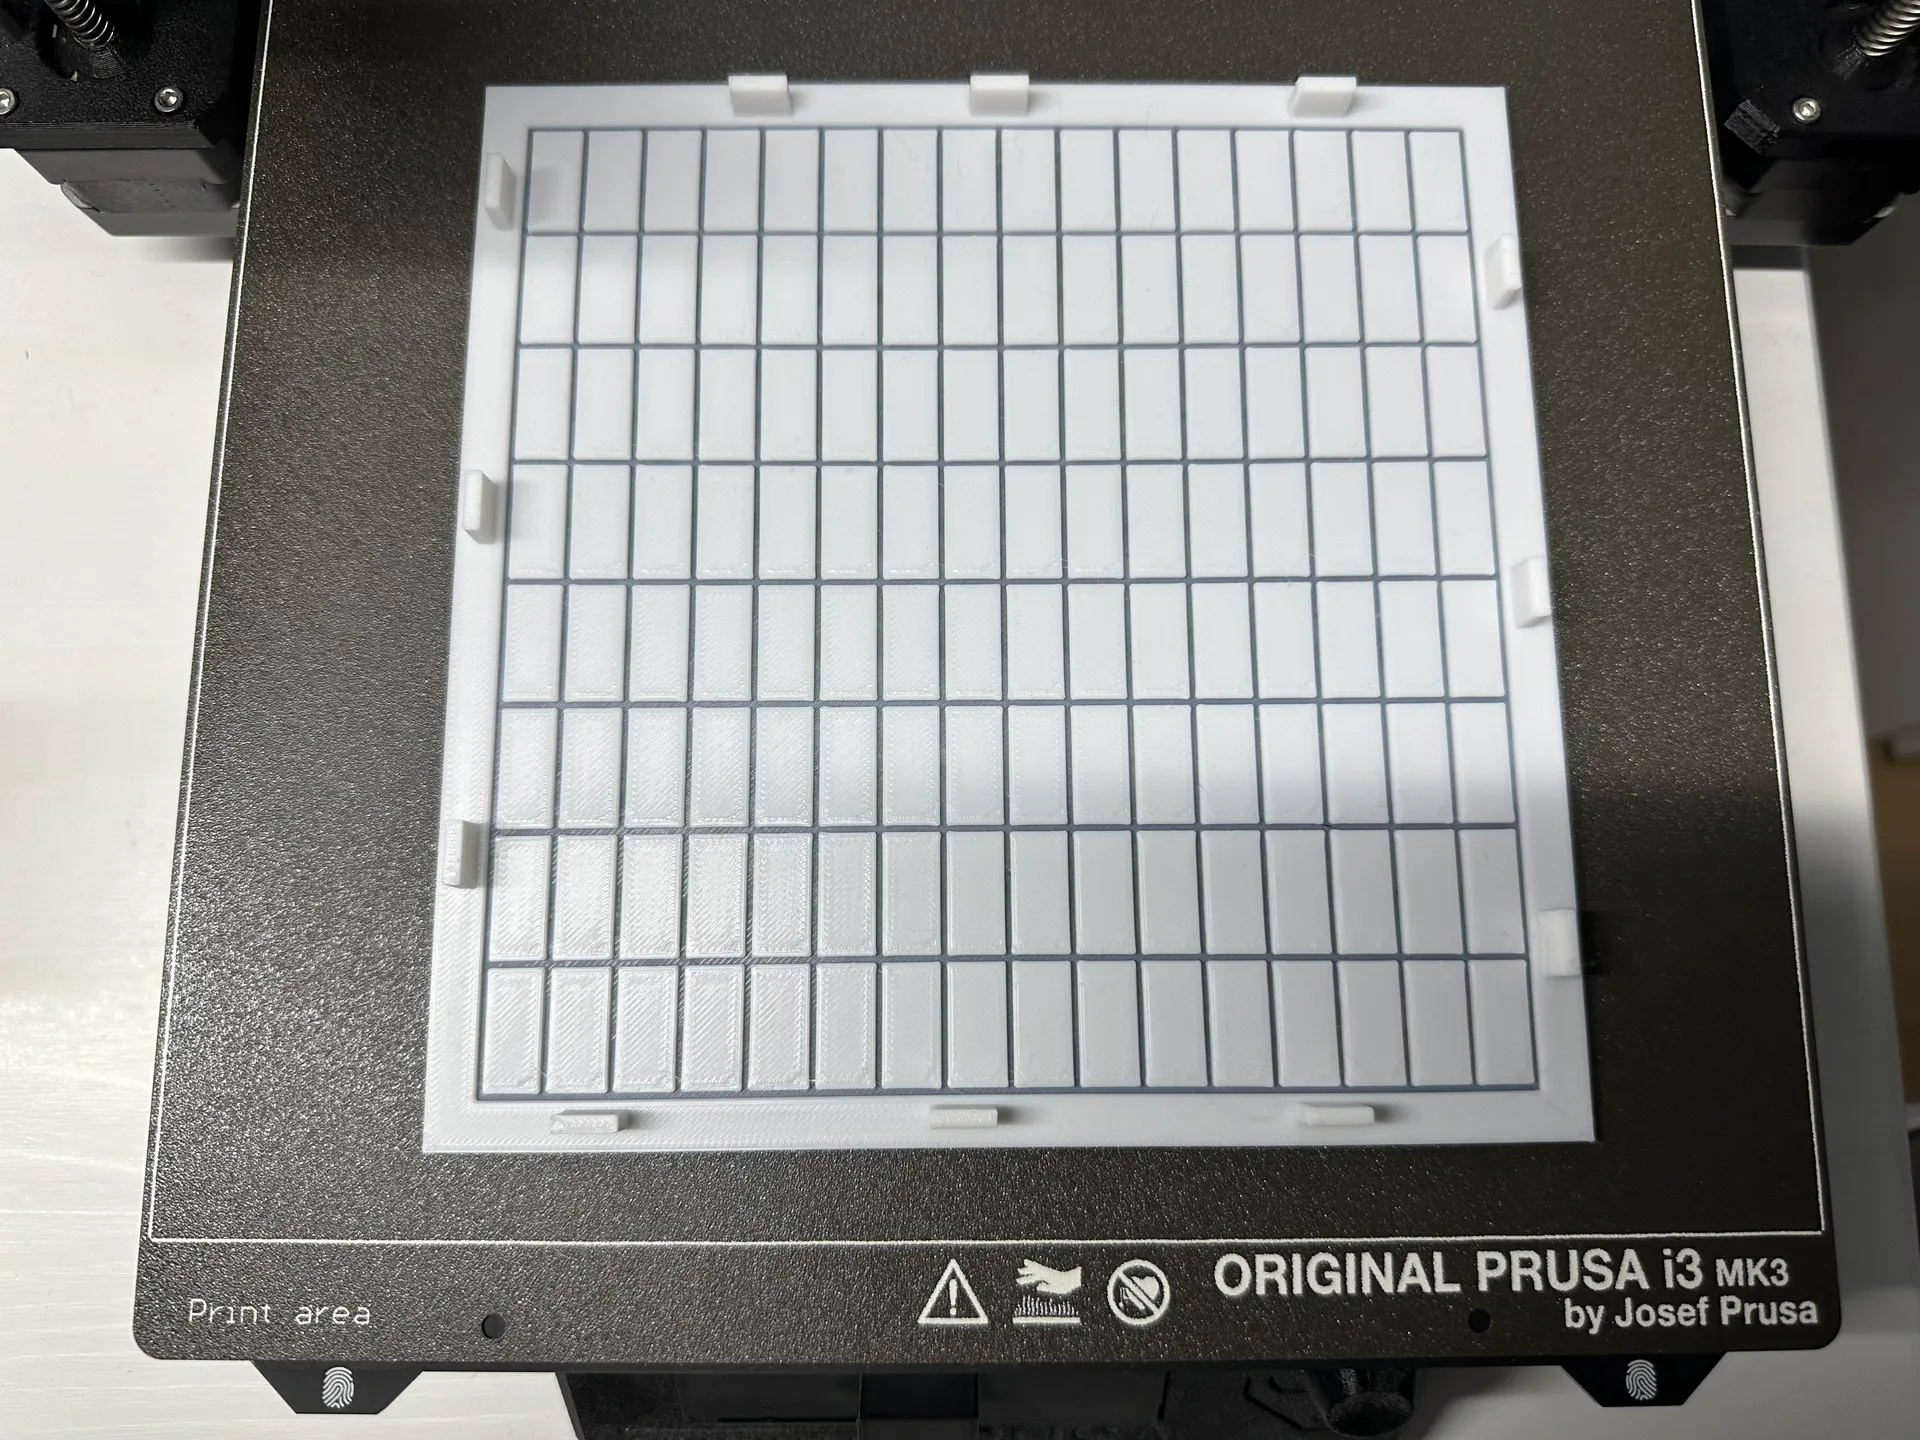
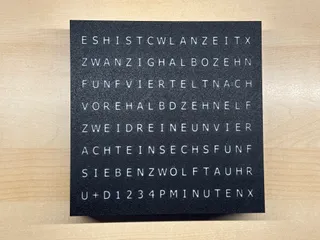
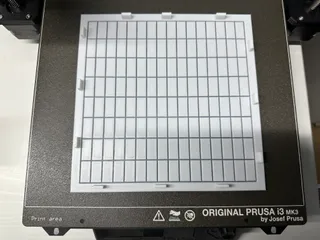
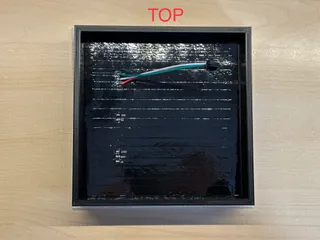
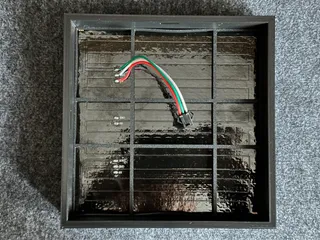
- The diffuser layer to show the LED colours is printed in white PLA with a colour change of the front part.
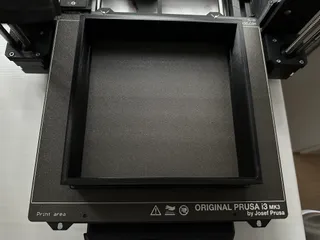
- No supports needed to print the parts. The parts just need to be placed on their flat sides.
- The front and lid parts click in place into the frame part and presses the LED matrix into the holes in the matrix part to separate the light from the individual LEDs.
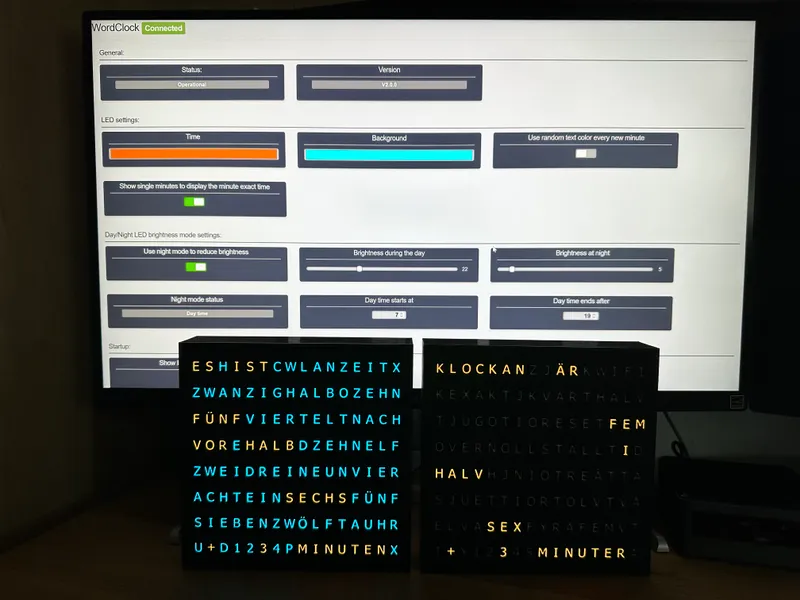
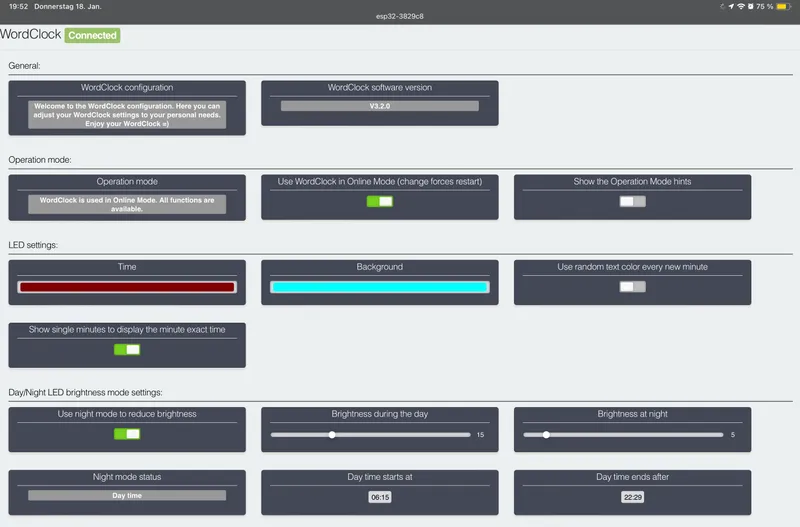
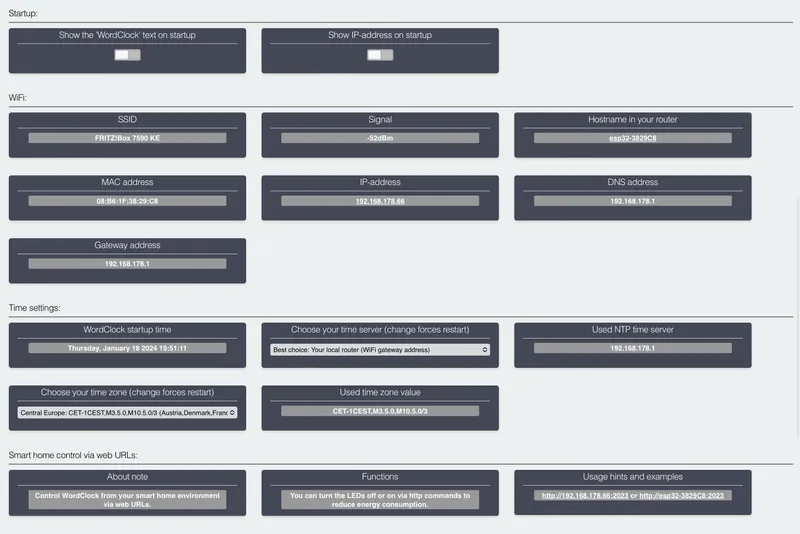
- Web configuration interface to control the WordClock functions.
- WiFi Manager integration to avoid setting your WiFi credentials manually in the code.
- The from your WiFi router received IP-address can be shown as text to inform you about the current value.
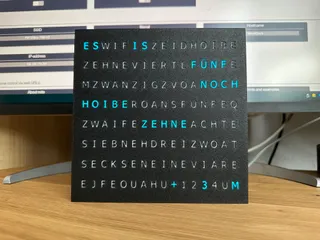
- During startup a text for “WIFI” is shown in blue until the WiFi settings were done for the first time or afterwards until the device received a new IP-address then in green color.
- In case the configured time server can not be reached a red “TIME" text will be shown and the device will restart until it can reach the time server.
- The configuration can be set with an integrated web portal by f.e. http://WordClock or via ip-address like http://192.168.178.50 (depending on your router settings).
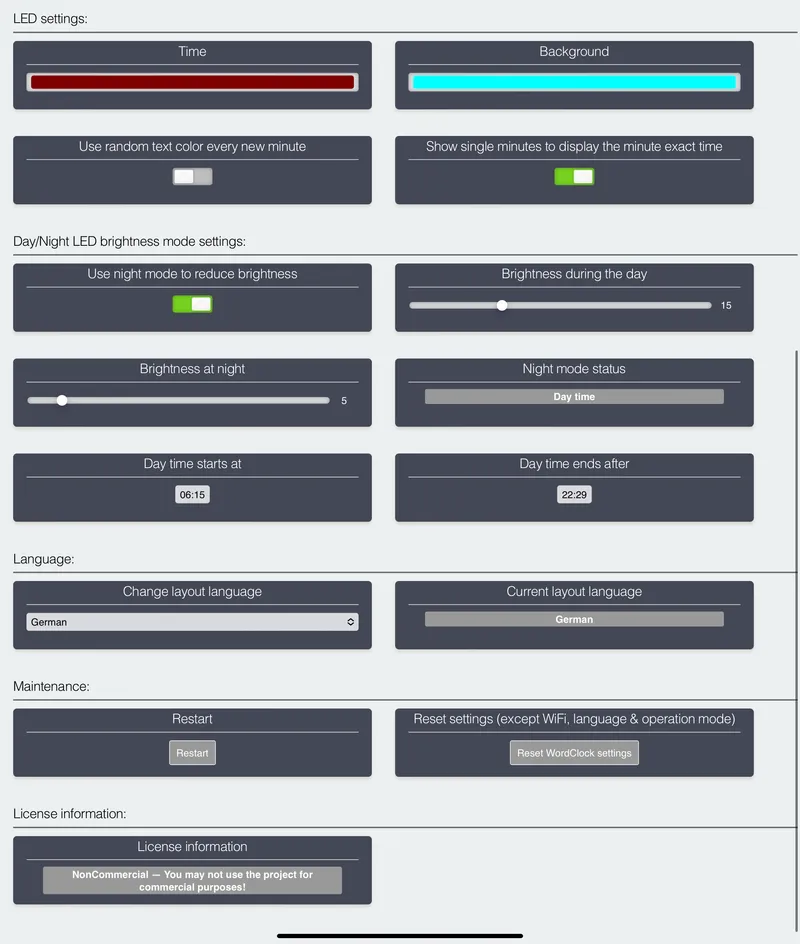
- The LED color for the time texts and the background can be configured to a static value.
- Also available is an option to set a random text color every new minute.
- The LED intensity can be set for a day time and optional for a night mode usage. With that a time span can be selected to turn off the LEDs fully or reduce their intensity for night time usage.
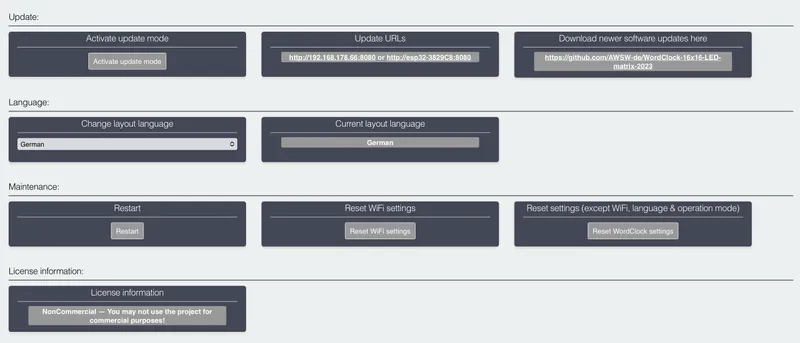
- Updates of the software can be done “Over The Air” / “OTA” with the internal web portal as well to avoid connecting the device to Arduino IDE again. See instructions below…
- During startup you can choose if the following functions should be displayed:
- IP-address
- The in the internal WifiManager stored WiFi settings can be set to default on request to switch to a new WiFi router afterwards.
- The WordClock settings can be set to default as well. WiFi settings will be kept.
- In case the WiFi is no longer available the device will reset the WiFi settings automatically after 240 seconds to avoid flashing with Arduino IDE again. Follow the initial WiFi setup again. You might need to perform a power reset of the device to start the process again.
- You can configure the hostname of the device that will be tried to transfer to your routers DNS configuration to reach the web portal via DNS name too.
- A restart request can be forced with the web portal as well.
- The timezone and NTP-Server configuration can be set in the code to fit to your needs.
- Optional background color like in the 1st 16x16 matrix WordClock.
- Smart Home environment integration to turn the LED display OFF and ON with HTTP url commands to save some power when e.g. you are not at home. The HTTP commands can be viewed via http://WordClock:2023.
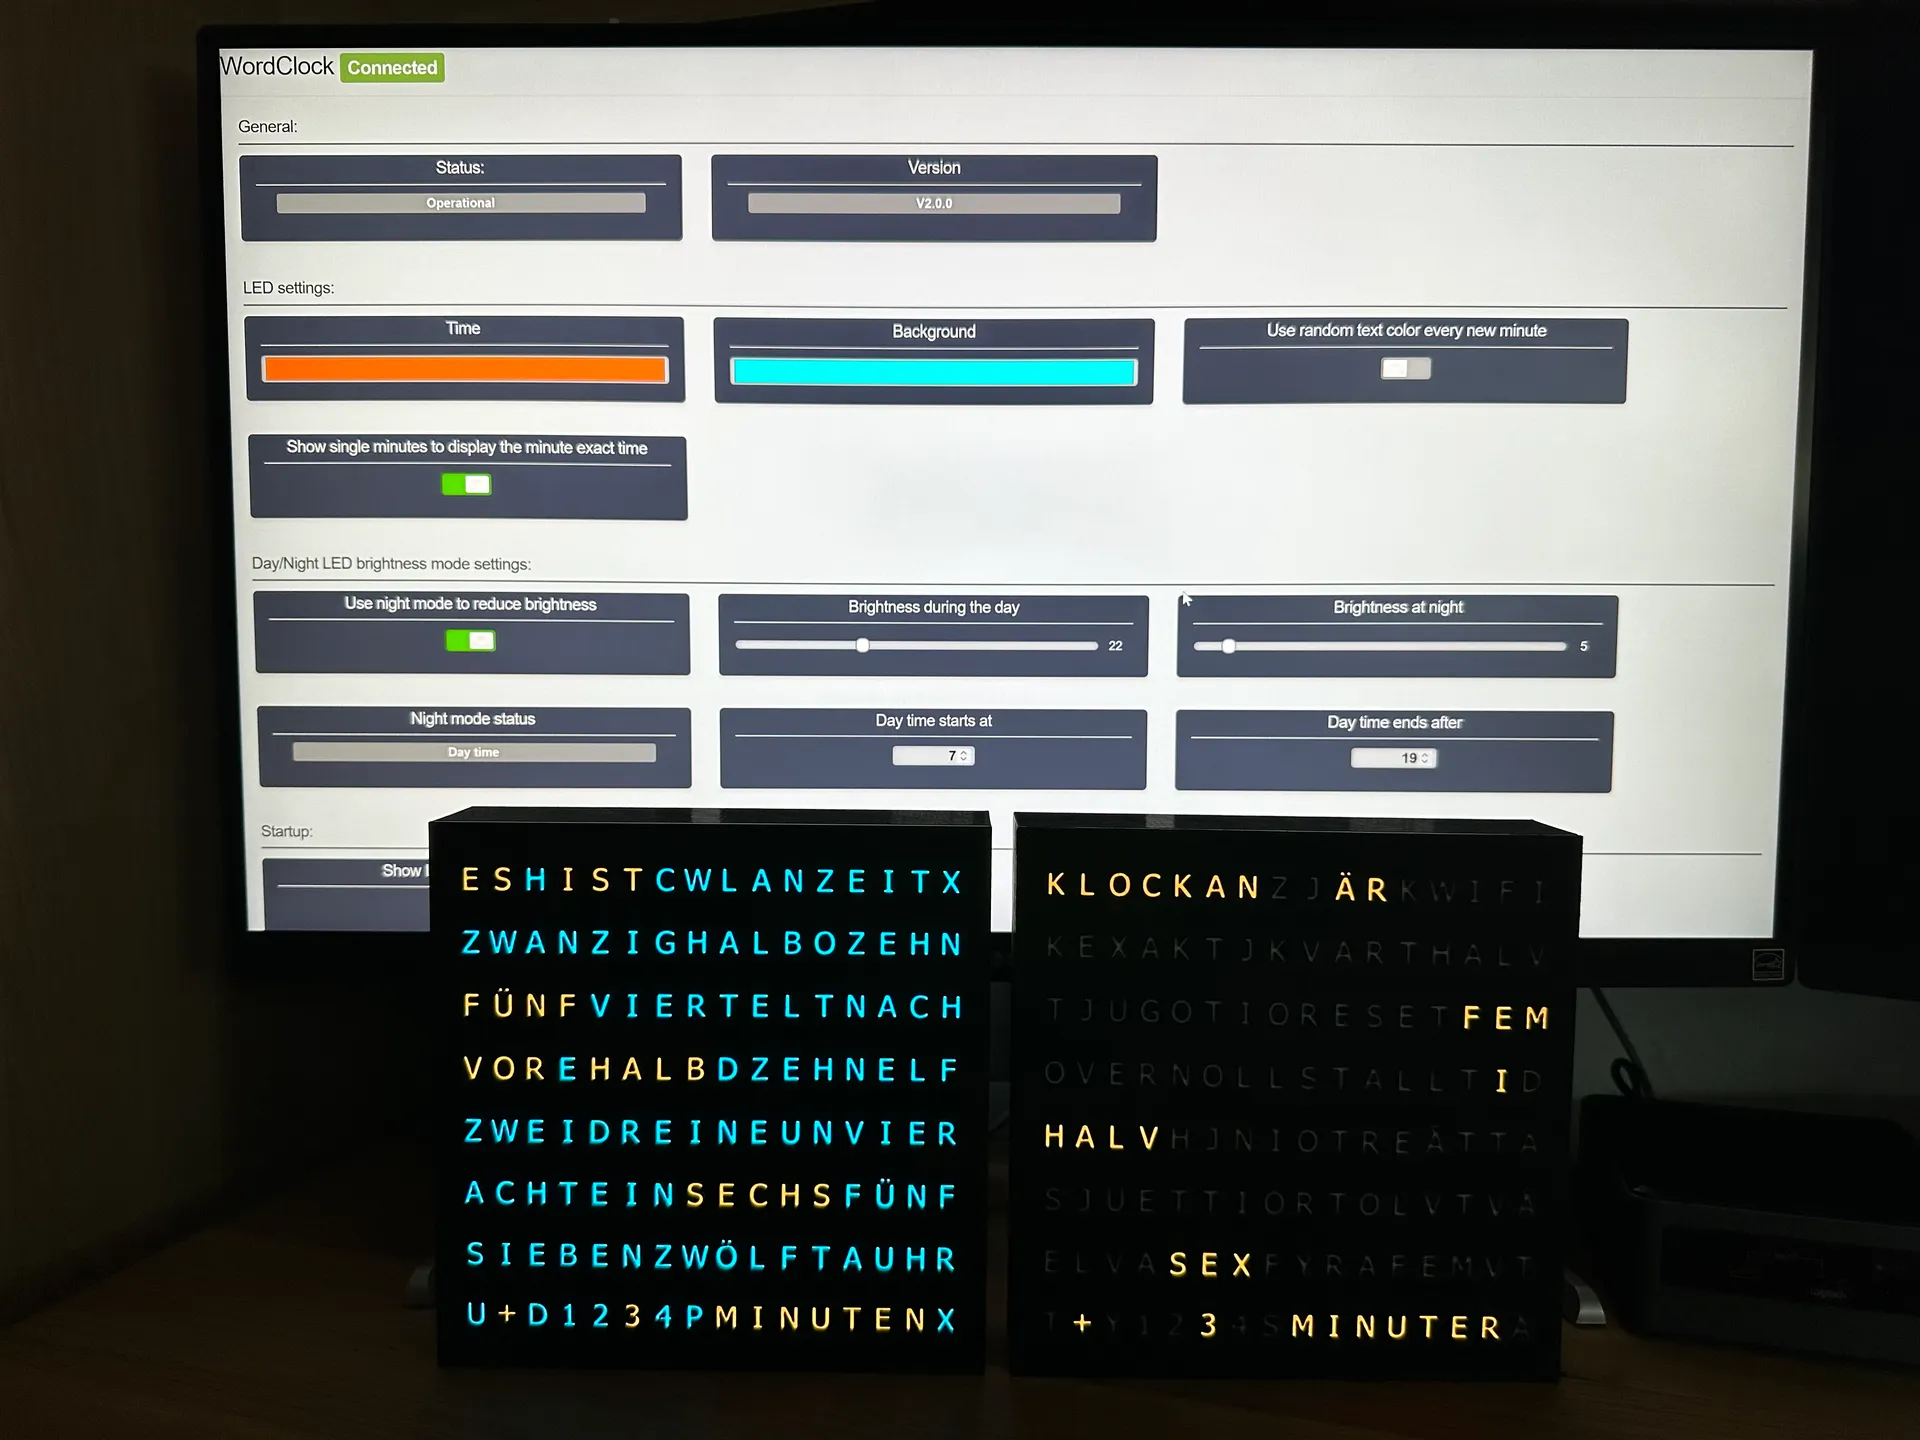
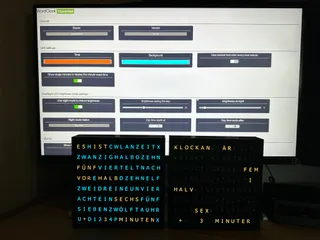
Integrated web configuration interface:
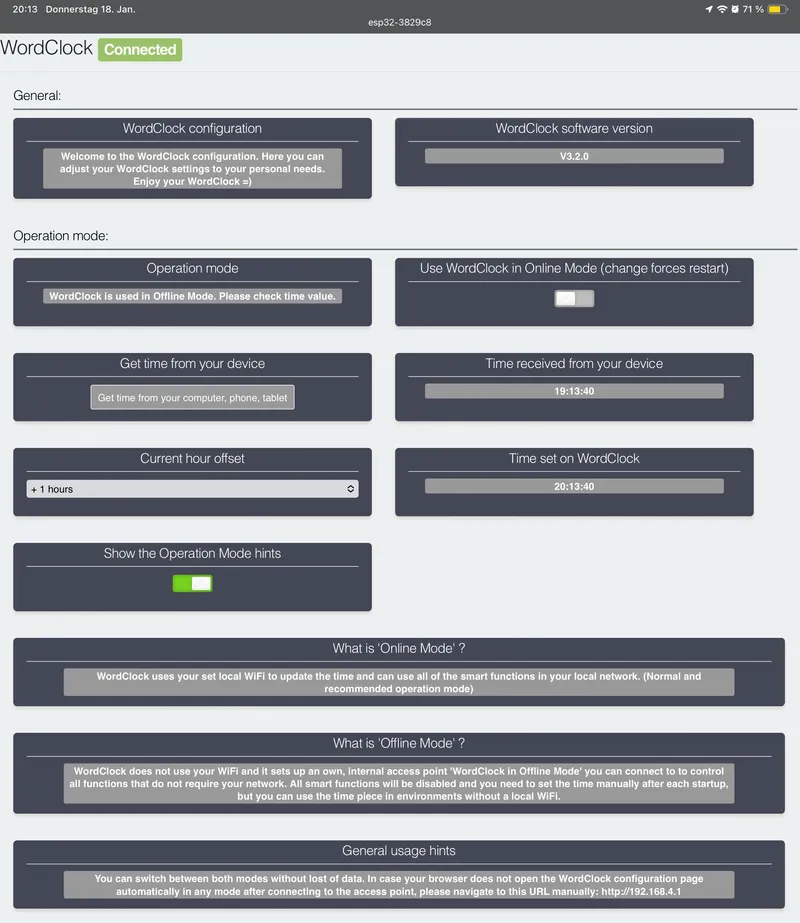
This WordClock can be used in "Online Mode" with WiFi usage or in "Offline Mode" without the need of a local WiFi. In both modes you will be able to use an internal configuration portal to configure your WordClock. See pictures below. =)
Online Mode:
Offline Mode:
Setup the code for the WordClock:
- Follow this video to get used to the usage:
Code download and WiFi setup:
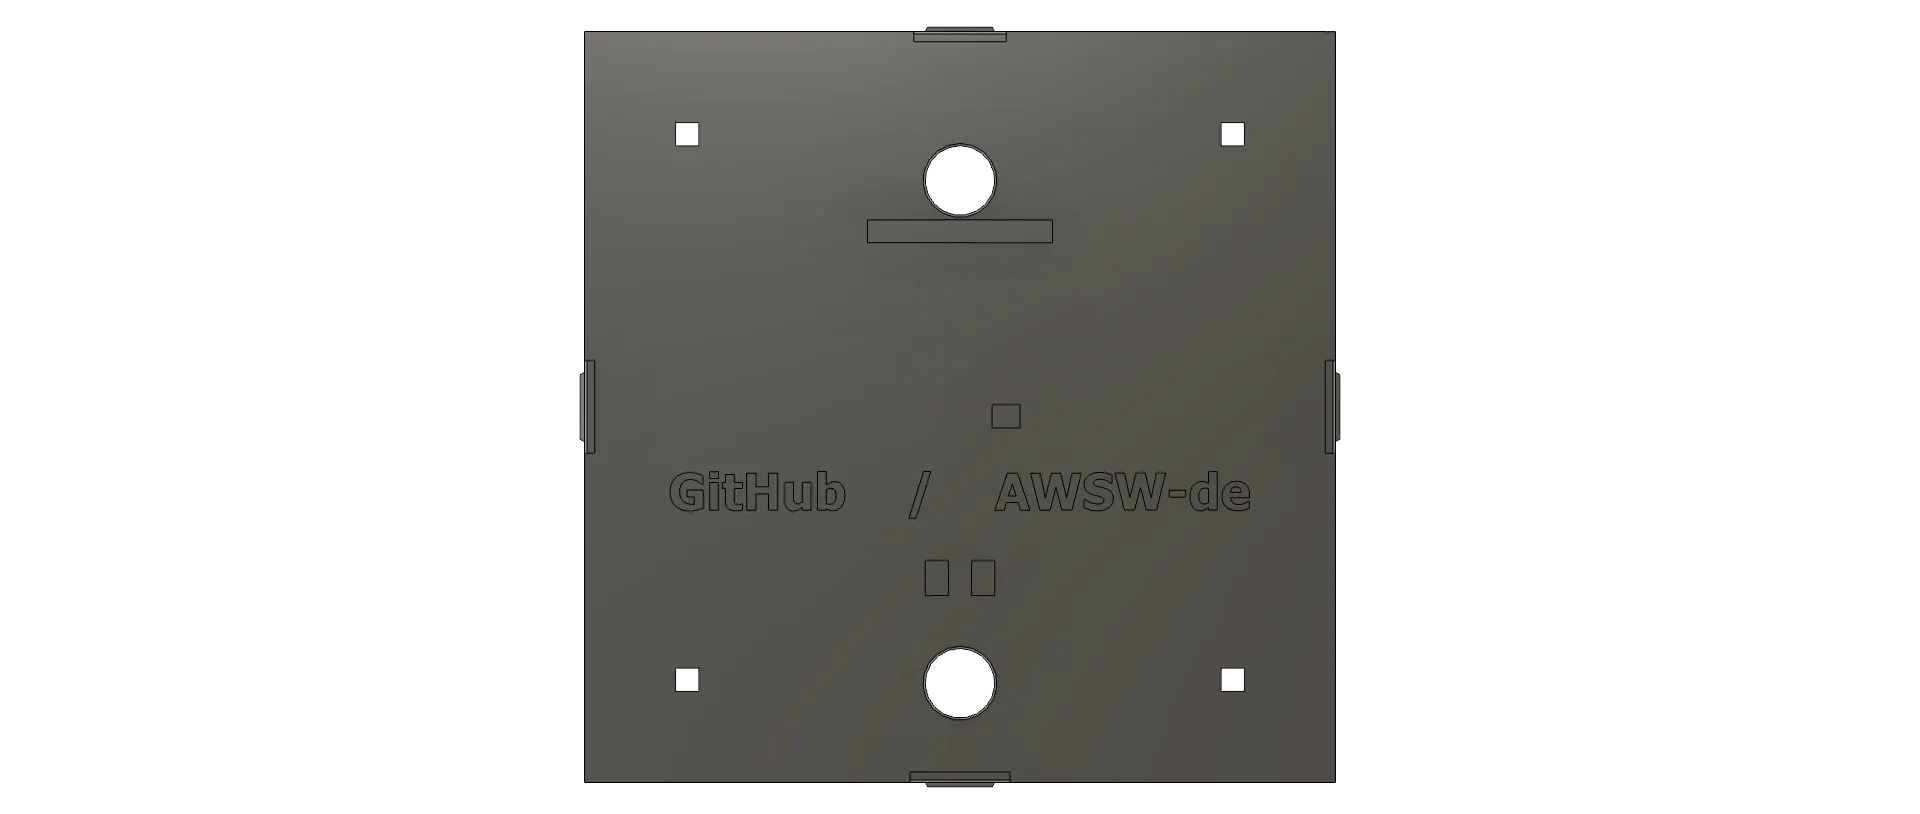
- The script to upload the code can be downloaded from my GitHub repository.
- See the FAQ section too for more details to the code software.
Update the code of a running WordClock:
- Updates can be done “Over The Air” / “OTA” with the internal WordClock web portal.
- You will find a section to get the update without the need of a computer with 2 clicks.
Parts needed:
- 1x 16x16 LED matrix (Use this one. The parts are made to fit to it only.)
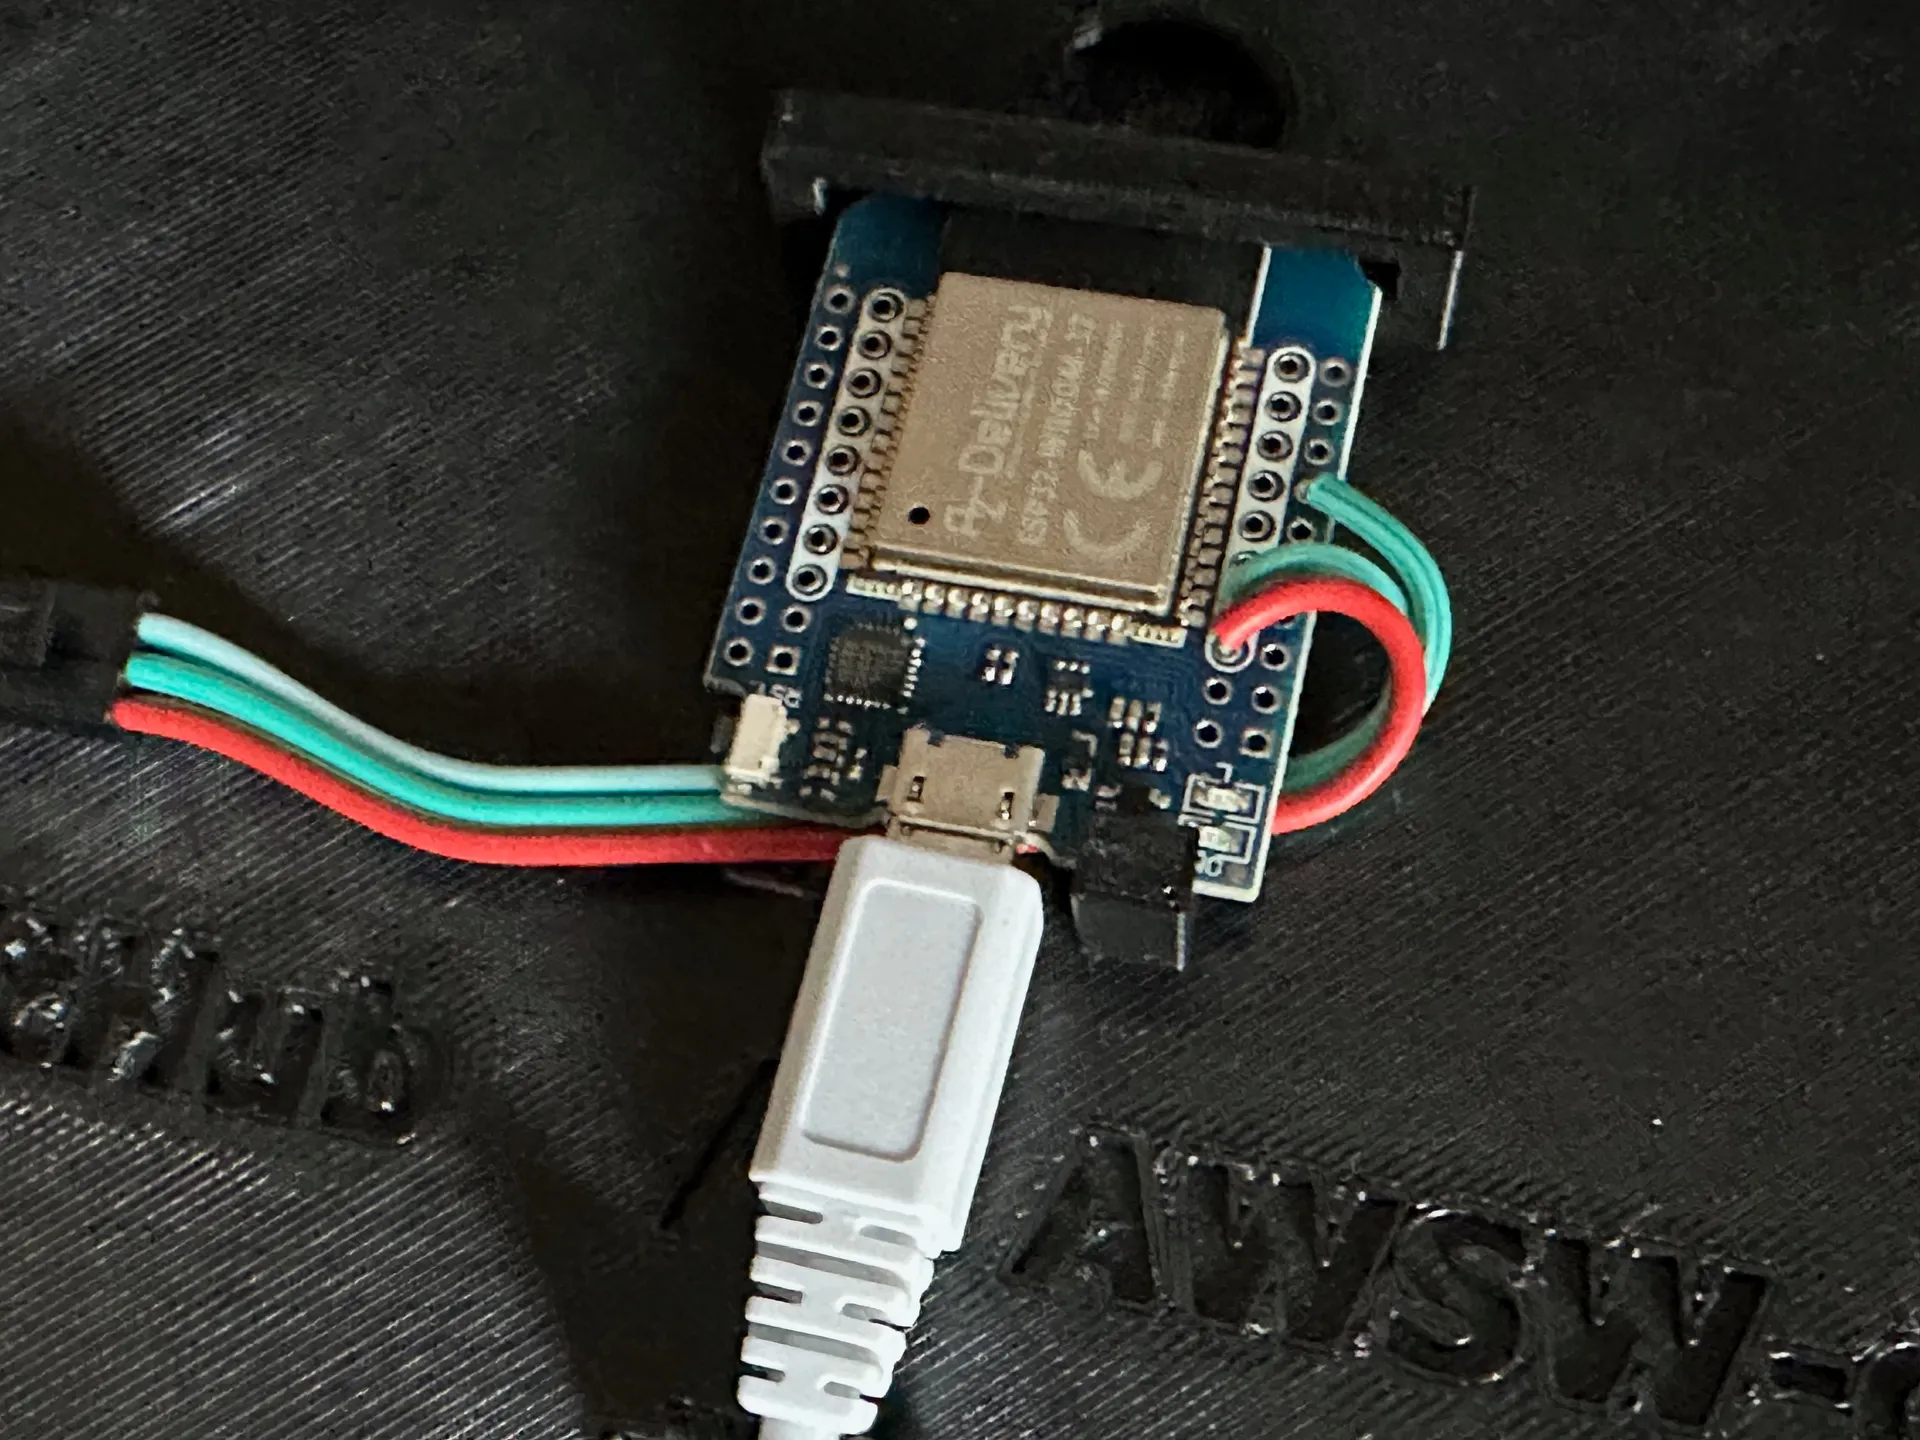
- 1x ESP32 micro controller board (No ESP8266 use possible because of its low specs.)
- 1x USB power supply 5V / 3A (Do not use 5V/2A or even 5V/1A ones to avoid damage!)
- 1x Micro USB cable 3m
Printing instructions:
- No supports or brim needed for all parts.
- 0.3 draft profile used.
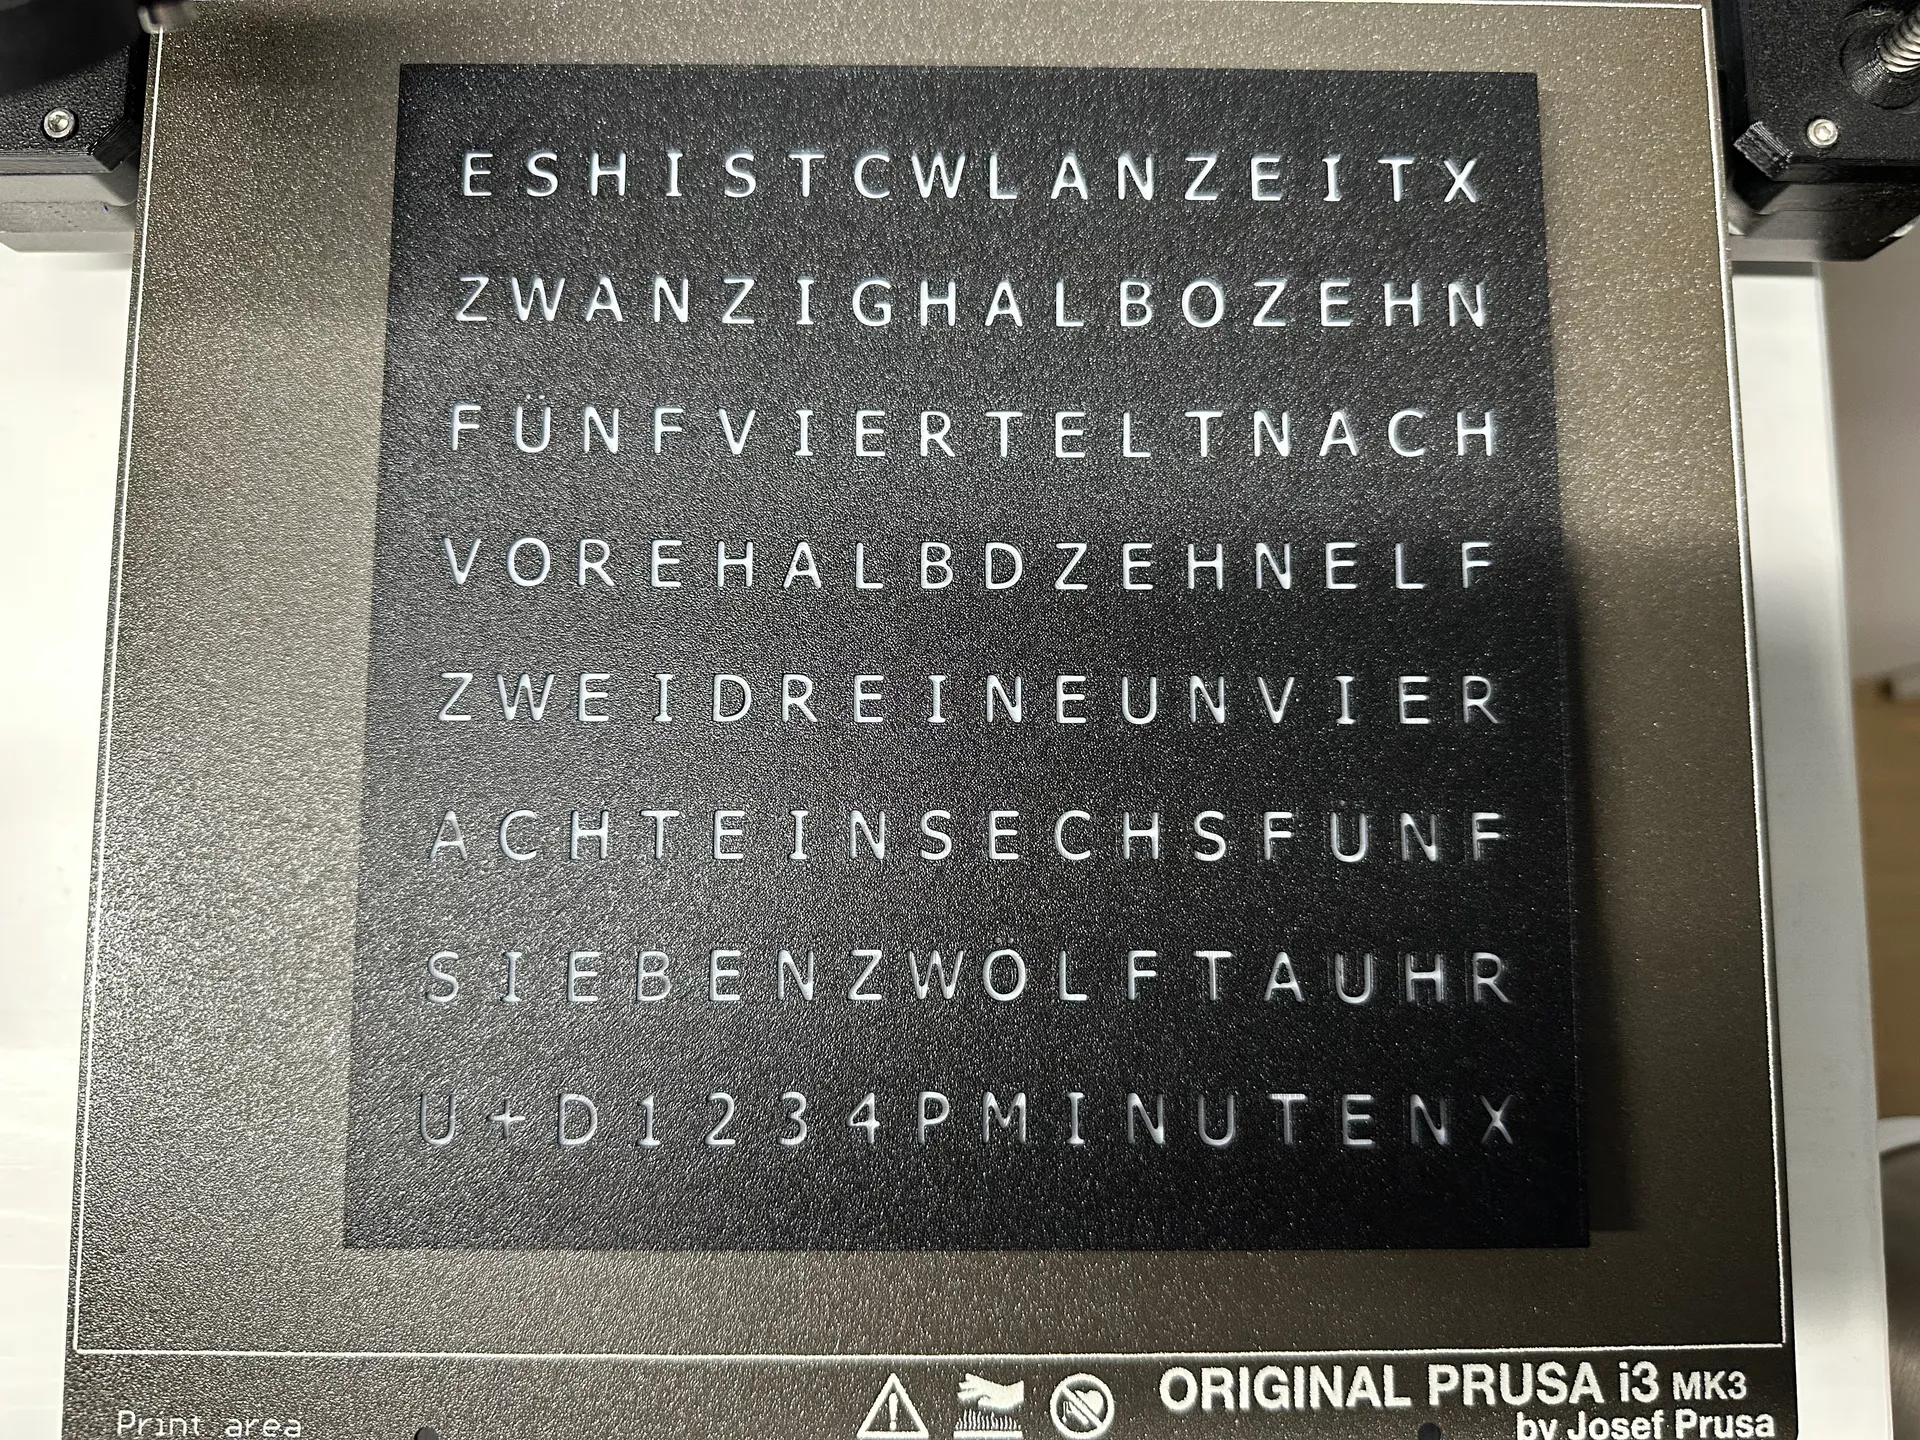
- Textured sheet used. If you use a textured sheet too, let it cool down completely after the print and wait for the part gets loose by itself. Do not pull on it to avoid ripping off the letters! In my case it takes 45-60 minutes after the print has ended and the part just lays loose on the print bed…
- Using a brim was not needed in my tests, because I cleaned my textured sheet with dishwashing liquid carefully with a new sponge and then with isopropanol alcohol again on the printer to make the parts stick really good. If you face problems with adhesion feel free to add a 5mm brim to the front and lid part…
- IMPORTANT: Color change in the front part from black to white at 1.2mm height to create the diffuser layer. You will find a really good article here to help you with this. If you use my print file or the .3MF files the color change is preconfigured.
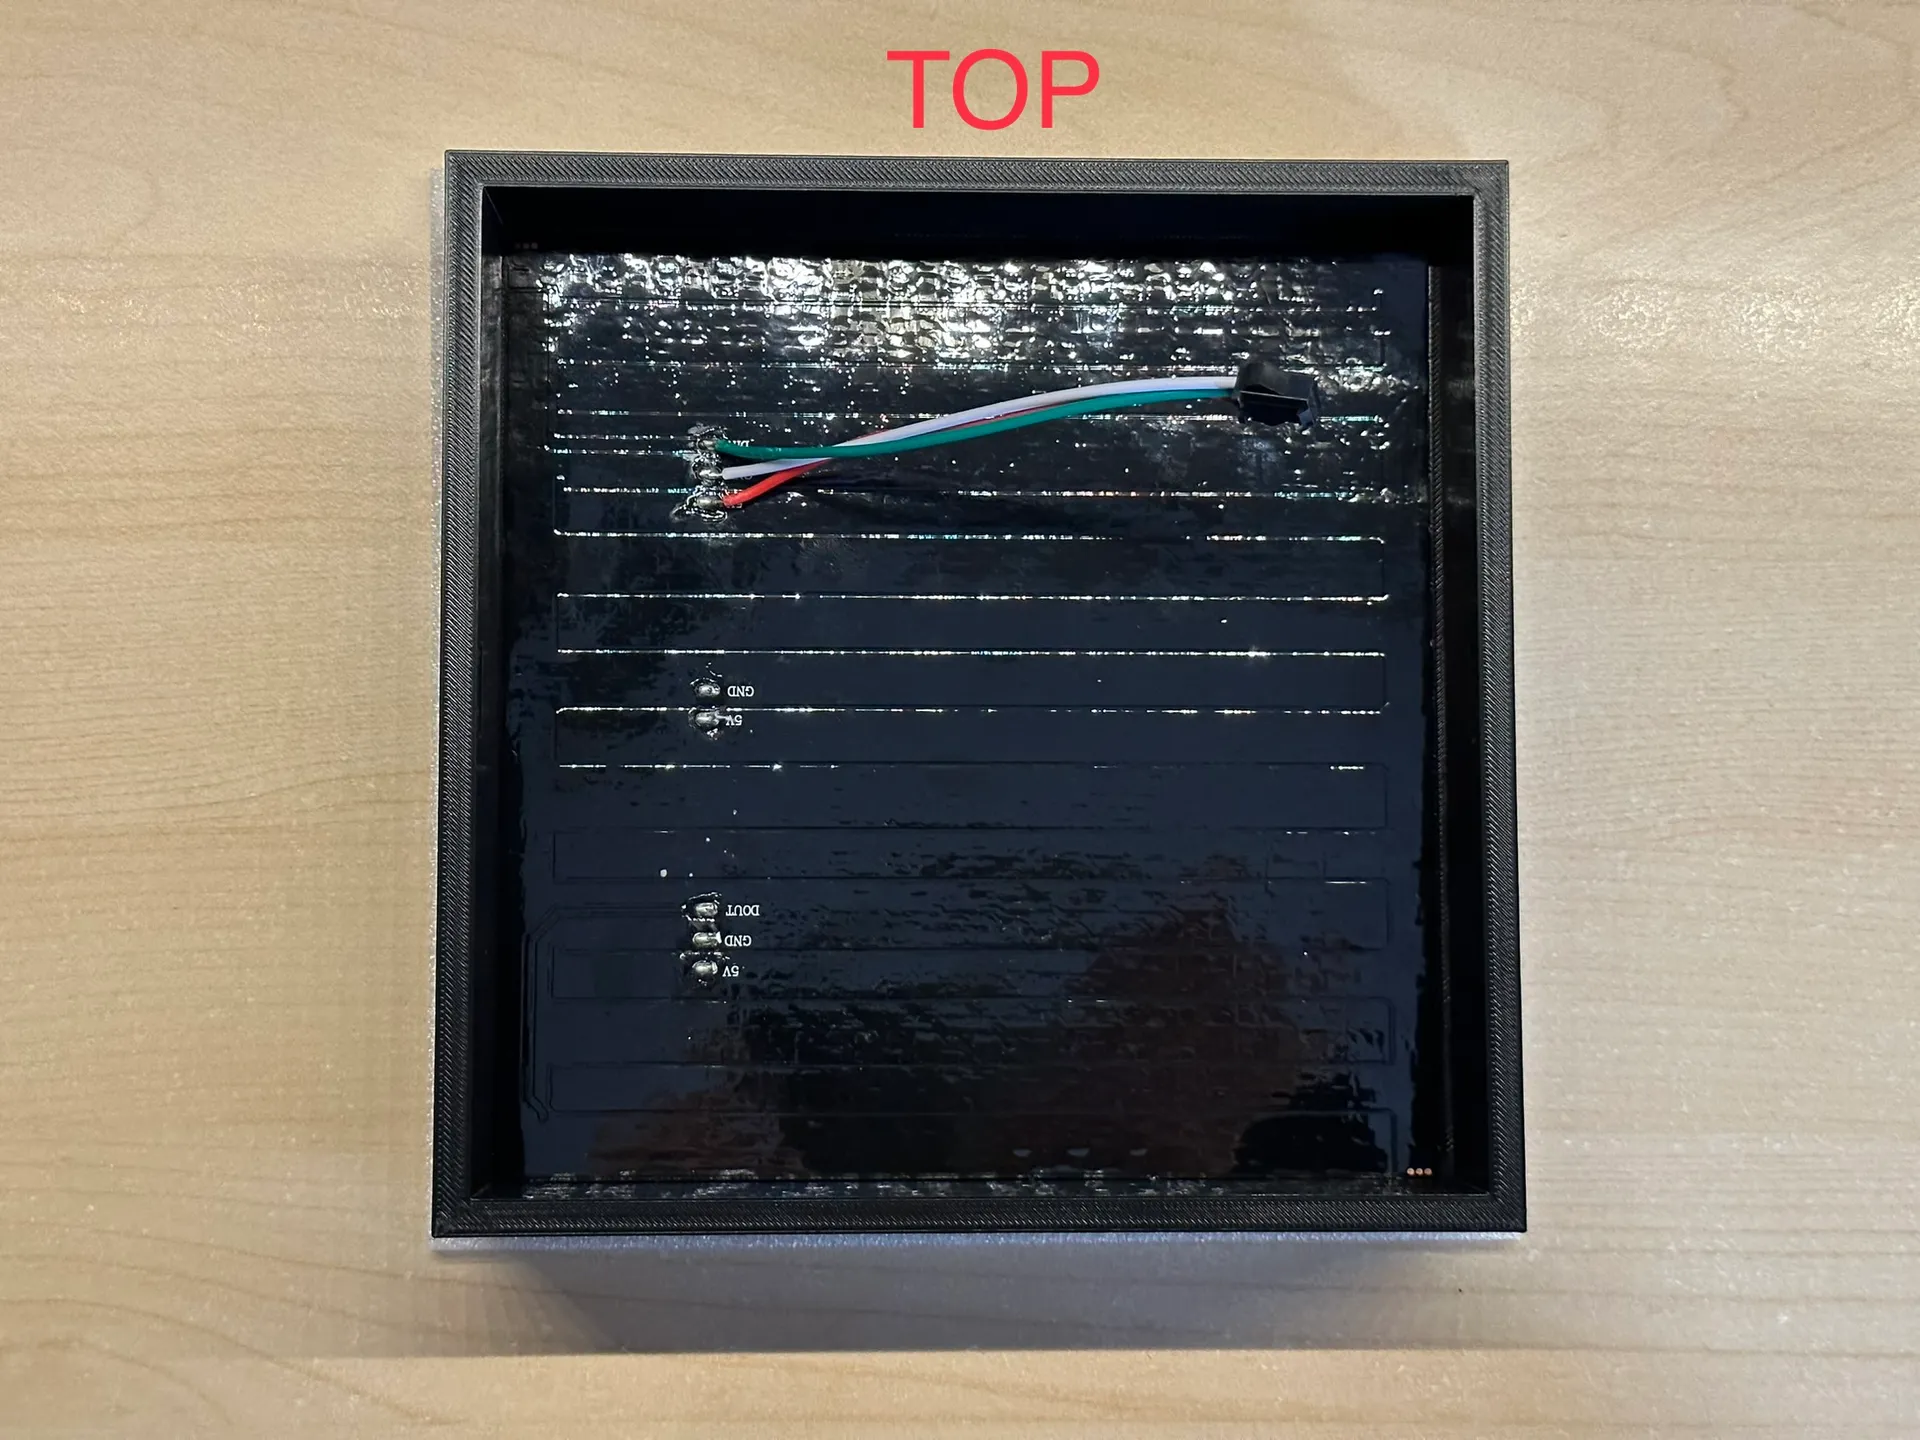
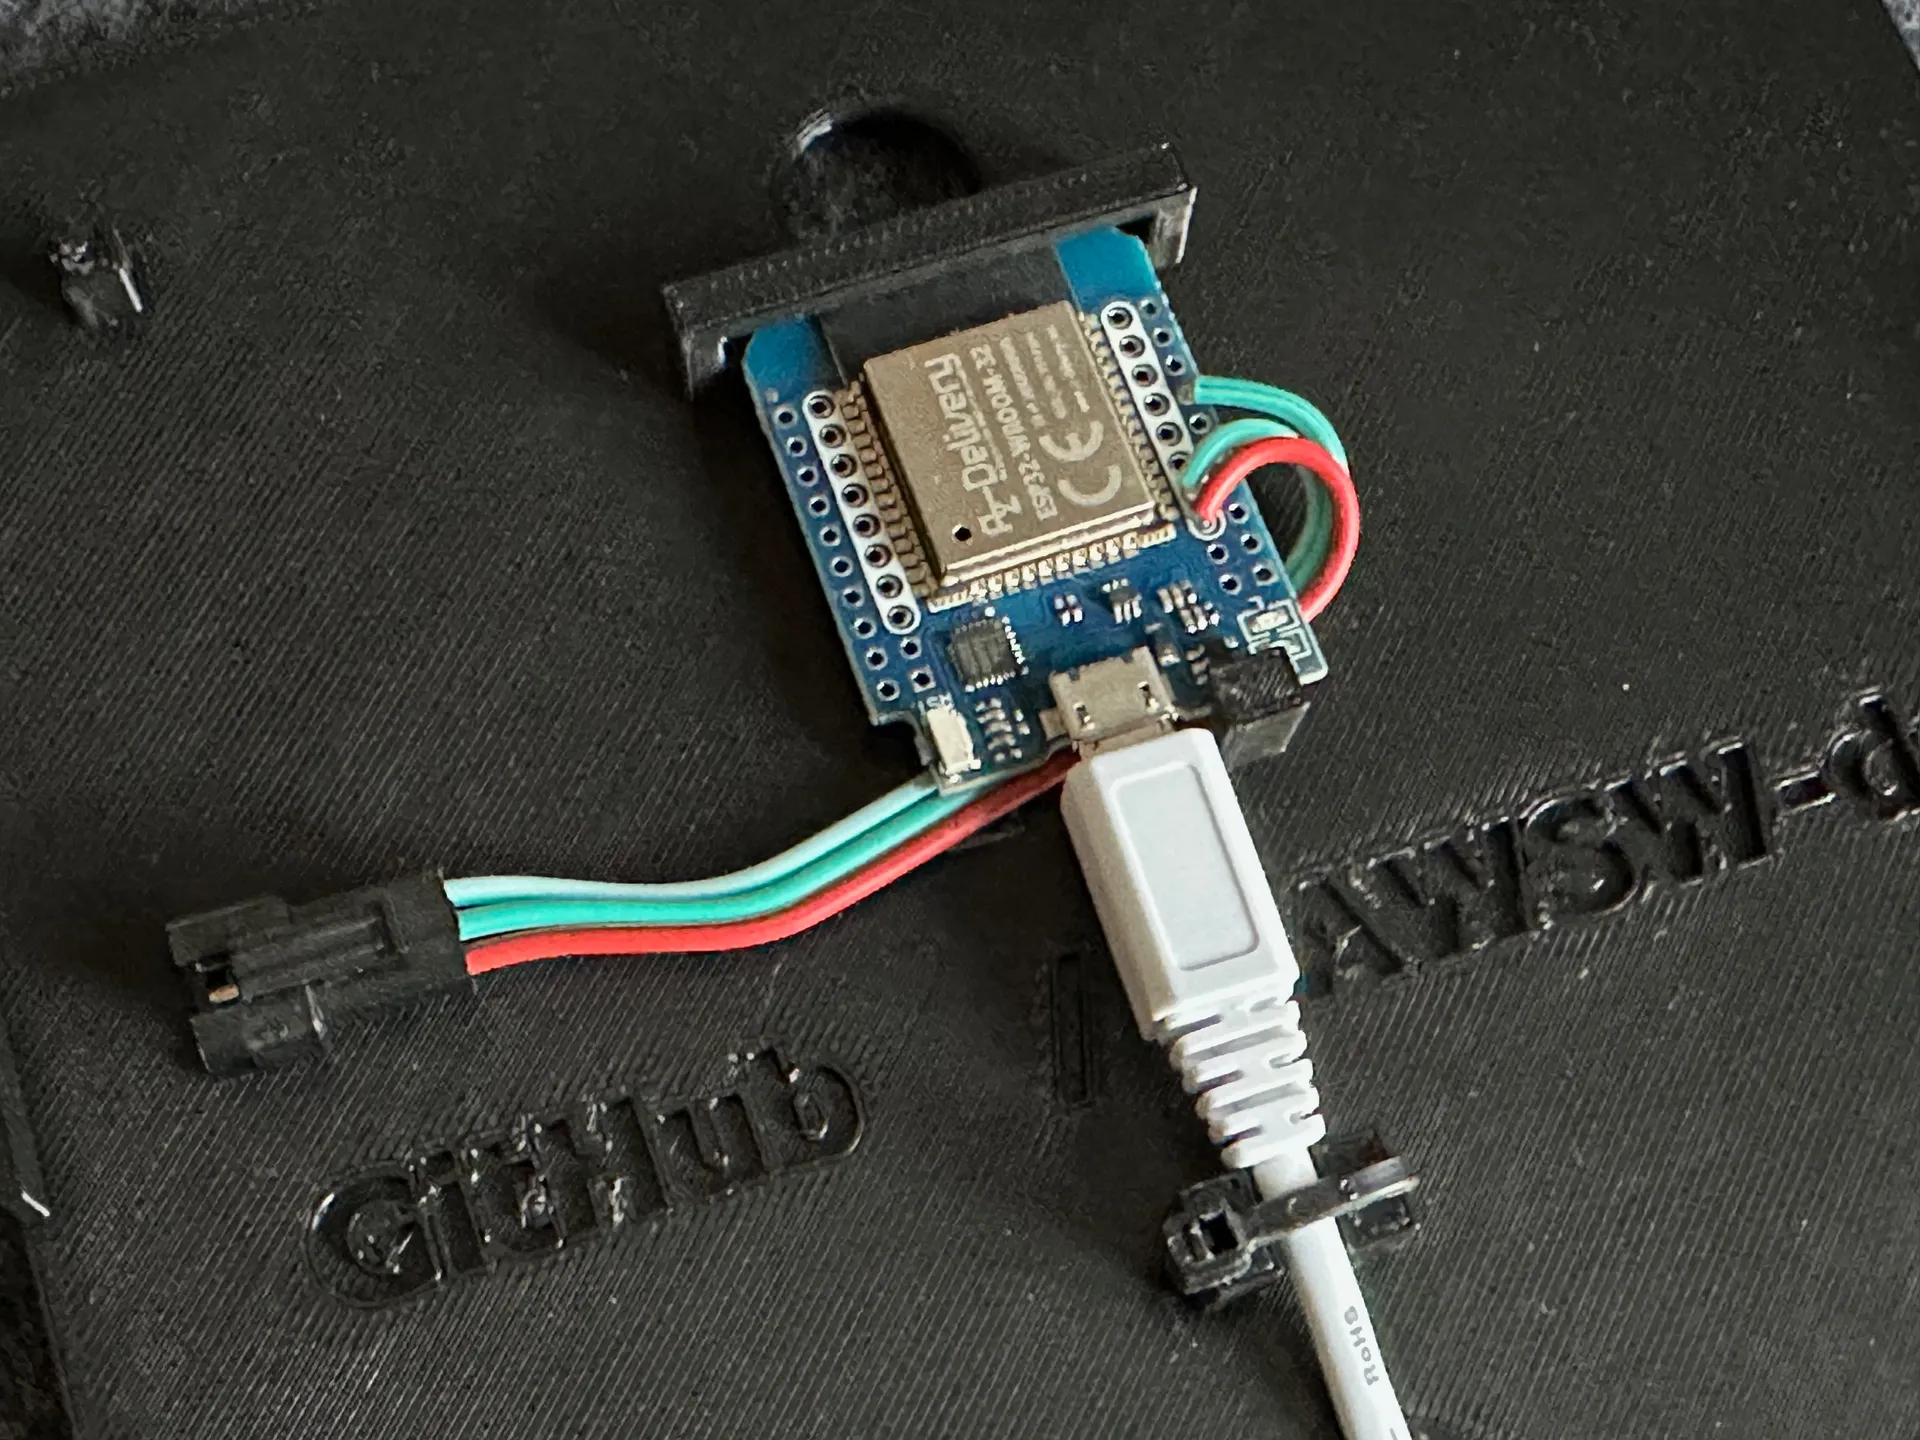
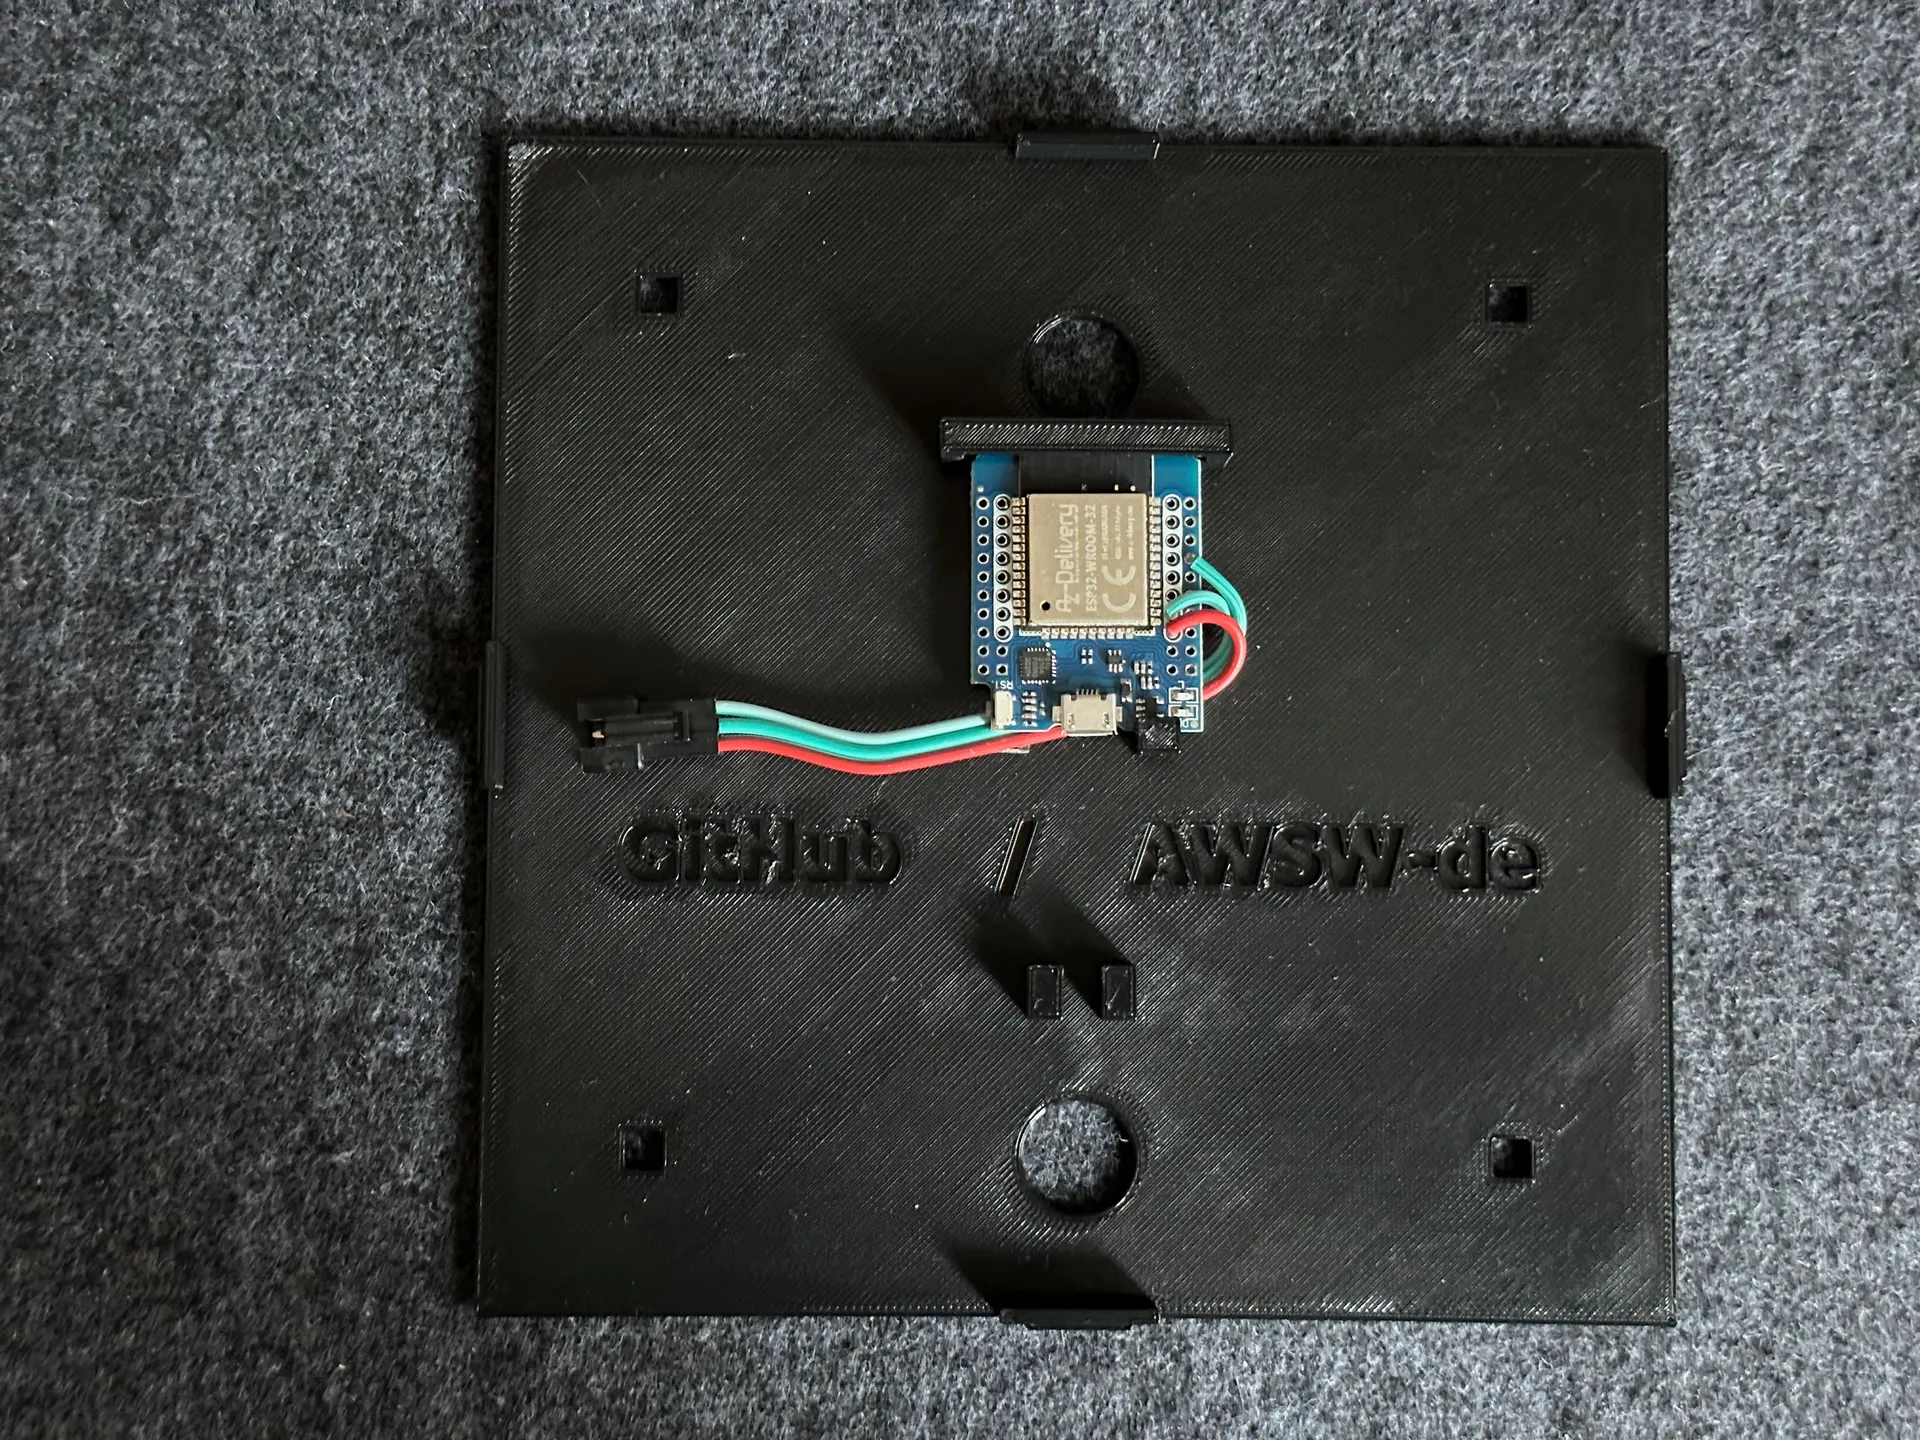
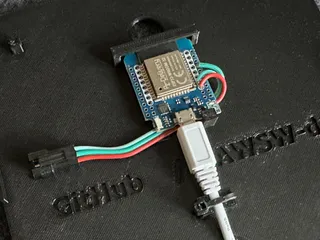
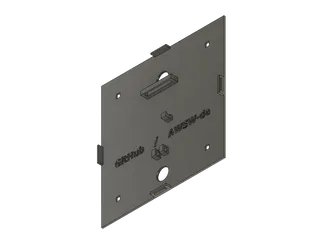
Wiring:
- Connecting the parts for this WordClock is as easy as possible.
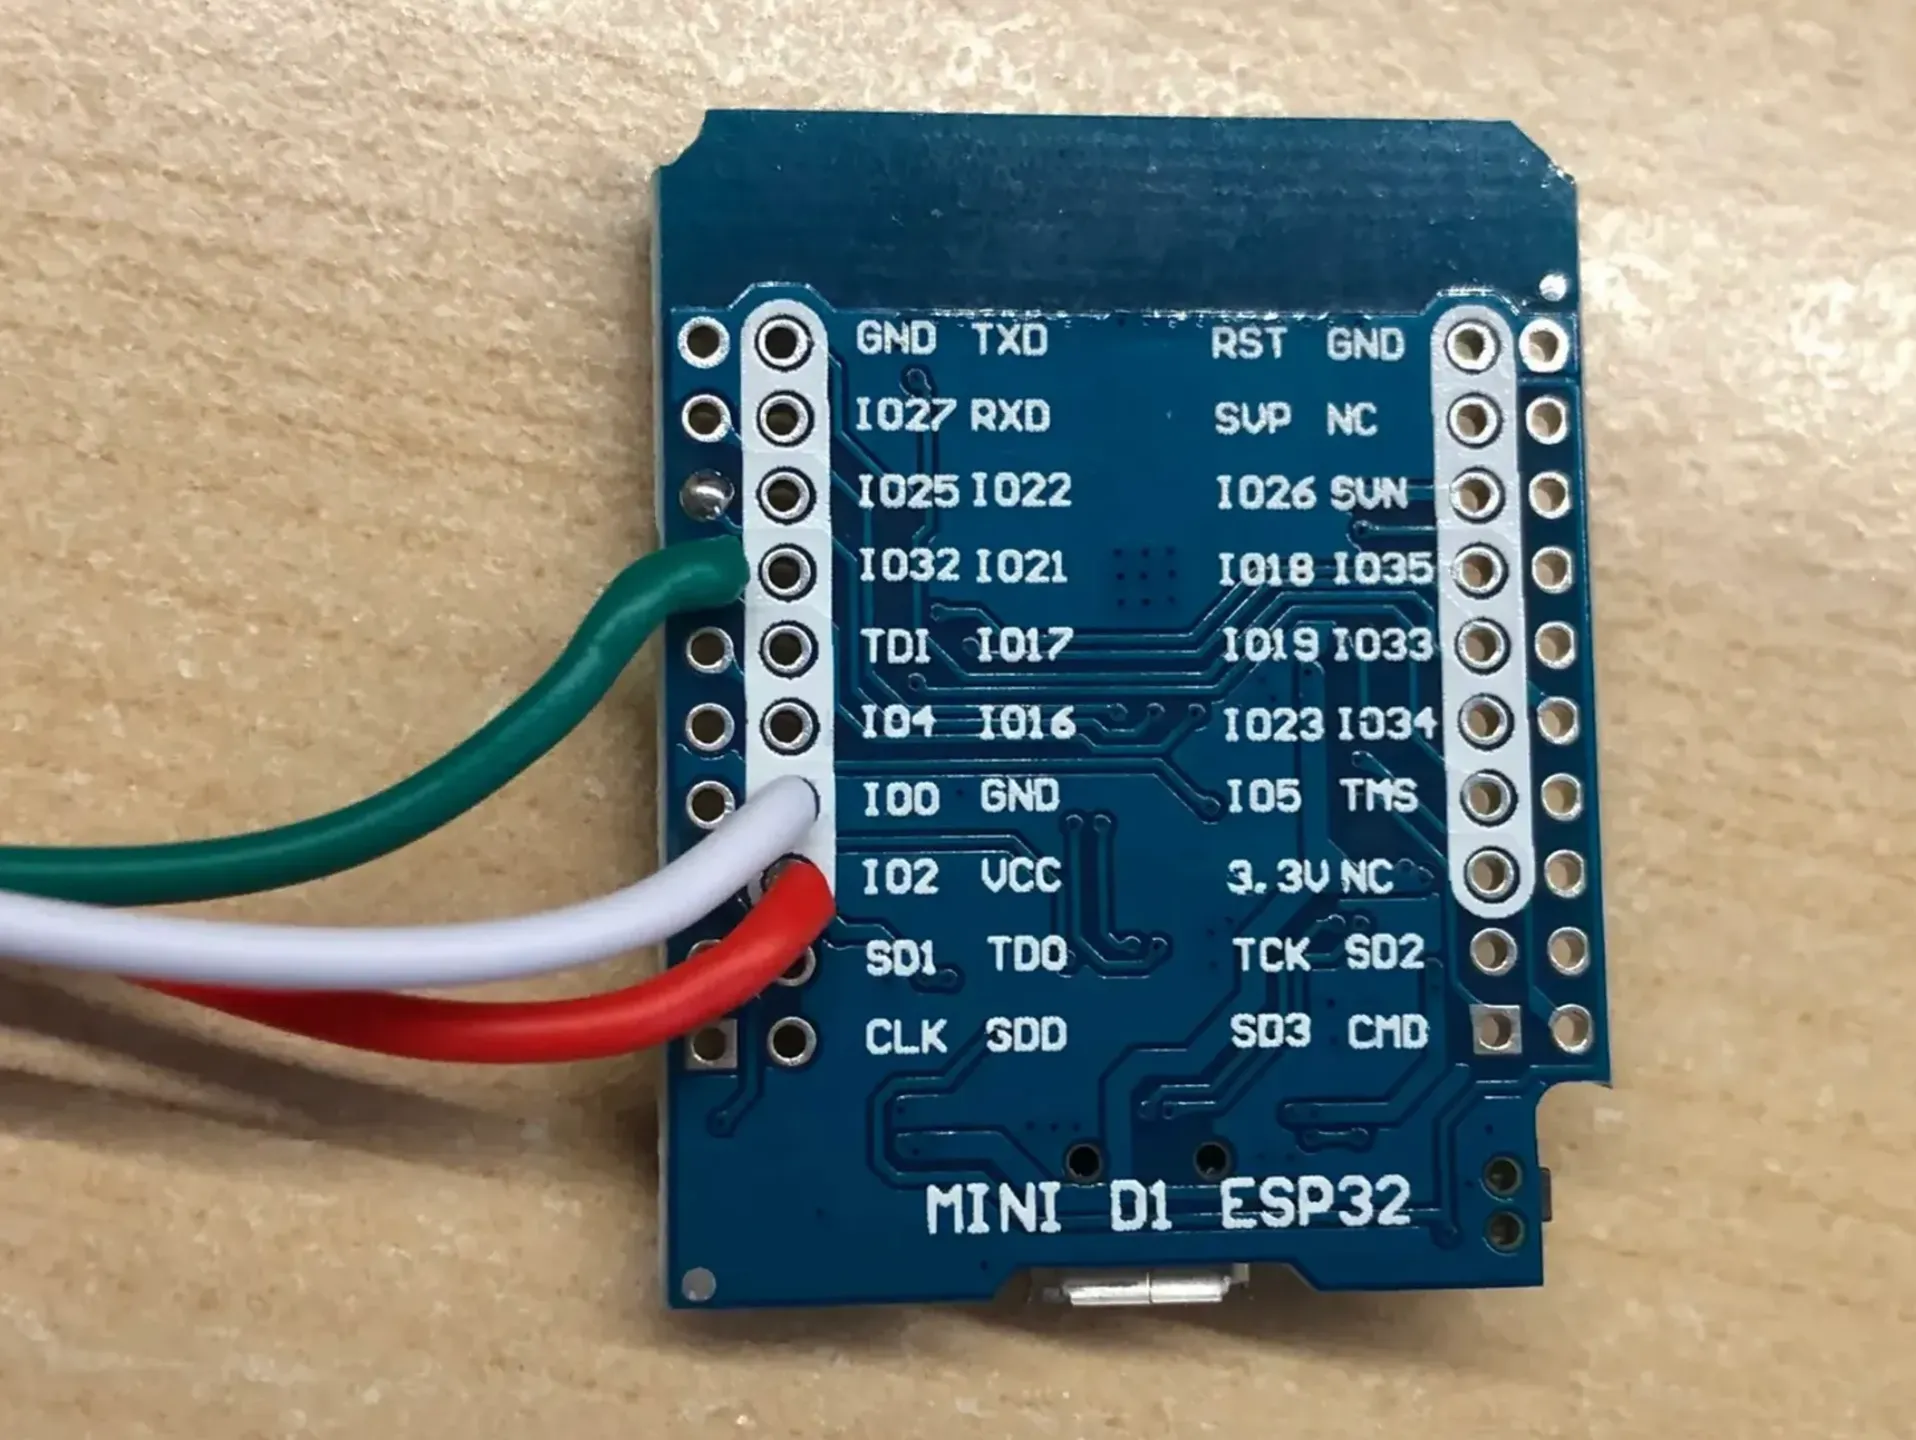
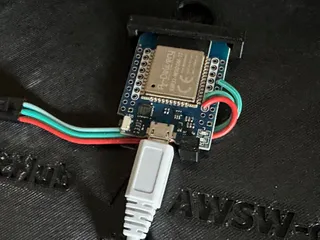
- You may need to solder 3 connections only to the ESP32.
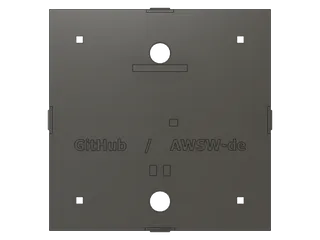
- The 2 small holes in the lid can be used for a small cable tie to secure the power cable
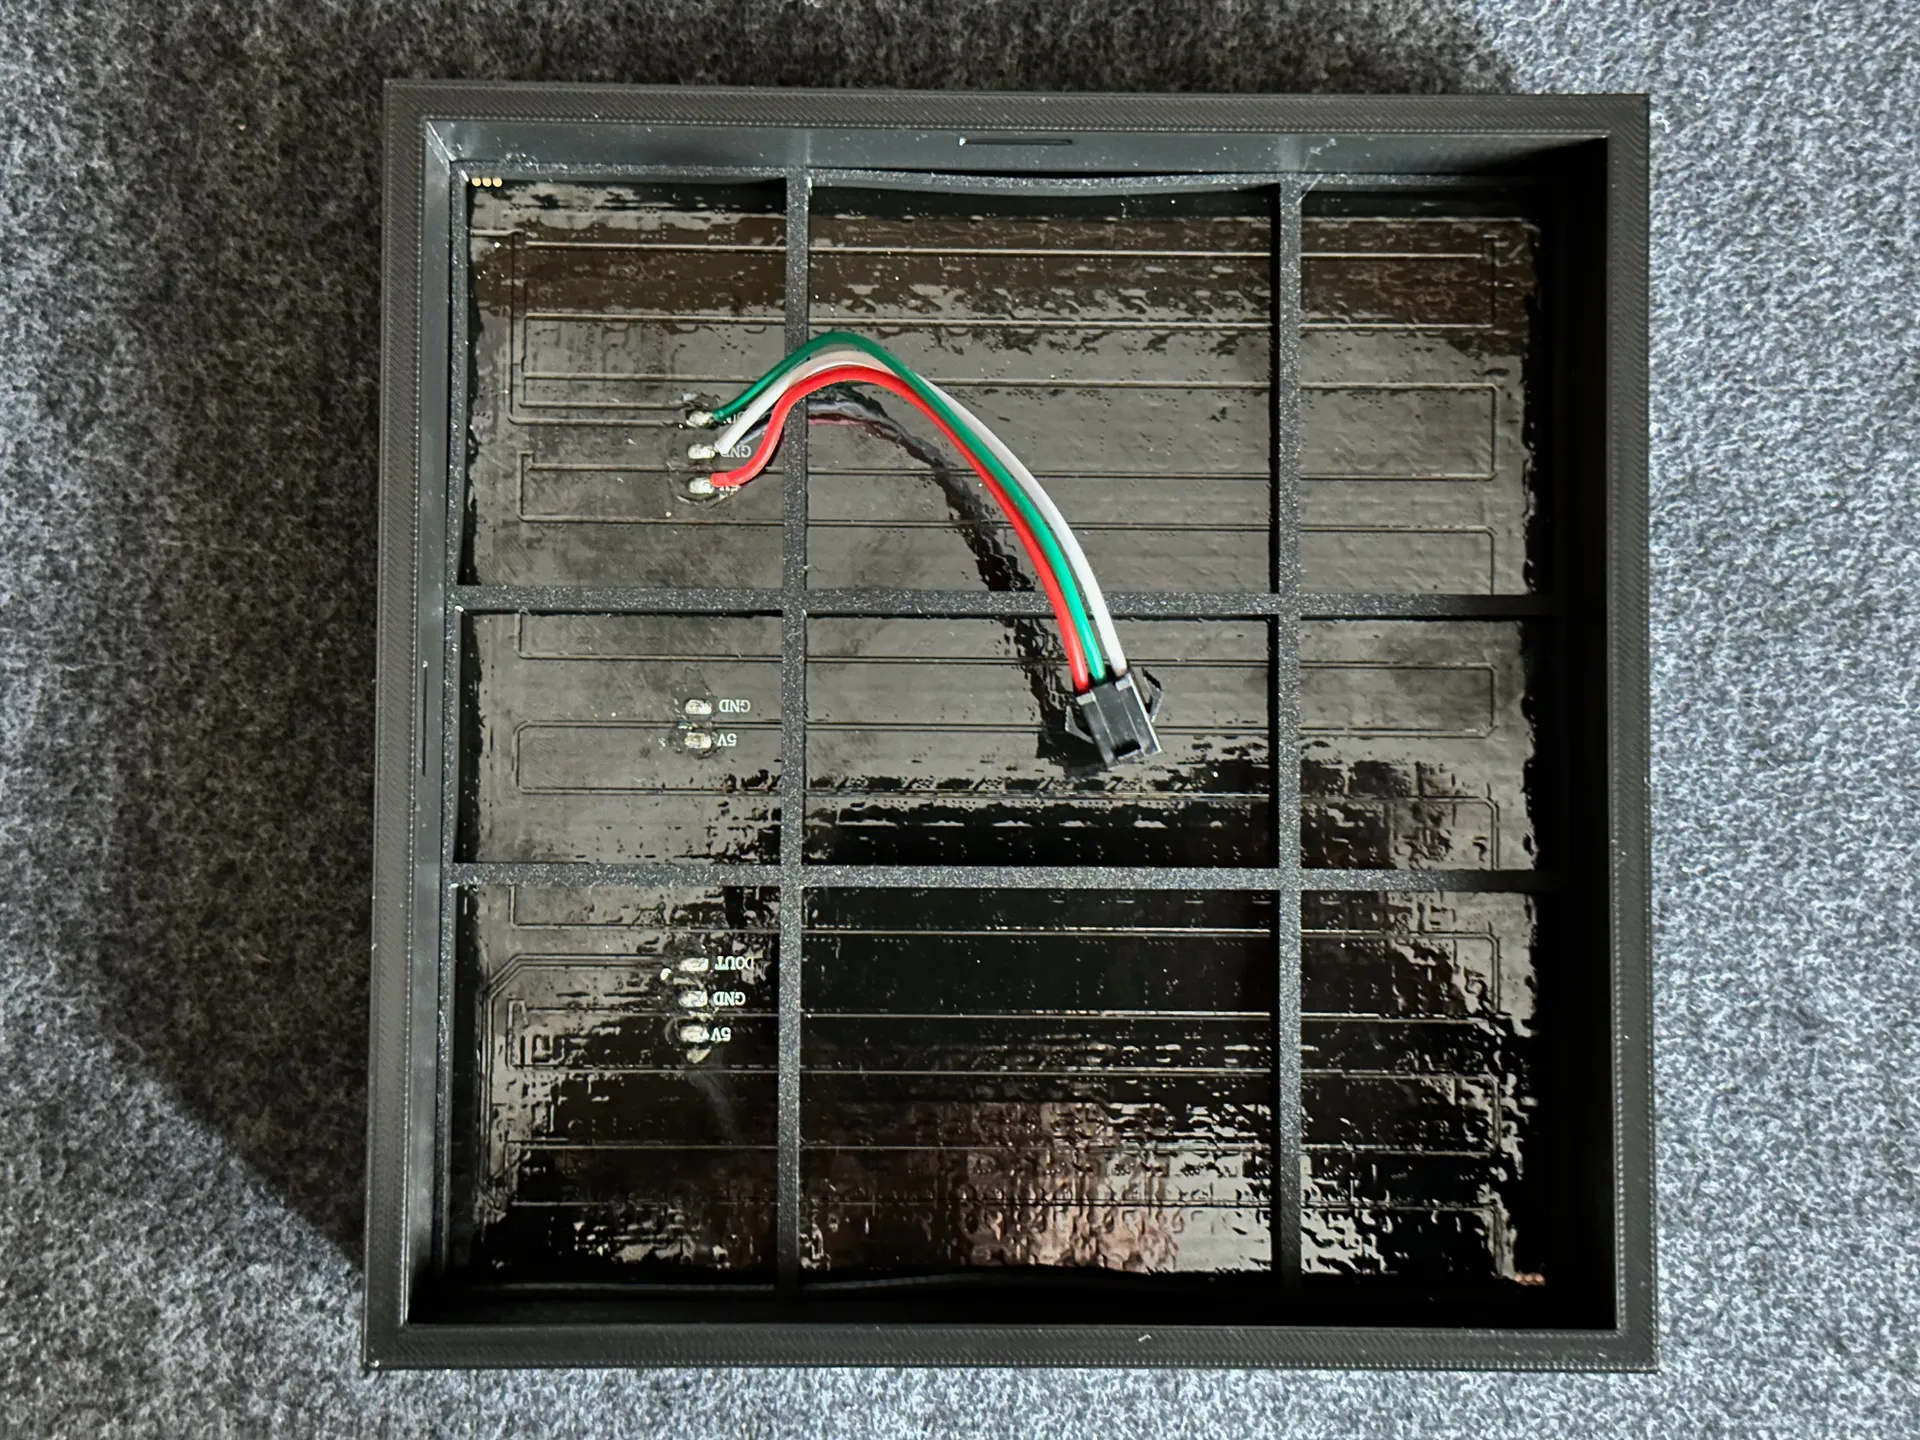
- Have a look into the pictures how to arrange the LED matrix in the front part to ensure that the direction of the LEDs is correct. Upload the code, test it and then close the case!
- Please check the table which pins are connected for the project as well as the pictures:
| ESP32: | LED matrix: | Wire color: |
| VCC | 5V | Red |
| GND | GND | White |
| IO32 | DIN | Green |
FAQ:
- Q: “Why is the software not provided as self to compile code to run in Arduino IDE?”
- A: Although I created scripts for setting up the Arduino IDE, automatically download and install needed libraries and spend a lot of time to give you a setup option as easy as possible, it seems to be still way to complicated for many users. Thats why you have the new script to download and flash the code for you now as precompiled .BIN files now. I had so many messages from users each week that did not (fully) follow the already quiete simple instructions and the only possible way for me is to make this as easy as possible and not provide the more complicated way anymore.
- A: By giving you the precompiled code you can be sure that this is tested and will work with the named components, which should be a big benefit. =)
- A: And YES, I know, that other ESP32 boards might not work with these precompiled code files, but I honestly have to say, that this is a ≤5€ or ≤5$ problem and I perform this here as a hobby and cannot support many different ESP32 variants anyway… I guess you will understand this, that I cannot and will not spent more time on this when it can be fixed with buying such a cheap ESP32 fitting to the project.
- Q: “In Offline Mode the from the device created WiFi access point requires a password, which I don’t know. What is this password and does the configuration page open automatically when connecting to this internal access point?”
- A: “The password is ‘Matrix-16x16’ and in case the configuration page doesn’t open up properly on your device (mostly heard of on Android devices) just connect to the WiFi and then open your browser on ‘http://192.168.4.1’. Once saved to your device the password should be stored and you not need to enter it again anymore. This password was added to make the device more secure for example if you want to use it on your work environment without access to a regular WiFi.”
- A: “The password is ‘Matrix-16x16’ and in case the configuration page doesn’t open up properly on your device (mostly heard of on Android devices) just connect to the WiFi and then open your browser on ‘http://192.168.4.1’. Once saved to your device the password should be stored and you not need to enter it again anymore. This password was added to make the device more secure for example if you want to use it on your work environment without access to a regular WiFi.”
Happy printing :)
Old notes:
- 30.03.2023: Added two 4K videos to the description that show the complete setup process of the Arduino installation, code upload to the ESP32 board and the WiFi setup on Microsoft Windows 11 and Apple macOS. Hope this will help all of you to setup the project even more easily. =)
- 01.04.2023: Version V1.9.0 online that adds language support for the Chinese (2023-V2 variant only) layout created and translated by Viperrr. New language select function without the need of a WordClock restart. Some corrections in the code done regarding the day/night function at 23 o'clock.
- 05.04.2023: Software V2.0.0 online with the following new functions and changes:
- Optional background color like in the 1st 16x16 matrix WordClock.
- Smart Home environment integration to turn the LED display OFF and ON with HTTP url commands to save some power when e.g. you are not at home.
- The new HTTP commands can be viewed via http://WordClock:2023. Hints to this are listed in the web portal as well.
- Direct ‘Reset’-button usage with 1-click function which helps saving time during programming and allows faster restarts if needed.
- When random time text color is selected the background color gets inactive to avoid not readable time texts when similar colors would be in use.
- Not currently useable options in the web interface get hidden to avoid confusion.
- Code optimisation and smaller changes in the web gui to get a better usage.
- 10.04.2023: Switched to new variants of the “COMMON” model and print files:
- The new files reduce the print time about 3 hours, which is quite a lot.
- The “lid” part is kept stronger in the frame now with 4 bigger noses that click deeper into the “frame” part.
- The lid now also contains a holder for the ESP32 D1 mini as shown in the pictures.
- The high walls of the “lid” part were removed to give much more space in the inside for the electronic and wiring and to reduce the print time.
- Because the walls on the “lid” part were removed you will now find a new part called “matrix-holder” which will secure the LED matrix strong in place behind the "matrix" part.
- Notes:
- It would now be possible to reduce the height of the “frame" part to about 10-15mm to save even more print time and make the device much thinner, but I decided against this, because it would reduce the stability when you use it on your desk instead of the wall usage.
- These new files will not fit to the other WordClock variants or to the previous “frame” part of this variant. The “front” and “matrix” part are still the same in this variant.
- 26.04.2023: Added Swabian German layout and code V2.2.0 to support it. =)
- 12.05.2023: The new software version V2.5.0 brings some bigger changes within the code so under the hood mostly to make the setup and usage better:
- The previously used "WiFi Manager" library was fully removed, because it caused the most problems i heared from users writing me about issues to setup the WordClock. It also did not allow to respond when the WiFi connection was not successfully performed with the set values, which was working in the past but not with the newer versions of this library. This removal should help a lot to setup the device and removes one of the other most problems during setup that most libraries called "WiFi Manager" listed in the Arduino IDE simply do not work at all... You can delete the "WiFi Manager" library from your computer in case you downloaded it before. It will not be used anymore from me in future…
- The “WiFi Manager” was fully replaced with my own new solution, which allows more control and display outputs during the setup shown on the LED display as well as in the Arduino IDE serial monitor. I will try to improve it in future…
- IMPORTANT NOTE: The update will require to setup your WiFi credentials again once with the new solution. So if you update an existing WordClock you will see the letters "SET WIFI" after each other showing up and after that a static text in cyan color showing "WIFI" (or "WLAN" in the german languages) letting you know that you will need to connect the device 1x to your WiFi network again.
- You can choose your language layout during the WiFi setup now too. =)
- The new WiFi connect solution shows a blue or red blinking "WIFI" (or "WLAN" in the german languages) text on the WordClock for each try to connect to the set WiFi, so not just a static blue text like with the old library to give you more response information:
- WordClock tries to connect to the set WiFi in default 30 times. In my tests it usually connects within the first 3-5 tries even with really bad WiFi strength conditions.
- The amount of WiFi connection tries can be set in the settings to connect to the set network in case you need a higher value to connect.
- The display will first show a blue color blinking “WIFI” text and if it failes to connect the last 10x it will show the text in red color letting you know that the set WiFi can not be reached.
- After 30 (default value) not successful tries it will reset the set WiFi credentials automatically and restart the WordClock showing the initial new WiFi setup letters "SET WIFI" after each other showing up and after that a static text in cyan color showing "WIFI" (or "WLAN" in the german languages) letting you know that you will need to connect the device 1x to your WiFi network again. This will also help if you need to replace your WiFi router in case it brakes…
- Additionally these changes were done:
- Enhanced display outputs during startup showing the startup text "WordClock" which you can turn off if you do not want to show it during startups in the web portal.
- New text output option to show single letters after each other which can be used for future functions as well.
- In case the set time server cannot be reached to get the current time the WordClock will not restart again and again anymore. It will try to reach it continuously with a blinking red text for "TIME" and will light up "TIME" in green color once it could connect to the time server. This should reduce the amount of restarts when connecting to the set time server.
- New web pages to setup WiFi and perform OverTheAir (OTA) updates are now included to give you more informations about the process.
- During the activation of the "update mode" for OTA updates the display will show "UPDATE" as single letters and an "U" with all 4 corners light up to let you know that the update mode was initiated within the web portal and you can upload the .BIN file.
- 20.05.2023: The new software version V2.6.0 supports the new Bavarian layout. =)
- 24.12.2023: Added a new video how to setup the WiFi connection.
- 25.12.2023: The new software version V2.6.5 is online. Added time zone examples in the "settings.h" file and added a test function "ShowTimeEachSecond" to output the current time each second in the serial monitor if needed. Reduced brightness limit to 50. Smaller changes in the code…
- 04.01.2024: The new software version V2.7.0 is online. New WordClock 16x16 LED matrix (2023-V2) layout for Luxemburgish added and thanks to user jandegraaf not only this new layout is available. He also made some good improvements to the code to the reduce the "2nd row"-lines a lot. Thanks you Jan! Some more code cleanup and bugfixing was done too.
- 06.01.2024: The new software version V3.0.0 is online with new features: =)
- Operation Mode: Use WordClock in Online Mode with WiFI and all the known network functions or use Offline Mode to run it in environments without WiFi. All network only available functions will be disabled and you will need to tab 1 button on your tablet, smartphone or computer after startup to send the current time of the device to WordClock (because it is offline). Time will be kept until WordClock performs a reboot. You can switch between both modes without data loss. So please feel free to try it out. Details see in the video below.
- NOTE: You will need to add 1 more library to Arduino called “ESP32Time” by “fbiego”. Check the top of the “Code.ino” to download the correct one.
- Selection lists for time servers and time zones available to be changed in the web configuration portal now. This might serve most needs to these settings for the most of you. For those with sepecial settings, there is still the default setting in the "settings.h" file to add other values.
- WordClock can find your router gateway IP-address now and this IP-address can be used as time server address now too. Your router should be the closest time server to you.
- Several improvements to startup, bug fixes and general usage of the device and lots of new and updated values now in the web configuration portal.
- More details and a short demo of some of the changes and new functions are shown here:
- 18.01.2024: The 2nd update in 2024 is available: V3.2.0. Please see the video for details. This video is for the smart variant WordClock 16x16, but you will get the idea about the changes here in this model too. The code is available for download in my GitHub repository. Enjoy =)
- 20.01.2024: Update V3.4.0 available. This version brings 2 new functions:
- Big thanks to user jandegraaf who integrated a nice selection list during setup where you can select the found WiFi SSIDs to reduce typing in the setup screen. THX! =)
- The 2nd function is the now available language layout for “East Germany” which was requested from some users.
- The code is available for download in my GitHub repository.
- 05.05.2024: Release of software version V3.7.0 adding new functions:
- Active WiFi reconnect in case the WiFi connection got lost during runtime.
- 06.10.2024: The automatic script to setup the Arduino IDE and WordClock code made a huge step to make the installation even more easy. All you need to do is choose the WordClock variant 16x8 or 16x16 and the board plus port and hit upload. Check this link and this video for details:
- Microsoft Windows 10/11:
- Apple macOS:
WordClock WiFi setup:
Tags
Model origin
The author marked this model as their own original creation.


