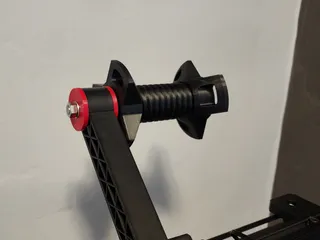
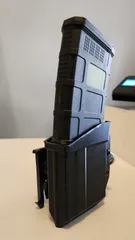
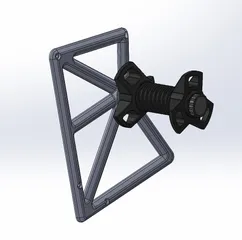
Double Stack Race Mag Pouch Canik Glock M&P CZ Sig Taurus USP9 Colt 2011
Description
PDFDouble Stack Mag Pouch for left hand loading. This is designed to work with ELS and now also Tek-Lok mounting systems.
If you have a gun that I don't have a pouch for just measure the magazine with your calipers (LxW in 3 different spots) and message me the dimensions and model pew it's for. I'll post the STL for it as soon as I can.
Features
Cant adjustable from 0 to 70°
You do not have to take this apart to adjust the cant. Loosen the arc screw and pivot screw (pivot screw is behind the mount hole shown in silver, access it through the mount hole), set it where you want and tighten it back up.
Retention is adjusted with an M6 screw that is buried in the MRD.
If you need right hand loading just mirror the angle plate and mag pouch in your slicer.
Print pouch upside down on the angle with supports
I print with 0.6 nozzle set at 0.24 layer height, wall count at 6, 5 tops and bottoms, infill 50% triangle for all parts.
I print all mine in PolyMaker PETG, (some of the prototypes in the pics were printed in PLA, the MRD and Angle Plate are PETG and work extremely well. I have not used a printed ELS yet, I only modeled for assembly design.
BOM - Single Mag Pouch
(1 each) printed parts - Mag pouch, MRD, Angle Plate ELS or Tek-Lok
(5) Low profile M5 x 12 cap screws.
I used these for the ELS mount
Flanged buttonheads will be too big for the counterbore on the Tek-Lok, you can use regular buttonheads but if you want a true flush fit i found these
(5) M5 x 5.8 x 7.1 Heat set insert with lead-in
(2) M5 x 20 Flanged Button Head Cap Screws
(2) M5 Nuts. Mine came in an assortment set, im sure you can get them on amazon as well. Truss nuts or Chicago nuts would look better but with where the nuts are the dont bother me to be regular hex nuts.
(1) M6 x 16 Thumbscrew (or regular screw)
DIN 653 Steel Flat Knurled Thumb Screws, Blackened Finish | JW Winco Standard Parts
About the heat set inserts. I only use the heat sets with the lead-in and for these you need to insert from the back of the part. You cannot access the back of the holes in the mag pouch with a soldering iron so I made the holes a “little more than snug” interference fit and put a step at the end of the hole. So you will need to use some needle nose pliers and put the lead-in end of the heat set in to the hole from INSIDE the mag pouch, then put a washer and M5 screw on the outside and start cranking it down until the end of the heat set is clear of everything on the inside. It doesnt take long and surprisingly they hold REALLY well. The mag pouch in the picture was a prototype, thats why there is a 3rd hole
BOM - Double Mag Pouch for ELS
(2) Mag Pouch, (2) MRD, (1) ETCropDuster Plate
(7) M5 x 12 Flanged Button Head Cap Screws
(7) M5 x 7 x 8 or M5 x 5.8 x 7.1 Heat set insert with lead-in
(5) M5 x 20 Flanged Button Head Cap Screws
(5) M5 Nuts. Mine came in an assortment set, im sure you can get them on amazon as well. Truss nuts or Chicago nuts would look better but with where the nuts are they dont bother me to be regular hex nuts.
(2) M6 x 16 Thumbscrew (or regular screw) DIN 653 Steel Flat Knurled Thumb Screws, Blackened Finish | JW Winco Standard Parts
(1) M5 over size flat washer (could be printed)
BOM - Double Mag Pouch for Tek-Lok
(2) Mag Pouch, (2) MRD, (1) Tek-Lok Adapter Plate - Remixed by @Micha_196828
(7) M5 x 12 Flanged Button Head Cap Screws
(7) M5 x 7 x 8 or M5 x 5.8 x 7.1 Heat set insert with lead-in
(5) M5 x 20 Flanged Button Head Cap Screws
(5) M5 Nuts. Mine came in an assortment set, im sure you can get them on amazon as well. Truss nuts or Chicago nuts would look better but with where the nuts are they dont bother me to be regular hex nuts.
(2) M6 x 16 Thumbscrew (or regular screw) DIN 653 Steel Flat Knurled Thumb Screws, Blackened Finish | JW Winco Standard Parts
Update 11252024
- Added Glock 20 21 Mag Pouch
Update 10182024
- Added Sig mag pouch with Magnet
Update 06192024
- Added 2011 style mag pouch
- Added Tek-Lok Angle Adjust Plate
Update 02252024
- Added Colt SMG Mag Pouch
Update 05042023
- Added Sig P220 P365 Mag Pouch
- Added Taurus G3 Mag Pouch
- Added Dimensions in the file notes. If your piece isnt listed you can measure and find one that would work using this dimension tolerance. (L +/- 0.75mm) and (W +/- 0.25mm). If something fits in that dimension for your mag then it will work very well for you.
Update 04242023
- Added Glock Mag with Magnet
- Added Canik Mag with Magnet
- Requires magnet with bigger than 5mm hole, M5 x 12 flat head screw and the same M5 insert used everywhere else. Check magnet dimensions before you order as many i have seen many are under 5mm or do not have a dimension on it. I found this one on Amazon. Neosmuk Magnets, 130lb Super Strong Round Magnet with Hole in The Center for Mounting, Heavy Duty Neodymium Cup Magnet with Screw for Wall, Rare Earth Magnets Round Base Disc Magnet: Amazon.com: Industrial & Scientific and these screws MonsterBolts - M5 x 12mm Flat Head Socket Cap Screws, DIN 7991, Stainless Steel, 50 Pack: Amazon.com: Industrial & Scientific
Update 04052023
- Added Link for Low Profile Thumb Screws
Update 01122023
- Added ETCropDuster Plate for running double mag pouches. 35° of cant adjustment at the ELS and 35° more at the plate for a total of 70
- Added Glock G17 mag pouch
- Added Smith Wesson M&P 9mm mag pouch
Update 01132023
- Added Chamfer to inside of pouch around the heat set insert holes
- Made heat set insert holes slightly larger
- Added Canik Mag Pouch V2
Update 01152023
- Got some feedback about the ELS not fitting (too tight). Updated the model.
- Added CZ Mag Pouch
Tags
Model origin
The author marked this model as their own original creation.


