Drying station for flexible flasks, camelbacks or water bottles

Description
PDFLooking there I found this cool design https://www.printables.com/model/352555-water-bladder-dryer from Radek so I adapted my model from it
The model I need is smaller and will be used to dry ½ liter flexible flasks or water bottles and will have following features:
- Fan size 60mmx60mm height 25mm / 12v (The one I have on stock)
- Powered with a simple 5v phone charger (Can be powered with 9v battery as well) even if it'll turn slowly
- Power On/Off switch
- Interchangeable duct for different flasks, camelback or bottles
Design
I designed my model using Fusion 360
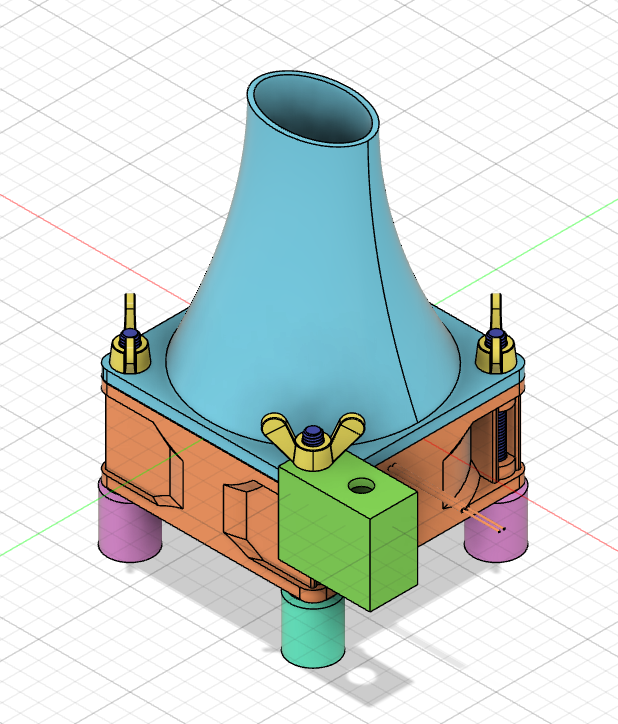
I started from the fan (Downloaded from manufacturer parts) and build the air duct. Then I designed the feet with hexagonal head screw inserts.
I add a support for the micro switch. Note that the foot under the support has a deeper insert for the hexagonal head screw (2mm / red marks) so no need to use a longer screw

It's possible to design a different air duct to change it. Just unscrew the 4 wing nuts to remove air duct and install a new one
Printing instructions
Nothing special for printing operation. All .gcode generated using PrusaSlicer and standard parameters.
- Nozzle 0.6mm
- Layer height 0.4mm DRAFT for air duct and 0.2mm DETAIL for feet and switch support
- 2 perimeters
- Infill 15% Gyroïd
- No support needed
All parts printed with SAKATA 3D PLA850 Black
Needed material
- 1 cooling fan 60mmx60mm 25mm height
- 4 screws M4x40
- 4 nuts M4 or 4 wing nuts M4
- 1 micro switch
- 5v phone charger and USB cable
Note that wing nuts can be replaced by 3D printed knobs like this model → https://www.printables.com/model/124780-mini-knobs-with-inserted-nuts
Assy
Assembly is fairly easy. Install the 4 M4x40 screws inside feet. Then place a screw in each hole of the fan. Note that feet ref "Pied 1" must be place where switch support is as it is longer. Then place the air duct on top, the switch support and screw the 4 wing nuts
Connect the wires to the USB cable and the micro switch. Install switch on its support and you're done
You can now dry properly your flexible flasks
On top of .stl and .3mf files, I uploaded Fusion 360 .f3d file so you can modify the design and adapt it to your needs
As usual, feedback and comments (and for sure "likes") will be always welcome. Feel free to post also nice pictures of your makes
Enjoy
If you like this model, take a look also at my other designs
Tags
Model origin
The author remixed this model.


