Description
PDF→ cabinets for drying and storing screenprinting frames out of the sunlight… the cab is made of ¼ BB plywood with a gasketed door to keep out light. The top and bottom have a baffle and foam filtration material to allow ventilation but block light. A computer fan at the top for ventilation runs on a 12v power wart when drying emulsion but otherwise is not plugged in.
These runners are taped together and drilled then pop-riveted to the sides before assembly.
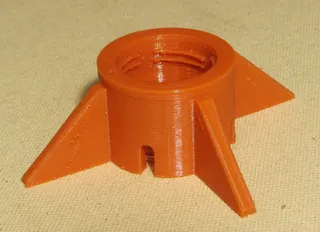
This was my very first filament print and I wrecked several while figuring out adhesion, but the rest have printed well. I ran the first set using the default prussaslicer PLA values for my Ender3, fill 15%, and the 4-up took 16 hours. Too long!, but they are rigid and strong - ruggeder than I would have thought.
I changed the default bottom to 4 and the top to 5 layers setting back the fill to 10% so I could print 4 up in under 12 hours (I need 24 of the 200mm and 24 of the 150mm for my frames, and wanted to print at least 8/day to get 'em done - I could have fit 5 (and maybe 6) on the build plate but that would have taken more than the half-day that keeps my throughput going; besides I have an adhesion issue on one corner of the the plate, maybe poor heating, so I am keeping away from there.
I got even better throughput with a .5mm nozzle and with no apparent struggle in nozzle temp… dropped the back (bottom) to 3 layers and upped the layer height to .25, and the cycle time comes in around 8H/4pc. Bigger nozzles print faster and give stronger layer adhesion with some reduction in surface detail (not important here), so for mechanical parts it's a win/win… I have .6mm nozzles on order (maybe I should get some .8s).
Tags
Model origin
The author marked this model as their own original creation.


