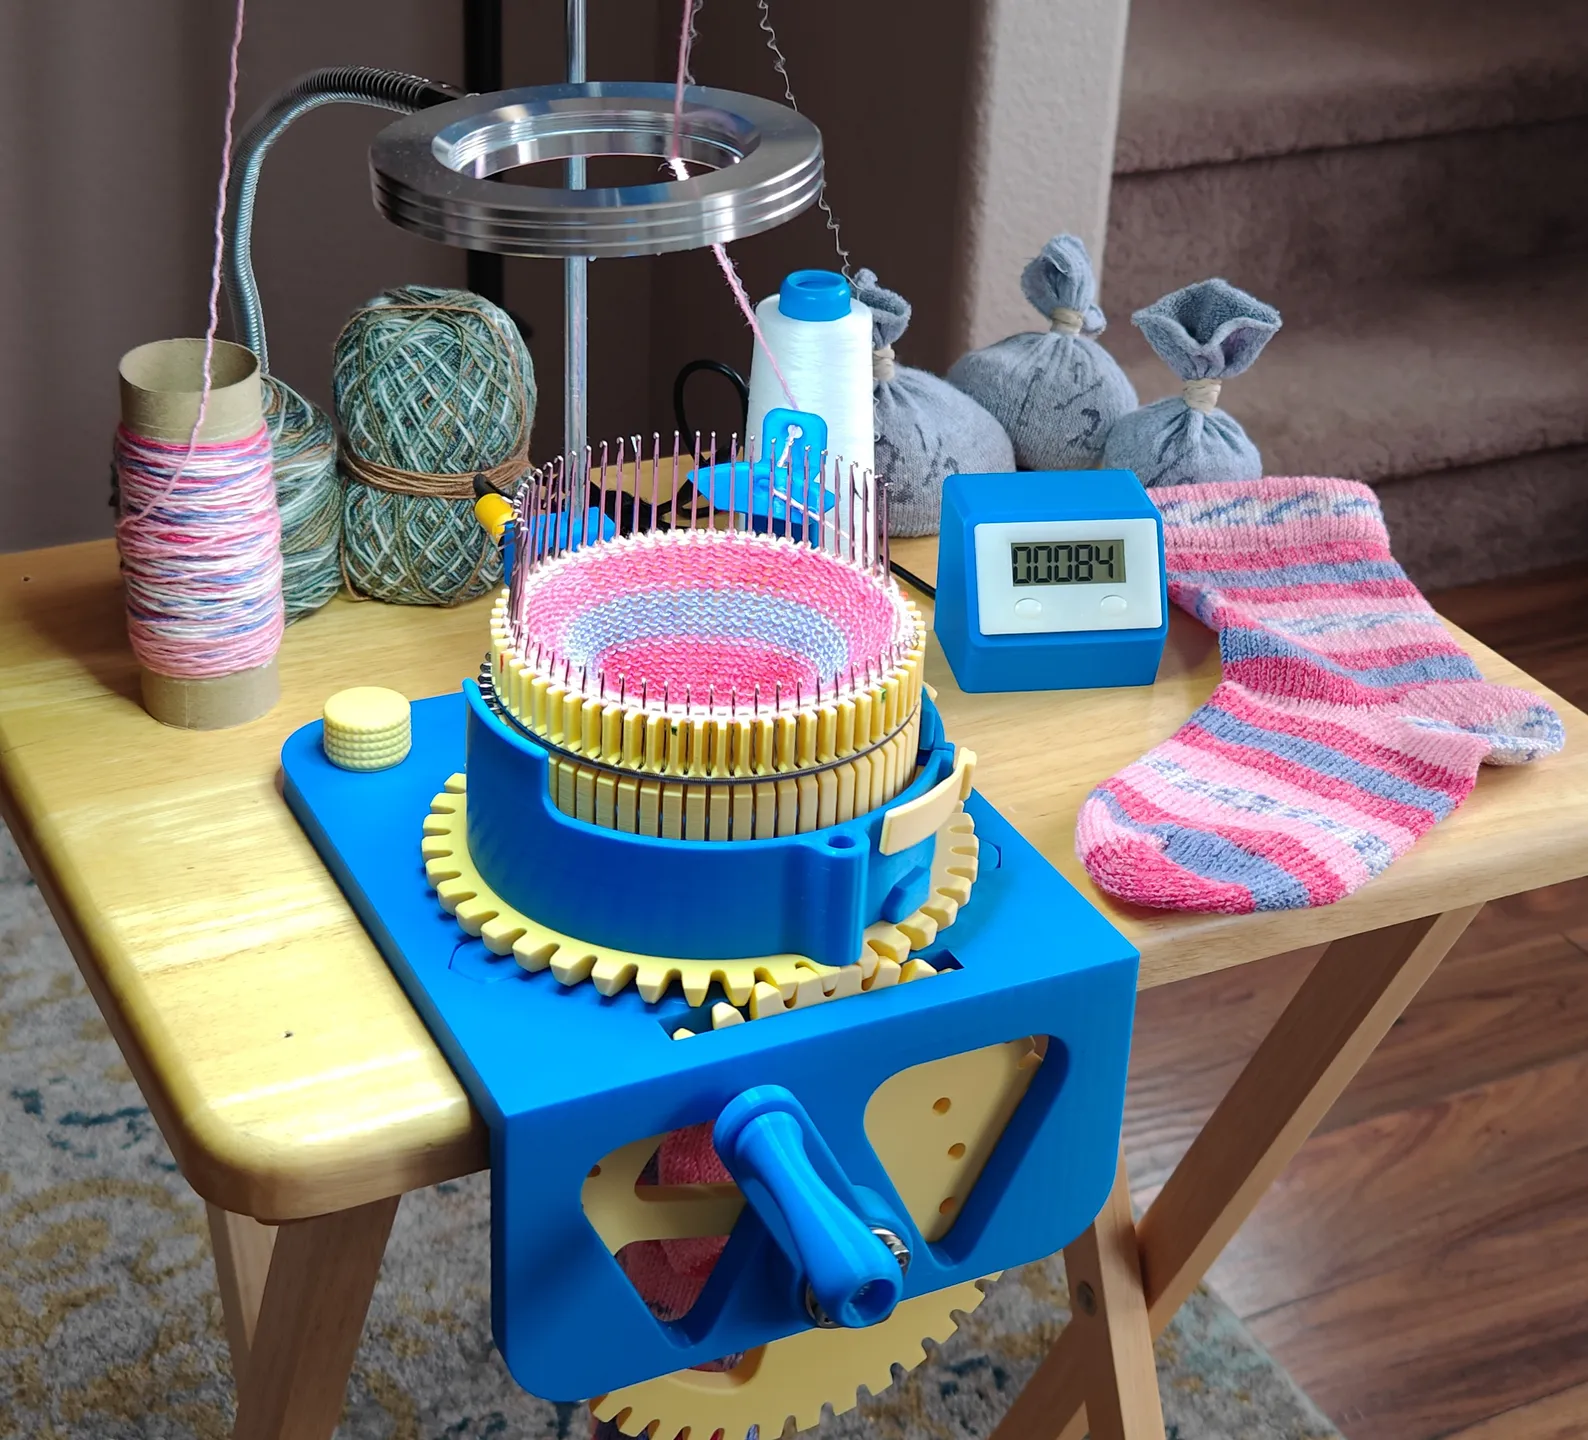
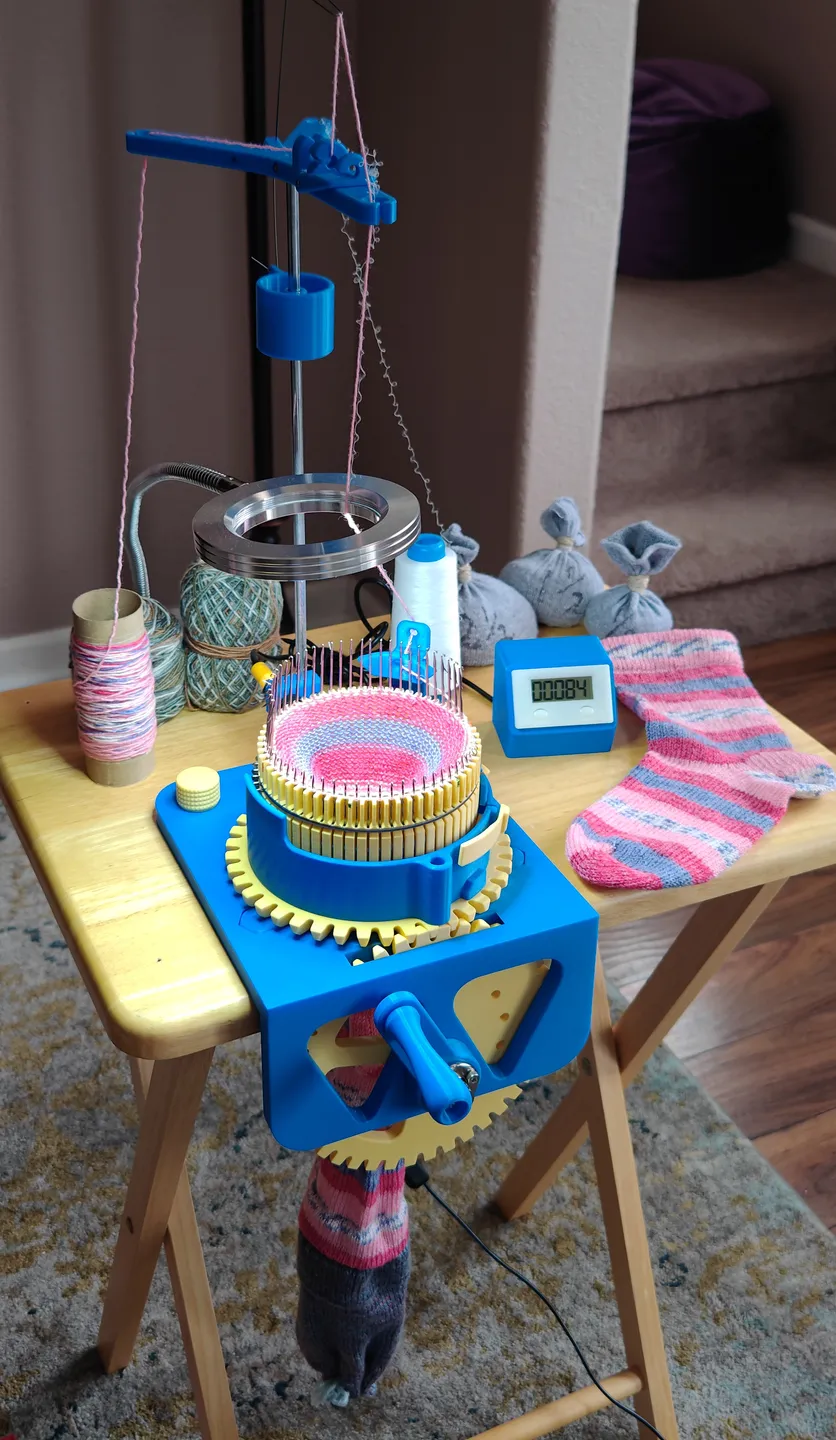
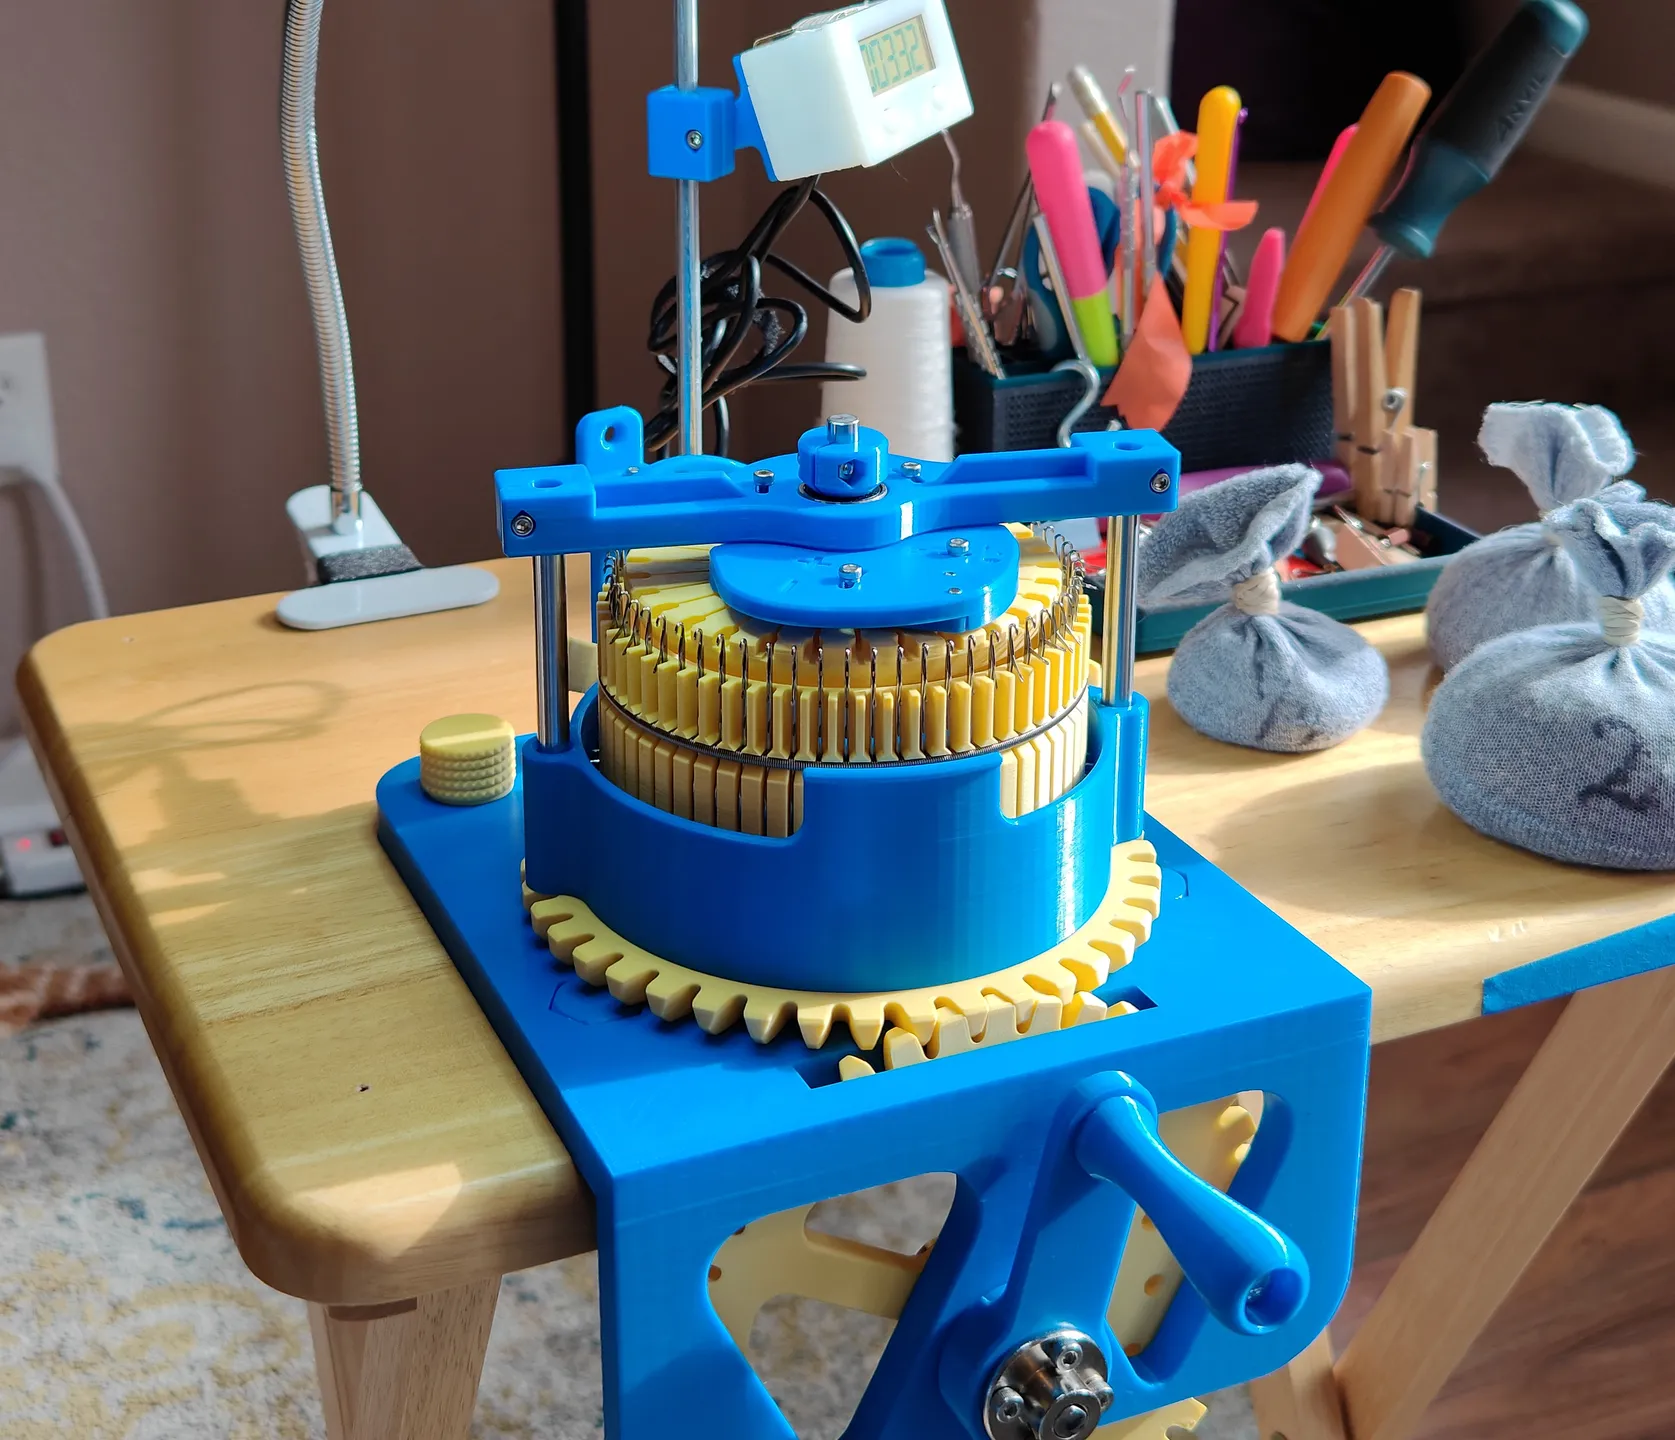
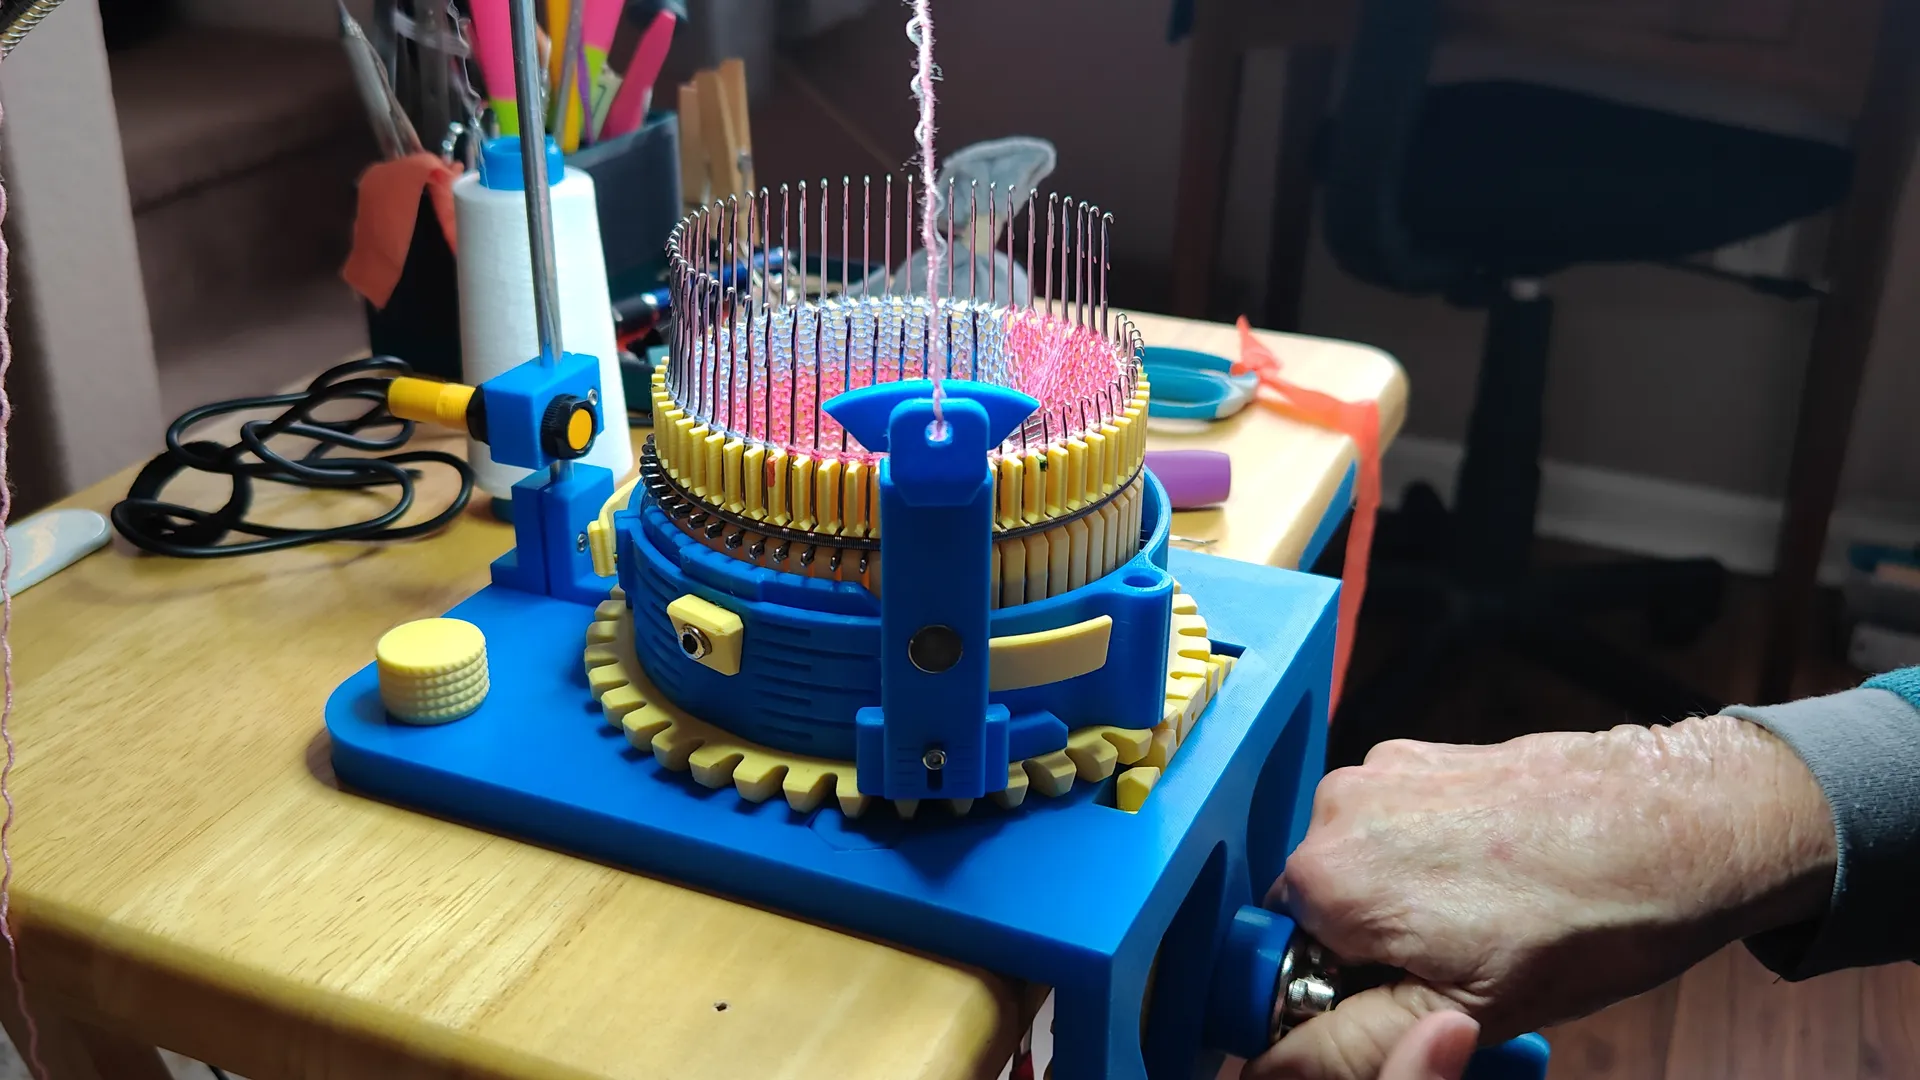
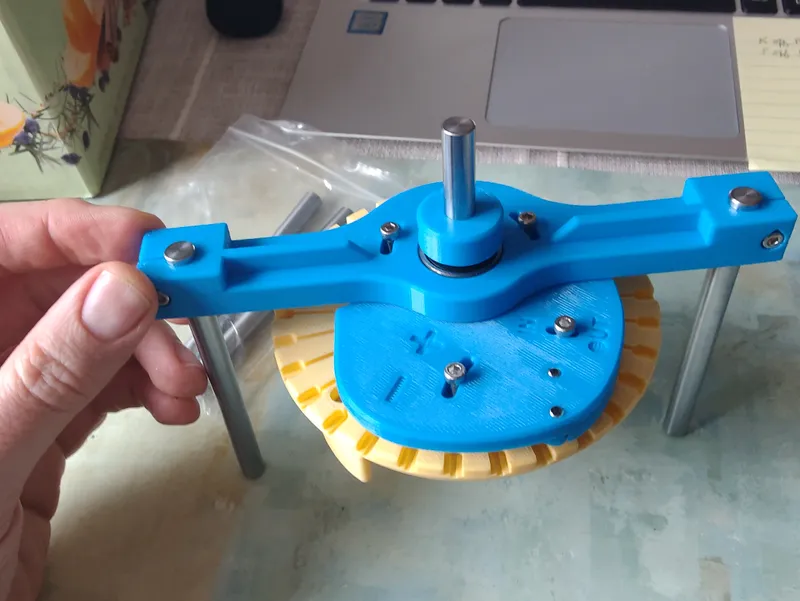
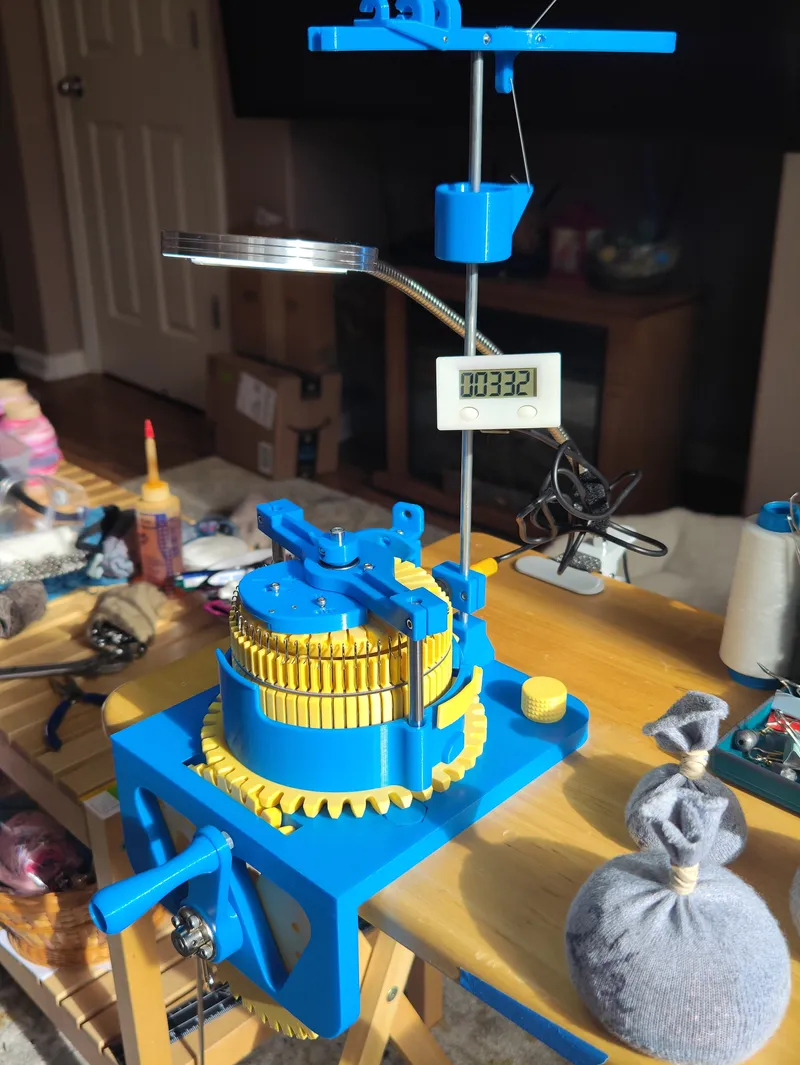
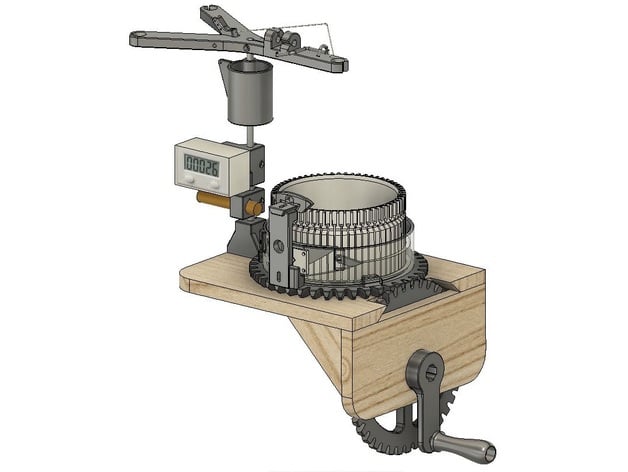
Circular Sock Knitting Machine For My MOM and YOU! V2! With Ribber. Legare Style Machine!


Description
PDFTHANK YOU Mom for being My MOM! You are Amazing and the best MOM ever!
Please Give my Mom a HEART she deserves it!

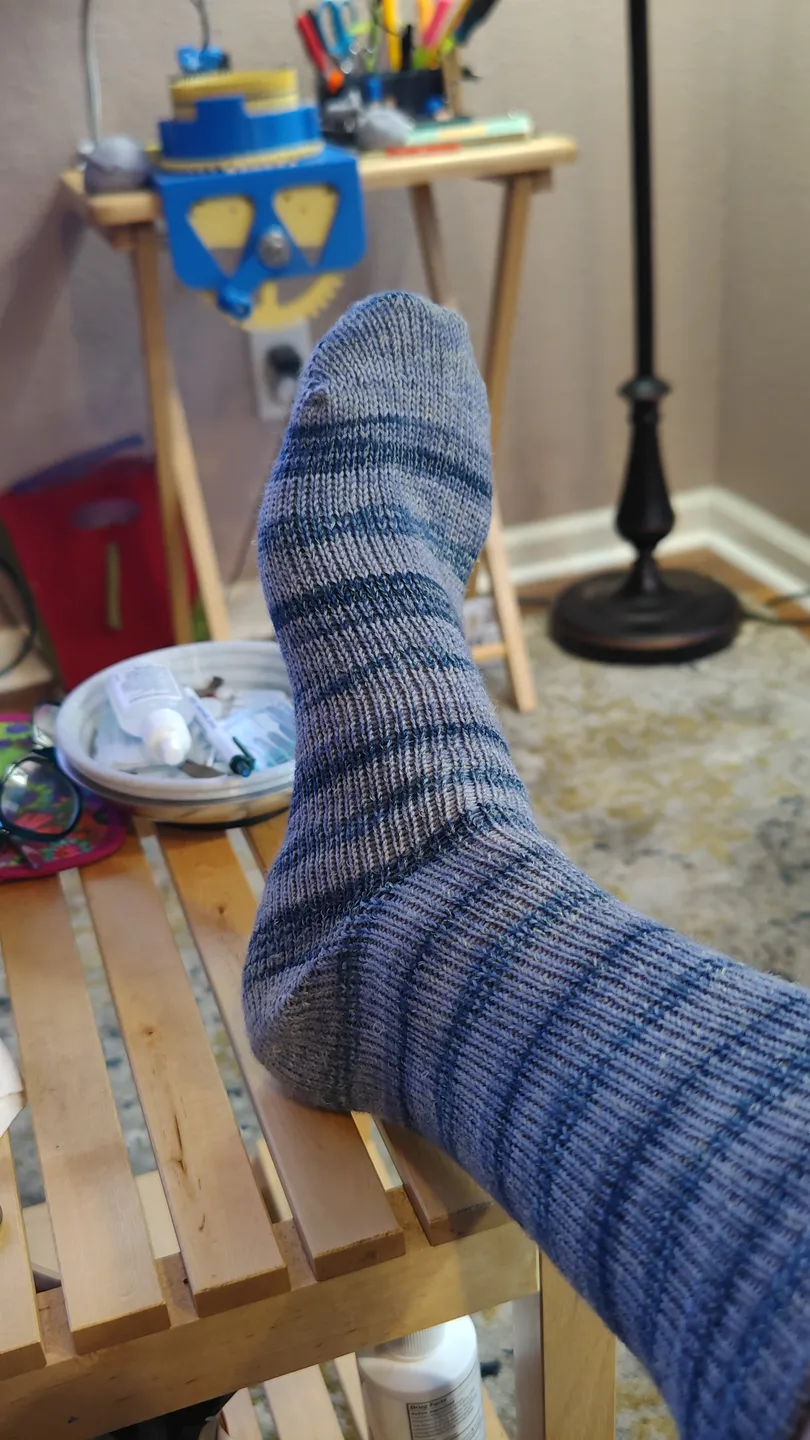
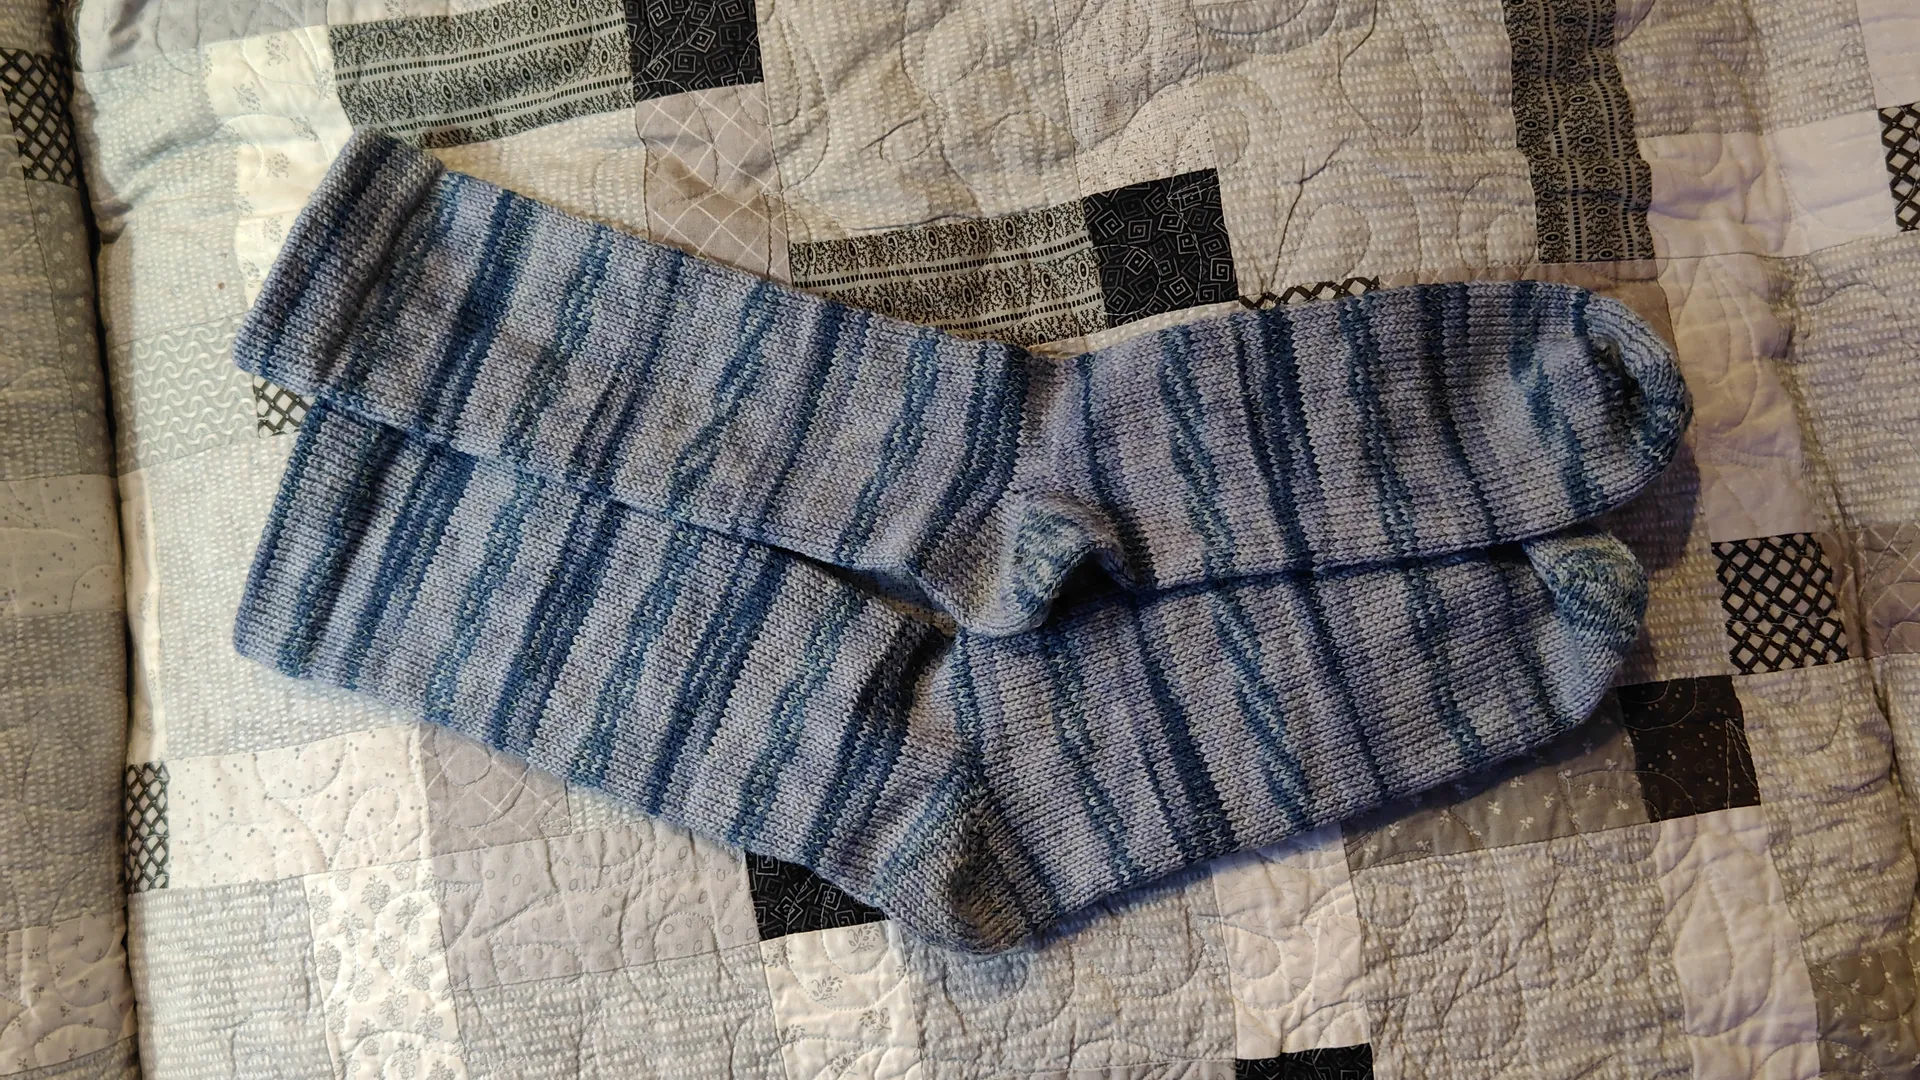
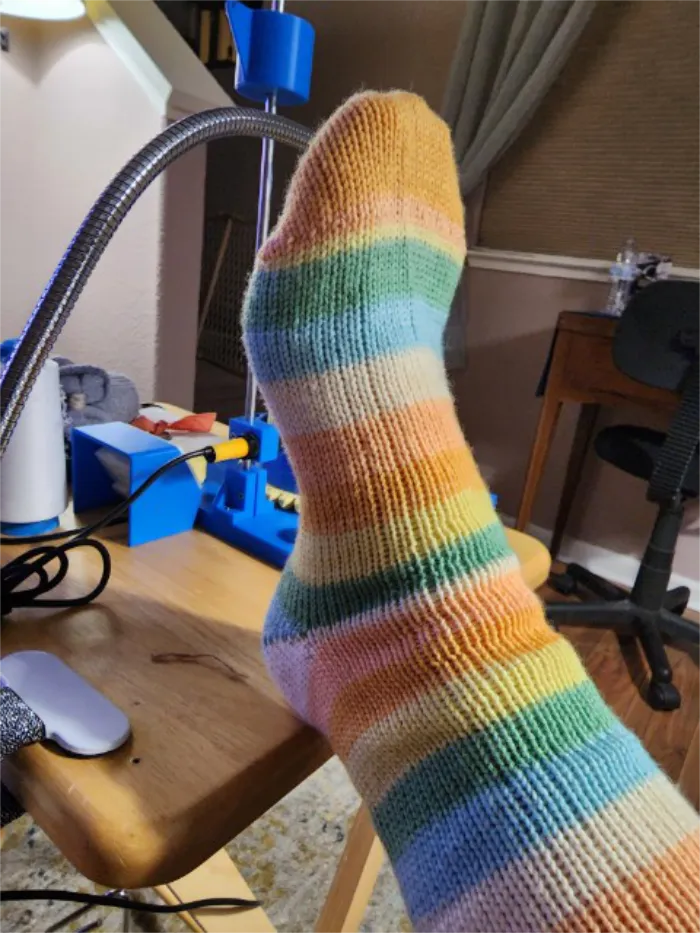
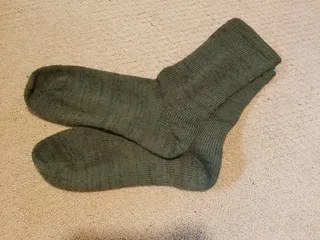
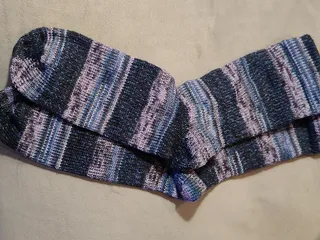
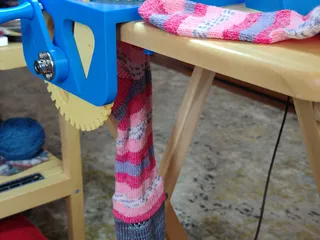
My Mom is always sewing and knitting for others. When my Cousins' wife was sick with cancer and lost her hair. My mom hand-knit matching winter hats for her and her daughter. When my neighbor's son comes to help out in the winter at her house (clearing snow), she hand-knits him socks to keep his feet warm! She is always making and creating things for others…So I wanted to make this for her when she asked me. I and my Big brother and my mom worked together and collaborated on this project.
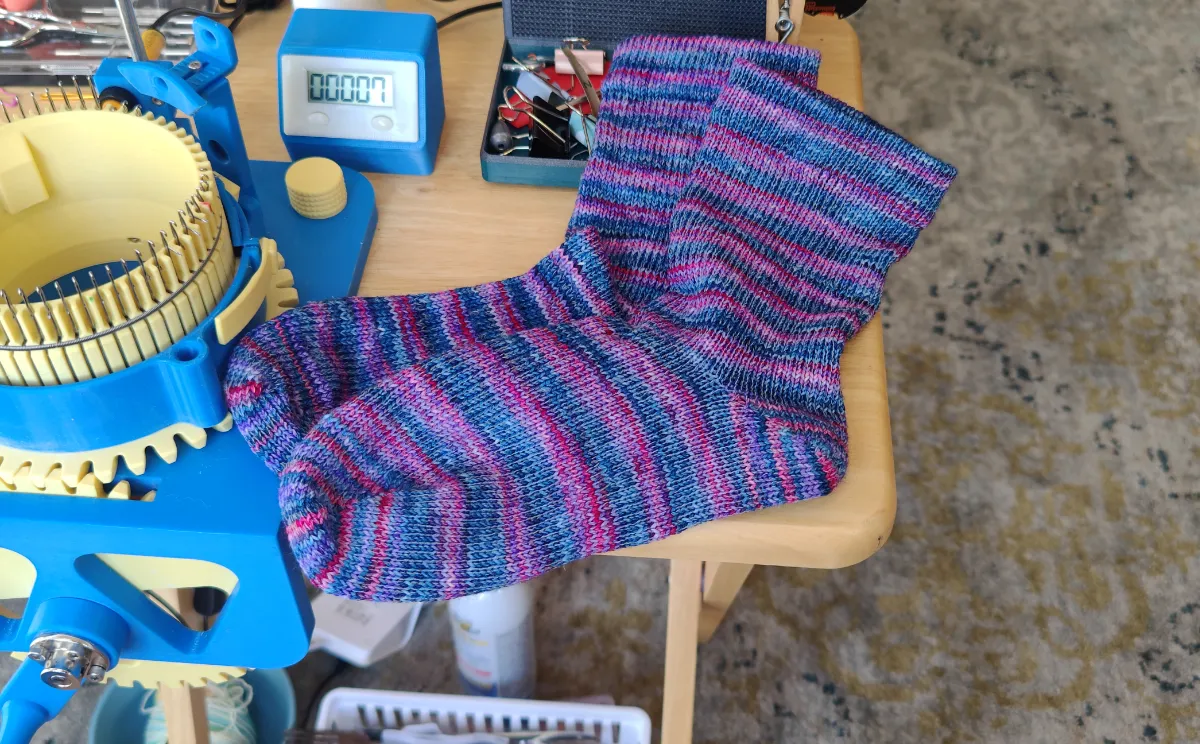
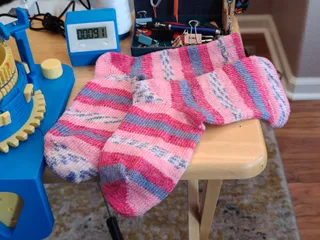
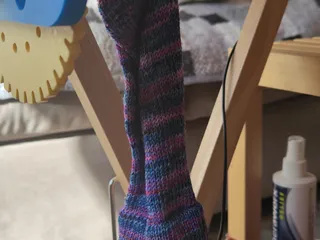
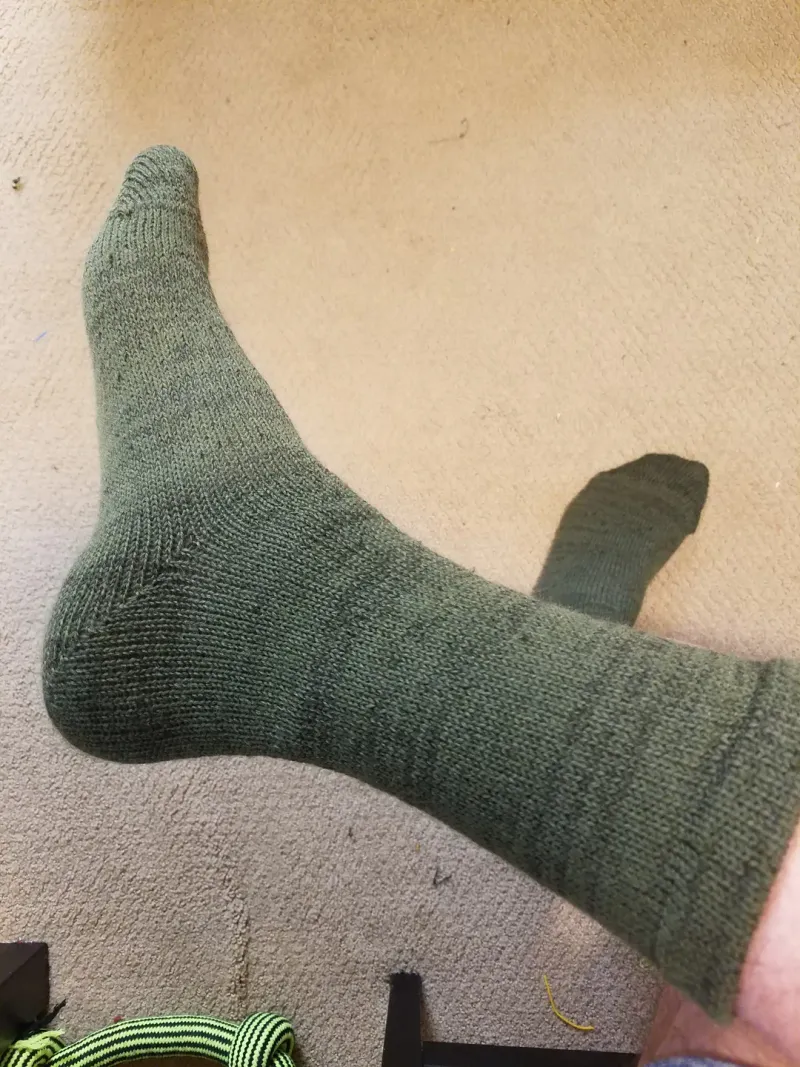
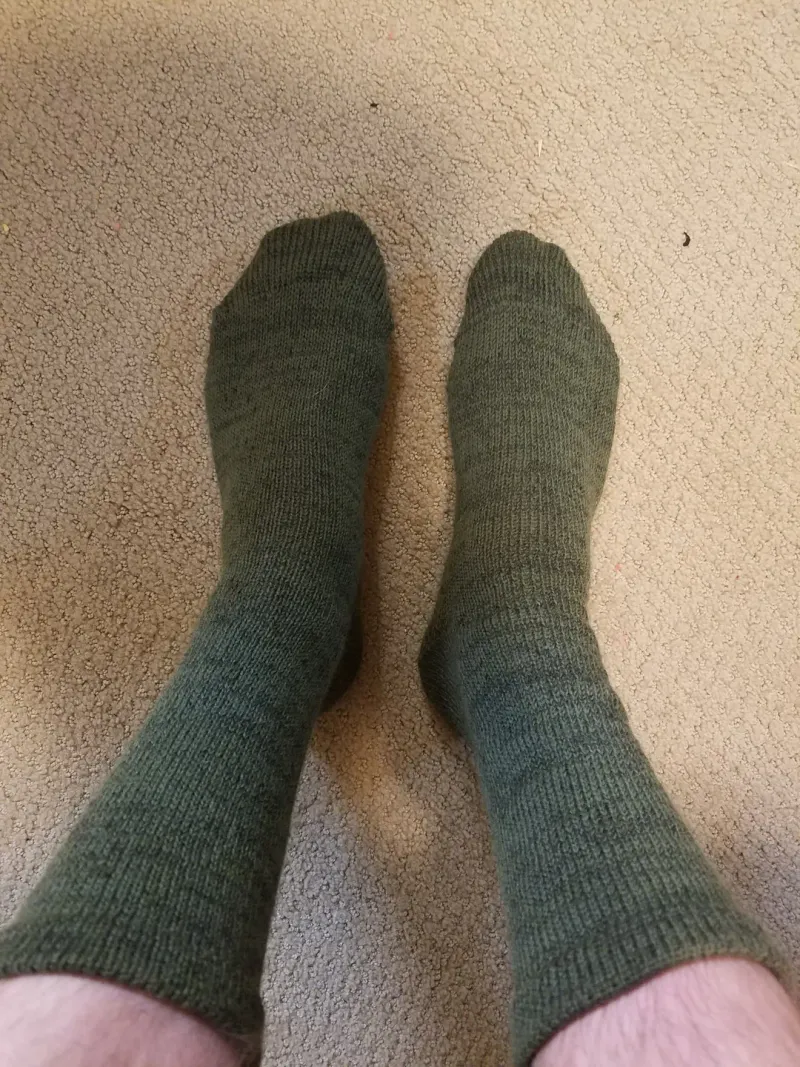
We build a Circular Sock Knitting machine last year for my Mom. We had done extensive upgrades to it. She made socks, learned a lot, and had a ton of fun using it.
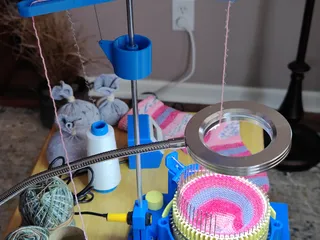
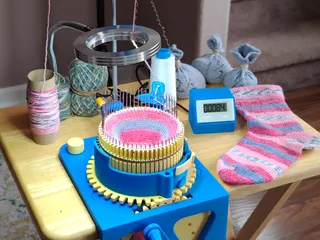
She had seen this Legare Circular Sock Knitting Machine W/Ribber, by Steve Turner (MrRoboto19). We decided to Redesign, Remix, and built it out this winter as an upgrade for her. We combined different remixed projects and we did a lot of redesigning for whatever she needed or asked for.
My Big Brother helped a lot with the metal cutting, metal shaping, and cutting the table. He's really skilled with wood and metal and chopping trees.

We are redesigning the machine to improve many aspects of the original design. We are making it easier to build, better organized, and more accessible to everyone who would like a machine like this. We are remixing multiple projects into one project. It is a Legare Style Circular Sock Knitting Machine, with Ribber, and Yarn Stand.
UPGRADES
We have done extensive upgrades and redesigns to the original projects that we remixed including……
- Organized multiple Remix projects and added them to one project.
- Renamed project parts to keep them organized and easy to understand at a glance.
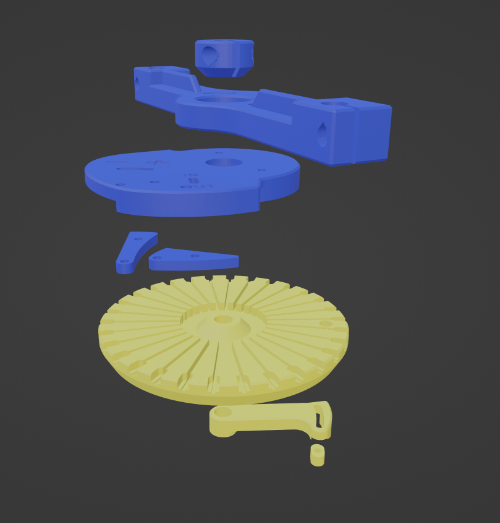
- Put together a blender file with all the parts in a build layout so you can see exactly how the machine is put together.
- Reduced the hardware needed to build by improving the design and function, and constructing custom printable hardware.
- Flattened the collar under the Collar Tension Cam nut adjuster for better grip.
- Remodeled and lightened the Frame for faster printing and less plastic used.
- I have remodeled an optional shorter frame and a separate Yarn Stand Mount. They both use the same Frame Bolt Back for mounting. The full frame is 216mm x 190mm x 102mm optional Frame Shorter is 177mm x 190mm x 102mm.
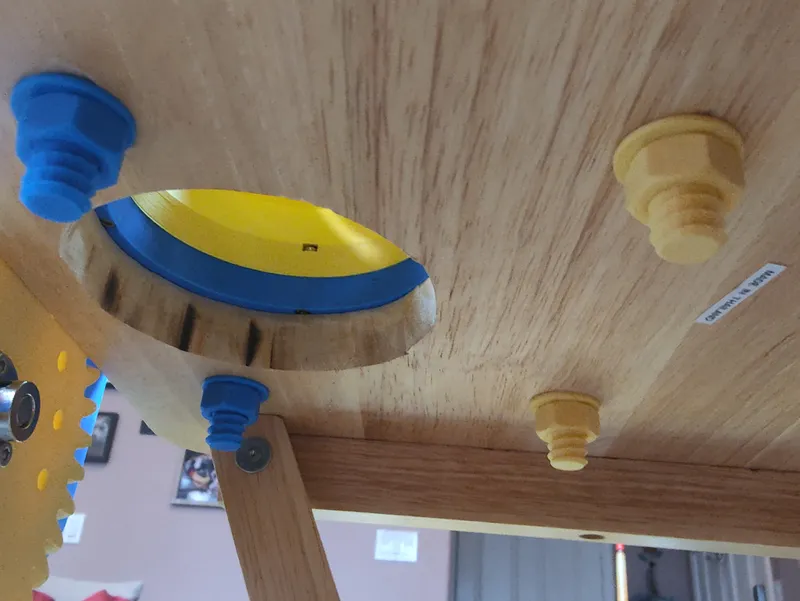
- Added 4 x mounting bolt holes in the frame for table mounting with printable bolts, nuts, and washers. You may use your own hardware if you wish.
- Added sunken-in-frame bolts for just under the Cam gear. This allows for better frame mounting to a table. It's very sturdy with four strong mounting points.
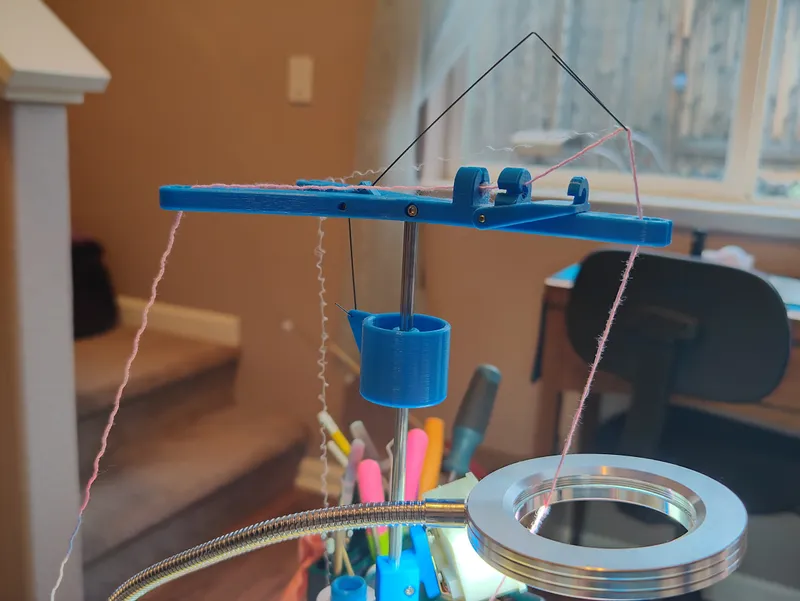
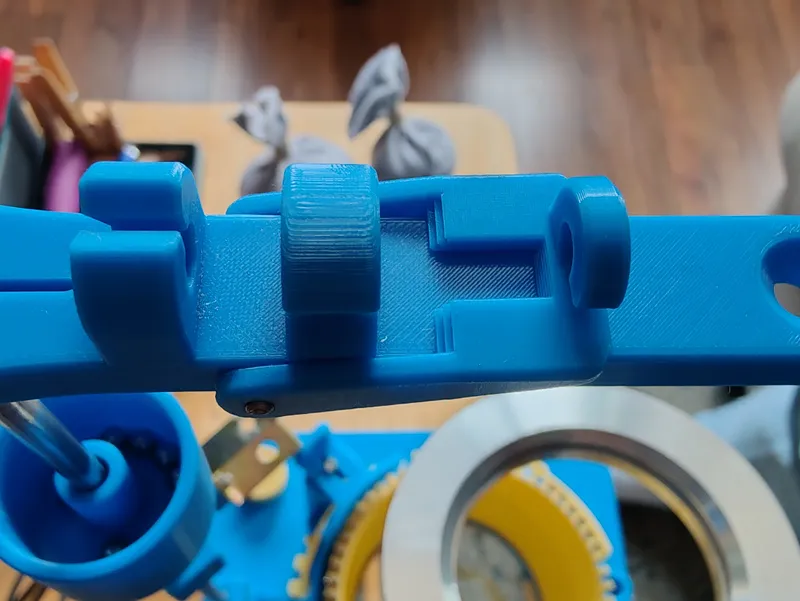
- Added markers to the Yarn Carrier horizontal and Yarn Carrier Stem vertical adjustment.
- Added markers for the Collar Tension Cam nut adjuster.
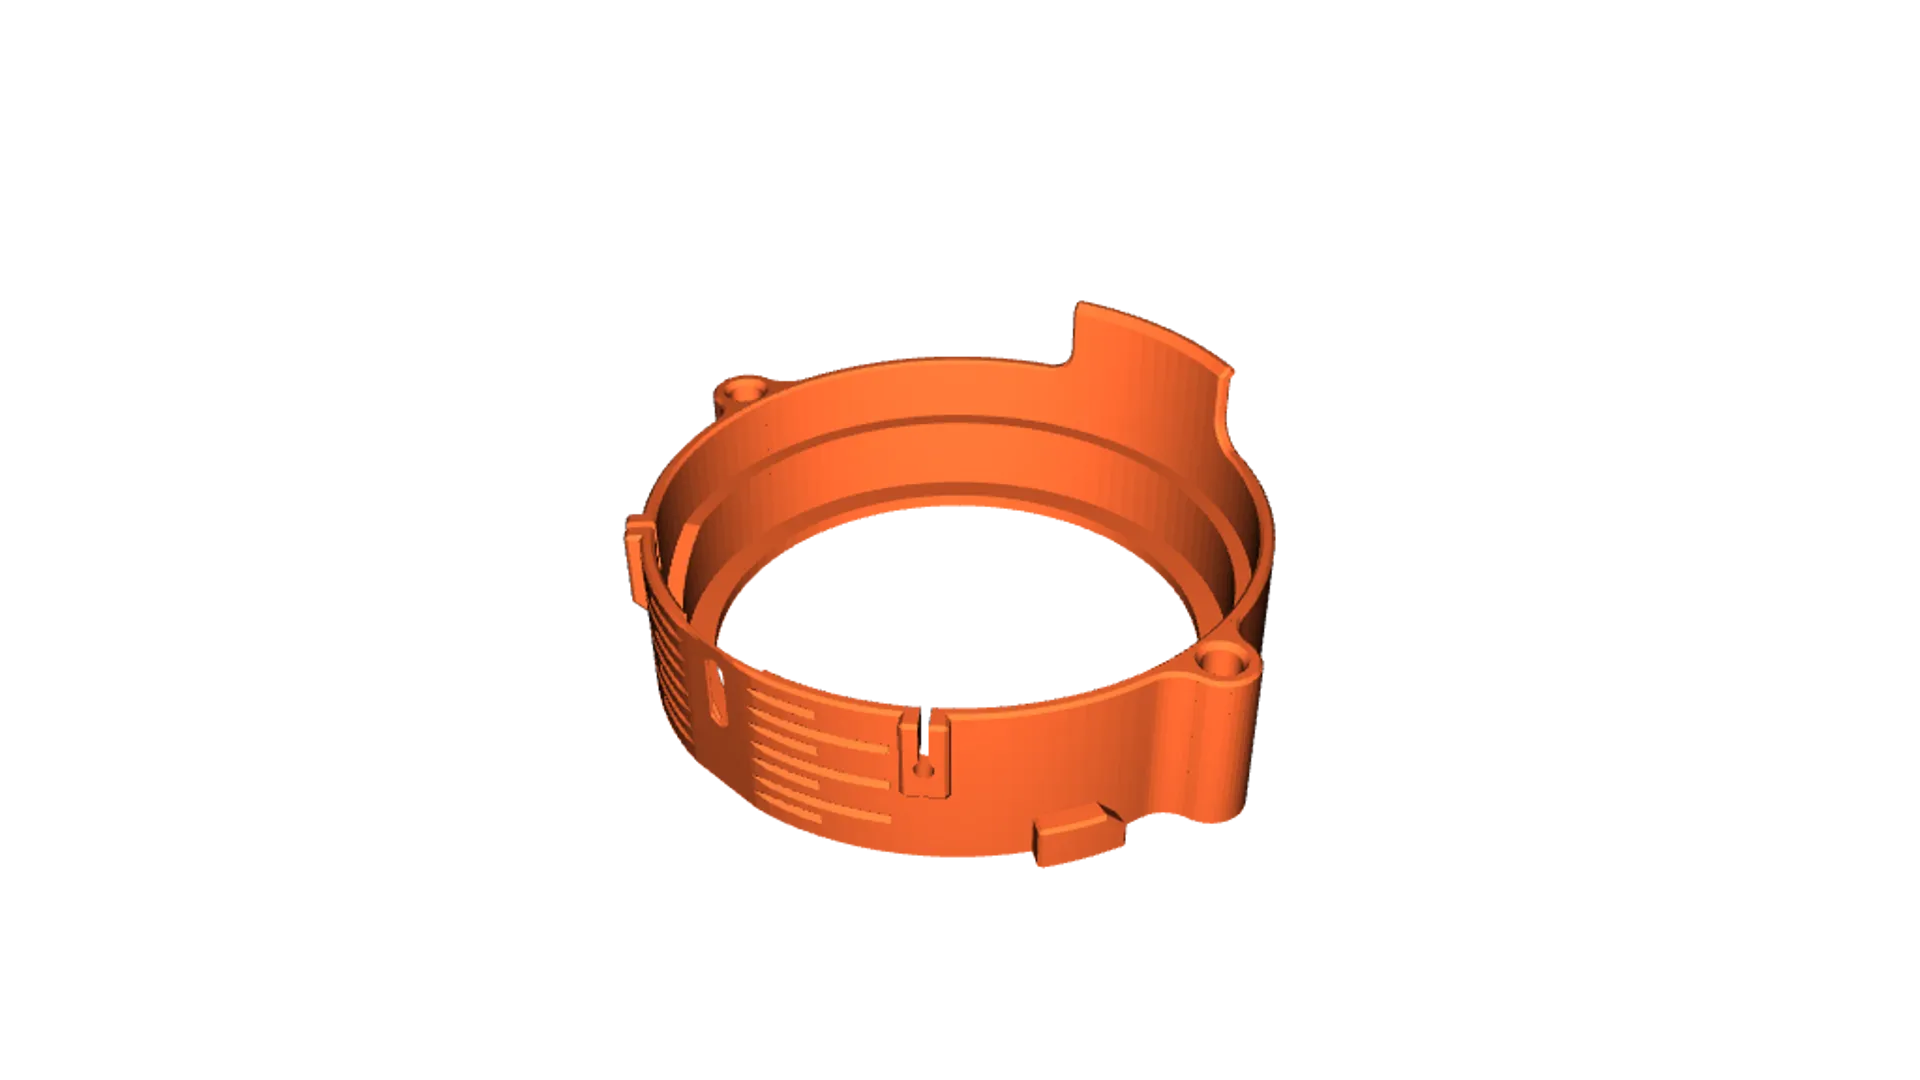
- Remodeled the Collar for better knitting performance.
- Remodeled and redesigned the Tension Cam for better knitting performance.
- Remodeled the Tension cam vertical movement along with the collar to help widen the stitch availability of Small/Large stitches.
- Added a new mount for the tension cam that uses a single bolt and nut with a bolt holder. Works excellent.
- Keyed the Tension cam into the collar for better needle track performance. Got rid of the open track design for the needles as they travel below the tension cam in the collar.
- Designed a Keyed drop in Counterweight needle lift… they are easier to print and install and perform very well. It is much easier to use and install than the original design which required springs, brass tubing, and glue. Print these at 100% infill. No extra hardware is needed! This is detailed in the hardware section below.
- Flattened the top of all the Cylinders. This helps with creating more surface area for successful prints. Print them with the top on the bed for fewer supports faster print time and the best overall quality.
- Placed every STL in its optimal print position for your slicer.
- Added the ribber stop to each cylinder made it smaller and embossed the cylinder slot number into the ribber stop for each cylinder for easy identification. I am including the original Cylinders without ribber stops so you have a choice of what you want. I am also including the Ribber Stop itself so you can print it out and glue it in if you want to.
- Embossed the number of the slots into each ribber dial for easier identification.
- Added better lettering to the Ribber Tappet.
- Shortened the Yarn Stand Weight by ⅓ height so it's more compact…the full size was too heavy without weights for doing heels. It was also too big for the height my mom wanted for her yarn stand. Opened up the center of the Yarn Stand Weight a little to make it slide on the ¼" metal rod much easier. My mom said the original was getting stuck.
- Added a notch to the Yarn Stand Brake so the yarn can flow through it when it is in its uppermost position. The old version was trapping yarn on the hook on the Yarn Stand Guide. My Mom was hand feeding the yarn and doing it that way was easier with this Brake. I am including the original Yarn Stand Brake for those that want that style. It works good with yarn off a cone.
- Added a longer crank arm for more torque.
- Added a needle lift tool.
- Added a Lubricant port on the Collar Gear this will allow you to put a little lubricant right down to the Collar Gear Spacer and the Collar Gear. DO not use water based lubricants with plastic!
- Added a full hardware build section to make it easier to build…see below.
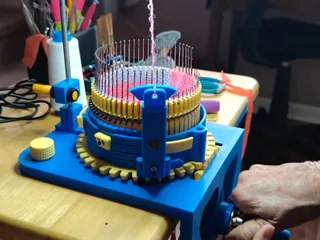
Here is some short videos of the machine in operation!
The machine in these videos was built from the exact files you will be downloading.
https://www.youtube.com/shorts/HqbQPxJuZwE
https://www.youtube.com/shorts/BgUBi-enyi4
https://www.youtube.com/shorts/6Ms8-BK3Nho
Our table is a little wobbly we are going to upgrade that soon with something more stable.
We put a new 100% infill Cylinder on and some of the needles were a little tight in the slots. So I gave it a good 5 minute fast run and it became much smoother. Your machine may have a break in period don't be afraid to run it nice and fast to help speed that up. It won't hurt anything and it will help it run smoother.
https://www.youtube.com/shorts/-pBsu83sGhI
User DaniAngel had provided this break in video, of their machine operating.
https://www.youtube.com/shorts/m5fujWRpokw
https://youtube.com/shorts/ga0v32p4P6E?feature=share
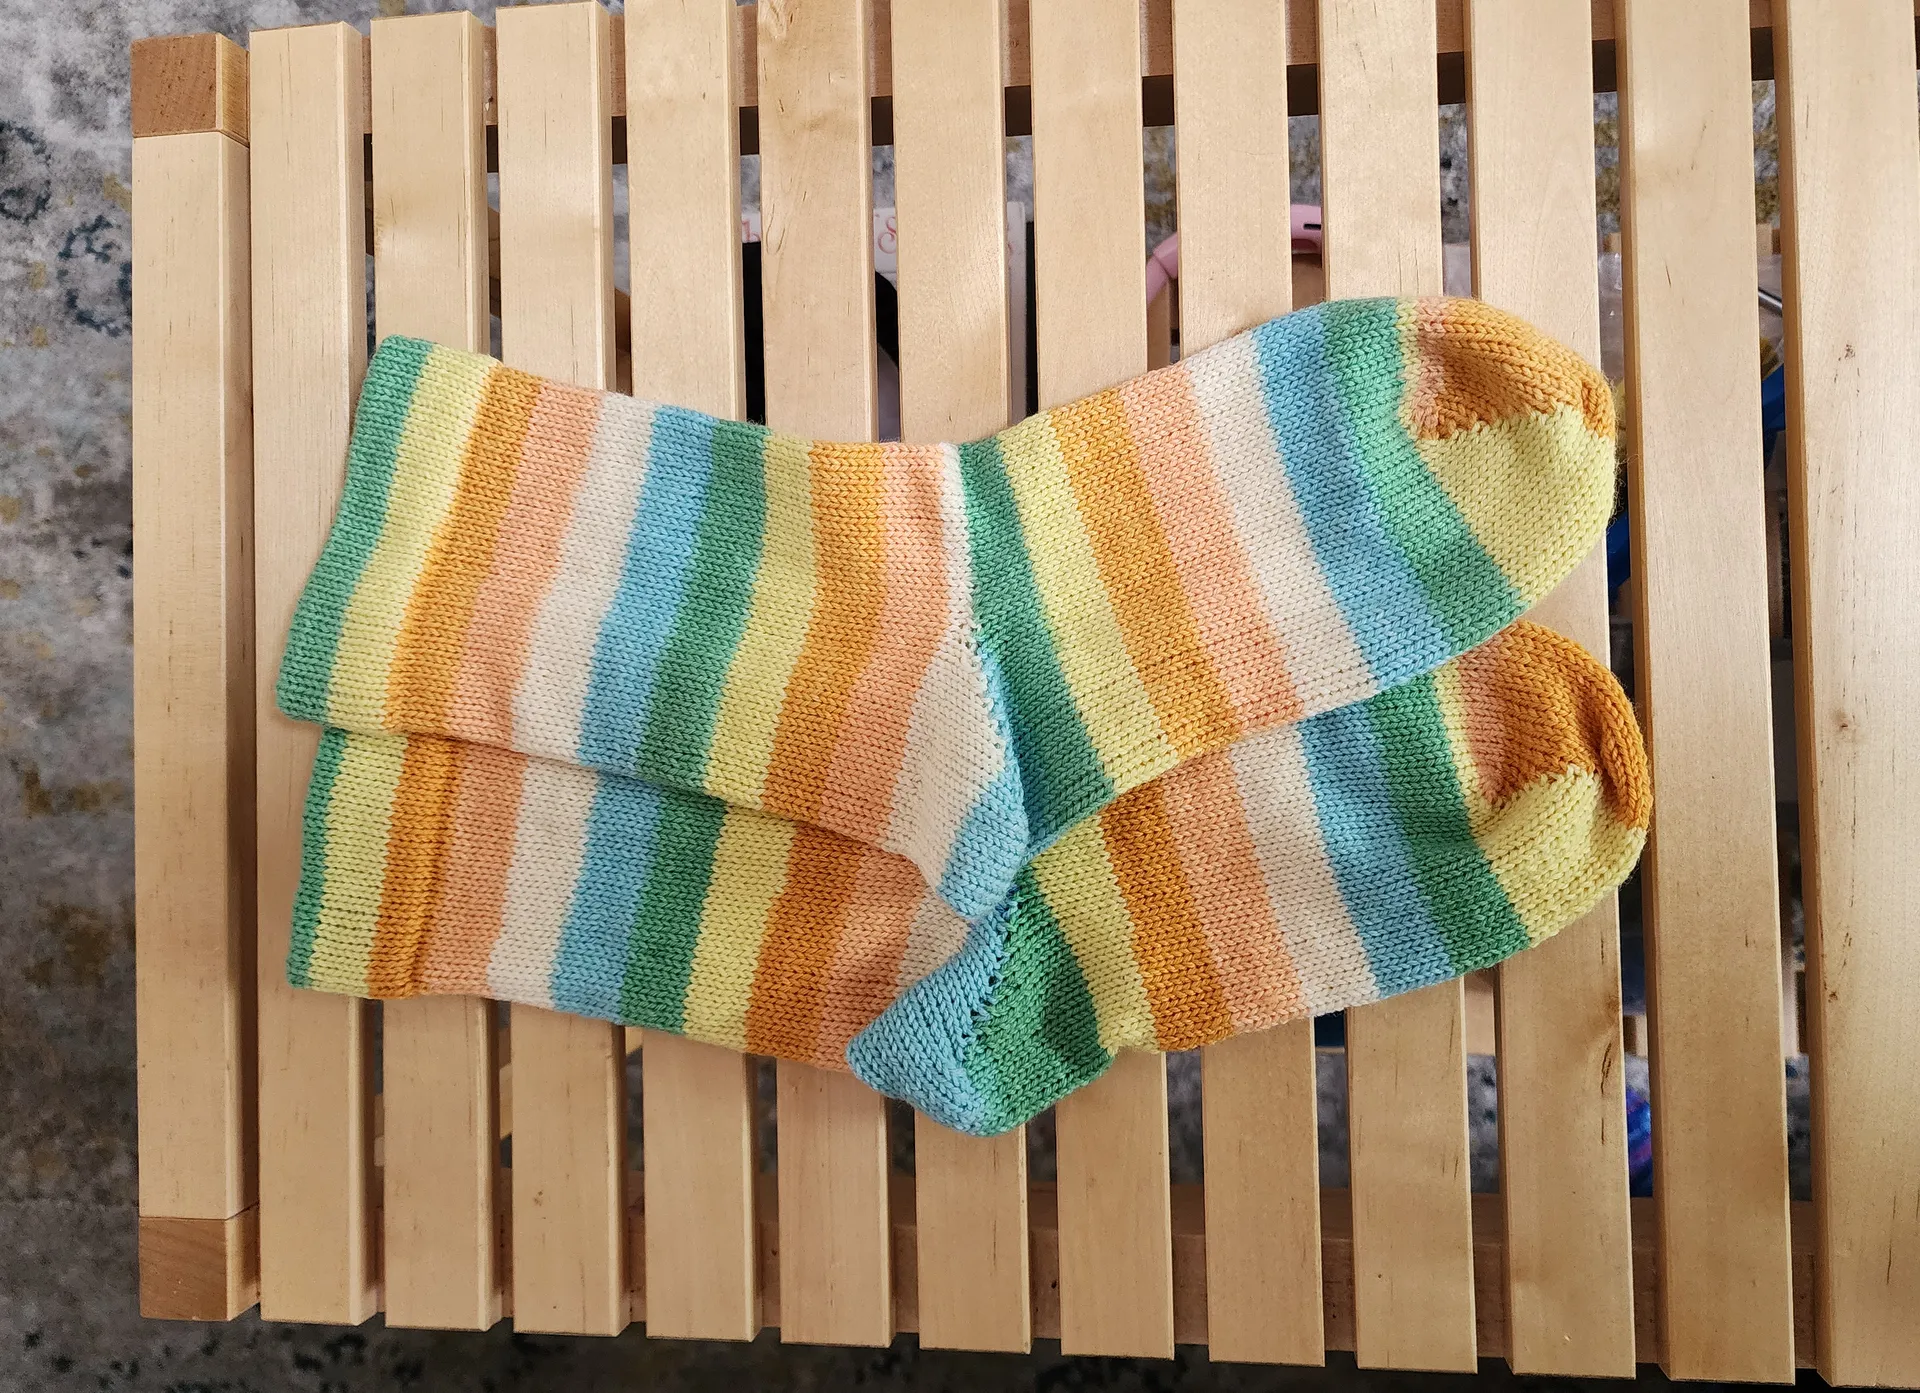
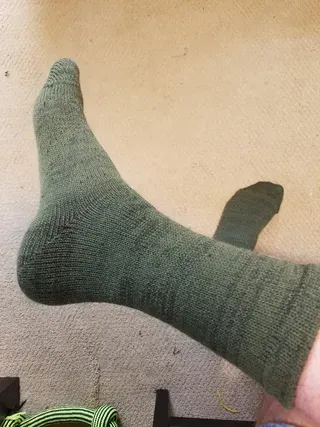
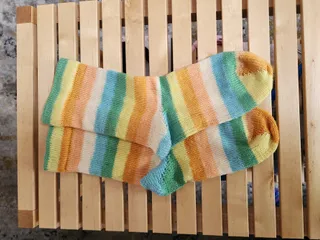
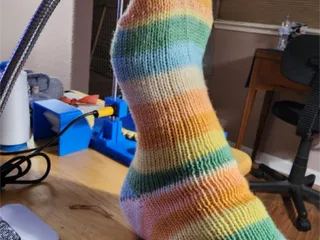
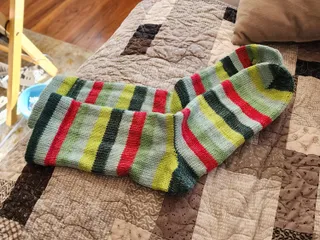
Here is DaniAngel socks made from their machine,

HARDWARE Build and Tips Guide!
If you have questions please ask we will help as much as we can.
I organized everything here for your build. Please read everything there are a lot of tips here.
You will be cutting metal rods, for the Ribber Tappet, Yarn Stand, Crank Gear, and Yarn Stand Guide. You will be bending wire for the Yarn Stand Guide. The rest is metric bolts and hex nuts. It's not hard to build. It does take a little time and effort. It's worth it! You can do it!
The machine is completely laid out in the blender file, reviewing it will help you a lot in understanding how the machine is put together. Blender is a free program anyone can download.
The ribber is an add-on, it is not necessary for making socks or the operation of the main machine!
Hex Socket Head Cap Bolts
I buy the smaller pack also for the M3x25 with hex nuts. If you can find those somewhere you wouldn't need the smaller pack.
https://www.amazon.com/gp/product/B08QDHMTSL/ref=ox_sc_act_title_1?smid=A286O29JJYZD4N&th=1
- For various parts.
8x22x7 mm Skate Board Bearings
- These go into the frame and ribber tappet and ribber arm.
- I pound these in using a flat piece of wood and hammer.
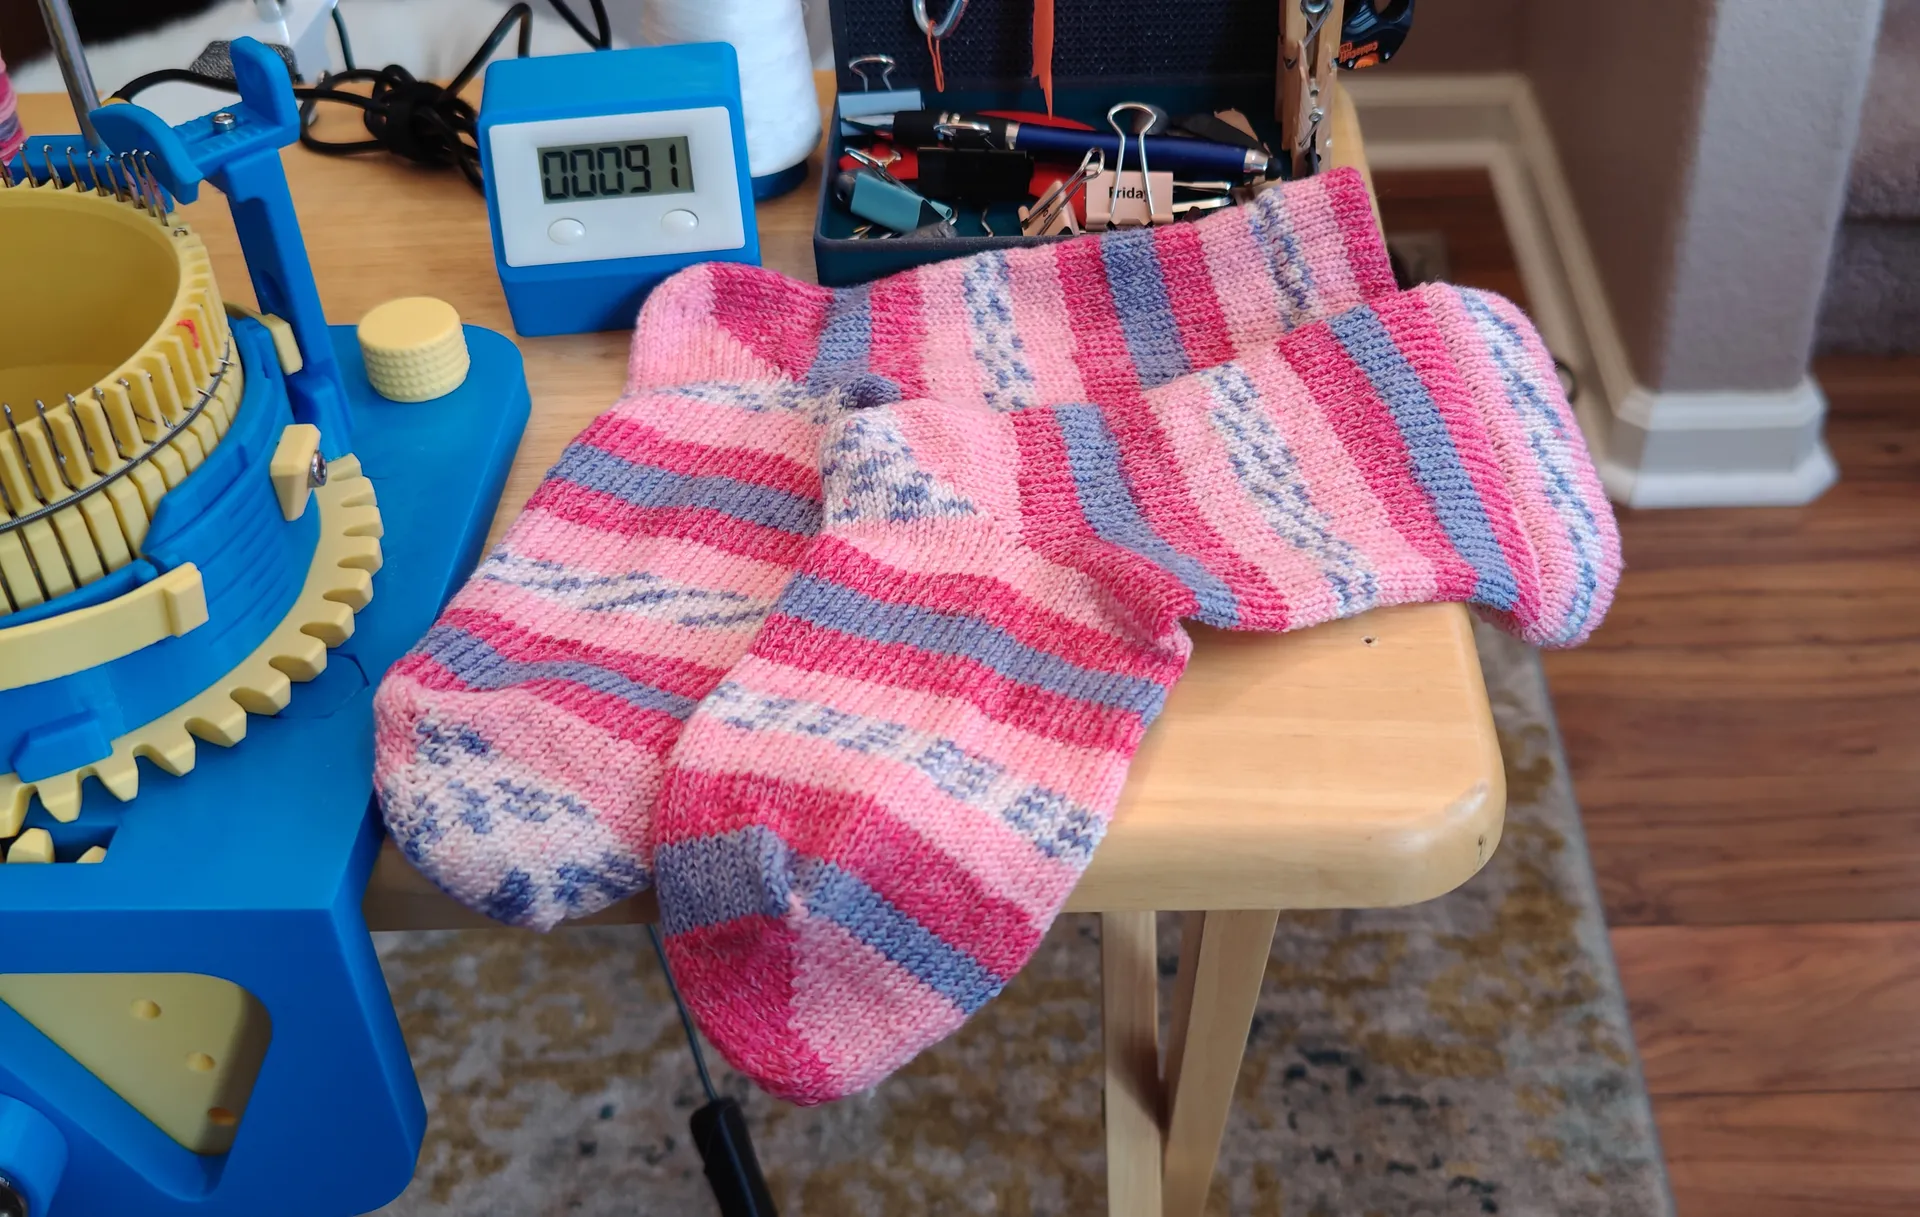
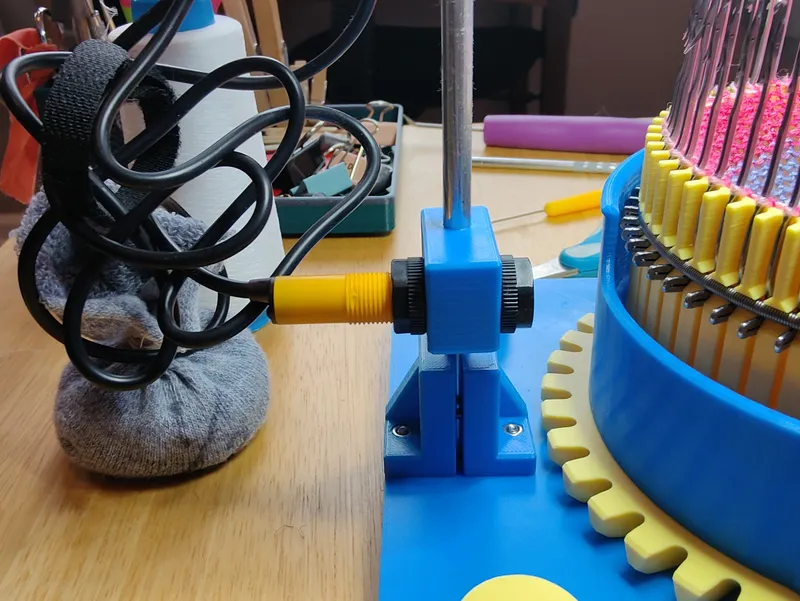
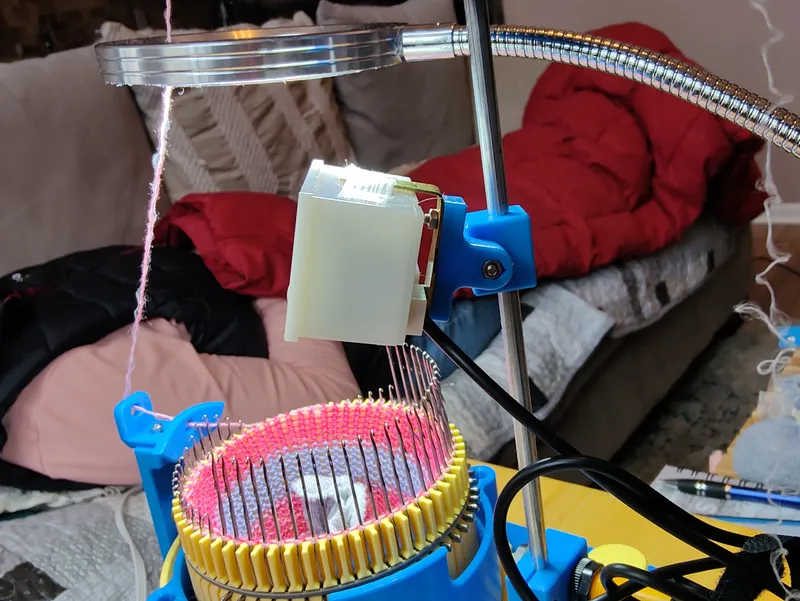
LCD Punch Counter Digital 5 Digit Proximity Switch W/Magnetic
- The magnet is included, 13mm, and will fit exactly into the Yarn Carrier Stem.
- You mount the counter on the Yarn Stand Counter Pivot.
- The yellow sensor goes into the Yarn Stand Sensor Bracket and reads the magnet on the Yarn Carrier Stem.
https://www.amazon.com/gp/product/B01875612U/ref=ppx_yo_dt_b_asin_title_o06_s00?ie=UTF8&psc=1&tag=1
Magic&shell 2-Pack 8mm Flange Shaft Coupling
- These go onto the Crank Gear and the Crank Handle for the Crank Arm Shaft.
- They use captive hex nuts.
- Crank Gear M4x12 M4 Hex Nuts x4
- Crank Arm M4x16 M4 Hex Nuts x4
K&S Precision Metals 5501 Music Wire, 0.032" OD x 12" Long
- For the top Yarn Stand Guide see pictures.
- We bought this at Hobby Lobby but you can get it at amazon also.
- This is for the Yarn Stand Weight and making a Heal Spring.
Needles (style #7, 12 ga, for Auto Knitter / Legare, regular size hook)
Ribber needles (style #1, 12 ga, for Auto Knitter / Legare, regular size hook)
Cylinder Spring (0.11" wide)
https://angoravalley.com/sockmachines/accessories.html
True Value Local
- 1/4" Metal rod For the Yarn Stand.
- 1/8" Metal rod Yarn Stand Guide, Pivot and Brake, Ribber Tappet.
8mm x 100mm metal rods x 4
I bought these off amazon with chamfered edges.
- Used for the Ribber arm x 3
- Crank arm Crank Gear, cut, chamfered, and notched for the set screw. 65mm
Yarn Carrier It goes on the "Collar Gear" and it's three pieces.
- Yarn Carrier Base to collar gear M3x16 w/hex nut x 2
- Yarn Carrier Stem and Guide M3x12 w/hex nut x 2
- 13mm Magnet comes with the digital counter goes into the Yarn Stand Stem.
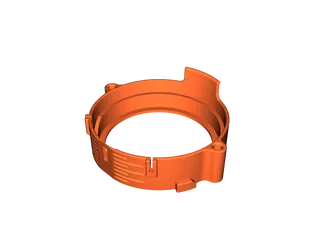
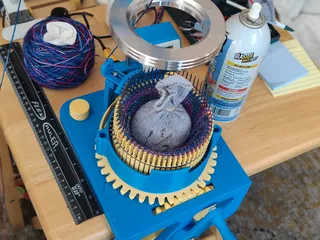
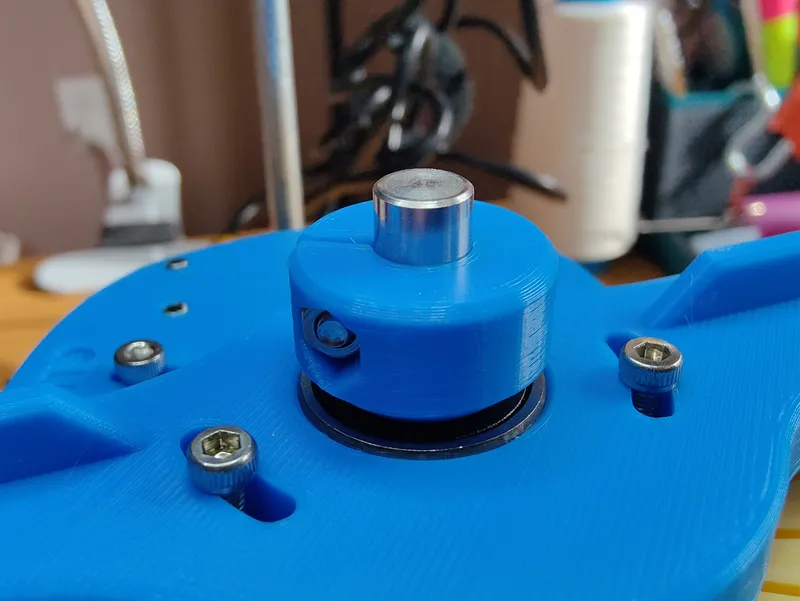
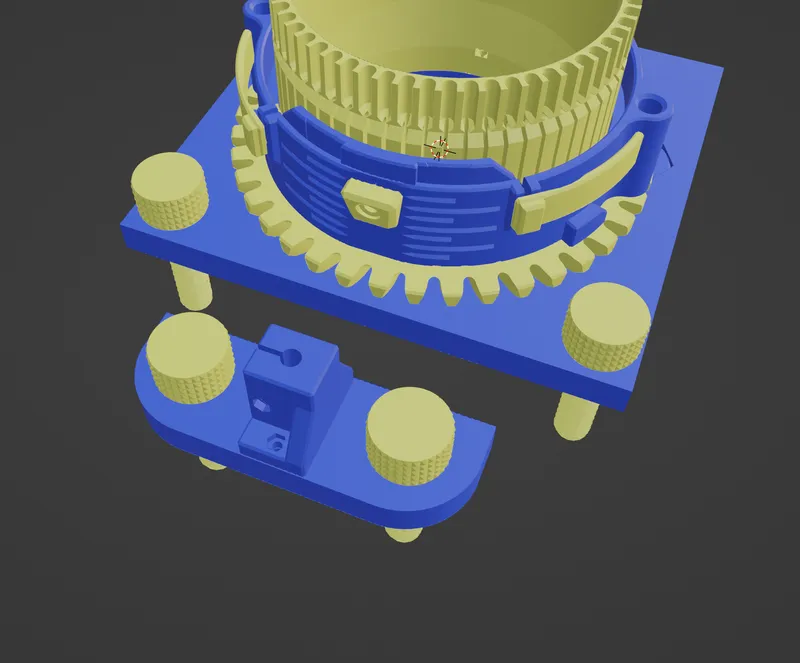
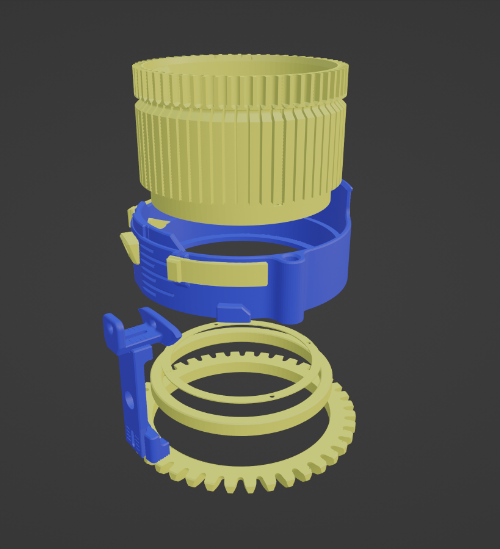
Cylinder This goes into the collar and attaches to the frame.
- M3x25 w/hex nuts x 4 Tighten but not too tight if you over tighten it will be hard to crank the Collar around.
- Included cylinders 48, 54, 60, 64, and 72 are included with and without Ribber Stop.
- I am including the Ribber Stop as a separate piece if you want to glue it into any Cylinder you print.
- Included ribber dials 20, 24, 27, 30, 32, 36, 40.
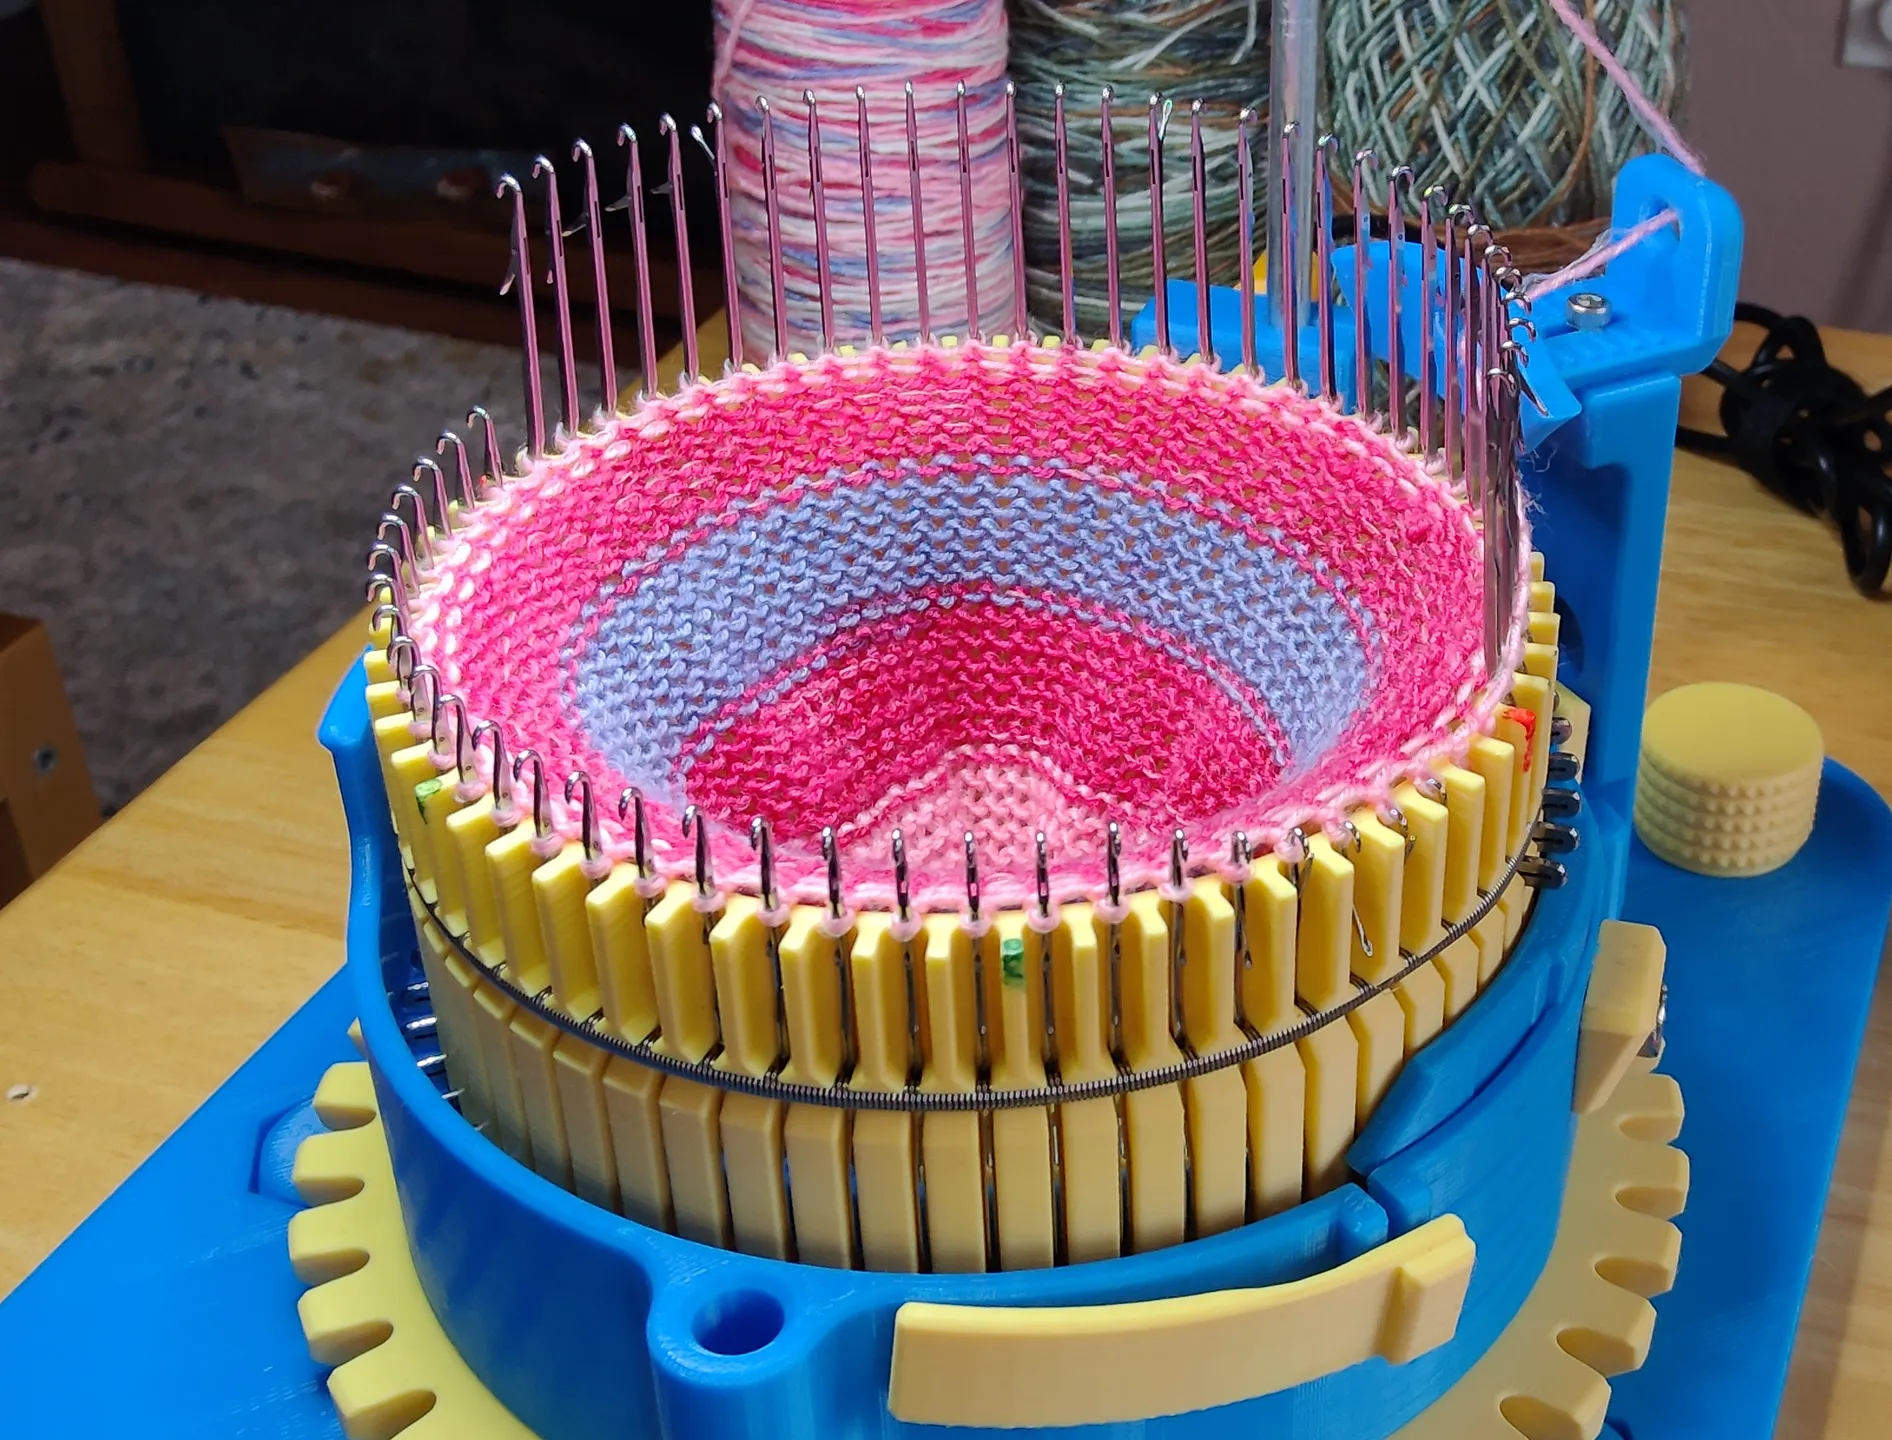
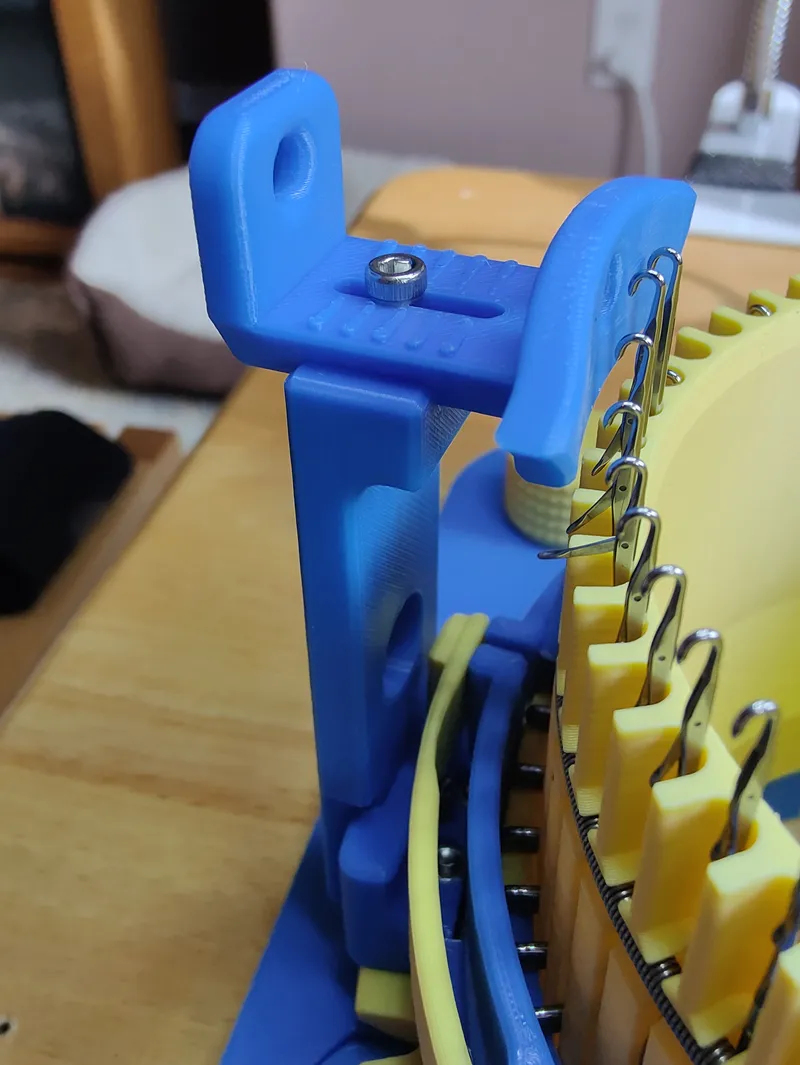
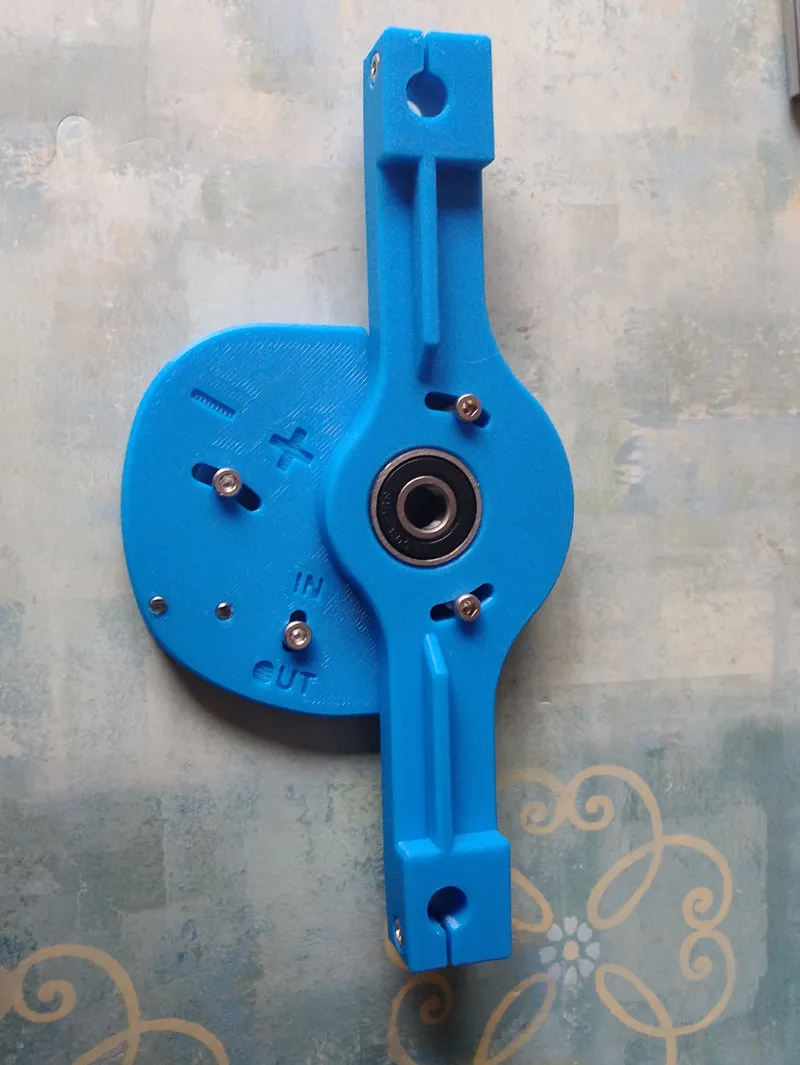
Collar Tension Cam This goes in the collar it adjusts the stitch size.
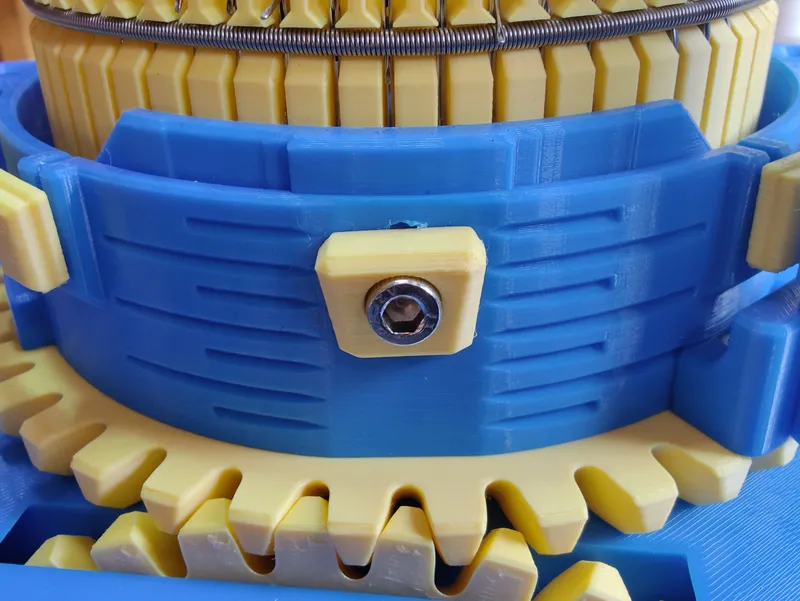
Use with Collar Tension Cam Bolt Holder The flatter side on this goes down to give clearance for the Yarn Carrier Base.
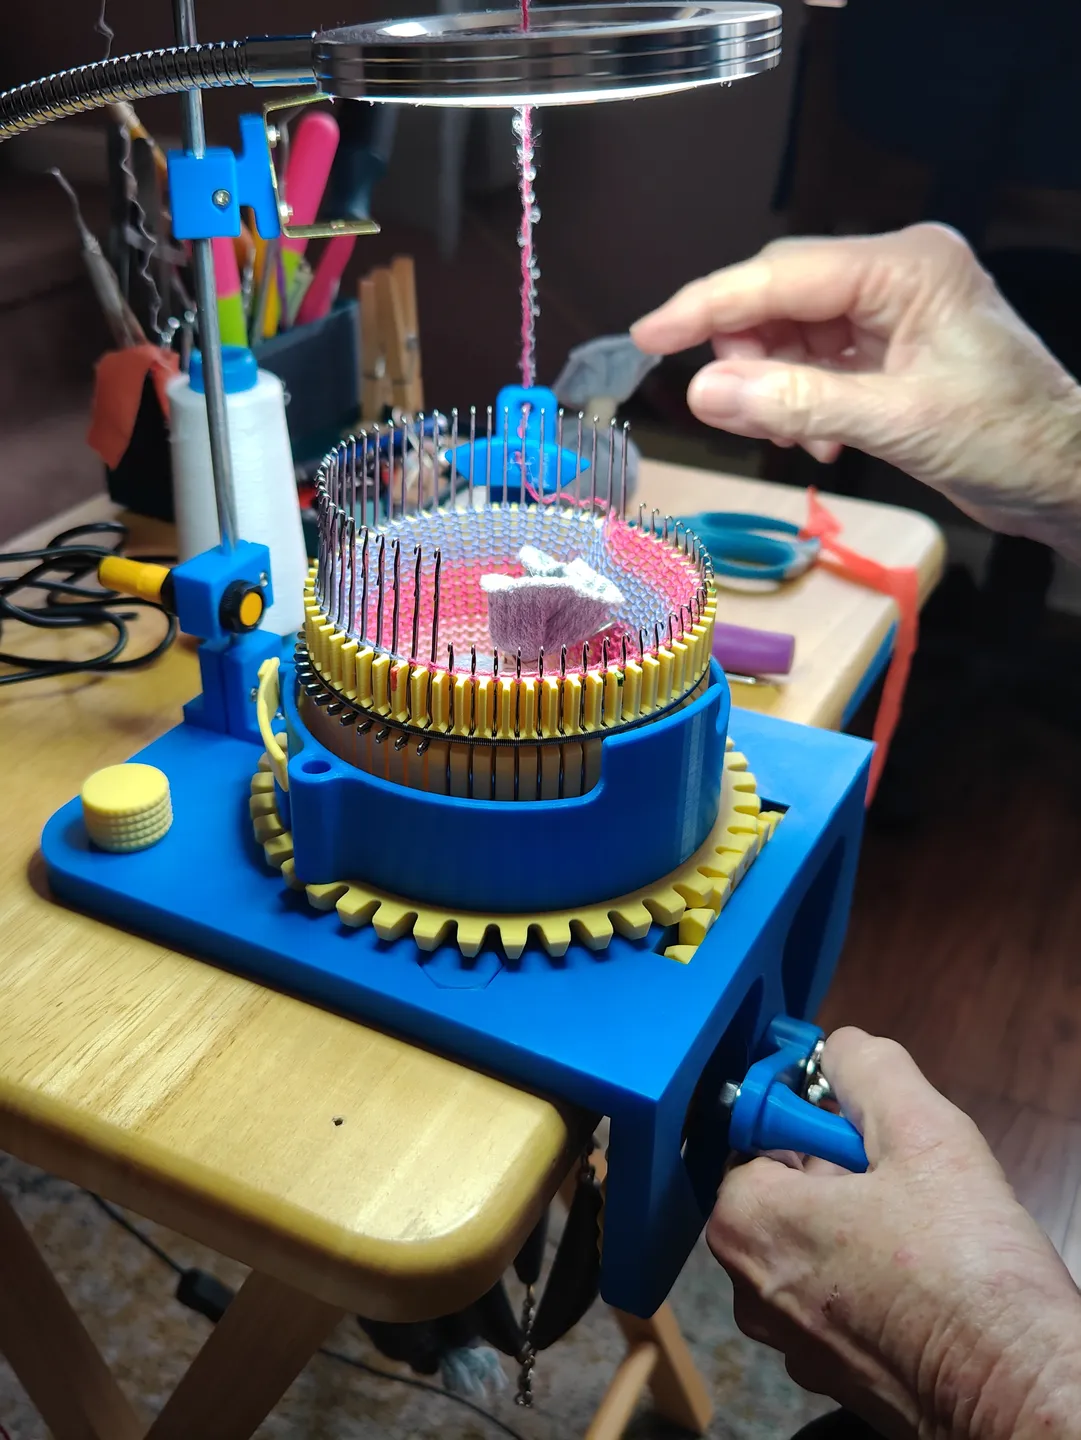
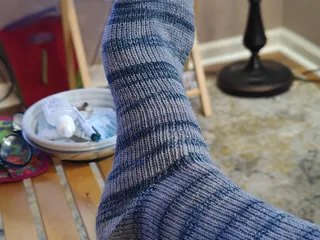
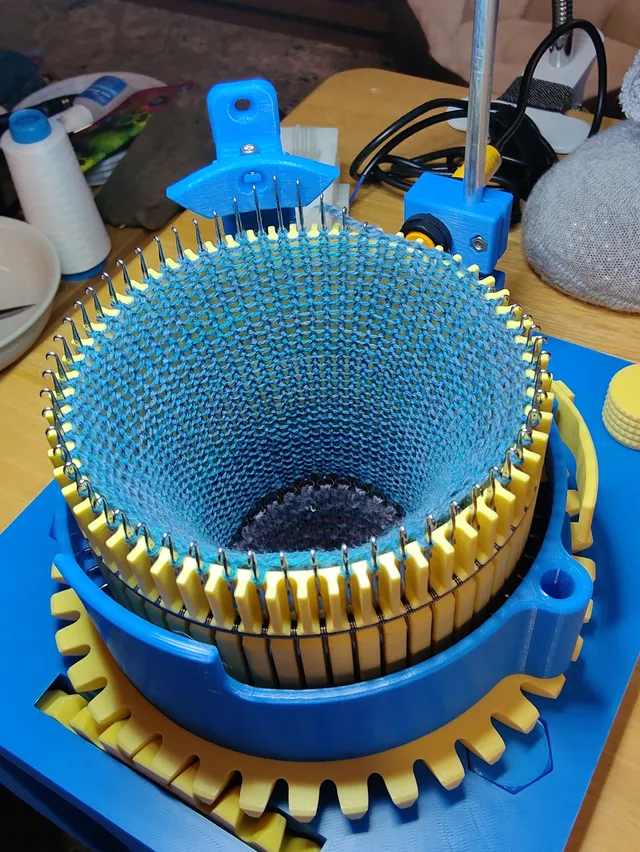
The Tension Cams lowest position is not meant to let the needles pass through it's there to give you a low starting point. Raise it a little bit from the lowest point to find the lowest stitch possible. The lowest stitch makes very large stitches when making socks. Higher on the Tension Cam will make smaller stitches and a tighter better fitting sock. You will need to find the right spot with the tension cam to make the stitch size you want for your sock. My mom says lower is not as good because it makes a loose floppy material because the stitch is large.
- M5x8mm w/hex nut
- I got a metric driver bit kit for my mom. For adjusting and tightening everything like the Cam, set screws, and yarn carrier. She said it's much easier to use than the Allen keys.
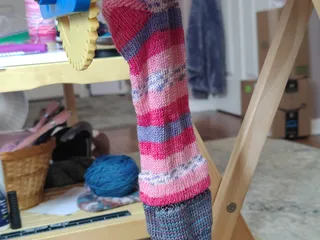
When the Tension cam is lower it will produce a loose, larger stitch. If you stitch to low the sock would look like the web netting on the back of a soccer goal. Below in blue stitching.
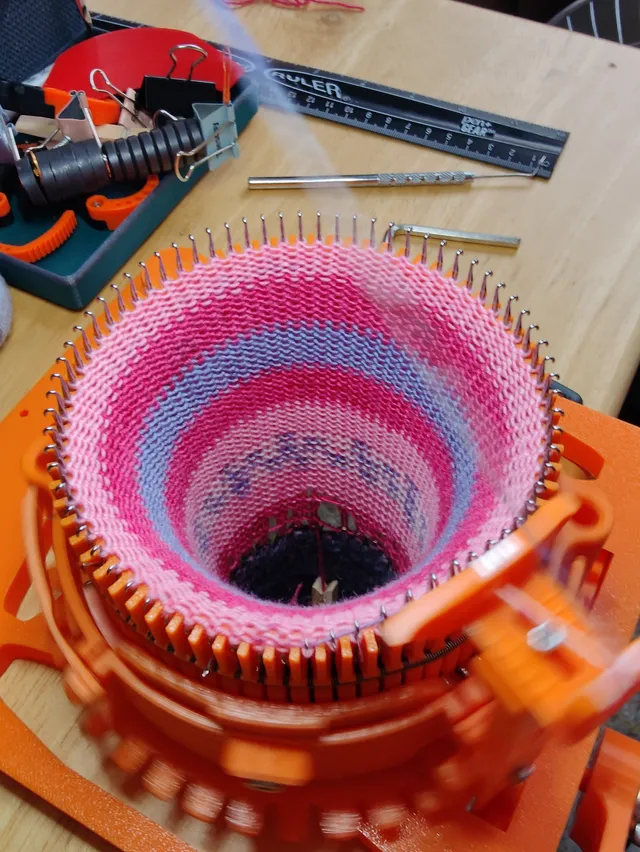
When it is higher it will produce a tight, smaller stitch. This is better overall for a tighter springer fabric. The tighter you knit the more difficult it becomes. You need to find the right stitch size you like. Below in pink stitching.

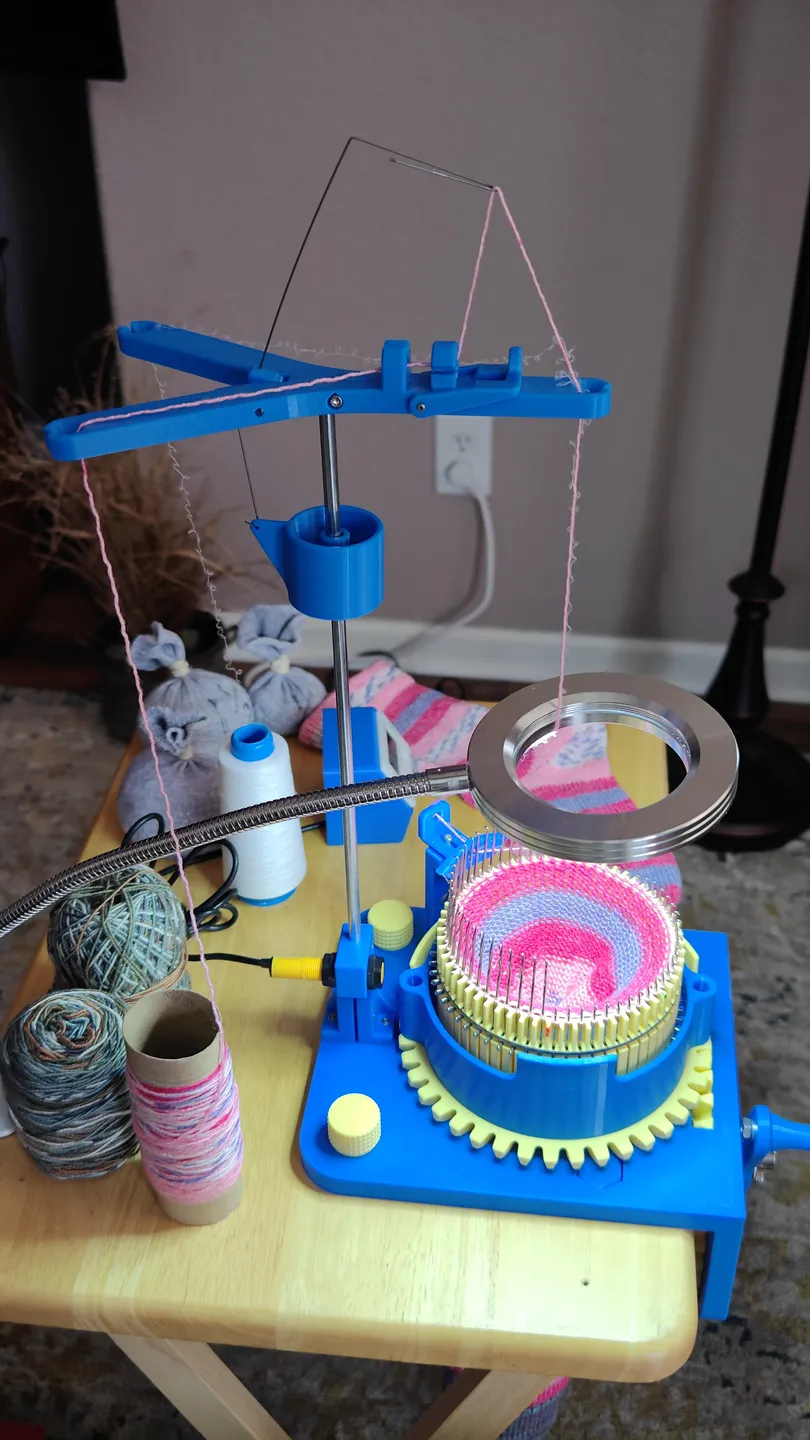
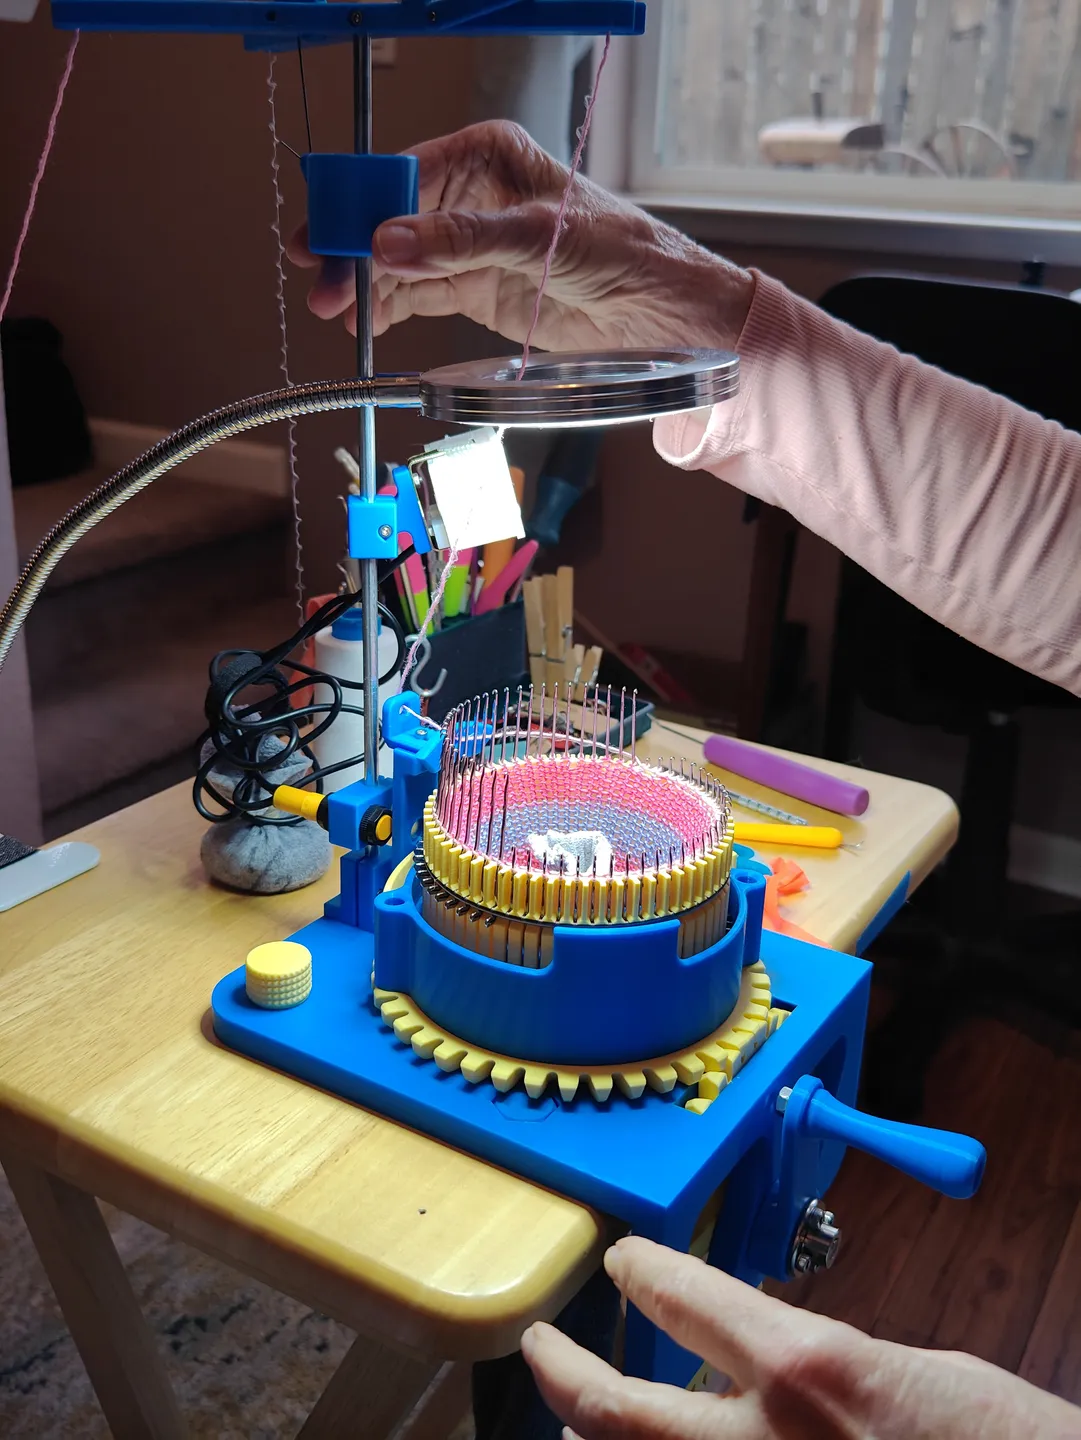
Yarn stand
- 1/4" Metal rod for the center
- Cut to your desired length and chamfer the edges.
Yarn stand sensor bracket
- M3x12 w/hex nut
Yarn Stand Counter Bracket and Yarn Stand Counter Pivot
- M3x25 w/hex nut x1
- M3x8 w/hex nut x2
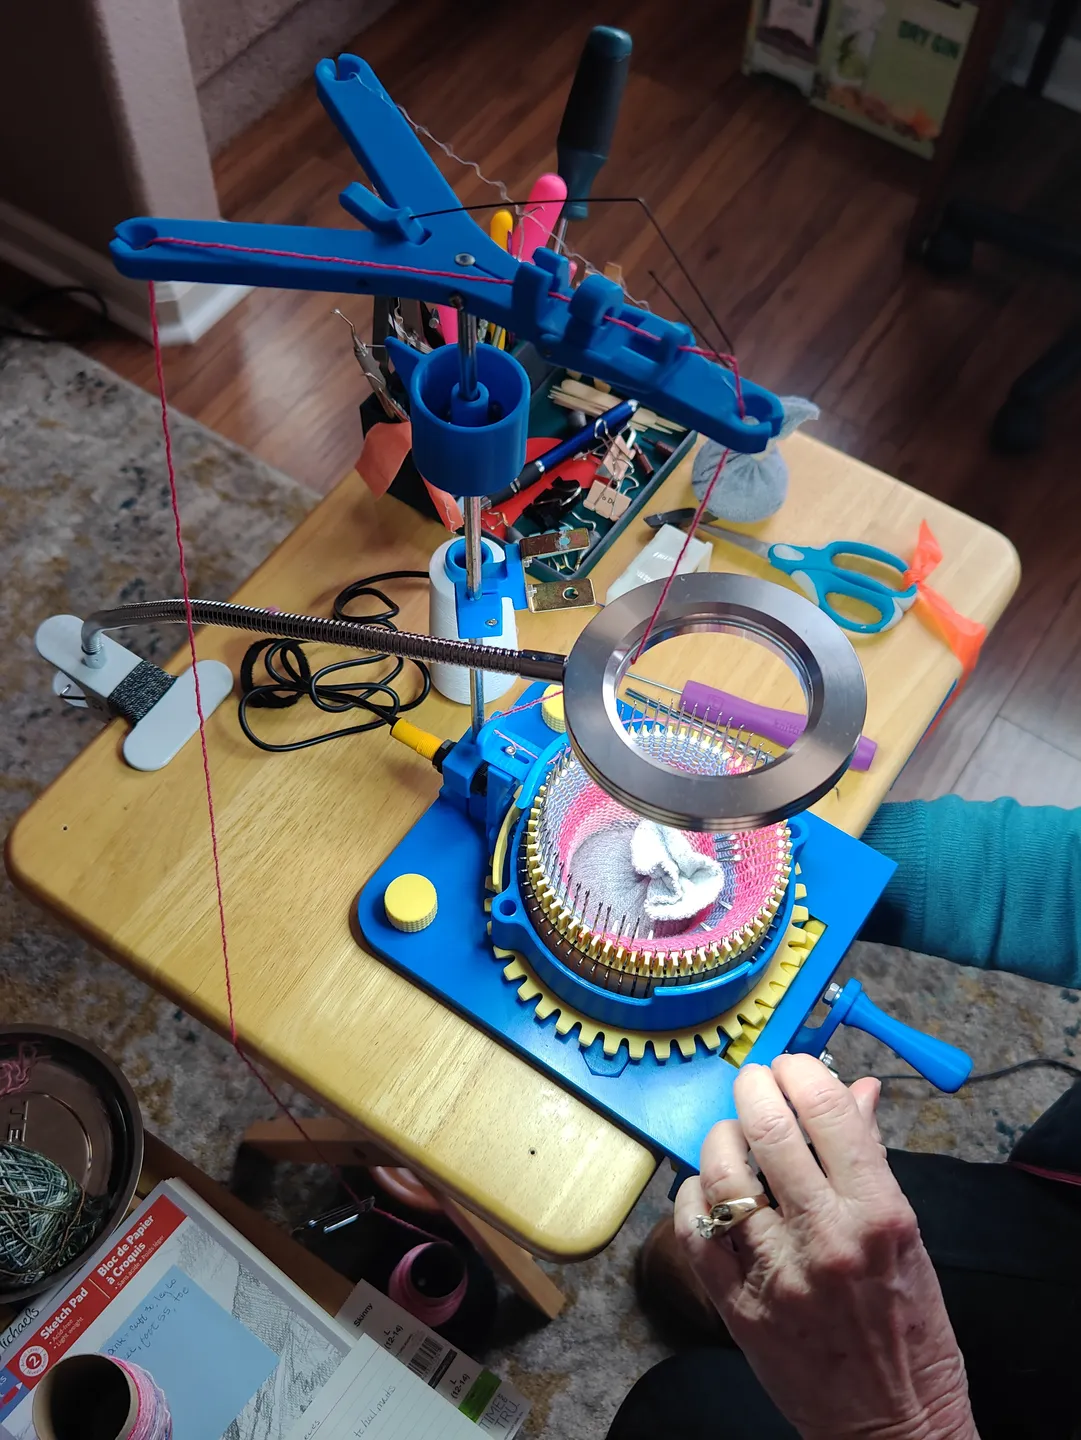
Counter Housing optional desk mount
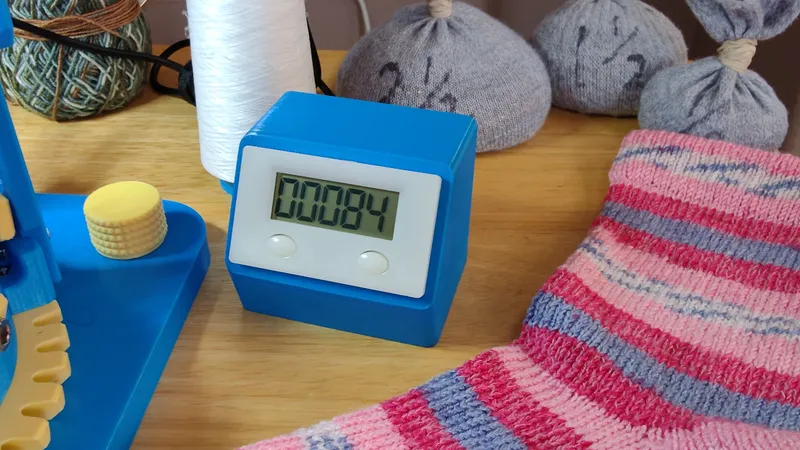
Thanks to Pete Stock here on printables we have an optional counter housing to use. It's a desktop version that frees up your work area above your CSM by giving you an additional option to place your counter on your desk anywhere you like. My mom likes this much better. The counter is now out of the way from above her CSM when she is working. She can place it anywhere on her desk she likes.
Yarn Stand Weight
- 1/4" Steel balls or whatever weight you wish.
Yarn Stand Base
- M3x12 w/hex nut x 2
- M3x20 w/hex nut x 1
Yarn Stand Guide This is the top of the yarn stand.
This includes the Yarn Stand Pivot and Yarn Stand Brake.

- M3x20 w/hex nut x 1 to secure the rod.
- 1/8th" Metal Rod For the Yarn Stand Brake and the Yarn Stand Pivot. Cut to length and chamfer the edges. The Yarn Stand Pivot goes in with the little hole facing forward.
- I used a hammer to tap them in, the Pivot and Brake should move freely.
- The Brake was a little tight after tapping in the 1/8 rod. I pulled the arms out slightly to get it moving freely.
- To chamfer the edges I put the rods in a drill and use a file while spinning them.
ASSEMBLY TIPS
The final main machine took me about 2 hours to build. Once you understand how the parts go together it isn't hard. You will have to pull some nuts in their captive holes with longer bolts.
You may find a different order that works for you when assembling the machine. With the four printable frame bolts the machine is very stable when mounted into a table with all the bolts.
There is a frame template you can print out to help you cut holes for your table. Be aware the crank gear takes up space at the front of the template where the large square hole is.
You may also find other hardware that works for your build you don't have to use exactly what we used.
The machine may be a little tight when your first using it. Sanding parts and a little lubricant can help. Also using the machine after assembly will help wear it in. There are tips below in the printing section for sanding and lubrication.
This is how I assemble the machine. It may not be exactly the same way you assemble it but there is a certain order that makes things easier. It is not complicated at all and easy to understand once you know how the parts go together. Learn the parts from the blender file.
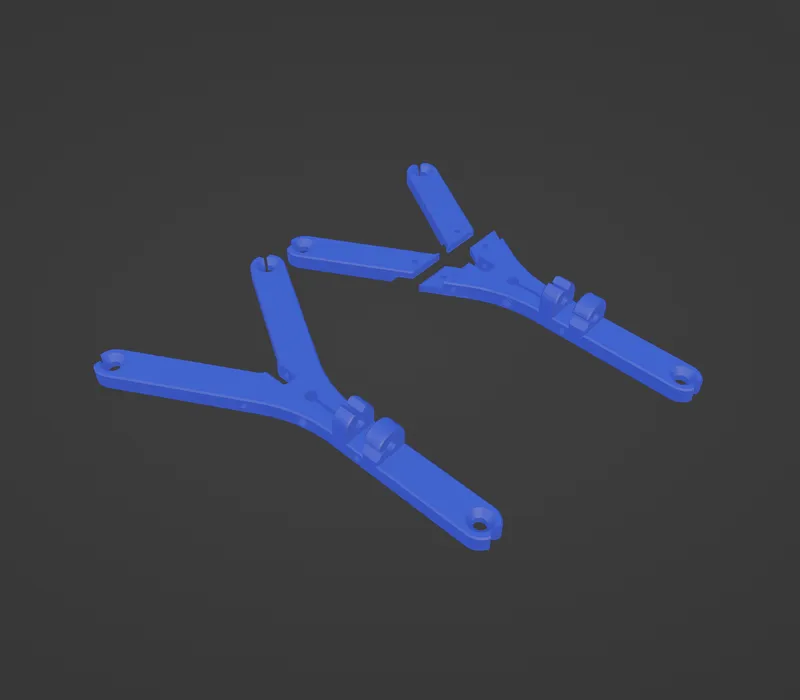
Collar Needle Lift Counterweight Cam
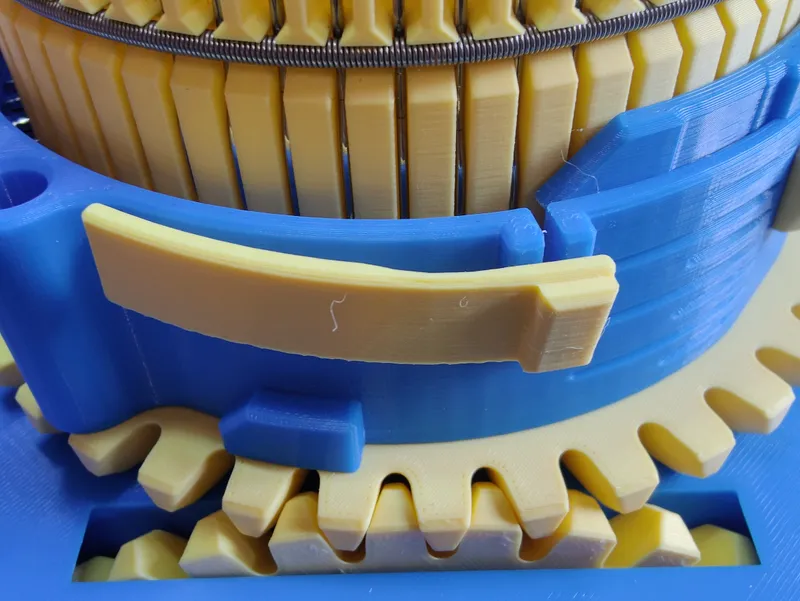

You need to print these at 100% infill. They are easy to replace. I would also suggest using a Stronger PLA or a stronger Plastic such as PETG. They may wear down over time because of the pressure applied in this area of knitting. I would replace them periodically and or print extras to have on hand. We have done quite a bit of knitting (5 weeks now), on them without any issues so far. I would consider them consumable items that should be replaced from time to time.
I print them like this with the bottom of the counter weight as the orientation to the print bed. Then I clean them up.
These are keyed so they will insert from a top angle and push down and rotate into place. They should freely move without resistance to work properly. Print them at 100% infill. I cleaned them up with a little light sanding on the center flat section and the bottom of the needle lift and they work perfectly. They should move freely and be a little bouncy. With the Cylinder in place, they will get stuck against it if rotated too high. This isn't a problem because during normal operation they will only move a small amount as they travel over and under the needles.
You should insert these before you put the Cylinder in the Collar. The needle lifts are curved so the Cylinder will interfere with the inside needle lifts if rotated too high. This is not a problem during normal operation. We have tested and used these quite a bit and they have worked without any issues. There are A and B needle lifts mirrored for each side.
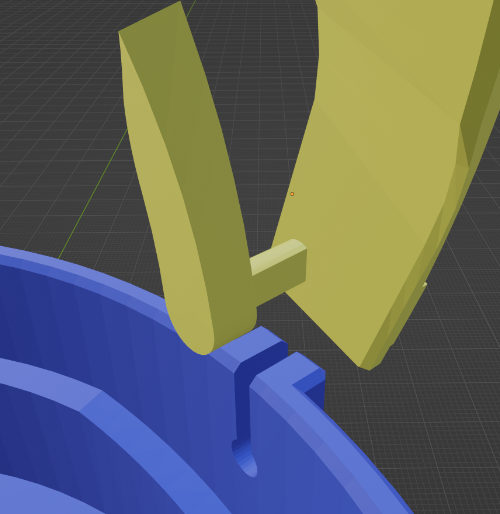
The Key on the Needle lift is the flat center section, it fits in the Needle lift slot when you angle the needle lift and counterweight pointing upward. You push the center down to the hole and rotate it into place. No extra hardware is needed.

If you ever need to replace, redesign, or change the needle lifts this makes it a lot easier because you can rotate it and take it out as easily.
You can watch your cams and visually see when the internal needle cam passes the needles in the lifted nonworking position (when doing heels for example) the outside counterweight will drop. You can also at a glance see if the inside needle Cam is under or over the needles by looking at the counterweight if it's up or down. This is a great visual indicator for where the position of the inside needle cams are.
Ribber
The ribber is an addon it is not necessary for making socks or the operation of the main machine!
We cannot give you a lot of advice or knowledge on how to use a ribber yet. We have not used the ribber as of yet in making socks. My Mom plans on learning to use the ribber at a later time. We will build it, and make the files available for anyone who wants to add this great addition to their CSM. We have done some upgrades to the ribber. There are a lot of online resources to learn how to use a ribber.
The Ribber Tension Cam has a plus and minus on it. The Ribber Needle Direction Cam is labeled in out. The Ribber Dial Adjuster is used for getting the needles lined up with the main Cylinder.
Tappet Plate
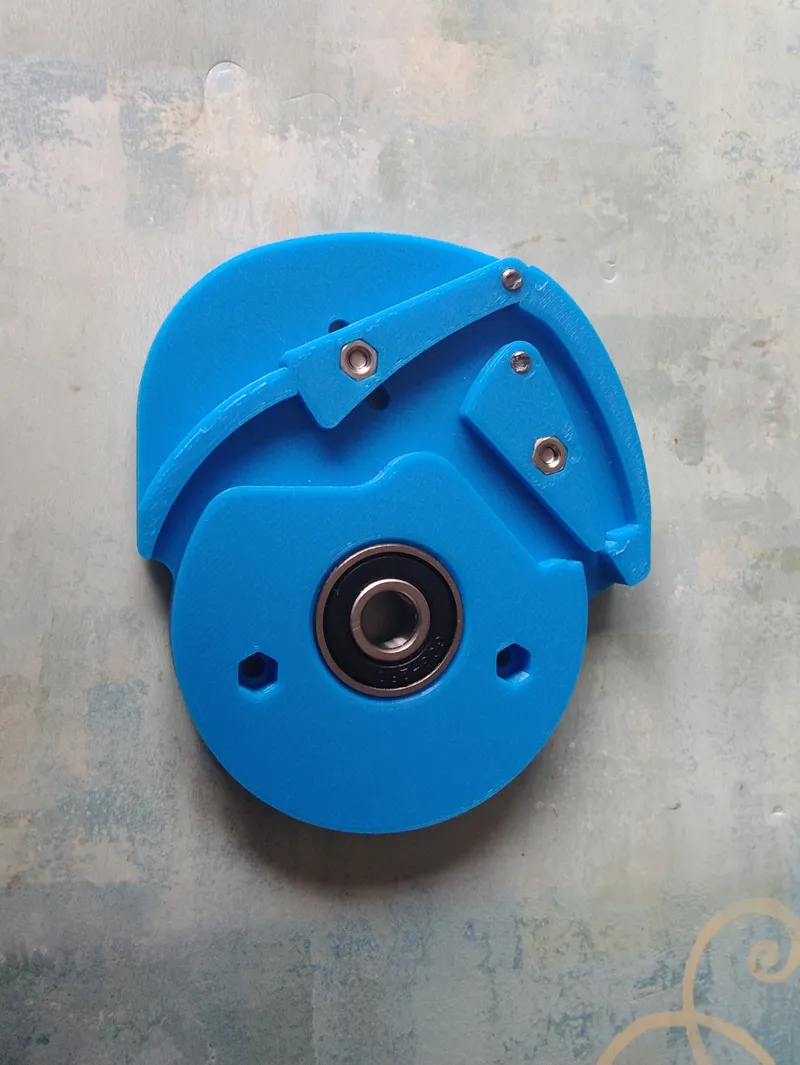

- Skate Bearing
- 1/8" Metal Rod Cut and chamfer for the Needle in out cam and the tension cam. This goes through the small hole in the Ribber Tappet and through the small hole in each of the cams. The bolt head needs to be on top of the tappet the captive hex nut needs to be at the bottom. Just tap them in.
- M3x8 w/hex nut x 2 Ribber Needle Direction Cam and the Ribber Tension Cam on the tappet.
- M3 Bolt head goes on the top of the Ribber Tappet.
Ribber Arm
- Skate bearing
- 8mmx100mm Goes into the Collar sides and Ribber Arm sides. And into the center of the ribber arm.
- The Ribber arm also takes M3x12 w/hex nut to attach to the tappet plate.
- Outer ribber arm M3x20 w/hex nut x2 to tighten the rods in.
Ribber Shaft Collar
- M3x12 w/hex nut
Ribber Dial Adjuster
- M3x16 w/hex nut
- This goes in the Cylinder at the bottom of the Ribber Dial.
- The dial adjuster gets your starting needle position correct in line with the main cylinder when it hits the ribber stop.
I highly suggest watching this video on Ribber assembly by Steve. It explains everything in detail. It's pretty straightforward. I don't use the arrow because I added a - and + to the Ribber Tension Cam adjustment area. The 1/8 inch rod on mine is shorter for the Tension Cam also because of this. I also didn't use washers yet. I will if I feel they are necessary. Other than that this video covers everything for the ribber in detail and in less space than I could type out. Thanks Steve!
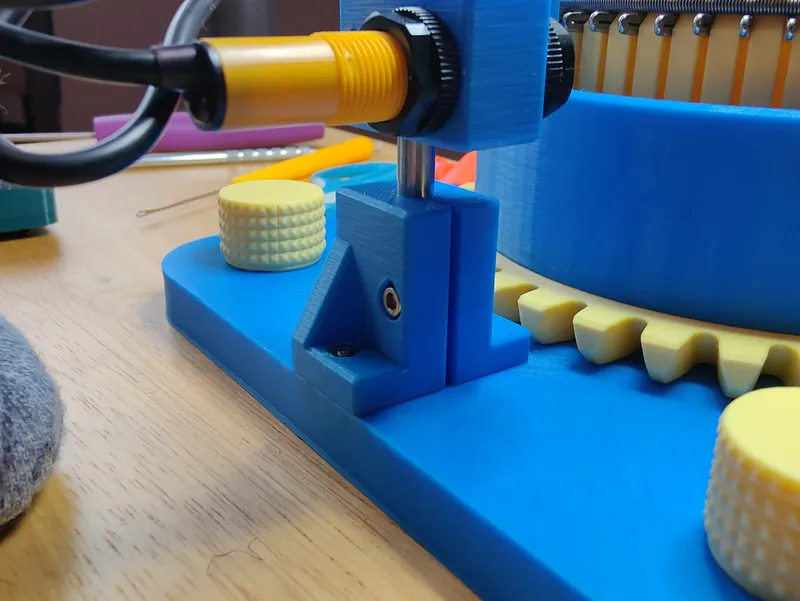
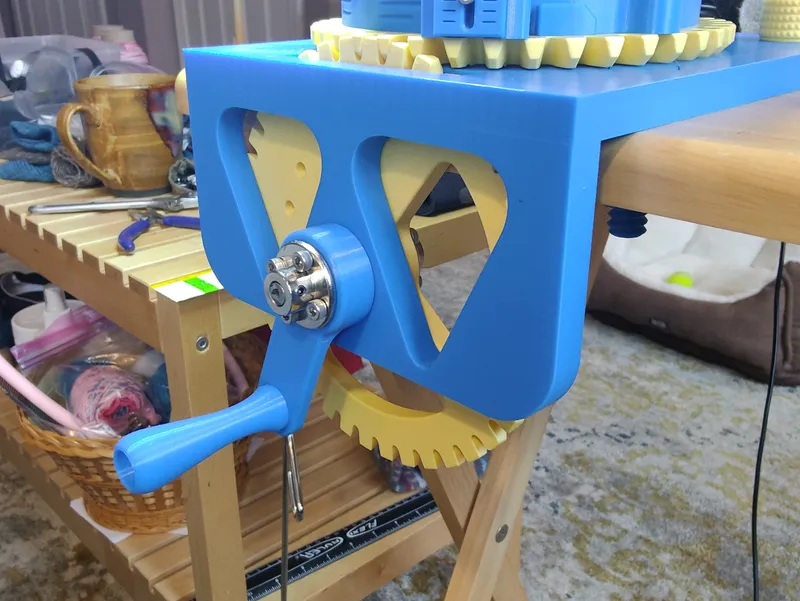
Crank Handle, Arm and Gear

Crank Arm
- M4x16 w/hex nut x 4
- Flange Shaft Coupling
Frame
- Skate Bearing
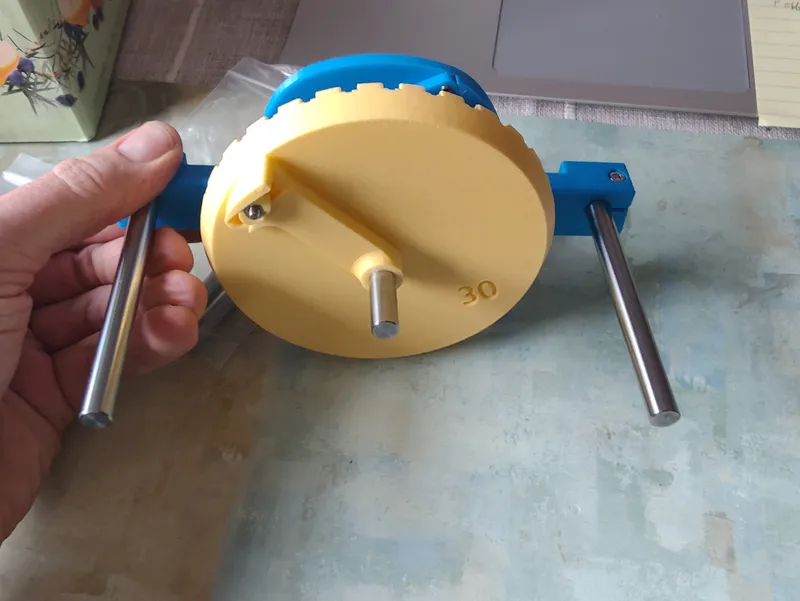
Crank Gear
- M4x12 w/hex nut x 4
- Flange Shaft Coupling
Through Crank Arm, Frame, Crank Gear.
- 8mmx65mm Metal rod Chamfered notched for the set screws.
Tap a skate bearing into the frame. Add the hex nuts to the arm and gear. Here you want to line up the Crank Arm and Crank Gear. And put your 8mmx65mm Metal rod through the arm, skate bearing (in the frame), and gear. I used a hammer. The tolerance on my 8mm rod was very tight. I just flip the frame around and hammer from both sides till the arm and gear had the best clearance to move smoothly and was centered. Then I added the flanges and tighten everything down. Tighten the set screws into the notch in your rod. In hindsight, I should have sanded down the rod a little till its tolerances were better.
Crank Handle
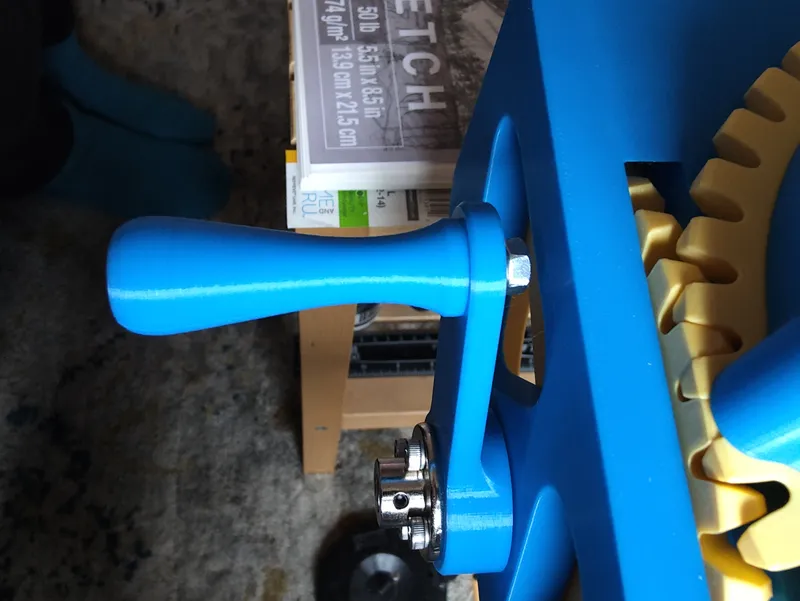
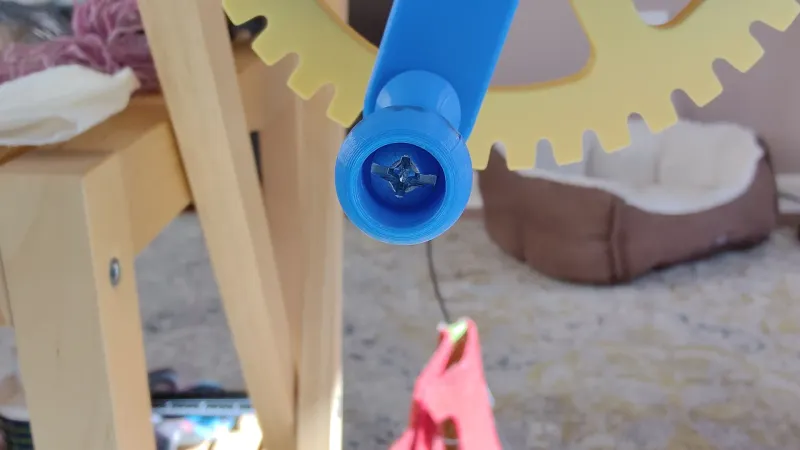
You will need a long bolt and washer, nut for the Crank Handle. Just be sure the nut washer on the back doesn't interfere with the frame as you crank. We got a bolt approximately 65mm-68mm in total length with a washer and nut. The nut recess is a little deep and you may need to secure the bolt head somehow (glue). Or use a bolt with a hex key, philips, or flat head to help secure it.
A shorter Frame and separate Yarn Stand.
On request I have remodeled a shorter frame and a separate Yarn Stand Mount. These are Frame Shorter.stl and Yarn Stand Mount Separate.stl. This should help with some of the Printer sizes. It will give you some more options on how you want to table mount the frame. They both use the same Frame Bolt Back for mounting. The full frame is 216mm x 190mm x 102mm optional Frame Shorter is 177mm x 190mm x 102mm.

A segmented Yarn Stand Guide to print on smaller print beds.
I am adding an additional segmented Yarn Stand Guide to help with smaller print beds. It is Yarn Stand Guide Split 1.stl and Yarn Stand Guide Split 2.stl. This is by bill42.
https://www.thingiverse.com/thing:5376665
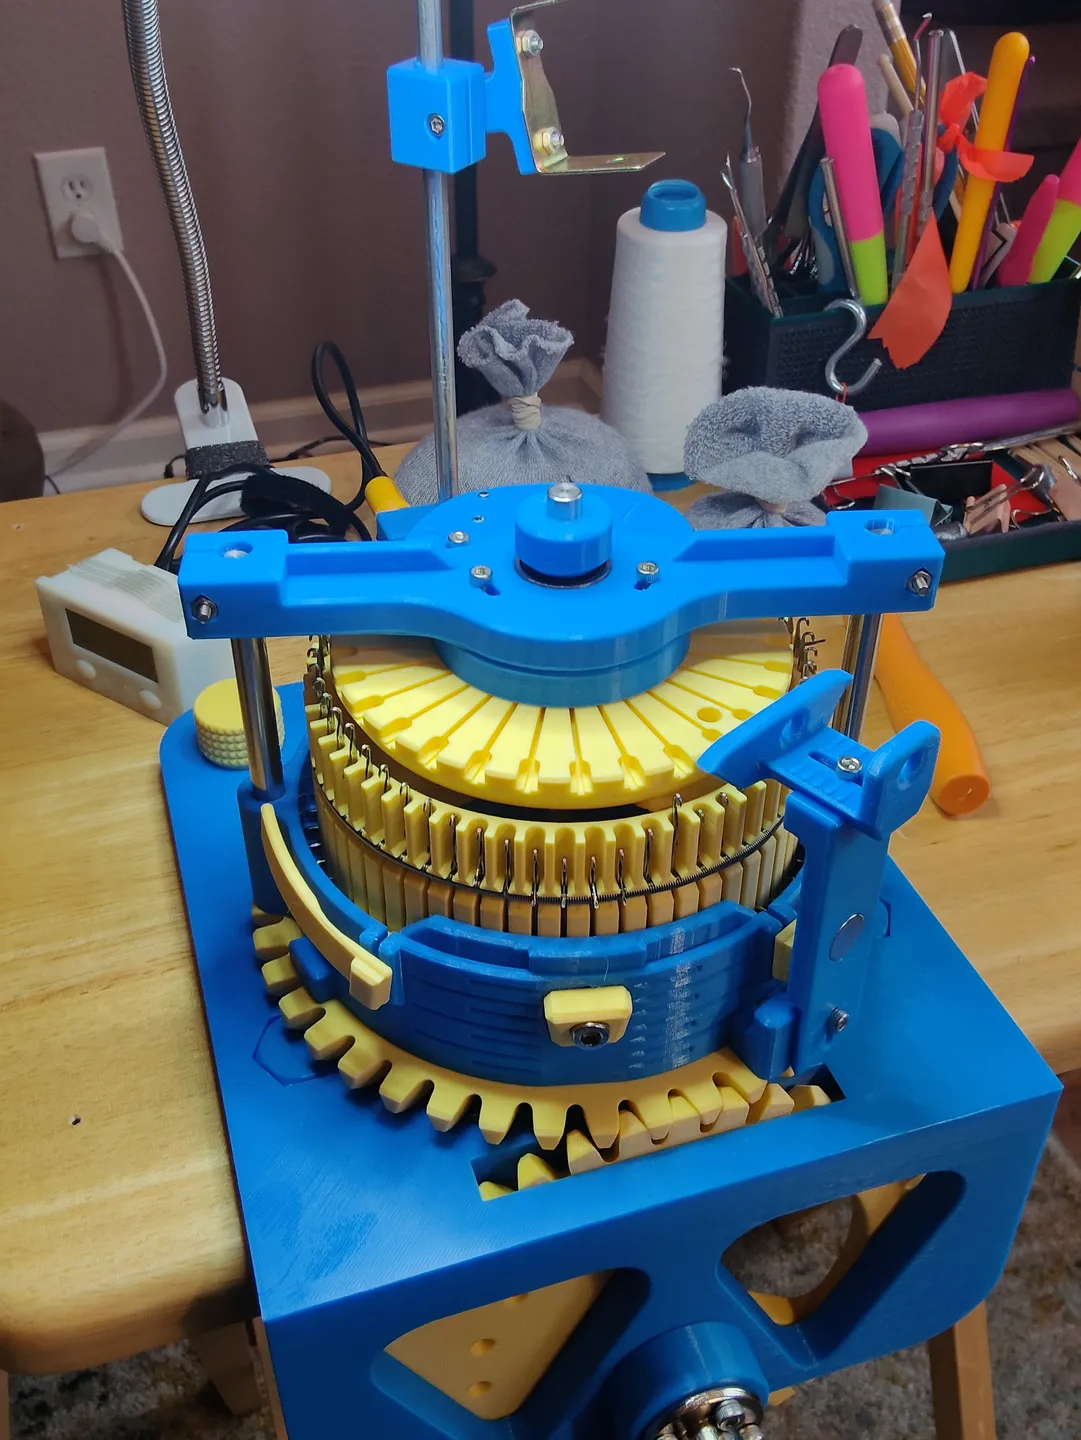
Main Collar, Cylinder Assembly to the Frame
FYI the raised portion on the back of the Collar is a spring rest.
I assemble the Crank Gear, Crank Arm with flanges first. It is easier to install them on the frame before you mount the frame to your table, and before you install the Cylinder assembly.
Add the Collar Tension Cam whenever you want it can easily be installed after everything is put together. It just slides in and screws down with the Collar Tension Cam Bolt Holder.
You need to add the Collar Needle Lift Cams before you put the Cylinder in the Collar.
Add the Yarn Carrier parts to the Collar Gear with M3 bolts and captive nuts. When attaching the whole Collar assembly together the Yarn Carrier must be between the two stops between the needle lifts on the Collar. If it is not after you assemble everything you will have to disassemble it and reassemble it correctly. The machine will not operate if you don't do this correctly. Yes, I have done this more than once. ;) Actually three times now. (*Smacks forehead) You will probably do this also at some point. Smack your forehead and take it apart and reassemble it correctly.
You need to place the front frame bolts in before you screw down the cylinder assembly in all cases (if you want to have 4 bolts in your mounting solution). Depending on your table you may screw down the cylinder assembly before or after you place the frame into the table. In my opinion, it's easier to install the bolts and Collar assembly before mounting it to a table. If you install the Collar assembly after mounting it to a table you need to cut the hole large enough to access the Cylinder screws. Adding the Cylinder assembly after table mounting would be a lot more difficult.
You have to tighten down the front frame bolts before you try to rotate the gears. They need to be tightened down so they are under the frame and don't hit the Collar Gear. When tightened the head of the front sunken bolts will be about .5mm under the frame.
The Cylinder goes in the Collar. The Gear Spacer goes around the base of the Cylinder that protrudes below the Collar. The Collar Gear then goes around the Collar Gear Spacer and lastly the Cylinder Riser 8mm goes below the Cylinder between the Cylinder and the frame.
This you hold all together and screw the Cylinder into the frame with M3x25 Hex socket cap bolts after you insert a captive M3 nut into the space in the Cylinder. It can be a little tricky to hold it all together. I do it by holding the frame between my knees and pushing a M3 x 25 bolt into the frame then feeding the Cylinder Riser 8mm through the M3 bolt then feed that bolt into the Cylinder while holding the whole assembly, secure one bolt then the rest of the assembly is easier to line up for the remaining 3 bolts.
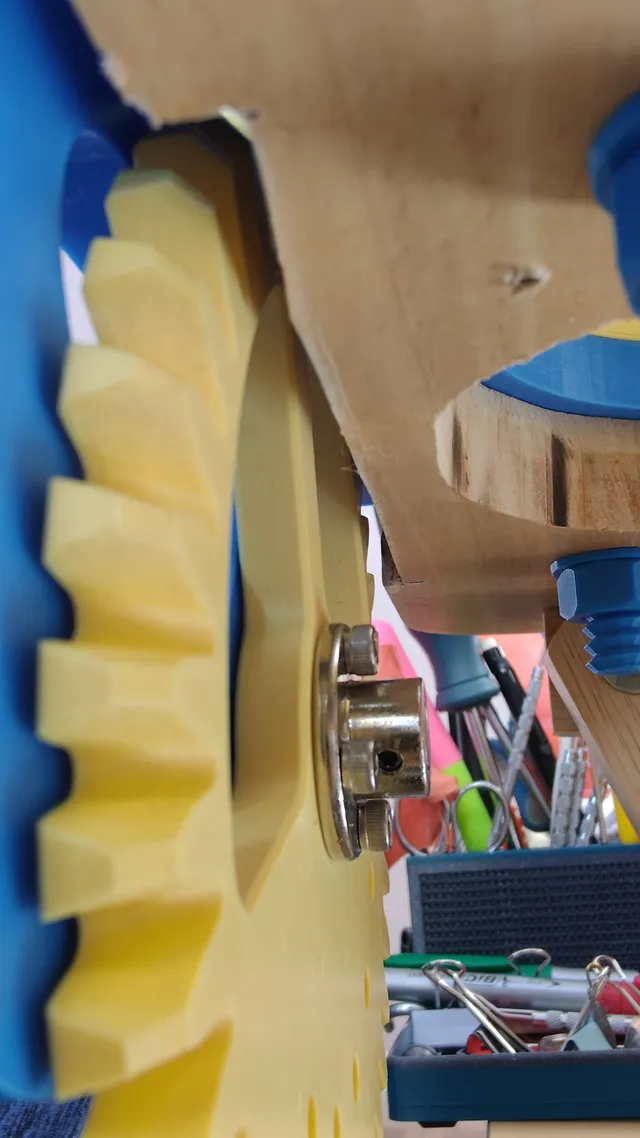
I tilt the machine at an angle and drop the frame bolts into their respective holes then install the rear bolts. This is because the flange for the crank gear is somewhat blocking the placement of the frame on my table. If your table thickness for any reason won't allow this you may need to cut the bottom hole wide enough to place the frame on the table install the front bolts then screw in the Cylinder assembly from below the table.

Or you may cut the table in another way to make it easier to install for yourself. We cut holes for the frame bolts and a hole for the center cylinder only. You could cut long slots for the front frame bolts and slide them in.
Make sure your gear isn't contacting the table We notched the table for the gear and its running a lot smoother. The gear was just barely rubbing the table and causing drag when we cranked it.

Yarn Stand
Tap the ¼" metal rod into the Yarn Stand Base then into the frame and secure the Yarn Stand Base into the frame from below with M3 bolts. Add the Yarn Stand Sensor Bracket then Yarn Stand Counter Bracket (if you want it mounted here) then Yarn Stand Weight. Use M3 bolts to secure. Before in install the Yarn Stand Guide, I tap a cut 1/8th cut chamfered rod into the guide with the Yarn Stand Pivot in place with the little hole facing forward for the music wire. Tap another 1/8th cut chamfered rod through the Yarn Stand Brake and Guide for the front. I placed the Yarn Stand Guide on a table on its side to tap the rods in.
My mom didn't like the counter on the yard stand it was just in the way all the time. We made a desk-mounted solution so it is more out of the way, and you can place it anywhere.
K&S Precision Metals 5501 Music Wire, 0.032" OD x 12" Long


The music wire is for the Yarn Stand Weight and one for the heel spring. The Yarn Stand Weight basket attaches to the side of the Yarn Stand Pivot with bent music wire. The heel spring goes into the front of the Yarn Stand Pivot and bends towards the front of the Yarn Stand Guide for doing heals. I used little super glue on the wire before I set it in the pivot hole and let it set for a couple of hours.
TIPS for Printing the Machine!
These are only suggestions of mine after printing and operating the machine
~~~~~~~~~~~~~~~~~~~~~~~~~~~~~~~~~~~~~~~~~~~~~~~~~~~~~~~~~~~~~~~~~~~~~
PLEASE.…open the blender file it contains the whole machine organized and put together. Review the parts and you can easily see how it's put together!
~~~~~~~~~~~~~~~~~~~~~~~~~~~~~~~~~~~~~~~~~~~~~~~~~~~~~~~~~~~~~~~~~~~~~~~~~~~~~~~~~~~~~~~
Sanding You may need to sand/lubricate various parts.
Sanded
We sanded quite a bit and it improved the machine smoothness and performance a lot. I sanded all the contact parts on the main collar assemble. I used 600 then 1500 from True Value $2 each sheet.
- Tension Cam
- Collar all the tracks
- Collar Needle Lifts
- Gear Spacer
- Collar Gear bottom
- Frame where the Collar Gear travels over
Lubricated…DO not use water based lubricants with plastic!
- Collar Gear
- Needle track
Be careful not to over-lubricate!
We have added a Lubricant port on the Collar Gear this will allow you to put a little lubricant right down to the Collar Gear Spacer and the Collar Gear. Be careful using lubricant. Make sure your lubricant is plastic-safe. To clean the lubricant you will have to disassemble the machine. You should disassemble it once in a while to clean and tighten everything. I have updated the files to include this. PLA is hygroscopic it will absorb moisture. Keep this in mind when using a lubricant or the type of plastic you use to print the machine.

We tried this dry lube and it works really well.

Print at Higher infill
- Collar Tension Cam bolt adjuster
- Frame Bolts, Frame Nuts, Washers
- Needle Lifts
- Collar
- Cylinders
WARNING!!!!!
I suggest a stronger more rigid plastic to be used for the machine. Parts can benefit from higher infill! This machine when under pressure with the weights on the sock material and the knitting can put significant weight and stress on the machine. Consider a stronger plastic like pla plus, pla pro, and petg. Consider higher infills for more strength. I am leaving the infill amount up to you.
Lycra is especially difficult to add to the knitting process.
I am now suggesting that everyone making this machine print the collar, cylinder, and tension cam at higher infill.
The original Legare machines are metal and printing this in plastic means this needs more help to strengthen it to match the performance of the metal it was designed for.
In summary, we're basically building a machine in plastic that was originally designed to be made of metal, the stronger we can make it the better the machine will perform.
~~~~~~~~~~~~~~~~~~~~~~~~~~~~~~~~~~
The Machine in the pictures was printed in Polymaker PLA Matte Pastel Banana, Hatchbox PLA Pro + Lite Blue. Running great no problems after a month.
https://www.amazon.com/Polymaker-PolyTerra-Bioplastic-Printing-Filament/dp/B08R3BMG6Z?th=1
I use a Prusa MK3S. I used Prusa Slicer and it worked fine even with errors in some of the original models. It prints extremely well. Your printer needs to be able to print down to tight tolerances. The needles need to freely move within the Cylinder slots. Make sure your prints are not warping especially anything around the needles such as the collar, cylinder, cams, and gears.
Upon request, I have remodeled a shorter frame and a separate Yarn Stand Mount. These are Frame Shorter.stl and Yarn Stand Mount Separate.stl. This should help with some of the Printer sizes. It will give you some more options on how you want to table mount the frame. They both use the same Frame Bolt Back for mounting. The full frame is 216mm x 190mm x 102mm optional Frame Shorter is 177mm x 190mm x 102mm.
I am adding an additional segmented Yarn Stand Guide to help with smaller print beds. It is Yarn Stand Guide Split 1.stl and Yarn Stand Guide Split 2.stl. This is by bill42.
Some people with Cura Slicer are having issues with the Collar. Keep this in mind if using Cura you may need to try another slicer such as Prusa Slicer or Creality Slicer. I fixed some geometry issues with the collar after taking a closer look at it. I uploaded the newer version to the project. Someone already tried the fixed version in cura and said it's working better. If anyone has problems with printing let me know I will do my best to help.
Print on a flat surface do not print on any textures surface. This is important for parts of the machine that travel over each other, such as the gears and the frame.
I printed the whole project in PLA which works just fine. I used .20-layer height for the frame and .15 quality for everything else. If you like .20 should be fine for everything.
Most of the parts are easy to understand and how you should print them. I will include the STL's and Blender file. I have oriented the STL files so that when loaded into a slicing program they are in their printing position.
I used brims, a heated chamber, and other useful tricks to help in printing. You need to avoid warping for the machine to work properly.
Print the cylinders top-down. Use supports for the captive nut areas, it is very minimal.
When you print the frame use supports for the captive bolt areas.
The four printable frame bolts use the same printable washers and nuts.
Hand-tightening the frame bolts are sufficient enough. With the washers, they have a lot of grip.
There are over 50 parts to the complete machine. You can create your own STL files by exporting them from the blender project.
To learn more about the machine please go to Steve's YouTube channel and review his videos. Although my remix is redesigned quite a bit his videos are very good for learning about this machine. He has some video guides on assembly that are excellent.
https://www.youtube.com/@steveturner1447/videos
~~~~~~~~~~~~~~~~~~~~~~~~~~~~~~~~~~~~~~~~~~~~~~~~~~~~~~~~~~~~~~~~~~~~~~~~~~~~~~~~~~~~
Tips on using the machine.
As users ask questions I will post the questions and answers here so the community can learn.
A user asked about the yarn type for the machine.
I don't think cotton yarn will work under any circumstances. Look for sock yarn only with 75-80% wool, the rest nylon or polymide. This kind of yarn has stretch, which is important for the CSM. The size yarn is sock or fingering. Other yarn sizes do not work. I see your yarn picture. The Yarn Bee hanks should be fine. Note those are 100% wool. The 100% wool will not last as long as the combo yarn, but it works fine. I see a Yarn Bee stack of yarn, but I can't see the yarn size. If it's fingering or sock yarn, that should work great. If it is a heavier yarn, consider returning it or using it for another project. It is most important to use the correct size yarn and wool makes it stretch. If you have any more questions, please feel free to ask.
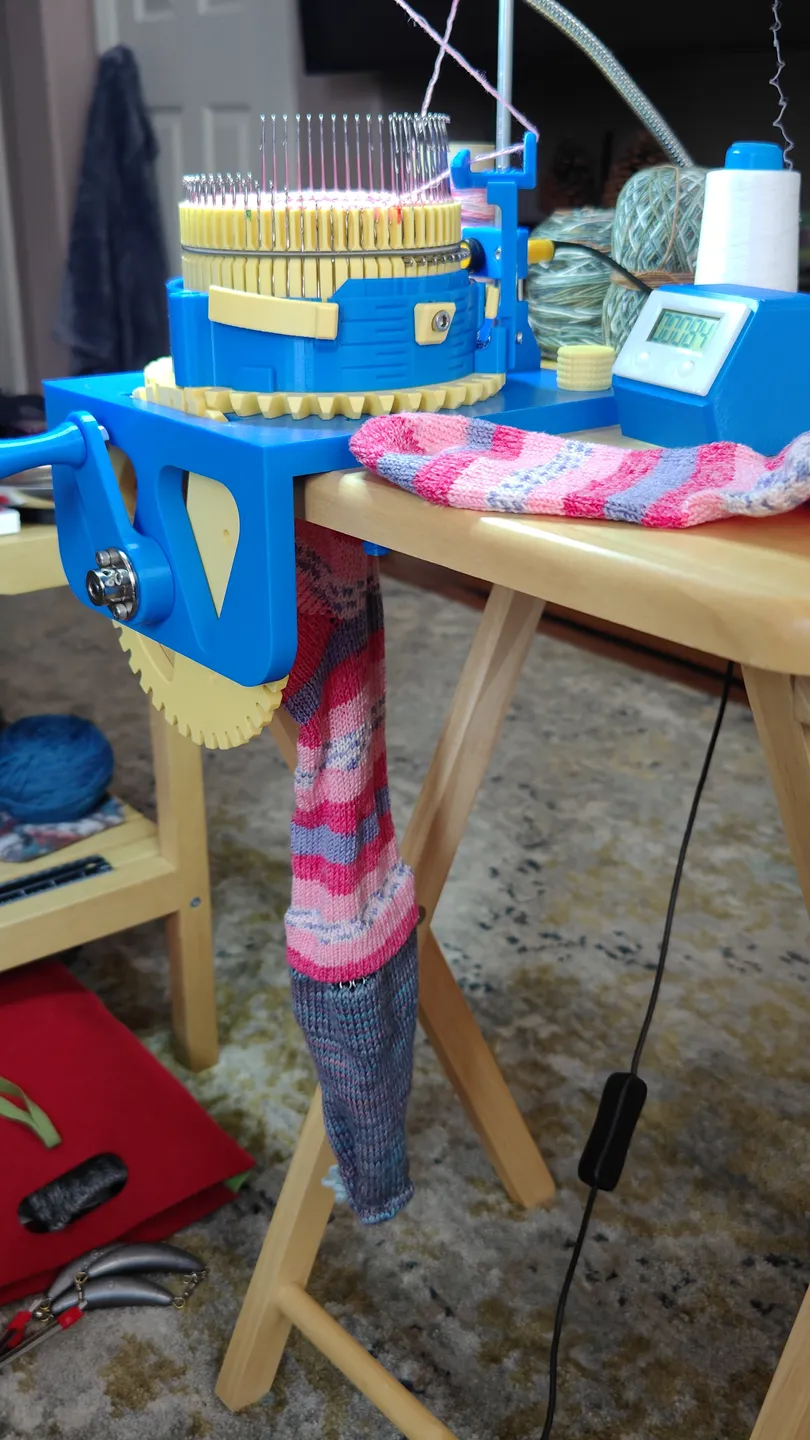
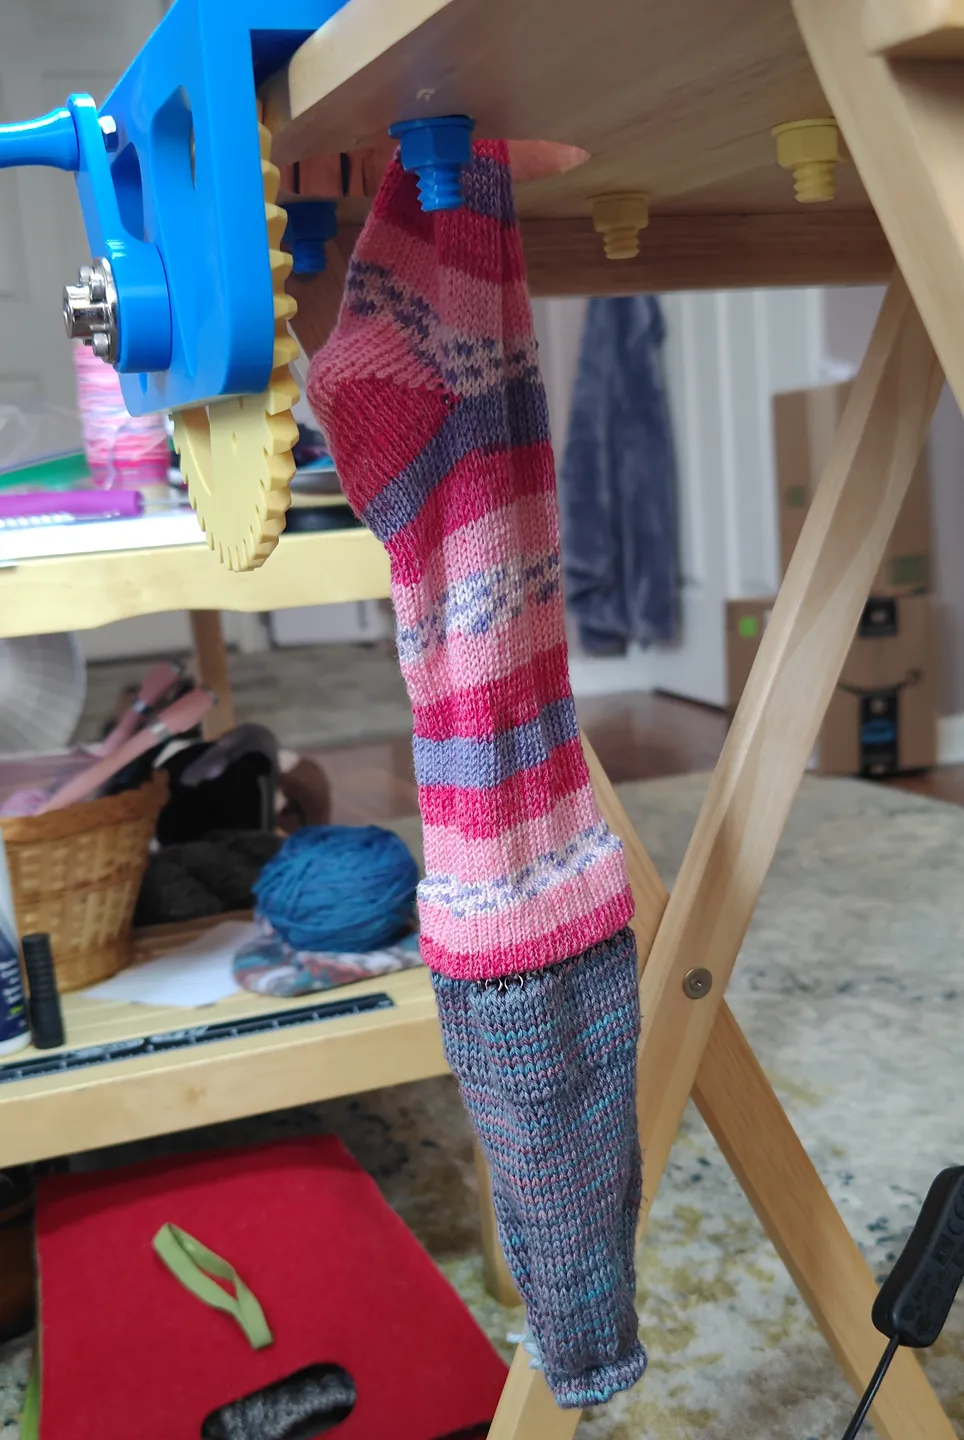
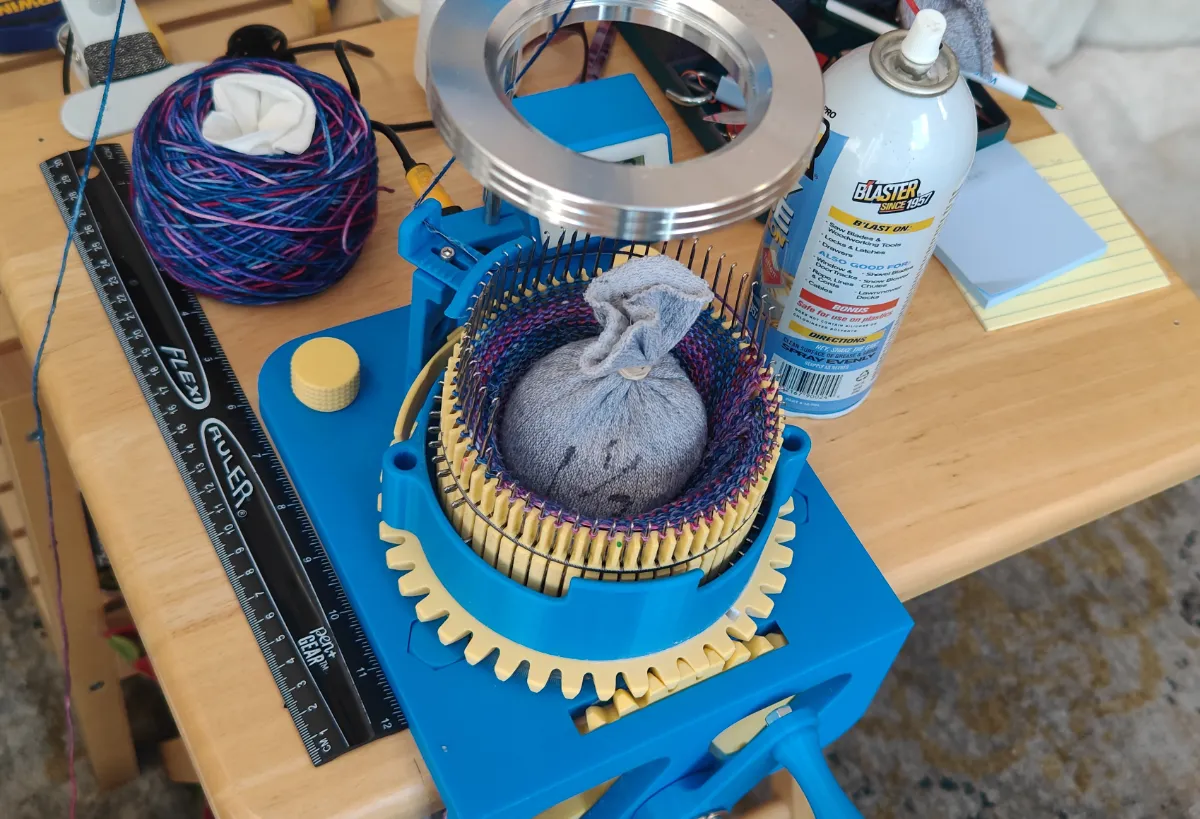
Be sure you have enough weight in the center pulling the knitting down as you are cranking. I made 3 weights from toes of socks and added BBs to .5 lb, 1 lb, and 2 lb. Closed with a tight rubber band. Wrote the weight on each. Just like in the Dean and Bean's videos. You can combine weights to make more weight if needed.
The tension of the yarn coming from the source is 0. Yarn should be loose, free, and flowing only guided by your hand.
Question:
Question on ribbed socks. Will this make the sock tighter? The 72 cylinder is right for my foot but the upper part of the sock is loose on my skinny legs. What does you mom do to narrow down the tube for the leg?
Answer:
The ribbing will make a small difference to be more narrow. What really helps is using lycra. You can buy lycra from CSMsupplies.com. I have white, tan/beige, and black. Lycra pulls the yarn together nicely and yet stretches to fit well. I watch a lot of Jamie Mayfield. She now uses lycra in all the CSM socks. You can find videos where she talks about using lycra. Good luck!
Also the 60 cylinder will tighten up the sock for a better fit. 72 is additional width on any sock.
Question: I also discovered by accident that if I use a heavier weight, the tube seems to be narrower/tighter. Does you mom have any comment on varying the weight to tweak the tightness of the sock?
Answer: I have minimal experience with varying the weight. Extra weight will make the stitches a tiny bit longer. I'm not sure that changes much. Yarn is forgiving and gives width-wise and length-wise. If I add extra weight, I do find more resistance in cranking the gears. One thing I use in all my socks is Lycra. It is a thin stretchy thread used along with the yarn. The effect is that the sock keeps its shape better. The sock conforms more to the fit of the foot. It stretches nicely to put on and the sock fits well.
~~~~~~~~~~~~~~~~~~~~~~~~~~~~~~~~~~~~~~~~~~~~~~~~~~~~~~~~~~~~~~~~~~~~~~~~~~~~~~~~~~~~~~~~~~~~~
I love you MOM! Thanks to everyone for reading this guide!
We all worked together as a Family to bring this to you!
You can ask questions and we will do our best to answer you.
If you feel blessed by this please take a moment and Thank God your Heavenly Father for this blessing!

Thanks for checking out my designs! And Print On!
Tags
Model origin
The author remixed this model.


Differences of the remix compared to the original
Updated file names.


