WiFI QR Code Sign - Embedded Magnet Version

Description
PDFHere is a version of my WiFi QR Code Sign that uses embedded 8 mm x 3 mm magnets (Amazon) instead of a stand, so you can attach it to your refrigerator or any other ferrous metal surface.
Use this sign to share your WiFi hotspot SSID and passcode with your guests. Most iOS and Android devices should be capable of interpreting the QR code and will connect to the WiFi network without manual selection of the hotspot or manual entry of the passcode.
Note that your WiFi SSID and passcode are available to anyone who has the QR code. This is not a major security risk but it is something that you should know.
To make your own sign:
Copy this Tinkercad file into your Tinkercad profile and open it as a project: https://www.tinkercad.com/things/9CLmrPRHdBd
First, take a look at how the sign is designed. You will need to make some changes to the sign to customize it for your network before you export.
Select the sign, then select the Ungroup button ( ) to separate the QR code object from the sign panel.
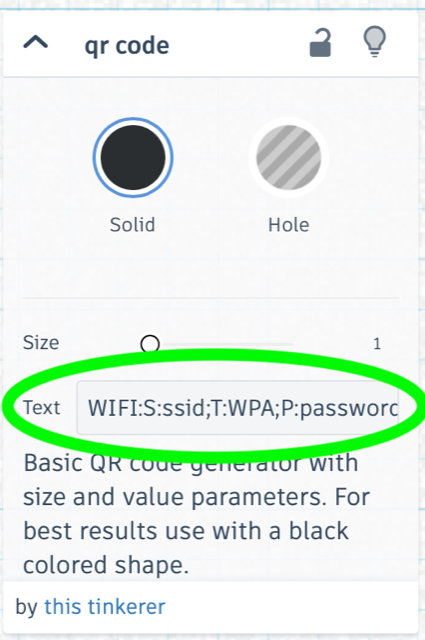
Select just the QR code object. In the Properties for the QR code object, enter your WiFi information into into the Text box using this format: WIFI:S:ssid;T:WPA;P:password;; where ssid is the SSID of your WiFi network and password is your network password. Note that both are case sensitive. For more information on how this works, see https://pocketables.com/2022/01/how-to-format-that-wifi-qr-code-in-plain-text.html or Google “WiFi QR code Format”.
The sign is configured to set the top of the QR code object two layers above the panel (0.4mm) which should be sufficient to eliminate the gaps that will appear in a single layer. You can go higher if you want a more pronounced emboss effect, but don't go too high or it will only be possible to scan the code while standing directly in front of the sign.
Test the code by switching to a top down view, then put your phone into camera mode and point the camera at the QR code on the Tinkercad screen. You should be prompted to join the network specified in the QR code properties. After you test the code, select the sign and the QR code and press the Group button ( ) to group them together. When ready, export the sign as an STL file.
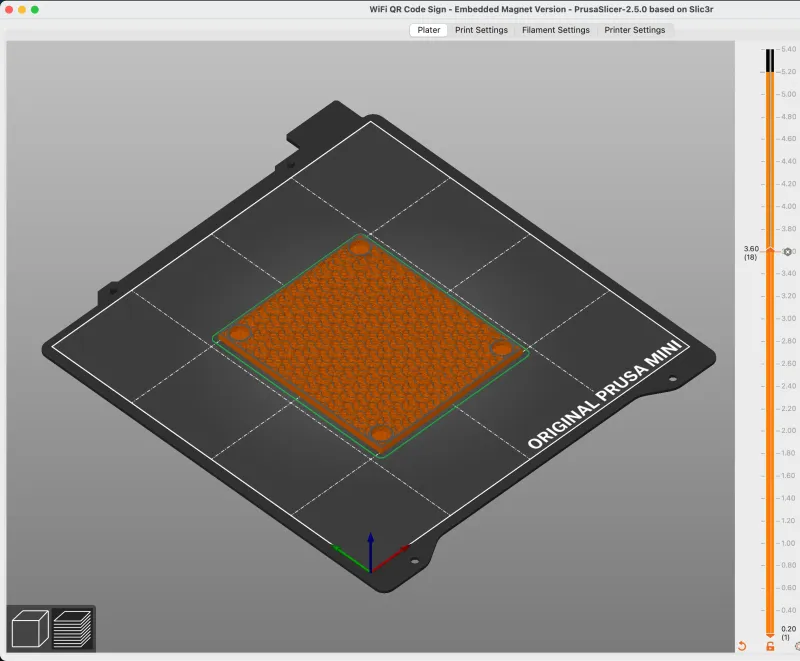
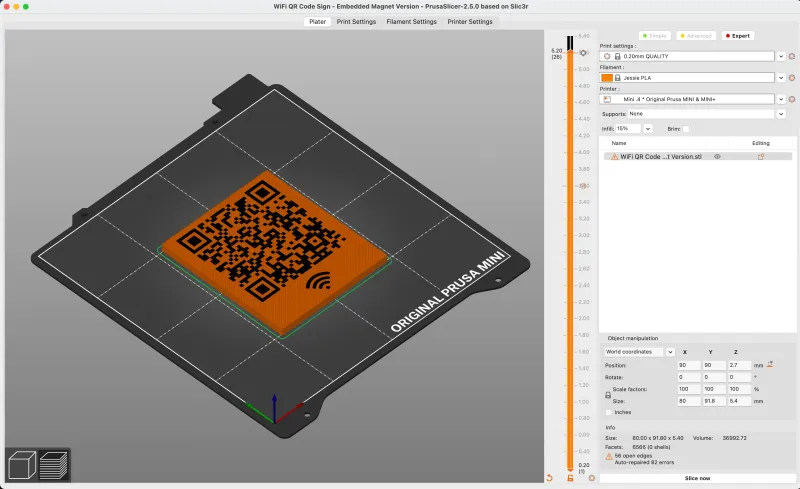
Import the sign into Prusaslicer. Slice the sign using 0.2mm layer height. A 4mm brim is recommended to keep the corners from lifting.
The sign uses Prusaslicer's Pause Print function to stop the print at the point when it is time to insert the magnets. Use the layer height slider to select the point to pause the print. For 0.2 mm layers this will be 3.60 mm:
With the slider at 3.60 mm, right click the “+” sign and select “Add pause print”:
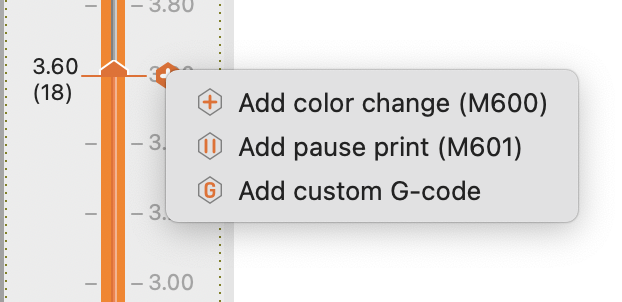
You will be prompted to enter some text for the LCD message, I used “Insert magnets”. The “+” sign will change to “x” after you program the pause, then will appear as “II” as you preview other layers.
The sign uses Prusaslicer's color change option to stop the print and allow you to change the color for the QR code. Use the layer slider in Prusaslicer to select the first layer where the QR code and WiFi icon appear (if using 0.2 mm layer height, this should be 5.20 mm), then click the “+” sign on the slider to set a color change at this layer.
After you have programmed the pause and the color change, re-slice the sign and print. If you use Octoprint please note that the Pause command doesn't always play nice when using Octoprint, particularly with the Prusa Mini. Consider using your SD card or USB stick for this print.
When the print reaches 3.60 mm, the printer will pause for the magnets. Insert four 8 mm x 3 mm magnets into the holes, keeping the same polarity for all four holes. Press the magnets in as far as they will go. The top of the magnets should be just below the current layer height. When the magnets are in place, resume the print.
When the print reaches 5.20 mm, the printer will pause and prompt you to change the filament. Change to the color that you selected for the barcode and finish the print.
Leave a comment if you have questions and I'll be happy to assist! Post your make and please give it a Like if you are happy with your sign!
Happy Printing,
Jack
Tags
Model origin
The author marked this model as their own original creation.