Let's build...Drybox v2!

Description
PDFI was thinking quite hard how to fix the issue some experienced, that not all types of spools slide nicely. I had the solution right in my hands all that time, I just didn't realize it before! Let's finally use all these old pieces of PTFE laying around, being too short. Just slide it into the holes in the redesigned stands and cut away the excess. No gluing this time, you can just force it there and it will stay. It totally surprised me how nicely spool rolls with this simple, almost trivial idea.
Intro
This is my return to the drybox. Recently, I found some humidity issues even with my PLA spools and a need for multiple dryboxes arise. Instead of reprinting the original design I decided to go back and start from scratch, to fix various issues, improve here and there and avoid past mistakes, you name it. I ended with improving pretty much each part but most important, I manage to simplify the whole design greatly, make it easier to print, complete and operate. Let me show you how.
First and foremost, while we all used tons of metal parts, mostly bearings and screws in abundant numbers, there is no reason for that. Those can easily double the price of the whole build while offering a very little advantage. Do you think the bearings are absolute necessity? And what about alternative approach? We can bravely use low friction property of PTFE here, can't we...The moment you need like 64 pcs of 608ZZs for your project (other than a huge battle robot) is the moment you should rethink your approach.
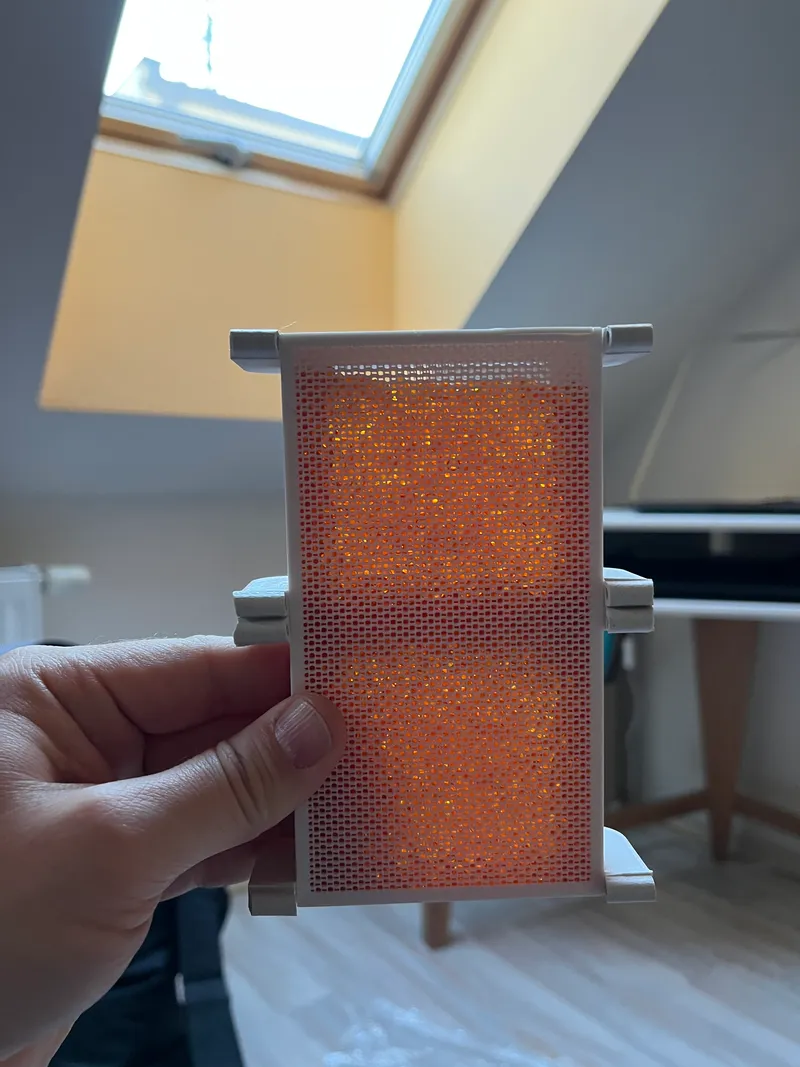
How does it work? By having only small points of contact as you can see here:
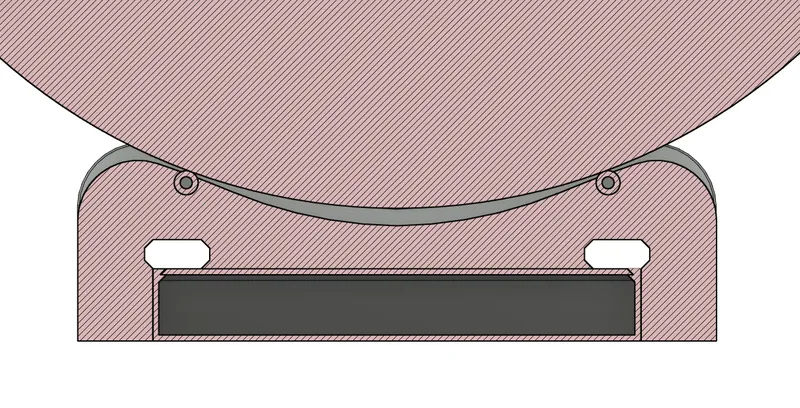
Does it have some limitations? Well, I have no idea how it will behave with one of those cardboard spools, and obviously, smooth outer rim of the spool helps so if you are like me and use Prusament all the time, this is exactly for you. I did try with some generic spool though, which had more matte surface and thus a higher friction, and found no difference, it still works perfectly well. Feel free to try and let us all know if you find some kind of spool for which this solution doesn't suit well.
I would like to rehabilitate a glue with this build as well. It's very popular to avoid it completely these days and while I do admire those elegant builds which nicely snaps together just like everyone else, there is no reason to skip a glue in our construction here. (You mostly can though, if you really feel like so...)
What you're gonna need
…besides Ikea Samla 22l with a lid (Ikea code 80102976), obviously.
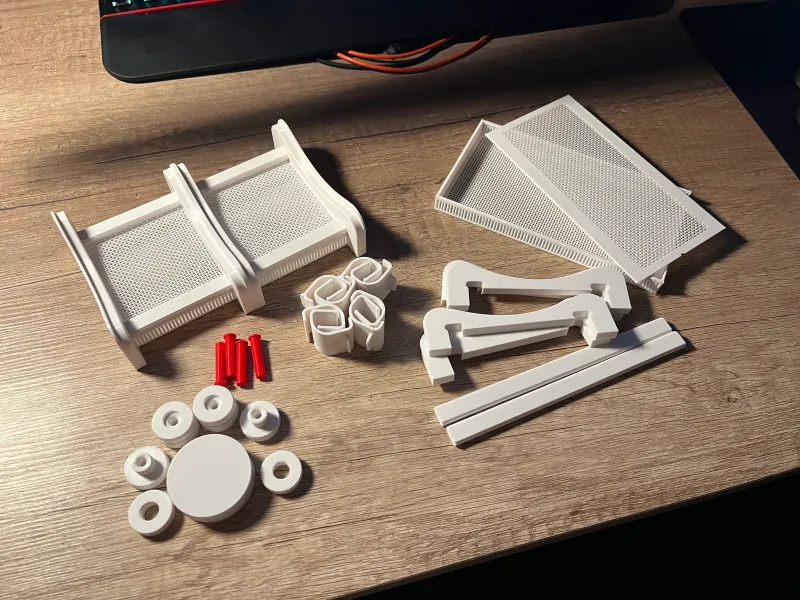
Printed parts:
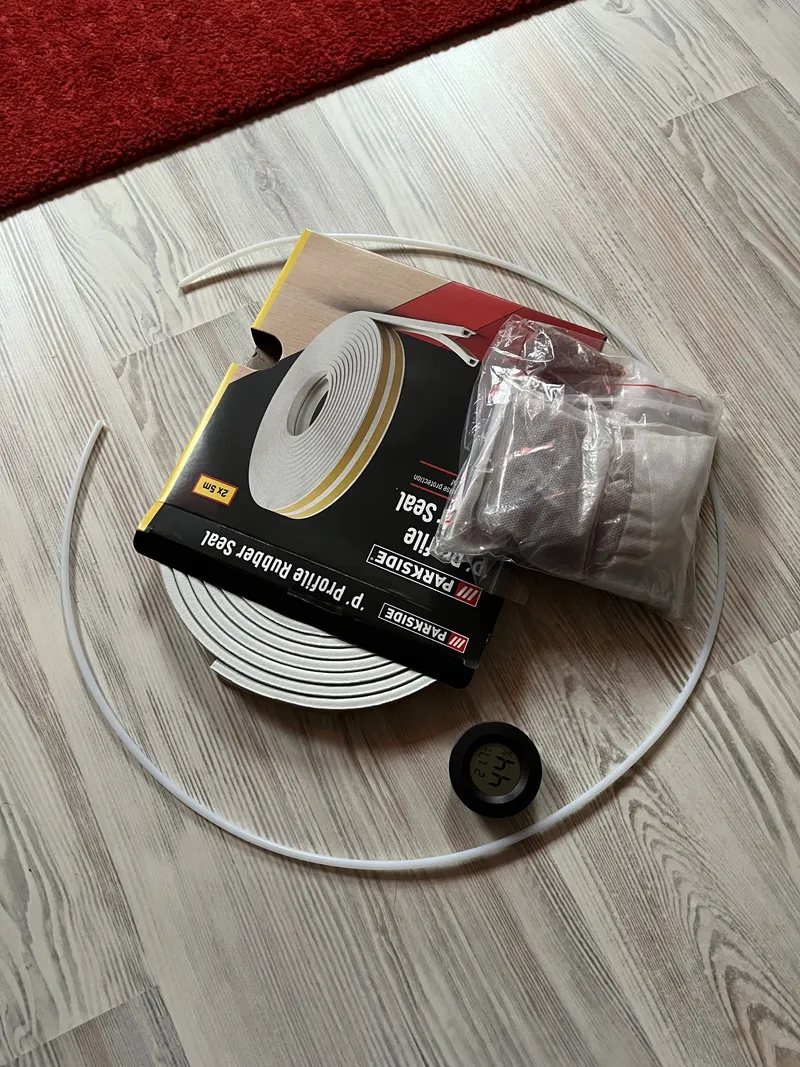
Consumables like any generic hygroscope, some rubber seal (about 2m) and desiccant/silikagel, preferably color indicating (get the orange one, the blue one contains cobalt and is considered a health risk):
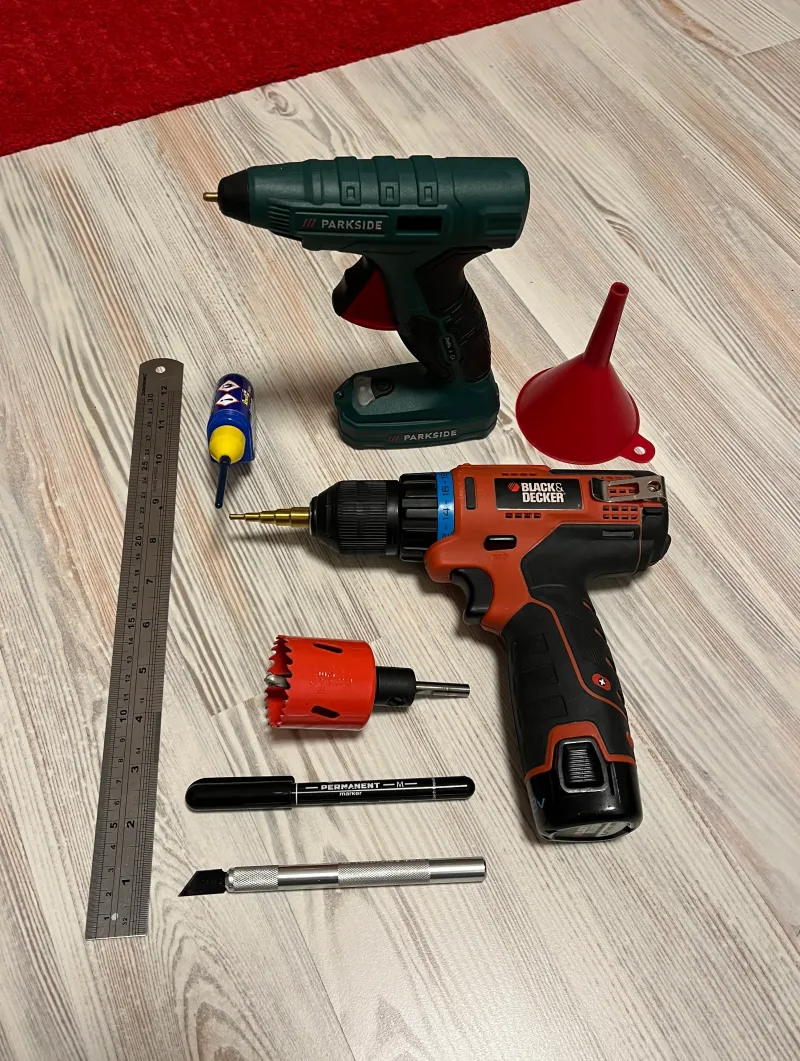
Tools are just a basic ones, 10mm drill bit (step drill is preferred), hole saw is optional:
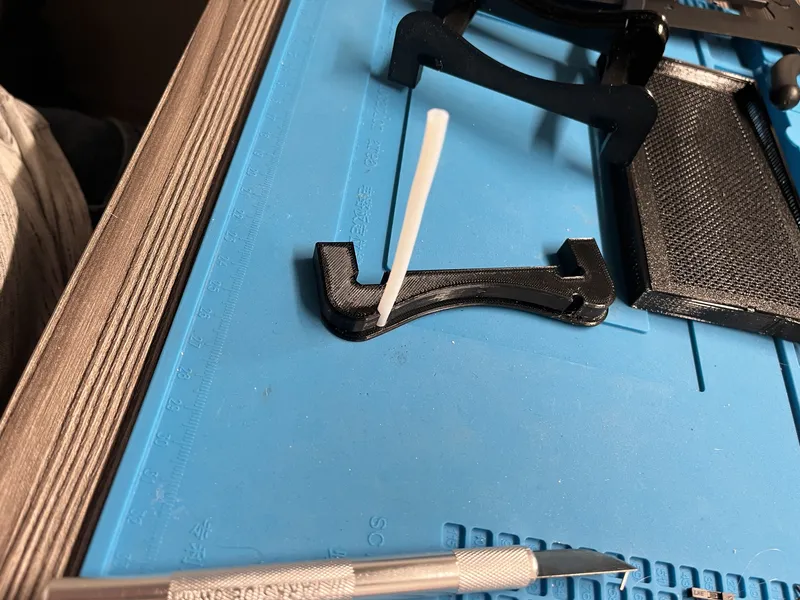
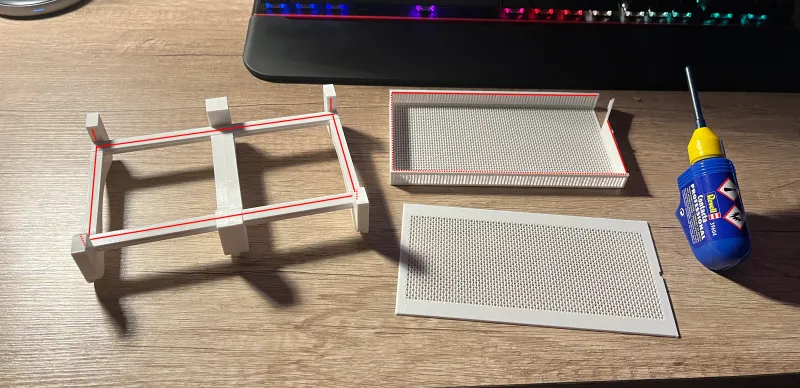
Complete the stand
Now comes the part where you will want to use the glue. Or don't, up to you. If you do, apply it along the red lines (click to enlarge the picture). Try to complete the whole contraption dry first a few times, to get used to it. As noted in the comments, keep an eye on the orientation, the lid of the box slides in with sheet side up, check the crosscut on the very first picture of these instructions. CA glue is not the best idea here, it's generally too quick, even the gel one. Keep the glue off the tiny door and the central stand.
Do you see those tiny tic tac pack style door, you hopefully didn't glue shut in the previous step? These are the reason for PETG being material of choice here and will be used for loading and unloading desiccant. I'm quite proud of that one. Carefully bend them a few times, as long as you do not open them over 90°, they will serve you much longer than your usual tic tac package. If elephant foot effect connected them by the hinge with the bottom, use your exacto knife to carefully set them free first, otherwise you risk tearing them away completely. Trust me, been there.

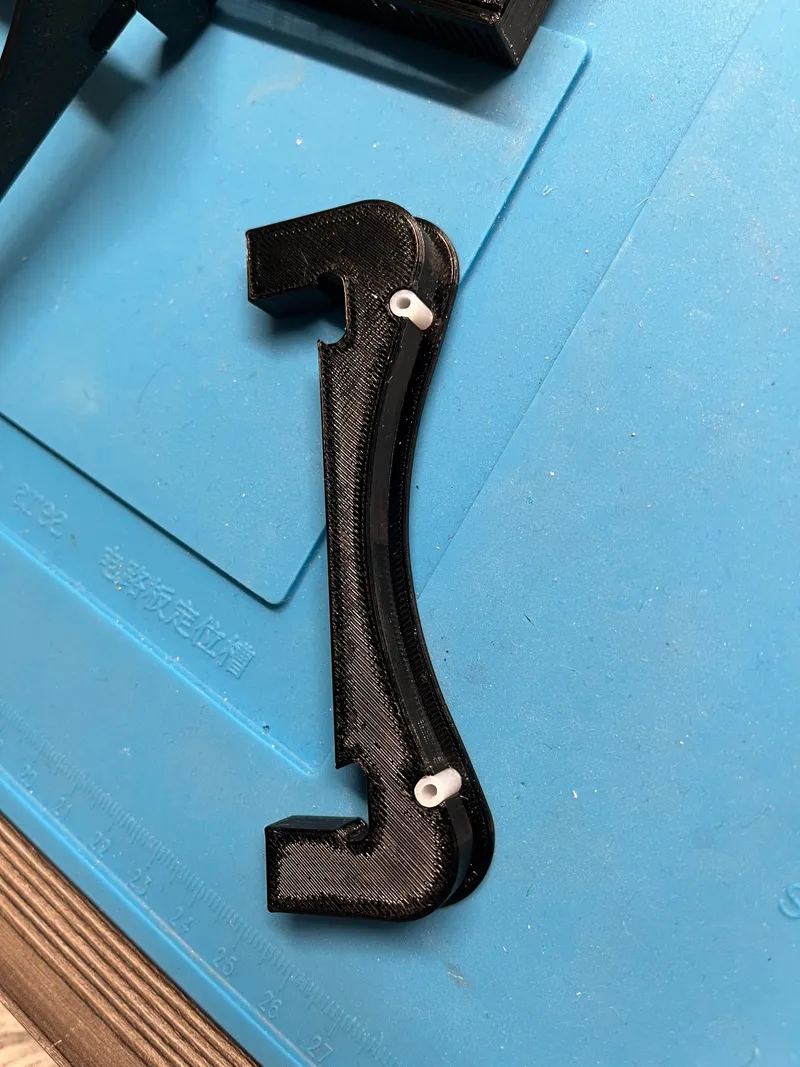
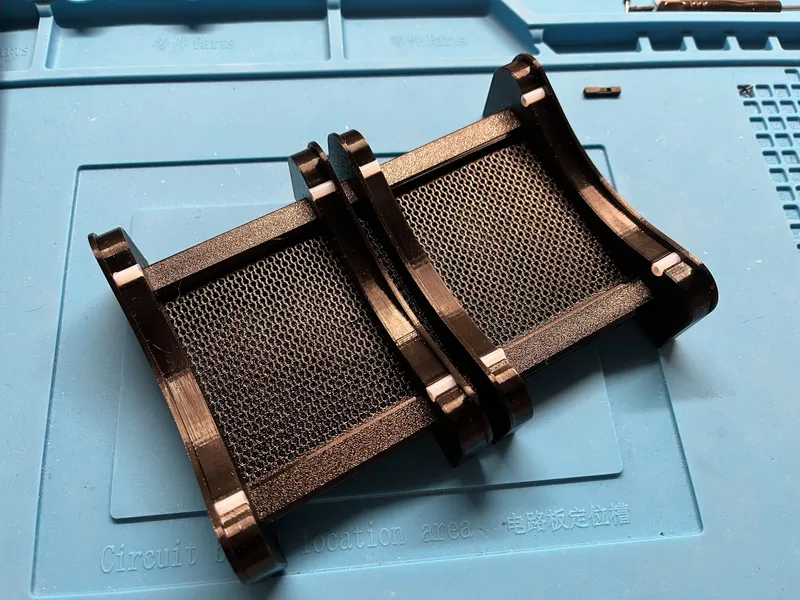
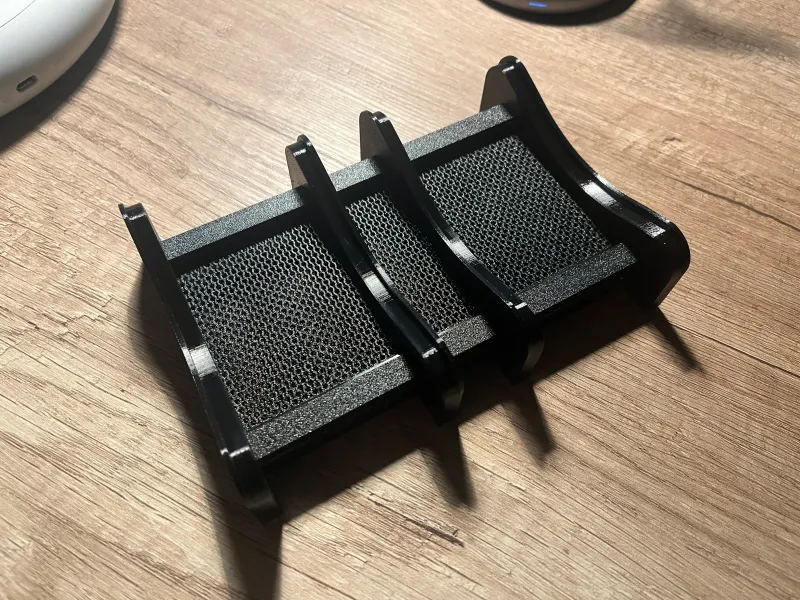
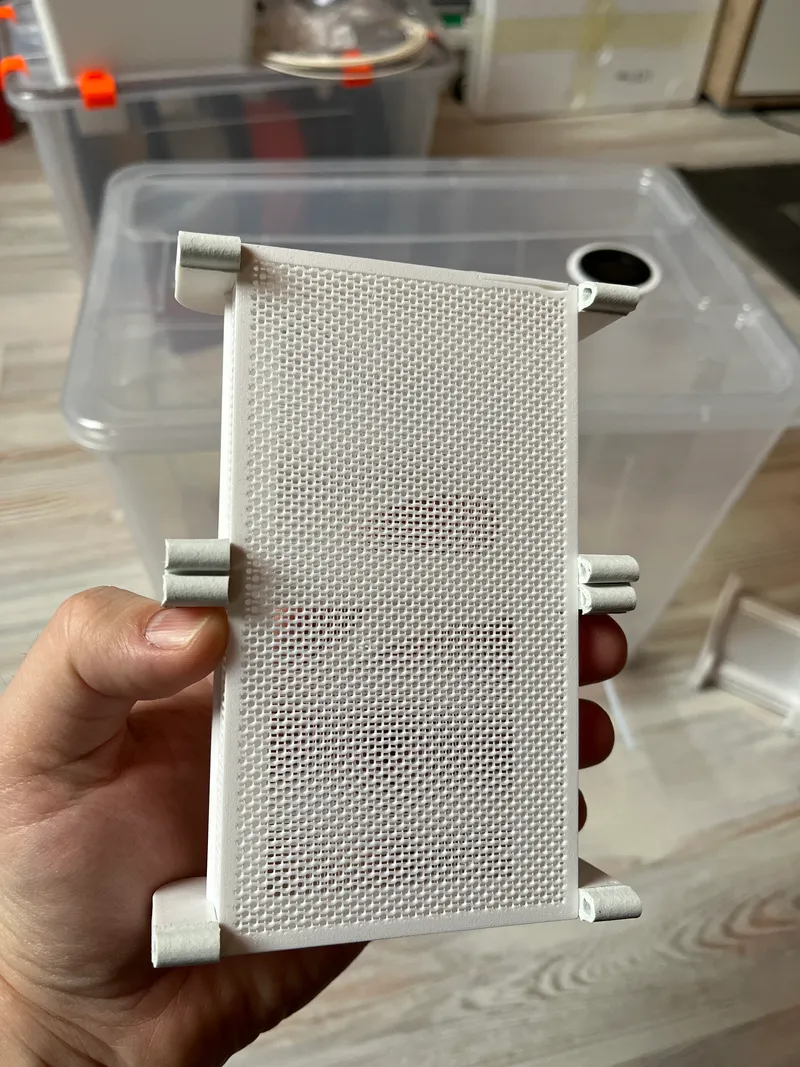
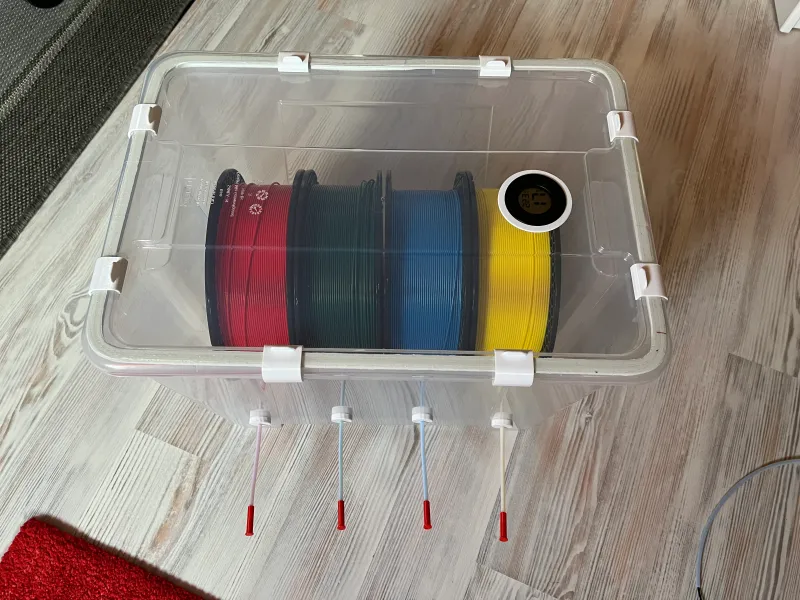
So, beside of the desiccant container function, what else interesting this stand has to offer? Glad you ask. It slides along to accommodate different spool widths like this:
Those middle sliders aren't glued together which offers a choice of serving two narrow spools too, if needed:
Putting it all together
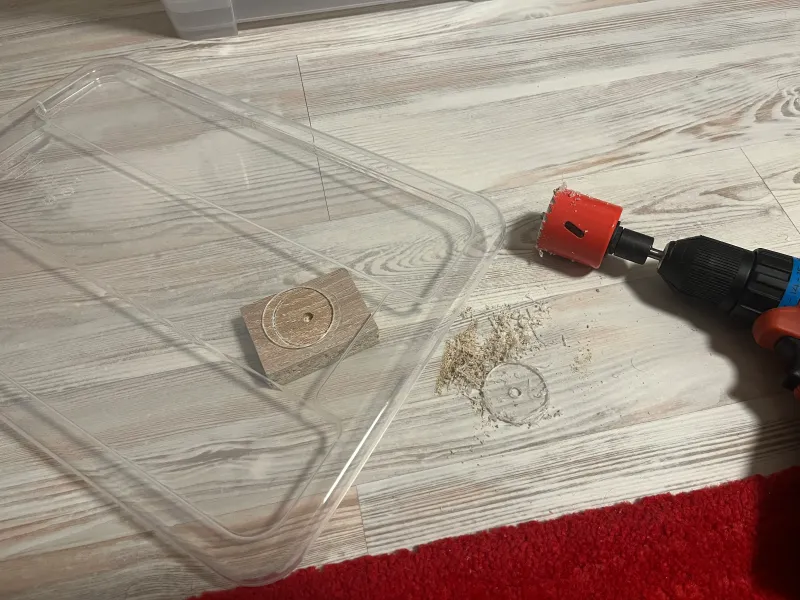
Mark four holes, about 6cm above the bottom of the Samla:
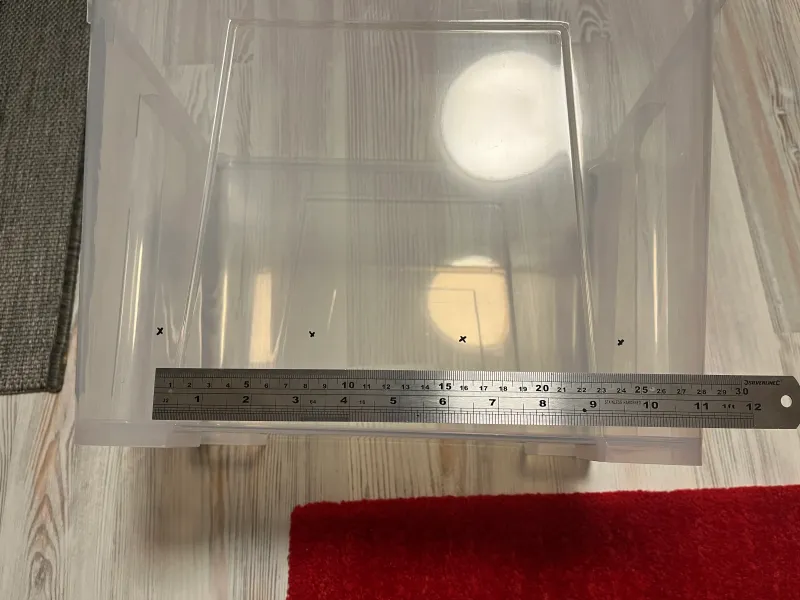
And carefully drill them:
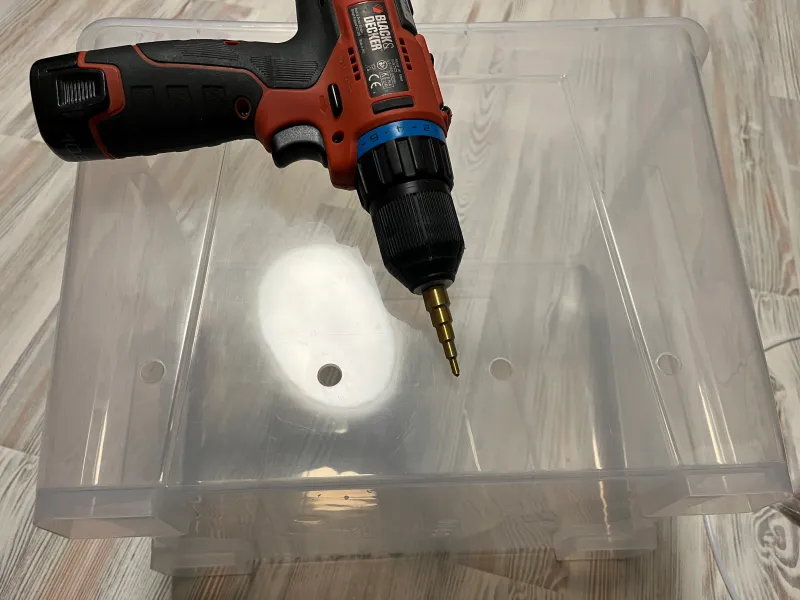
If you do not have a step drill bit on your hand, you can use pretty much any 10mm drill bit, just use a scrap piece of wood to counter the pressure from the other side so you won't break the brittle plastic:

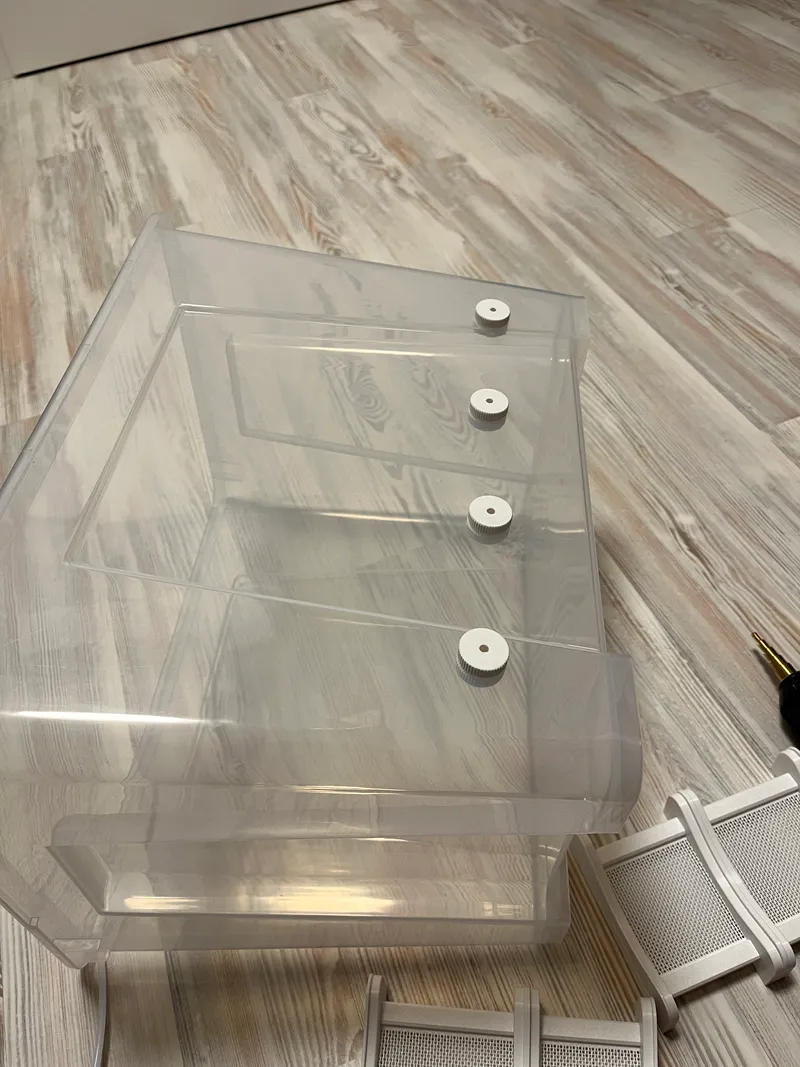
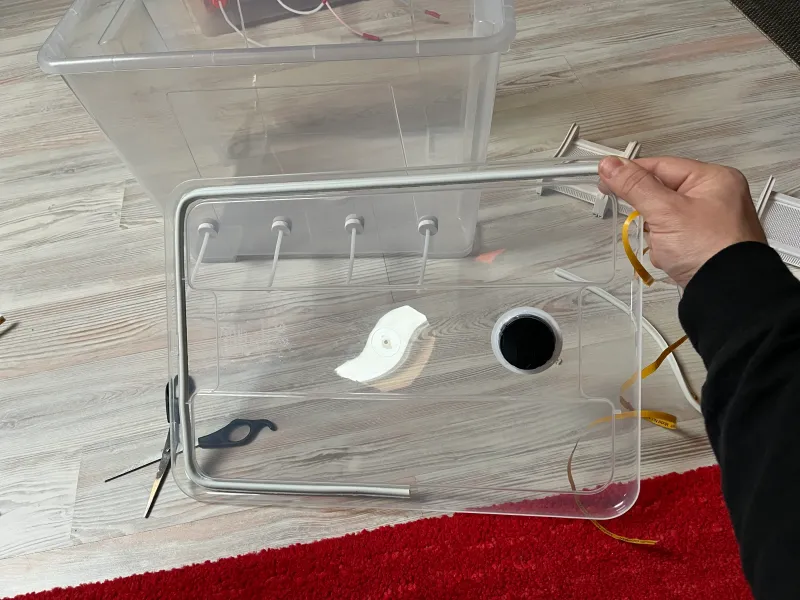
Screw in those passthroughs:
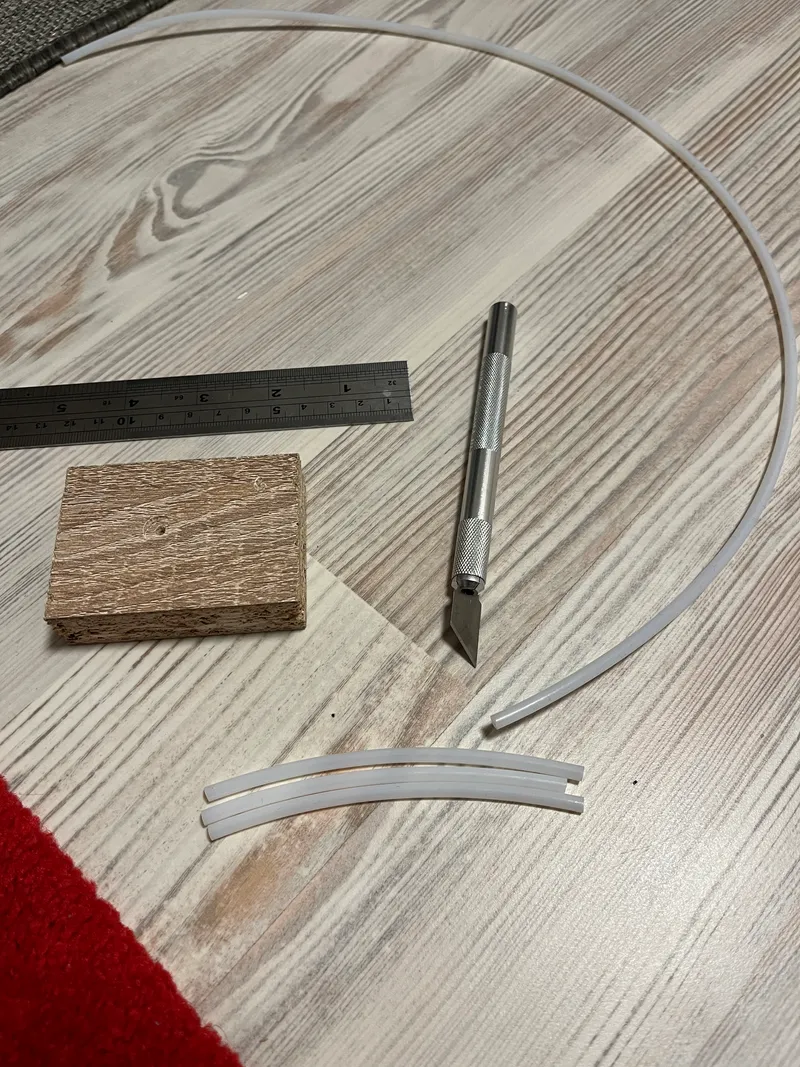
…cut four pieces of PTFE tube of required length:
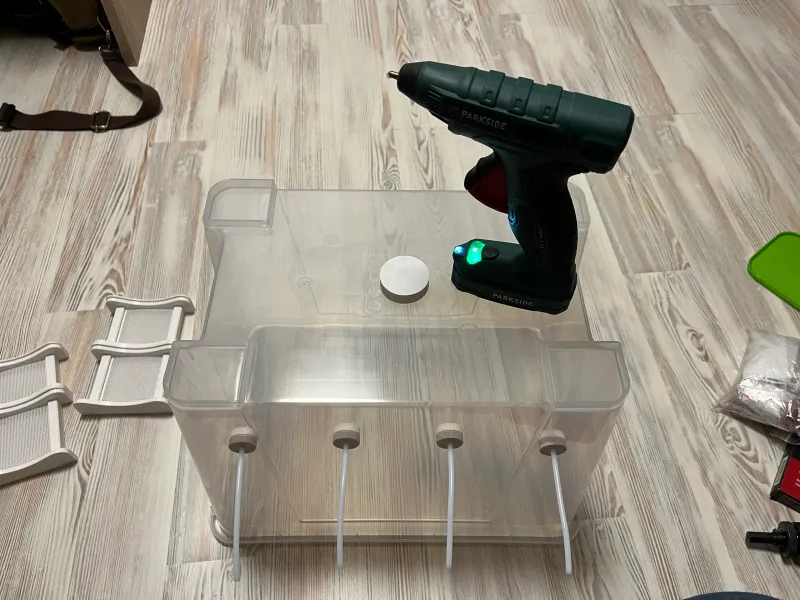
…and force them in, elephant foot/first layer squish again decides how easily it will go in. It's better to push them from inside of the box. If you have too much free play (which you shouldn't), you can try to glue the tube in place but we have a PTFE here, being slippery and refuse to stick is part of its job description, so good luck with that. Use a glue gun to place the puck to serve as a central foot:
You can saw a hole to hold hygrometer where required, not strictly necessary, but looks tidy (to make a hole in a side of the box would be a smart idea, if you will be stacking boxes):
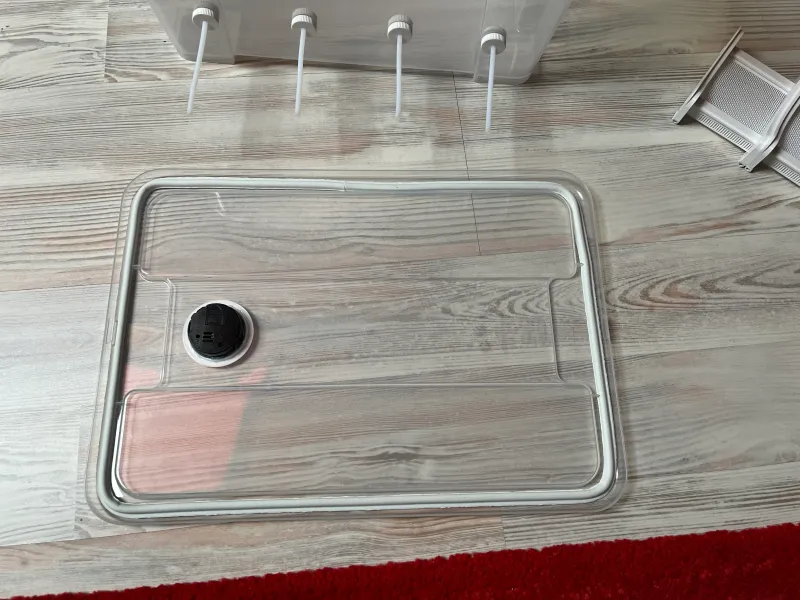
If you made the hole for hygrometer, you need to use a glue gun to close it shut. Now run the rubbery seal around the lid rim like this:
Some of them stick better than others, this specific one sticks pretty well (otherwise you can put the lid on the Samla already, to keep the seal in place till you finish the rest):
You want to make small feet for the stands themselves from the very same rubber seal, this is very important to keep them in place, otherwise they tend to travel inside the closed box for whatever reason they see fit:
Now comes the final and rush part. Keep in mind that desiccant starts to draw water from air the moment you open the jar, bag or whatever storage you use to keep it. You need to complete following steps as quickly as possible, and we're talking MINUTES here. (24-12-03: You can use any funnel of course, but I added one exactly fitting the box and easing this task very much. It can be printed standing without problems, but if you doubt your printer anyhow, use a brim to stay on the safe side, do not forget to deburr properly.) Now load your desiccant:

It's easy to check the level:
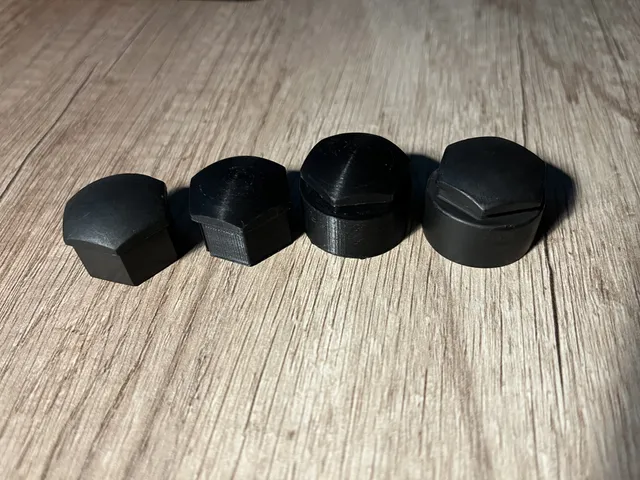
Now throw it all in, put the lid on, secure it with clips, put the caps on the tubes and we are done here.
Caps should fit tight on the FILAMENT, not PTFE. You pull a bit of filament out, secure the cap on and push the cap on the tube. This way it should never happen that filament slides inside the tube forcing you open the box to get it out again.
This is how the caps are meant to be used:

Final words
While this may seem to be awfully lot of work, it actually is not, I just tried to be as much illustrative as possible. Whole completion work can be totally done in under an hour and basically in minutes if you work on your 10th drybox.
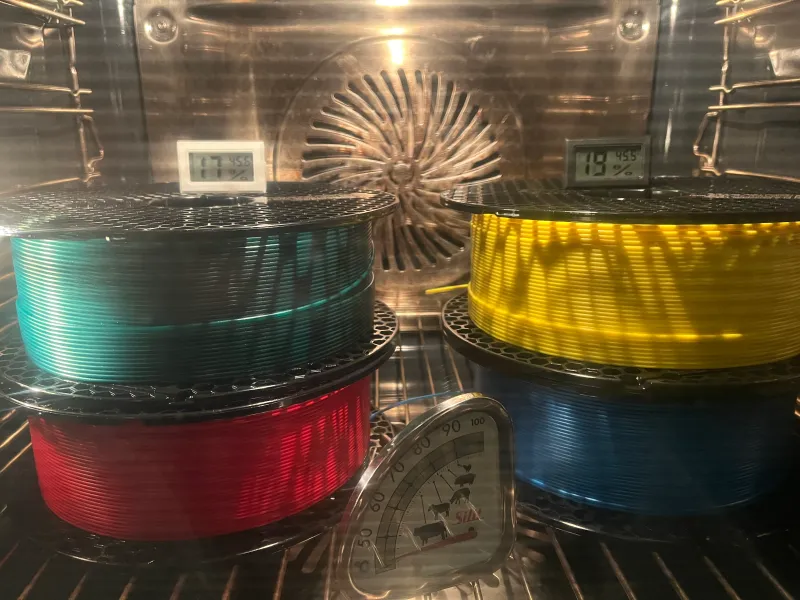
If you exposed silika to fresh air for only a few minutes, put in fresh or predried filament and also predry the box itself (I use large pack of kindry coming from airline industry for that), you maximized a duration of your mikroclima and you are looking for almost a year of <30% humidity inside the box, unless you live in tropics. After that, you just open the box, use the handy door to empty the desiccant to a bowl and dry it in the owen for 90 minutes at 110°C, repeating the filling process afterwards.
And, if you are for some reason interested in even more details, you can always check my original build.
And usual disclaimer comes here:
Do yourself a favor and use PrusaSlicer/SuperSlicer to work with 3mf files provided. No kidding, forget all the tools from the old days, these 3mf files contain various modifiers and similar advanced features, so with PS you won't have to ask in comments why there are these odd blocks or why the slicing didn't went well…
---
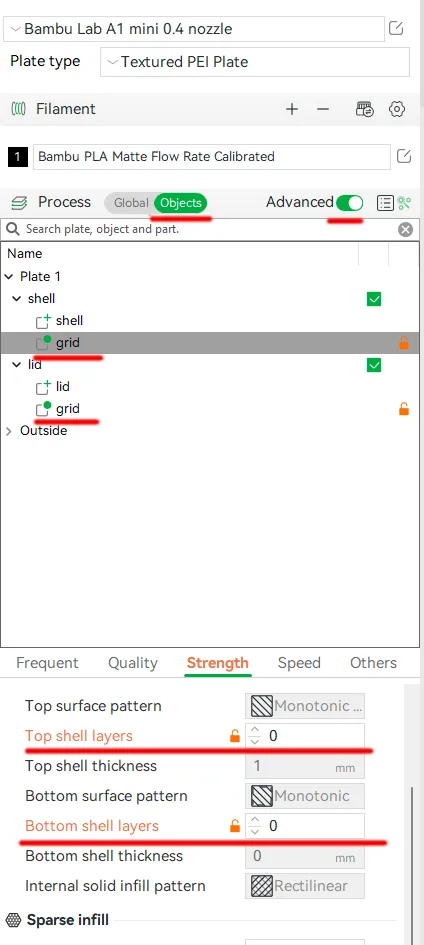
Note above doesn't hold true so much anymore, there's again a new generation of PS forks/clones which became popular and wide spread, Bambu Studio being one of them. It doesn't properly implement modifiers from PS, which is shameful considering they took most of the source code from PS. Anyway, for those of you who use BS, @Nubinko_2200761 was kind enough to find the right settings for the grid in the silica box:
Tags
Model origin
The author marked this model as their own original creation.