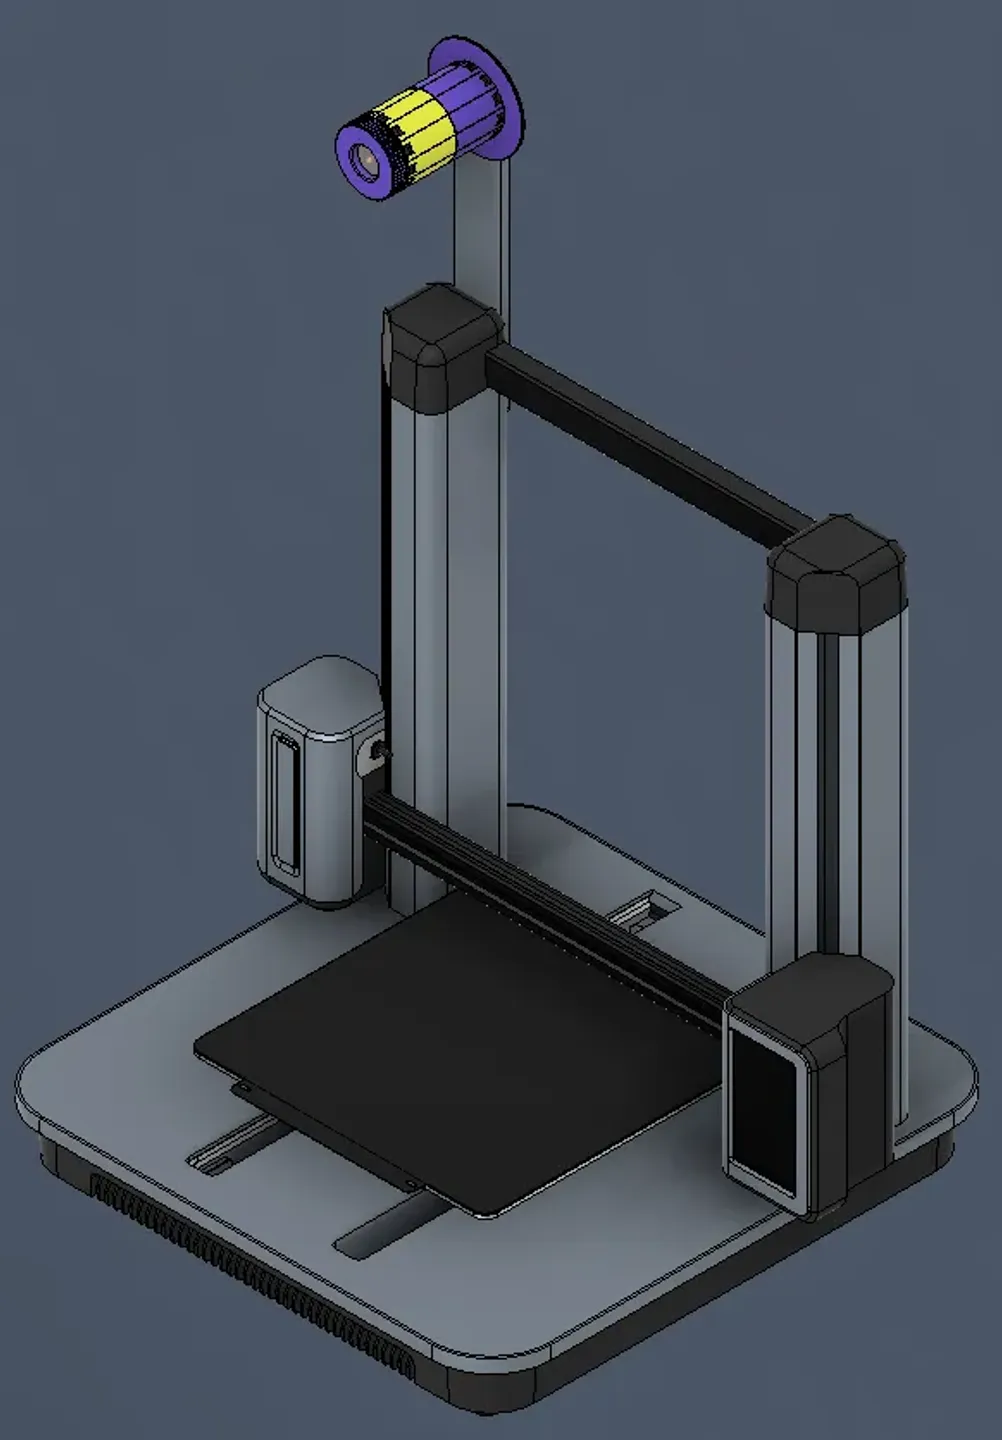
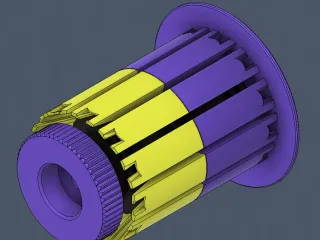
Ankermake M5 - Spoolholder - Expanding Mandrel


Description
PDFUPDATES
- Step file of the assembly has been added
- 2023-08-05: NOTE, if you use cardboard spools, try and keep the spool off of the very edge of the holder (with the two very thin parts on each key); Cardboard spools tend to be hollow in the middle and so all of the clamping force goes on the outside, resulting in chipped keys. Ultimately an oversight in the design. If it gets requested, I can make a modified backing plate that overhangs above the spoolholder, to protect the keys on the rear.
- 2022-12-23: Added Expansion Collar - Modified test file.stl. This is a simplified and reduced cut out of the Expansion collar if you want to test/adjust for tolerances on the parts, so you don't use up as much material or time.
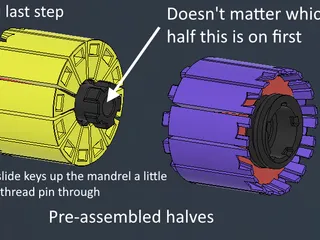
- 2023-01-08: Added two images for a better visual on the final steps of assembly to try bringing a bit more clarity.
- 2023-01-09: Added minor details in instructions for clarity.
- 2023-01-23: Added a few more details to instructions + a warning right under this. Also added a rear shim that is 1mm thinner if you want a little more clearance on the spoolholder.
This is a tight tolerance model. It will test your patience if you're not dialed in enough for your material
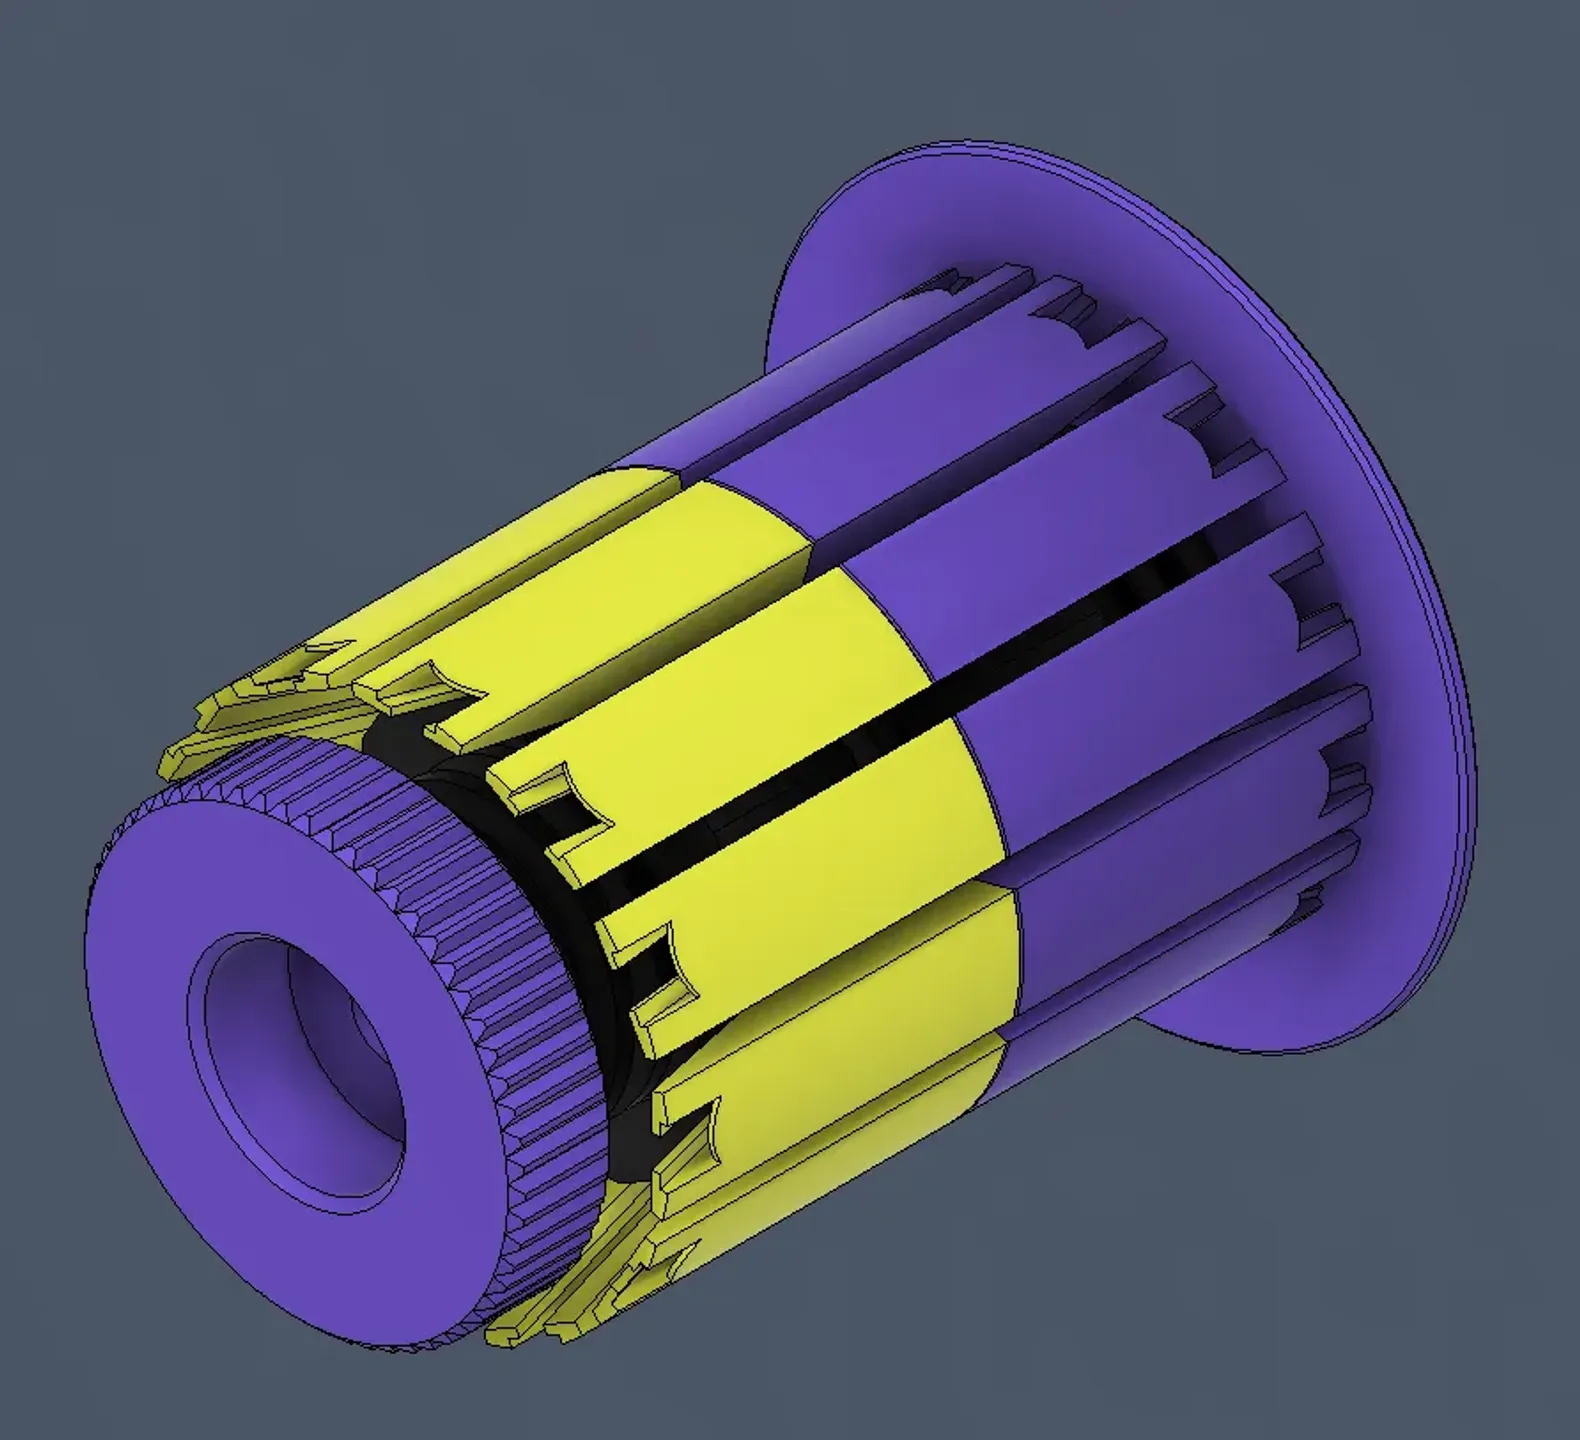
I've been thinking about making an expanding mandrel of sorts for the spoolholder of the Ankermake M5 for a bit. My OCD doesn't like the spools spinning off-center; I also like to overcomplicate things because why not. Took about 6 revisions to get it at this stage. The design is loosely inspired by a coil winding mandrel PDF I saw while searching for possible design methods; on top of some equipment at work for large steel coils.
It can be used anywhere else, not just on the M5 printer. It is designed to fit within an 85mm length constraint; 74mm OD bearing to bearing.
The mandrel goes from 50mm to ~59mm - so a 9mm expansion range. It could expand a little more, but I had to sacrifice expansion capacity to be able to keep all the keys located centered.
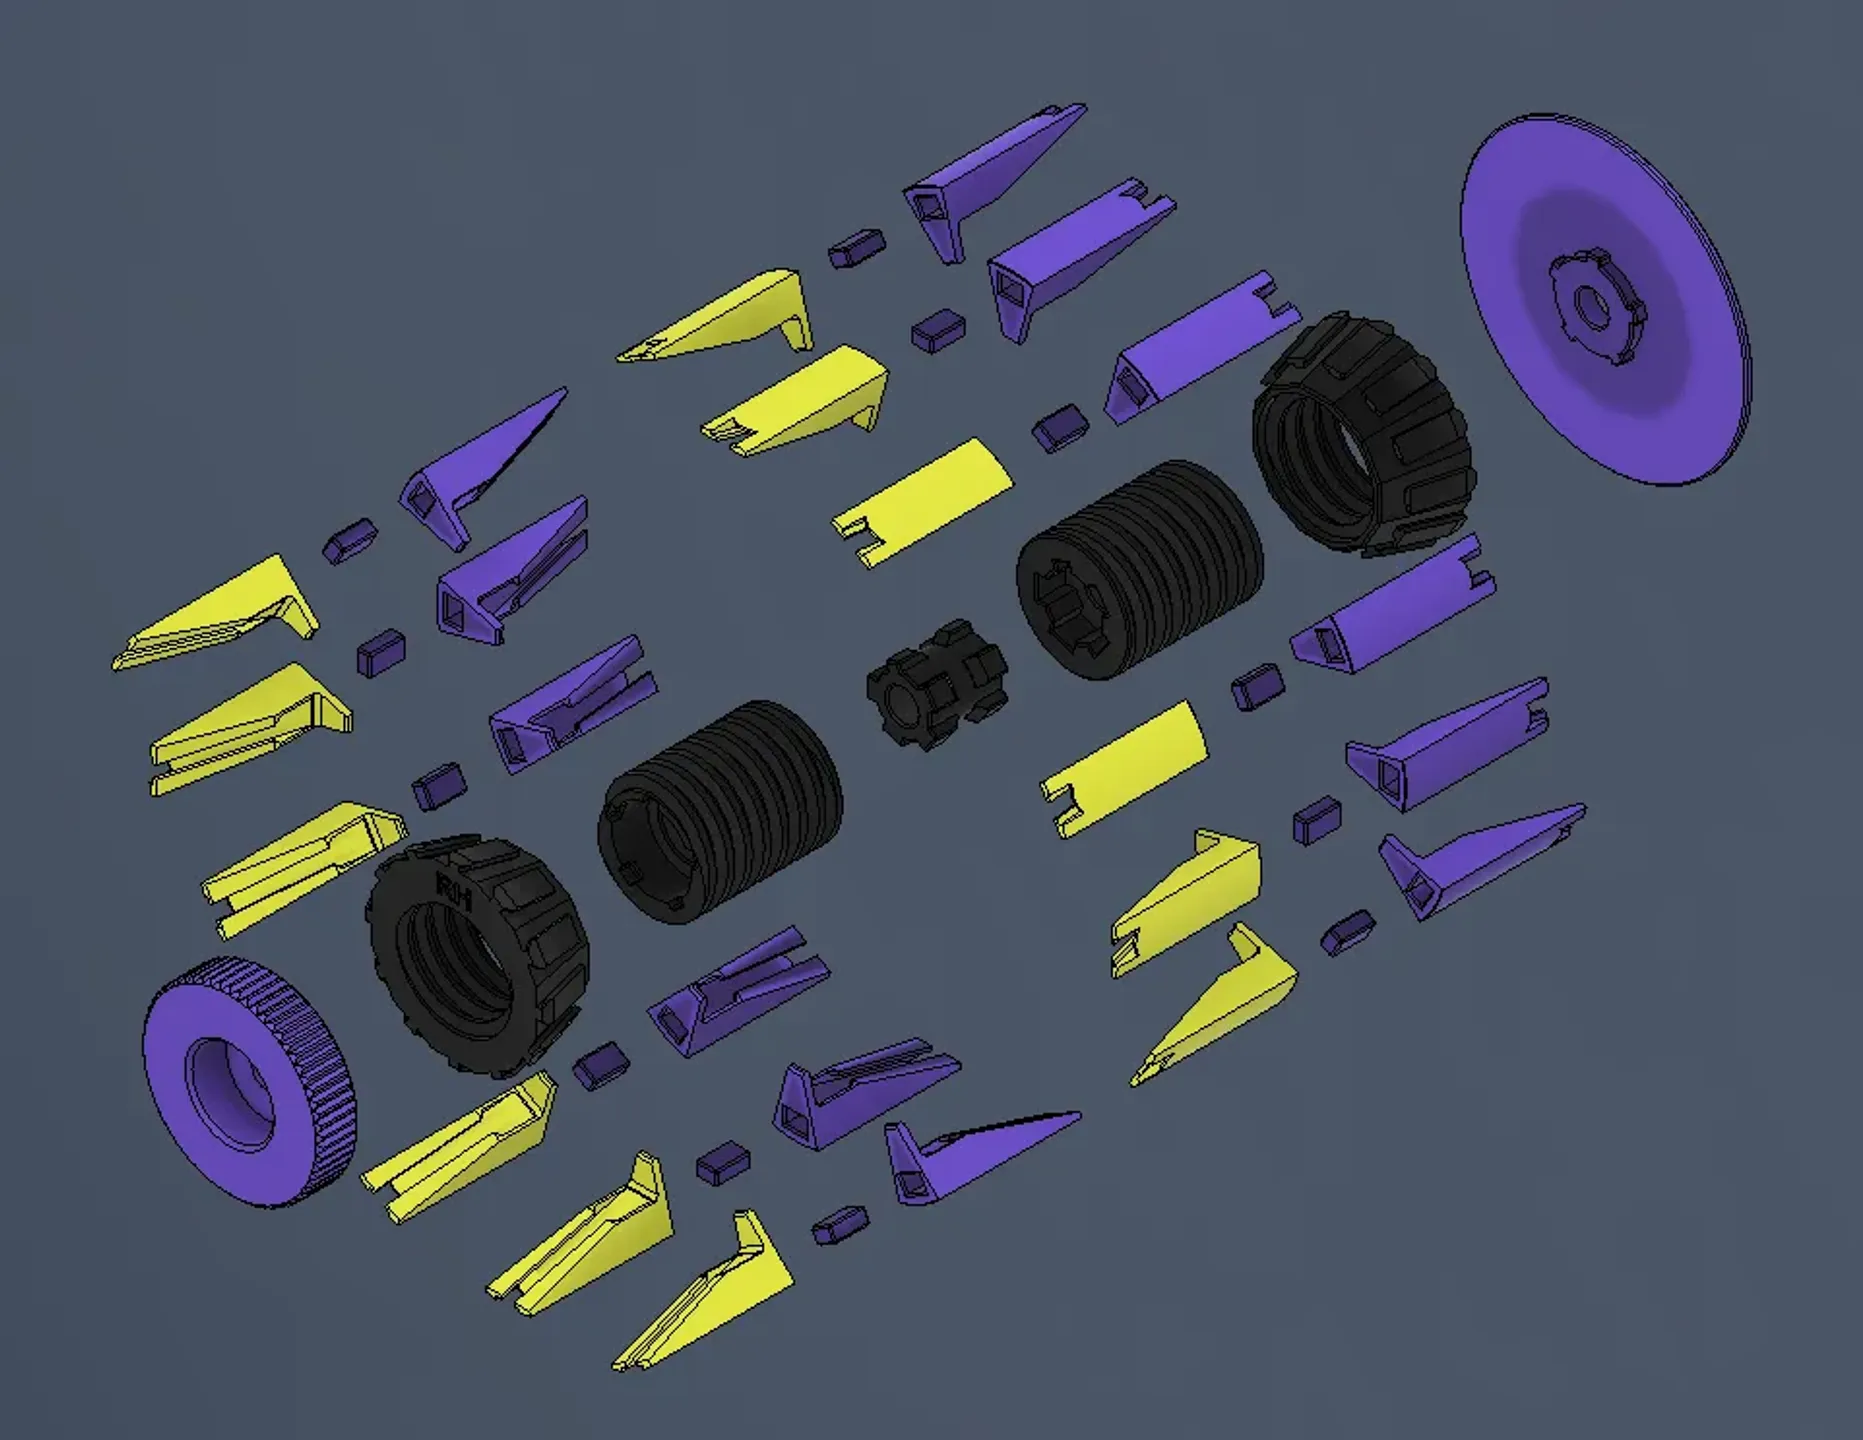
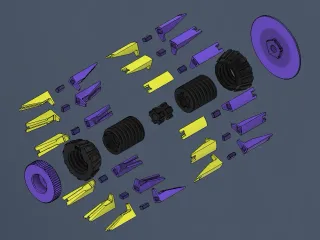
A ZIP file is provided that includes all of the individual part files.
If I get enough requests, I can publish a modified key to reach a higher range of sizes, however I cannot make them any smaller. The bearings don't leave much room for the threads. It would have to be a bearing-free version to be smaller.
To tighten, hold the keys and turn the knob clockwise. If you're feeling frisky, the model is completely reversible so that you can turn it counterclockwise if you want. The knob and rear shim press into the body using the same feature. One 608 bearing gets pressed in on each end. If you don't want to use bearings, there's about 0.6mm of extra clearance so it can be used on its own without much slop or extra friction (outside of material).
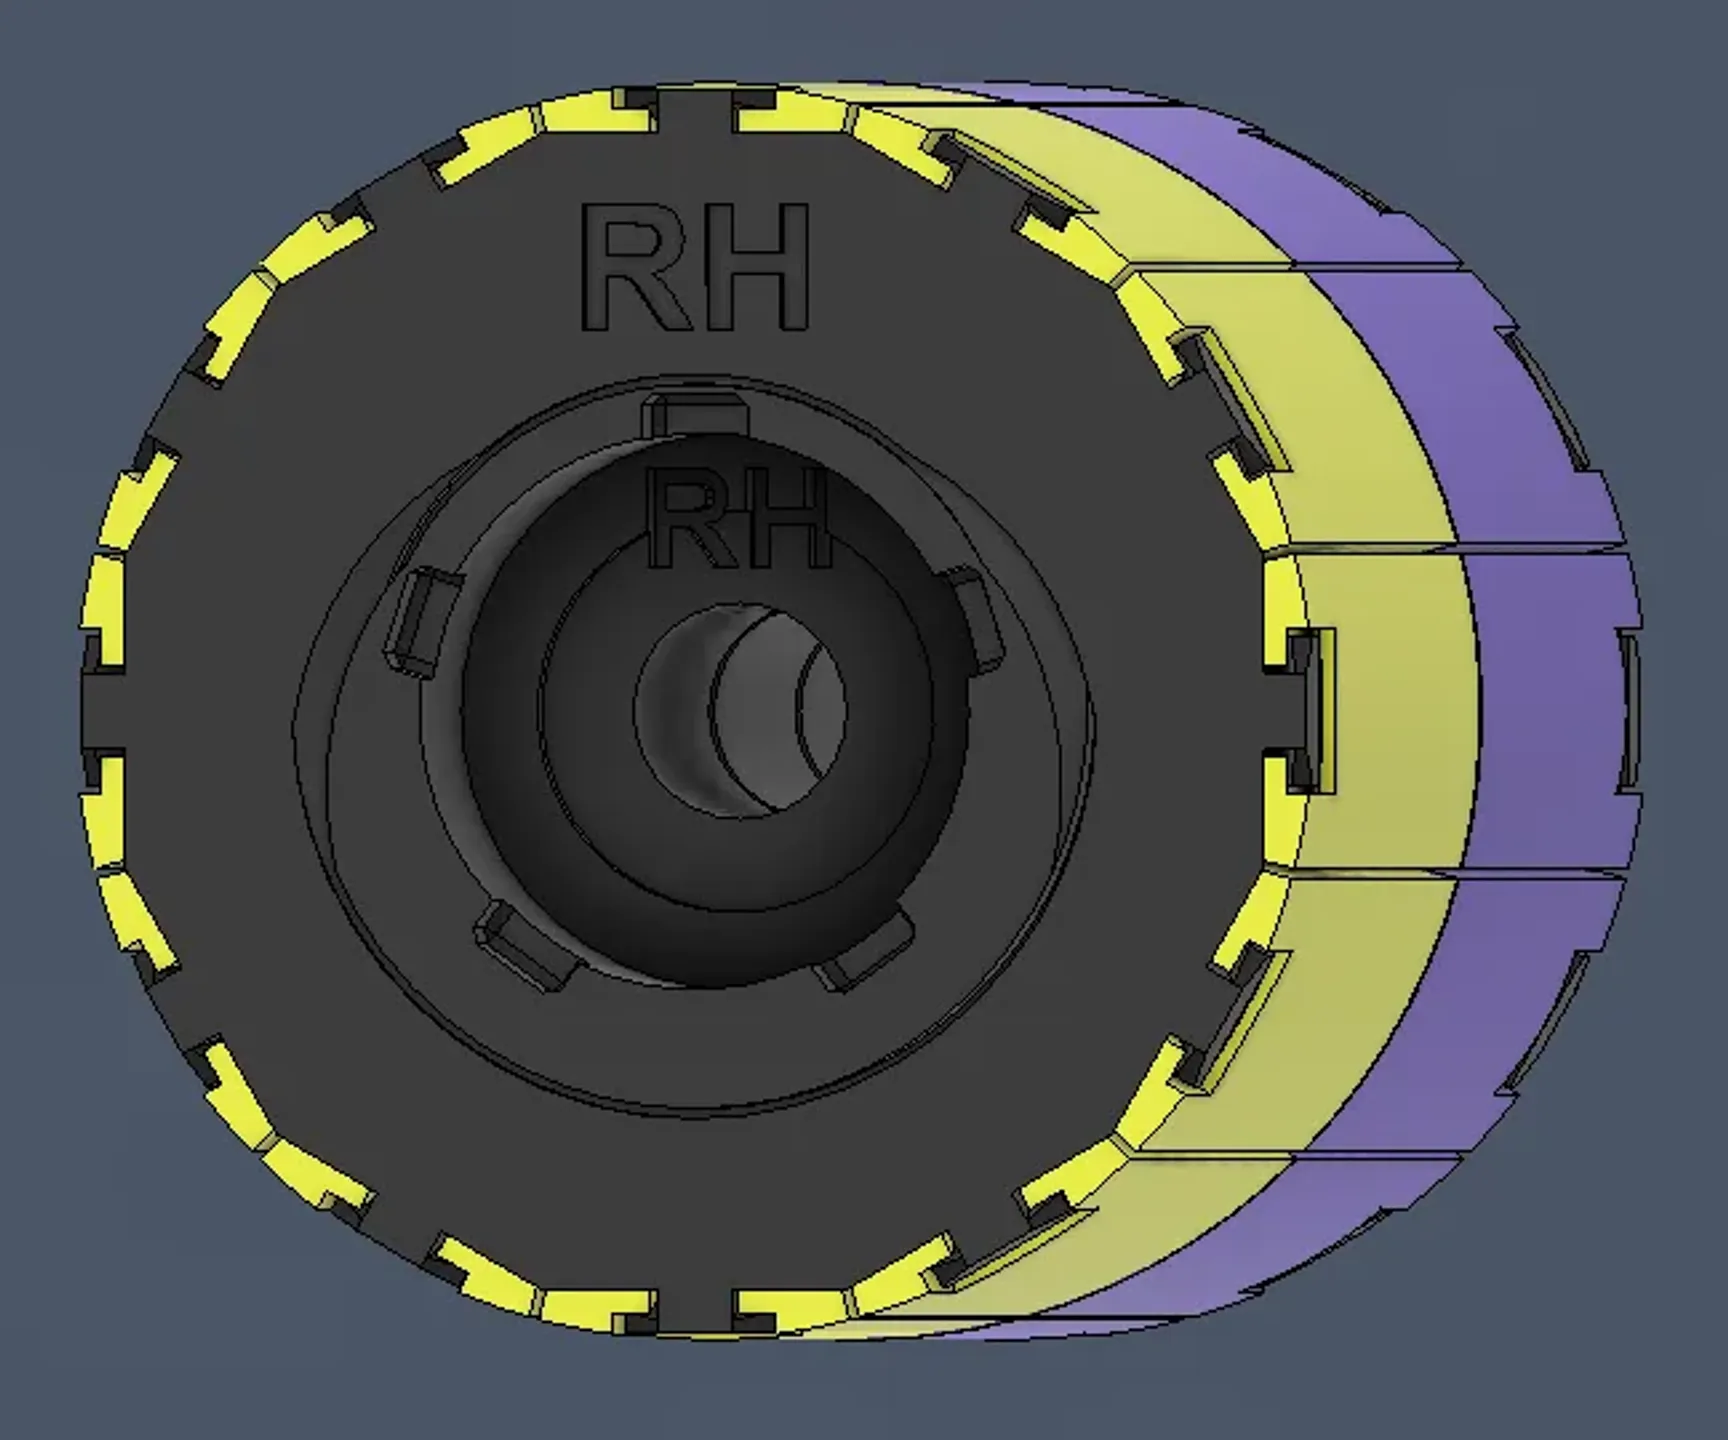
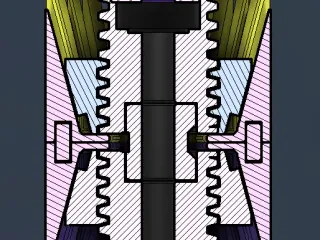
The threads are labeled in reverse; As in RH = righty tighty to expand, but the thread is the opposite. Uses an ACME 1 ¼" Thread.
Both the expansion collars and the threaded shafts have an LH/RH label that are meant to align with each other for assembly; Which is a little tricky.
Parts that require more than one copy printed:
- Mandrel Key (Half) 50mm - 59mm - 24pcs
- Mandrel Key Dowel - 12pcs (Note - I added a file that includes all 12 of the keys in a circular pattern, so you can print each half in one shot)
All part tolerances worked just fine for me. They are on the tight side. All parts were printed around default speeds of the Ankermake M5. Choose print orientations that work best for you. The bearings are a little bit of a press fit by hand. The same goes with the threaded body connecting pin and potentially the mandrel key dowels (those are slightly looser). If you have difficulty with tolerances, you can open things up a little bit, but some features are already rather small as it is.
Parts that need supports
- Front Shim (Knob)
- I printed with the large surface on the build plate, since the supported region is hidden behind the printer's shaft cap.
- Threaded Body LH - Front
- Printed with the inside section on the build plate (Bearing hole facing up). Can be printed the other way as well. This only needs support for the holes in the center. The threads do not need any.
- Threaded Body RH - Rear
- See above
The Mandrel keys do not need supports if printed vertically. If you print the x12 file, a brim will make them stuck together (~0.4mm clearance between them).
Expansion collars printed with large side on the bed. Bad bed adhesion might give you a little bit of curling on the T key sections. I added some chamfers to try and mitigate it (Worked on my prints).
Assembly
- I first glued the 12 Mandrel Key Dowels into half of the keys. They might not be necessary in the assembly, but it helps keep the keys aligned and gives them a little more rigidity.
- NEW: You can insert the bearings into the threaded bodies now if it makes it a little easier. Just be sure that all the parts fit together nicely first. It's a bit of trouble to take the bearings out if you have to.
- Thread the threaded body into the expansion collars all the way (The center section sits flush with the inside of the collar and cannot be threaded in from the outside).
- Slide in all of the 12 keys in each expansion collars. The keys need to be all the way out (the lip on the inside touching the mandrel) as you slide them in- otherwise they will bind/interfere with each other
- You then need to press the threaded body connecting pin into one half (the keys need to be pulled out a little bit to clear the tabs)
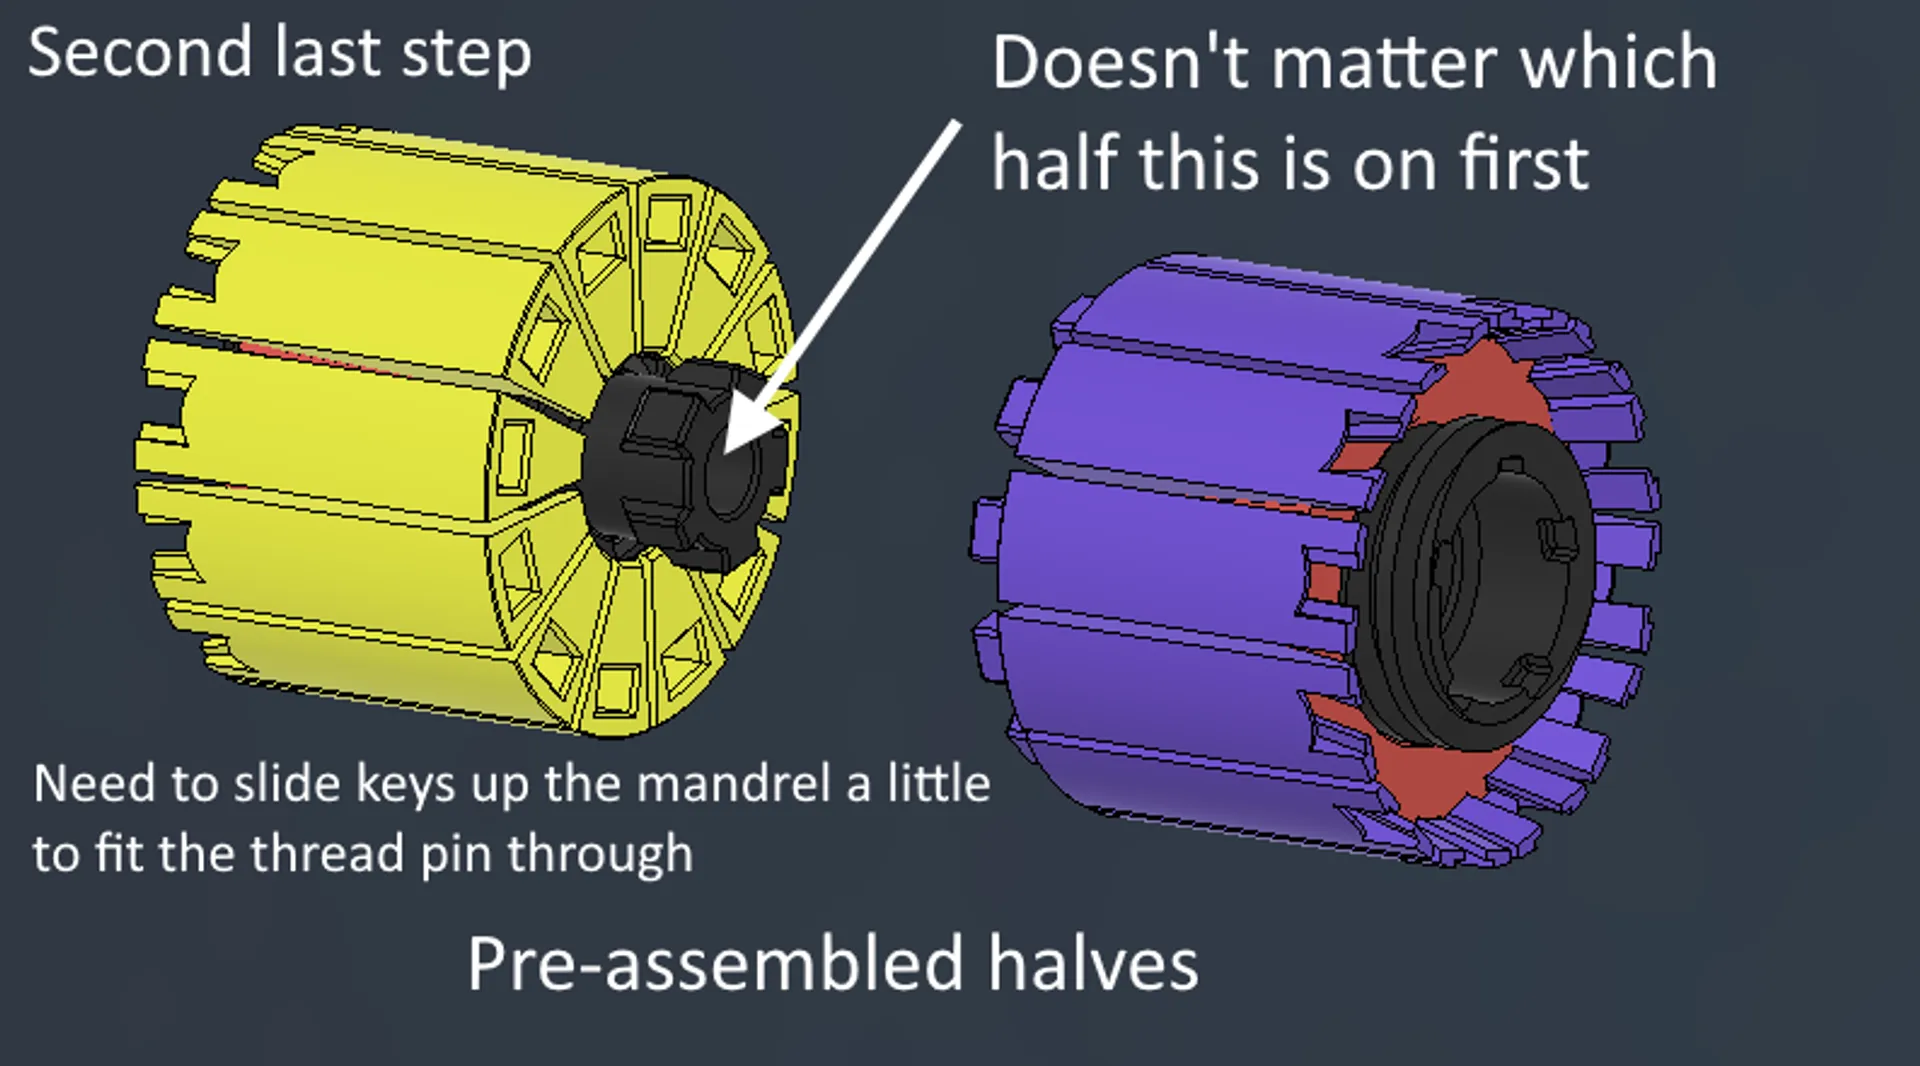
- Once both halves are assembled, you should be able to rotate the threaded body in both sections (it will push the keys out) until the outside sits flush on both ends. The LH should line up with the LH, and the RH should line up with the RH.
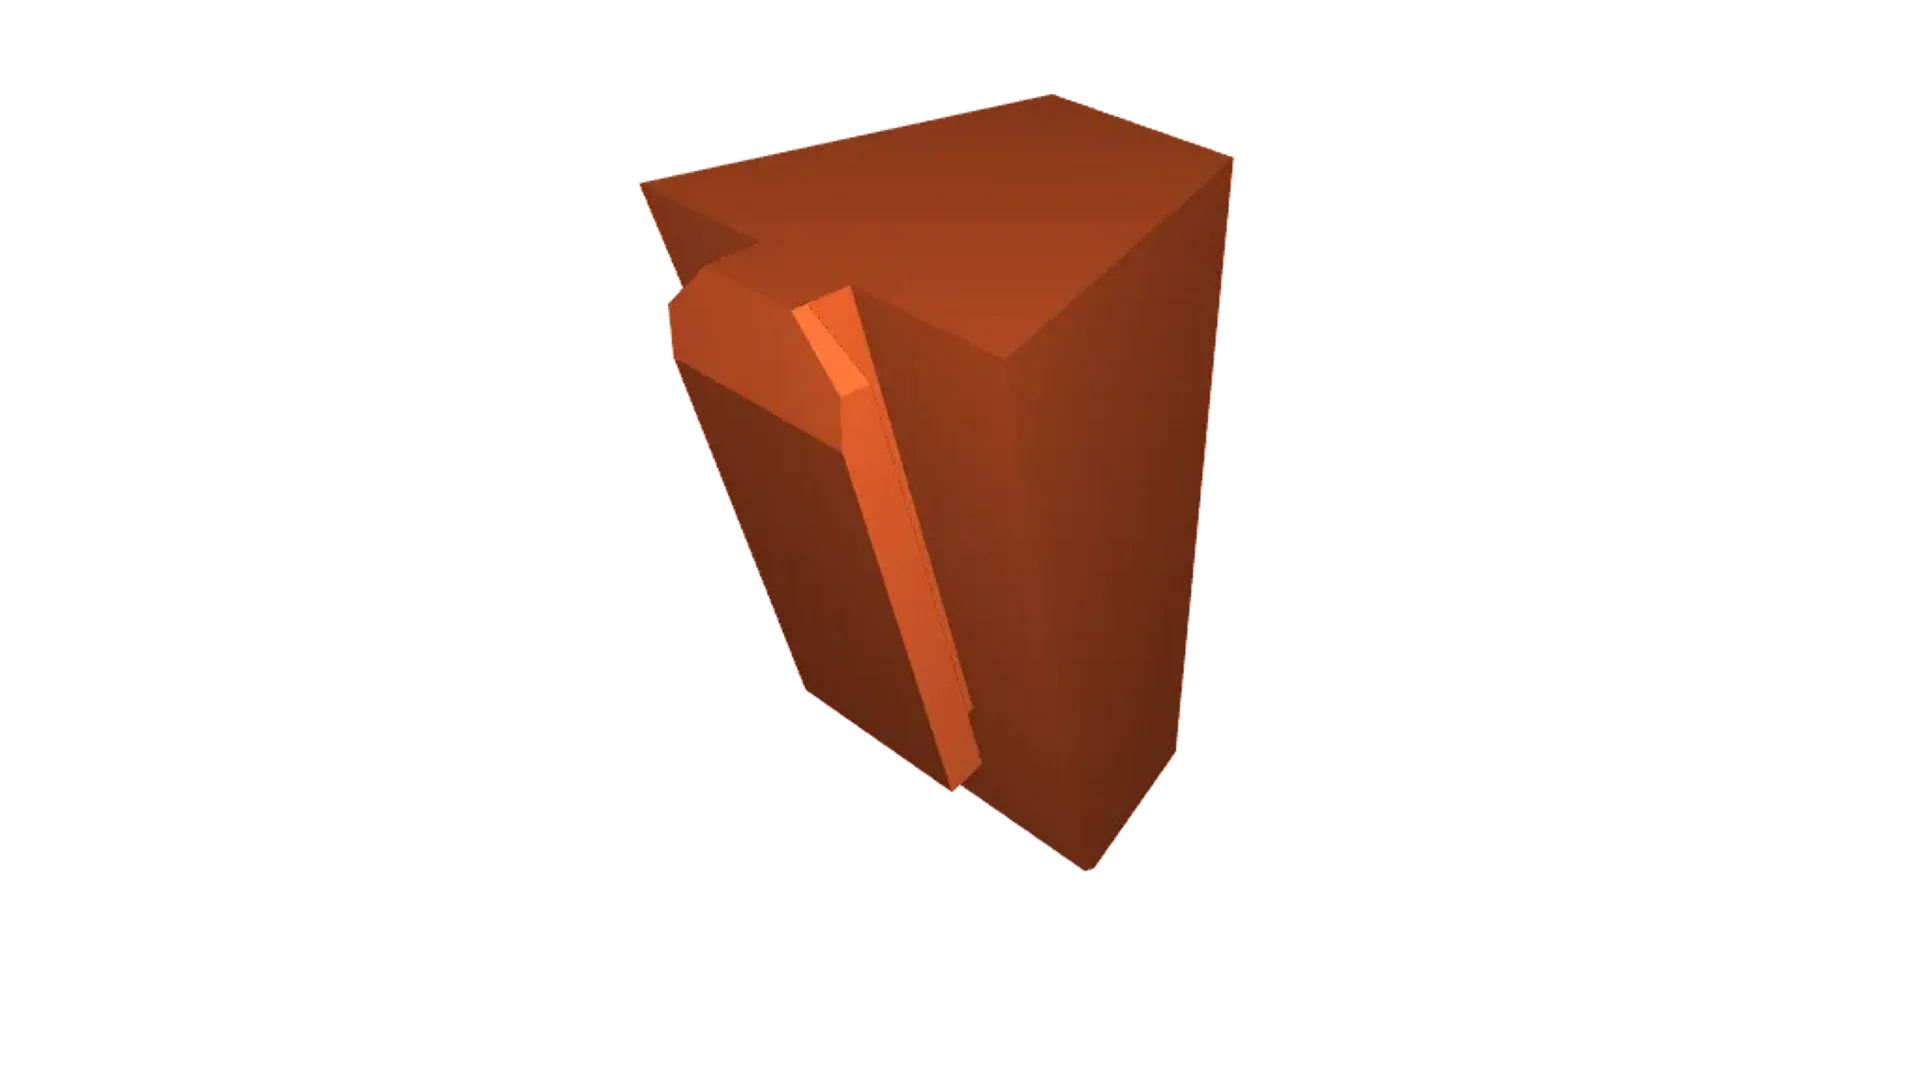
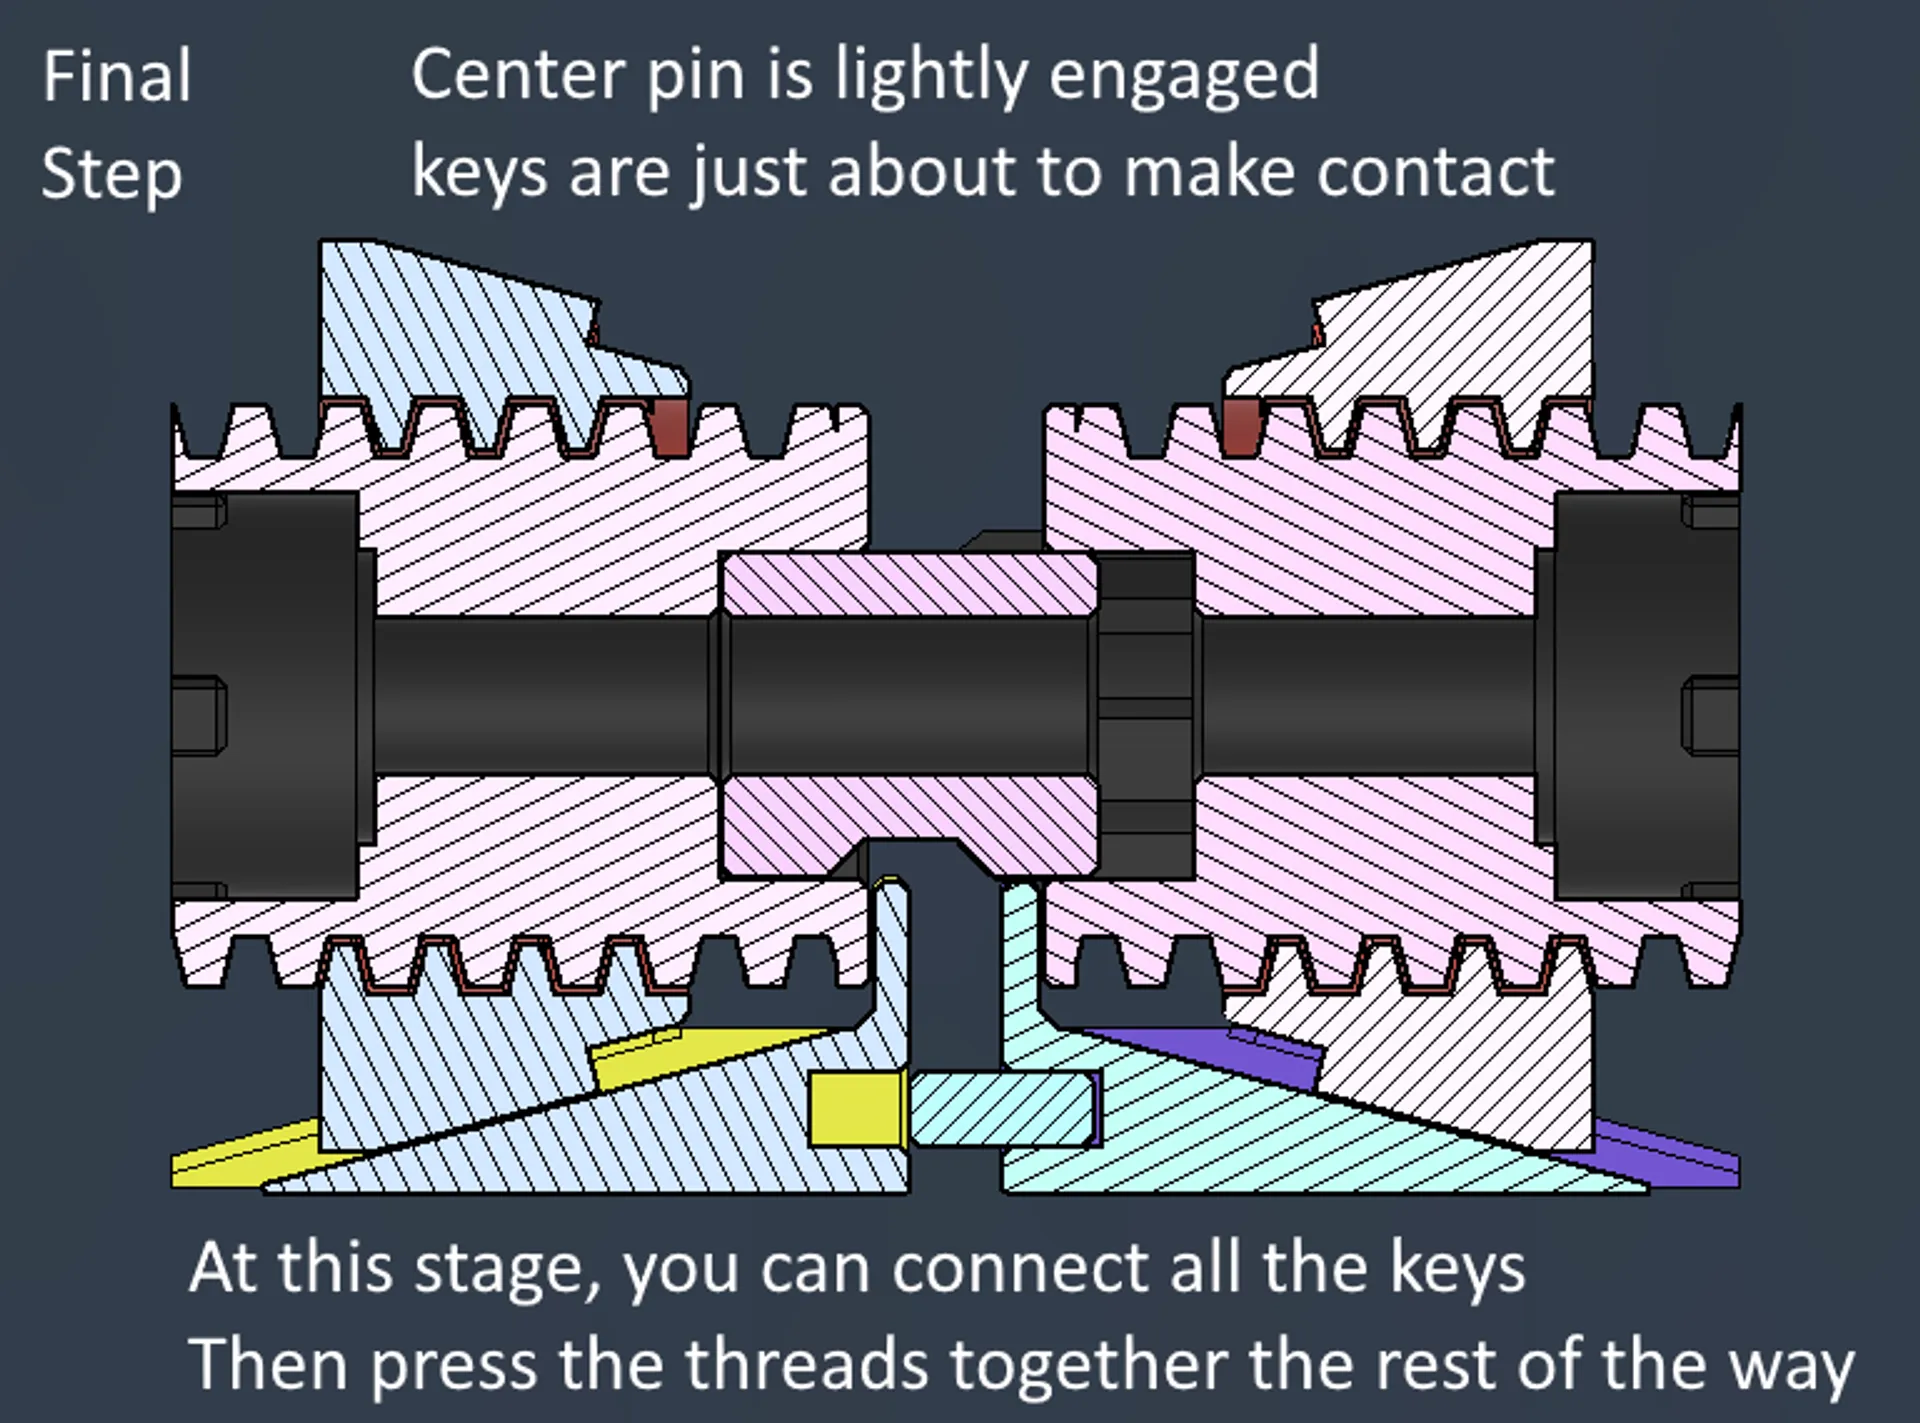
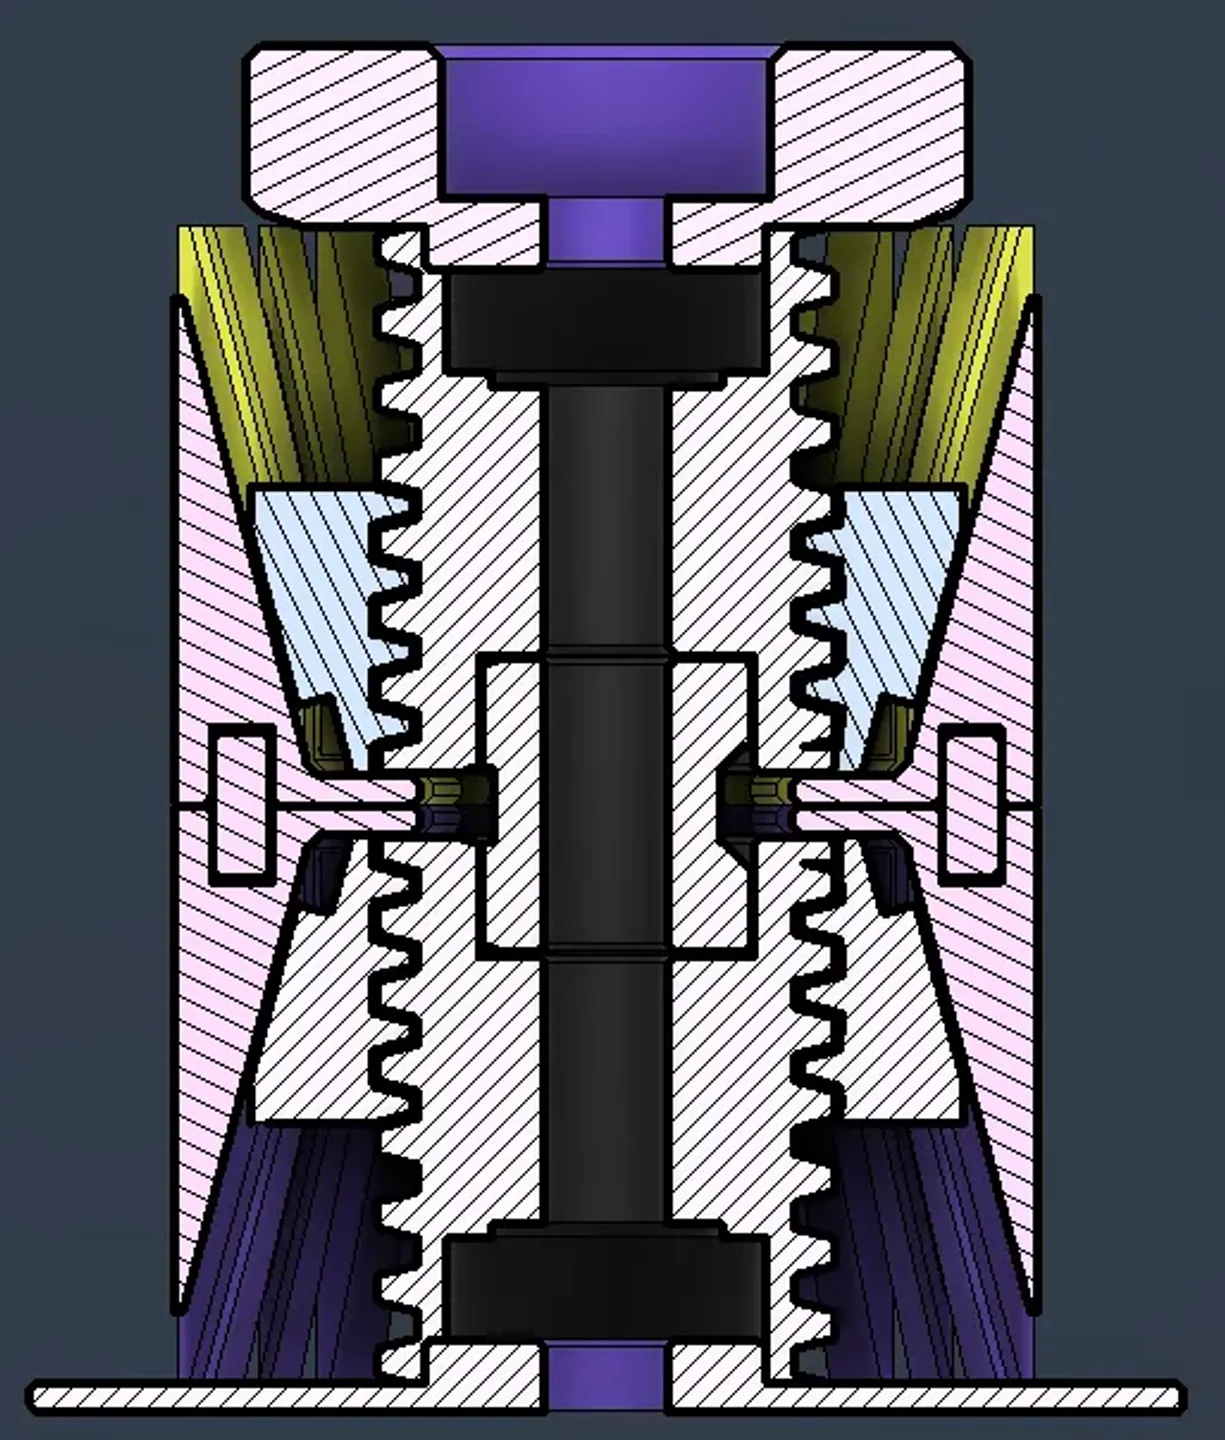
- This is the tricky part. Depending on how you decide to do it (You can also assemble it with the threaded body farther in, just make sure they're evenly rotated). Some tape around the keys to hold them in place might help make it less awkward, I took the hard route myself. Keeping all of the RH & LH symbols aligned and facing each other, press the threaded bodies together. The Connecting pin has one tab that is a different size so that it's easier to get them aligned properly. I included a section view of the assembly and an image displaying the label alignment to help out.
- NEW: Glue the two threaded shafts together with the pin if you want to be able to tighten the mandrels on your spool without it separating. This does mean disassembly will be impossible after, so choose wisely.
- Once the threaded body is at least half pressed together, you should be able to start snapping the front and rear half of the keys together. Once all that is pressed together around the perimeter, you should be able to snap the threads together the rest of the way. You don't need to glue the two halves of the keys together.
- Once that's done, you can press in the 608 bearing on each side.
- Then you can snap the rear shim into place (This is where you can decide which way you want to turn the knob to tighten onto the spool) and the front knob as well.
- To install on the Ankermake, either remove the whole shaft, or remove the 22mm cap that's threaded onto the end and slide the assembly in place. If you remove the cap piece, it's a bit awkward putting it back on since you can't tighten it so I suggest taking the whole shaft off. The shaft is an 8mm shaft so depending on your bearings, it might be a tight fit to get on. Mine were very snug to go on.
- Make sure that the rear shim is slightly off of the mounting arm so that it doesn't rub. You have about 1mm of play. You may want it to rub just a little if you find it free spins too much.
- To install anywhere else, you just need an 8mm threaded rod or shaft.
…Let me know if I missed anything, that's a big wall of text.
Tags
Model origin
The author marked this model as their own original creation.


