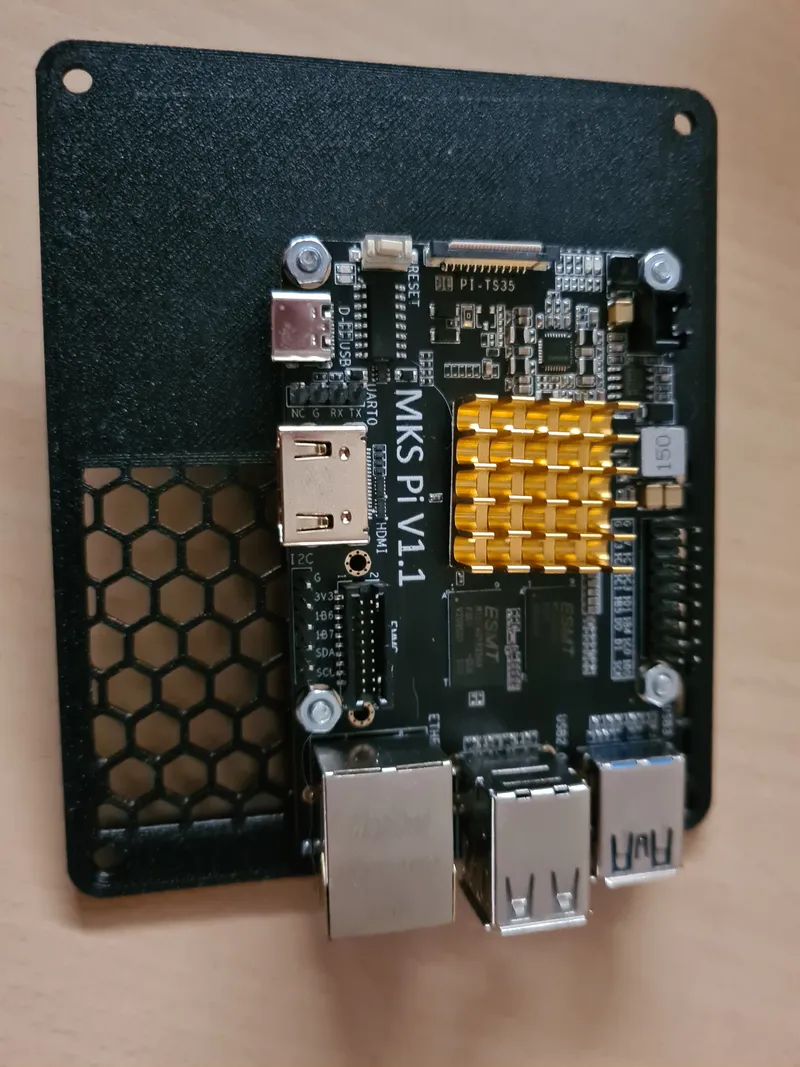
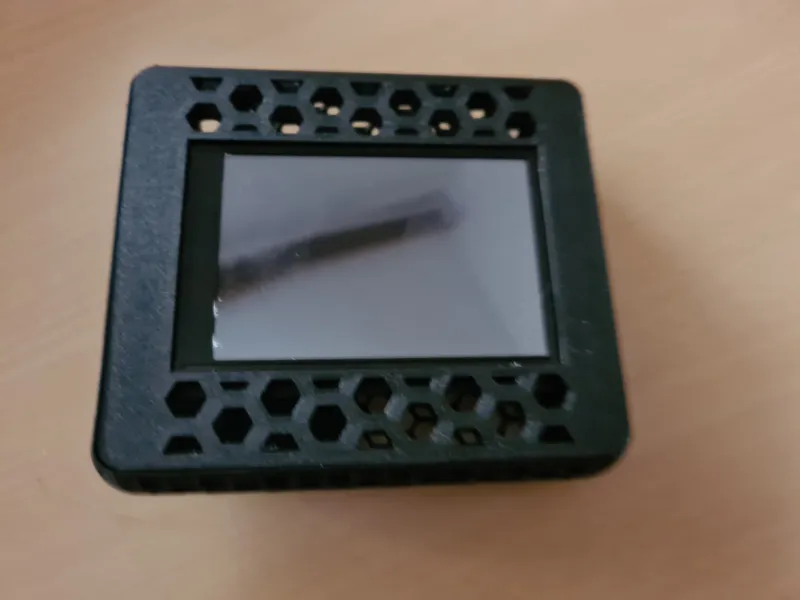
MKS PI (or raspbarry Pi 3) + MKS PI TS35 Case with Ender 3 S1 holder

Description
PDFI switched my ender to klipper because a raspberry pi is just too expensive and the sonic pad is a "rather" closed system (at the time of my upgrade, it could change), I selected the solution of MKS.
Since the layout of the raspbarry 3 is similar, the case should work there too.
Please feedback on this I can adjust it if necessary.
The case should look modern and still fit to the printer, I hope that I succeeded.
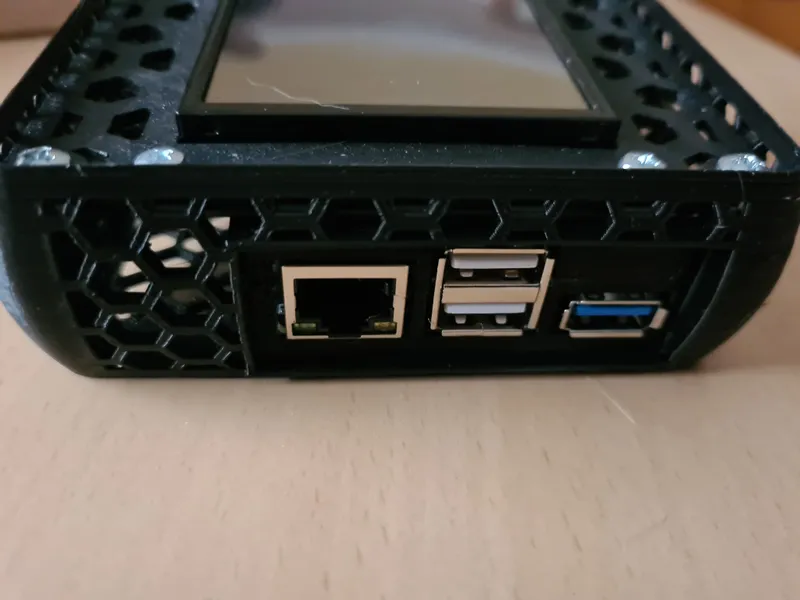
Since I use the emmc variant and assume that it is not necessary to constantly reflash the emmc, neither the emmc nor the sd card slot are accessible. The hdmi and usb-c ports are also not necessary for the intended purpose from today's point of view, so they are not exposed either.
The main body needs support at the openings for the connections and the passage for the adxl345 cable.
When using autosupport, the poligones must be provided with a support blocker. (this is quite time consuming).
The opening for the power connection is designed so that everyone can insert the adpater plate suitable for his connection, it is a cut-out of 12 X 12 mm with a circular arc on the top. the thickness of the cut-out is 2.4 mm.
screws:
I used M3X10 bolts and matching nuts to attach the board to the base plate
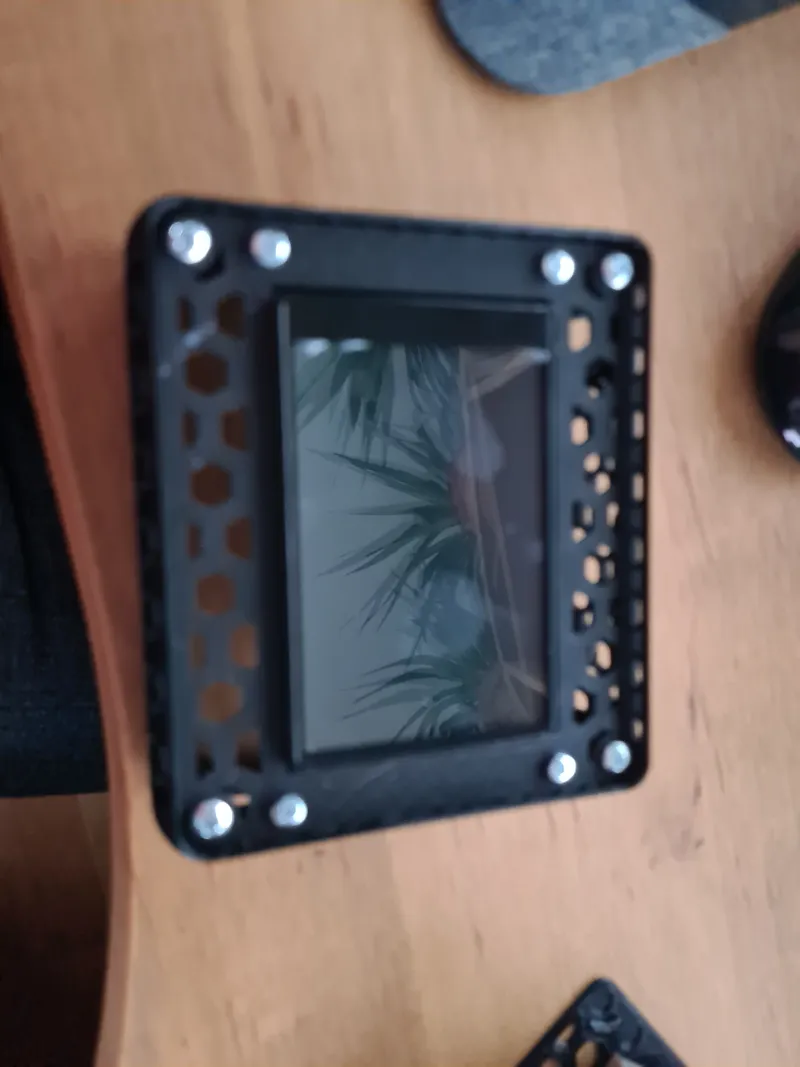
For the display on the diesplay holder M3X8 screws.
The diesplay holder and the base plate are fastened with self-tapping 3.5 X 13 mm screws.
assembly:
First attach the board to the base plate, then attach the display to the diesplay holder.
Next, attach the ribbon cable to the display.
Now the diesplay holder is screwed onto the main body. The cover can also be inserted here, as it does not require any screws.
The ribbon cable should now be rolled up a bit (here follows a strut that does this (an additional part, the existing ones are not changed)) and plugged into the board.
Finally put the SD card or e-mmc into the board and plug in the adapter plate for the power connection.
When inserting the boatd, please be a little careful and thread lightly, the connectors are counter sunk in the main body
With the screwing of the bottom plate the assembly is finished and the case can be put on the original holder of the ender.
Tags
Model origin
The author hasn't provided the model origin yet.