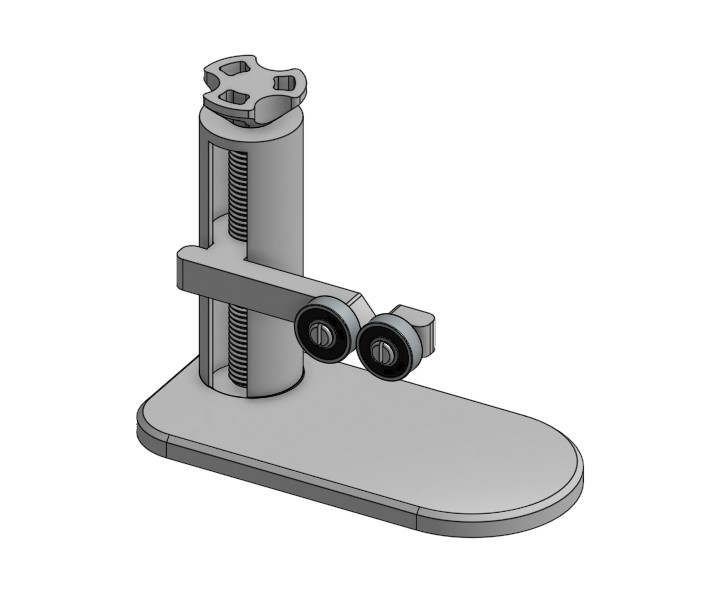
Laser Engraver Rotary Riser/Stabilizer (3D Printed or Laser Cut)

A Riser for Laser Machine Rotary - Available as 3D Printer Or Laser Cut Versions. Used with my xtool laser.
75
369
0
2366
updated November 27, 2022
Description
PDFLaser Engraver Rotary Riser/Stabilizer
2 Options Available: (3D Printed or Laser Cut)
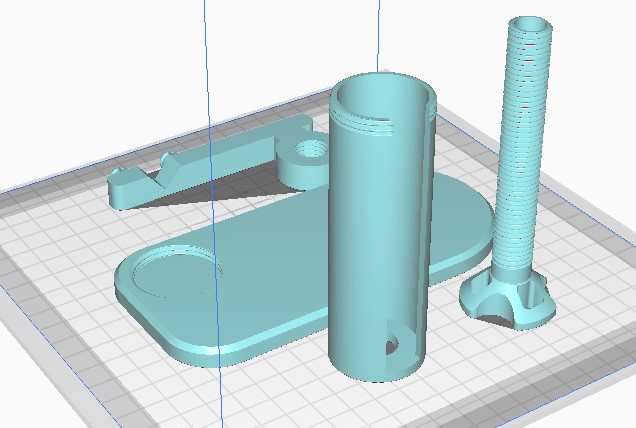
3D Printed Version:
Printed in PLA+
- I used a .6mm Nozzle, however you can use a .4mm as well
- With a .6mm Nozzle 2 Outer Walls. With a .4mm Nozzle 3 Outer Walls
- Top & Bottom Layers: 4
- 20% Infill (Grid)
- No Supports Required
- Print each part separately to avoid stringing
- Orient printed parts as follows
Assembly as follows:
Requires 2x 608-RS Ball Bearing available on Amazon.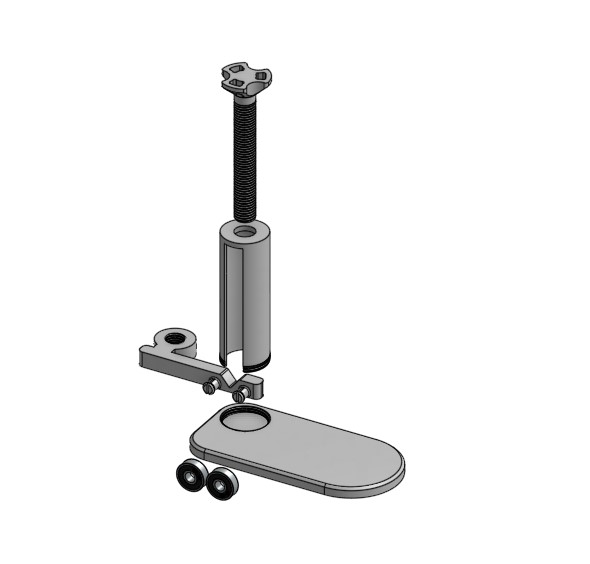
- TEST ALL THREADING BEFORE PROCEEDING.
- Secure Both Ball Bearing to Arm. Heat up pegs slightly to allow bearings to slip on.
- Insert Arm with V slot oriented up into Shaft.
- Insert Threaded Portion of Shaft into Base thread and rotate until shaft opening is parallel to base front. It would be a good idea at this point to use some SuperGlue to secure shaft into base.
- Insert Screw into top of shaft and thread into arm.
Laser Cut Version:
(Used the X-Tool M1 To Cut. Job Time approx 1hr for cutting and 20min assembly)
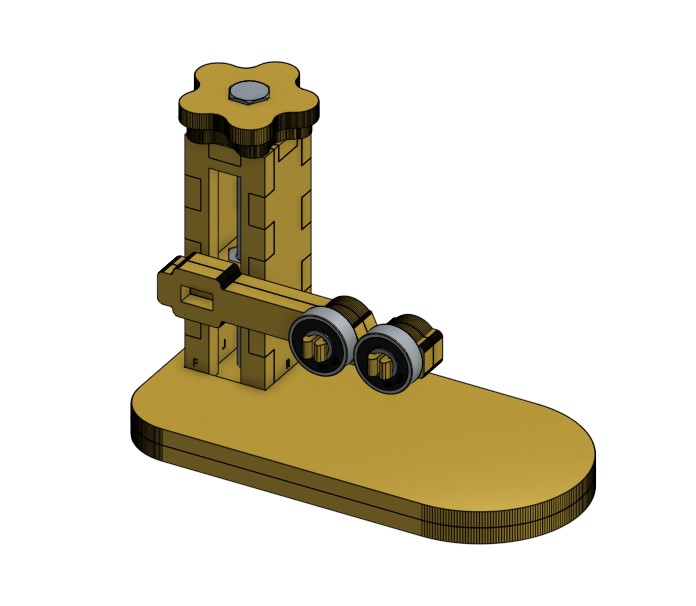
Requires a 265x200mm (Approx 10.5in x 8") piece of 6.35mm (¼") Plywood
Hardware Required:
- 2x 608-RS Ball Bearing available on Amazon.
- 1x 5/16" x 4in Hex Head Bolt
- 1x Matching Hex Nut
- 1x Matching Washer (optional)
Cut Overview:

Assembly as follows:
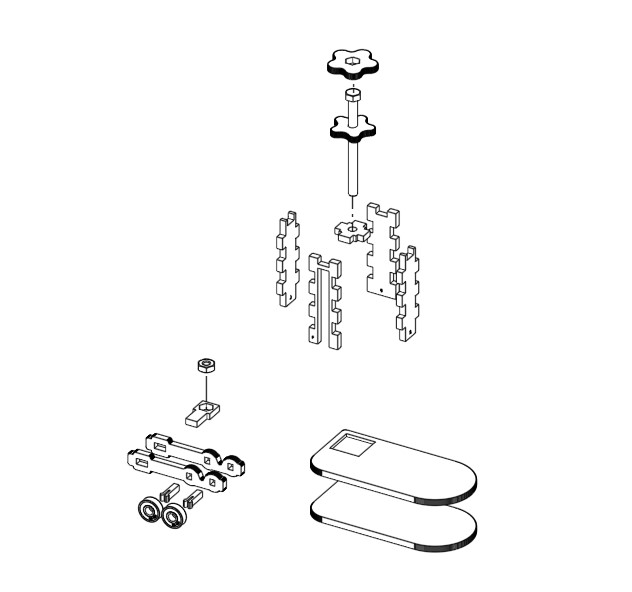
Prep:
- Press fit & use glue to insert/embed Nut into arm receiver
- Press fit & use glue to insert/embed Hex Bolt head into top knob piece
- For Ball Bearings: First insert pins into ball bearing prior to Glue up of arm
- Glue Up all parts as shown above.
If you download and use please like this model and upload a make picture.
Thanks
Model origin
The author marked this model as their own original creation.