3D Ski Binding Jig

Description
PDF*I've got enough requests for these that, yes, I will make you one If you're interested in this but can't make your own - send me a message. My cost to cover time and materials is $65 for a jig and hardware and $10/$20 per set of templates (without inserts/with inserts). Shipping within the US is usually around $15.
Newest Changes:
2025_02_22
- Tweaked handles to be easier to print and smoother rotation
For past changes, see the end of the description.
Overview
This is for those who prefer to mount their own ski bindings but want something better than paper templates; this is a nice middle ground between printouts and a proper drill jig.
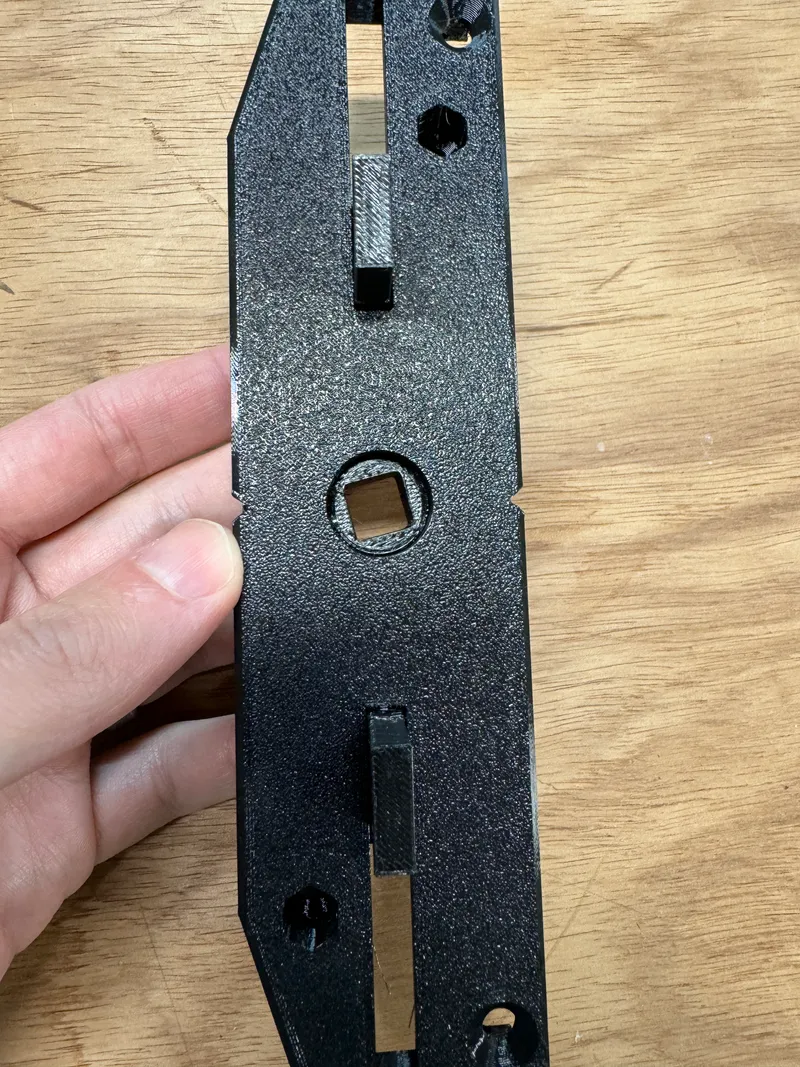
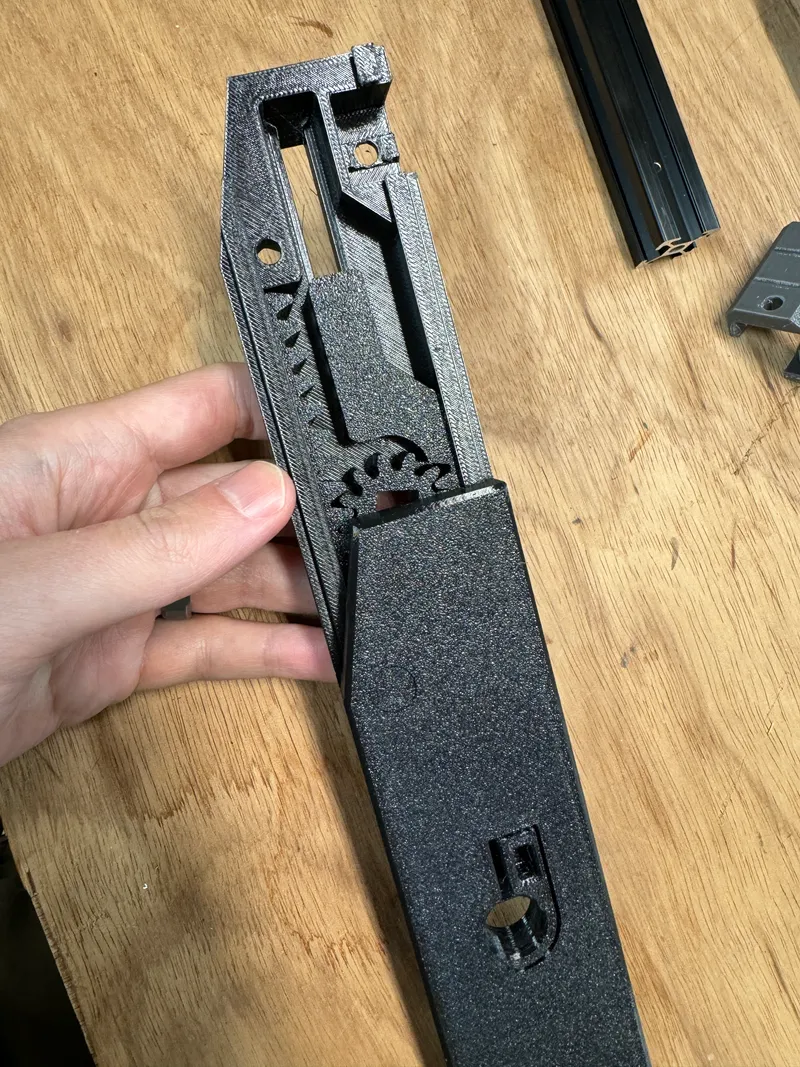
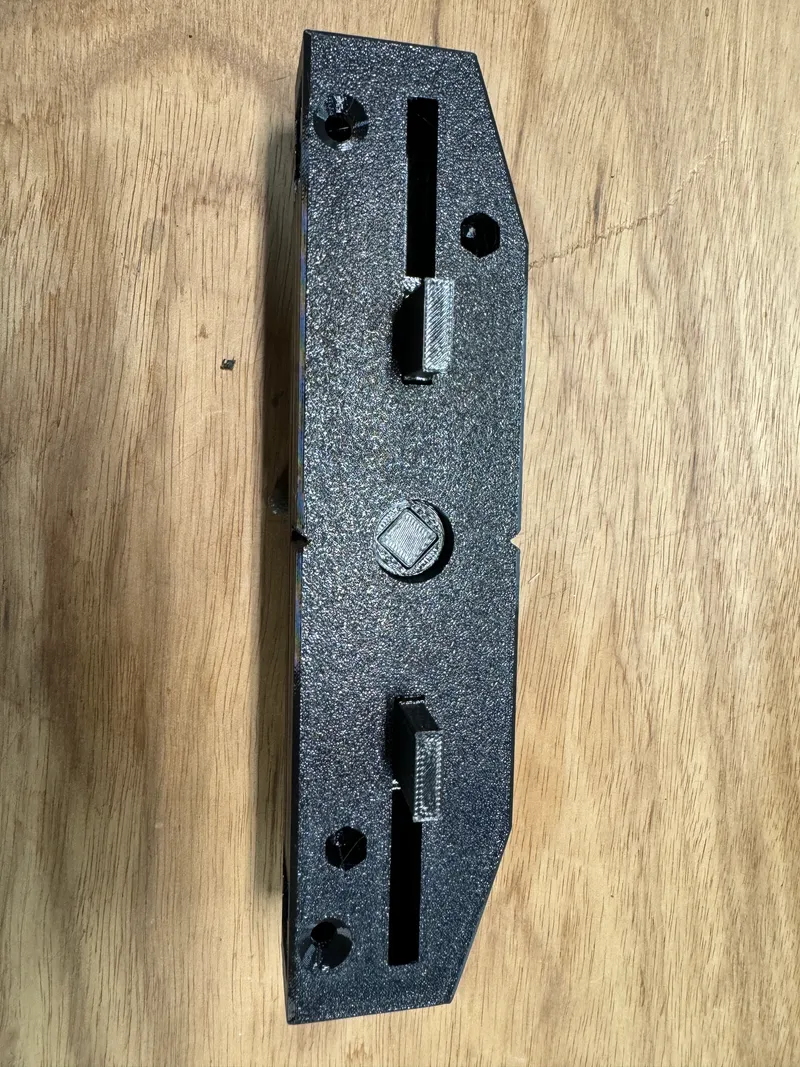
The basic system uses 2020 t-slot profiles with a centering clamp at each end to grip the ski. Riding on these are sliders that fit a toe and heel drill template and a center plate between them. The sliders can be used to lock the fore/aft position of each template but allow some vertical float to accommodate for the ski shape.
I've tried to keep the design inexpensive. Total cost should be around 5-15USD for fasteners plus the aluminum extrusion which could be 20-30USD. A detailed parts list is included below.
There are is fairly complete set of binding templates, and they are easily modifiable for adding new templates or changing hole sizes. You can print for use with brass or aluminum tubes as an insert for longevity, or drill straight through the plastic (which should still last a few mounts). There are a couple different versions depending on how you want to print them. I have moved those files to a separate file here. Links are Below.
This jig works well for me, but obviously I can't take any responsibility if you screw up a brand new pair of skis. Please carefully check things before you start drilling; it only takes a couple minutes to do a test mount on a 2x4.
I hope this works well for you too, and takes some of the tediousness out of mounting your skis!
Binding Templates
These are now in separate files, as its easier for me to keep things organized this way and I can allow remixes of the templates without changing the license for the jig itself.
Version 1 - raised text for easy multicolor printing
Version 2 - flush text (better final product in my opinion)
Printed Parts list
The jig will take ~500g filament and the largest parts require a print bed that can fit 8"/205mm width. Templates vary in size, but are usually around 60-100g filament. You should be able to print everything on a mini sized printer (180mm x 180mm) but the bigger pieces you will have to do one at a time at 45°
I recommend PETG or better for something like this just to have a little better layer adhesion and better thermal resistance (so it won't warp if you leave it in the sun or something).
For the housings and templates I suggest 3-4 walls and 25% infill at 0.4mm nozzle. For the gears, handle, clamps, etc I would recommend 5-6 walls and 25% infill.
| Item | Qty | Notes |
|---|---|---|
| Housing - Top | 2x | |
| Housing - Bottom | 2x | |
| Side clamp | 4x | |
| Handle | 2x | |
| Gear | 2x | |
| Sliders | 6x | Print without supports by orienting on the build plate ‘V’ shaped open upwards (ver 1.4) |
| M5 Knob | 8x | |
| Mount Center | 1x | |
| Template stops | as required |
Fasteners and other hardware
Hardware required should all be available at a hardware store, apart from the T-nuts, 2020 profiles, and optional rubber tube which will all probably have to be ordered. There are also options for printing with a sleeve/drill bushing which will require special hardware too
| Item | Size | Qty | Notes |
|---|---|---|---|
| FHSCS | M5x25mm | 4 | Holds upper and lower housings together |
| FHSCS | M5x10mm | 4 | Attaches assembled housing to t-slot with t-nuts |
| HCS | m5x45mm | 2 | friction clamp/lock for housing. 40mm length might also work I think. |
| HCS | m5x16mm | 6 | slider clamp knobs, attach to t-nuts |
| hex nut | m5 | 6 | |
| Machine screw/SHCS | M4x16mm | AR | as required, use for template heel and toe stops and toe pin springs. You might need shorter (~10mm screws) for some tech toe templates |
| hex nut | m4 | AR | as required, use for heel and toe stops, toe pin springs |
| rubber hose | 12mm x16mm | optional. This works for me, cut into ~5/8" long pieces. This was suggested as a less expensive option in the comments. | |
| Aluminum extrusion | 2020 T-slot or V slot, 550mm length | 2 | There are different variations of t-slot; most should work but I'm not sure I've tested everything. T-slot, V-slot or something similar to this (which is actually stepped) will work. 550mm should be long enough for 99% of mounts. Shorter is better for stiffness, so don't go too much longer than necessary. |
| t-nut | m5 | 10+ | This style works best |
| Drill sleeve | optional, see info on template pages |
FHSCS=Flat head socket cap screw (a philips or other drive flat head should work too)
SHCS=socket head cap screw
HCS=Hex cap screw
Assembly
Assembly is fairly straight forward; here is a general procedure and some pictures:
Assemble each centering assembly
- Insert slide clamps into housing. You will have to tilt them and insert towards the narrow end of their travel.
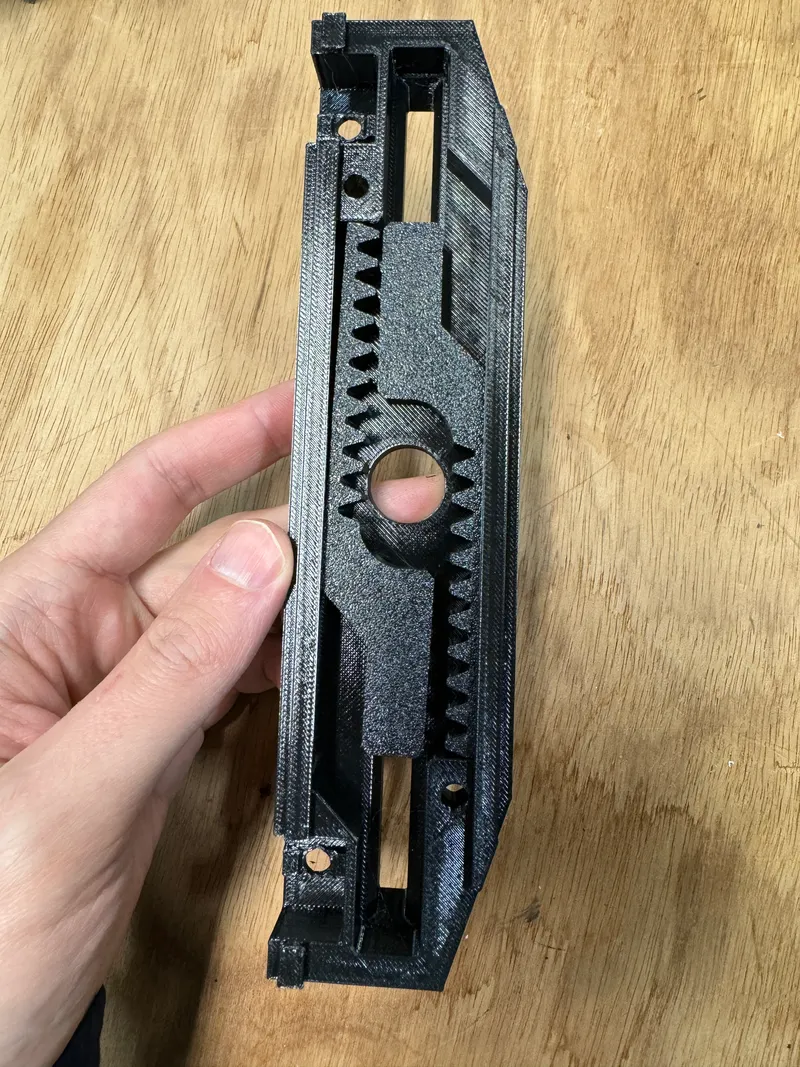
- Put the arms at the outer limits of travel (to ensure each side is the same distance apart) and then insert the center gear.
- Align and then slide on the top part of the housing.
- Insert a nut into the slot on the top of the housing, and install the locking clamp screw and knob (but don't tighten until the handle is installed).
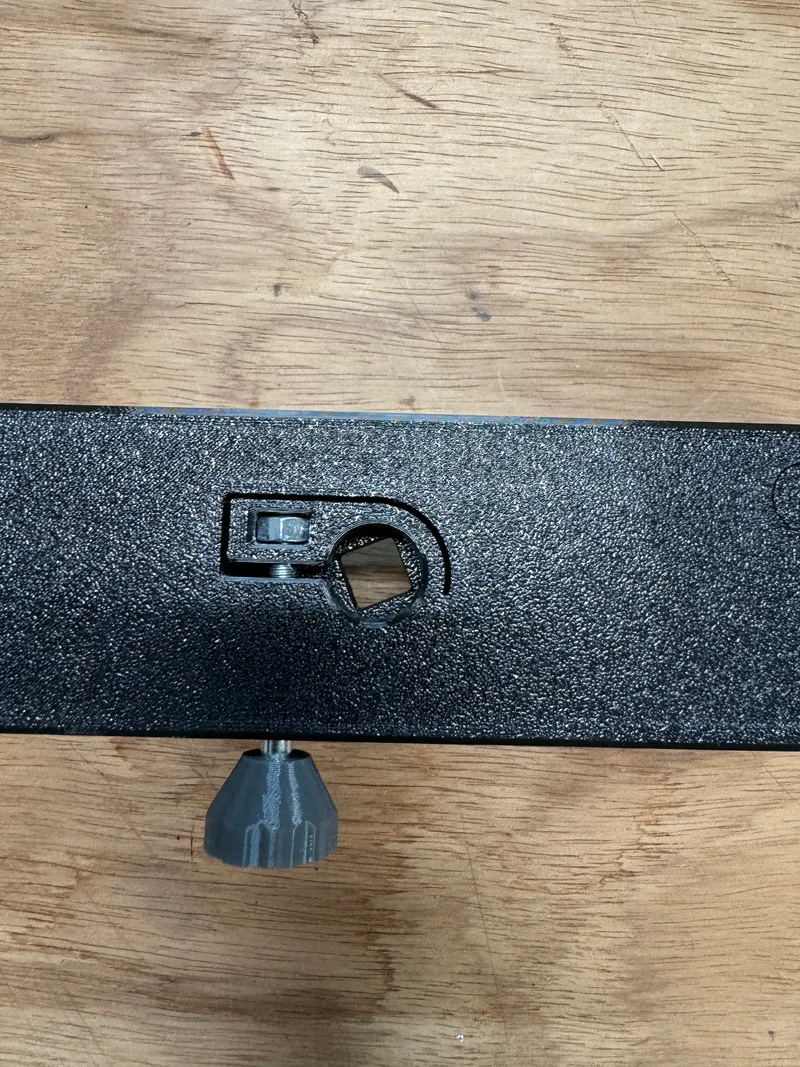
- Insert the rotation handle into the top of the housing assembly
- Install the nut and screw to hold the assembly together
- install a t-nut and short flathead screw into the the hole below the 2020 bar slot
- optionally, install rubber tubing for more grip on the side of the ski
Install sliders onto the 2020 bars
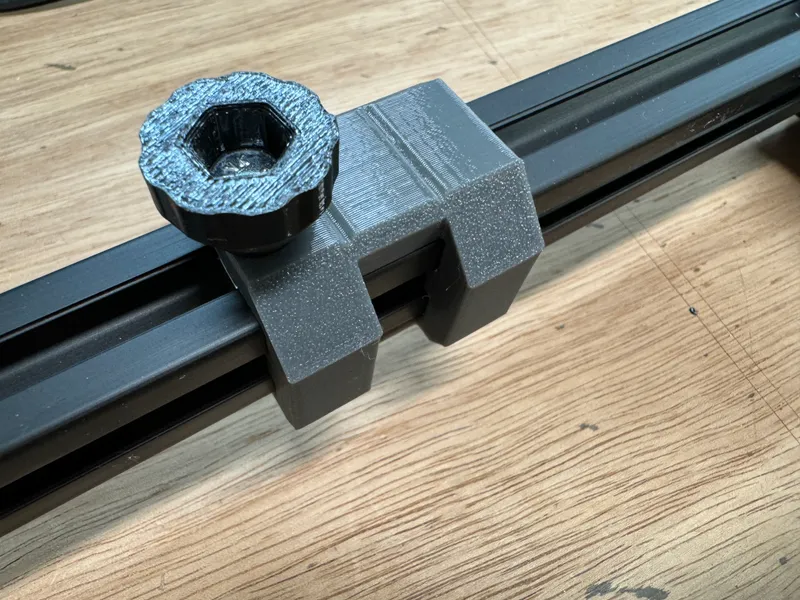
- Assemble each slider onto a bar with a t-nut, screw, and knob.
- You should need six total sliders
Assemble 2020 bars with the centering assemblies

- insert 2020 bars and use t-nut and screw to lock in place (tolerances and tight so it might be easier to line up and rotate into place)
- Check the centering mechanisms (if the slide clamps are not centered when the gear is inserted, the centering mechanism will not properly center) When you turn the handle each clamp leg should reach the limit of its travel at the same time as the other side.
- Do a test mount!
Mounting procedure
- Attach jig to ski roughly centered lengthwise over mount position
- Tighten handles on each housing to center jig
- While applying some pressure to the handle tighten smaller knob to lock each end into place
- (optionally) Attach extra clamps to secure ends to skis to ensure the jig doesn't move
- Set center slider on the center mark of the ski or wherever you intend to center the mount.
- tighten slider knob to lock into position
- Set toe and heel templates
- Align boot center mark with the center slider
- Use template heel stop, toe stop, or toe pin springs to position templates relative to boot and mount center.
- tighten slider knobs to lock each into position
- Use templates to punch and/or drill
- For second ski, use tape measure from tail to make sure jig is positioned identically and then only use ski center mark to verify position.
- Attach bindings and double check to the boot before gluing
Here is a sped-up video of me doing a mount using an early version of the jig.
Full Change History:
2024_09_24 - Pre Ski Season update
- Tweaked flush text templates. Templates also now available on MakerWorld here if you have a Bambu Printer and want to use my settings.
- toe and heel stops are just a friction fit and removable for easier storage
- toe and heel stops have been moved to the templates page as they are now different between the flush text version (the one I will continue to update) and the raised text version.
- Minor changes on housing pieces and sliders.
2024_04_20 - Big Update
- Updated to new V2 jig files. This version is a little bigger and beefier in general, but the main change was to move the bars down so there is full engagement between the side of the bar and the template. This results in a little stronger/stiffer template retention.
- Updated pictures, bill of materials, and description where applicable as well
- I will keep older models in an archive folder if replacements are needed
- Move the templates themselves to a different file for better organization and so I can post multiple versions and I have changed the license on those to allow remixes so people can upload templates if they wish.
- There are two different template versions, use whichever you wish
- Jig is also uploaded to makerworld if you have a Bambu printer and want to use my profiles
2023_12_27
- Added pivot rev2 templates. this is based on the binding freedom template instead of Knut Pohl's. This moves the toe line back 3mm relative to the holes - supposedly both have been verified and are correct, so test and decide what works best for you.
- Added alternate gripper arms and information on where to get rubber tubes which will be grippier than printing a TPU part.
- Updated toe and heel stops to allow for shorter screws and fit SHCS's
- Updated knobs and related hardware for sliders
2023_12_14
- Fixed G3 templates mistakenly having toe text on heel templates
- updated descriptions of some parts
2023_11_29
- Removed Note that Ski trab template was unverified. Is at least partially verified.
- Added 22 designs AXL template files and added to SCAD (thanks FabianN)
- Added Fristchi Vipec templates
2023_11_09 - added some templates
- Added ski trab heel template. Use ATK for toes
- Added 22 Designs templates
- Added plum Yak
2023_10_29 - Updates for ski season :)
- re-upped entire template library
- Templates have chamfers at edges for easier fitting into jig
- included templates at 8.25mm hole size for use without inserts (for anyone able to print this themselves, that is probably sufficient)
- primary rotation handle and housing hole are a little tighter fit. This should result in a more fully lockable clamp.
- changed knob to work with longer screws on slider.
- updated slider to be more friendly to different styles of t-slots
- updated some sections of writeup
2023_06_05
- added scad of hole size checker for use with different sized inserts
2023_04_16
- Uploaded new center position placeholder with raised text
- Uploaded new slider that is less sensitive to printer calibration and can be printed without supports.
2023_03_12:
- Changed slider geometry to be more friendly to different T-slot profiles, of which apparently there are more than a few variations for 20x20.
2023_01_05:
- Updated gear and side clamp for smoother motion
- Added slider with slightly wider slot. Depending on how the parts are sliced, this might be a better fit with templates
- new toe pin with captured nuts (and change from m5 down to m4)
- Updated templates
- Text extends above surface (rather than cut into) for easier mutli-color printing
- different geometry for better tech toe pin positioning
- slightly larger hex hole for toe/heel stop nuts
- I've switched to 9.0mm hole size from 9.1mm, most new templates I've uploaded for other features are 9.0mm. You can always generate templates for whichever size is preferred via the SCAD files.
2022_12_13:
- Added hole size test block to dial in fit for brass inserts; If you want a tighter or looser fit than the 9.1mm, determine a size and then use SCAD files to generate new templates as required.
- Added Demo templates for Salomon Warden 11 & 13, and Tyrolia attack, along with spacers specific to each of those.
- Added rental holes to ATK template.
- Added PLUM bindings.
- Added older template for older Solomon alpine bindings.
- Updated SCAD files to have these patterns aswell.
- Organized
2022_11_21:
- Added more standard template files.
- Added parameterized files for templates with multiple hole sets and standard templates for easy drill size modification.
2022_10_22: Original Release.
Tags
Model origin
The author marked this model as their own original creation.