MINECRAFT pickaxe - MultiColor, No glue, Easy Assembly

Description
PDF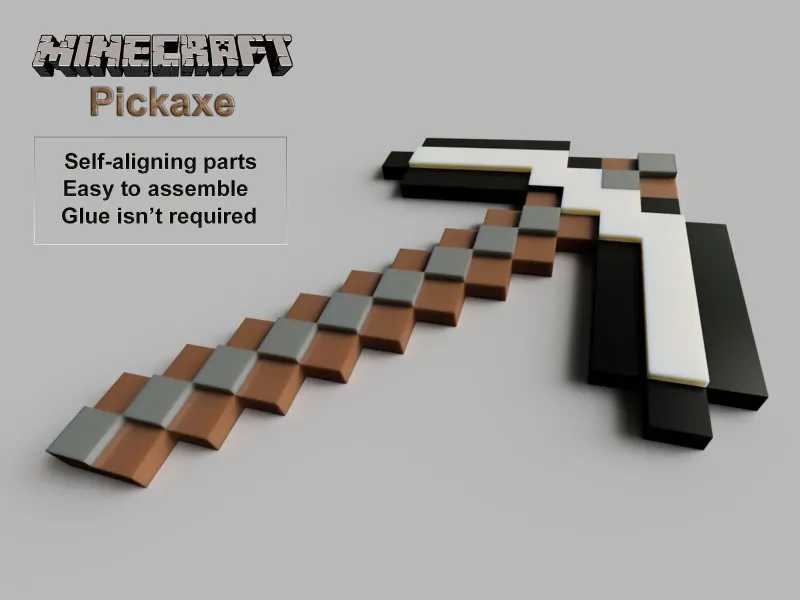
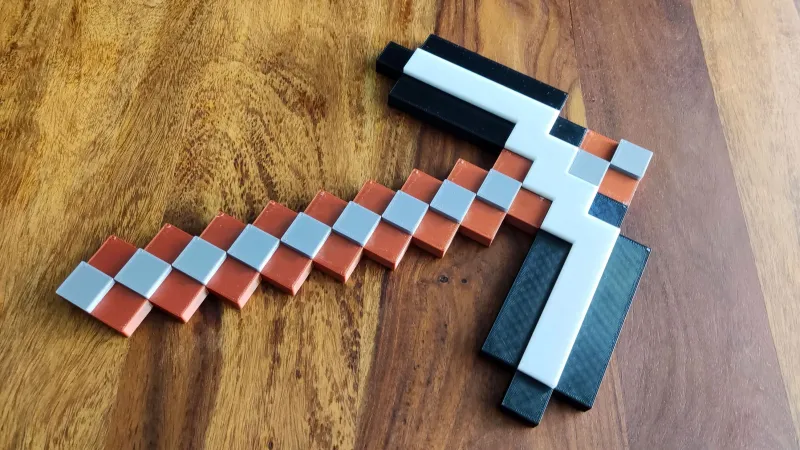
MINECRAFT pickaxe
I purchased my son a Prusa MK3S+ knowing he would be able to handle it quickly even though he is only in fourth grade. After a month of learning how to print he was interested in printing the famous MINECRAFT pickaxe because he loves the Minecraft game.
It took him a while to find a MINECRAFT pickaxe model and most of the ones he found required glue or were too small. After printing one of them, he struggled to align the parts and stick them together with glue, and not only but it broke shortly after. Seeing him cry after two days of work (it's not easy to be a kid, you know..) made me want to help him.
Easy assembly
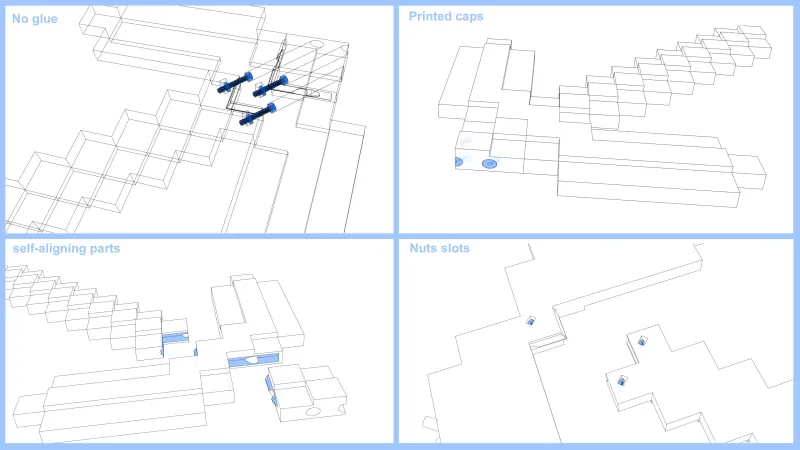
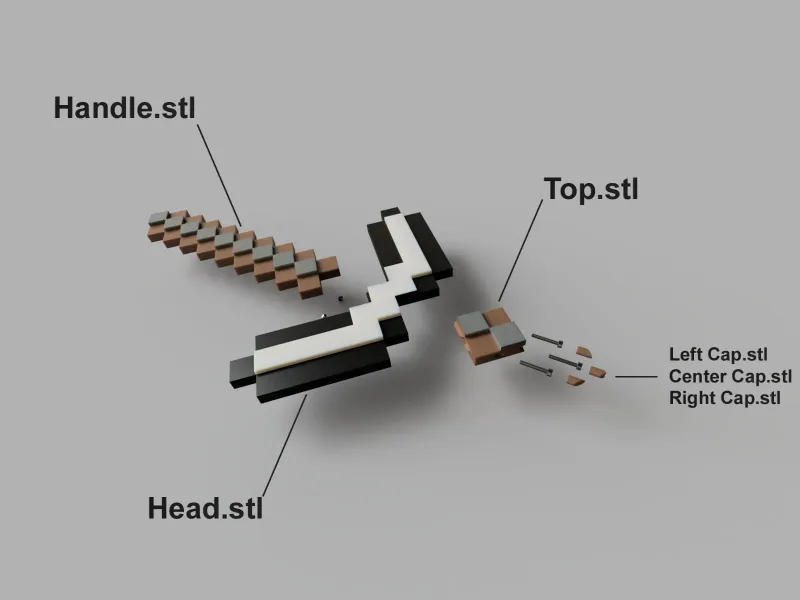
Firstly, I modeled the MINECRAFT pickaxe from scratch (easy task). Then I added the chamfered channels to quickly align the parts. All parts are held together by three screws instead of messy glue. There are 3 caps that cover the screws, which you insert into the screw channels at the end. Very simple and clean.
Multi Color
It's a multi coulor print - my kid wanted it to be with few colors and beacuse of the blocks it was simple to do. I used to simple method of filament switching - in middle of print the Printer will pause (M600) and will allow you to change the top blocks color (Highet 10.4mm / 64 Layers).
I have included 3MF files for all the models needed, in which you can change your print settings and the color change height is pre-defined. You can also use the pre-sliced G-code (for Prusament PLA). If you are using other brand material just change the temp/material on the slicer or tune it while printing.

What do you need?
First make sure you havee these parts:
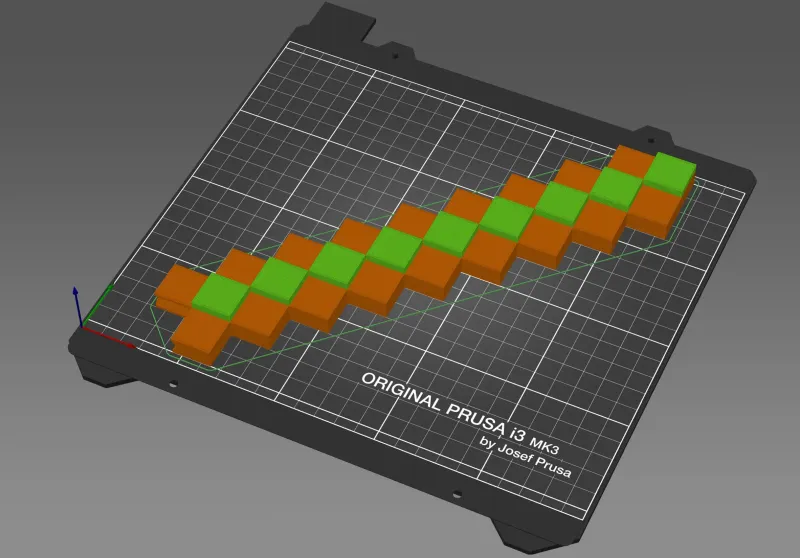
- Prusa MK3S+ or any printer with 200mm+ build plate.
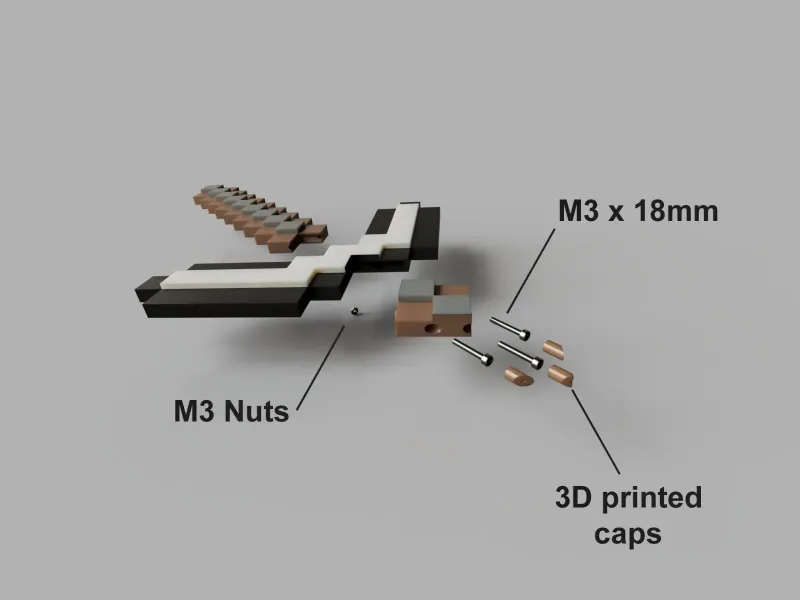
- 3pcs M3 x 18mm Socket Hex screws DIN912.
- 3pcs m3 nuts (Please don't use Nyloc nuts)
well it's easy, i made it simple to you:
Just use the sliced files (G-code) with Prusament PLA or Use the 3MF files in wich the parts will be align correctly, support only where needed and color switch pre-set.
 |  |  |  |
Another option is to manualy print the STL files:
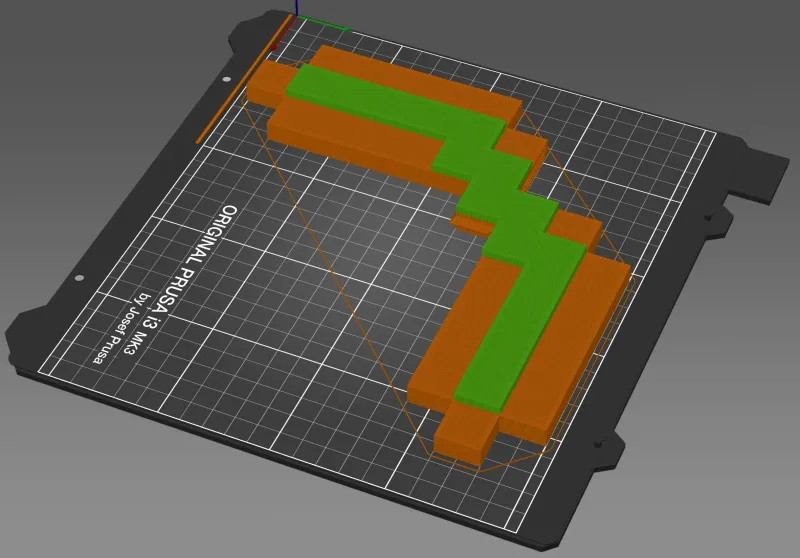
- Head.stl - needs support inside the nut hole (bottom).
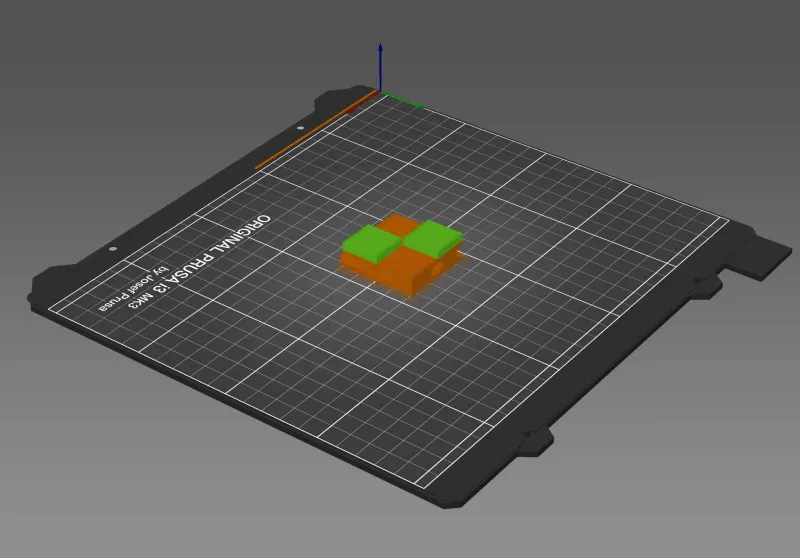
- Top.stl - No support needed
- Handle.stl - needs support inside the two nut holes (bottom).
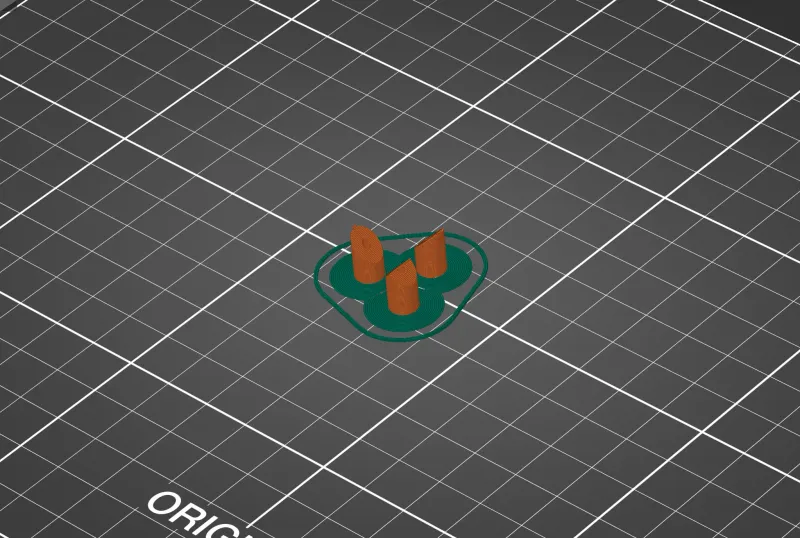
- Center Cap.stl + Right Cap.stl + Left cap.stl - No support needed, Brim needed.
Happy Ending !
My kid printed it on his Prusa MK3S+ printer by himself. Well, not exactly by himself - I still had to teach him a few things about switching colors in the middle of printing and why the brim is important for small and tall parts. However, he eventually did that all by himself. My heart is overflowing with pride!
He assembled it using the pictures I made for him (attached) and it was a joy to see him so happy throughout the process. The print quality does not even come close to that of my BLV Cube printer, but for me as a father, it's the best print ever made :)
Tags
Model origin
The author marked this model as their own original creation.


