Easy Stir Plate


Description
PDFSometimes we need a stir plate, but even the cheapest stir plates are too expensive. So you have a printer and have an old computer fan sitting around, or access to old computers, and a USB cable, and a few magnets, then you have all you need to make your own!
Update (Oct 8, 2022): The stir plate works, but it depends a lot on the thickness of the container you use on it and the friction that comes out. The fan has little torque, so if there is too much friction, and it is close (so well coupled to the magnet), it tends to stall. So far, a 1 L pyrex measuring cup works well if placed directly on top.
Parts
- 80 mm computer fan - bigger or a bit smaller would probably also work but you need to scale the parts. Mine was a 12 V 80 mm fan I grabbed from an old computer case lying on the side of the road. If you want it to go full speed, try to find a 5 V one.
- 4 x [12 mm diameter x 2 mm high] Neodymium magnets, you can probably get away with two, depending on the stirring bar. I bought mine on ebay.
- USB Cable - you will be modifying it if you do not add a plug
- USB charger - for using the stir plate, not in the build
- (optional) Female USB - if you want to preserve your USB cable, you can build a female USB plug into the plate. I used a female USB-C connector from AliExpress.
- (optional) Power switch - any kind of three way switch will work, I used this one.
- (optional) 4 x Rubber feet
Tools
- Soldering Iron and solder + flux
- Thin wires - I got away with just using the fan wires and cutting them to length.
- 4 x M3 (16 mm, screw head) screws + washer + nut
- 4 x M5 (8 - 12 mm, flat head) screws
- Cyanoacrylate glue (Super glue) or other type of glue
Assembly
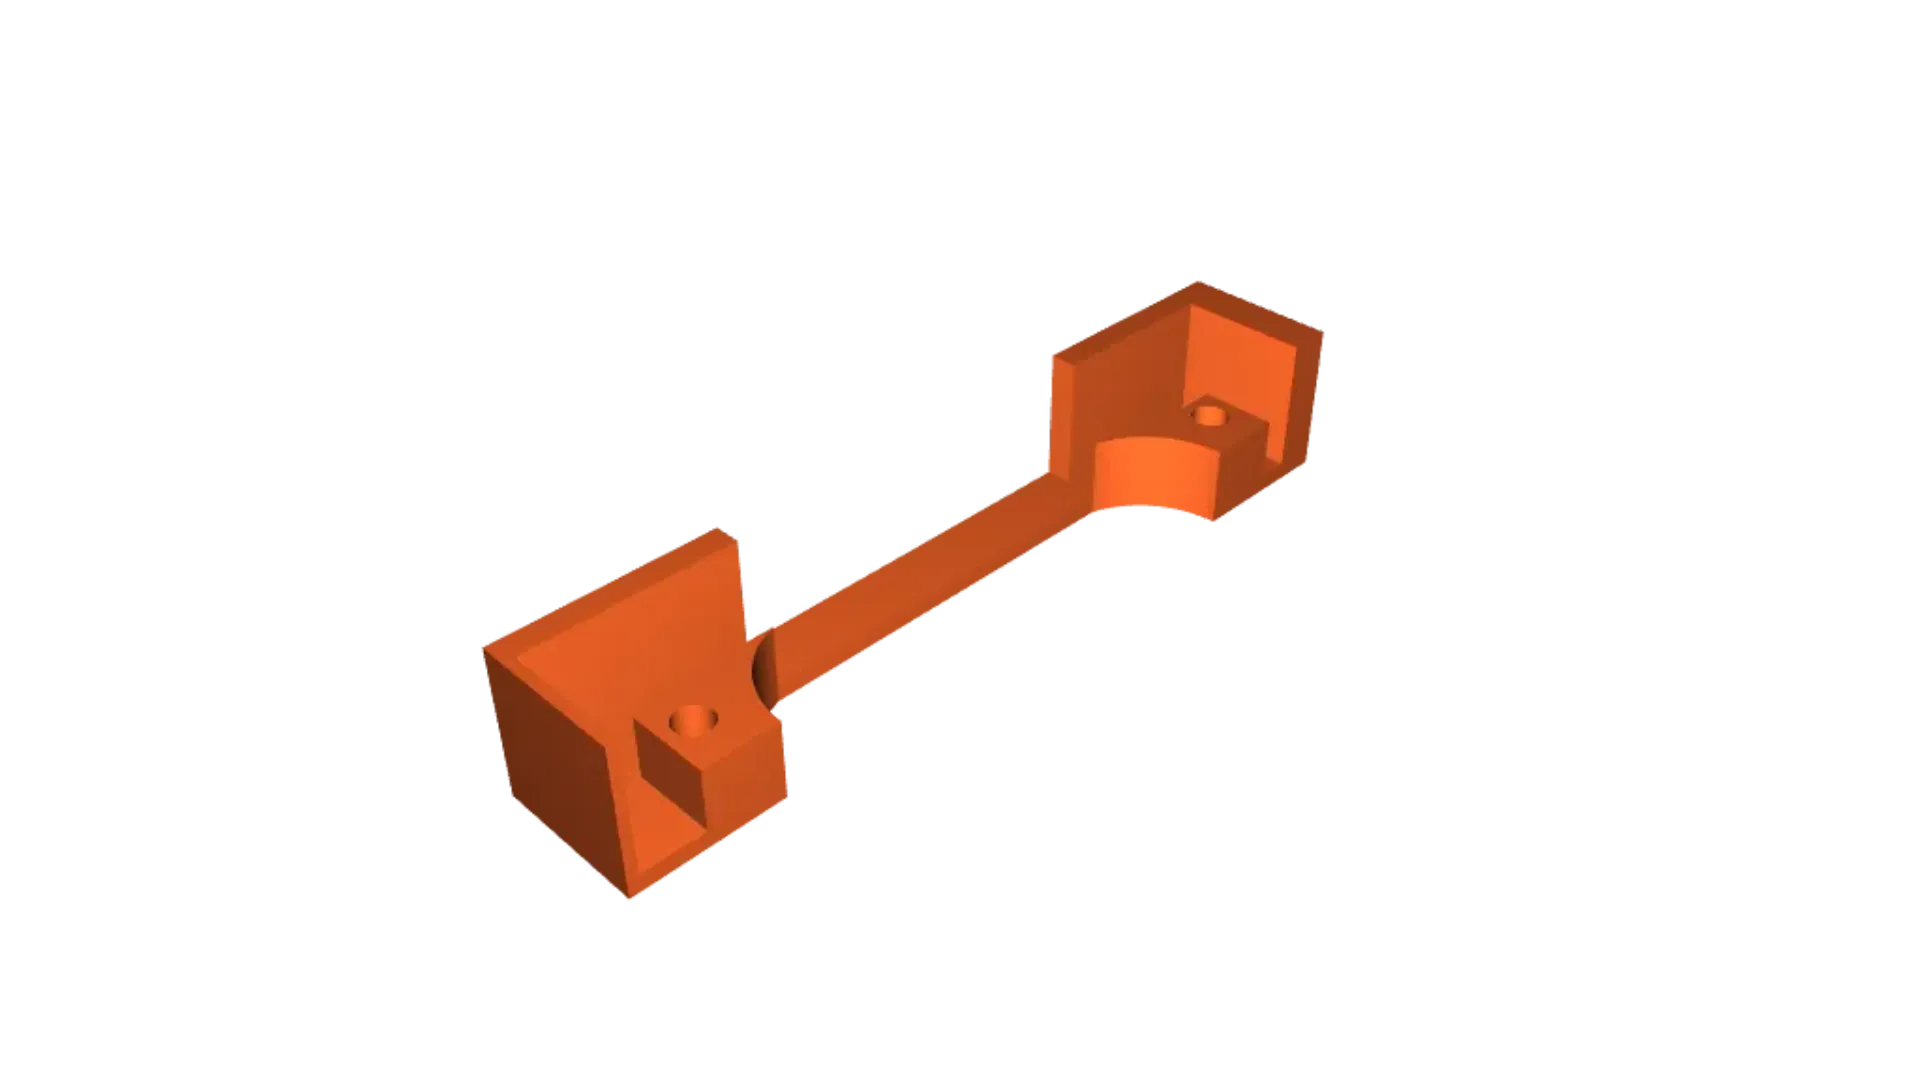
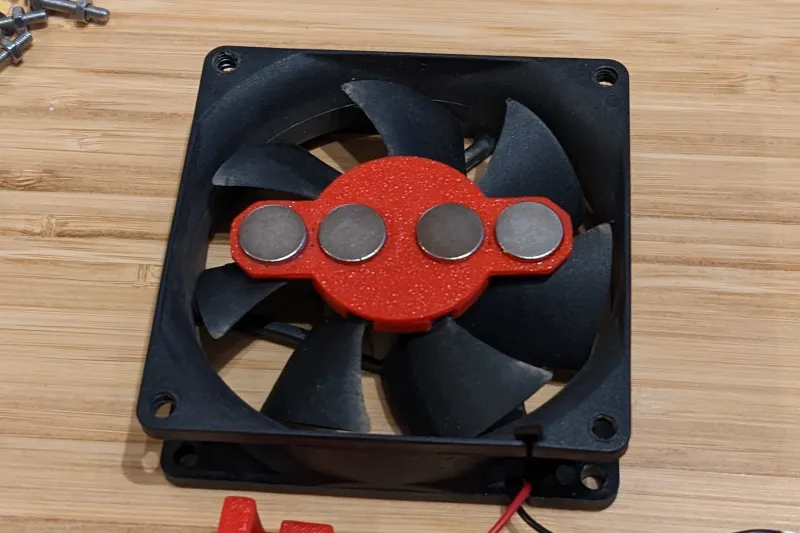
- Place magnets in adapter
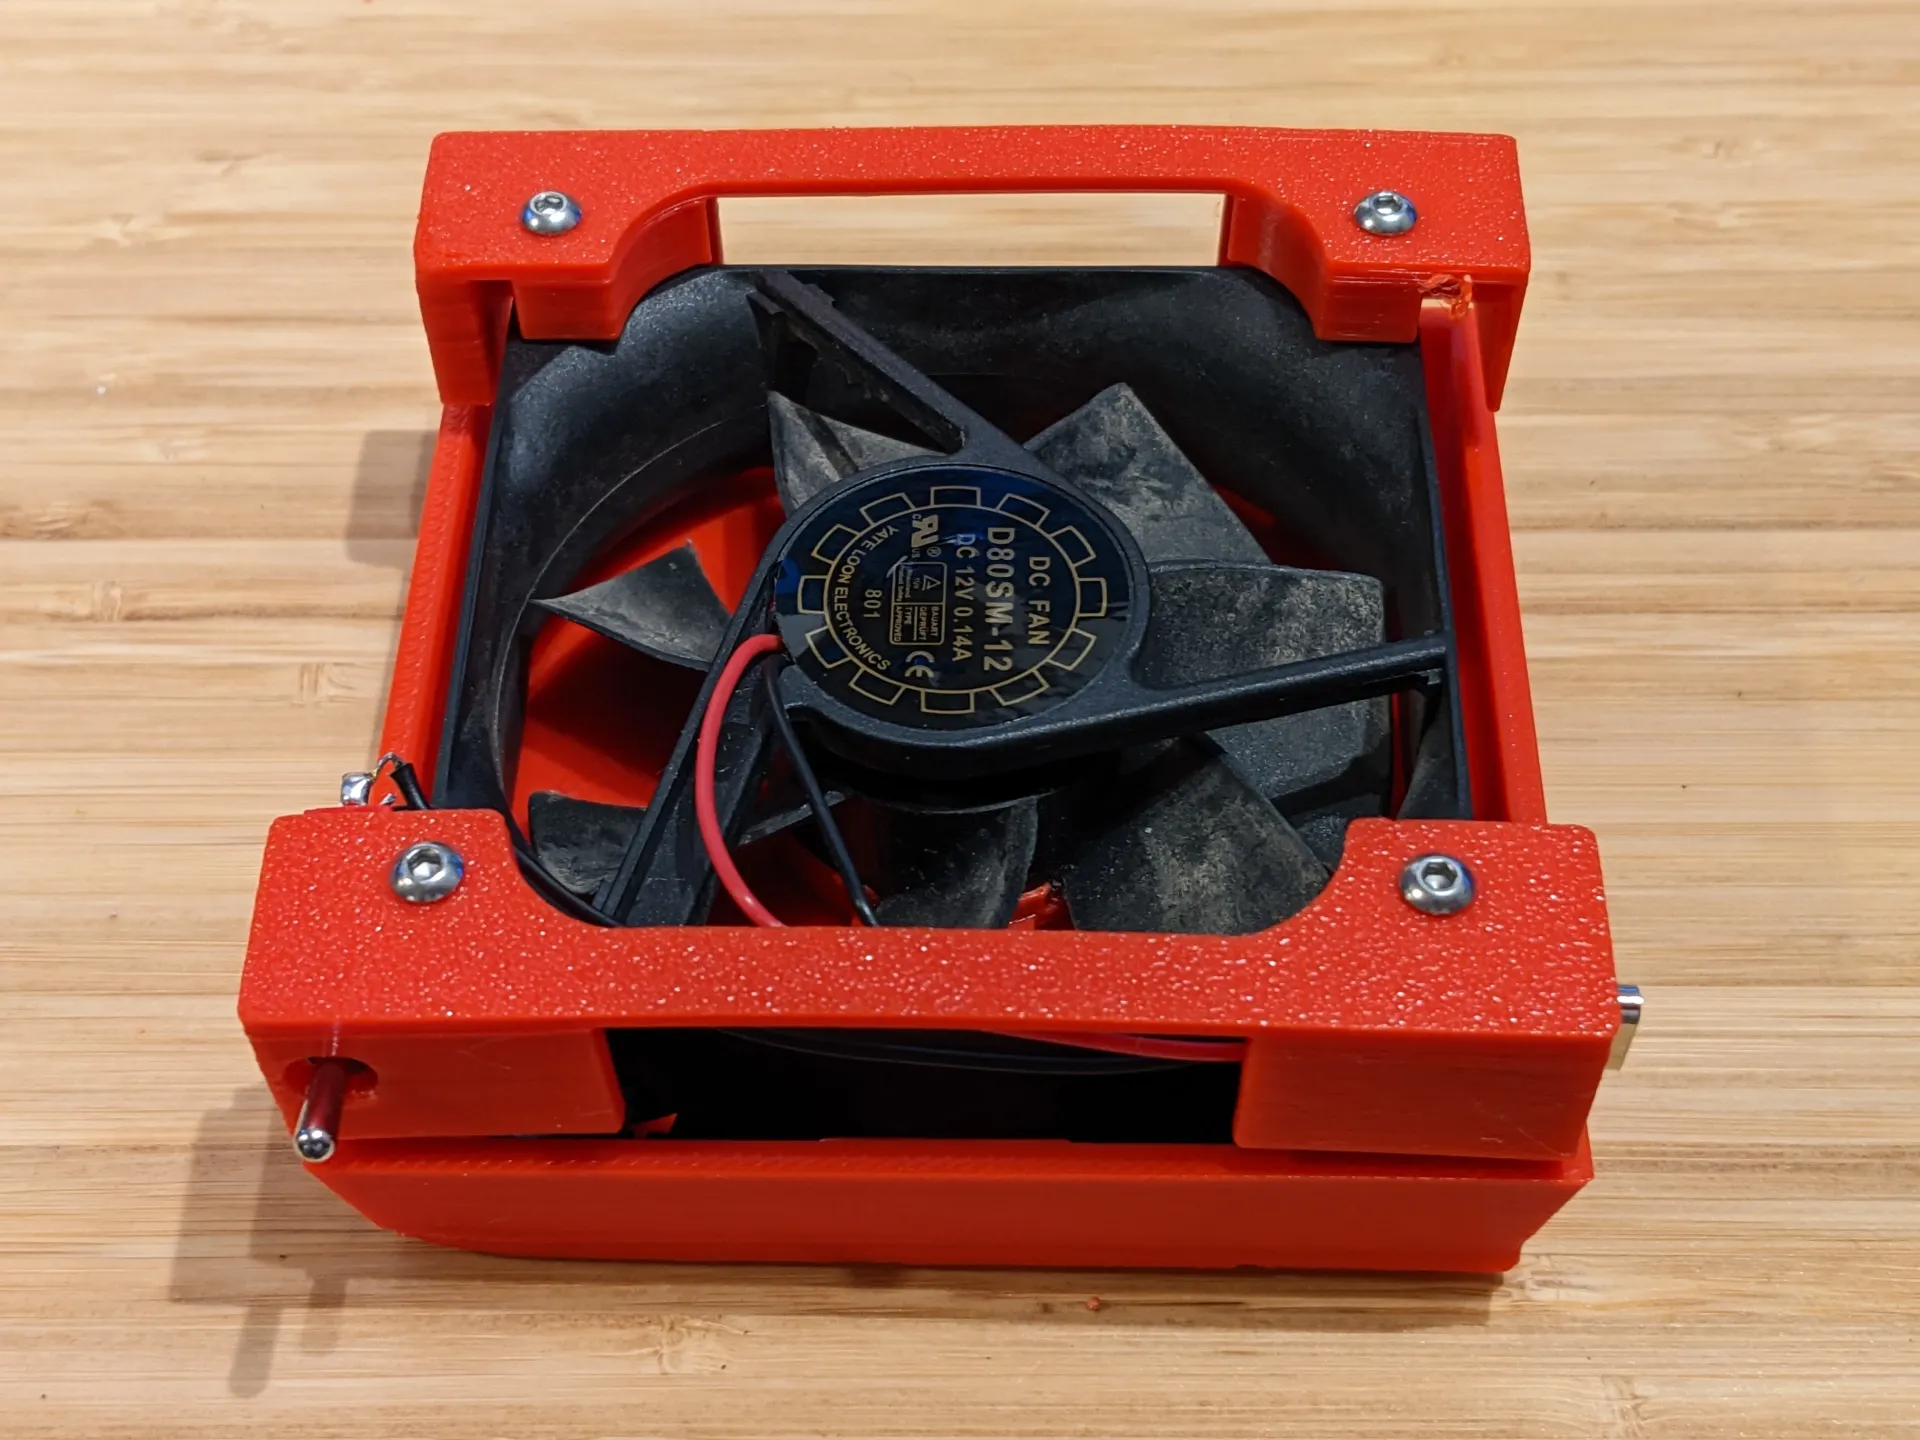
First stick the magnets onto the “fan adapter” piece. These should be arranged as N-N-S-S, i.e. each side should be oriented similarly, and opposite from the other side. It can be a bit of a pain to get the magnets to stay in place, but a piece of tape over the top works well until the glue sets up. - Stick on fan hub
Add a dab of cyanoacrylate glue to the fan hub and press down the adapter on top of it. You might be able to get away with a pressure fit, but since the lid will be on
Note: before going through the somewhat permanent steps of cutting wires and or soldering things together, it is a good idea to test that your fan will actually work with the desired power source. If you are using a 12 V fan, there is a chance that 5V will not be sufficient to make it turn, in which case you can either add a barrel jack instead of a USB connector, or add a boost converter to provide the required higher voltage.
- a) Connect the wiring (for USB and toggle switch)
If using a Female USB connector, and/or a switch, this is the time to press them into place. The tolerances are pretty tight, so press fit did it for me, but I also added a bit of cyanoacrylate glue to secure them.
Connection should go as follows:
Connector Power (+ ve, red) > Fan power + (red)
Connector Ground (-ve, black) > Switch Pin Middle
Fan Ground (black) > Switch Pin Side
For the switch, if it is 3 pin, then one switch position (e.g. up) will connect those two pins (e.g. 1 and 2), and the other position (e.g. down) will connect the other two pins (e.g. 2 and 3). So as long as the two pins you connect to are next to each other, it will work, it may just be upside down.
Solder the wires onto the indicated connectors, and you are good to go! Plug it in to test that everything is working as it should be. Use electrical tape to cover any exposed wires to prevent shorts.

- b) Connect the wiring (for USB cable only)
Otherwise, for the simplest build, hack off the end of a USB cable (being mindful to preserve the end that plugs into the wall wart. Separate the inner wires, typically red or orange will be power and black or white will be ground; if you are not sure, plug the USB into the wall and try touching the red and black fan wires until it turns. It is low voltage, so you will not get shocked, but try to avoid shorting them completely to avoid potentially damaging the power supply.
Once you know which wires to use, you can solder them directly to the fan wires. If you do not have a soldering iron, twisting the wires together tight and taping them hard might be enough to hold them in a pinch.
Plug in the USB wire to make sure it turns as it is supposed to.
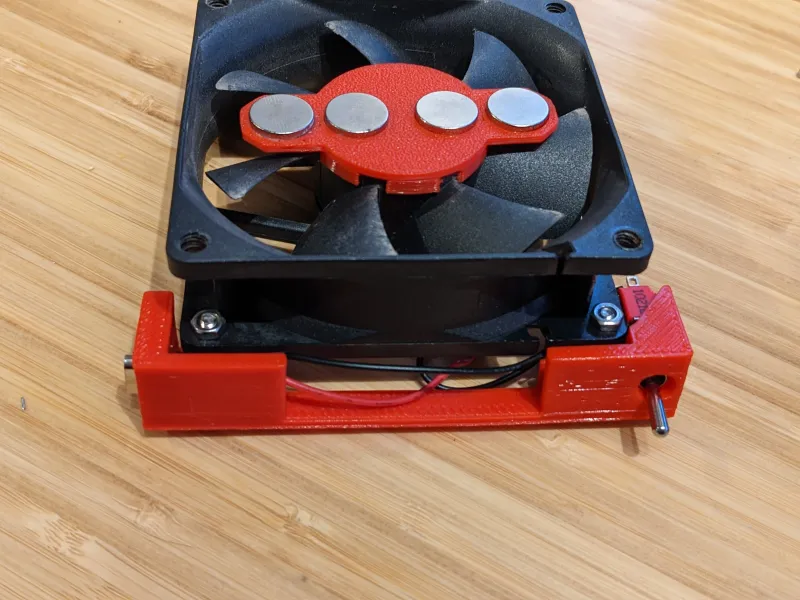
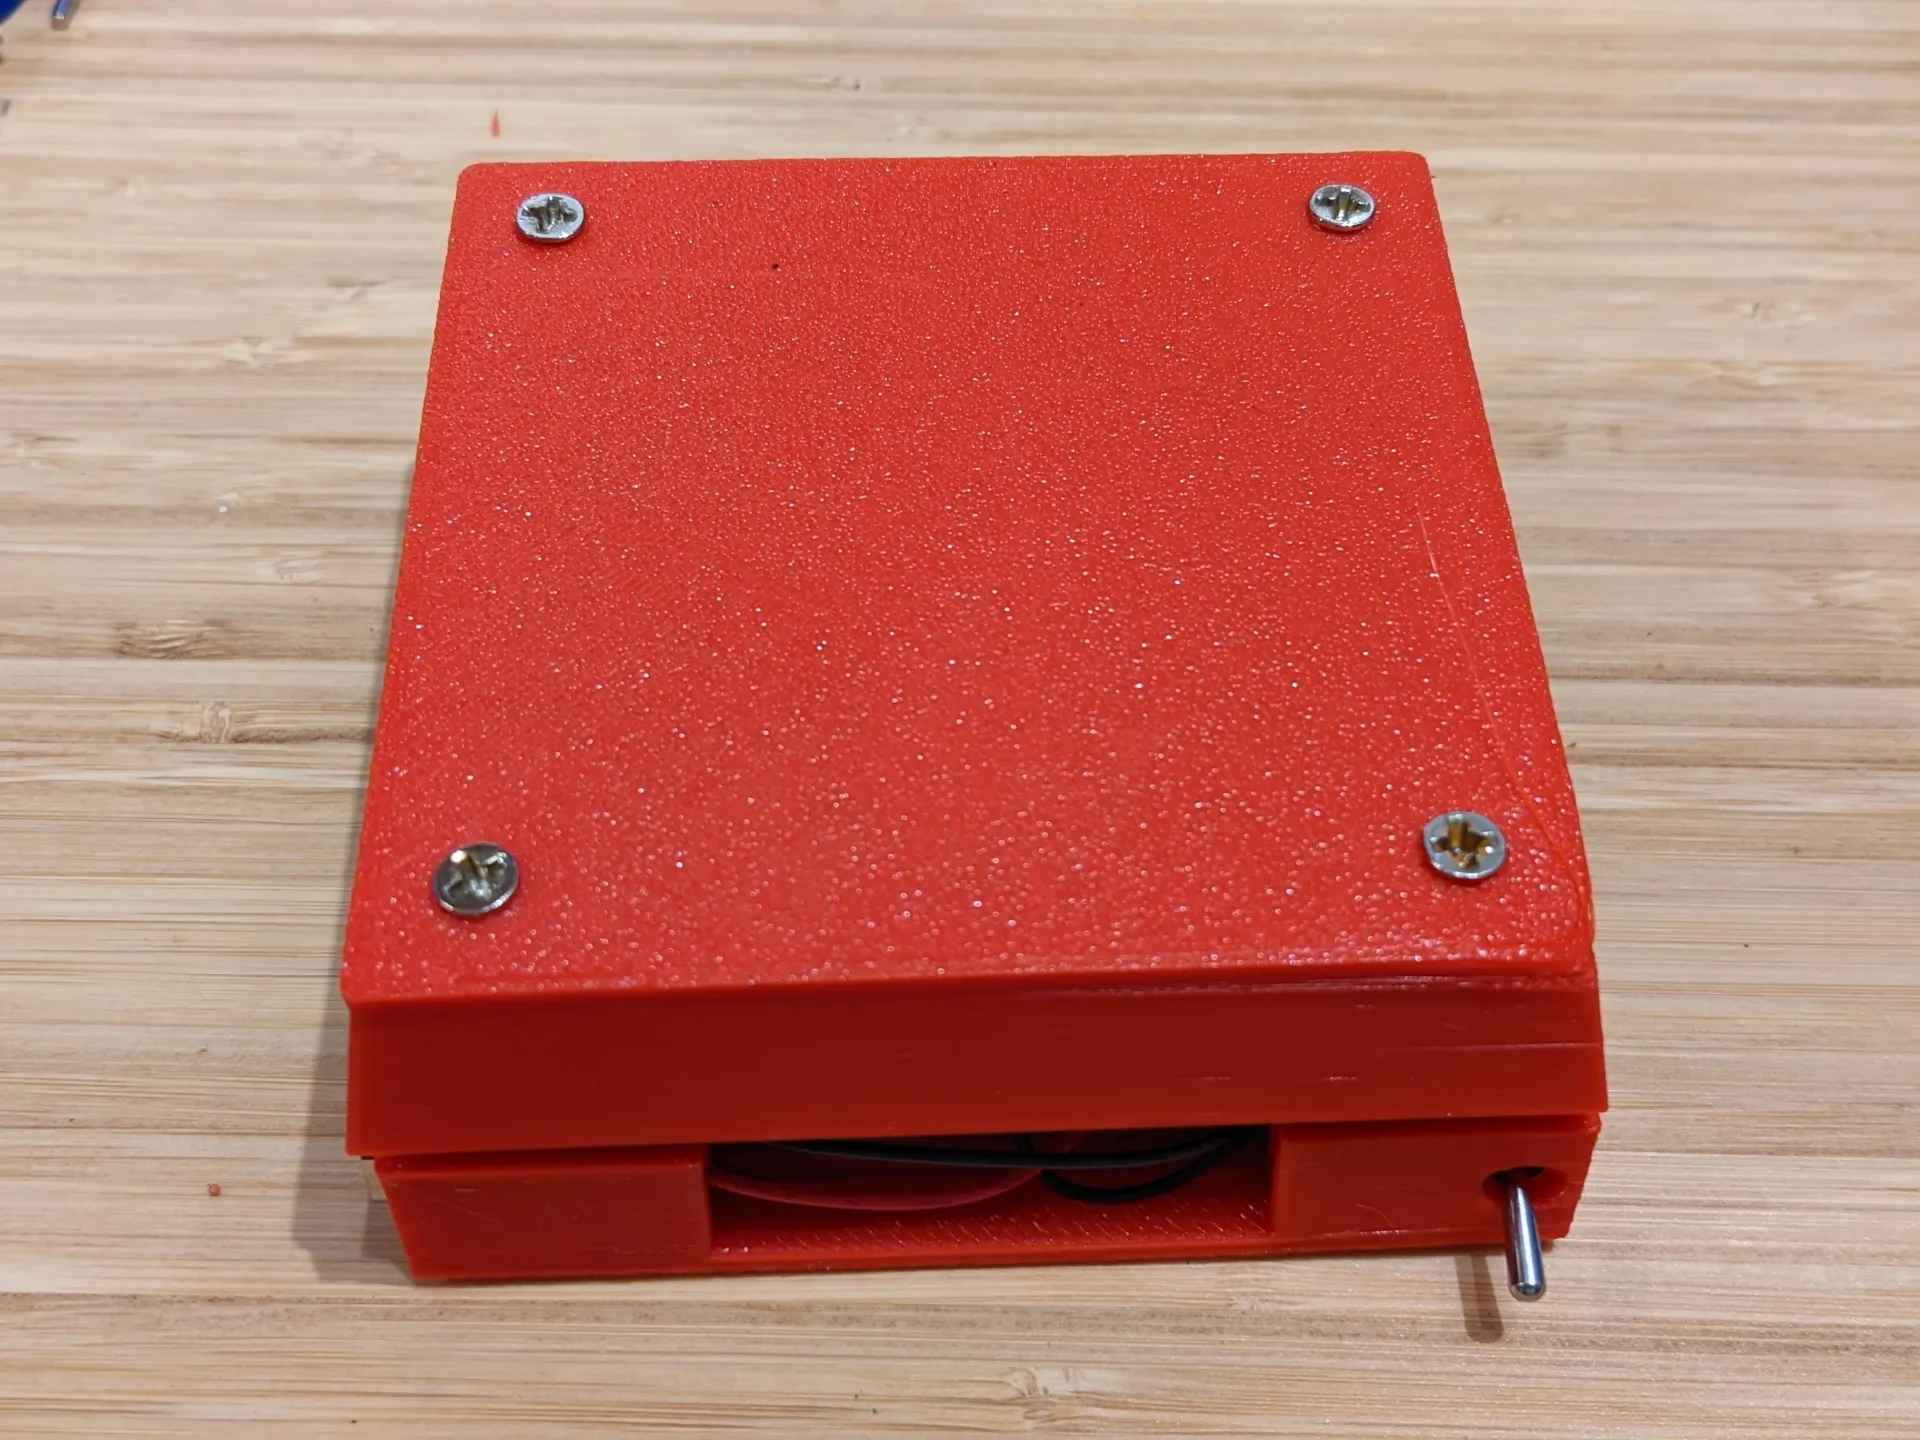
- Screw in and tighten the feet.
Thread the M3 screws from the bottom of the foot and through the bottom holes for the fan and tighten the nuts from the top.
Install the other foot similarly on the other side.
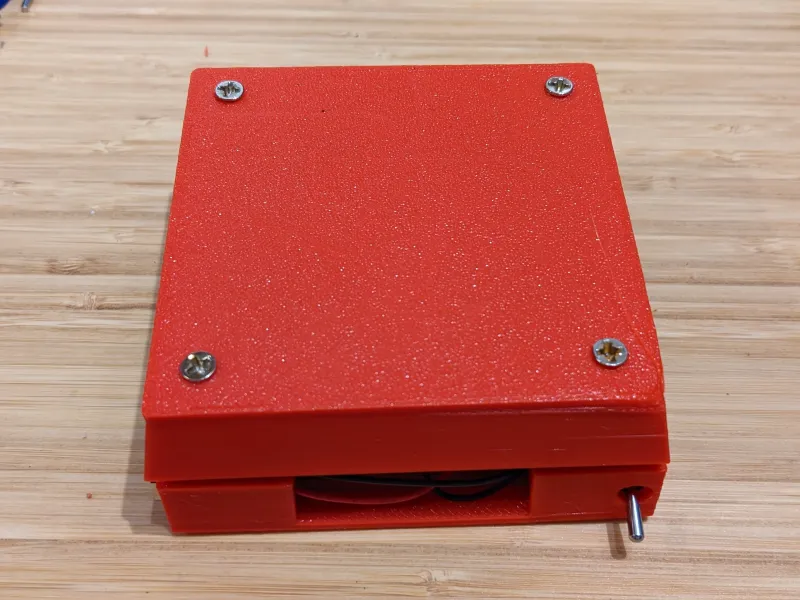
- Install the top
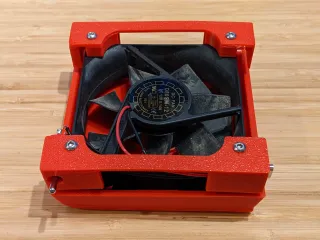
Tighten the top onto the top of the fan with M5 screws. They will be tight in order to bite into the plastic of the top and the fan. Mind that the fan does not rub onto the bottom of the top plate. You can add washers between the fan and the top to give additional clearance. You do want it to be as close as possible but free to turn though.
Congratulations, your stir plate should work! Specially if you have a magnetic stirring bar, otherwise a screw or bit works to test it out… just be careful as it may fly off when you turn it off.
Upgrades!
- Variable Speed/Voltage
Given that the fan that I used was 12 V, 0.14 A, this means that the fan has an internal resistance of 85.7 Ohm. If you want to add a variable speed to the stir plate, you can add a potentiometer in series with the fan, 500 ohm will let you reduce power from 100% down to 14 %, though there is typically a minimum voltage below which the fan will not turn, which may vary from one fan to another. - Higher voltage
Ideally, it should be at the correct voltage, so a boost converter would work between with the power connector and the fan. Alternatively, it could be connected to a 12 V power supply.
Model origin
The author hasn't provided the model origin yet.


