UK vertical plug adaptor
A (fused) wall wart adaptor to raise the height of the plug
1
11
0
267
updated September 5, 2022
Description
PDFBackground
I bought a sofa that gets in the way of the only outlet on that side of the room, and thus I needed to raise up the oulet a few inches. I modeled the interior after Dominic Notman's plug model and built a case around it.
Construction
Hardware
In addition to the print, you will need:
- a fused UK plug (I got mine from Tesco)
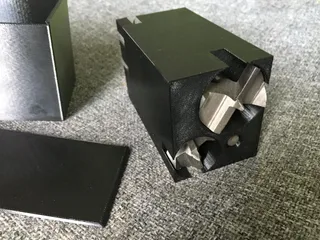
- An unfused 2 way 2 gang adaptor (B&Q's Diall brand was specifically what I used); a 3 way adaptor should have the same internal metalwork but it might not.
- A short length of 3 core power cable (I cannibalized an old power strip)
- Soldering iron
Printing
This is a fairly straight-forward print; the version shown in the images was done in Gentleman's Grey PLA, 0.2 layer height with a 0.4 nozzle.
Assembly
- Disassemble the 2 way adaptor and remove the metalwork. Break off the non-grounded pins (the rivet should pop out fairly easily) and cut the ground pin (see drawing).
- Disassemble the plug and transfer the metalwork to the base of the print.
- Wire the plug side and solder the wires to their counterparts
- Use the three screws from the plug to connect the base to the top
Other notes
The wall wart is thin enough that you can fit two on a standard outlet. The cutouts on the side allow for the old-style toggle switches to fit, but I tested on newer outlets and it works there as well.
Tags
Model origin
The author hasn't provided the model origin yet.


