Threaded Insert Press V1 - UC Edition

Description
PDF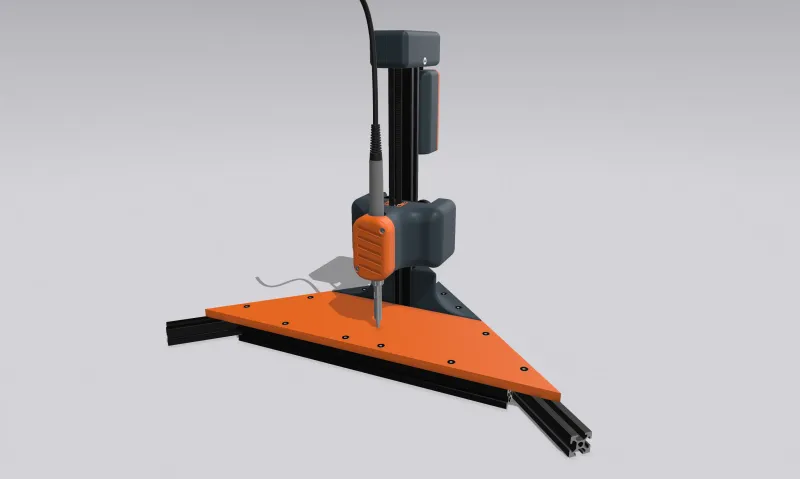
// Threaded Insert Press - V1 //
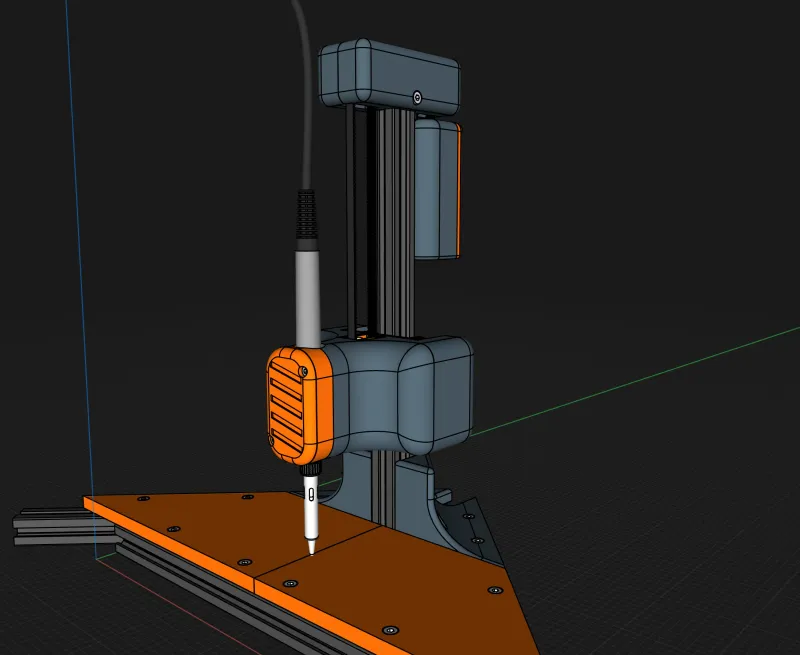
This is my take on a threaded insert press based on the use of a soldering iron. My goal was to design something that looks aesthetically pleasing combined with an intricate mechanical look. Form-follows-function takes the back seat on this one.
But why?
Awaiting all parts for my first DIY 3D printer, I was already dreading inserting 100+ heat inserts free-handed precisely. So I opened up my CAD software and this is the result.
______________________________________________________________________________________________________
FYI: This first version of my press requires purchased parts, but I plan on doing a simplified V2 with less parts.
// Required parts:
| Part Name | Quantity |
| M2x10 SHCS | 5 |
| M2 threaded inserts | 5 |
| M3x10 SHCS | 6 |
| M3x18 SHCS | 4 |
| M3 threaded inserts | 10 |
| M4x10 SHCS | 26 |
| M4 hammer head / t-nuts | 26 |
| 2020 aluminium extrusion 30cm length | 4 |
| GT2 Timing Belt 6 mm | ca. 70cm |
| GT2 Idler Pulley 20 Teeth, 5mm ID, 6mm belt | 4 |
| V slot gantry for 2020 aluminium extrusions | 1 |
| Weight (approx. 500g-700g) | 1 |
| Printed Parts (see files and folders) |
// Print instructions:
All parts should be printable without supports.
Only exception is the counterweight body, which should be printed with open side down and supports on its back for the part that slots into the extrusion.
I recommend printing with a material with good mechanical strength that is not brittle, PETG or ASA, etc.
For the shafts I recommend a little brim if you're not comfortable with your build plate adhesion.
General settings:
- 3 perimeters
- 40% infill at least
- Layer height is variable, 0,2mm or higher is enough
// Example parts I used:
These are NOT affiliate links and I do NOT gain any promotion on purchased products.
______________________________________________________________________________________________________
// Assembly Manual //
// Step 1:
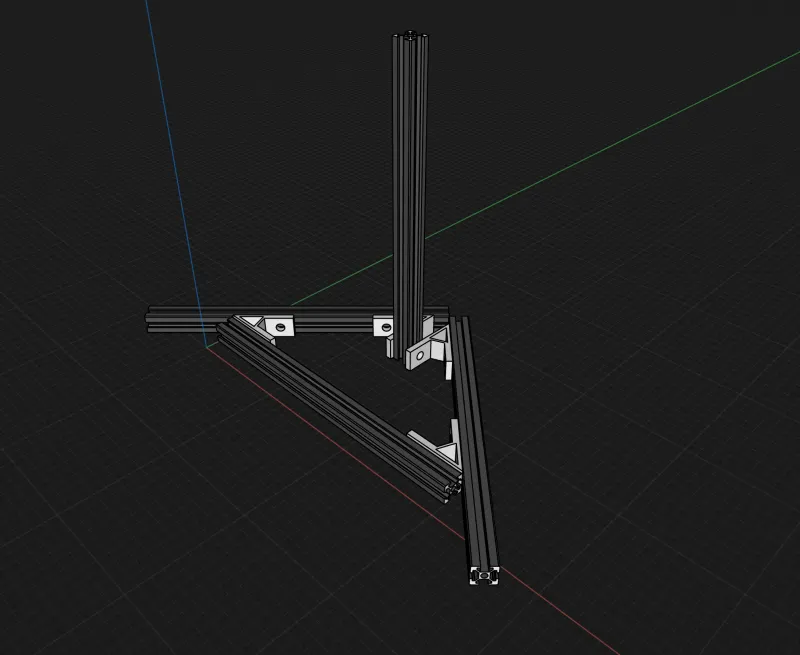
Align all 2020 extrusion like shown here.
It is done best on a flat countertop or similar.
Mount all extrusions together using the angle connectors with M4x10 screws and M4 t-nuts.
________________________________________________________________________________________________________________
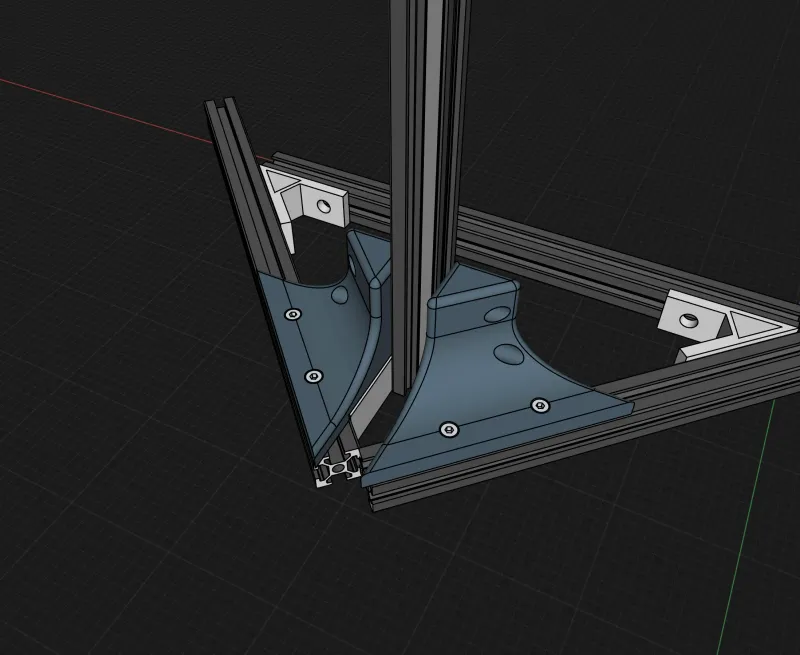
// Step 2:
Mount both center extrusion stabs with four M4x10 screws and M4 t-nuts each.
If previously squared properly, the center extrusion should mount flush and correctly oriented.
________________________________________________________________________________________________________________
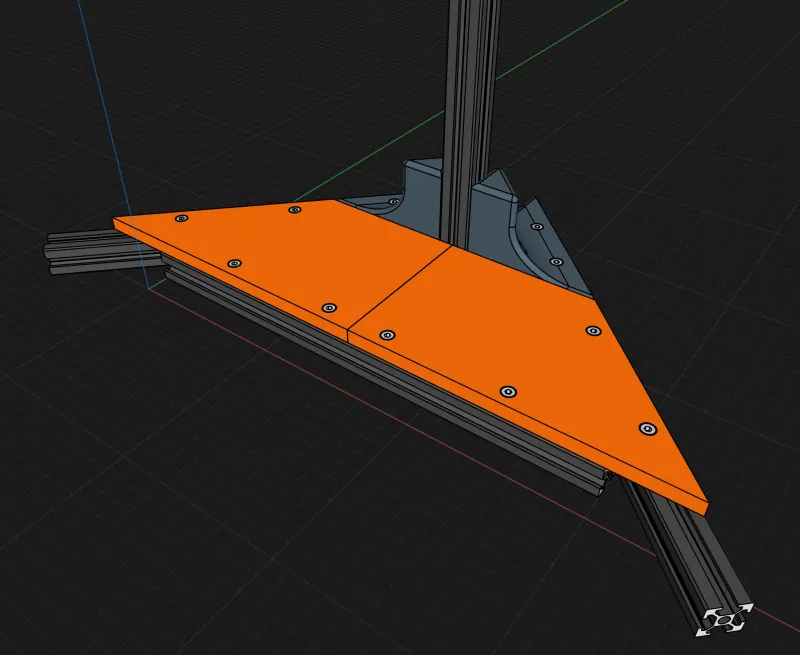
// Step 3:
Mount both bed sides with M4x10 screws and M4 t-nuts.
If all extrusions were previously squared correctly, the bed should sit flush.
If not, you can remove both sides again and re-adjust extrusion positions.
________________________________________________________________________________________________________________
// Step 4:
Insert four M3 threaded inserts into the slots on the back of the main body.
________________________________________________________________________________________________________________
// Step 5:
Insert two M3 threaded inserts into the front slots of the main body.
________________________________________________________________________________________________________________
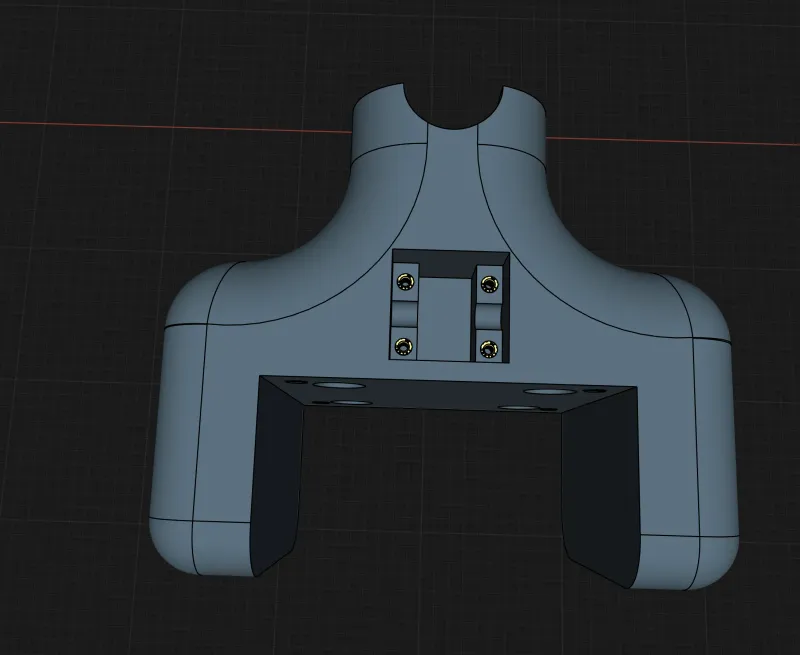
// Step 6:
Insert four M2 threaded inserts into the top slots of the main body.
________________________________________________________________________________________________________________
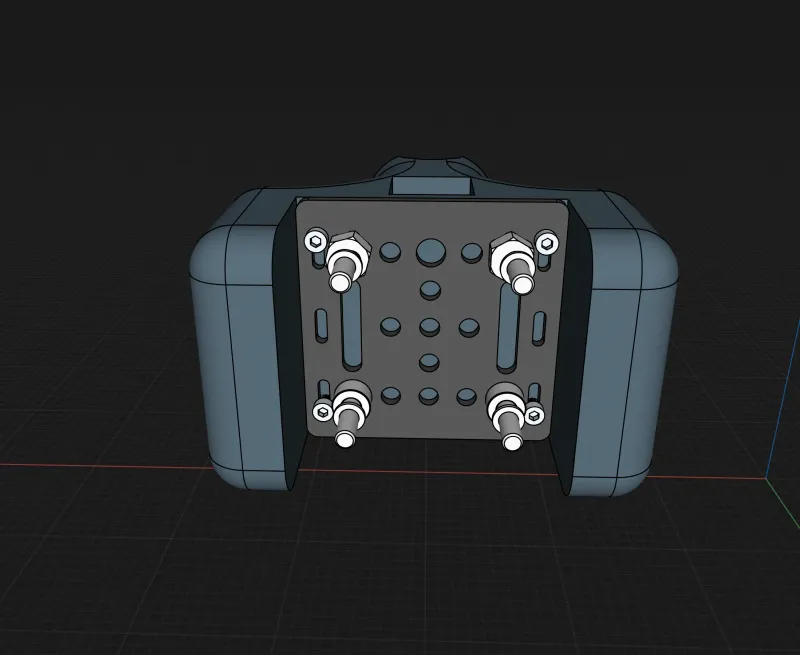
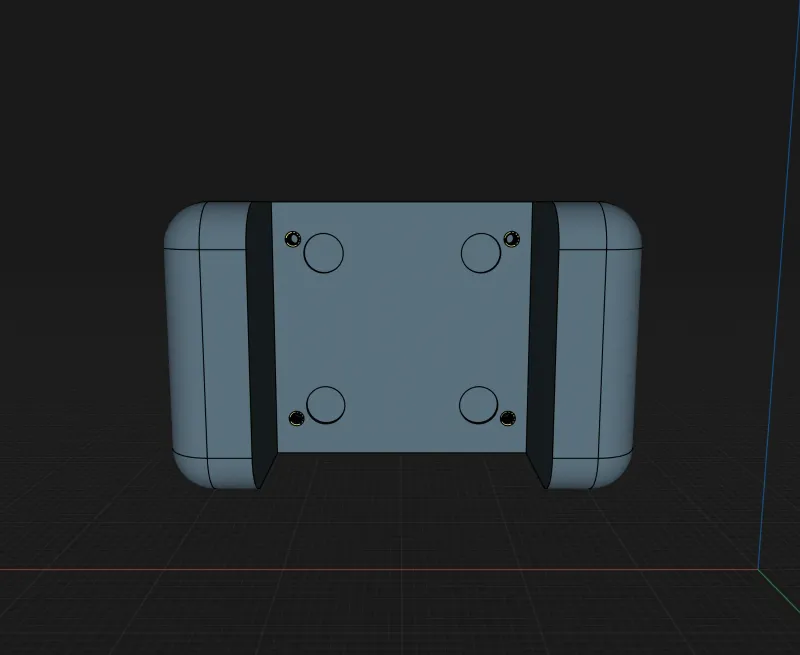
// Step 7:
Disassemble the V slot gantry wheels and slot it in place.
It is important to keep the wheel screws attached while mounting the plate to the main body.
Secure it with four M3x10 screws into the threaded inserts.
Re-assemble wheels onto V slot gantry.
________________________________________________________________________________________________________________
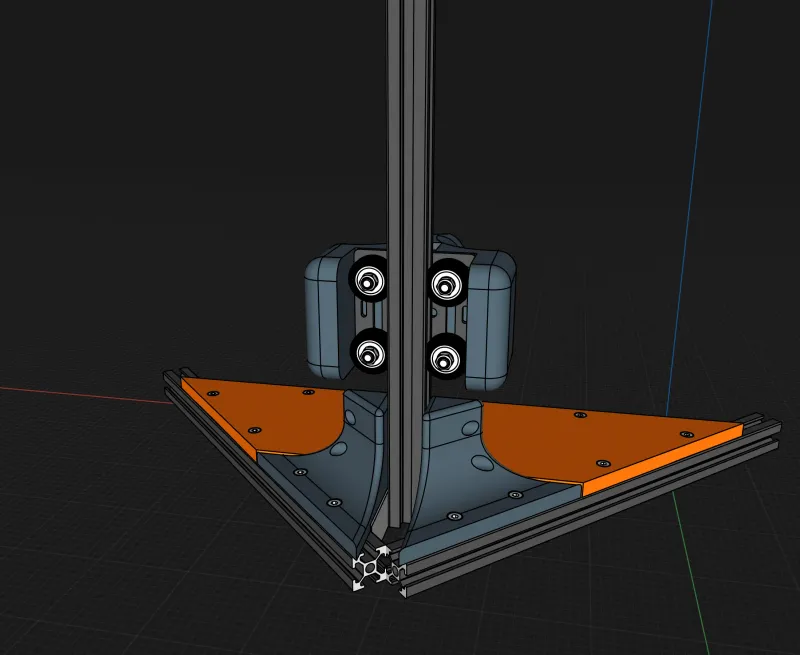
// Step 8:
Slide the gantry mounted onto the main body on the center extrusion.
Adjust tension of wheels for minimal play while still sliding down under main bodies weight.
________________________________________________________________________________________________________________
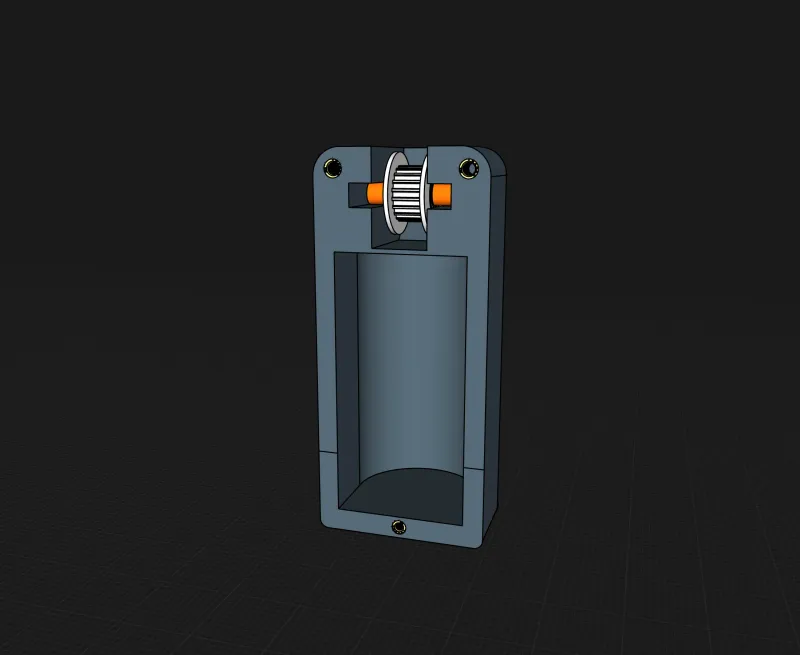
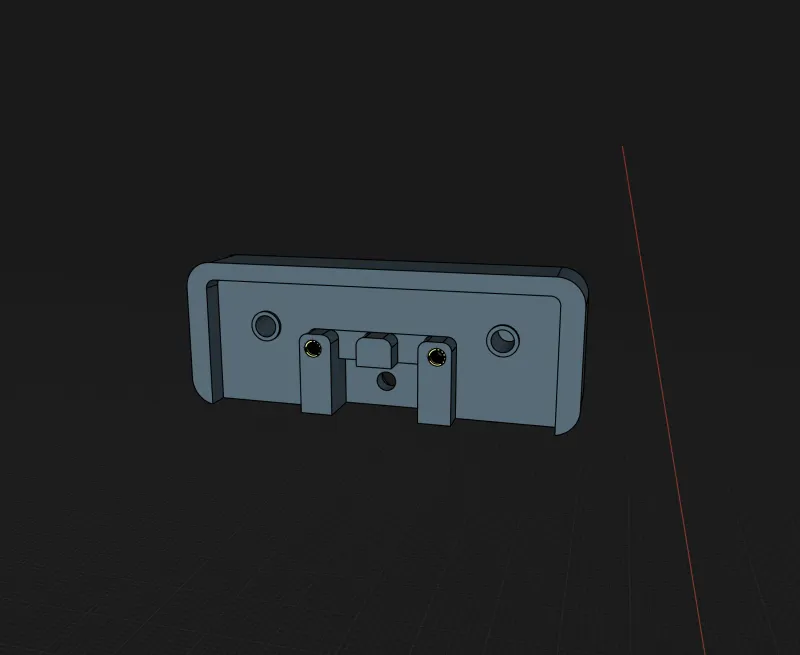
// Step 9:
Insert two M3 and one M2 threaded inserts into the Counterweight body.
Slide a tooted idler onto the idler shaft and push it in place.
Insert your preferred weight and mount the corresponding faceplate with two M3x10 and a M2x10 screw.
Slide it into the back slot of the center extrusion.
________________________________________________________________________________________________________________
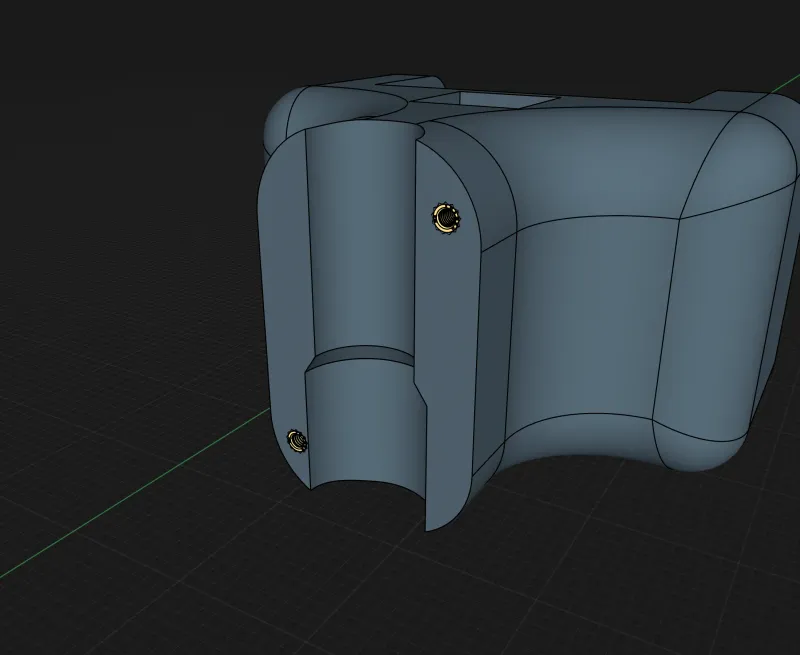
// Step 10:
Insert two M3 threaded inserts into both slots of the right top idler routing shell.
________________________________________________________________________________________________________________
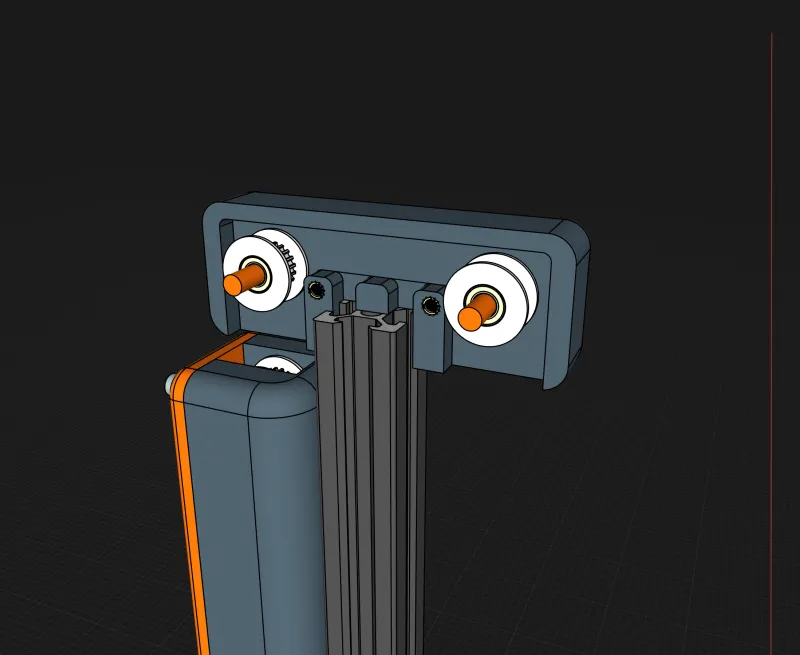
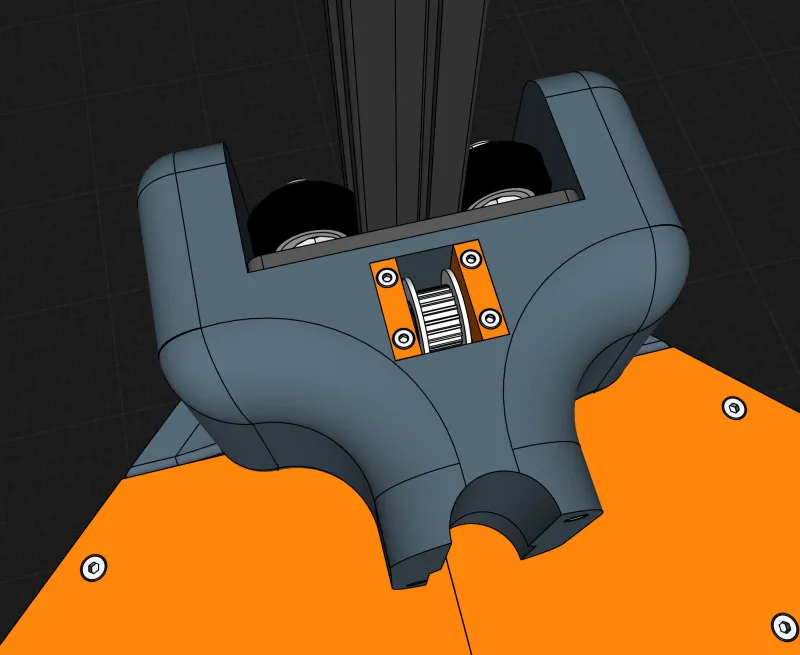
// Step 11:
Insert both idler shafts into the corresponding place in the right top idler routing shell.
Slide two toothed idler onto the shafts.
________________________________________________________________________________________________________________
// Step 12:
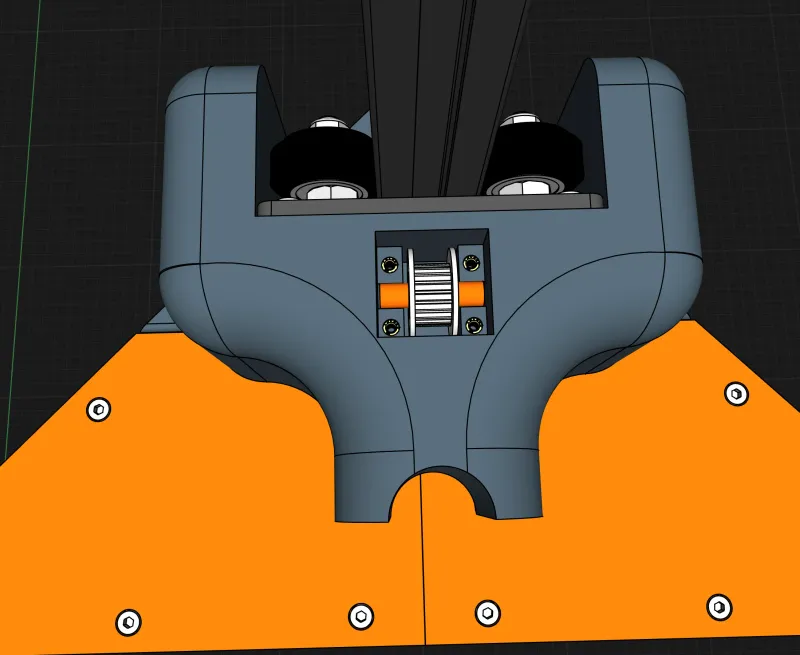
Slide a toothed idler over the main body idler shaft and insert it into its position.
________________________________________________________________________________________________________________
// Step 13
When both the toothed idler and shaft are in position, fasten both screw in bodies with four M2x10 screws.
________________________________________________________________________________________________________________
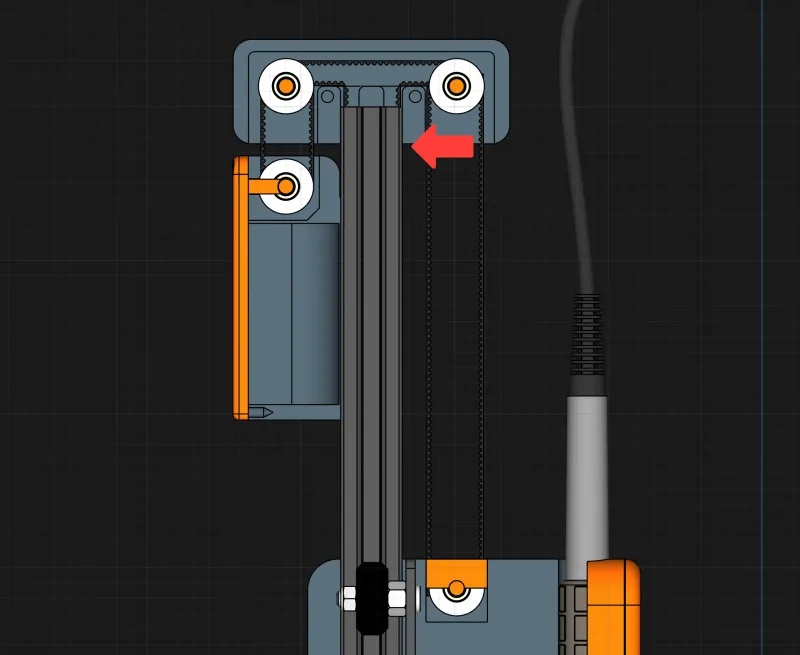
// Step 14:
Mount one end of the belt with a M4x10 screw and a M4 t-nut.
Screw the M4x10 into a t-nut slightly.
Push the end of the belt into the correct rail slot. See the red arrow on the left for visualisation.
While holding the belt, push the nut over it into the extrusion. When in position, fasten the screw into the belt.
Route the belt like illustrated, and mount it on the second side as well.
________________________________________________________________________________________________________________

// Step 15:
When the belt is routed, mount the right side of the top idler housing shell to the left shell with two M3x18 screws and to the center extrusion with a M4x10 screw and a M4 t-nut.
A picture for understanding how to mount the belt ends can be found in the gallery.
________________________________________________________________________________________________________________
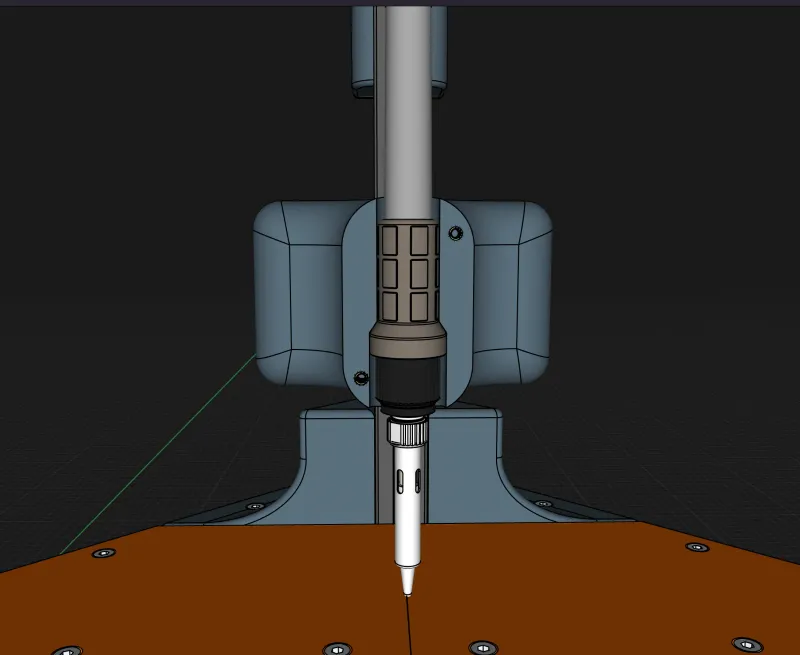
// Step 16:
Push the soldering iron into its slot.
It should fit many generic soldering irons, but if yours does not, feel free to remix the main body STEP file to fit yours.
________________________________________________________________________________________________________________
// Step 17:
When the soldering iron is in place, mount the faceplate with two M3x18 screws.
Place your chosen weight in the counterweight body.
It is complete.
____________________________________________________________________________________________
Tags
Model origin
The author hasn't provided the model origin yet.


