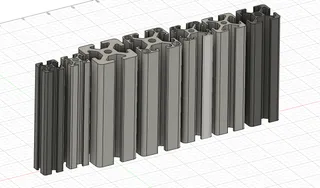
Spool shelf - stackable and customizable! (english)
Description
PDFThe new spool shelf is now awailable!
- can be extended as required
- suitable for all needs
- suitable for unpacked spools and spool boxes
What you need:
- 16mm wooden rods Amazon: 16mm x 1000 mm (5 Stück)
- the filament of your choice Filament:
What you have to do:
Single line version:
The basic framework consists of 2 brackets, which are plugged together with 2 round rods each. To be printed now would be 2x Endcap_single.stl.
Just press the round rods in, align them on the ground so they are straight and put filament rolls on them. Done!
Stackable verseion:
This is where you have the full unfolding opportunity. You need the following files:
- Endcap_bottom_stacked 2x (or 4x if you just like to flip them over for the top end).
- Endcap_top_stacked 2x (These are the end caps for the top row of shelves.
- If you want to have 3 or more rows of shelves, you still need Endcap_middle_stacked 2x
Just put the round timbers in and align them on the floor so that the shelf stands straight at the end. Drilling, screwing or gluing is not necessary. If you want to glue the logs in to make the shelf transportable, you can use any glue. However, I recommend 2K glue from UHU (Amazon).
Important:
do not try to give the shelf up on one of the upper shelf rows! It is only plugged and thus the lower rows would simply fall off.
I myself would also not recommend more than 3 rows without fixing the shelf to the wall.
The wider the shelves, the more unstable they become.
- recommended width: 500mm
- recommended height: 260mm per row
Als Amazon Partner bekomme ich eine kleine Provision an qualifizierten Verkäufen.
Print Settings
Printer:
QIDI X-Max
Rafts:
No
Supports:
Yes
Resolution:
0.2 mm
Infill:
20%
Filament: Extrudr PLA NX2
Category: 3D Printer Accessories
Tags
Model origin
The author marked this model as their own original creation. Imported from Thingiverse.


