Acetone Vapor Polisher for ABS and ASA prints IKEA 365+ Box

Description
PDFYou are looking for an easy way to polish your ABS and ASA prints? Now you have the chance to create your own vapor polisher.
Disclaimer:
I take no responsibility for this of any kind! Acetone is dangerous for any organism or plants. Take care while working with it. It's also explosive and can produce significant damage to human bodys.
if you know what you are doing and if you still want to build this smoother, you can use my instructions as followed:
Parts you need:
- Acetone pump 24V (Amazon)
- Acetone Vaporizer (Amazon)
- Acetone container (Amazon)
- Timer (Amazon)
- on off switch (Amazon)
- push button (Amazon)
- power connector (Amazon)
- 12V power supply (Amazon)
- Silicone (Amazon)
- Silicone tube 4x6mm (Amazon)
- Silicone tube 15x19mm (Amazon)
Printed Parts:
- vapor mount base
- vapor mount cover
should be out of PETG which is more resistant to acetone.
Description:
A short summary: We have a 24V pump, a 24V Vaporizor and a 18V Power Supply. This means, the pump and the vaporizor is running under power which is correct and proven by myself. with this configuration the power consumption will be close to 18W.
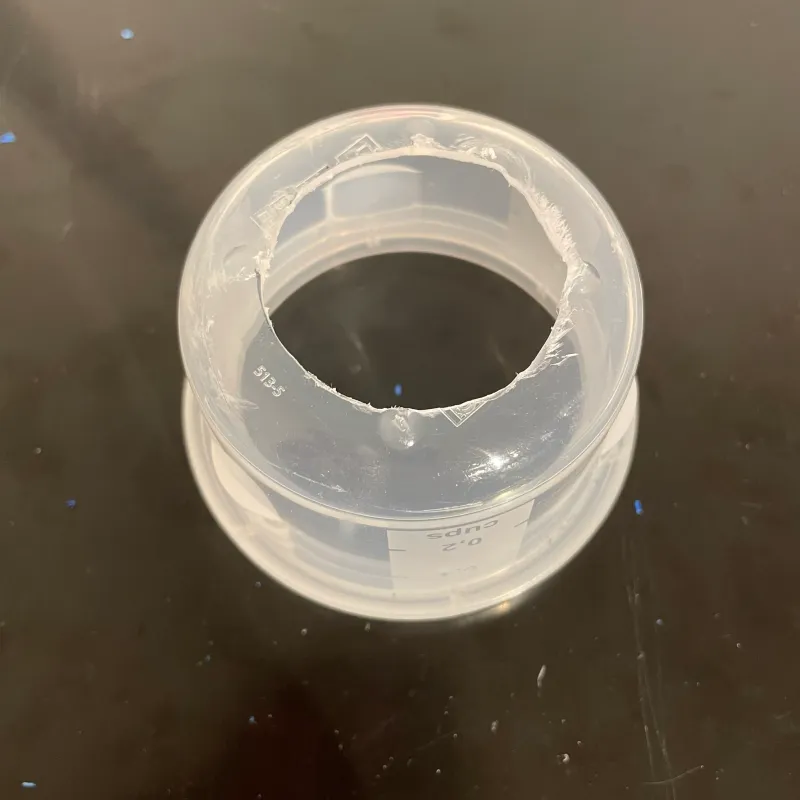
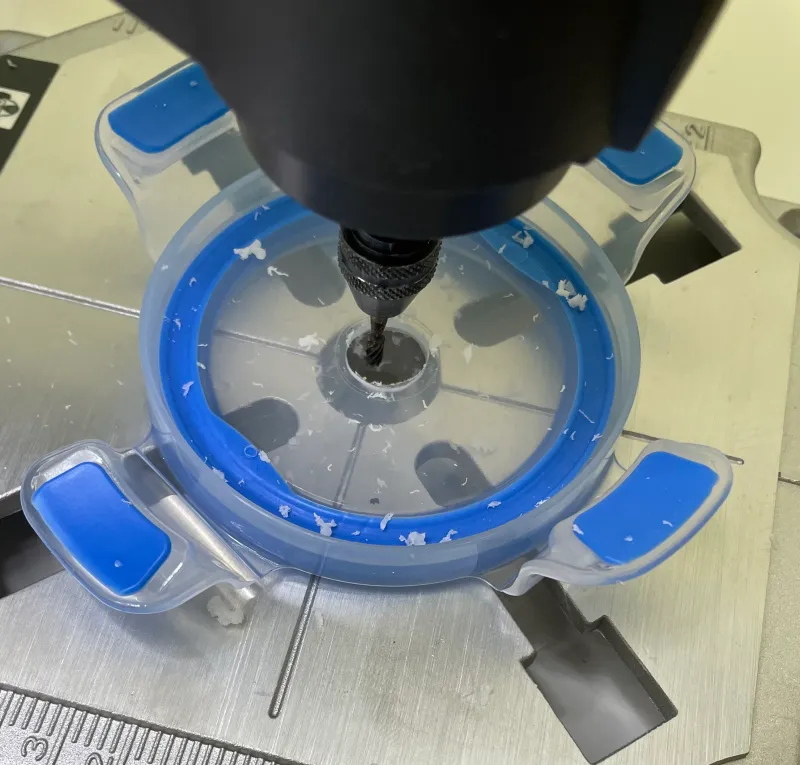
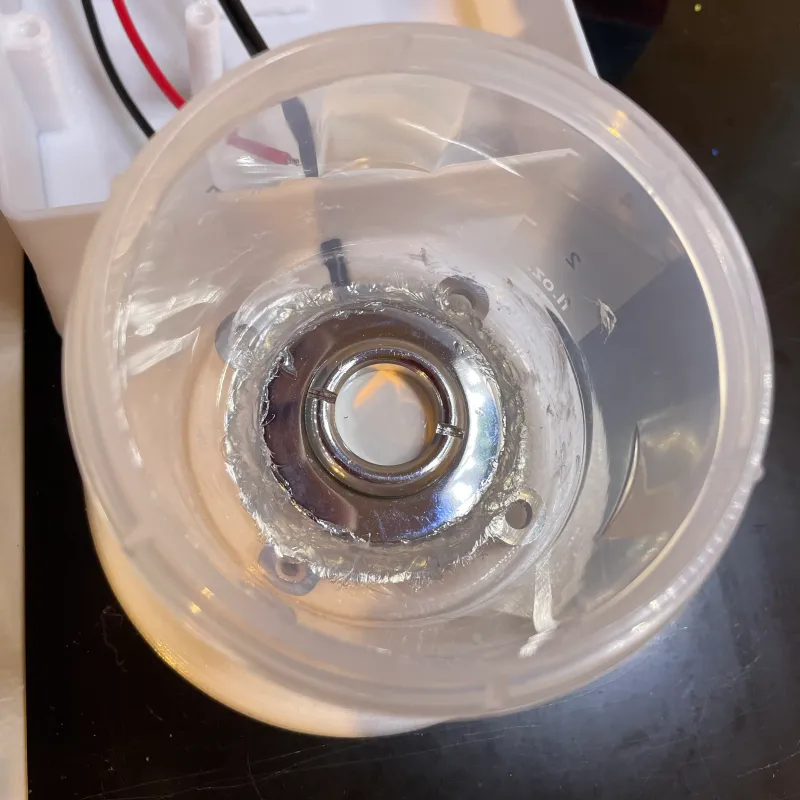
Lets start with the acetone container. You have to drill 3 holes in it. Two in the cover and one in the bottom of the container. The pictures show you how it should be. By the way, for me it turned out, that the top hole must not be centred. It also works when it is a bit off center.
Now we have to place the vaporiser inside our printed mount by cutting the connector. Otherwise it would not fit into the housing.
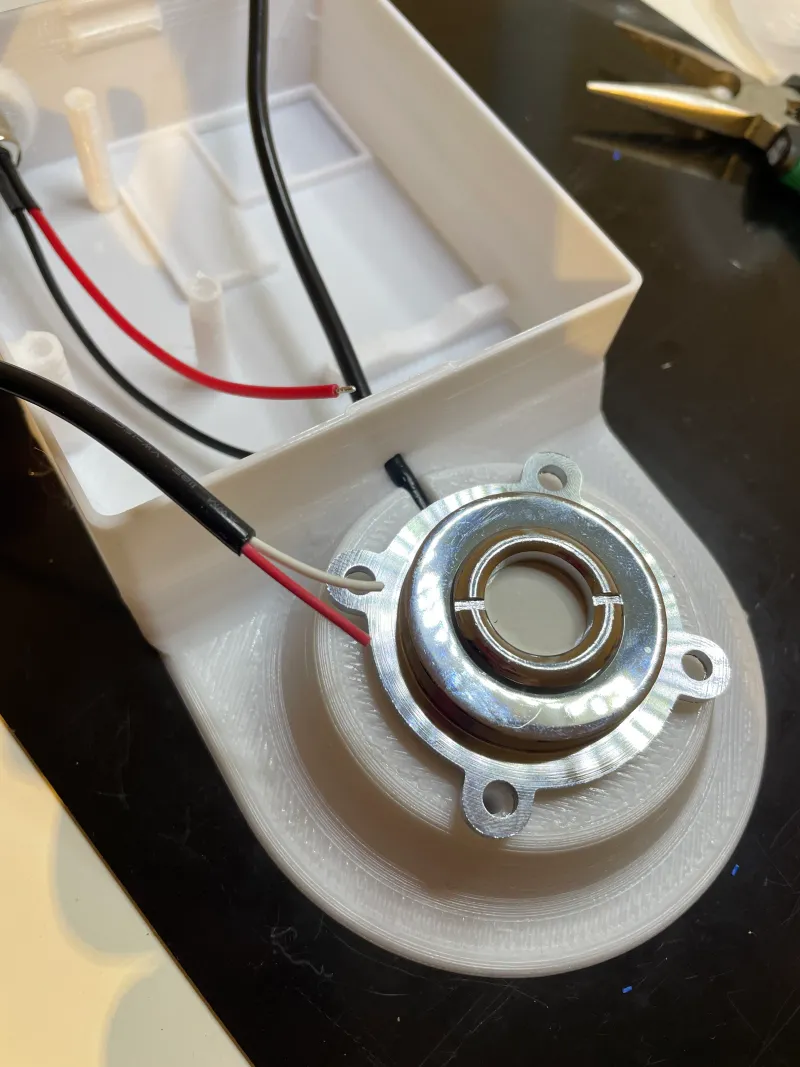
In the next step, glue the bottom box onto the vaporiser with silicone. Don’t use Acryl or UHU or similar glue because it will not resist the acetone. Also don’t touch or have strings of silicone at the membrane of the vaporiser. It will destroy it immediately. Nevertheless, you have to use much silicone to make it acetone proof.
Now let it dry for at least 24h. The next step is to add some heat inserts for mounting the timer later.
Electronics:
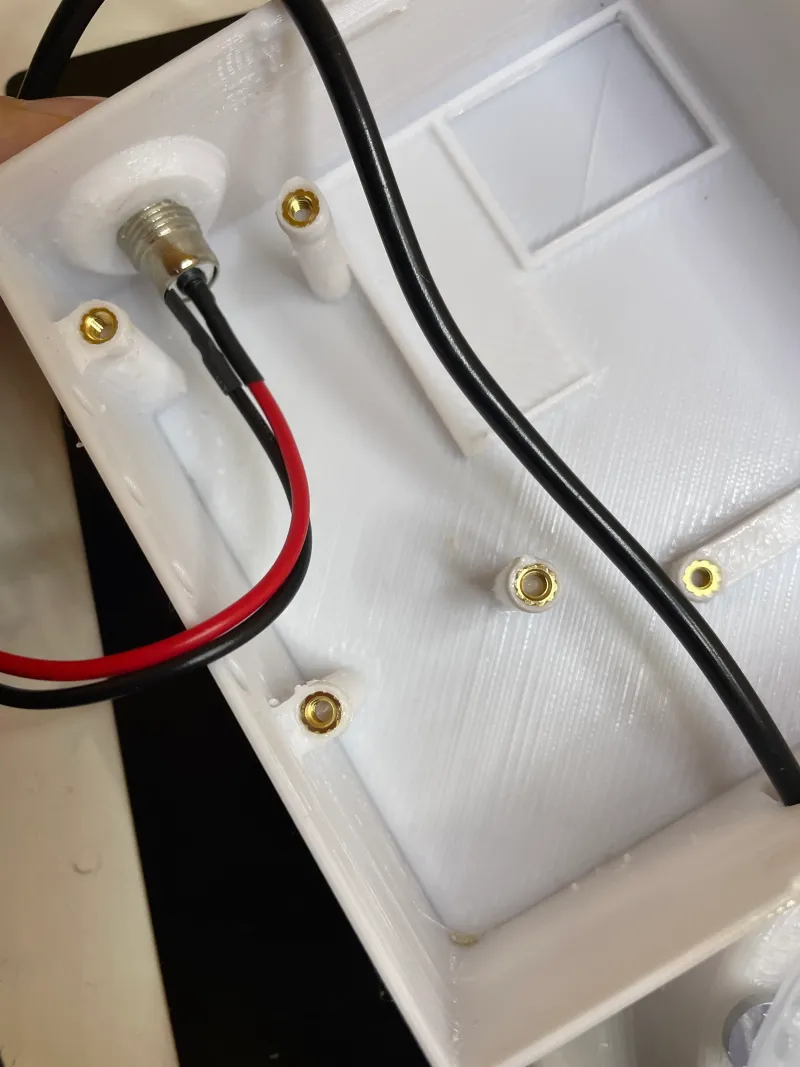
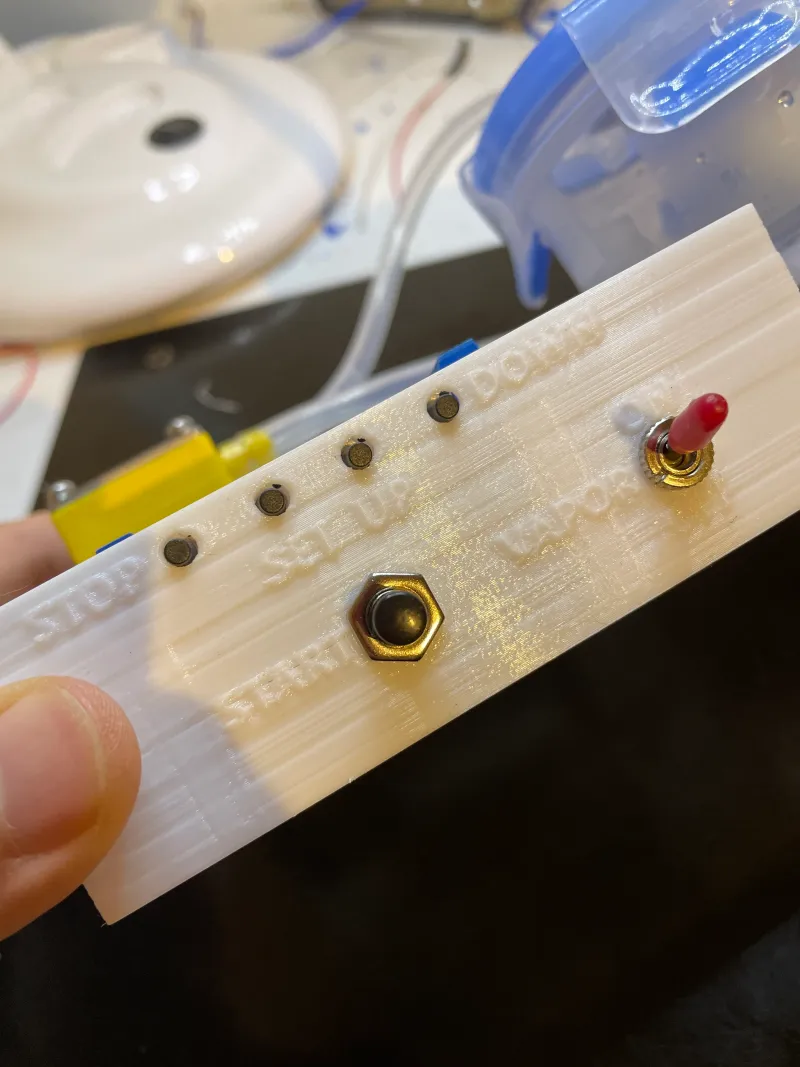
Let’s start with the switches and the connector. it is easier if cables are already connected to the switches, because later it will be challenging to solder it. Also make sure you have the correct orientation of the on off switch. If not, you have to rotate the switch of 180° later, which should not be a big deal for you.
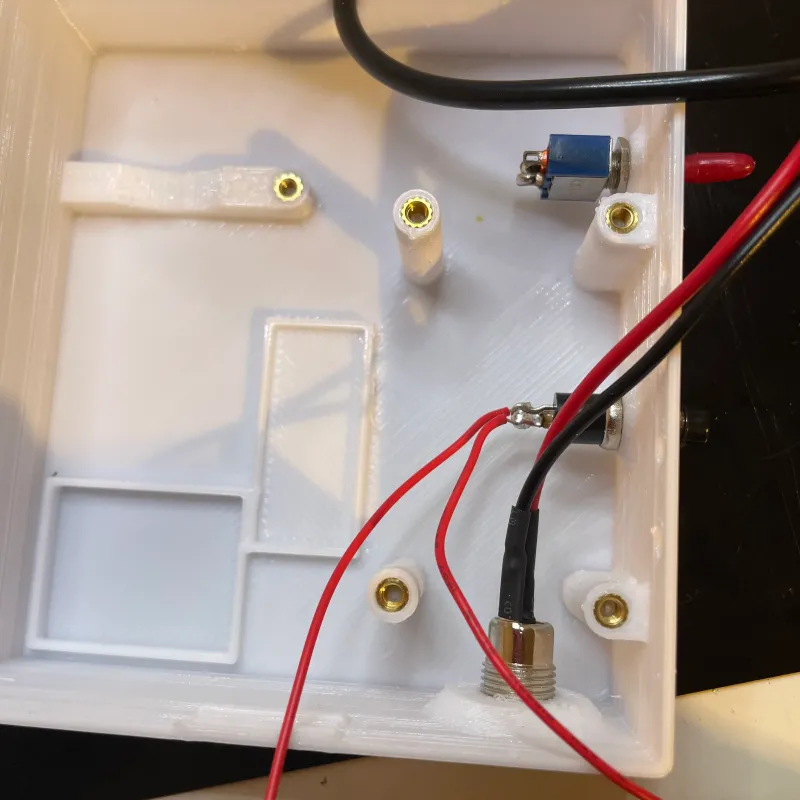
the next step is to place the timer inside the shell. This means, you have to wire it first.
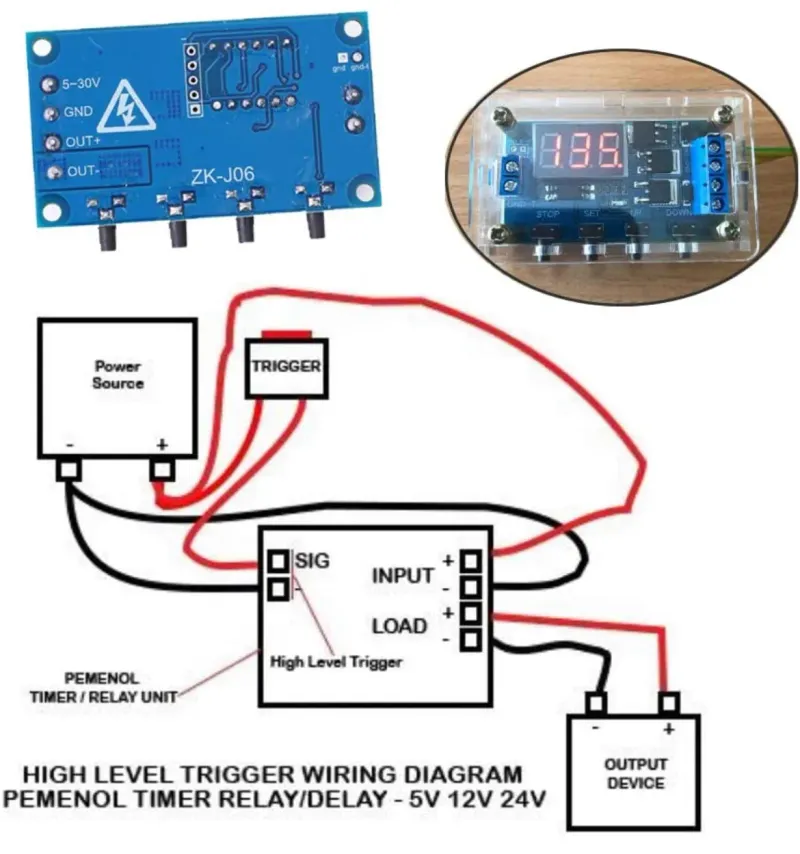
by looking at the picture below, the trigger is the small push button. The load is where the pump and the vaporiser will be connected. The vaporiser itself will be connected to the on off switch to have the possibility to turn off the vaporiser while the pump is running.
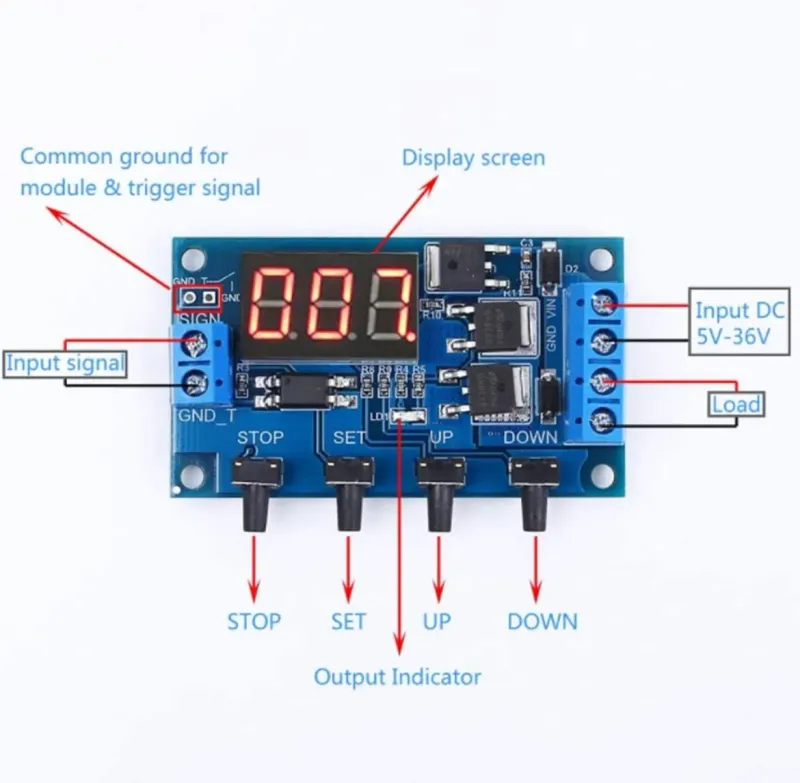
After completing the wires, you can mount the timer onto the already existing M3 heat inserts. The buttons of the timer should be in place.
Now you can connect The wires to the pump and place it inside the the shell.
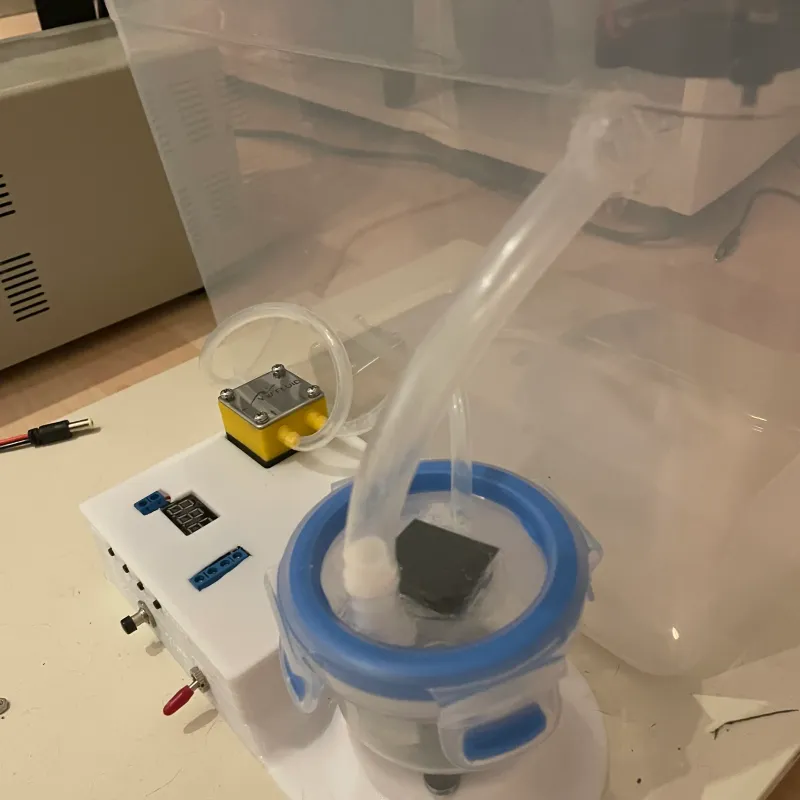
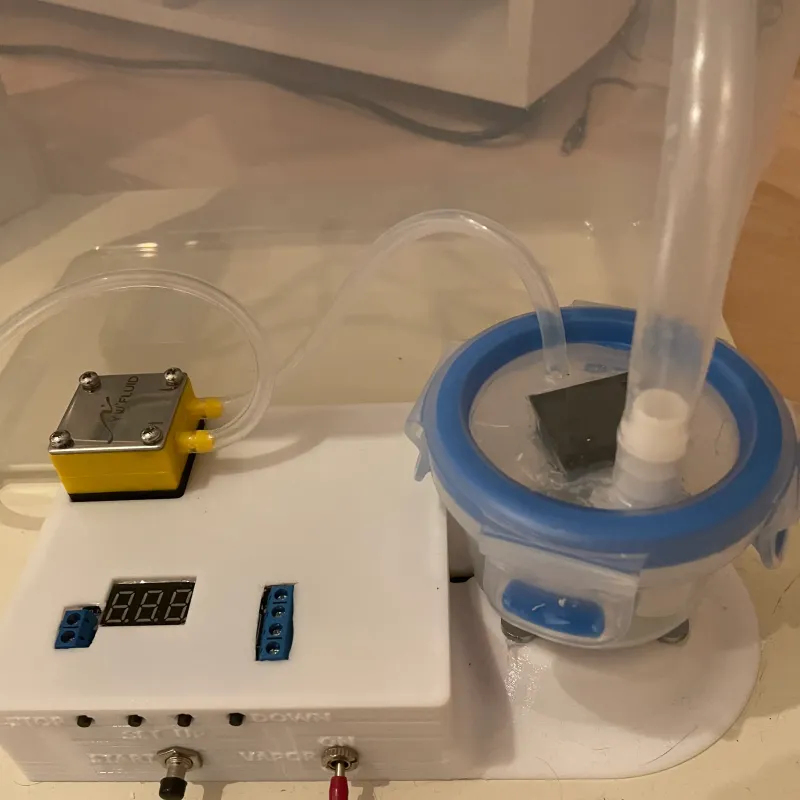
After done so, choose a container where you like to smooth your parts in. you can use the Ikea 365+ boxes for big parts or smaller containers like the Lock&Lock from Amazon.
The last step is to connect the pump with both containers and the acetone container with the smoothing box. The bigger the tube from the acetone container to the smoothing box is, the more vaporized acetone can enter the box for smoothing your parts.
here some pictures of my setup:
The top cover of my control box is shown as beta status. Your cover will look better by the way ;-)
Programming the timer
(german manual)
Press and hold “set” for 2 seconds. Select the mode “P1.3” press set again to select the time which you want to have your smoother active.
There are 3 time decimal settings
- “000.“ equals 1-999s.
- ”00.0” equals 0.1s - 99s
- ”0.00” equals 1-999 min
to select your timing decimal, press the stop button. By holding the up or down button, you can select your value quickly.
to exit the setup, press and hold “set” for 2 seconds. Your settings are saved and will be active each time you power up your smoothing box.
now, glue your smoothing box as well as your control box to a solid wooden plate and fill your acetone container with acetone. filling it half will give you the best result for the vapor.
Press the trigger to start the process. Press the trigger again to stop it.
you can use each power supply from 12-18V. from my experience, 15V gives you the best result. But 12V is also good.
I will add some more pictures and testings with this smoother soon. Feel free to test anything you like!
Als Amazon-Partner verdiene ich an qualifizierten Verkäufen
Tags
Model origin
The author marked this model as their own original creation.


