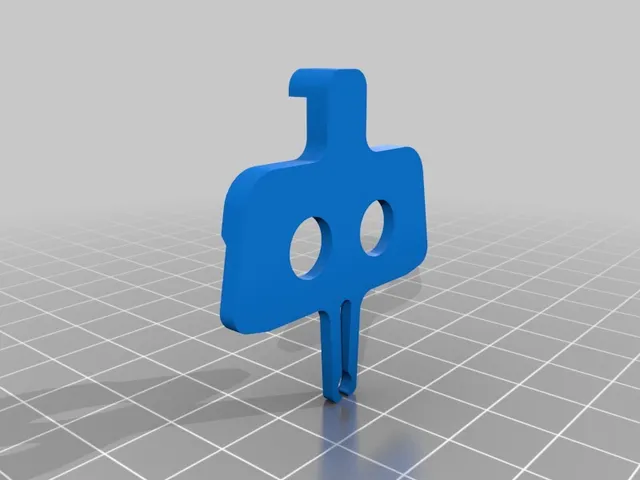
Cantilever brake hanger angle adapter
Description
PDFAchieves this effect (http://www.pestrickland.co.uk/images/front_hanger_big.jpg) with this product (http://www.tektro-usa.com/category.php?catid=188&productid=1096).
I tried just 3D printing my own Tektro cable hanger clone, but it was far too weak. I do not recommend trying this at all. I will upload my attempts, but I advise only using them for modeling purposes only, or if you can get them machined out of aluminum or something. Only then will they be strong enough.
If your stem is too low or your cable housing is too short, then the housing will make a bend near the hanger. Over repeated braking, the cable may fatigue & break. Also, there will be a lot of friction in the housing. This buys you some extra length & allows the cable to enter at an angle. I have been switching out handlebars/brake levers with this particular bike, & I really don't want to unwrap the bars just to swap out for longer housing.
Note: this only works for the Tektro fork crown-mounted cable hanger (http://www.tektro-usa.com/category.php?catid=188&productid=1096). You may be able to adapt this to work with similar hangers.
Conveniently, this product still allows the use of a barrel adjuster. The top hole is 17 mm, so that is the maximum barrel adjuster depth that can be inserted. Obviously, don't have too much barrel outside this piece or else it might break. Hole features are extremely anisotropic in the axial direction.
Since this has do with your braking, a critical safety feature, I can't vouch for the safety of this thing.
Assembly & Materials
- barrel adjuster
- Tektro fork crown cable hanger (http://www.tektro-usa.com/category.php?catid=188&productid=1096)
For installation with the Tektro cable hanger, just remove the barrel adjuster & everything else related to it. There should be three parts: the barrel, the knob, & the plastic piece with the flat side. This product will fit into the top of the bare hanger.
Removing the supports was best done using a drill & an appropriately sized bit. Be careful with the drilling, & make sure you step up the bit size incrementally; you just need the bit to catch on the supports & rip them out, then use a larger bit to ream the hole. If you try & do all this with a single bit, you will probably break the hole axially. I also used a sharpened spoke to clean out the holes. I rubbed it along the brake cable to clean up the inside.
Definitely will need some minor filing to size the external round to fit snugly in the hanger.
I also filed a small chamfer to ease the insertion.
Updates
17 Dec 2016: Uploaded picture of the setup. I just installed this today. Printed with 3 mm PLA on a Lulzbot Mini, with supports. When installed, I didn't notice any bending or yielding in the plastic, so it might be good. I was pleased that there wasn't any noticeable friction between the cable & this piece.
I also uploaded a second version with a steeper angle. This will probably be stronger because there's less of a moment perpendicular to the central axis. It'll be compressed more, & the structure is better at resisting that. Haven't used it yet.
20 Dec 2016: I realized I could add real threading action with the barrel adjuster by adding a captive nut. I'm not going to do this without interest though. As is, you can still just tighten the locknut down onto the face.
11 May 2017: Over time, the cable rub on the plastic eventually starts wearing through, & the brake action becomes very rough. If you can procure a small plastic sleeve (like the ones found inside shift cable housing), I'd run the cable through that first, & thread the insert through the adapter. I wouldn't call this a long-term solution by itself.
Category: Replacement PartsTags
Model origin
The author marked this model as their own original creation. Imported from Thingiverse.