Parts for Bicycle Turn and Stop Signals with Front and Rear Lights

Description
PDF3D Printed Parts for Bicycle Turn and Stop Signals with Front and Rear Lights
DOWNLOAD Version 1.3.4 (2022-03-28) ZIP ~8MB
 Detailed HELP with images on how to assemble parts (external link)...
INTRO
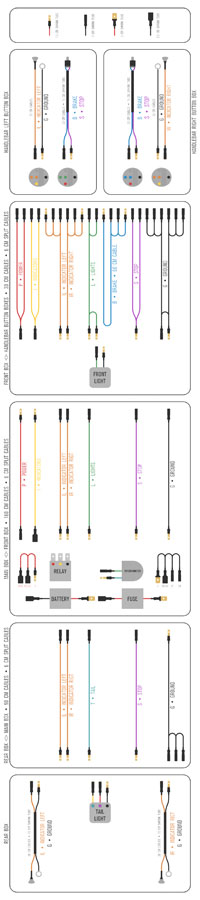
Below you will find parts and tools, which will help you to add turn and stop signals to your bicycle. Not all tools, like multimeter or label printer, are necessary. If you noticed mistakes, have questions or suggestions, know better components (available in EU and US), please write to info@jocys.com • Project page: Jocys.com/Bicycle
Parts were printed from PETG with Prusa3D i3 MK3 Printer. If your printer is not precise enough, printed parts may not fit into each other.
If you made your own updates or (file) changes, related to this project, please send me a link. I will add this link to your work on this page.
This project is based on 12 Volts. Bicycle dynamos and lights are, usually, 6 Volts. USB is 5 Volts. Be careful and don't mix wires.
UPDATES
1.3.4 (2021-10-06) • Handlebar Box Plate updated to make 2 bottom screws more accessible.
1.3.3 (2021-10-06) • Screw covers for Touratech folding mirrors added.
1.3.2 (2021-06-17) • Cargo box parts (control box and rear light box) redesigned.
1.3.1 (2020-10-02) • Added knob for 6.1mm knurled shaft... to fit easier on 6mm plastic shaft.
1.3 (2019-10-28) • Handlebar center parts updated and handlebar box added.
1.2 (2019-09-06) • Indicator-mirror-button holders redesigned.
0.1 (2018-06-05) • ...
PARTS
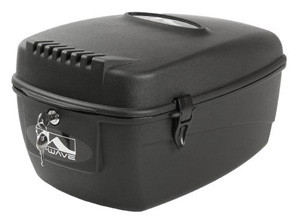 | M-Wave • Amsterdam Cargo Box 1 x The M-Wave Amsterdam Hardbox |
 | M-Wave Amsterdam Cargo Box Holes PDF File A4 (210 x 297mm) file will help you to drill holes in right places: 1. Print 2. Cut 3. Puncture 4. Drill |
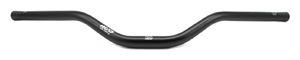 | NC-17 • 254 Trekking Pro Handlebar 1 x NC-17 254 Trekking Pro Handlebar |
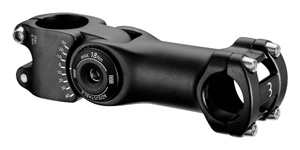 | BBB • HighSix BHS-28 Adjustable Handlebar Stem 1 x Adjustable Handlebar Stem |
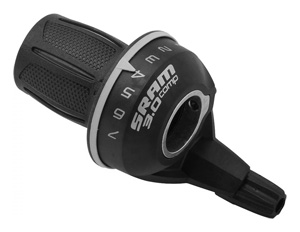 | SRAM • A3.0 COMP 7 Speed Twist Shifter My bicycle is equipped with "SRAM 3.0 COMP 7 Speed Twist Shifter". You may not be able to fit 3D printed indicator-mirror holder perfectly between brake lever and different shifter model. |
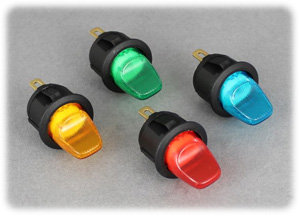 | Ningbo Jietong Electronics • E751 (MIRS-201) 2 x Amber color LED for left and right turn indicators. These switches are more intuitive than Ulincos push buttons, especially, during cycling with gloves. Operation type: ON/OFF Pole/way: 1 pole / 1 way Rating: 16A@12V Lever type: Illuminated paddle Terminals: 4.8mm blade Illumination: Bulb Panel hole size: 20mm dia. Overall dims (inc. terminals): 23 (Dia) x 40 (D) mm  |
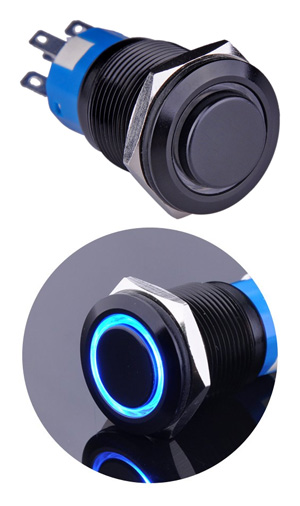 | Ulincos • U19C2B Latching Push Button Switch 1 x White color LED for front and tail light 1 x Blue color LED for hand brake levers  |
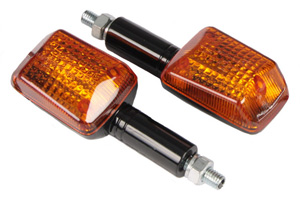 | TDH (Jiaxing HongFa Motor Vehicle Fittings) • Bike It • Mini Amber Indicators 4 x Mini Amber Indicator |
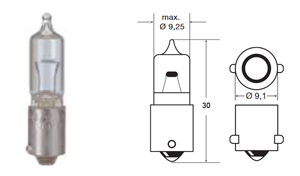 | You should change standard halogen or incandescent bulbs to LED bulbs. Some LED bulbs are larger than standard halogen or incandescent bulbs and will not fit inside. |
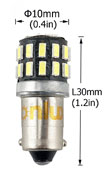 | Osram • LEDriving PREMIUM 3850WW Not as bright as Bonlux LED bulb. Bonlux • BA9S LED Bulb 12V 4 x Bonlux BA9S LED Bulb 12V Dimension: 10x30mm Base Shape: BA9s Lumen: 300lm |
| Orafol • ORACAL 8300 Transparent Cal (034 Orange) White LED lamps can be covered with orange transparent film. |
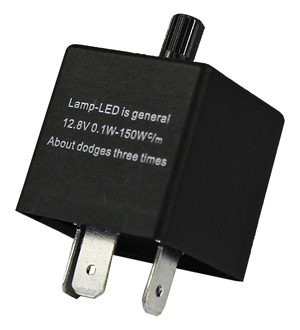 | PsmGoods • LED Flasher Relay 1 x LED flasher relay |
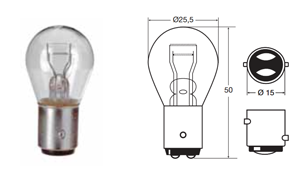
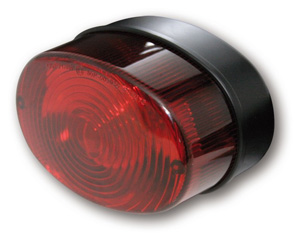 | Shin Yo • 255-700 Universal Stop and Taillight OVAL 1 x Shin Yo Oval Universal Stop and Tail Light (12v 21/5w bulb) | |
 | You should change standard halogen or incandescent bulbs to LED bulbs. Some LED bulbs are larger than standard halogen or incandescent bulbs and will not fit inside. | |
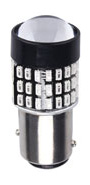 | LUYED (China) 1157 3014 78-EX red LED bulb: Brighter than OSRAM LED bulb. All LEDs are lit in “tail only” mode. On pressing brake lever (“stop” mode), all LEDs become brighter. Difference between “tail only” and “stop” mode is minimal and not very distinguishable. You can increased difference between “tail only” and “stop” modes by dimming tail light slightly with 1 kΩ potentiometer. | |
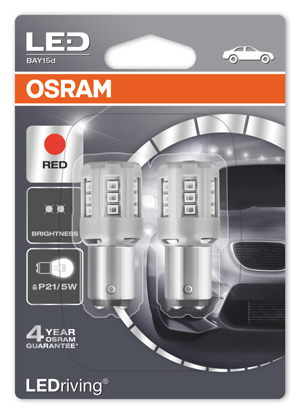 | 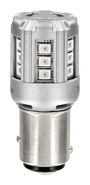 | Osram (Germany) • 1457R red LED bulb: Not as bright as LUYED LED bulb. Only 6 LEDs are lit in “tail only” mode. On pressing brake lever (“stop” mode), another 12 LEDs light up. Not as bright as LUYED bulb in both modes, but difference between “tail only” and “stop” modes is more distinguishable without dimming tail light with 1 kΩ potentiometer. Currently I prefer LUYED with 1 kΩ potentiometer setup. |
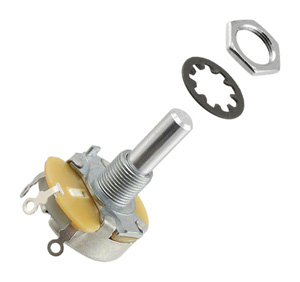 | CTS Corporation • 026TB32R102B1A1 1 kΩ Potentiometer 1 x 1 kΩ potentiometer for tail light Some LED bulbs have very small difference between “tail only” and “stop” modes. You can increase this difference by slightly dimming tail light with 1 kΩ potentiometer. |
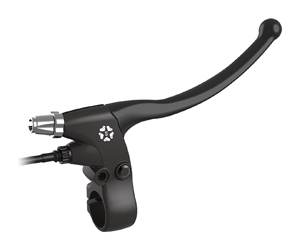 | Star Union (Wuxing) • Brake Lever 2 x E-bike brake lever If you know EU or US e-brake lever manufacturer, please send link to info@jocys.com. I use "noname" brake levers closest to this model: 89PDD.BS68.A |
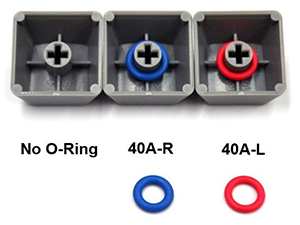 | WASD • O-Ring Switch Dampeners 4 x Blue o-ring (optional) Stop light didn't turn-off with my "noname" brake levers sometimes. I added 2 blue o-rings (2 x 0.4mm = 0.8mm Reduction) under each switch to fix it. |
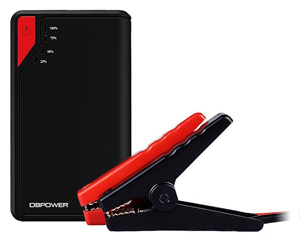 | DBPower • Portable Car Jump Starter Battery 1 x DBPower Portable Car Jump Starter Battery |
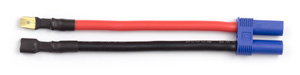 | Amazon • EC5 Female 10cm Adapter Wire 1 x EC5 Female 10cm Adapter Wire New jump cable version has box at the end of the cable. You will need to buy additional cable with EC5 female connector and add 6.3mm / 2.5 - 6.0mm² non-insulated male and female blade crimp terminal connectors at the ends. |
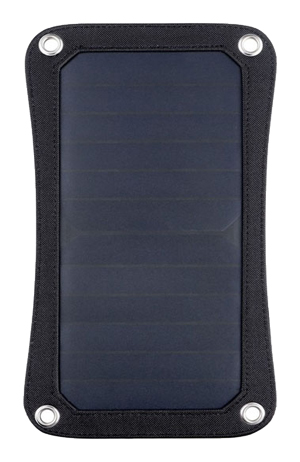 | Voltaic Systems (USA) • Solar Panel Kits Glory Solar • GS6.5-CC Solar Panel Charger Letsolar • SH51 6.5V/7W Solar Panel Charger 1 x Solar panel charger Hole diameters are 10mm. |
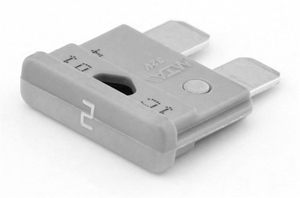 | 12voltplanet • MTA UniVal Blade Fuse All LED lights draw about 1A in my setup. I used 11A (0.5mm²) cables and 2A (Grey) fuse. MTA • UniVal 2A Blade Fuse 2 x 2A blade fuse |
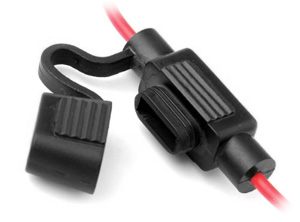 | Blade Fuse Holder 2 x Blade fuse holder Second version, I bought, was made from harder plastic. To open cap easily, you need to push it sideways first. |
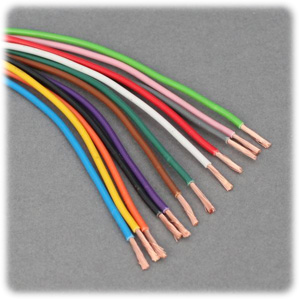 | 12voltplanet • Single 0.5mm² 11A 50m Reel of Single 0.5mm² 11A |
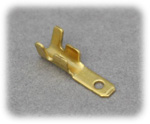 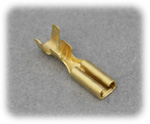 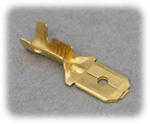 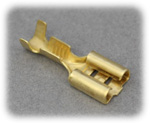 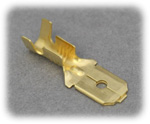 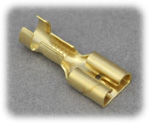 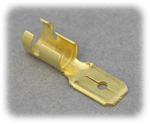 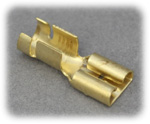 | 48 x 2.8mm / 0.5 - 1.5mm² female 32 x 2.8mm / 0.5 - 1.5mm² male 6 x 6.3mm / 0.5 - 1.5mm² female 3 x 6.3mm / 0.5 - 1.5mm² male 1 x 6.3mm / 2.5 - 6.0mm² female for DBPower battery jump cable 1 x 6.3mm / 2.5 - 6.0mm² male for DBPower battery jump cable ~2m ... 3.2mm / 1.6mm Heat Shrink Tubing (2:1 ratio) ~1m ... 6.4mm / 3.2mm Heat Shrink Tubing (2:1 ratio) 12voltplanet • Non-Insulated Male Blade Crimp Terminal Connectors 2.8mm / 0.5 - 1.5mm² • 3.2mm / 1.6mm Heat Shrink Tubing (2:1 ratio) 6.3mm / 0.5 - 1.5mm² • 6.4mm / 3.2mm Heat Shrink Tubing (2:1 ratio) 6.3mm / 1.5 - 2.5mm² • 6.4mm / 3.2mm Heat Shrink Tubing (2:1 ratio) 6.3mm / 2.5 - 6.0mm² • 6.4mm / 3.2mm Heat Shrink Tubing (2:1 ratio) 12voltplanet • Non-Insulated Female Blade Crimp Terminal Connectors 2.8mm / 0.5 - 1.5mm² • 3.2mm / 1.6mm Heat Shrink Tubing (2:1 ratio) 6.3mm / 0.5 - 1.5mm² • 6.4mm / 3.2mm Heat Shrink Tubing (2:1 ratio) 6.3mm / 1.5 - 2.5mm² • 6.4mm / 3.2mm Heat Shrink Tubing (2:1 ratio) 6.3mm / 2.5 - 6.0mm² • 6.4mm / 3.2mm Heat Shrink Tubing (2:1 ratio) |
  | Magazi • Stark Mirrors MG-1850 2 x Magazi Stark Mirrors MG-1850 or Touratech • Folding Mirror M10x1.25 01-040-0771-0 To attach Touratech mirror you will need to replace M10x1.25 bolt with parts: M8x50mm flanged or standard screw with M8x17mm outer diameter washer M8 10x8.2x12mm nylon spacer M8x20mm outer diameter washer M8 nylon locking nut |
 | Pro-Bolt • Aluminium Washer M8 20mm O/D 4 x M8 20mm Outer Diameter Washer. Mirrors can be screwed with M8 40mm screws, included with Magazi MG-1850 mirrors. |
 | Accu • Washer M5 15mm O/D 8 x M5 15mm Outer Diameter Washer. |
 | DBA Hardware • M5 20mm hexagonal stud connector nuts 12 x M5 20mm Hexagonal Stud Connector Nut (main holders, handlebar box, control box). |
 | Open Builds (US) • Low Profile M5 Bolt 30mm Ooznest (UK) • Low Profile M5 Bolt 30mm 4 x M5 10mm (main holders). 8 x M5 15mm (handlebar box). 4 x M5 30mm (control box). 6 x M5 30mm (rear light holder, solar panel holders). 2 x M5 35mm (solar panel holders). 4 x M5 40mm (battery holder). 4 x M5 55mm (or 50mm) (front box). 2 x M5 60mm (main holder). |
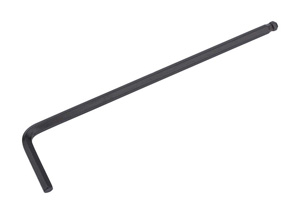 | Draper • 3.0 mm Hexagon and Ball End Hexagon Key (33602) Tip allows the hexagon key to be used up to 30 degree angle from the screw head recess. |
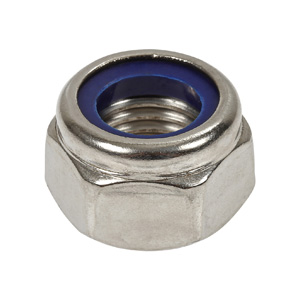 | Pro-Bolt • M5 Nyloc Nut • M8 Nyloc Nut 4 x M8 Nyloc Nut. 22 x M5 Nyloc Nut. |
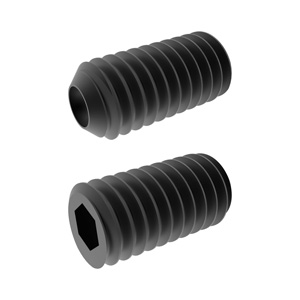 | Accu • M3 8mm Cup Point Grub Screw (DIN 916) 2 x M3 8mm Cup Point Grub Screw (DIN 916) for knob. |
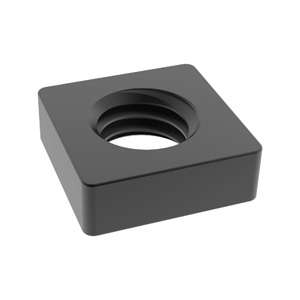 | Accu • M3 Square Nut (DIN 562) 2 x M3 Square Nut (DIN 562) for knob. |
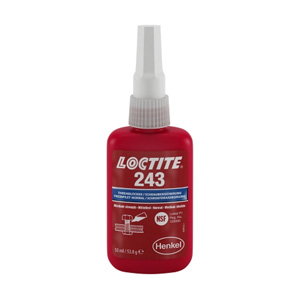 | Henkel • Loctite 243 NOTE: Do not apply too much - I could not unscrew one bolt and broke plastic. General purpose medium bond strength threadlocker. Secures and seal bolts, nuts and studs to prevent loosening due to vibration. |
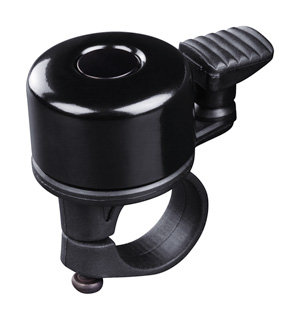 | Hama • 00178113 Bicycle Bell 2 x Hama 00178113 Bicycle Bell Bicycle bell for greater road safety with a plastic holder for all common bicycle handlebars. |
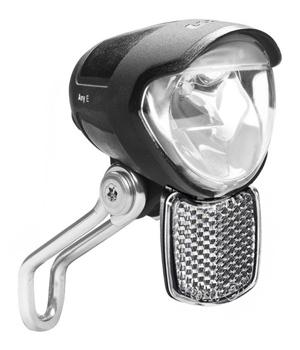 | Busch + Müller • Lumotec AVY E 1 x Busch + Müller Lumotec AVY E |
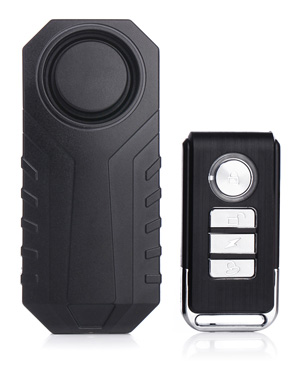 | King Serry • KS-SF22R Alarm Alarm Volume: 113dB Adjustable Sensitivity Level: 7 Waterproof: IP55 Loudspeaker Bell Sound Types: 6 Batteries: 3 x 1.5V AAA (included) Remote Controller: 1 (included) |
TOOLS
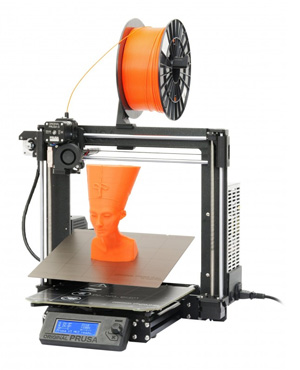 | Prusa • i3 MK3 3D Printer Print technology: Fused Filament Fabrication / Fused Deposition Modeling. 0.4mm nozzle (easy changeable) for 1.75 mm filament. Build volume 11,025 cm3 (25 x 21 x 21 cm). Layer height (layer resolution) from 0.05 mm (50 microns). Accuracy: 0.01 x 0.01 x 0.005 mm (10 x 10 x 5 microns). Max extruder temperature: 280 °C. Max heated bed temperature: 120 °C. Supported materials: PLA, ABS, PET, HIPS, Flex PP, Ninjaflex, Laywood, Laybrick, Nylon, Bamboofill, Bronzefill, ASA, T-Glase, Carbon-fibers enhanced filaments, Polycarbonates... |
WIRE STRIPPING AND CUTTING TOOLS
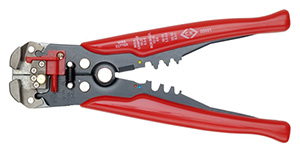 | C.K Tools • 495001 Wire Stripper Stripping: 0.2 - 6.0mm²; |
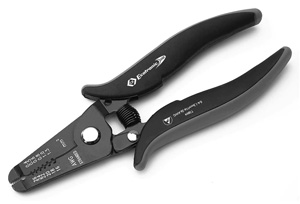 | C.K Tools • Wire Stripping Pliers T3894 For safe and damage-free stripping of fine, insulated solid wires. Suitable for cutting soft copper wires. Stripping capacities mm: 0.4, 0.5, 0.6, 0.8, 1.0, 1.3 Stripping capacities AWG: 26, 24, 22, 20, 18, 16 |
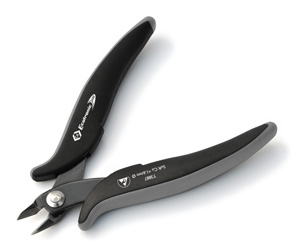 | C.K Tools • Side Cutters T3887 Precision side cutters. Suitable for cutting soft copper wires of up to 1.6mmØ / 14AWG. |
CRIMPING PLIERS
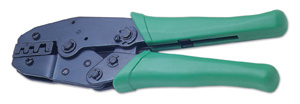 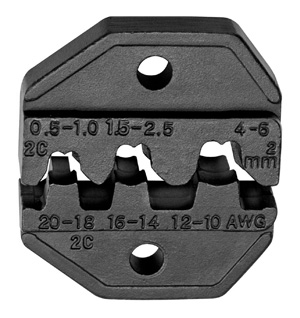 | Choosing a Tool • Pressmaster Laser • 1913 Crimping Pliers You can crimp terminals with “C.K 495001”, but with “Laser 1913” it is much easier and faster. For use on non-insulated terminals, the ratchet motion assures complete crimping. Forged jaws (spare jaws Part No 2927). For use with non-insulated terminals: 0.5-1.0mm², 1.5-2.5mm², 4-6mm² 20-18AWG, 16-14AWG, 12-10AWG Klein Tools • VDV205-036 Die Set |
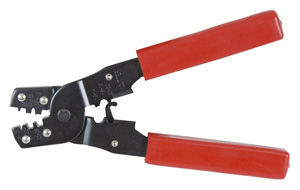 | Hozan • P-707 12voltplanet • P00456 (YTH-202B) I used 0.5mm² / 20AWG / 1.7mm diameter cable. Laser 1913 Crimping Pliers (0.5-1.0mm² / 20-18AWG) did not crimp insulated part well. I used P00456 (YTH-202B) non-insulated terminal crimping tool (0.3-0.5mm² / 20-22AWG) to crimp insulation part better. |
DRILLING AND SCREWING
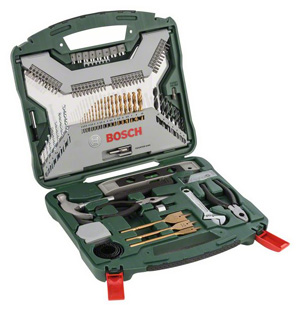
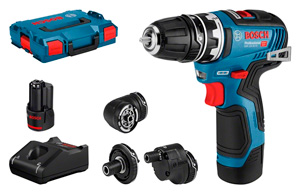 | Bosch • GSR 12V-35 FC Professional (06019H3000) Some holes must be drilled in plastic. I used wood drill bits for that. |
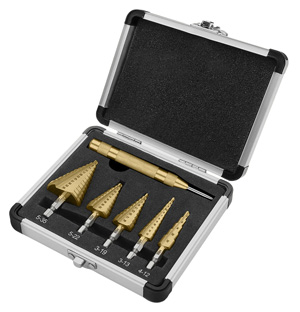 | TackLife (China) • PDH06A Step Drill Kit For drilling 19mm hole in cargo box with 3-5-7-9-11-13-15-17-19mm drill bit. TackLife drill bits are not very precise. For example 10mm part diameters: 9.84mm, 9.50mm, 9.94mm |
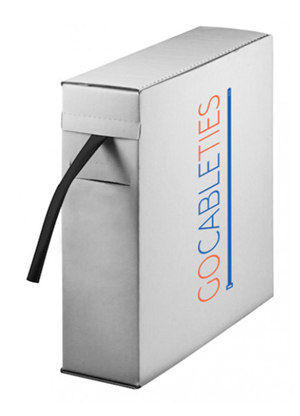
SHRINK TUBING
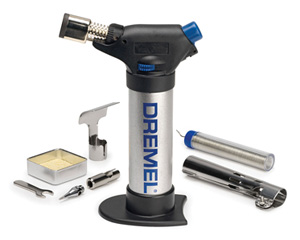 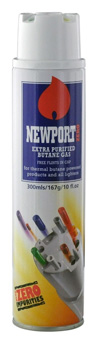 | Dremel • VersaFlame Butane Torch You can use gas lighter for heat shrink tubing, but it is much easier to work with Dremel VersaFlame. Newport • Butane Gas Extra Purified Near Zero Impurities Gas to use with Turboflame Lighters, Refilling Butane Lighters, other Butane-Powered Products And other personal needs. |
MEASURING
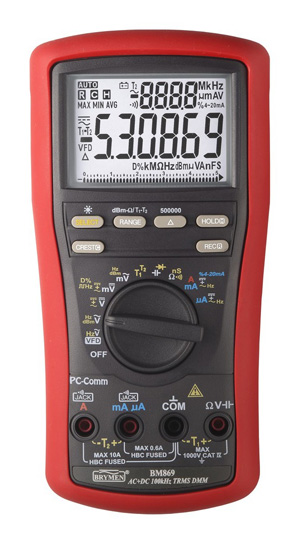 | Spreadsheet • Fluke Brymen • BM235 Multimeter Brymen • BM867S Multimeter I used multimeter for some measurements and to find right cable ends in “Continuity Test” mode during cable labelling process. |
MARKING
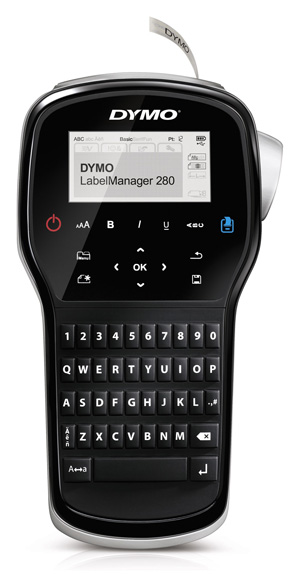 | Dymo • LabelManager 280 For marking cables with labels. D1 Standard Labels 12mm (S0720610) settings: Font Size: 16pt Length: Fixed 1.5" (38mm) Align: Right 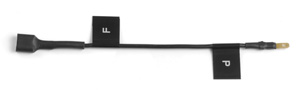 Dymo • D1 Standard Labels 12mm (S0720610) Black on White, Clear, Yellow, Blue, Green, Red White on Clear, Black Blue on White, Clear Red on White, Clear |
SOLDERING
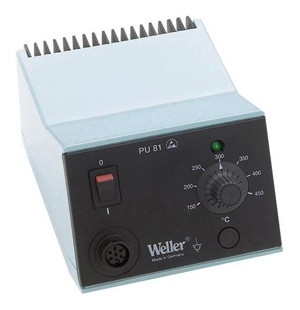
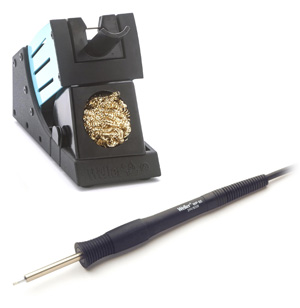 | Weller • Tip-Activator For regeneration of oxidized tips. Cleaning only possible in hot state of the soldering tip. Weller • WP 65 Set WP 65 - Soldering iron 65 W, 24 V with Power-Response Heating Technology. XNT A - Soldering tip chisel 1,6 x 0,4 mm. WDH 10 - Safety rest with Stop+Go function and dry cleaner. |
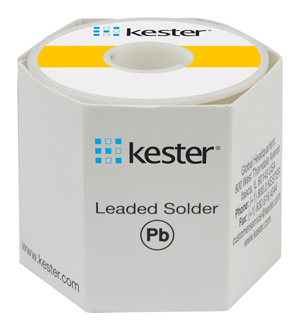 | Weller • EL60/40-100 Kester • 44 Flux-Cored Wire Sn60Pb40 - 0.8mm - 3.3% Flux - melting range 183-190°C Sn63Pb37 - 0.8mm - 3.3% Flux - melting point 183°C |
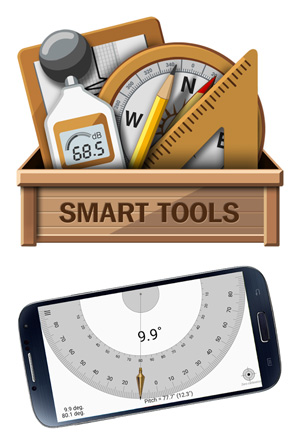 | Android boy's Lab • Smart Tool App To set precise 0° angle for indicator-mirror-button holders. |
PETG FILAMENT
You will need about 1.1 kg with 80% infill
I would not recommend to print parts from ABS (shrinkage is too big) or PLA (low heat resistance).
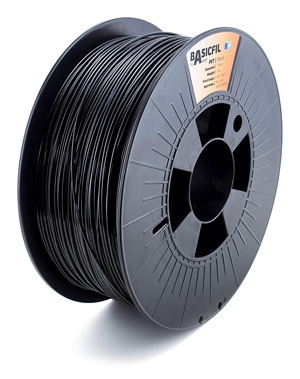 | I had no problems with these filaments: Prusa3D • Jet Black Prusament PETG 1.75 |
  | PC Johnson • Windex Original Glass Cleaner For preparing-cleaning heated printer bed... Spring Steel Sheet with Smooth Double-sided PEI before printing with PETG filament. Water: Water Cleaning Agent: 2-Hexoxyethanol, Isopropanolamine, Ammonium Hydroxide Wetting Agent: Lauryl Dimethyl Amine Oxide, Sodium Dodecylbenzene Sulfonate Fragrance: Fragrance Dye: Liquitint® Sky Blue Dye |
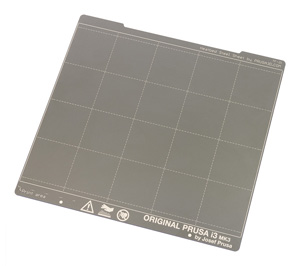
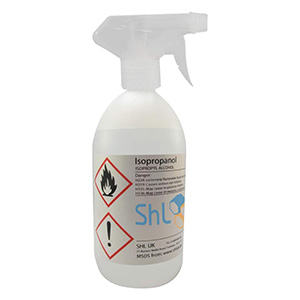 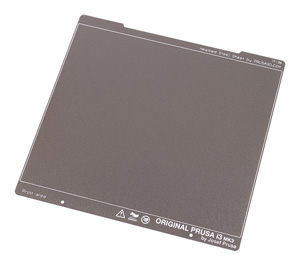 | SHL • Isopropanol / Isopropyl Alcohol / IPA NOTE: I didn't test-print parts for this project on Textured PEI Powder-coated Spring Steel Sheet. For preparing-cleaning heated printer bed... Double-sided Textured PEI Powder-coated Spring Steel Sheet before printing with PETG filament. For thin parts to stick correctly, you may need to adjust height of first layer perfectly and to reduce "Elephant foot compensation" from default value 0.2mm... to 0.1mm.  Modified settings: PrusaSlicer ► Print Settings ► 0.20 QUALITY MK3 ► Advanced ► Slicing... Modified settings: PrusaSlicer ► Print Settings ► 0.20 QUALITY MK3 ► Advanced ► Slicing...Isopropanol 99.9% / Isopropyl Alcohol / IPA Manufacturer Part Number: 1000-ISO-TRIGGER Trigger spray cap for bottles with a 28mm neck (OFF, Spray, Stream) 1 Litre |
 | Kleenex • Ultra Soft Pocket Tissues For preparing-cleaning heated printer bed. |
PRINTING SETTINGS
Printing Settings for MCPP BasicFil or AmazonBasics PETG Filament on PrusaSlicer
...for Spring Steel Sheet with Smooth Double-sided PEI
For BIG parts to stick on TEXTURED PEI Powder-coated Spring Steel Sheet sheet, I increased recommended bed temperature from 60-80°C (for AmazonBasic and MCPP BasicFill PETG filaments) to 85°C (First layer) and 90°C (Other layers). I printed BIG parts in my own Temperature Controlled Enclosure. Temperature inside enclosure was about 35°C with these bed settings. E3D V6 HotEnd is rated to 40°C ambient operating temperature. As you approach that temperature, cooling efficiency is reduced, allowing more heat up past the heatbreak. This can cause low temperature filament to soften in the mechanism to cause feed problems.
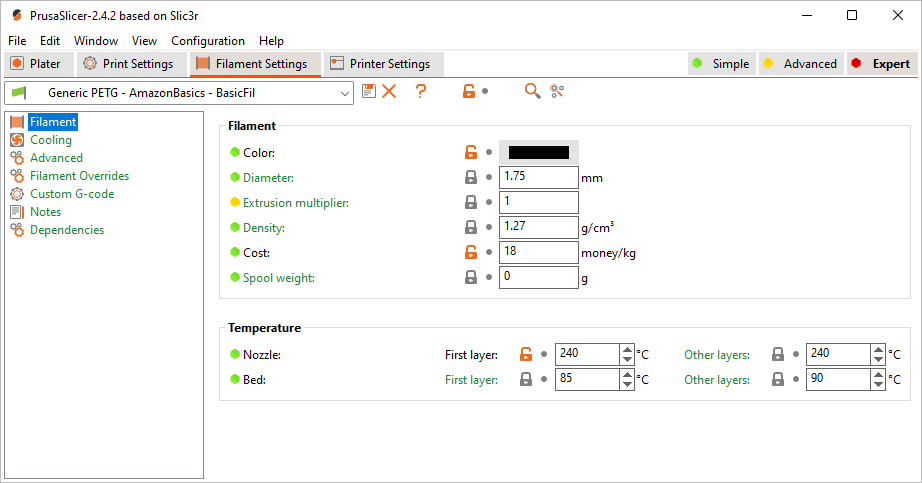
 Modified settings: PrusaSlicer ► Filament Settings ► Prusament PETG ► Filament
• "Extruder: 240°C".
• "Bed: 85°C / 90°C".
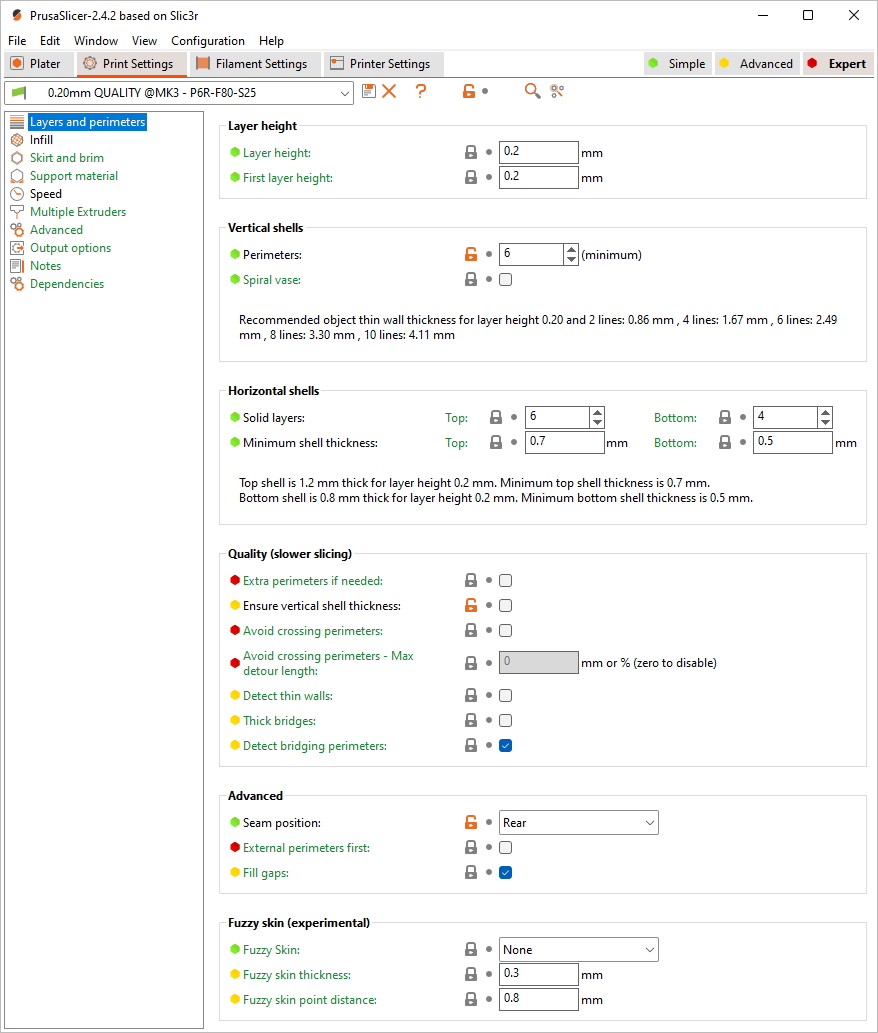
Modified settings: PrusaSlicer ► Print Settings ► 0.20 QUALITY MK3 ► Layers and perimeters
• "Ensure vertical shell thickness: disabled" - I had problems with thin 45° hanging angles when it was enabled.
• "Perimeters: 3" - infill pattern is less visible on surface.
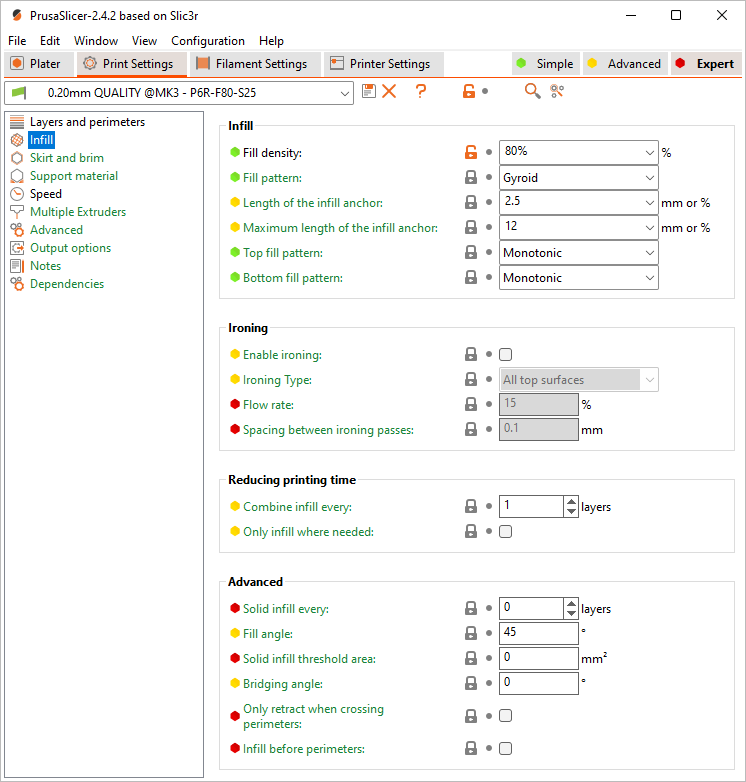
Modified settings: PrusaSlicer ► Print Settings ► 0.20 QUALITY MK3 ► Inflill
• "Fill density: 80%."
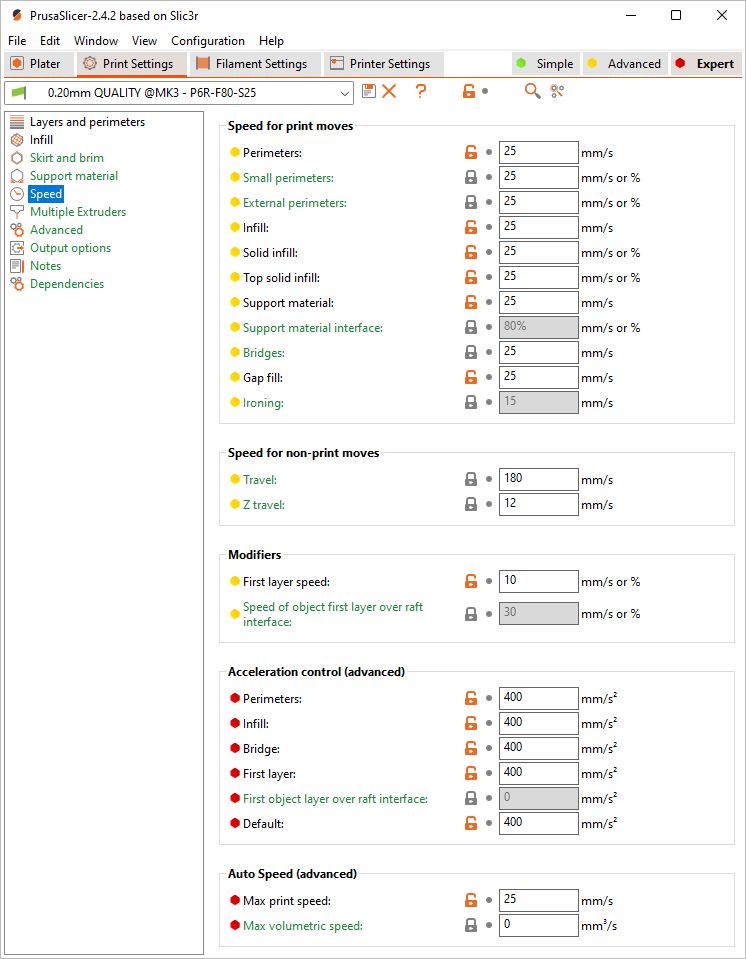
Modified settings: PrusaSlicer ► Print Settings ► 0.20 QUALITY MK3 ► Speed
• Reduced printing speeds (10-20-180-400). Slower speeds results in smoother and glossier surfaces without matte areas, reduces printing noise with vibrations... lesser probability for corners of big parts to unstick from heated bed, because of shrinking.
• "Travel: 180" - low speeds (like 20) creates surface blobs after long travel distances.
• "First layer speed: 10" - for better adhesion.
Modified settings: PrusaSlicer ► Printer Settings ► Original Prusa i3 MK3S ► Custom G-code
• I added few lines to G-code to remove filament blob on nozzle right before printing starts and raised intro line to reduce wearing of steel sheet plate surface.
G0 Z50 ; ADDED LINE - NOZZLE BLOB - Z up 50 mm to clean filament blob from nozzle before printing.
G4 S5 ; ADDED LINE - NOZZLE BLOB - Pause 5 seconds to clean the nozzle.
G0 Z-50 ; ADDED LINE - NOZZLE BLOB - Z down 50 mm to initial position.
G0 Z0.5 ; ADDED LINE - INTRO LINE - Z up 0.5 mm for less intro line adhesion to prevent steel sheet plate surface from wearing.
G0 Y-1 ; ADDED LINE - INTRO LINE - Y shift 2 mm intro line default start position to prevent steel sheet plate surface from wearing.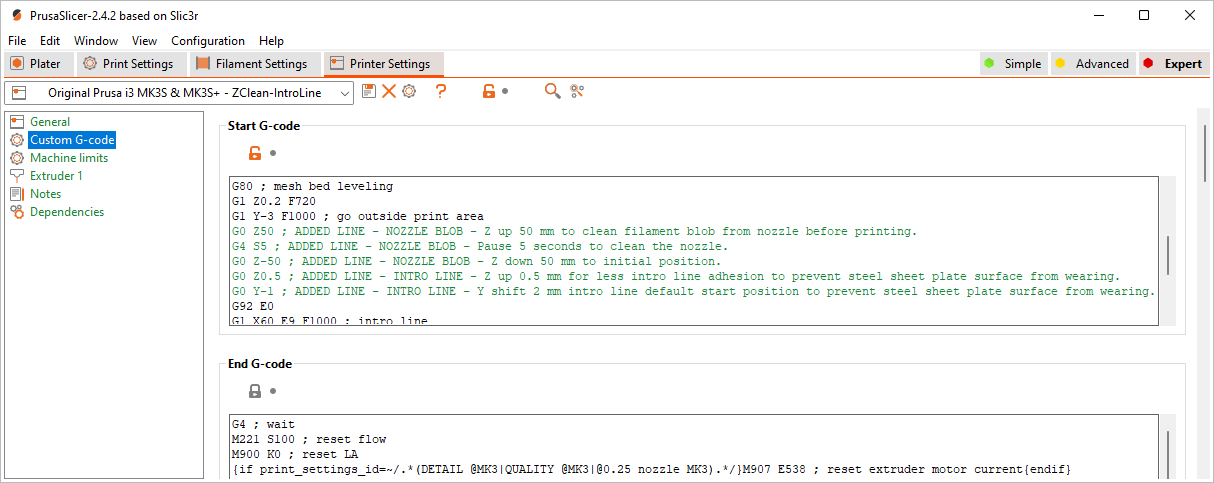
STL FILES
For better quality and safety... I printed majority of parts separately.
 | To split group and to remove some parts: 1. Open “*.STL” file in PrusaSlicer Edition. 2. Click on [ Split to objects ] button. 3. Select parts one by one, which you don't want to print. 4. Press [ Del ] key on keyboard. |
| You can edit STL files with free and open source 3D creation suite Blender. | |
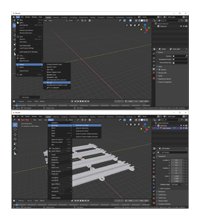 | Import “*.STL” file: 1. Blender 2.8 ► File ► Import ► Stl (.stl). If imported STL object is not visible: 1. Select imported object in “Scene Collection” list (top-right panel). 2. In “Object Mode“ (top-left drop-down) ► Object ► Set Origin ► Geometry to Origin. |
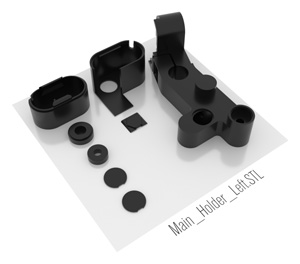 | Main_Holder_Left.STL For NC-17 254 Trekking Bicycle Handlebar 25.4 mm • 22.2 mm 1 x Main Holder Left 1 x Main Holder Left Cover Top 1 x Main Holder Left Cover Bottom 1 x Turn Signal Light Spacer 1 x Screw Cover Square 2 x Screw Cover Circle |
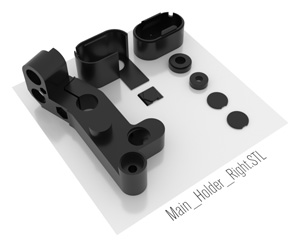 | Main_Holder_Right.STL For NC-17 254 Trekking Bicycle Handlebar 25.4 mm • 22.2 mm 1 x Main Holder Right 1 x Main Holder Right Cover Top 1 x Main Holder Right Cover Bottom 1 x Turn Signal Light Spacer 1 x Screw Cover Square 2 x Screw Cover Circle |
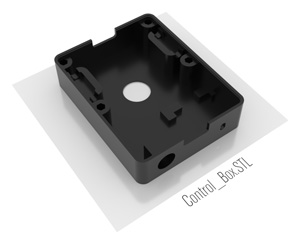 | Control_Box.STL 1 x Control Box - Seam position: [ Rear ] |
 | Control_Box_Cover.STL 1 x Control Box Civer - Seam position: [ Rear ] |
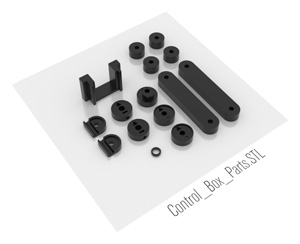 | Control_Box_Parts.STL 1 x Indicator Relay Holder 2 x Cable Holder 2 x Control Box 1 cm Spacer A 4 x Control Box 1 cm Spacer B 1 x 10mm to 7mm Spacer for Smaller (16mm) Potentiometer For all knobs - Seam Position: [ Rear ] 2 x Knob for Smooth 6.4mm Shaft 1 x Extended Knob for Knurled 6mm Shaft 1 x Knob for Knurled 6mm Shaft (with square dent) 1 x Knob for Knurled 6.1mm Shaft (with circle dent) |
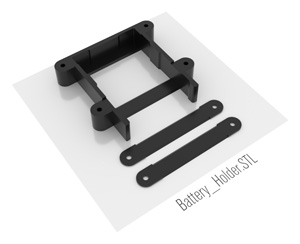 | Battery_Holder.STL For DBPower B07CVF7L77 300A 800mAh Jump Starter 1 x Battery Holder 2 x Battery Holder Clip |
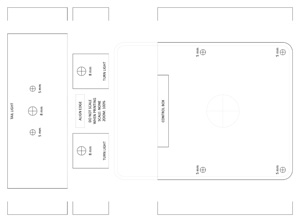
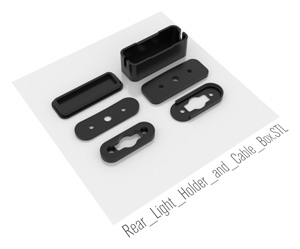 | Rear_Light_Holder_and_Cable_Box.STL Rear light parts are for Shin Yo 255-700 Universal Stop and Taillight OVAL 1 x Rear Light Cable Box Cover - Seam Position: [ Rear ] 1 x Rear Light Cable Box - Seam Position: [ Rear ] 1 x Rear Light Cable Box Spacer 1 x Rear Light Spacer 1 x Rear Light Screw Nut Holder 1 x Rear Light Screw Nut Holder Cover |
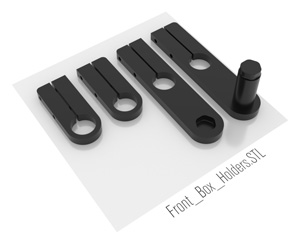 | Front_Box_Holders.STL For all parts - Seam Position: [ Rear ] 1 x Front Cable Box Holder A Left 1 x Front Cable Box Holder A Right 1 x Front Cable Box Holder B Left with 22.2mm Bar for Phone Holder 1 x Front Cable Box Holder B Right |
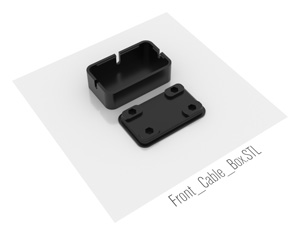 | Front_Cable_Box.STL 1 x Front Cable Box Cover - Seam Position: [ Rear ] 1 x Front Cable Box Plate |
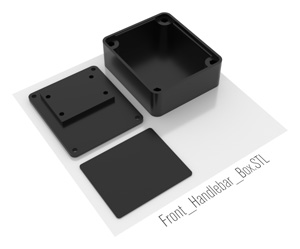 | Front_Handlebar_Box.STL Can fit anti-theft alarms, like King Serry KS-SF22R 1 x Front Handlebar Box Cover - Seam Position: [ Rear ] 1 x Front Handlebar Box Plate 1 x Front Handlebar Box Insert |
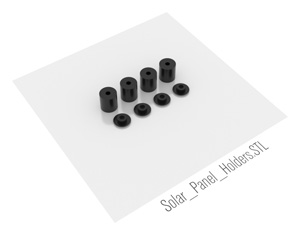 | Solar_Panel_Holders.STL 4 x Solar Panel Holder Top 4 x Solar Panel Holder Bottom Spacer - Seam position exception: PrusaSlicer ► Print Settings ► Layers and perimeters ► Seam position: [ Rear ] |
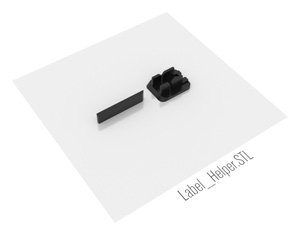 | Label_Helper.STL For marking cables with labels. D1 Standard Labels 12mm (S0720610) settings: Font Size: 16pt Length: Fixed 1.5" (38mm) Align: Right You can use needle or punch tool to slide label into helper, to prevent it from sticking to your fingers. 1 x Label Helper Part A 1 x Label Helper Part B |
Cables
Tags
Model origin
The author marked this model as their own original creation. Imported from Thingiverse.