100x100x100 Calibration

Description
PDFI needed a new calibration print to dial in my stepper motor to achieve great dimensional accuracy at a larger scale than just a simple 20x20x20 cube. Was looking and found this from Collect3D on thingiverse. Remixed it to have larger measurement holes and recessed the labels.
Purpose & Use
As I said above I needed a calibration print to dial in my stepper motor. This is not an end all. I use this to get sufficient dimensional accuracy, usually under 1.0% error (measured +99.0mm). After that I then adjust the shrinkage compensation settings in my slicer.
Final Thoughts & Expectations
The best calibration print is the print you want accurate! If you print your part and notice that its elongated only in the X axis by 0.5-2mm, then adjust only your X stepper to acquire the right dimensional accuracy needed. If your printed part has increase by 0.5-2mm in every dimension, then you need to adjust the shrinkage compensation settings in your slicer, not your stepper motor. To achieve perfection you are going to run into other issues like material shrinkage, bulging, layer inconsistencies, etc. Ellis Print Tuning Guide says it well
“Firstly, adjust your expectations. Remember, our 3D printers are hobby-grade, glorified hot glue guns, not CNC. You will not reliably get 0.01mm tolerances everywhere.”
STL's
12/4/2022 - Refined / More STL's!
I've redesigned the models to have distance indicators. The remix of Collect3D has distance marks at intervals of 25mm. My design has distance marks at intervals of 20mm. I also included two more models without Z calibration, for those who just need to calibration X & Y.
7/10/2022 - Initial Release
There are two .stl's below. One that is modeled after Collect3D and the other I designed. The one I designed is meant to be placed in the center of the print bed.
Acquiring a Measurement (12/4/2022)
This should be much easier since the distance is incorporated into the design. Here are some example pictures to help though.
100mXYZCalibrationV1.1(12_4_22)
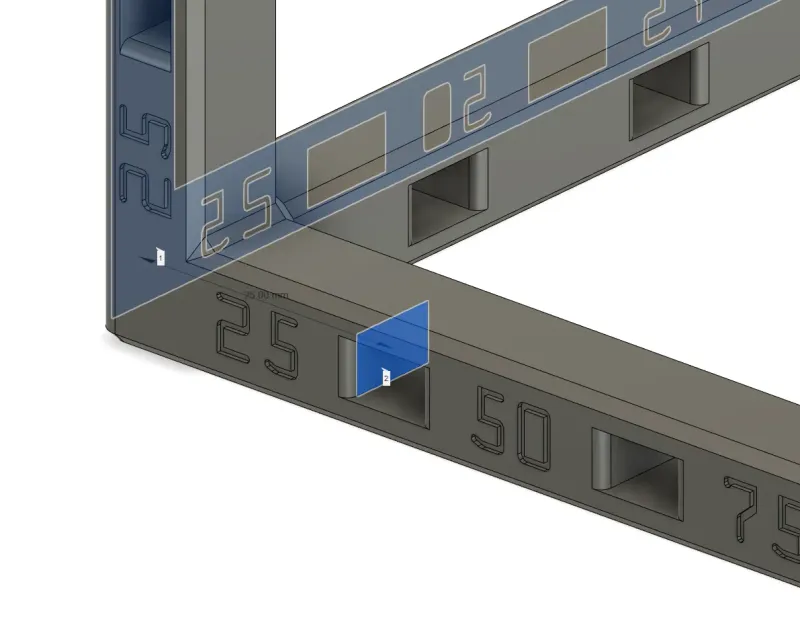
Measurements start from the back of the print and then out to the end of the axis.
100mXYZCalibrationV2.1(12_4_22)
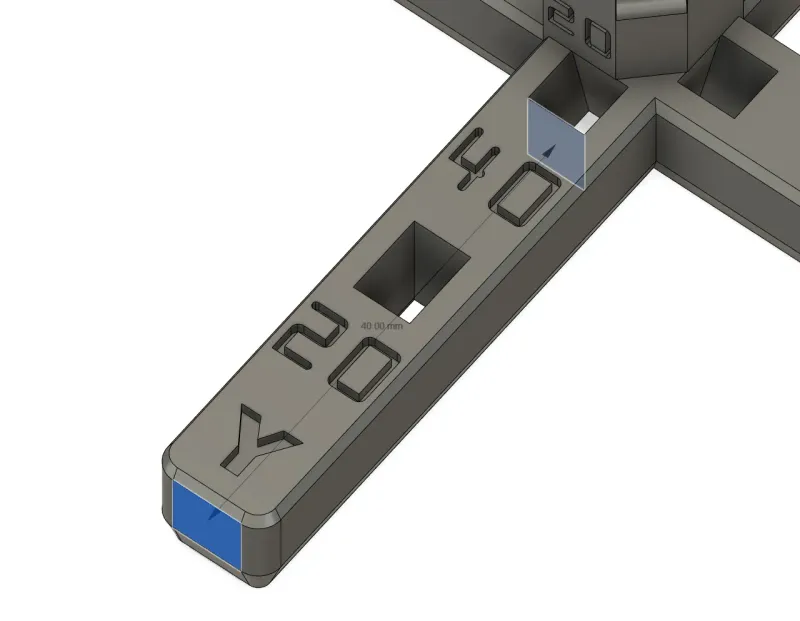
Measurement start from the marked ends of the axis and then out to the other end.
Print instructions
Printer: Creality Ender 3
Rafts: No
Supports: No
Resolution: 0.28mm layer, 0.4mm nozzle, 0.45mm line width
Infill: 15% Gyroid (PrusaSlicer)
NOTES:
7/10/2022
I'm touching up the .f3d file for 100mCalibrationV1 to be fully parameterized. You will be able to adjust it to any size (40-200mm+) for X,Y,Z axis's and it will add measurement holes at specific intervals. After that, I will do the same for 100mCalibrationV2.
12/4/2022
Honestly I have even tried to make these .f3d files to be fully parameterized. I'm just too lazy to do that at the moment lol.
Tags
Model origin
The author marked this model as their own original creation.