Void Switch Fidget
Description
PDFMake your own super addicting/satisfying Void Switch (https://github.com/riskable/void_switch) fidget toy! There's a lot of words below but assembly is actually super simple and straightforward. Most people can figure it out without even looking at these instructions…
See it in action: https://gfycat.com/bitterincompletefanworms
NOTE: To assemble the switch you'll need some 4x2mm magnets (cheap N35 is fine). When ordering “4x2mm” magnets know that most (90%) actually measure out to be about 4x1.7mm (or 4x1.8mm) which is why there's two sets of models:
- .3mf and .stl files for 4x1.7mm magnets (aka “the cheap kind”)
- .3mf and .stl files for 4x2mm magnets (rare)
Print everything at 0.16mm layer height or you could end up with a slightly more wobbly stem than is typical (because the height of the floor of the “sheath” part is based on layer height and that's part of the switch's tolerance). PETG is recommended as it has a super low coefficient of friction and self-lubricating properties! Having said that, just about any non-flexible filament will work just fine. Yes, PLA switches work great--just not as smooth as PETG.
Assembly instructions:
- Use pliers to place the magnet in the sheath part. See image.
- Slide the sheath into the top of the body and use pliers to finish it off/snap it in place (it's supposed to be a tight fit--it really needs to be squeezed in there). See image.
- Place a magnet on top of the body (it'll be stick there from the magnetic force 👍) to get the correct orientation and then push that magnet in the stem (press it against something hard). If the magnet is loose you may want to use some CA glue to keep it in place (and work on improving your printer tolerances 😁). Also, if you screw up the orientation there's a hole in the back of the stem (for a strong needle or fine tweezers) you can use to push the magnet out, flip it around, and try again. When done you can slide the stem into the sheath from the underside of the switch and it should just snap itself in place (keyup position)
- At this point the switch should be working--you should be able to press down on the stem and it'll return back up. If it's too tight you can just sand the stem a bit with 320-ish grit sandpaper until it slides smoothly (don't worry: After a few hundred presses it'll smooth itself out no matter how rough of a sanding job you do 👍).
- To maximize the return speed (and fidget potential) the next thing you need to do is assemble the levitator: It's the tiny part with a circular hole for the magnet and a + shaped cutout for being placed on the stem. The levitator is supposed to oppose the magnet in the body so place a magnet on top like you did at the start of the stem assembly but flip it around and press it into the levitator with pliers. See image.
- Place the levitator on the top of the stem (it's a tight fit but you don't need pliers--just squeeze it on there). Test it afterwards to make sure the switch operates like it should… If you press the switch and it stays down then you've got the magnet facing the wrong direction (in the levitator). It's pretty easy to pop it out and flip it around 👍.
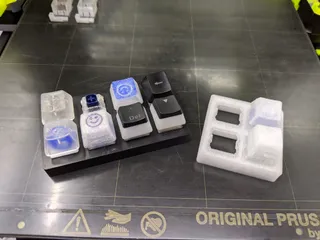
- You're done assembling the switch at this point so now you can press the switch body into the switch tester (the big square thing) and put the keycap on top. Note that the 1x1 and 1x2 switch testers have holes to use with a keyring/lanyard if you want.
Trivia:
- These Void Switch models were generated with 4mm of travel, 0.13mm stem tolerance, and a 0.6mm magnet void (which controls how strong the switch will be).
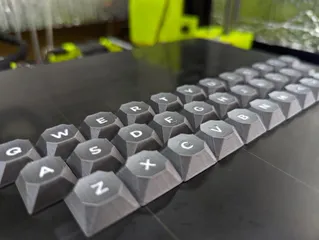
- The keycap model was generated using the “gem” (aka “gemstone cut") profile in my Keycap Playground: https://github.com/riskable/keycap_playground
- The switch testers were generated using my Parametric Switch Tester: https://www.printables.com/model/24163-parametric-customizable-cherry-mx-key-switch-teste/comments/188489
- Super Lube w/Syncolon (PTFE) works fantastically well to lubricate the switches. Either the oil or grease kind work great.
- All the parts can be cleaned in a sink with soap & water (to remove finger cheese and pocket lint hehe). The magnets have an anti-corrosive nickel coating and shouldn't be impacted 👍
Tags
Model origin
The author hasn't provided the model origin yet.


