Waveshare Raspberry Pi Pico Clock mount for Ikea Skadis

A mount for the Waveshare Raspberry Pi Pico Clock for IKEA SKÅDIS pegboards.
15
17
0
1128
updated December 29, 2024
Description
PDFThese are mounts for the Waveshare Raspberry Pi Pico Clock (wiki) for IKEA SKÅDIS pegboards. The clock attaches to the protruding M4 screw heads using they key holes at the back of the clock case.
Uses T-Nuts for a very secure hold and easy printing. The clock attaches to the M4 BHCS using the key holes on the back of the clock.
 | Read more about the Skadis T-Nuts Mounting System and check out the Skadis T-Nuts Collection for more Skadis accessories that use T-Nuts. |
BOM
| Qty | Description | Sourcing |
|---|---|---|
| 4 | M2.5 DIN934 Hex Nut | Aliexpress |
| 4 | M2.5x14 (or longer) Socket Head Cap Screw | Aliexpress |
| 2 | M4 DIN934 Hex Nut | Aliexpress |
| 2 | M4x8mm Button Head Cap Screw | Aliexpress |
Printed Parts
| Qty | Part |
|---|---|
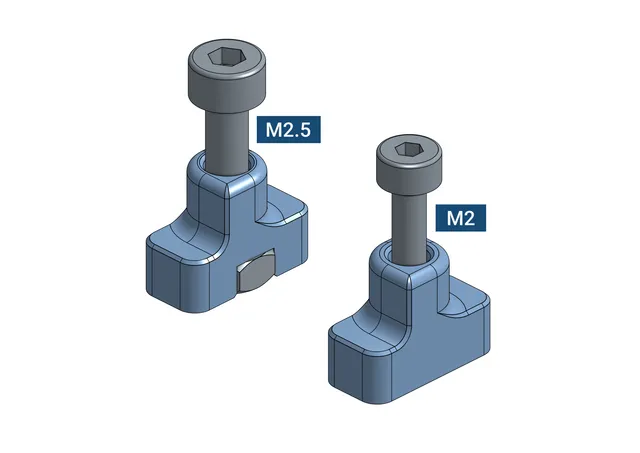
| 4 | T-Nut M2.5.stl |
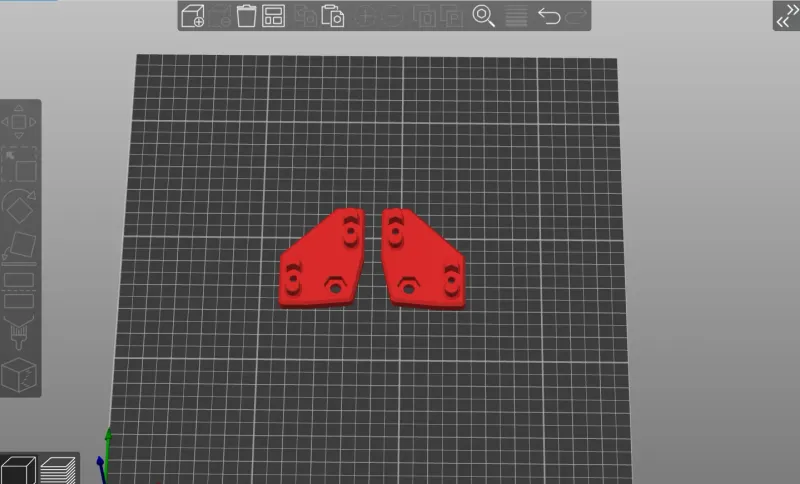
| 1 | Mount Left.stl |
| 1 | Mount Right.stl |
Printing
The STL files are pre-rotated and can be printed in the original orientation.
- Layer height: 0.2mm
- Extrusion width: 0.4mm
- Perimeters: 3 or 4
- Infill: 20%
- No supports
Assembly
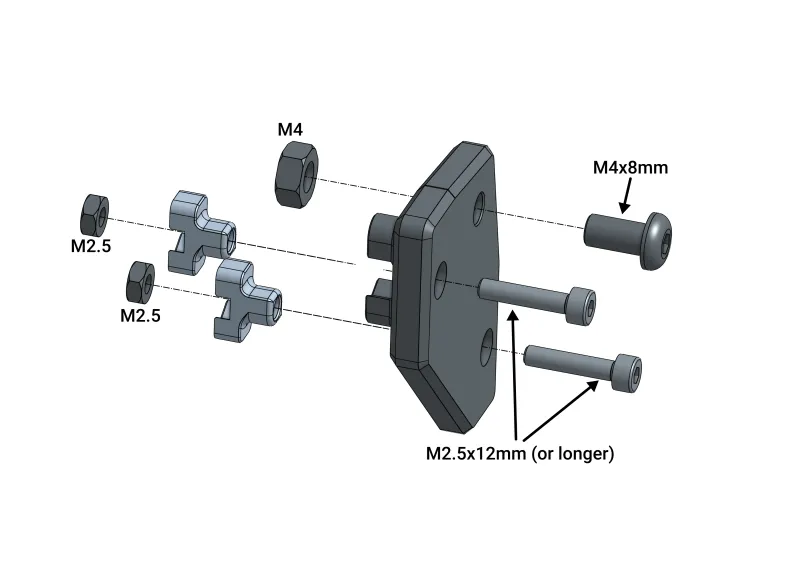
- Insert the M4 hex nuts into the back of the part.
- Screw the M4x8mm BHCS into the hex nuts until the distance between the screw head and the printed part is about 3mm or until the end of the screw is flush bottom of the M4 nut. Use thread locker on the M4 screw if you have some.
- Add a small piece of tape on each M4 nut to protect the pegboard from the screw.
- Install the M2.5 T-Nuts and screws.
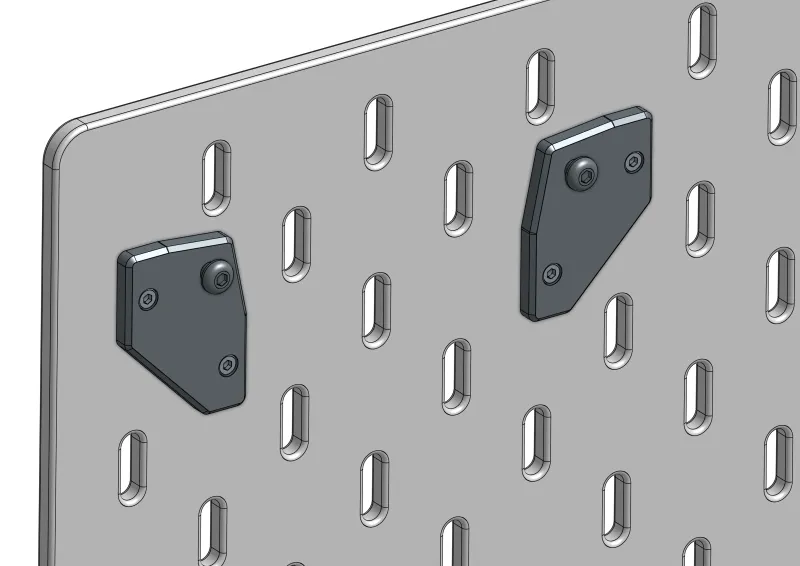
- Install the mounts on the Skadis pegboard as shown below.
- Install the Waveshare Pico Clock on the M4 screw heads using the key holes on the back of the clock.
Tags
Model origin
The author remixed this model.

Differences of the remix compared to the original
.