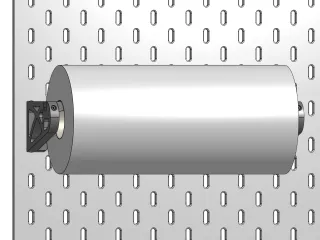
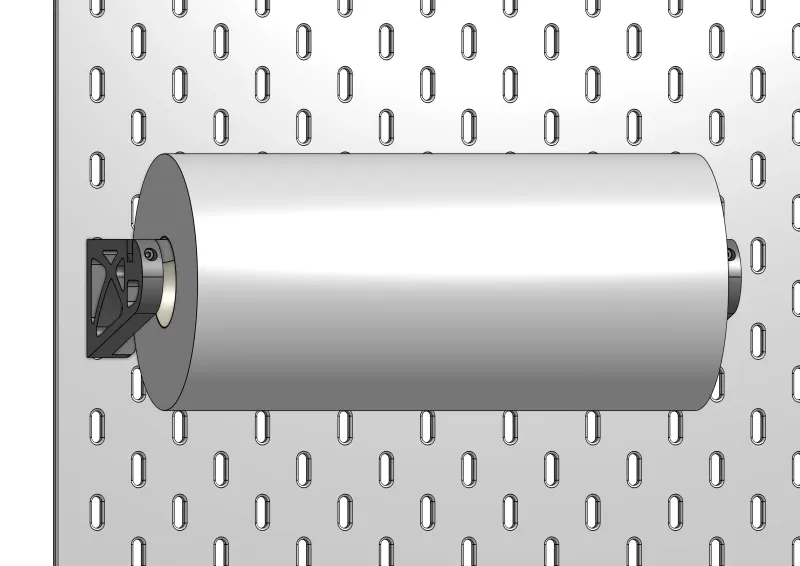
Quick-Change Paper Towel Mount for Ikea Skadis


Description
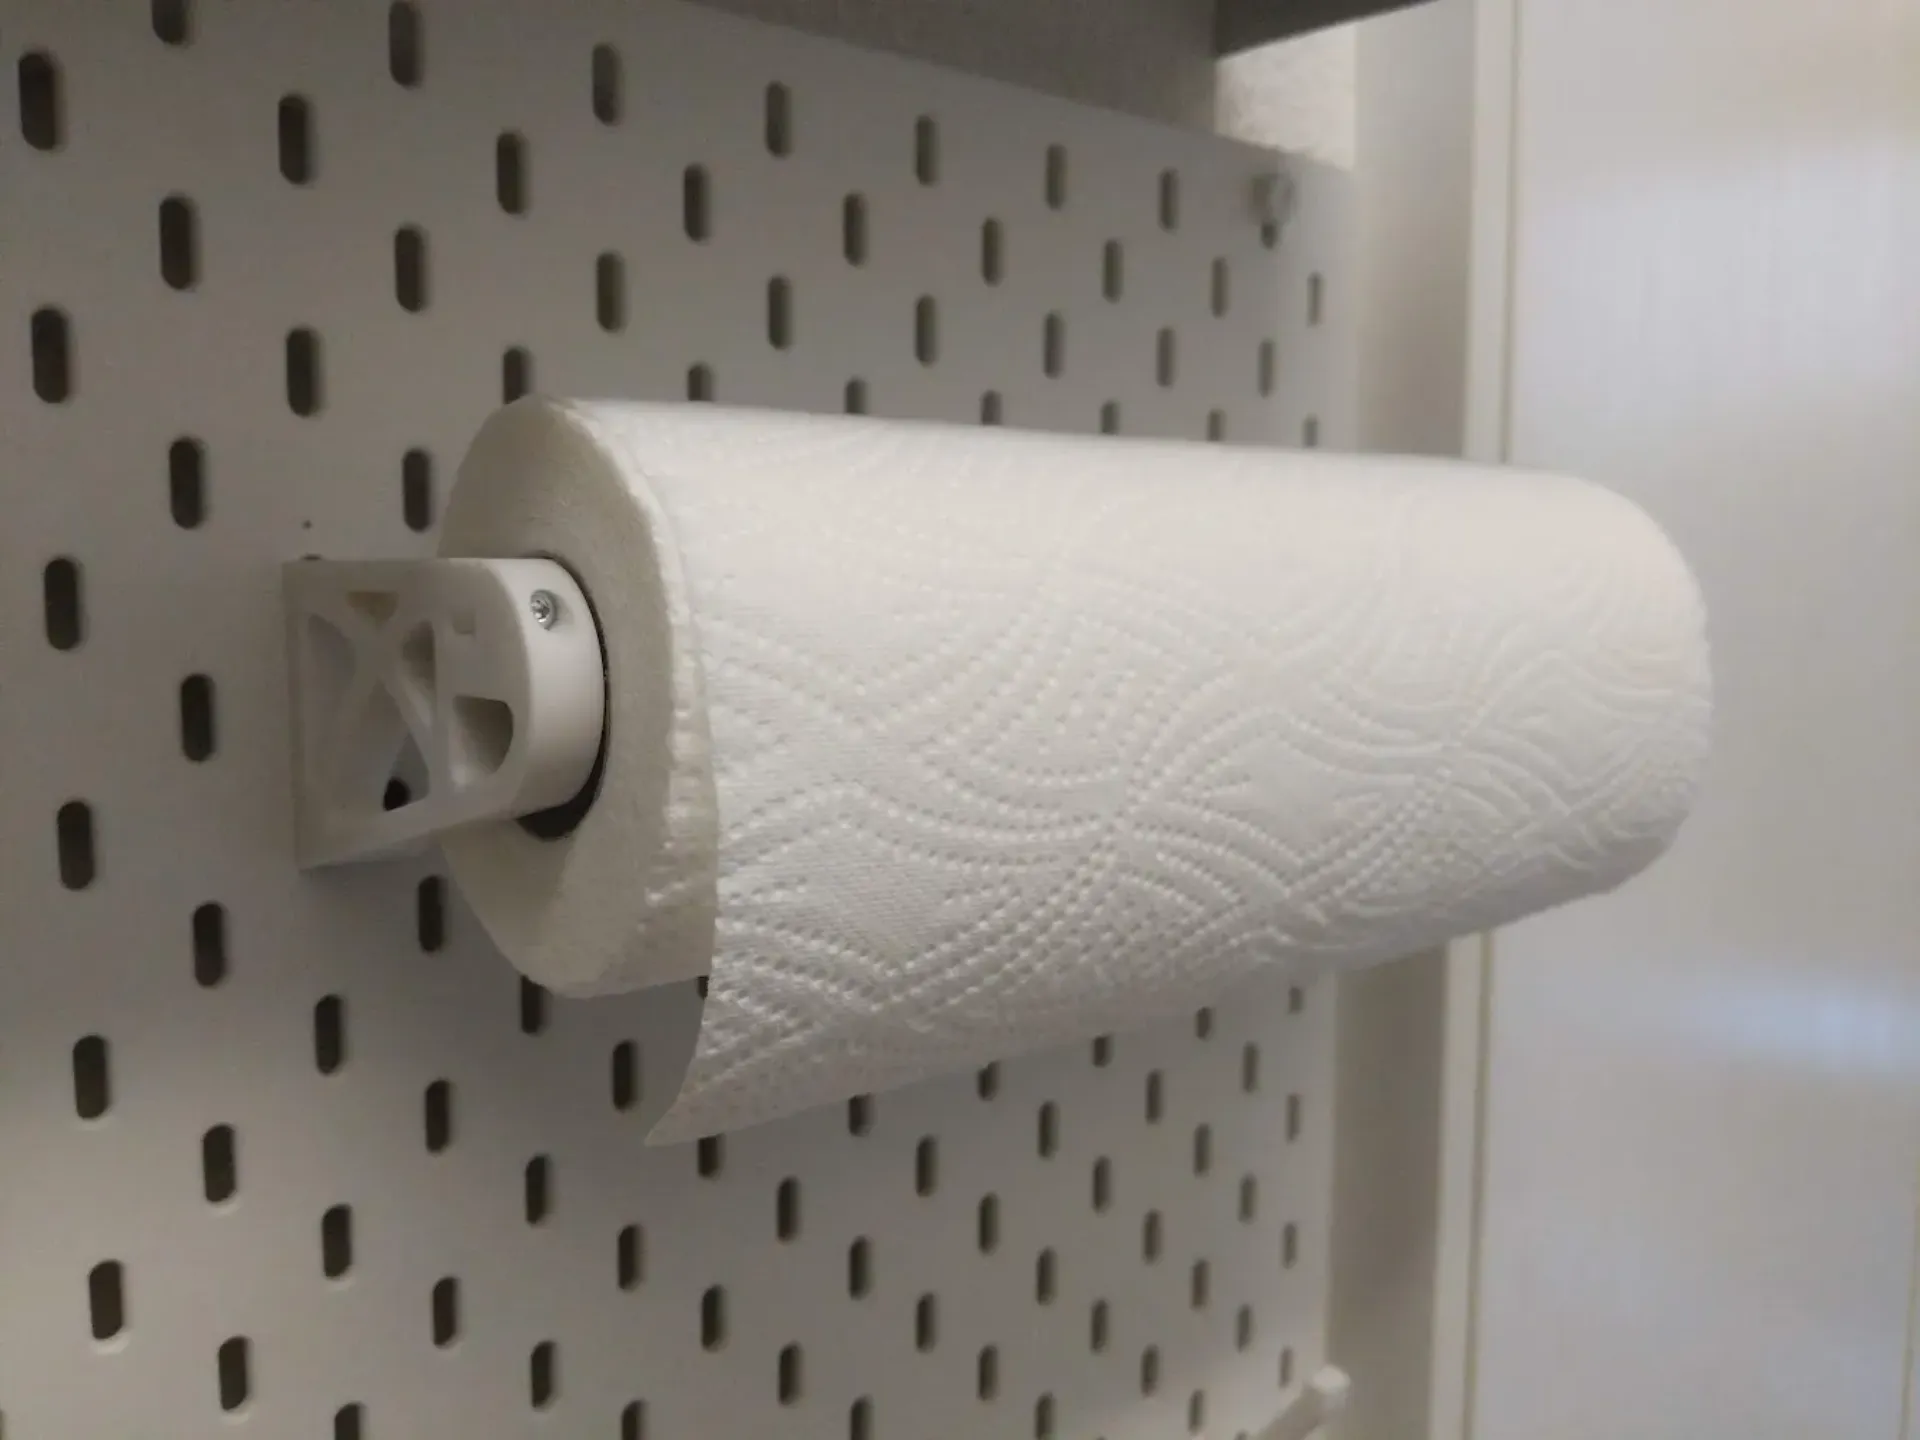
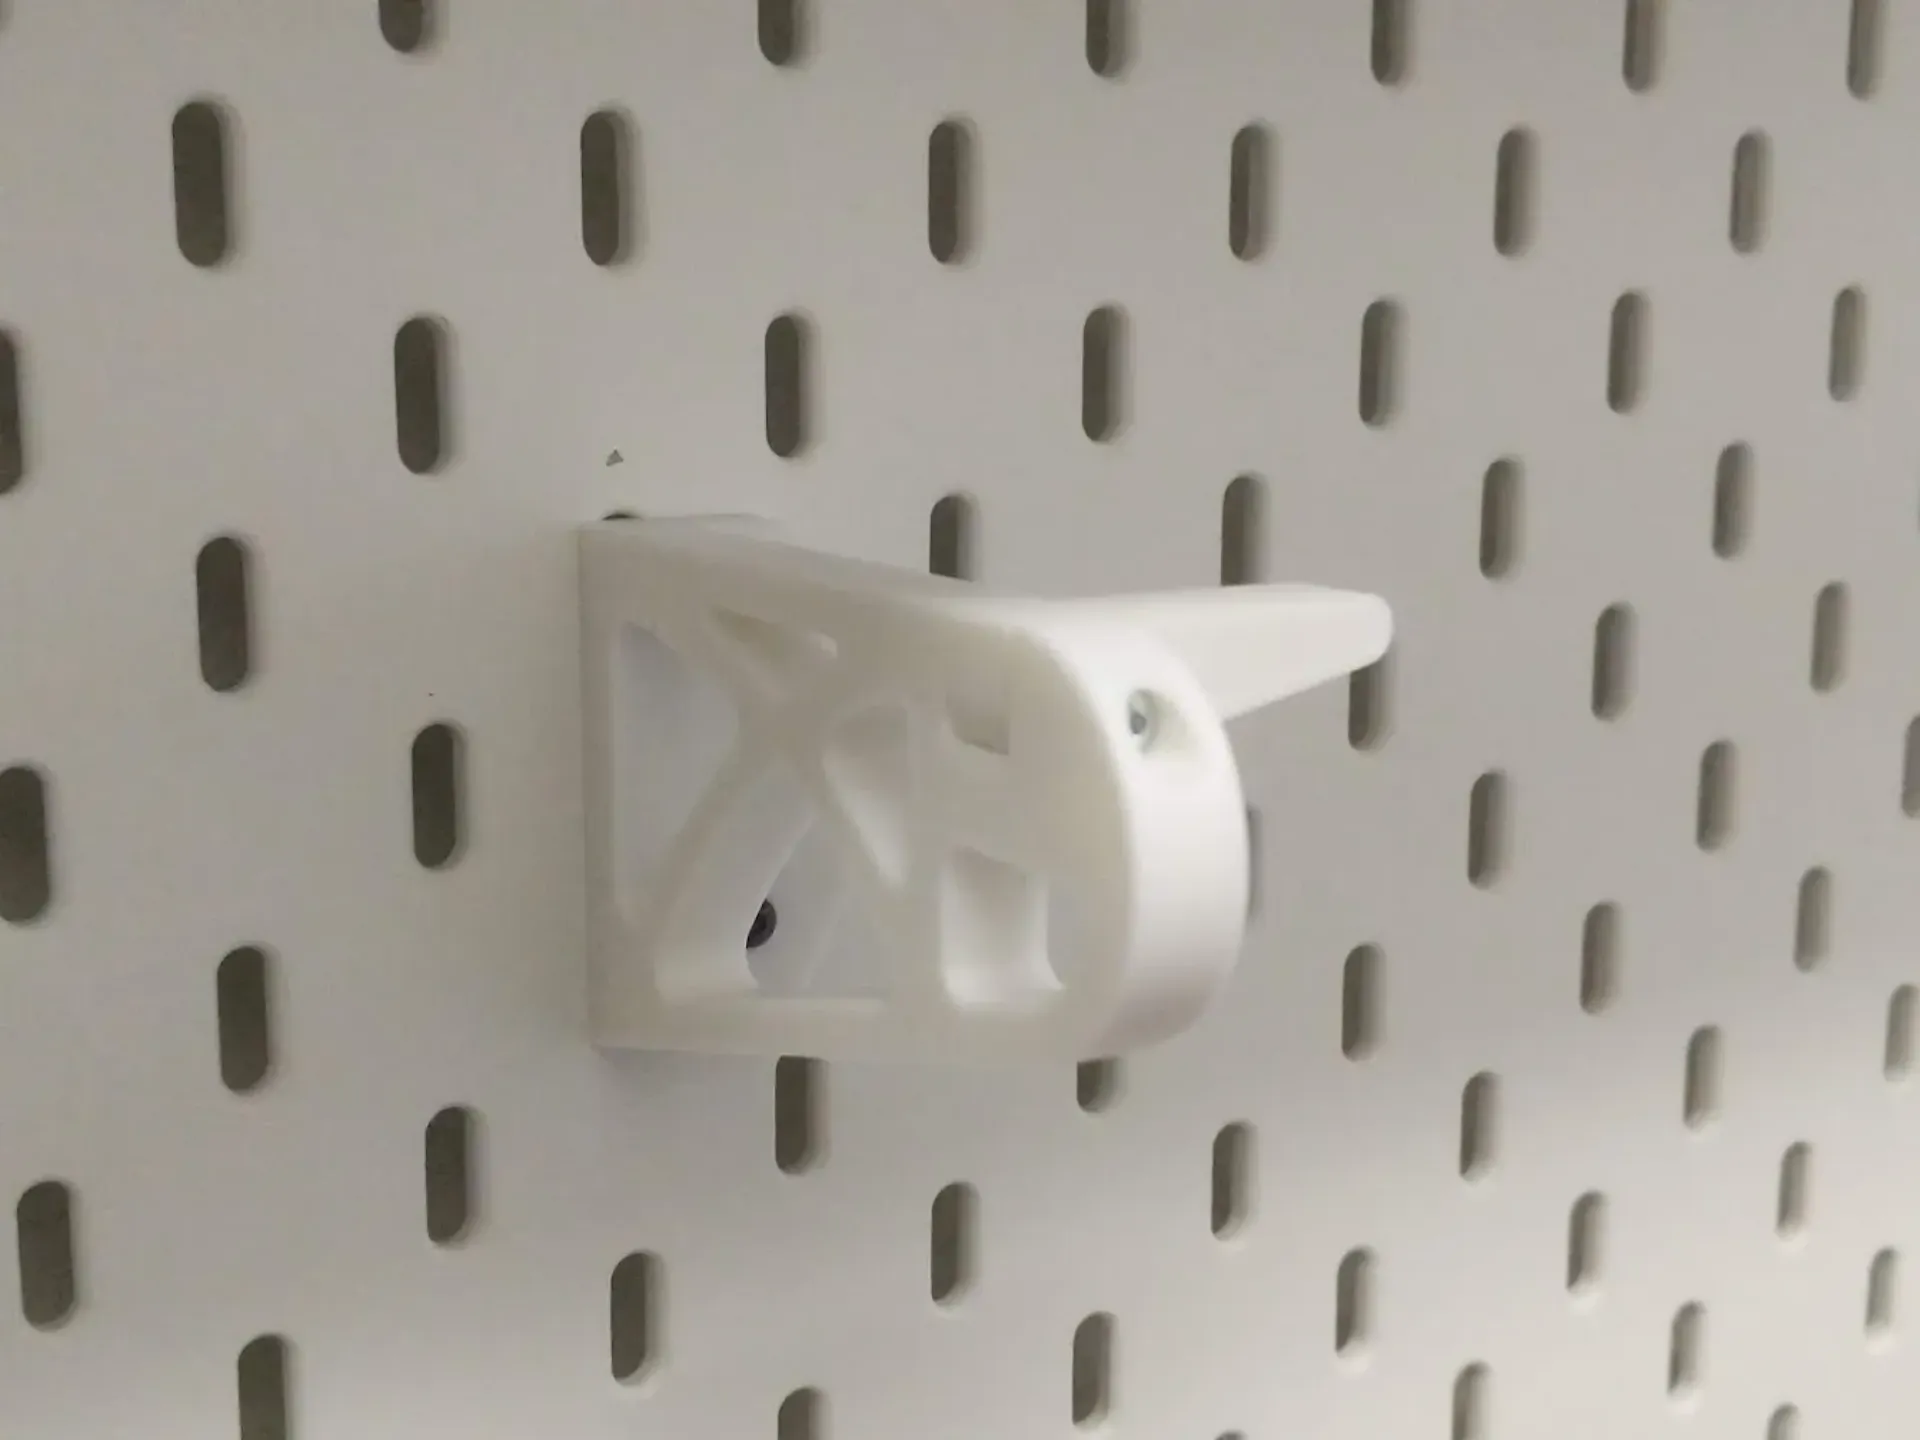
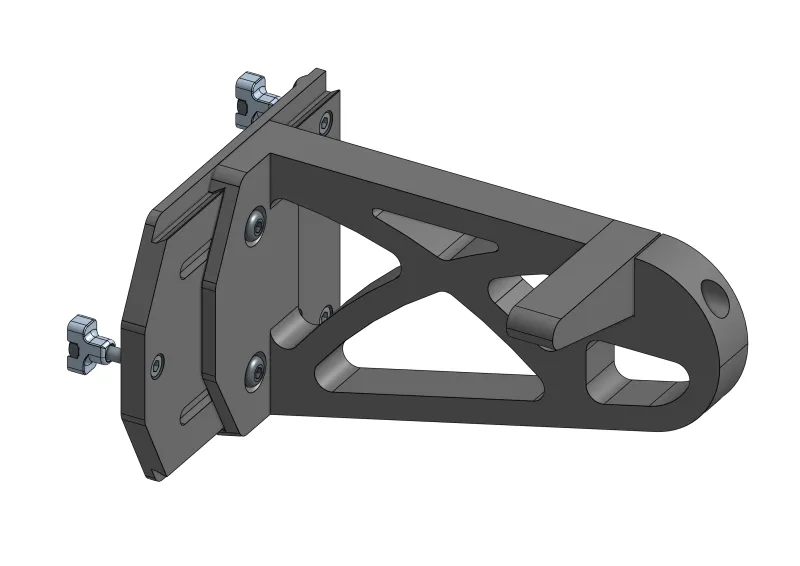
PDFThis is a remix of the amazing Quick-Change Paper Towel Wall Mount by DanPDK modified to work with IKEA SKÅDIS pegboards.
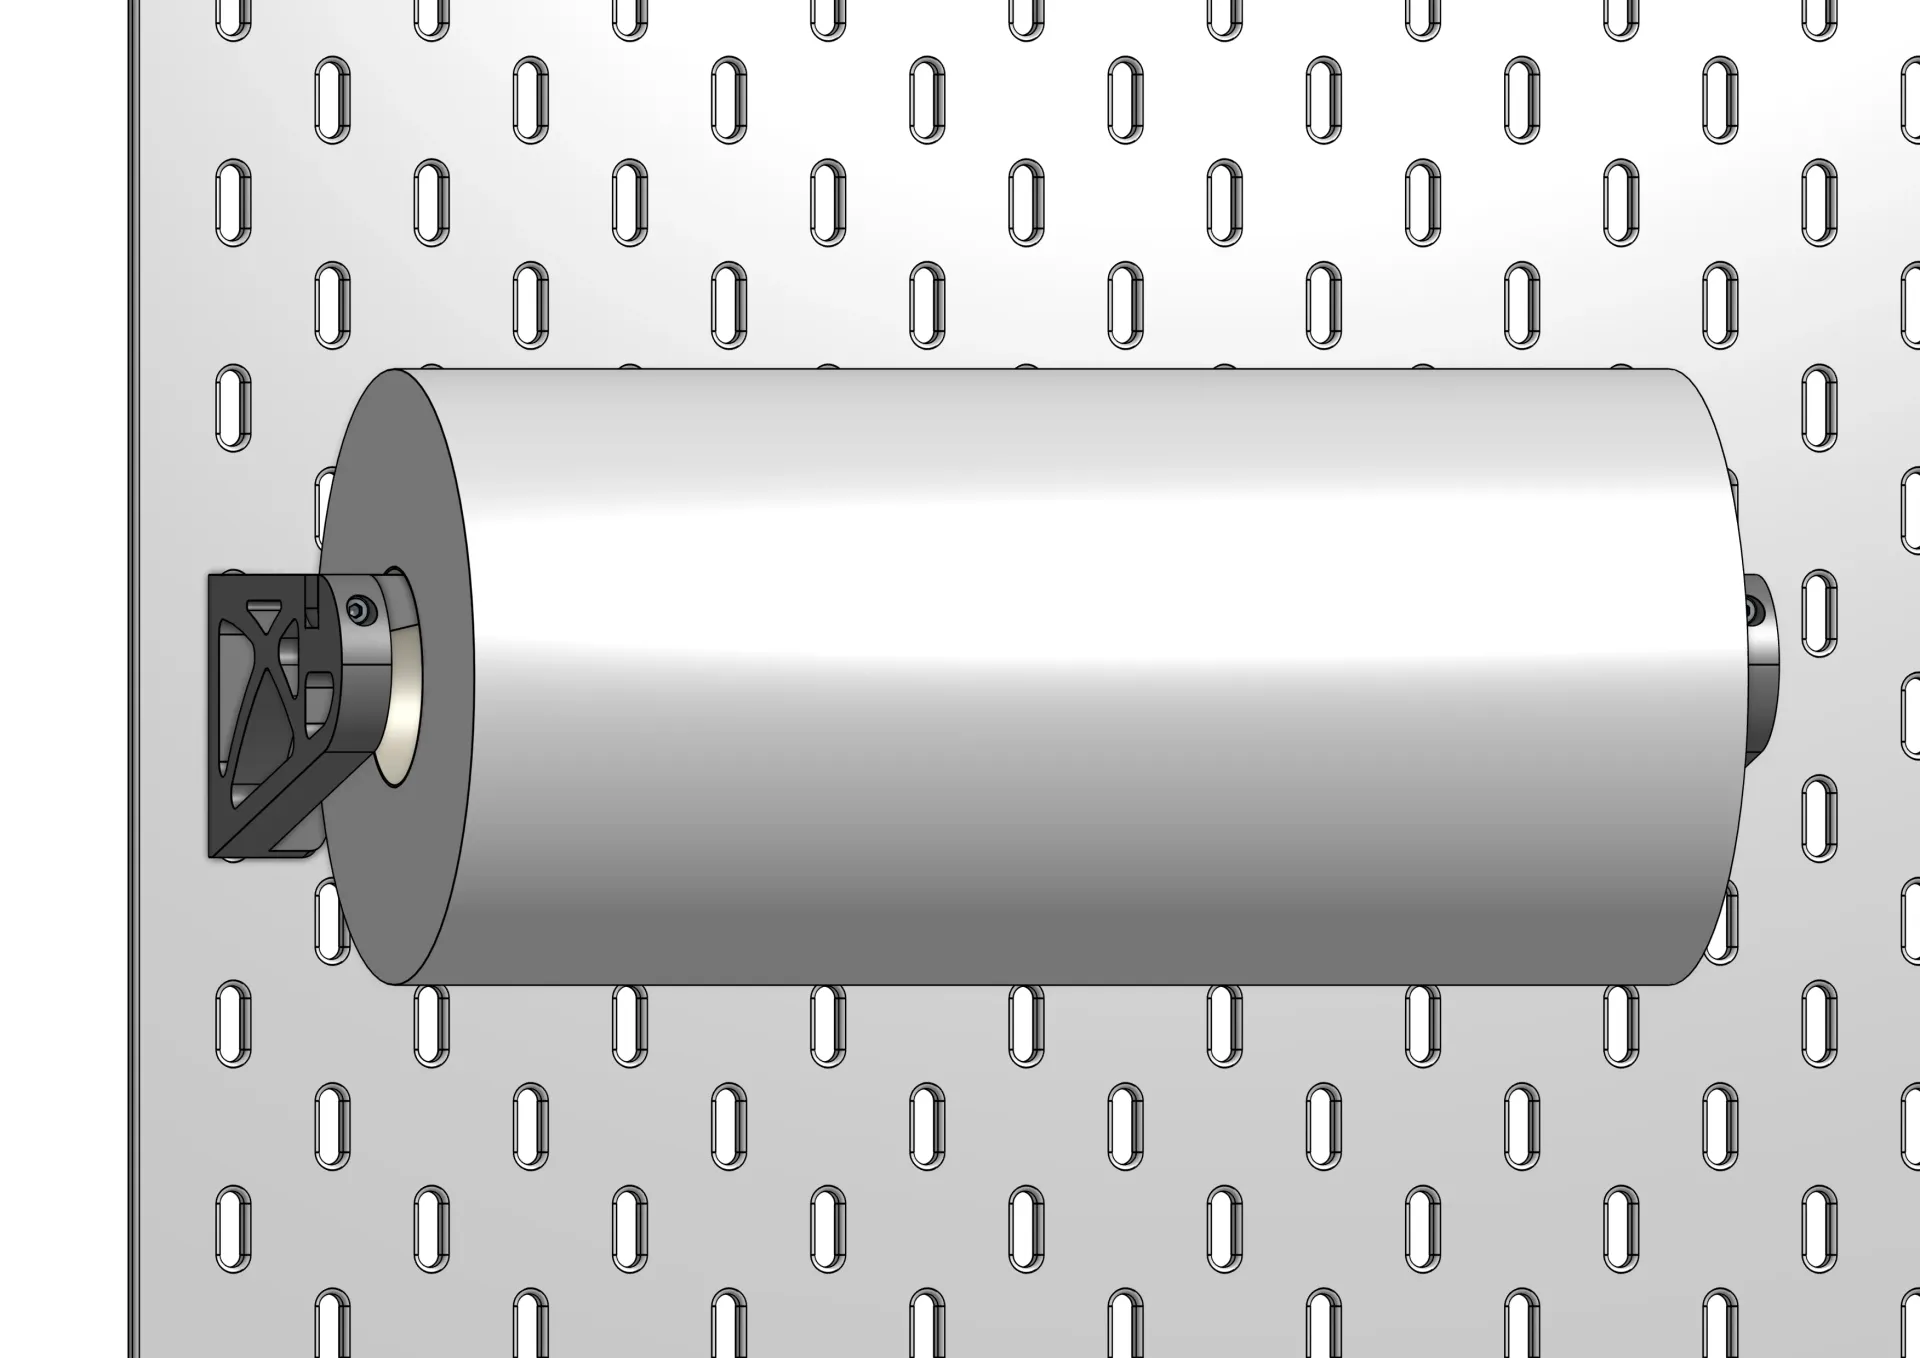
It's very sturdy and does not wiggle or wobble. Thanks to the use of T-Nuts, it is very securely mounted and easy to install and remove with a screw driver. It's adjustable to fit most kitchen paper rolls (any length and up to 130mm in diameter).
 | Read more about the Skadis T-Nuts Mounting System and check out the Skadis T-Nuts Collection for more Skadis accessories that use T-Nuts. |
BOM
| Qty | Description | Sourcing |
|---|---|---|
| 6 | M2.5 or M2 16mm Socket Head Cap Screw | Aliexpress |
| 6 | M2.5 or M2 DIN934 Hex Nut | Aliexpress |
| 4 | M3x6mm Button Head Cap Screw** | Aliexpress |
| 4 | M3 DIN934 Hex Nut | Aliexpress |
| 2 | M3x20mm Socket Head Cap Screw | Aliexpress |
** Can be socket head too but button head is nicer.
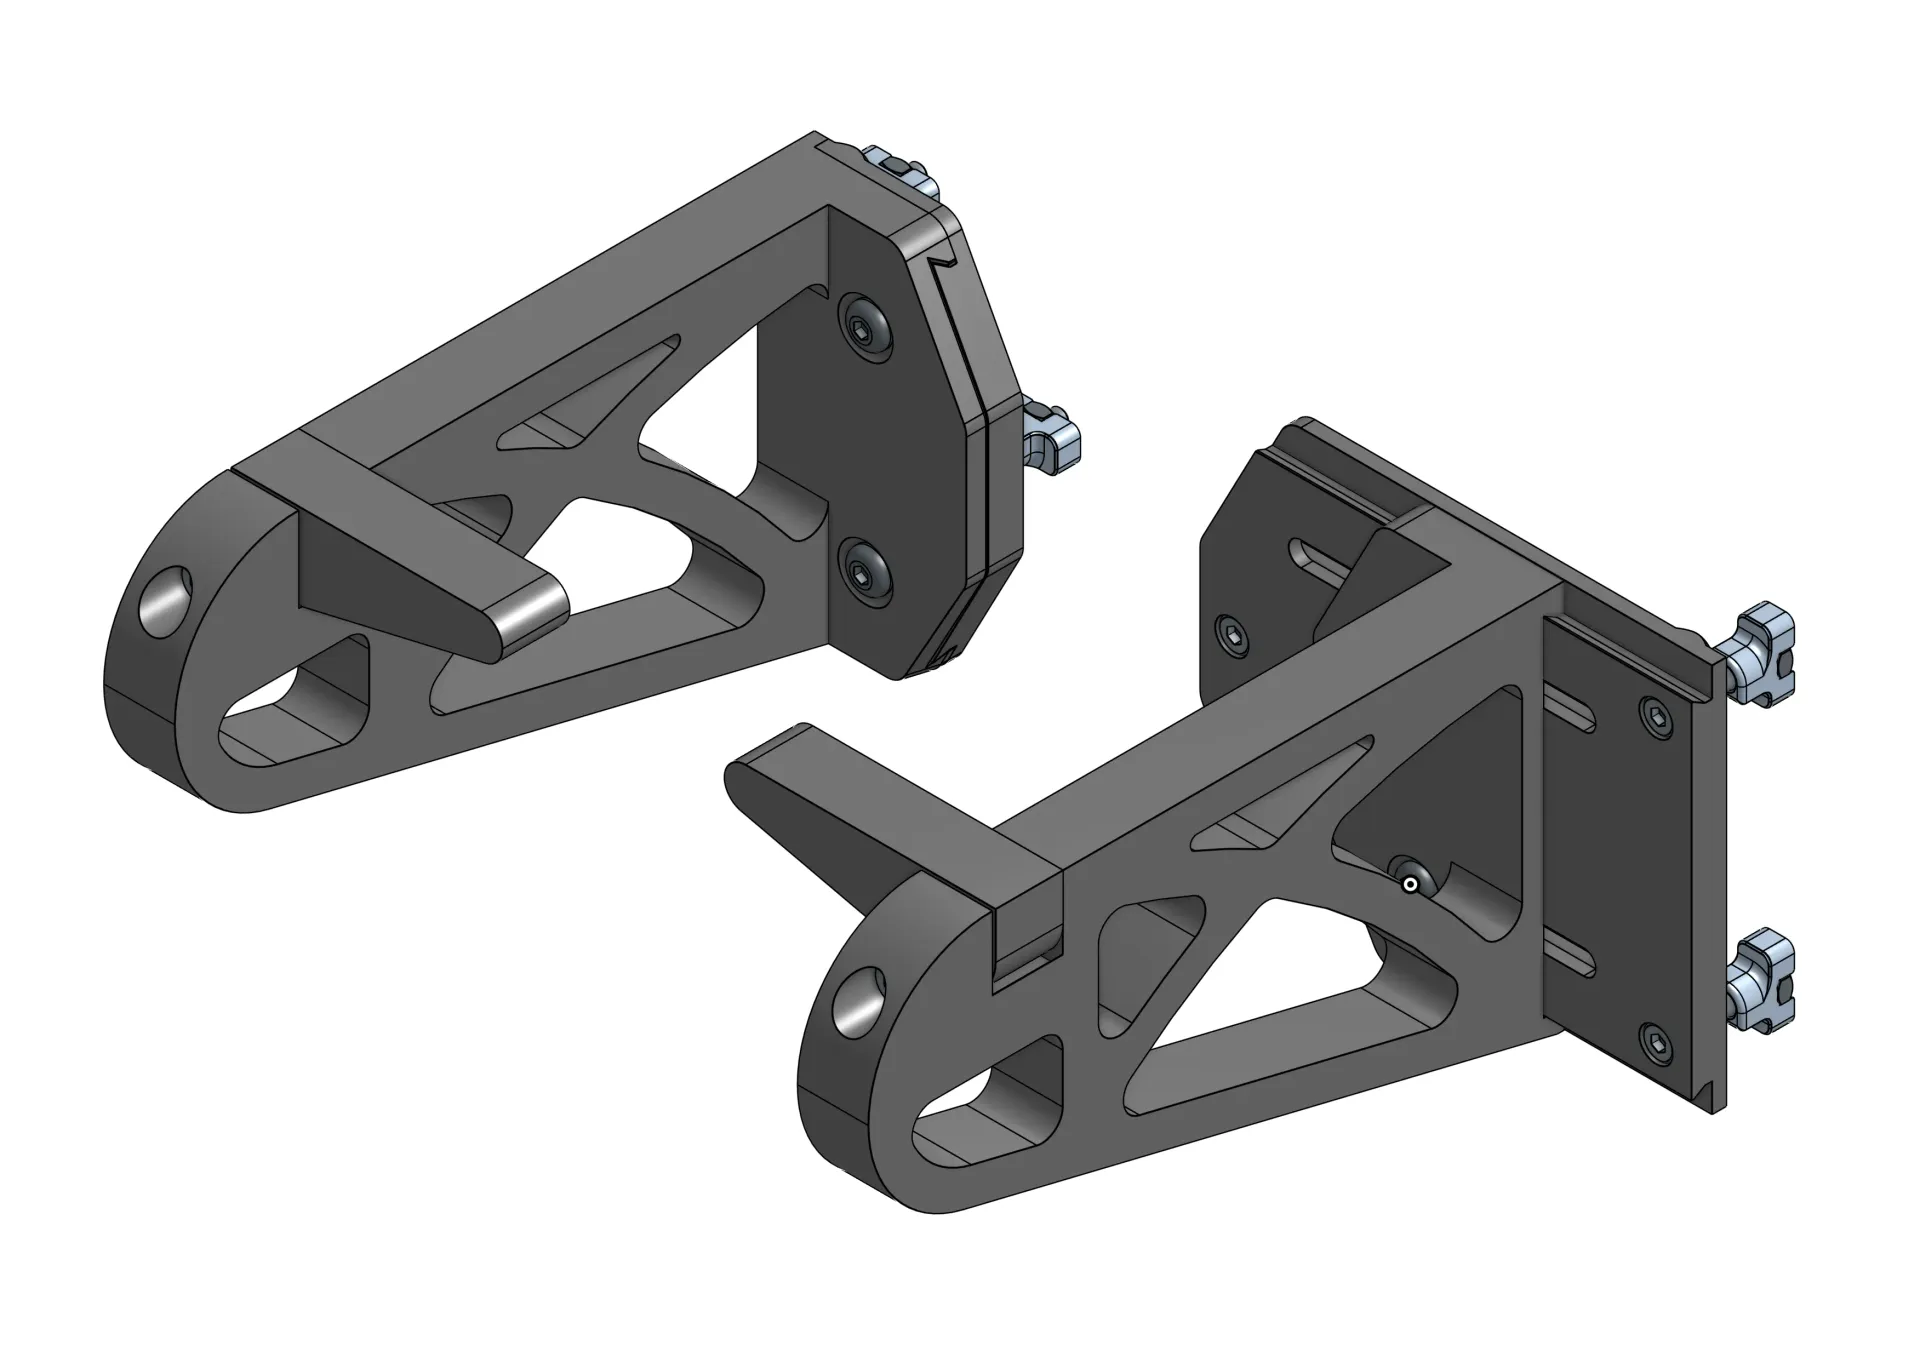
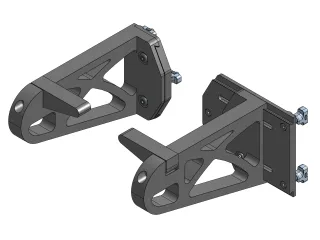
Fixed Arm VS Sliding Arm
You have the option of using two fixed arms (non-adjustable) or one fixed arm and one sliding arm, which should accommodate any size of paper roll.
Fixed arms on both sides is ideal if the width of your paper roll is roughly 100, 140, 180, 220, 260, 300, 340, etc. (increments of 40mm) millimeters in width. If your roll is in between sizes use a sliding version on one side.
The sliding arm can slide up to 40mm so you only need adjustability on one side. The other side can use a fixed arm.

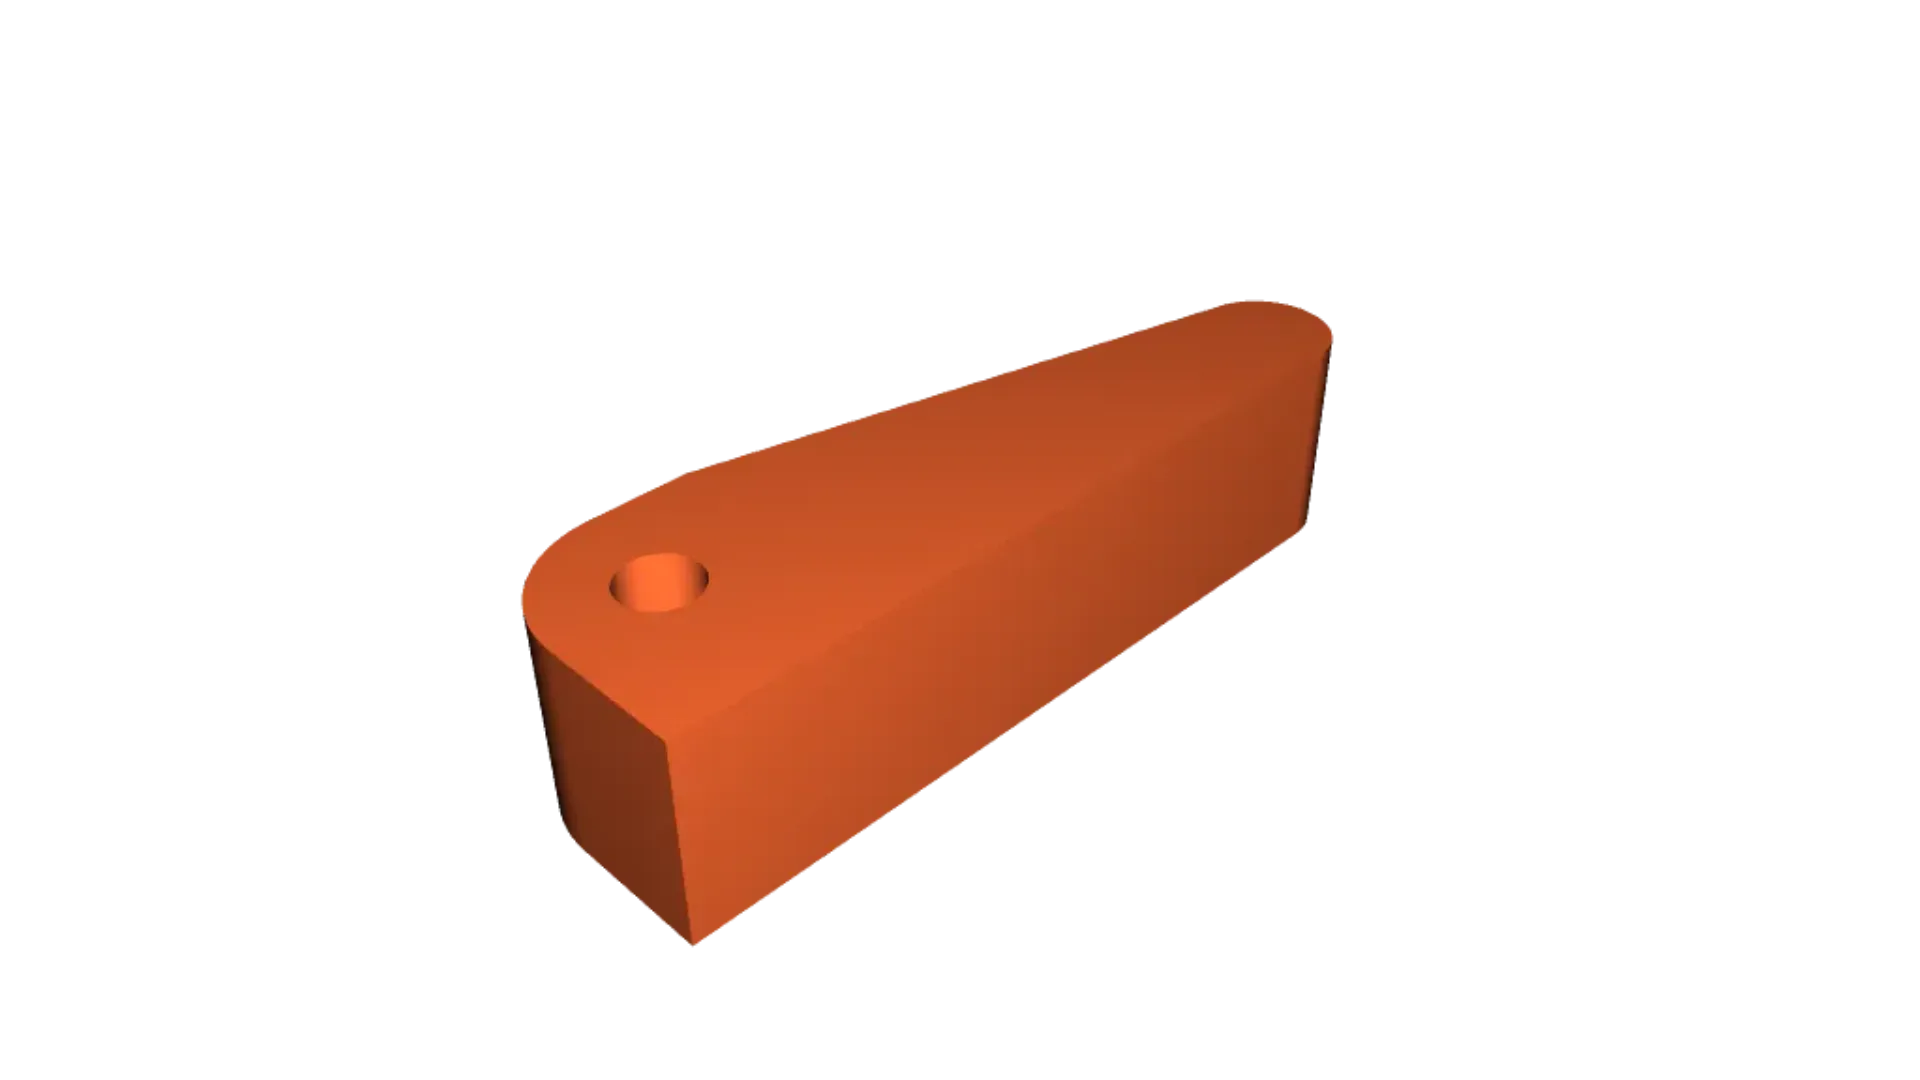
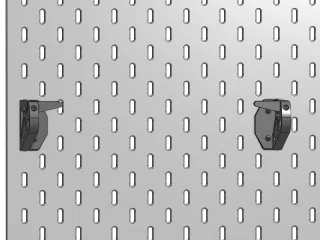
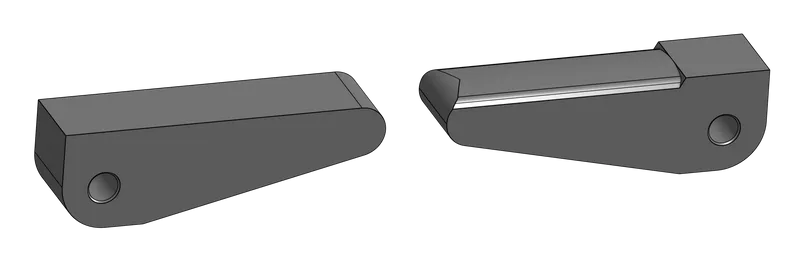
Alternative Flapper
Thanks to feedback from Superjanneke, there are two versions of the flapper. The original flapper with sharp edges (left) and a variation with a rounded top and edges (right) that reduces friction on the paper roll.
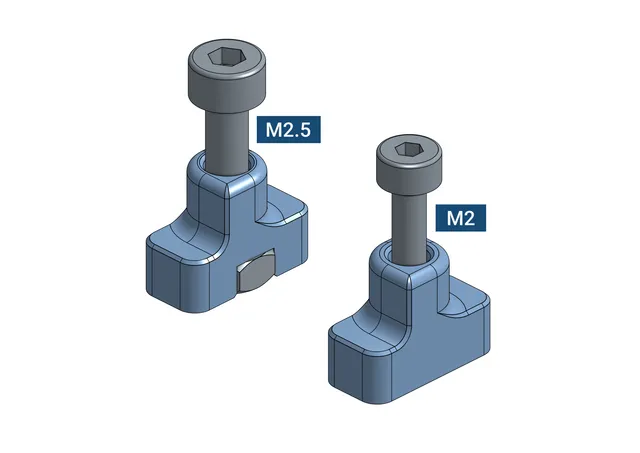
M2.5 or M2 Versions
The recommended screw diameter for attaching the mounting plates to the Skadis pegboard is M2.5 as they are stronger and the screw heads are wider which distribute the compression load over a wider are on the printed part.
However, sometimes M2 screws are easier to source locally than M2.5. In that case, use M2 hardware and print the parts that end with “M2”. Only the Skadis T-Nut and the Mounting Plates are different depending on the screws you use. The Arms and Flappers use M3 hardware.
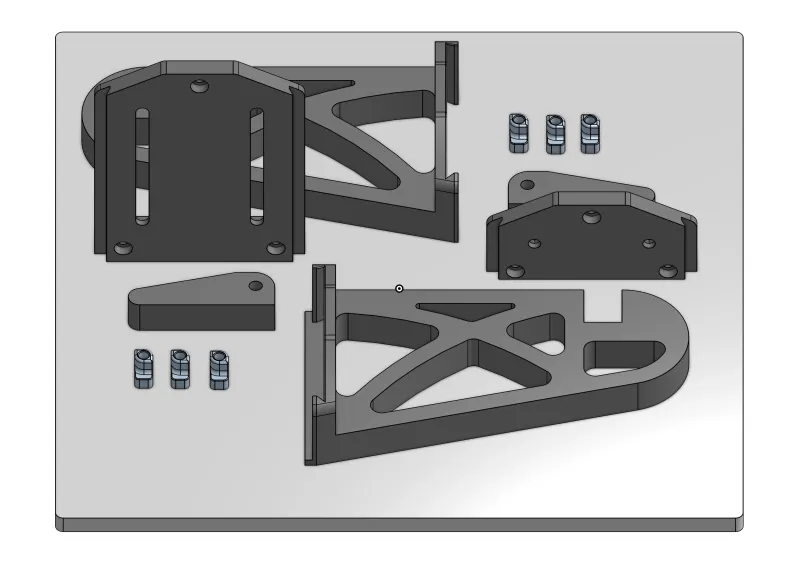
Printed Parts
You can use two fixed arms if your paper roll fits perfectly between the arms. ~260mm roll width and any 40mm increment works perfectly (tested with 257mm paper roll).
If your roll is in between the sizes you can use one fixed arm and one sliding arm.
Fixed Arm (per arm)
| Qty | Part | Download |
|---|---|---|
| 3 | Skadis T-Nut (M2.5 or M2) | Download here |
| 1 | Mounting Plate Fixed Left or Right (M2.5 or M2) | this project |
| 1 | Arm Fixed Left or Right | this project |
| 1 | Flapper Left or Right | this project |
Sliding Arm (per arm)
| Qty | Part | Download |
|---|---|---|
| 3 | Skadis T-Nut (M2.5 or M2) | Download here |
| 1 | Mounting Plate Sliding Left or Right (M2.5 or M2) | this project |
| 1 | Arm Sliding Left or Right | this project |
| 1 | Flapper Left or Right | this project |
Printing
Note that your printer will need to be well calibrated in order to achieve the tolerances to slide the Arm over the Mounting Plate. Over extrusion might lead to bad fit. If you can't slide the Arm over the Mounting Plate file, remove some material from the Mounting Plate using sandpaper or a file until the parts fit together nicely.
Settings
- Material: Anything you want (compensate for shrinkage if necessary)
- Extrusion width: 0.4mm
- Layer height: 0.2mm
- Perimeters: 4
- Infill: 20% or more
Part Orientation
All the STL files are pre-rotated and you can print them the original orientation. Depending on your printer it might be good to print the T-Nuts separately and a little slower. You can use a brim for the Mounting Plates.
Assembly Fixed Version
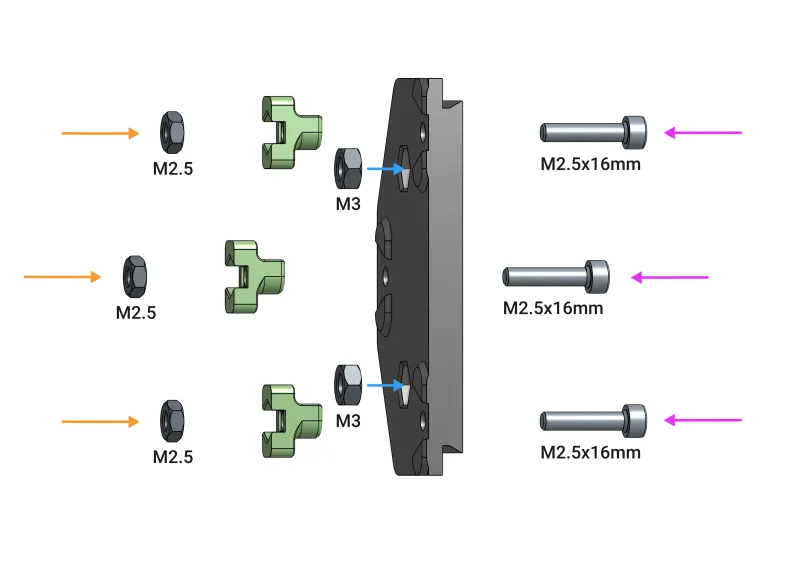
Note: In the following instructions and illustrations M2.5 hardware is used for the T-Nuts. If you're using M2 hardware use M2 nuts and bolts instead of M2.5.
Step 1
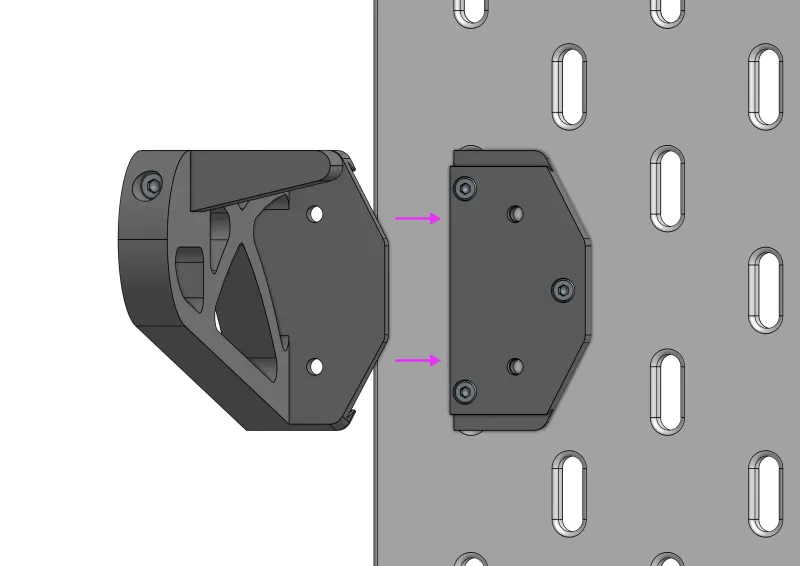
- Insert the M3 nuts into the back of the Mounting Plate.
- Stick the M2.5x16mm screws through the 3 holes in the Mounting Plate as shown.
- Install the M2.5 nuts in the in the T-Nut and thread them on to the M2.5 screws. Keep them loose.
- Repeat for the other Mounting Plate.
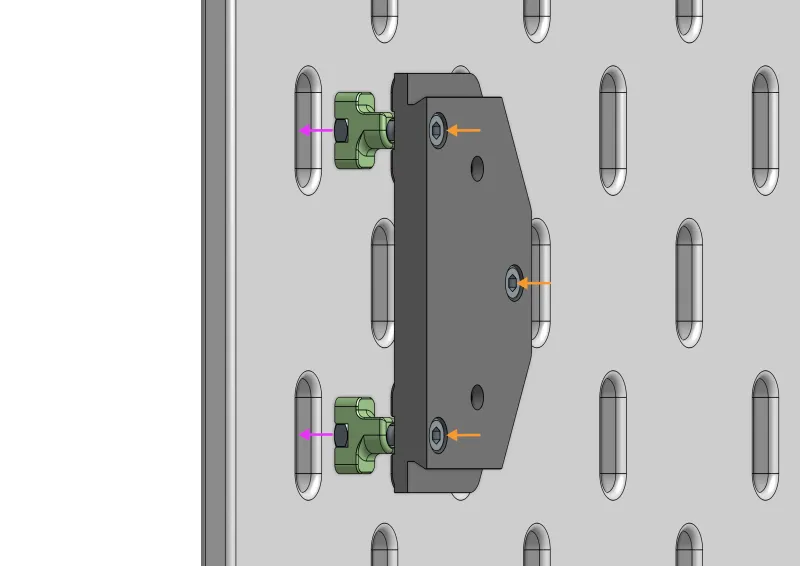
Step 2
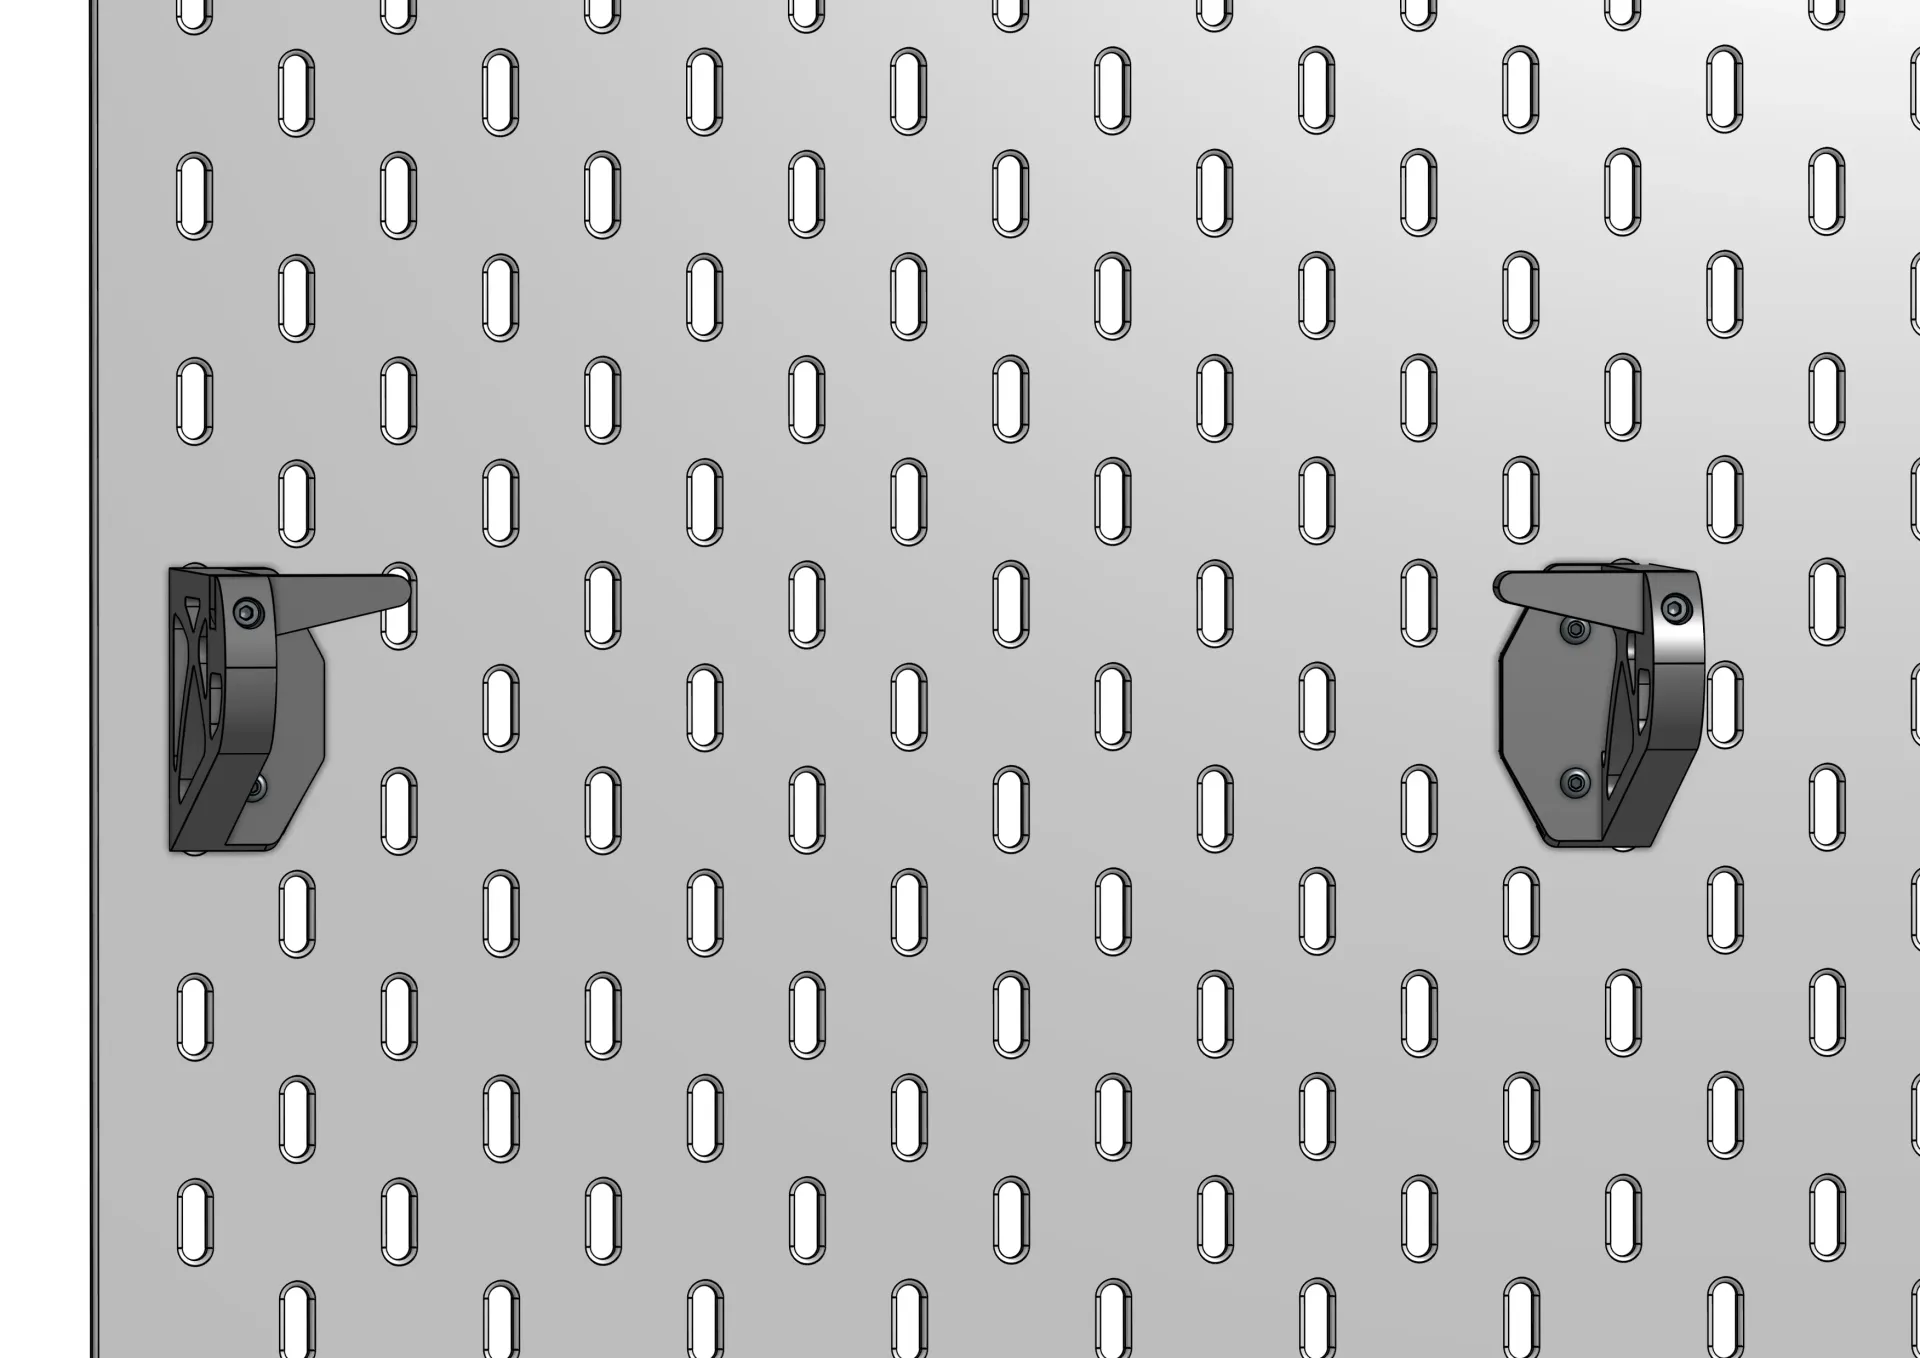
- Stick the T-Nuts through the holes in the Skadis pegboard.
- Press the Mounting Plate against the pegboard. It should self-align so that the screws are in the center of the holes.
- Tighten the M2.5 screws.
Step 3
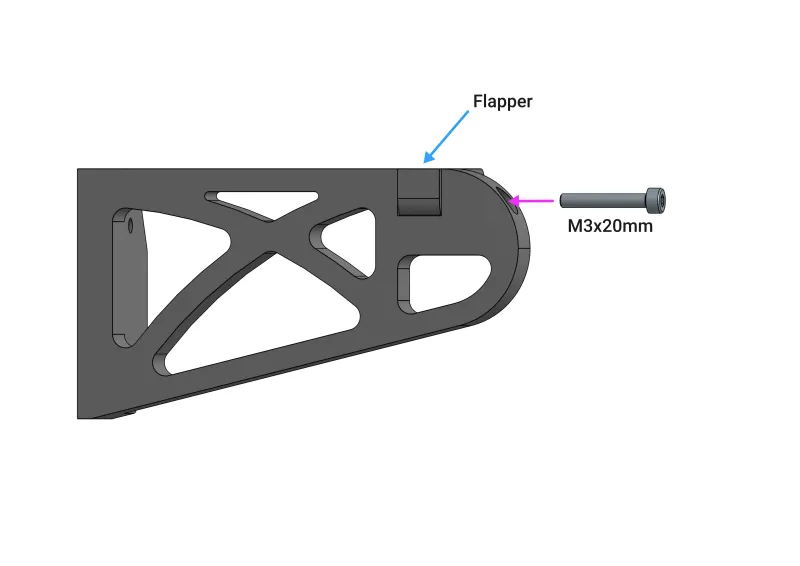
- Install the Flapper on the Arm using the M3x20mm screw as shown. Do not over-tighten the screw.
Step 4
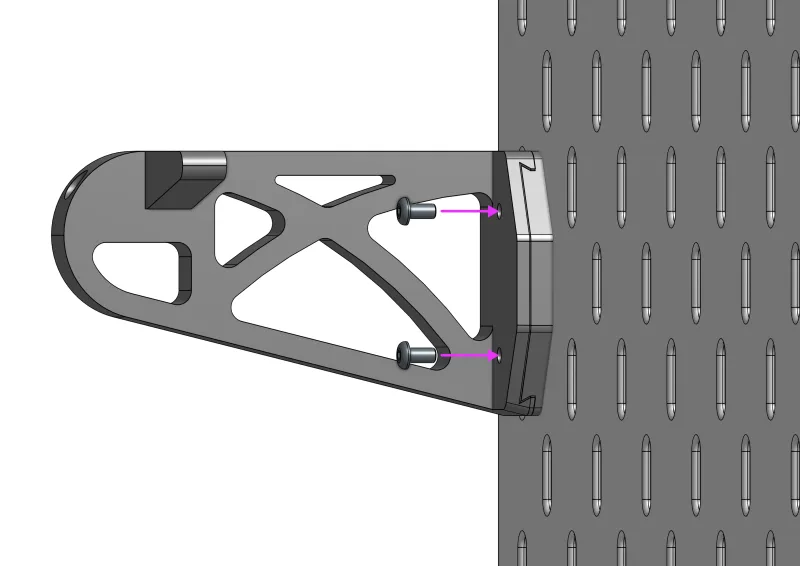
- Slide the Arm on to the Mounting Plate as shown.
Step 5
- Secure the Arm using M3x6mm (or M3x8mm with washer) screws and tighten them against the M3 nuts on the underside of the Mounting Plate.
Step 6
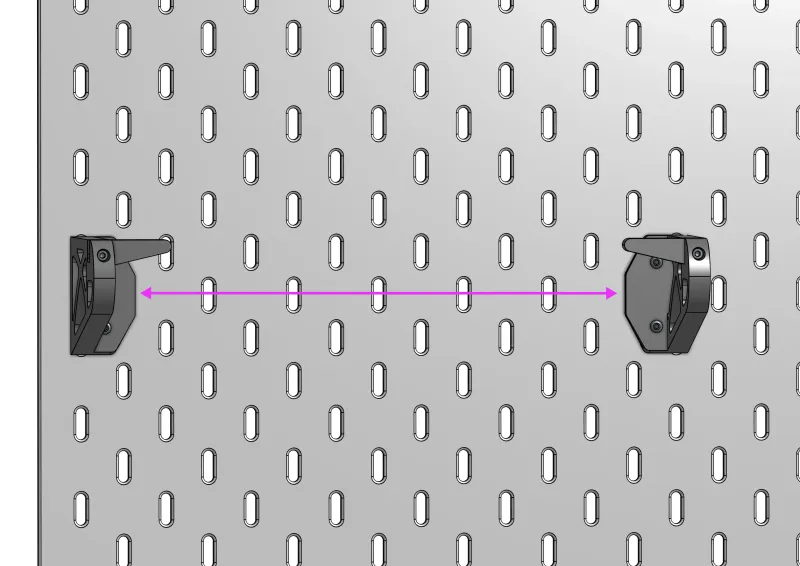
- Repeat step 2 for the other Mounting Plate.
- Install the Mounting Plate in the correct distance for your paper roll.
- Repeat steps 3 through 5 for the other Arm.
Assembly Sliding Version
Assembly of the sliding version is very similar to the assembly of the fixed version. Please refer to the instructions above.
The primary difference is that you should fully assemble the Arm and Mounting Plate before you install it on the pegboard.
- Insert the M2.5 screws into the Mounting Plate and install the T-Nuts.
- Slide the Arm on to the Mounting Plate as shown.
- Install the M3x6mm screws and nuts and leave them loose so that the Arm can still slide on the Mounting Plate.
- Slide the Arm to the center of the Mounting Plate so that the M2.5 screws are accessible.
- Install the whole assembly on to the pegboard and fully tighten the M2.5 screws.
- Slide the arm to the desired position.
- Fully tighten the M3 screws.
Tags
Model origin
The author remixed this model.


Differences of the remix compared to the original
.