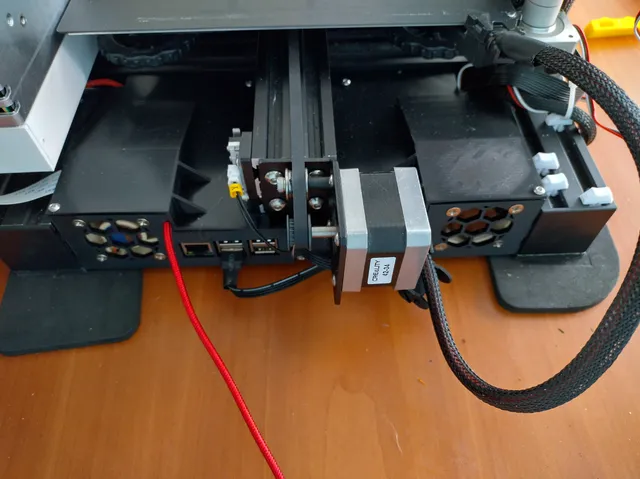
Ender 3 rear electronics case with additional 40mm fans

A modification of the original Ender 3 (pro) rear electronics case remix with improved cooling
87
249
2
2275
updated December 15, 2022

Makes

Comments

I have to agree with "nightmare to install." Once everything is worked into place it looks nice and clean, but the effort of getting there is a huge hassle, and all of the openings for cables are just a little too small.

I had to remove my Y-axis motor to fit everything in, because too much is mounted directly beneath it, and the stock cable for the screen just barely reaches that far. (edited)
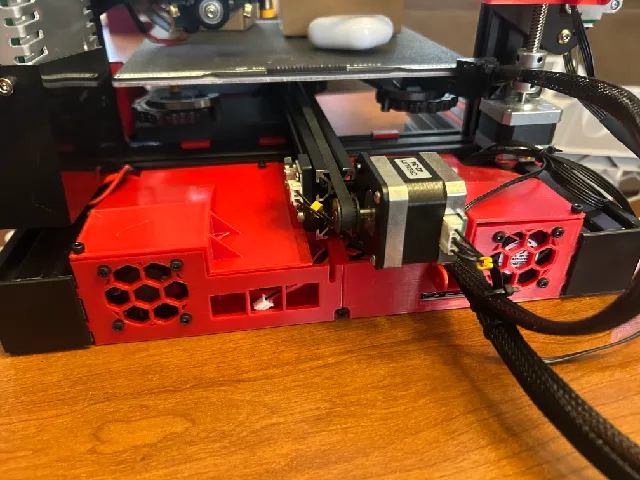
@Arcayenneist Issues I'm having:

1) Different screws between the two different top mounting points.
2) Not enough room for the wires.
3) SKR mounted directly beneath Y-motor, especially right where the screen and BLTouch connect makes these the two worst connections to have to work around, as the screen cable is too short.
4) Open section under the Y-axis extrusion allows stuff to fall in - like screws of the Y-axis motor when trying to reinstall it, meaning I then have to pull off the covers again, remove the BLTouch and screen cable again.
5) Had to cut away sections to get the Pi to fit through the opening. (edited)

I'm looking at doing this upgrade, but I'm curious and relatively new at doing mods like this - what are the buck converters for, exactly? I thought the SKR could take 24V, and I know most PIs can. Would the 5V one be for LEDs?

@Arcayenneist Mainly I wanted to use 12V silent fans and 5V for the Pi. The SKR stayed at 24V

@Chiral Awesome, thanks! I think I've only got one buck converter, but the BTT Pi I'm using can take 12-24V.

I found it a bit of a nightmare to install, but once everything is installed it looks very nice and it keeps my electronics very cool with 2 noctua fans. I used a dremel to make a small hole for a usb cable to the raspberry pi. Would be nice to have a slot that I could put in a cable extension or something similar. (edited)

I like this design but what kind of supports did you use to print the pieces?

@MrRonco_508317 I used the standard cura supports but I excluded the holes for the screws to combine the left and the right housing. for the upper parts, tree support might be easier to remove after the print.

Great design, but can you make it for SKR E3 Turbo?

@LordKillZone The SKR E3 Turbo has about 20mm more in width and would need a major redesign since it will not fit in between the fan and the raspi.

It will probably wor if you switch to a raspi pi zero 2 W.

@Chiral But fan can be mounted outside of this enclosure. I have mounted like this.

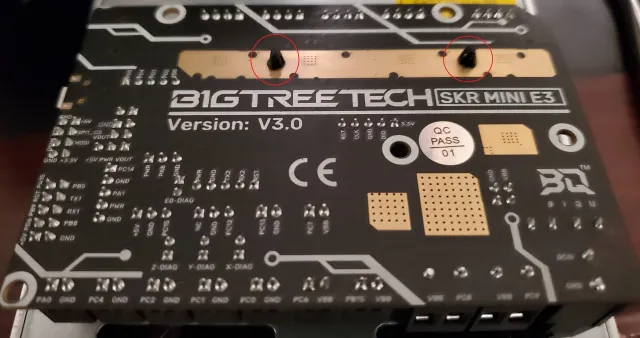
As a warning for others, the SKR Mini E3 V3 has a single heat sink for all of the stepper drivers, and this is mounted to the board with a plastic clip that protrudes about 4mm (3.9 says my calipers) or so through the underside of the board, see the attached image. There is very little clearance from the bottom of this case provided by the mounting standoffs, which means those clips do not have room and you will not be able to mount the V3 without some form of compensation.

I haven't decided if I want to modify the model and re-print that case segment, or simply remove the stock heatsink and replace it with 4 individual heatsinks (like the V2 boards have) since I have some lying around.

It might be worth uploading a version for the V3 (since they seem to be easier to find with the chip shortages) with slightly taller standoffs (4mm's should be fine)

Love this case by the way! I'll be posting a make once I've got everything wired up, but wanted to post this now encase someone else comes along planning on using a V3.

@Ohio_272698 Thank you very much for the feedback and the details. I have added a version with heightend mounting standoffs (4,5mm) This reduces the clearance to the fan significantly and the space for the cabling is also reduced. It should fit but since I have no V3.0 here I cannot test it properly. Perhaps two holes/dents in the bottom surface are a better solution.

All comments loaded