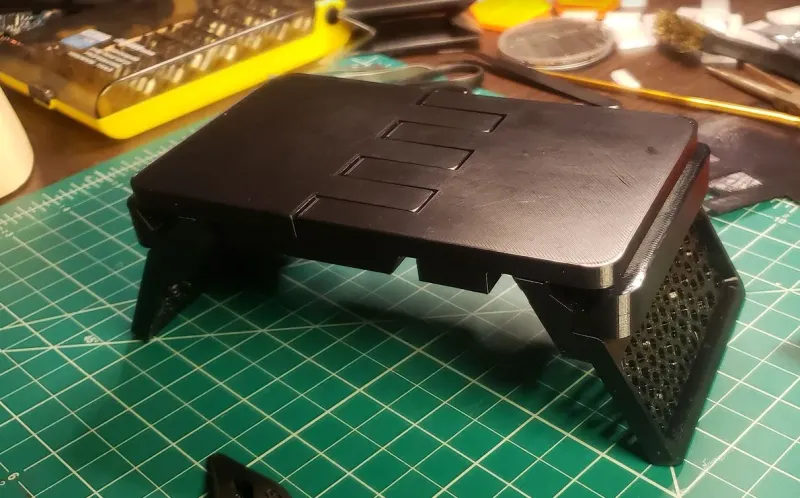
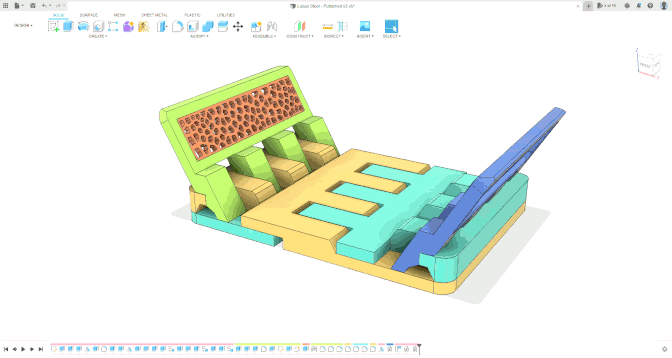
Luban Stool (parameterized & print-in-place with tape)

Description
PDF
Hello!
I really enjoy Grandpa Amu's Lu Ban builds, so I decided to make my own version of Lu Ban's stool.
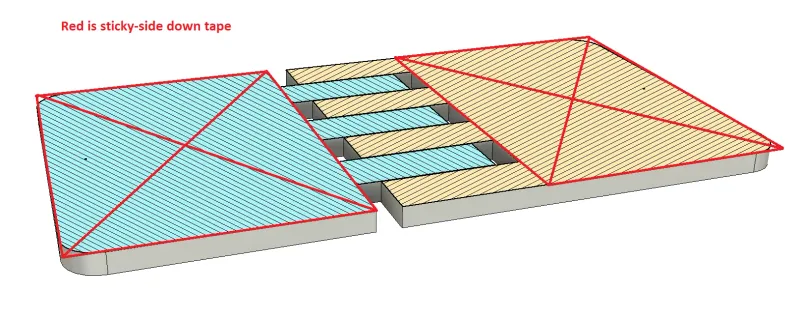
I haven't seen anyone use tape on a 3d print like this, but let me know if someone has. It allows me to print pre-folded flat assemblies and I'm kind of proud of it. The tape is used to separate the layers between parts that are laying on top of each other without support material.
This is my first version of the flat stool so it still needs some work. I made a change to reduce some bridging and now the movement isn't as fluid, but it works. In a future version I want to fix this by constraining the leg and slide movements with a linkage and add a opened/closed passive locking mechanism.
The pauses in the gcode were made with PrusaSlicer, so make sure they work for your printer.
;PAUSE_PRINT
M117 Apply Tape
M601
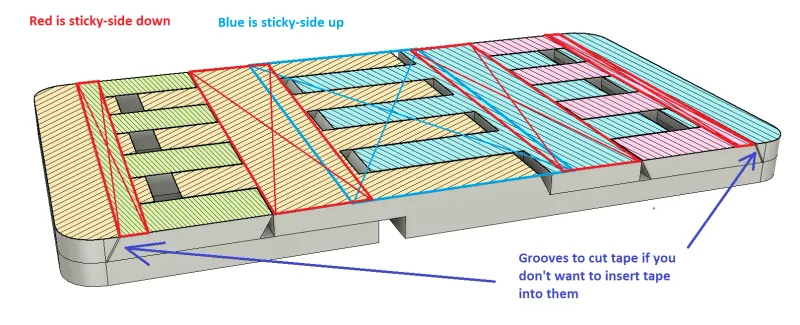
Tape
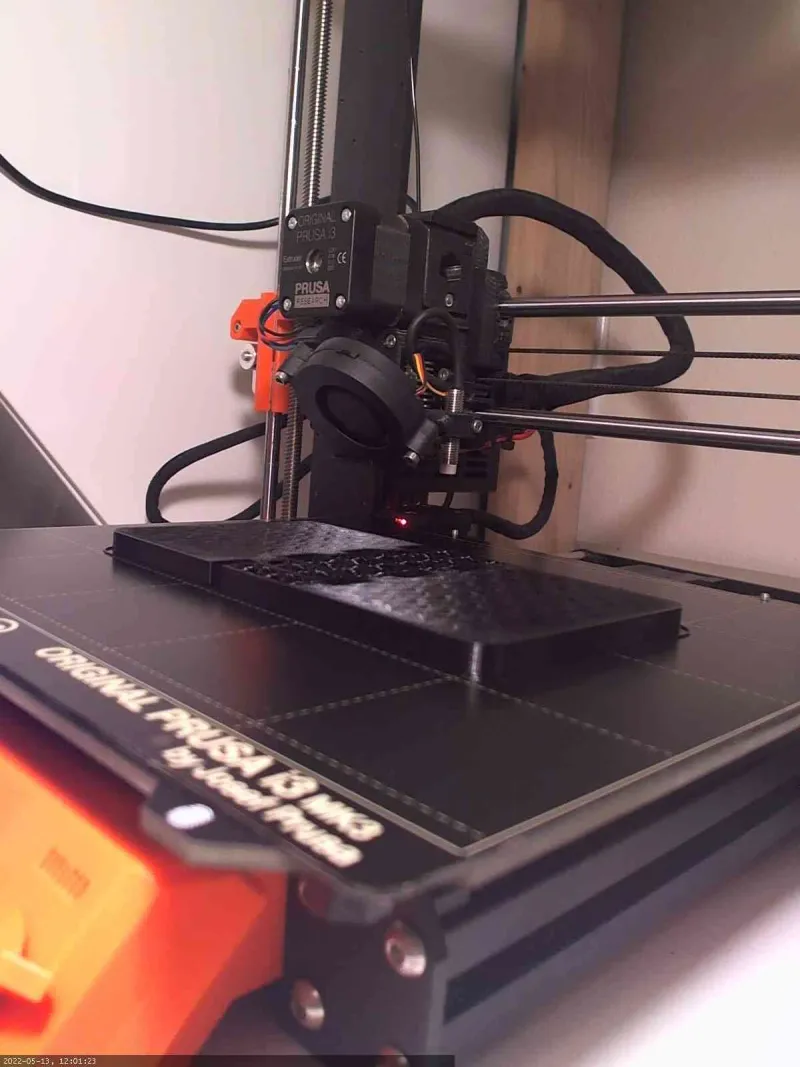
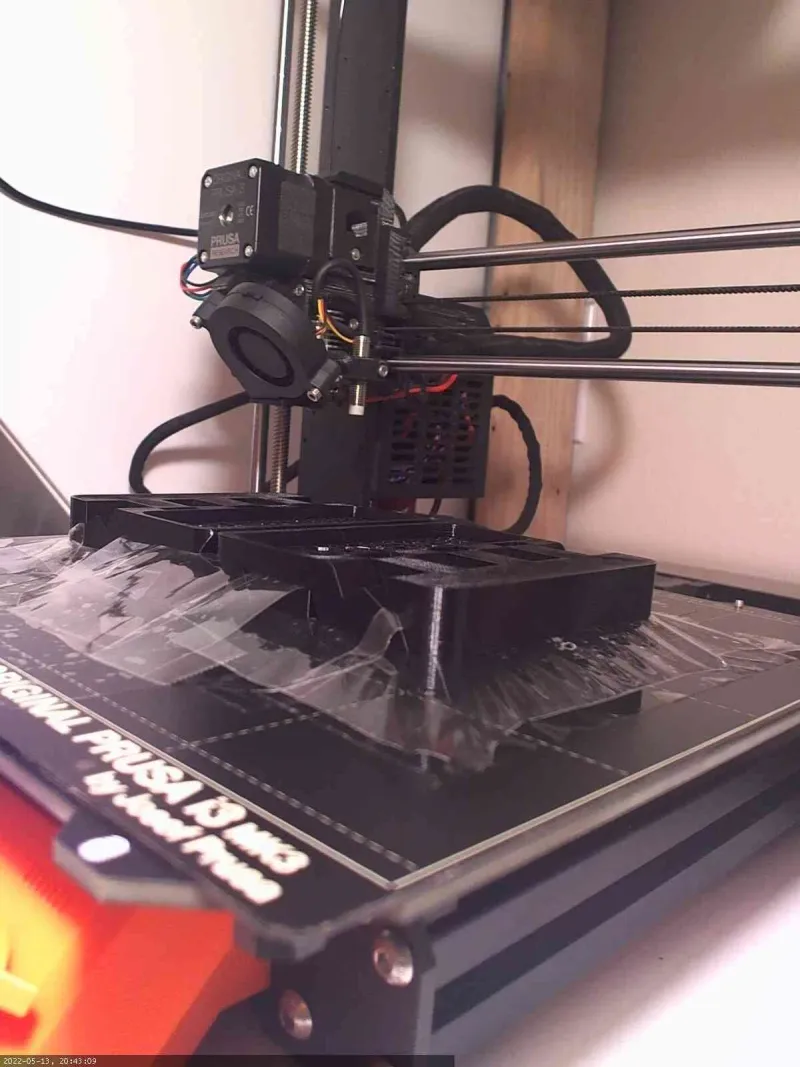
The print has two pauses for when it's time to apply tape to the model. Looking at the front of the model, you can see where the tape is applied from front to back. The model is oriented table top down for printing.

First Pause
The first pause will need 2 large areas covered in tape shown by the red boxes below
All I had was black filament so sorry about the pics.
| Here's the first pause | And the tape applied. |
 | 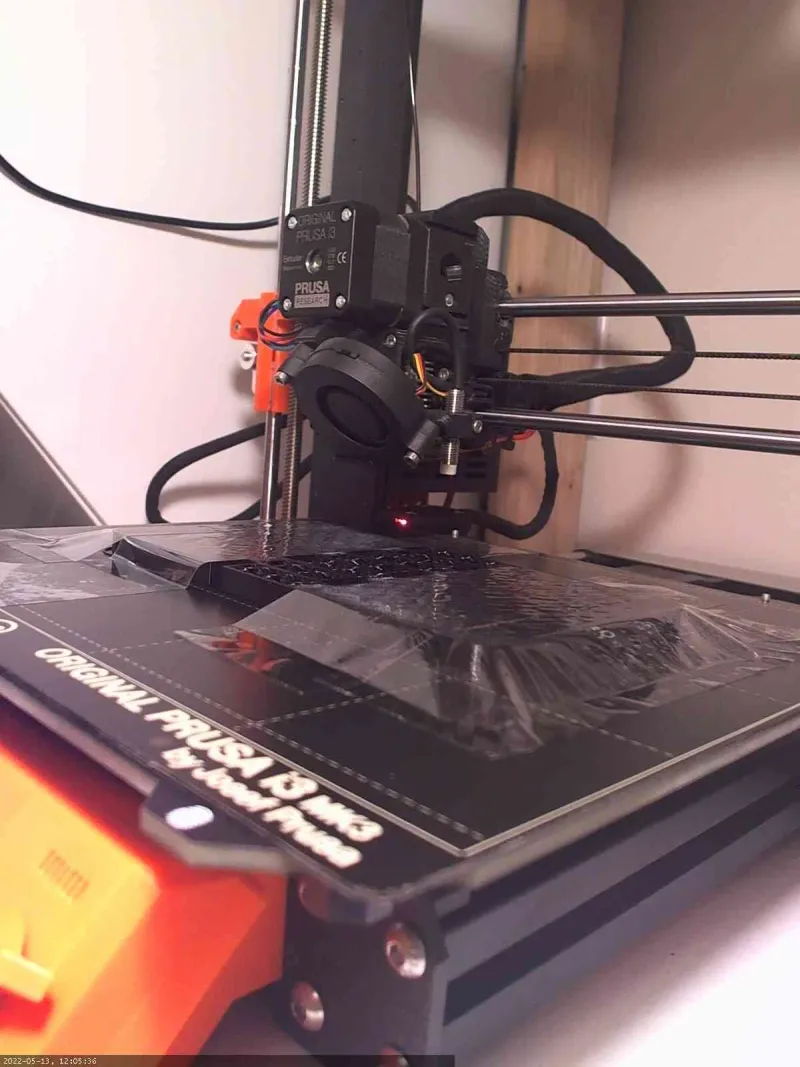 |
Second Pause
The second pause will need 2 narrow strips of tape on each side. There is a groove on both sides of the model that can be used as a guide for a knife to cut the tape to the correct width. If you do this, you'll probably have to break the groove free with a knife later, which isn't that bad as long as your printer is okay.
Or you can cut the tape a little longer than needed (<height/3) and insert the excess tape into the groove. I made these grooves bigger than the standard gap used everywhere else just for this purpose, but it's still awkward to do… a sawing motion helps.
Update: I still needed to cut the grooves even after inserting the tape but it was a lot easier.
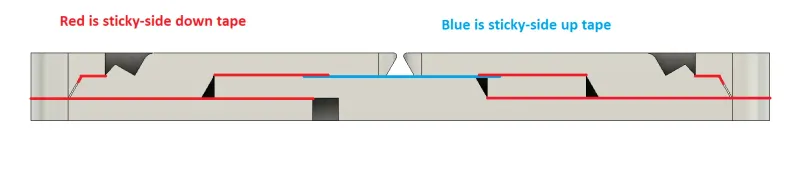
The ends of the sticky-side up tape are taped down to the bed so that the tape covers the central hinge. More tape (sticky-side down) is added on the sides to help hold it down. Leaving some of the sticky-side up tape uncovered stopped the table legs from warping and lifting up for me.
If you skip this and put the tape sticky-side down over the middle hinge, the tape might bind the hinge when separating the parts later.
| Second pause ready | Tape applied |
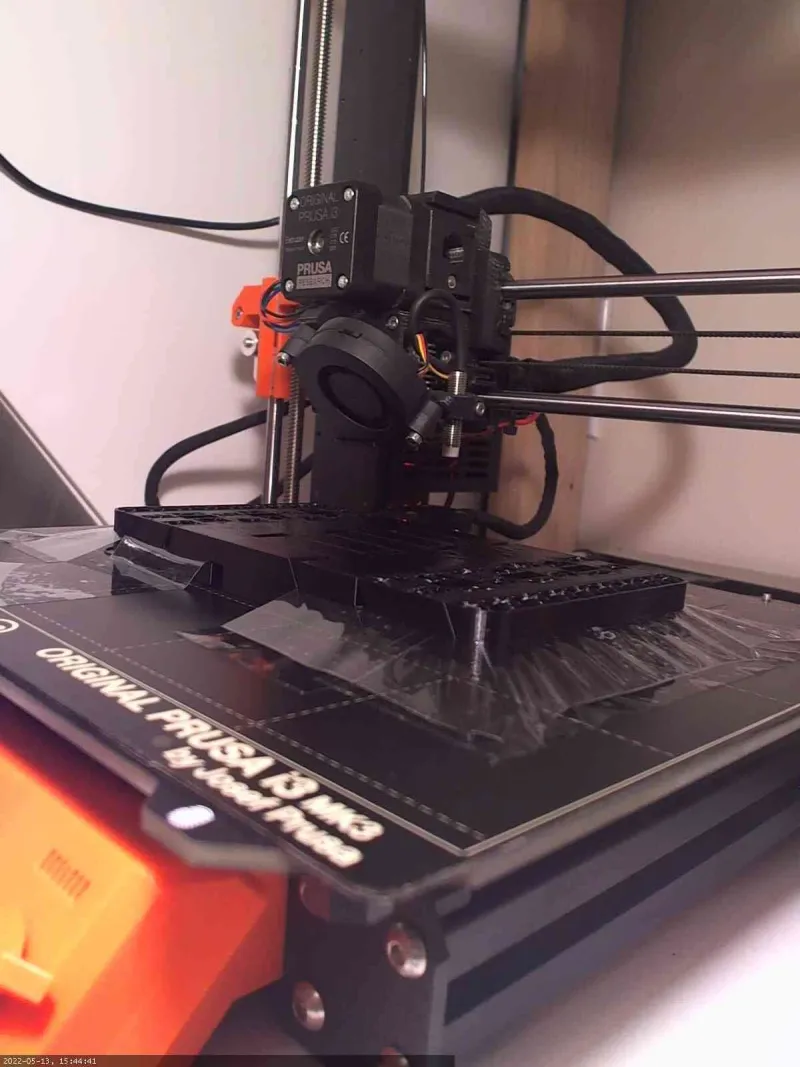 | 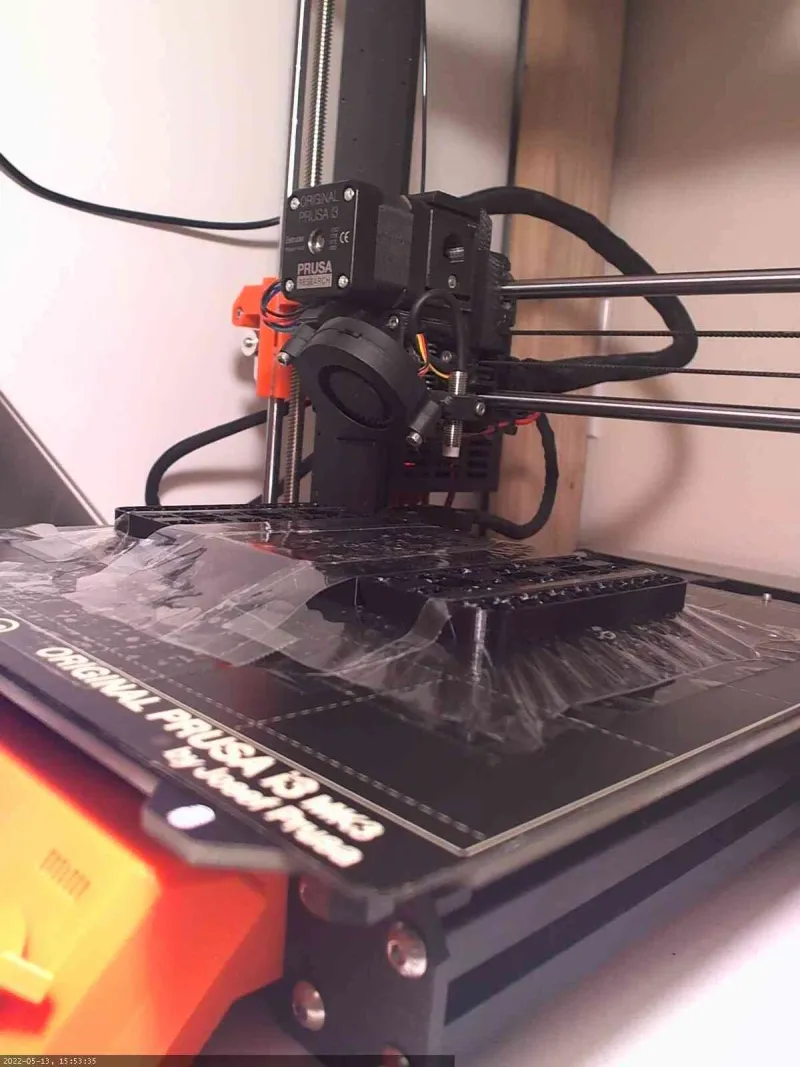 |
| Print finished | |
 | |
| Print removed and tape trimmed almost flush | |
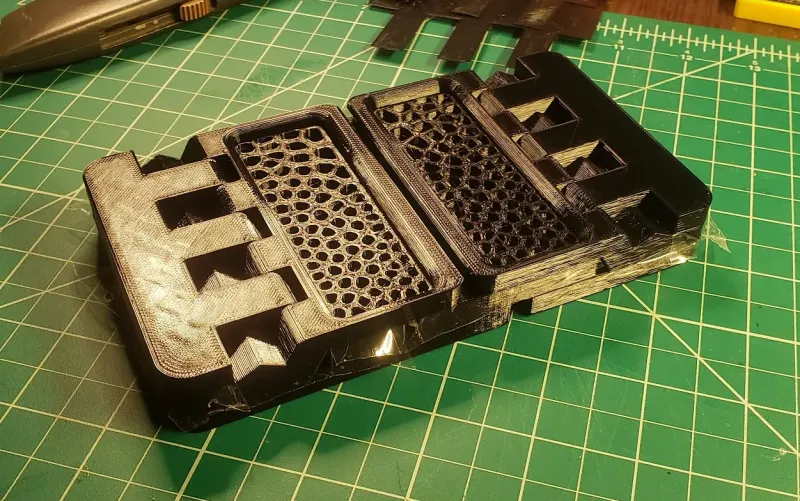 | |
| Breaking 1st pause tape seam.. working toward the middle. Please be careful. | |
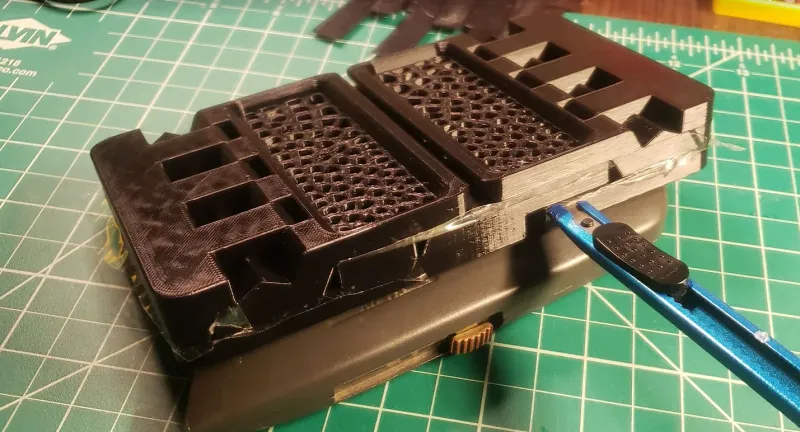 | |
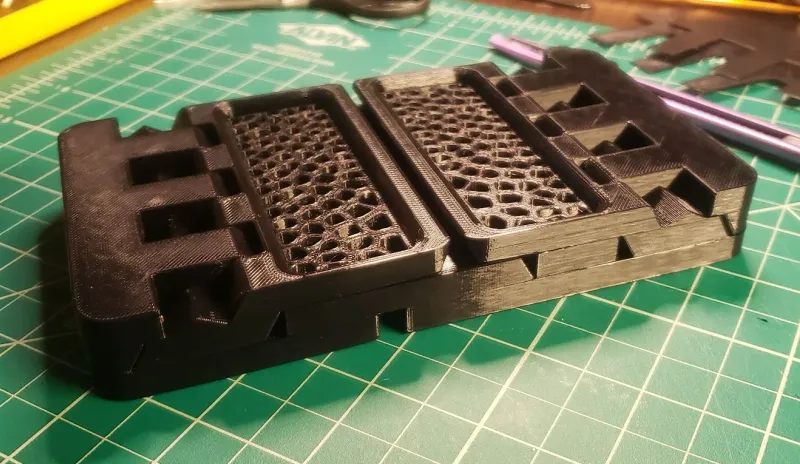
| Breaking 2nd pause tape seam… starting from the middle and working towards the outside. Please be careful. | |
 | |
| After breaking the hinges and removing the tape, you are done! | |
 | |
 | |
Tips
- Make sure there are no wrinkles in the tape.
- If you are printing a large version with really sticky tape, you can use sticky-side up tape underneath the sticky-side down tape to make the parts easier to separate. It lessens the adhesion.
- I didn't have any issues with the filament sticking to the tape, but I used a towel to press the tape down instead of my finger.
- After printing, trimming the tape almost flush with the model keeps the tape from getting in the way when separating the parts but still allows you to find the seam to insert the knife.
- Inserting a long snap-off blade knife in the tape seam for the large tape areas should be enough to separate the parts. It makes a loud pop sound when you get to the hinges.
- It should feel like cutting butter.
- If you use a lot of force, the snap-off blade might snap off so be careful.
- If you have to use a lot of force then something is wrong and your print is probably warped, the tape wasn't applied correctly, or the gaps aren't big enough for your printer.
- If the print isn't separating and you use something with a thicker blade (>0.5mm) or try to pry them apart, you might bend the parts.
Model Info
Size
- The model is sized 175mm (width) x 130mm (depth) x 21mm (height) so it will fit on the MK3S and Mini.
- The F3D file is parameterized, so different widths, heights, depths, and gaps can be created.
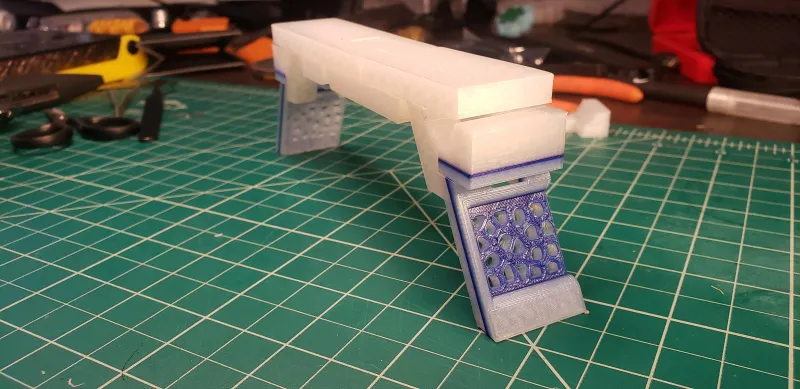
- I printed different sizes when testing so some of the images shown aren't the same size as the model.
- This model will not scale due to gaps on the X & Y axes
- If you resize the model and want to keep the voronoi panel, then you'll need to regenerate it or resize it manually.
Tape Application Pauses
- If the model is resized, make sure to add the tape application pauses at the correct layer heights in the slicer. If the model is 33mm tall, then each part layer is 11mm tall and the pauses should be added at 11.2 and 22.2mm.
- In PrusaSlicer the pause action happens before the filament is extruded so adding a pause at 11mm would be off by one layer.
Cooling & Warping
- The fan is disabled in the slicer to prevent warping.
- Hopefully your bridges are okay without cooling. Bad bridges will prevent the table from laying flat, but you can scrape them clean with a knife.
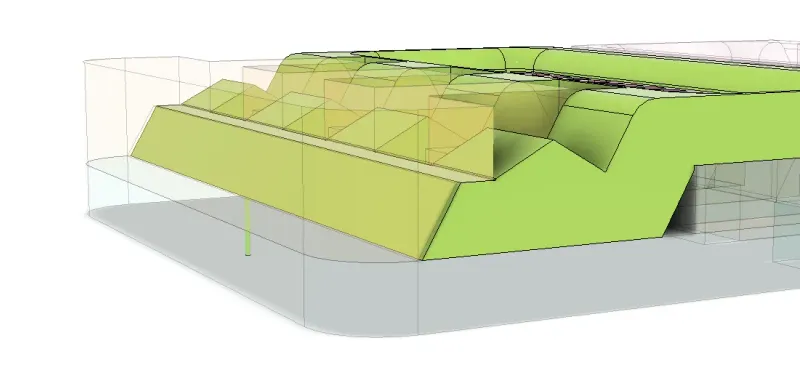
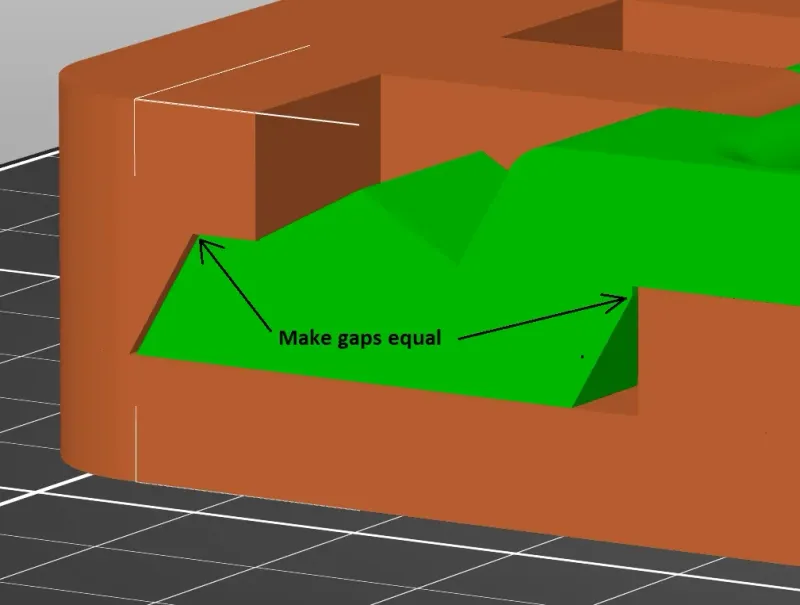
- Even minor warping will turn this model into a brick. There are 3 different gap parameters in the F3D file for you to play with.
- I also applied corner fillets to prevent warping… which makes it look like a tiny TV dinner tray, but that's fine. The corner fillets stopped all 8 outside corners lifting for me.
Leg Standoffs
- To trick the slicer into giving me pretty top and bottom layers for all the parts, I needed a way to keep the legs separate while they were sitting on top of other parts (instead of the bed), so I added a tiny cylinder to each leg to elevate them off of the print bed.
- Proper top and bottom layers look much better than using height range modifiers to add 100% infill at the pauses.
- Depending on how you slice it, you might see a little dot from the standoff on each of the table tops. A 0.6mm diameter cylinder was just big enough for PrusaSlicer to not give me an error.
STL Slicer Positioning
- If you resized the model in fusion, adding the table top STLs into PrusaSlicer positions them correctly.
- When you add the leg STLs into PrusaSlicer, they need to be moved left and right along the X axis until they are positioned with even gaps on each side as shown below. They will already be at the correct height because of the standoffs.
- The mirror leg is always upside down for some reason and needs to be rotated 180 degrees before being moved.
Things I used
- I used Voronoi Sketch Generator from Autodesk to generate the voronoi panel. I didn't know what to do with the legs so I added voronoi. Make sure you use the leg hole sketch to size the panel and add a border so you have a reference for the rigid joint.
- I used 3d Solutech transparent and black PLA filaments
- I used these knives
- I used Scotch Shipping Packaging Tape (48mm wide, heavy duty), but office supply or cellophane tape works too, it just isn't as wide and sticky. Wider and stickier tape is less likely to snag the nozzle. Stickier tape can also prevent you from breaking the model free. I haven't tried using tape like this with anything besides PLA.
- I used a marker to colorize the transparent filament for the voronoi panel on a test piece but didn't end up using the effect. A picture showing what it looks like is below.
I don't usually print big models so I learned a lot about warping. I've never shared a tutorial publicly before. I hope it was good. I welcome any advice. I'm largely self-taught with all of this. Thanks! It's only 11 pages on how to apply 7 pieces of tape.
**fixed an error with a certain size and re-uploaded all the files. I'm sure I'll find another one as soon as I hit the publish button again.
Tags
Model origin
The author hasn't provided the model origin yet.