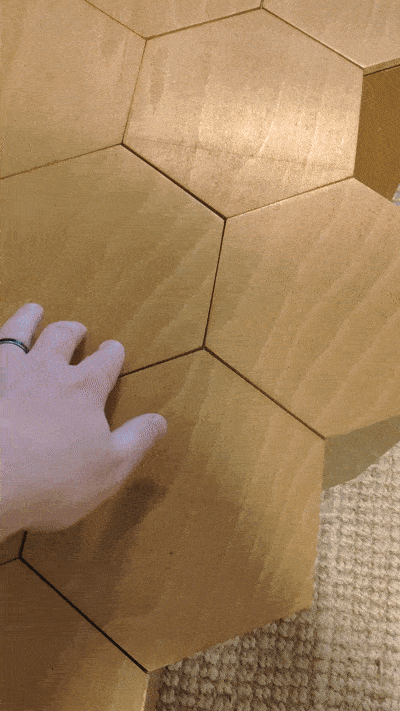
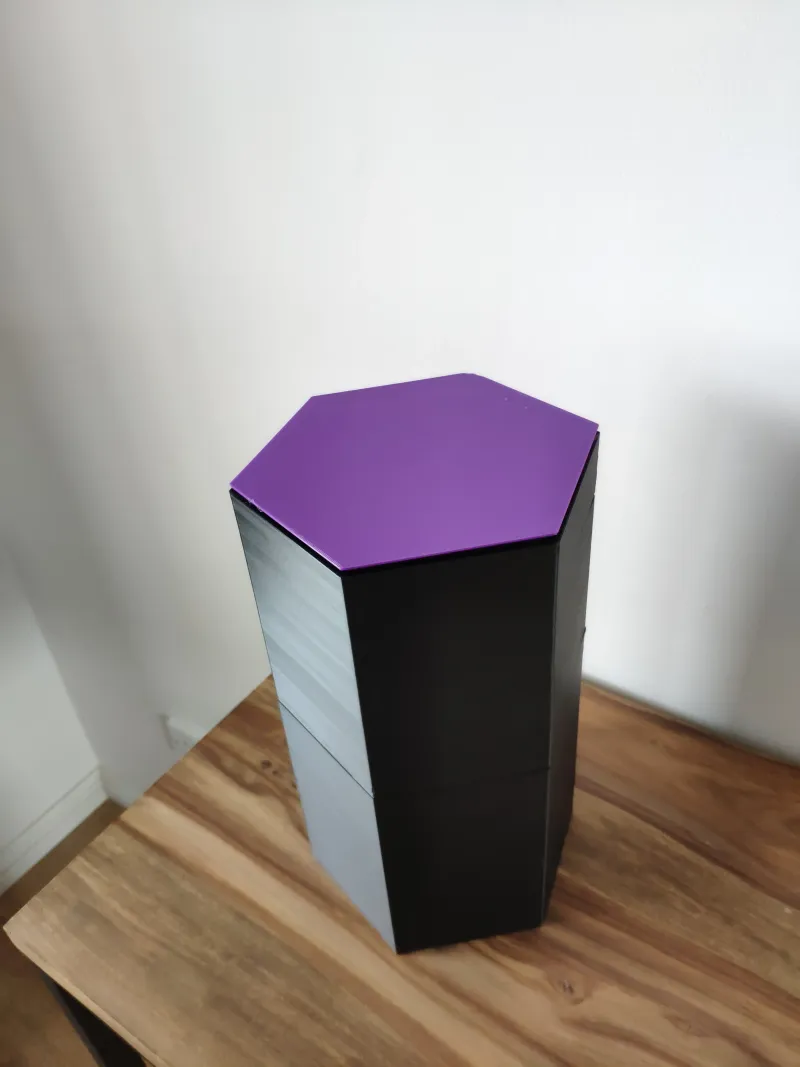
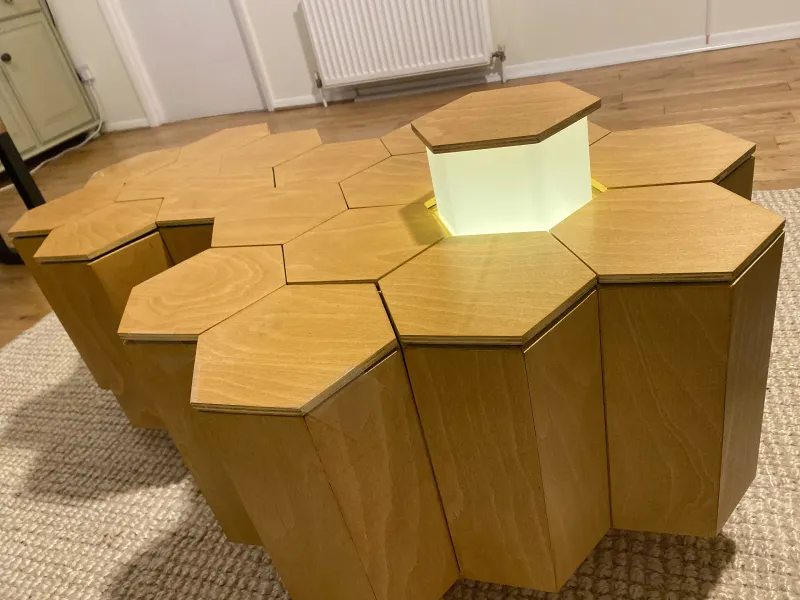
Modular honeycomb coffee table with built-in storage and pop-up light


Description
PDFA modular, honeycomb coffee table with two types of soft-open built-in storage and pop-up ambient light.
Internal mechanisms are printed. Structural elements can be printed or made out of plywood (or other similar sheet material).
The table is built out of three types of hexagonal modules, each about 310mm tall and 165x190mm wide:
- Lift mechanism storage module
- Soft-opening lid storage module
- Pop-up light module
A short video showing the modules in operation below:

More pictures in the assembly guide.
Purpose
Why storage this way?
We wanted a coffee table that is unique, attractive and practical. For our use case, these two storage method work nicely. The modules with the lid are great for tall objects (remotes, bottles) while the lift modules are perfect for coasters or other small objects that you wouldn't want to reach in too deep to grab.
I also wanted a project that would challenge my limited woodworking skills and put to good use that 3D printing hobby of mine. I wasn't going for a quick project but rather something that pushes myself.
Also, this makes a great conversation piece and amazing entertainment for children (hide and seek of some small objects in the table was great fun for some friends’ children).
Why hexagons?
While squares (or even triangles) would work, I chose hexagons because I love them and because “Hexagons are the Bestagons” (source below):
Why the overall shape?
Because my wife did not want something symmetrical. I made the modules, she chose the overall shape.
You can get creative with the choices of modules, overall shapes and uses. A coffee table, end table, bedside table and more…
Construction choice and alternative options
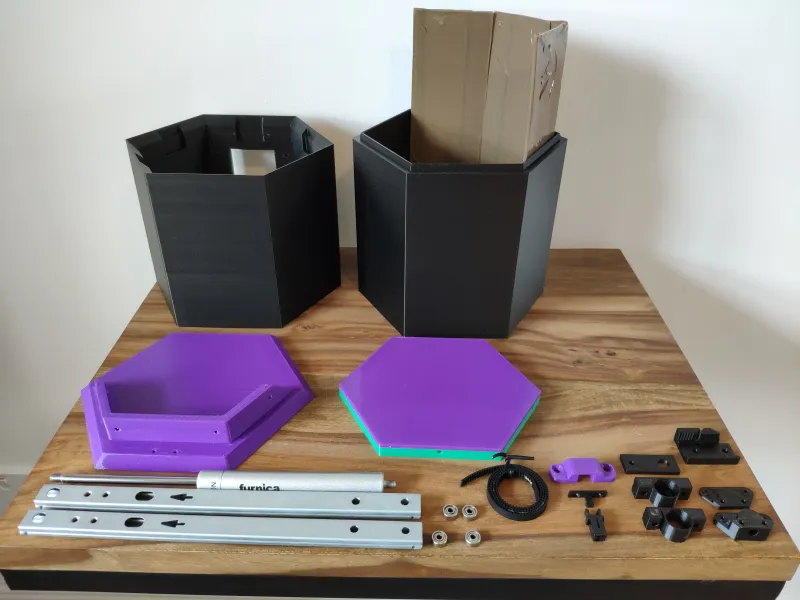
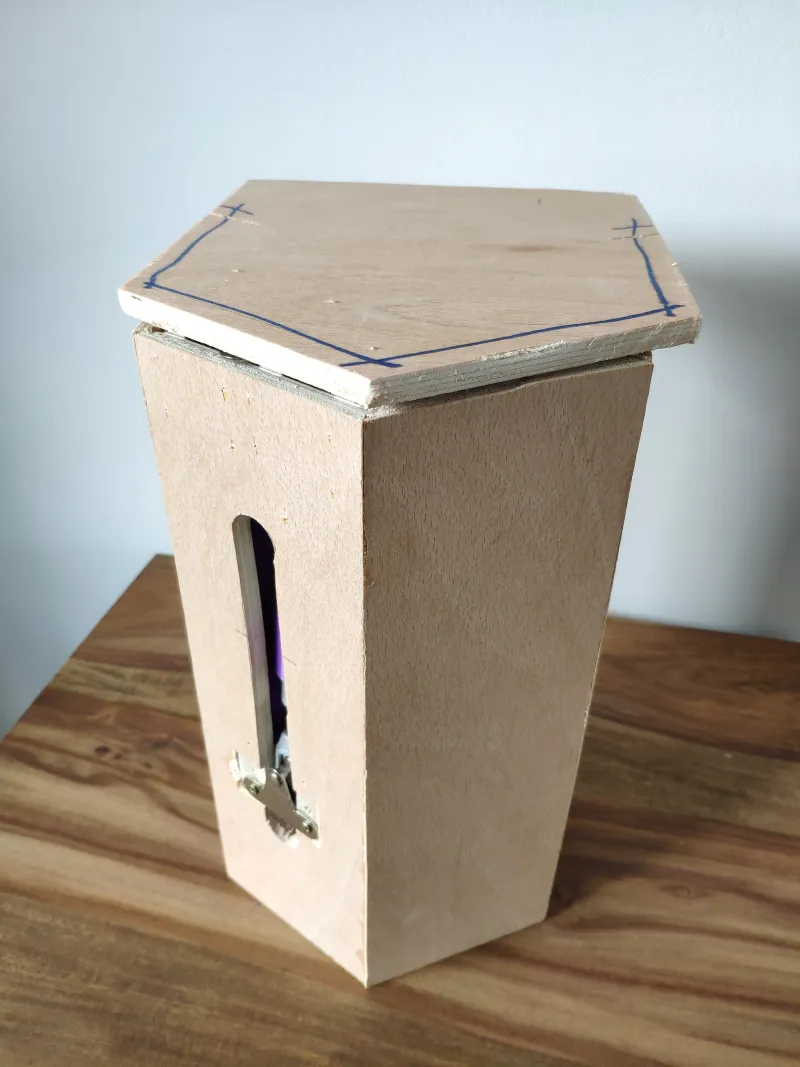
I built this table mostly out of 9mm plywood for the structural parts. It can be fully 3D printed (as seen in the pictures above) but it takes A LOT of filament and needs quite strong prints as I found with my test pieces that delamination can be a big issue with PLA.
There are differences between the printed Hex Bodies and the plywood ones, mostly because I only have basic woodworking tools and facilities. For example, the wood parts do not have the chamfer around the top Hex Lids and top of Hex Bodies. I also did not bother with the fixing features as I could screw together the Bodies.
Irrespective of the build material, all modules should be secured to a flat surface (again, I used 9mm plywood) cut to roughly the overall shape (smaller by about 10mm than the outer outline). I used some 100mm legs to lift the table from the floor. You can omit those if you wish.
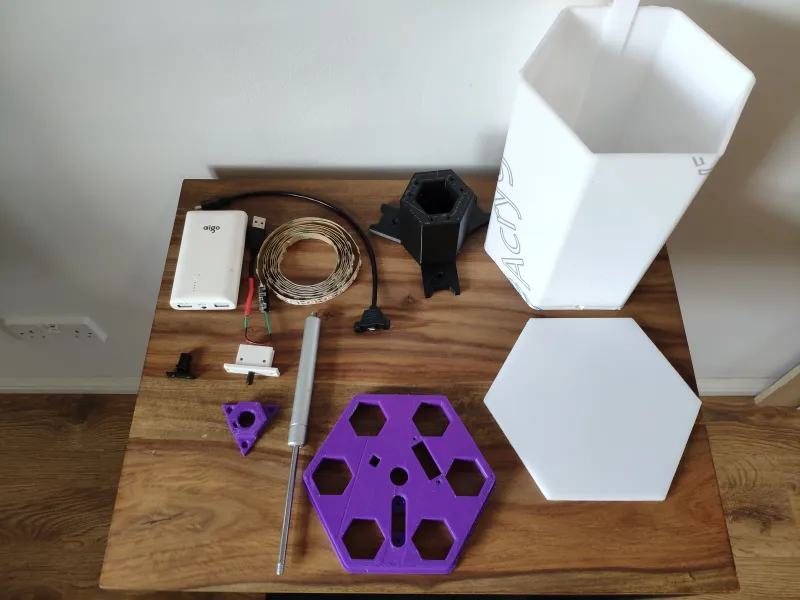
BOM
Most of the parts for this project are fairly common (at least in Europe) furniture hardware plus a few inexpensive parts (mostly sourced from Aliexpress). For this guide I will not mention in great details the fasteners. I mostly used M3 screws and some M4x8 pan head (for attaching things to the runners). A lot of small self-tapping screws were used for various purposes. The exact type of screws will depend on the building material choice. This is not a project for beginners so I trust you will be able to figure out what fasteners to use.
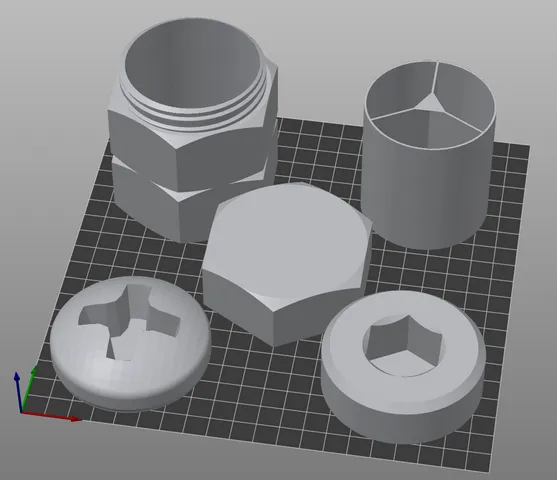
Printed parts
The module file also include some of the hardware needed to make it easier to understand the assembly. I marked those files with “DNP” suffix (Do Not Print).
I recommend printing the small parts out of PETG or ABS/ASA. Be generous with perimeters, top/bottom layers and infill.
The Hex Bodies are split halfway to allow printing on a 200x200x200 or smaller printer. They are meant to be glued together. The two halves self locate.
If you do decide to print the large parts, keep in mind that they us A LOT of filament. Also, the gas struts can exert a lot of force and, for some components, that can lead to layer delamination due to the print orientation. Additionally, if you use wood screw for the large printed parts, the screws will tend to delaminate the parts if you don’t have good layer adhesion and enough perimeters. Do your tests and find what combination works best for you.
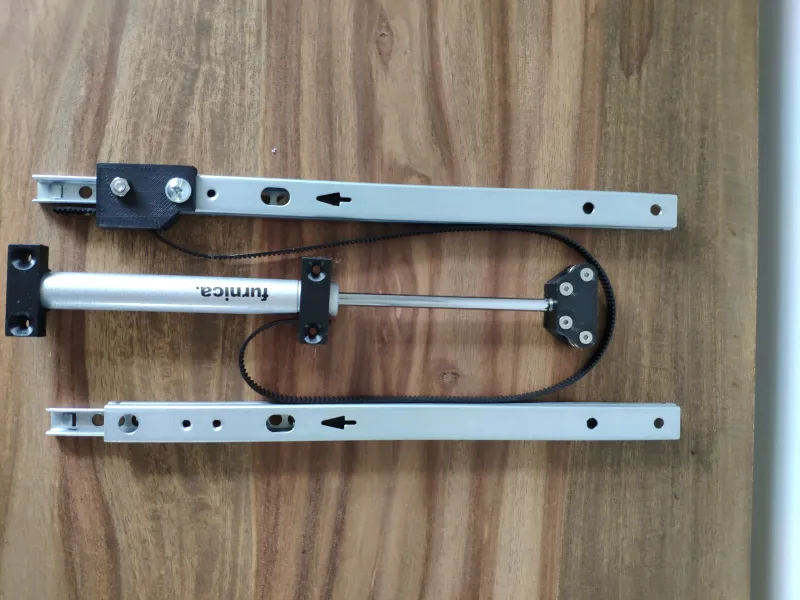
Lift module
| Item | Description | Quantity | Source (not affiliate) |
| 17mm drawer runners | single extension, 278mm | 2 (1 pair) | https://furnica.co.uk/products/drawer-runners-ball-bearing-246mm-h17-right-and-left-side |
| 60N gas strut | 250mm | 1 | https://furnica.co.uk/products/gas-strut-250mm-60n |
| 623 bearings | 4 | https://www.aliexpress.com/item/32434009843.html | |
| GT2, 6mm wide belt | about 30cm | https://www.aliexpress.com/item/10000401582873.html | |
| 50mm corner brace (optional) | 2 or 4 | https://www.ebay.co.uk/itm/372946161470 | |
| push latch | beware that some variants are very weak and can completely break if too much pulling force is exerted. | 1 | https://www.aliexpress.com/item/4001159858422.html |
| 3mm Acrylic side panels | 220x240mm panel, to be bent | 1 |
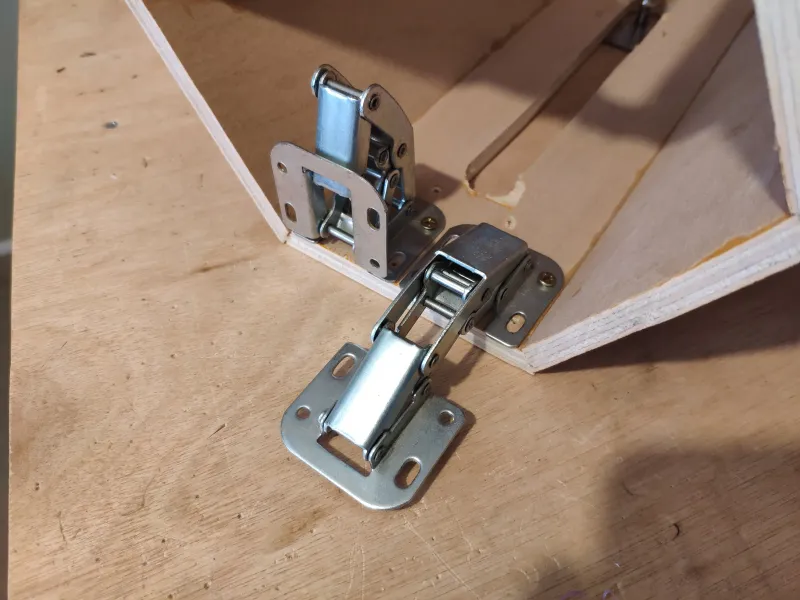
Lid module
| Item | Description | Quantity | Source (not affiliate) |
| Surface 4inch hinge | unsprung | 2 | https://furnica.co.uk/products/hinge-type-frog |
| 60N gas strut | 250mm | 1 | https://furnica.co.uk/products/gas-strut-250mm-60n |
| damper | 1 | https://www.aliexpress.com/item/1005002003167914.html | |
| push latch | beware that some variants are very weak and can completely break if too much pulling force is exerted. | 1 | https://www.aliexpress.com/item/4001159858422.html |
Light module
| Item | Description | Quantity | Source (not affiliate) |
| USB power bank | 10000mAh recommended | 1 | |
| 30N gas strut | 250mm | 1 | https://furnica.co.uk/products/gas-strut-250mm-30n |
| push to open furniture switch | flange mounting option | 1 | https://www.amazon.co.uk/2Amp-break-electrical-mortice-switch/dp/B004IFI3NE |
| 5V LED strip | 1m | https://www.ebay.co.uk/itm/303760059297 | |
| Surface mount USB extension (optional) | For easy access to recharge the power bank | 1 | https://www.ebay.co.uk/itm/232215565164 |
| push latch | beware that some variants are very weak and can completely break if too much pulling force is exerted. | 1 | https://www.aliexpress.com/item/4001159858422.html |
| 3mm Frosted acrylic panel, to be bent into a hex tube | approx. 240x500mm | 1 | |
| Frosted acrylic hex lid or other material of choice | top lid does not need to be translucent | 1 |
Assembly guide
Tools
I strongly recommend a 90 degrees drill adapter or a ratchet driver to be able to access the screw from within the Hex bodies.
|  |
Lift module
|  |
|  |
|  |
|  |
|  |
  |   |
Lid module
|  |
|  |
|  |
|  |
|  |
|  |
|  |
|  |
|  |
 |   |
Light module
|  |
|  |
 |  |
Dummy module
One could use some corner brackets screwed into the Hex body walls and rest (or glue) a top lid on those to create a dummy module. I did not include such a bracket as it will depend on your built material choice.
Overall assembly
Connecting multiple hex bodies together depends on your chosen build material. For wooden Hex bodies, wood screws between adjacent walls works just fine.
For the printed hex bodies, cut away the very thin wall at the top of the body on adjacent modules. A 25mm binder clip can then fit into place. Remove the wire arms after inserting the binder clip. The bottom of the hex bodies will only be attached to the base surface, by screwing them either from within the body into the base surface or, through the base surface into the hex body.
Disclaimer
I designed this table with the upfront expectation that I would build it out of plywood (which I did). The printable version of the Hex body and top lids I created for this competition, using insights from the wooden version build experience.
The printed Lift module was assembled with spare components I had. The back/side panel was quickly made out of MDF as I was out of acrylic. I made it to test out the fully printed models. The printed Lift mechanism worked (apart from print delamination due to filament quality). I did not try out the printed lid mechanism or tried attaching two printed hex bodies together. While they should work just fine (as the wooden parts closely match the model) some misalignment issues may occur. I attached the .STEP files for the Hex Bodies and Lids in case you need to make any adjustments or you have the option to print the Hex body in one piece. The other parts I printed and used for the wooden version as well so they should not need any modifications.
Tags
Model origin
The author hasn't provided the model origin yet.