Clamp for Tronxy X1 Control Box Base - No need to drill acrylic
Description
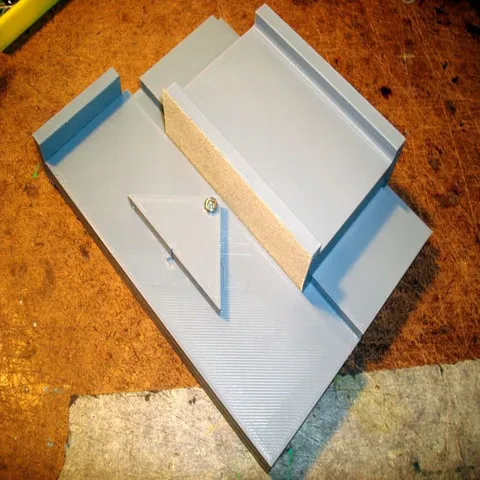
PDFI was feeling reluctant to drill holes in the acrylic base of my X1, not being sure it would not crack or split. (Overcautious? maybe.) I designed these clamps to hold down the base with holes drilled in the control box as seen.
Installing:
- Push an M4 nut into the nit holder. It may be a tight fit, so use force, or print a little bigger.
- Use the L shaped clamp to locate and drill a hole large enough for an M4 screw.
- Thread the nut holder over the screw and use it to hold on to while gluing with super glue.
- undo the screw and put the clamp on, securing it firmly, being sure it is tight to the base.
- If you use a long enough screw, you can remove the printer from the base by simply loosening the screws.
Parts required:
2x printed clamp and nut holder
2x M4 screw of sufficient length.
2x M4 nut
2X m4 washer
This clamp should work with other case/base/box designs.
Print Settings
Printer:
Tronxy X1
Rafts:
No
Supports:
No
Resolution:
.2
Infill:
100
Notes:
I printed in PLA, which I think should be strong enough. You use whatever you have on hand :)
Post-Printing =============Getting the nut in may be hard. I use a pair of slip-joint pliers to press it in.
How I Designed This
123Design. Took just a few minutes :)
Category: 3D PrintersTags
Model origin
The author marked this model as their own original creation. Imported from Thingiverse.