Kirby Gacha Figurine (from Kirby and the Forgotten Land)

Description
PDFI. OVERVIEW
This model is composed of 19 parts, printed separately with different colors and then assembled (because I hate painting).
All parts made by me in AutoCAD. The stand is inspired by this one posted by Lazlo: https://www.printables.com/model/167542-kirby-collectible-stand-kirby-and-the-forgotten-la
Dimensions at 100% scale: 11cm x 11cm x 9.5cm (4.33in x 4.33in x 3.75in)
To make the entire model, you'll need to print ONE (1) of each file, with these exceptions:
- KirbyCheek.stl (x2 required)
- KirbyStar.stl (x3 optional; see below)
The feet and all 3 parts of the eyes are split into Left and Right versions, so you need to print one of each. The directions are from Kirby's perspective!! So, "left" is Kirby's left, and "right" is Kirby's right.
Additionally, KirbyStand.stl and KirbyStar.stl are entirely OPTIONAL as the model will stay together and look great without them. These are a recreation of the figurine stand & star decals that appears ingame. The file KirbyBase.stl, however, is required if you want the figurine to stand upright. Here is what the finished product looks like without the optional parts:
II. PRINTING
All parts are already oriented as intended and are on a flat face, so you can just slice + print. You may want a brim for the feet to make sure they stay put. I recommend 15-20% infill and a layer height of 0.1mm because most of the parts have round curvy bits, but 0.15mm or 0.2 will be fine as well.
Here are the colors you should use if you want to match the model as closely as possible:
PINK
- KirbyBodyFront.stl
- KirbyBodyBack.stl
RED / HOT PINK / MAGENTA
- KirbyFootL.stl
- KirbyFootR.stl
- KirbyMouth.stl
- KirbyCheek.stl (x2 required)
WHITE
- KirbyEyeWhiteL.stl
- KirbyEyeWhiteR.stl
- KirbyStar.stl (x3 optional)
BLUE
- KirbyEyeBlueL.stl
- KirbyEyeBlueR.stl
BLACK
- KirbyEyeBlackL.stl
- KirbyEyeBlackR.stl
GREEN
- KirbyBase.stl
- KirbyStand.stl (optional)
ANY COLOR
- KirbyAlligner.stl
I used various PLA brands for all the parts and had great results. Here are the brands I used:
- Eryone (red, white black)
- Voxelab (pink)
- Hatchbox (blue)
- Overture (green)
III. ASSEMBLY
Press the alligner inside the designated cutout in either half of the body, and the two halves should fit together easily. I recommend using the left foot to make sure they are oriented perfectly, since it slots into both halves at the bottom. Glue the halves together.

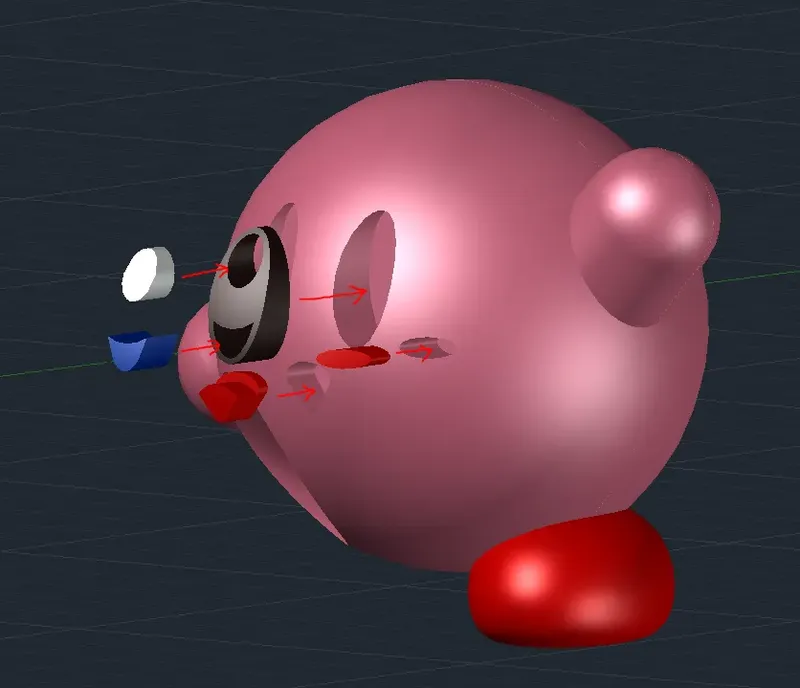
The cheeks, mouth, and eye parts all slot into the face FLAT SIDE FIRST. Make sure you don't mix up the left and right versions of the eye parts — remember that the orientation is from kirby's perspective. I found that the cheeks and mouth were loose and needed a tiny bit of glue, while the eye parts all fit very tightly and needed no glue.
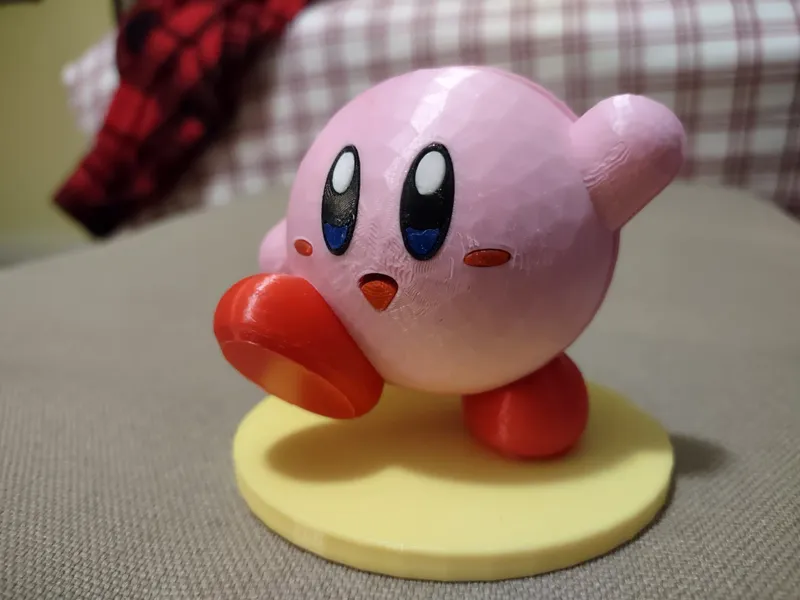
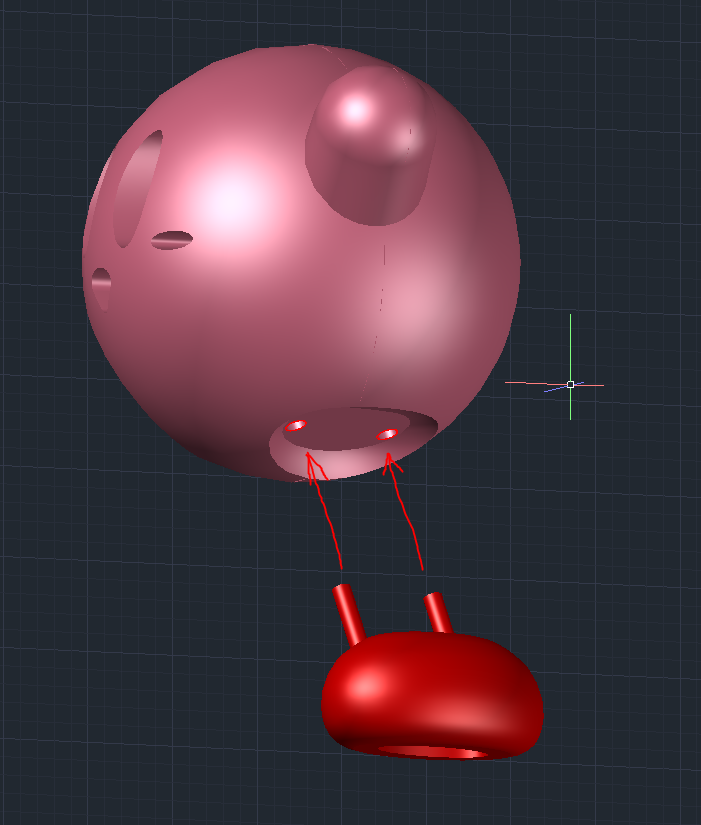
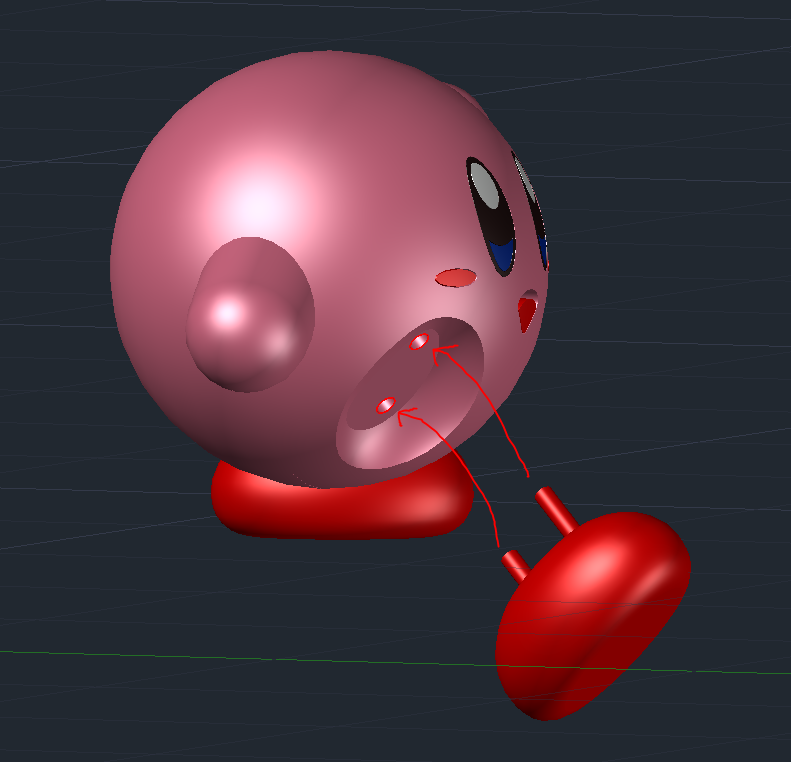
The right foot slots into the body just like the other one. On my printer, the parts fit tightly and didn't need glue.
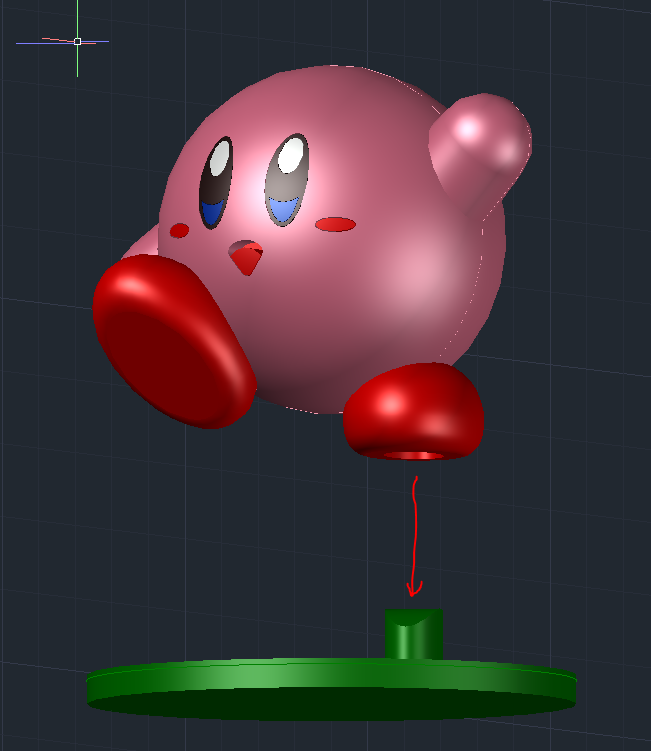
The right foot has a cutout in the bottom that slots onto the circular base. It fits loosely so that Kirby can be taken off the stand, but you can use glue if you don't want the pink puffball going for a walk.
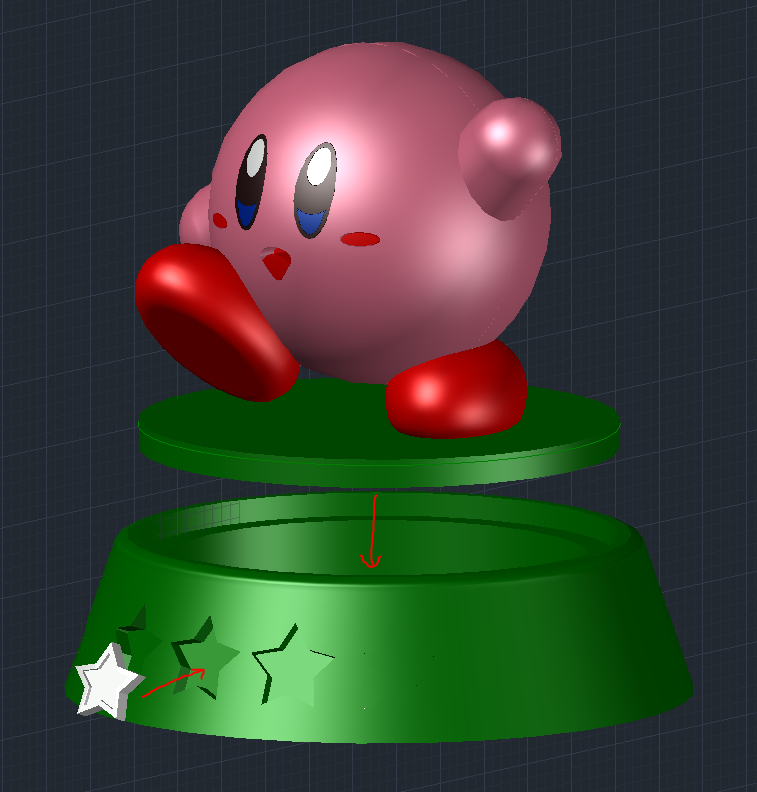
(Optional) Press the base firmly into the top of the stand, being sure that Kirby faces forwards. The circular base will stick out above the rim of the stand at a height of about 1mm.
The star decals fit into the indicated cutouts on the front of the stand. The stars are technically curved a tiny bit to match the curvature of the stand, but it's barely visible. Use a touch of glue to keep the stars in place.
Done!
Tags
Model origin
The author hasn't provided the model origin yet.


