Lazy Susan - Learning Resources Create-a-Space Storage Center
Description
PDFWhat is it?
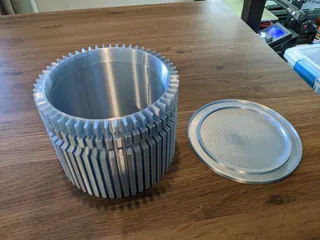
My wife asked if I can convert our Learning Resources Art Caddy to rotate more freely. The art caddy looks like it should have obviously been when purchased, so I designed a lazy susan system for this art caddy!
Which art caddy does this fit?
Here is the Learning Resources Create-a-Space Storage Center this was designed for: https://smile.amazon.com/Learning-Resources-Create-Space-Storage/dp/B01N6L9JK2 (this is not an affiliate link or anything, simply where we purchased it from)
How it was designed
I had some 608ZZ bearings lying around from a filament storage box I printed previously and decided to use this as the bearing for the lazy susan. I suspect any 608 bearing would work, I didn't choose the 608ZZ for any other reason except that I had it on hand.
Tolerances on everything are intentionally tight so no glue or adhesive is needed, but it's still a good friction fit and won't come apart.
I set the height of the turntable section to still support itself on the table it's sitting on to limit stress on the 3D printed parts. However, it is also just high enough to make turning the art caddy much easier.
Makes and Comments
Makes are very appreciated and I'm more than happy to modify this as needed if you need anything changed on it!
Print Settings
Printer Brand:
Creality
Printer:
Ender 3 Pro
Rafts:
No
Supports:
No
Resolution:
0.32
Infill:
15% and 100%
Filament: Hatchbox PLA Matte White
Notes:
I printed these twice, once for us and once for a friend. I printed one at 0.2 resolution and another at 0.32 resolution, both worked great and had a nice firm friction fit
The base needs to be printed at 100% infill (or some variation) to strengthen the pin that goes in the bearingThe tray insert can be printed at 15% and would work fine
Post-Printing
Post Printing Details and Steps
No glue or adhesive should be needed for this print. Everything is a tight friction fit but should fit with little force.
Steps for installing it to your Learning Resources Art Caddy:
- Push bearing into the tray insert center. This is intentionally tight but I was able to do this by hand. Make sure the bearing is going in flat. Once I had it started I turned the 3D printed part over so the bearing is facing the table and pushed down on the 3D printed part
- Push the tray insert into the art caddy. This is designed to be somewhat tight but should be easy to install
- Now push the base into the bearing in the tray insert. This should go in pretty easily but with enough friction not to want to fall out when the art caddy is picked up
Now enjoy your easier-rotating Learning Resources art caddy!
Category: OrganizationTags
Model origin
The author marked this model as their own original creation. Imported from Thingiverse.


