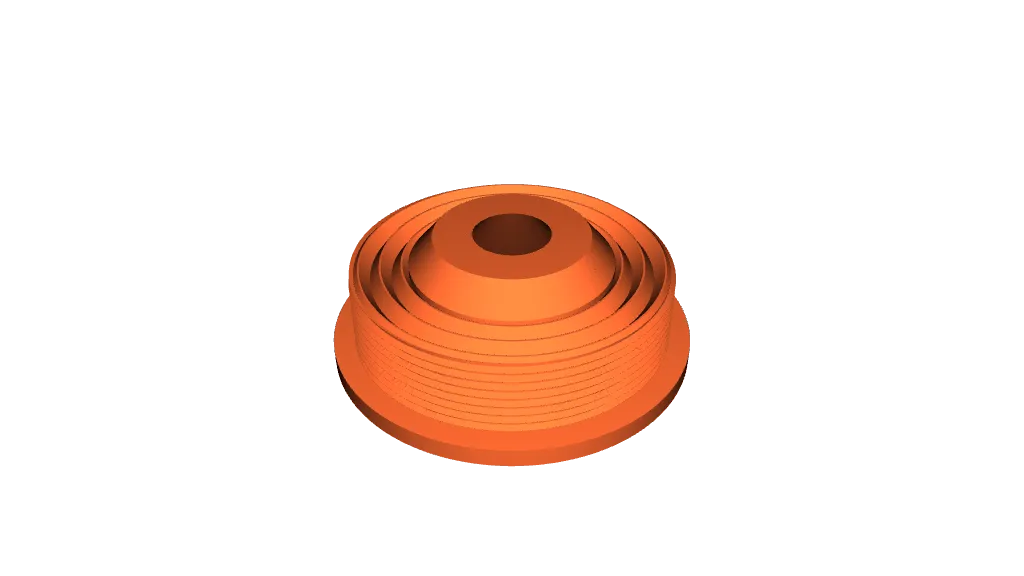
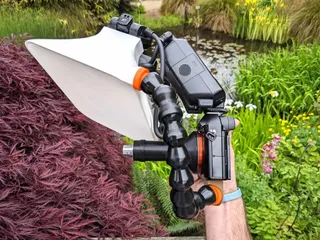
Microscope adapter for 4x macro photography with Sony A, E/FE, Canon EF/EF-S, RF, M, Nikon F, Z, Fuji X, Leica L, M4/3, M42 cameras


Description
PDFThis adapter allows you to mount any finite RMS microscope objective (i.e. objectives that are marked with "160mm" rather than "infinity") on your Sony A, Sony E / FE, Canon EF / EF-S, Canon RF, Canon M, Nikon F, Nikon Z, Fujifilm X, Pentax M42 or Micro Four-Thirds camera.
The slimline design allows you to get much closer to your subjects without your rig colliding with leaves and pushing your subject out of the way.
Don't have a 3D-printer? I now sell 3D-printed microscope adapters on my webpage, please check it out!
The $20 4x Plan Achromatic microscope objective I've been shooting with gives fantastic image quality on this adapter:
https://www.aliexpress.com/item/32360730919.html
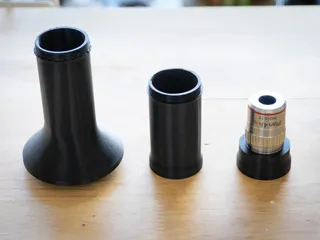
The outer casing of this objective unscrews, which makes it much slimmer and shorter to give you more working distance and easier lighting. (I just use the casing as a lens cap for storage and transport)
In the US Amscope sells an objective which is identical in outward appearance (but I haven't tested it):
https://amscope.com/products/pa4xk-v300
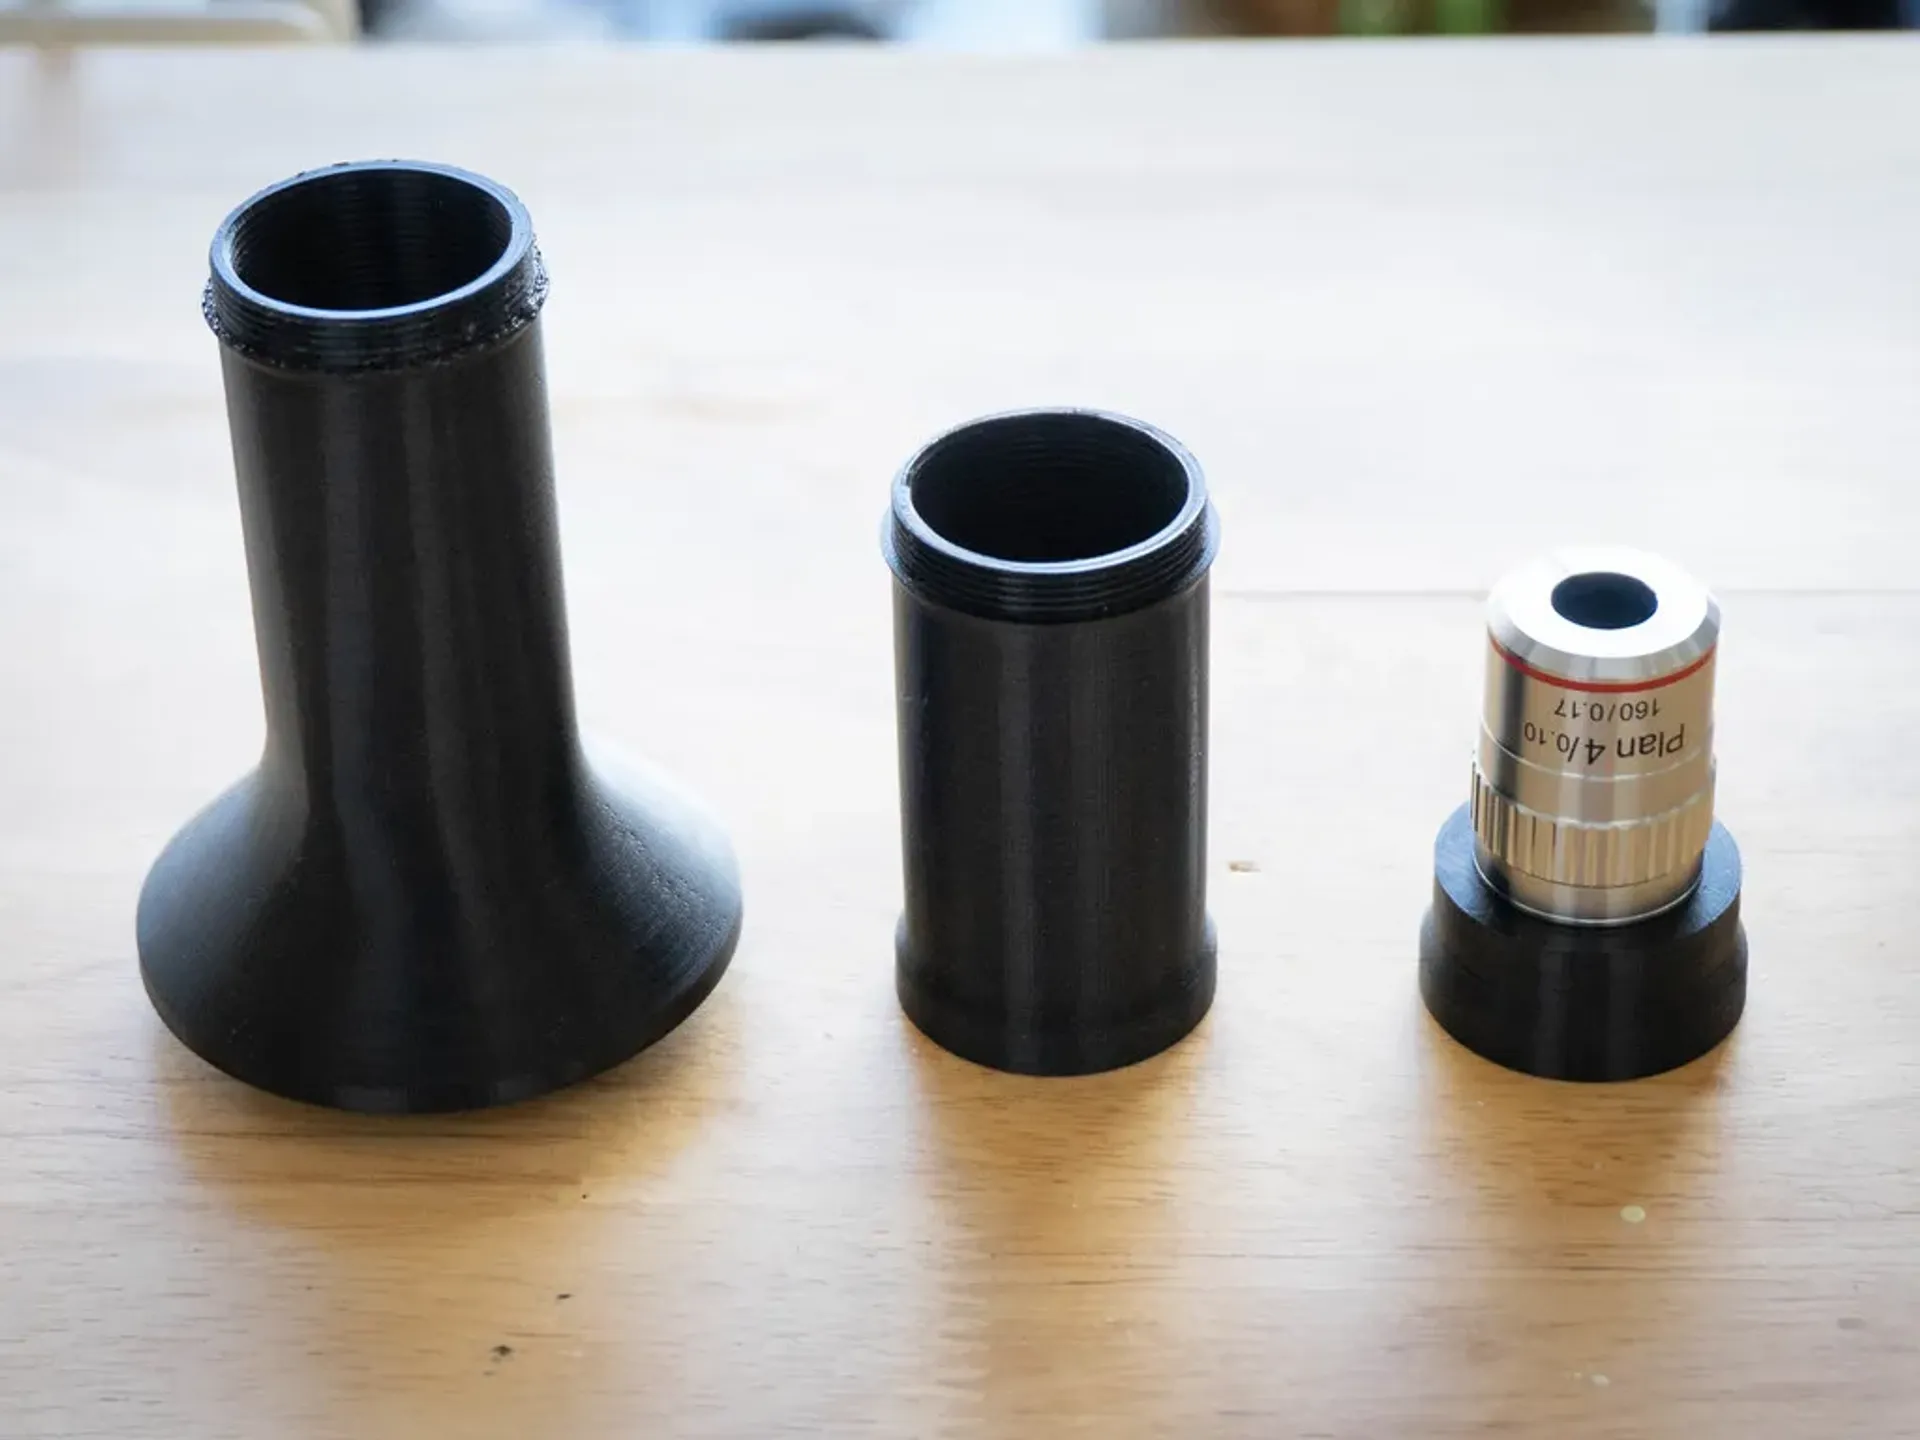
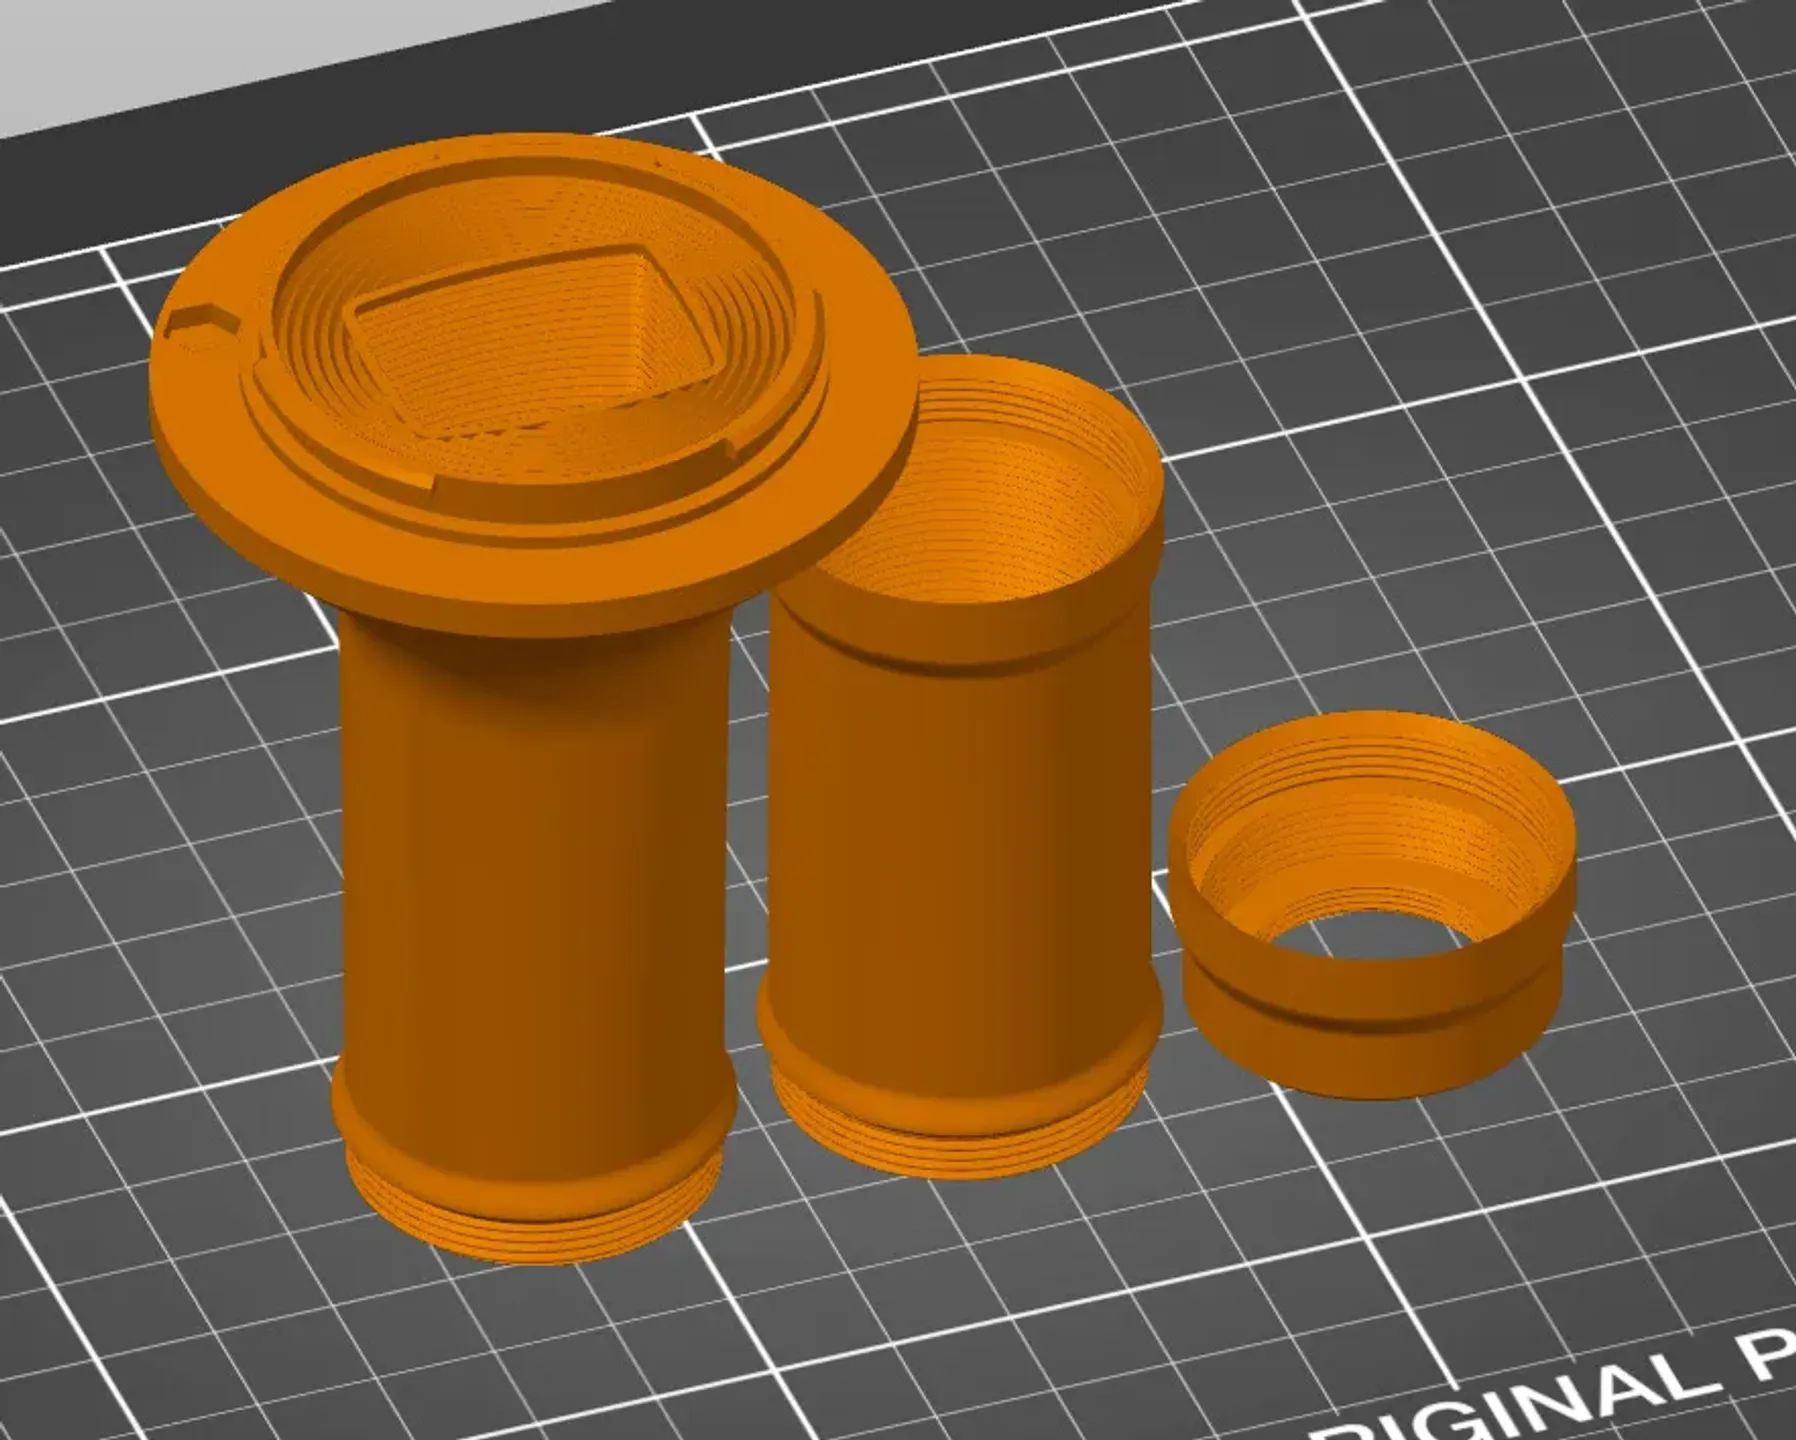
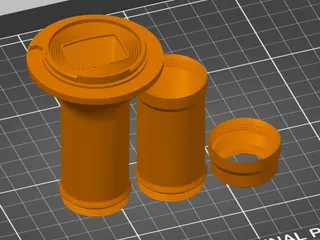
I've included two adapter designs:
The crop design is for Sony A, Sony E, Canon EF-S, Canon RF, Canon M, Fujifilm X, Leica L, Micro Four-Thirds, Pentax M42, Nikon F or Nikon Z crop cameras (or full-frame cameras which have been switched to crop mode) which has a segment of tube you can remove to shorten the tube.
For objectives which cast a big enough image circle, removing this middle tube allows you to reduce the magnification and focus at a greater distance (for the 4x objective I tested this reduced magnification from 4x to 2.75x, and increased working distance from about 28 to 31mm).
The full-frame design for Sony A, Sony FE, Canon EF, Canon RF, Leica L, Nikon F, Nikon Z or Pentax M42 cameras does not have a removable tube segment.
Want something with a little lower magnification? I now have a version of this tube which pushes the magnification down to 2x even on full-frame cameras, you can get it here
If you like macro photography then check out my other designs too! I have designed a lot of 3D-printable photography equipment.
Printing instructions


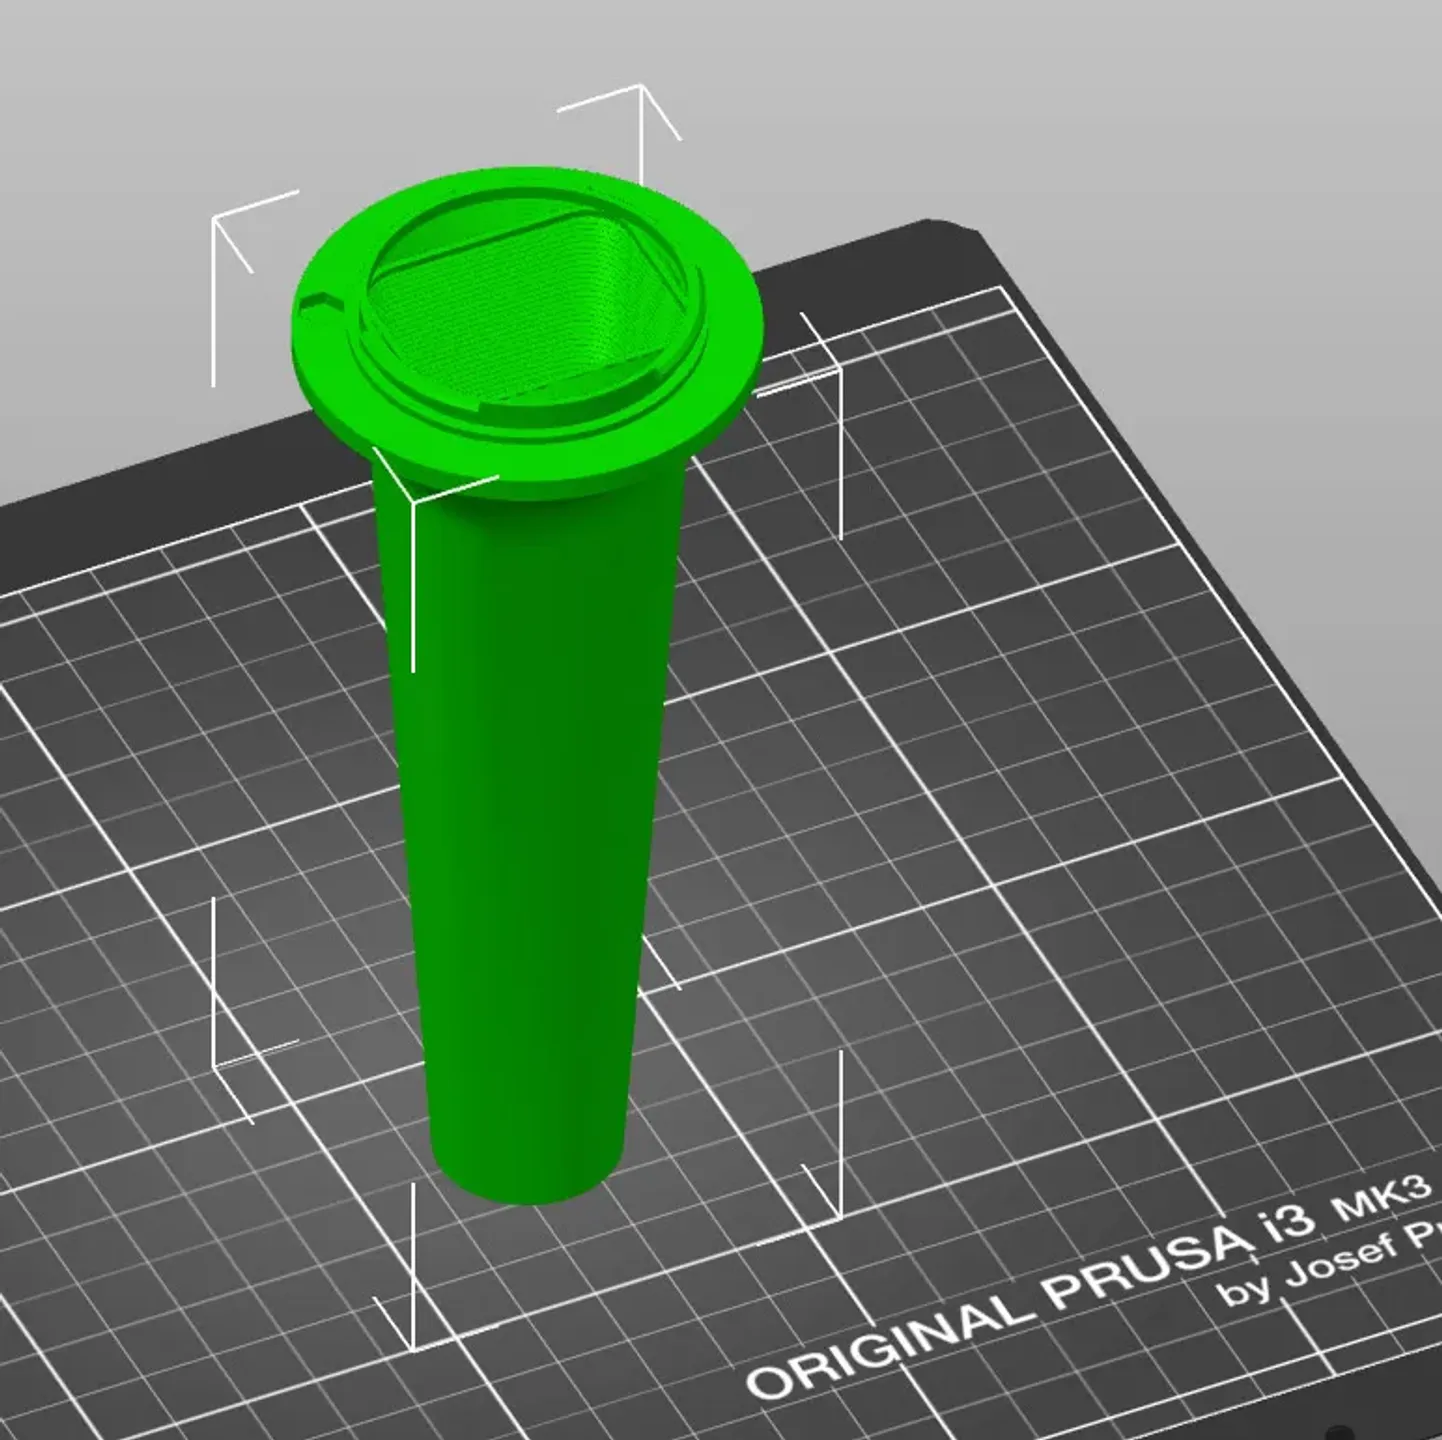
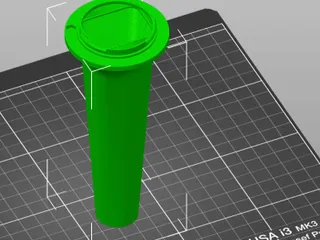
Be sure to observe the printing orientation shown in the images above (particularly that the base counter-intuitively prints "wide side up", but the orientation for all parts is critical).
- Material: Black PETG or ABS
- Layer height: 0.1mm
- Supports: None
- Infill: 15% rectilinear
- Perimeters: 3
- Elephant Foot Compensation: Disable
In PrusaSlicer, you can turn off "ensure vertical shell thickness".
Do not use PrusaSlicer's new "Arachne" perimeter generator, it creates at least a super fragile Sony E mount.
For the Full Frame tube you may want to add a brim to ensure it doesn't detach from the bed during printing, since it's so tall. For me ABS sticks incredibly well to my smooth PEI sheet, so I didn't need it.

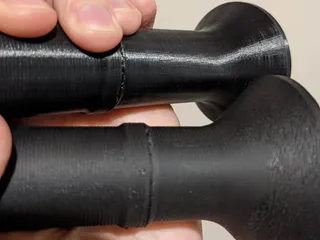
Shown above are PETG (top) and ABS (bottom). You can see that ABS has the advantage of being already matte, which will improve image contrast. Painting the inside of the PETG tube with matte black spraypaint is a good option to close this distance.
All example photos above have been taken with an unpainted PETG tube.
Shooting notes

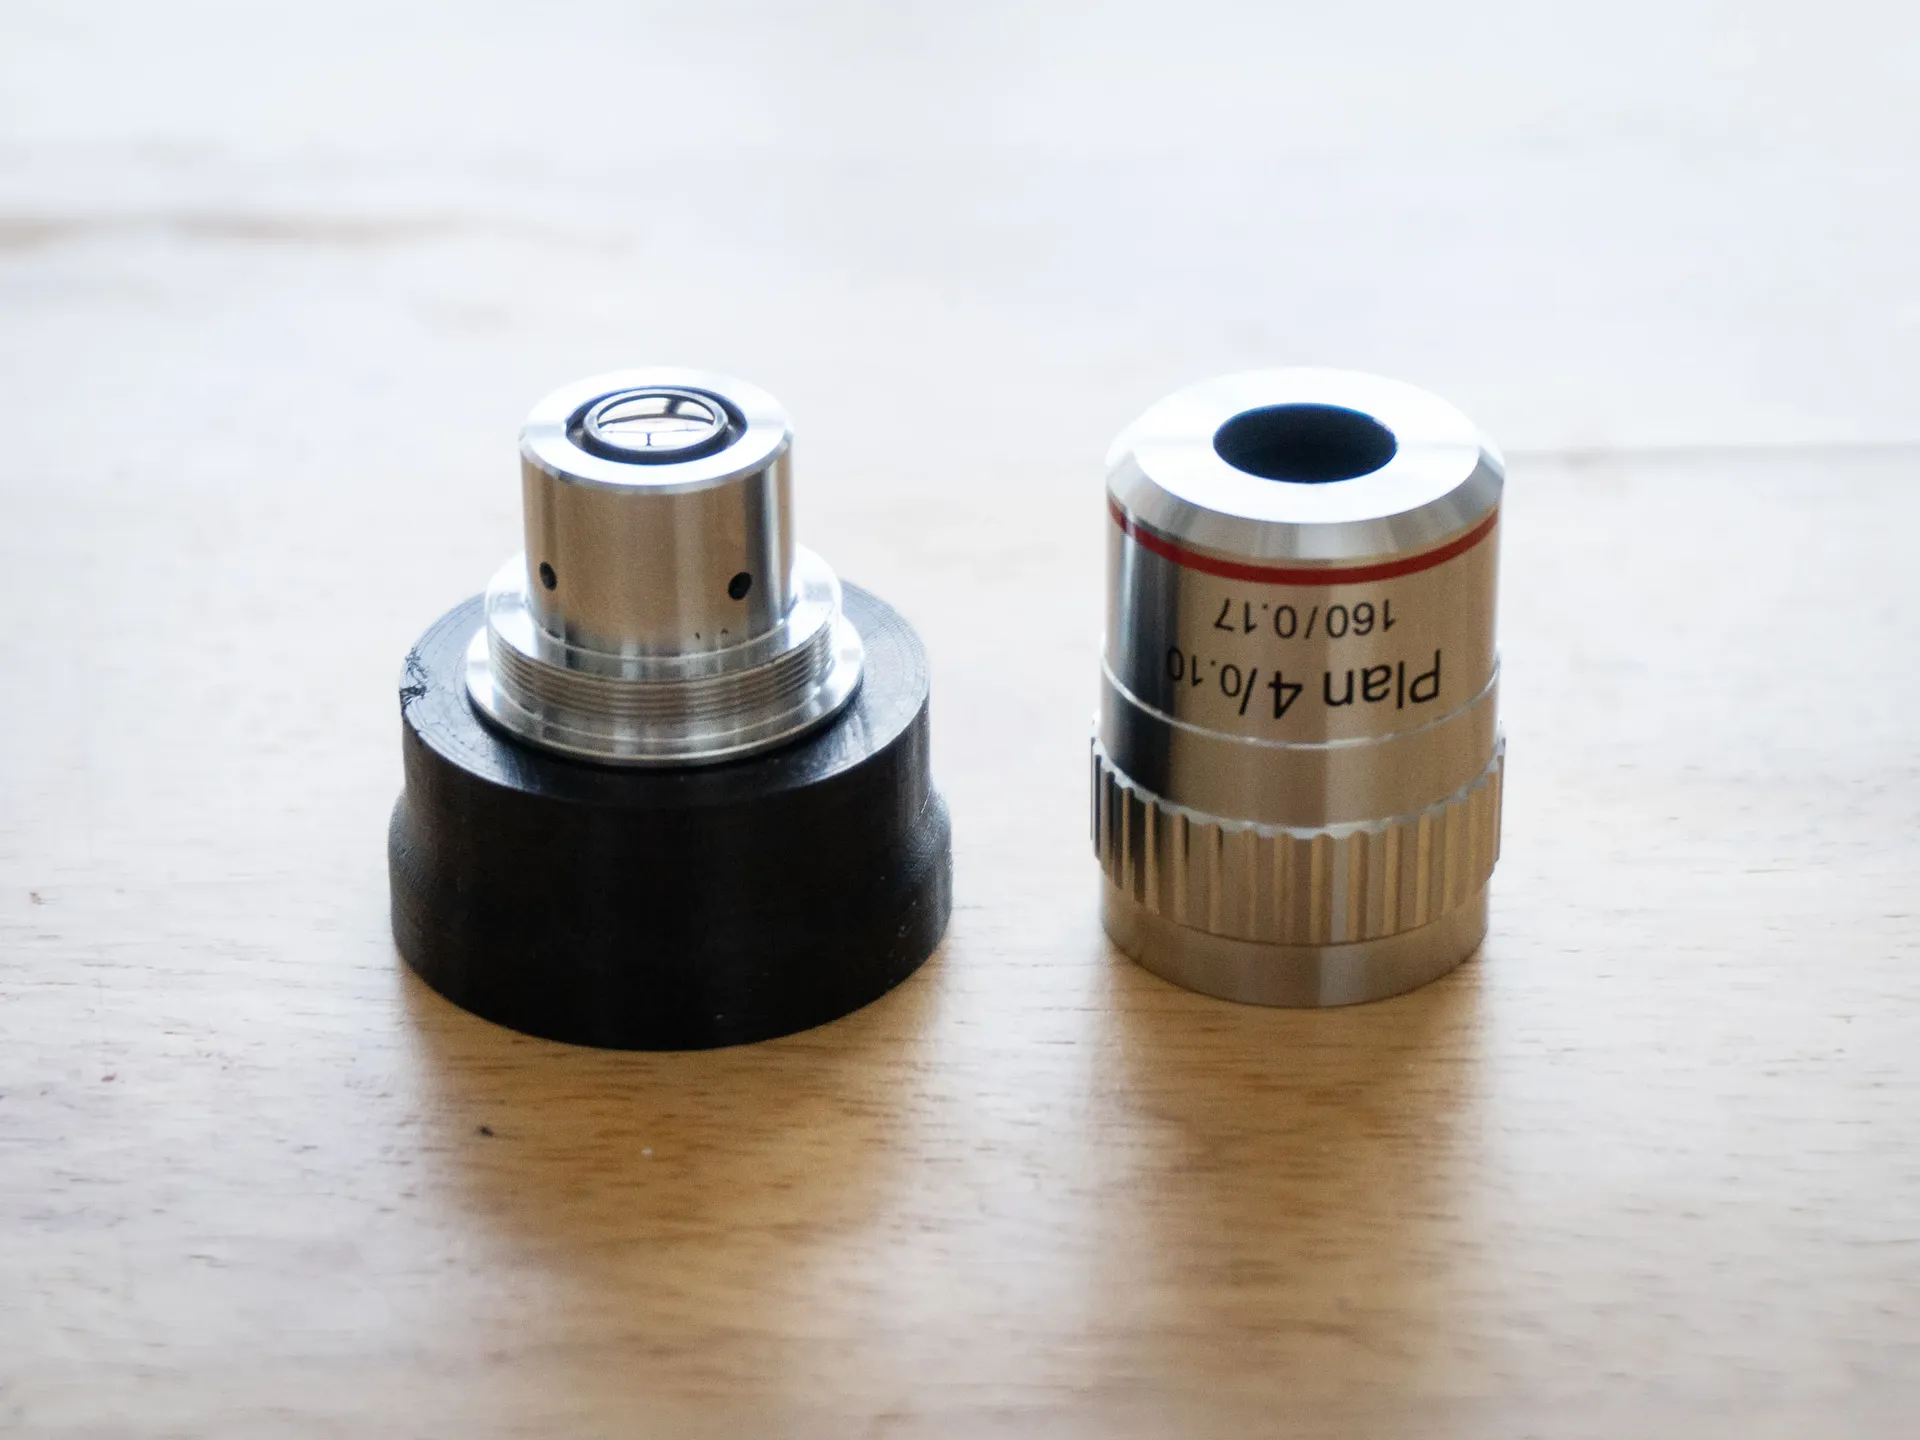
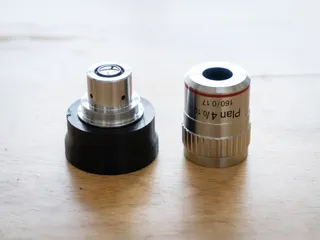
As you can see above, it's well worth removing the outer casing of the objective (right) to boost your working distance and avoid poking the leaf your subject is standing on. But note that the threads that are found under the cover are very sharp. My finger and thumb got multiple very shallow slices in them before I even realised what was happening (so maybe wear a kitchen rubber glove to install or remove the caseless objective, lol).
This objective has a nominal aperture of f/4, which is an effective aperture of f/20 at 4x magnification, and has no mechanical aperture so this cannot be changed.
Accordingly you will want flash lighting to get the image bright enough and to counter the effects of subject movement and camera shake.
On DLSRs the viewfinder will be very dim due to the effective f/20 aperture. You can preview what this will look like by setting your current lens to f/20 and holding the DOF preview button. This isn't a problem on mirrorless cameras (be sure to set Setting Effect: Off on Sony cameras so your viewfinder is bright regardless of the camera's exposure settings).
I shoot at my A7R's flash sync speed (1/200th), ISO 100, with my diffused flash set to 1/8th power and placed as close to the subject as possible.
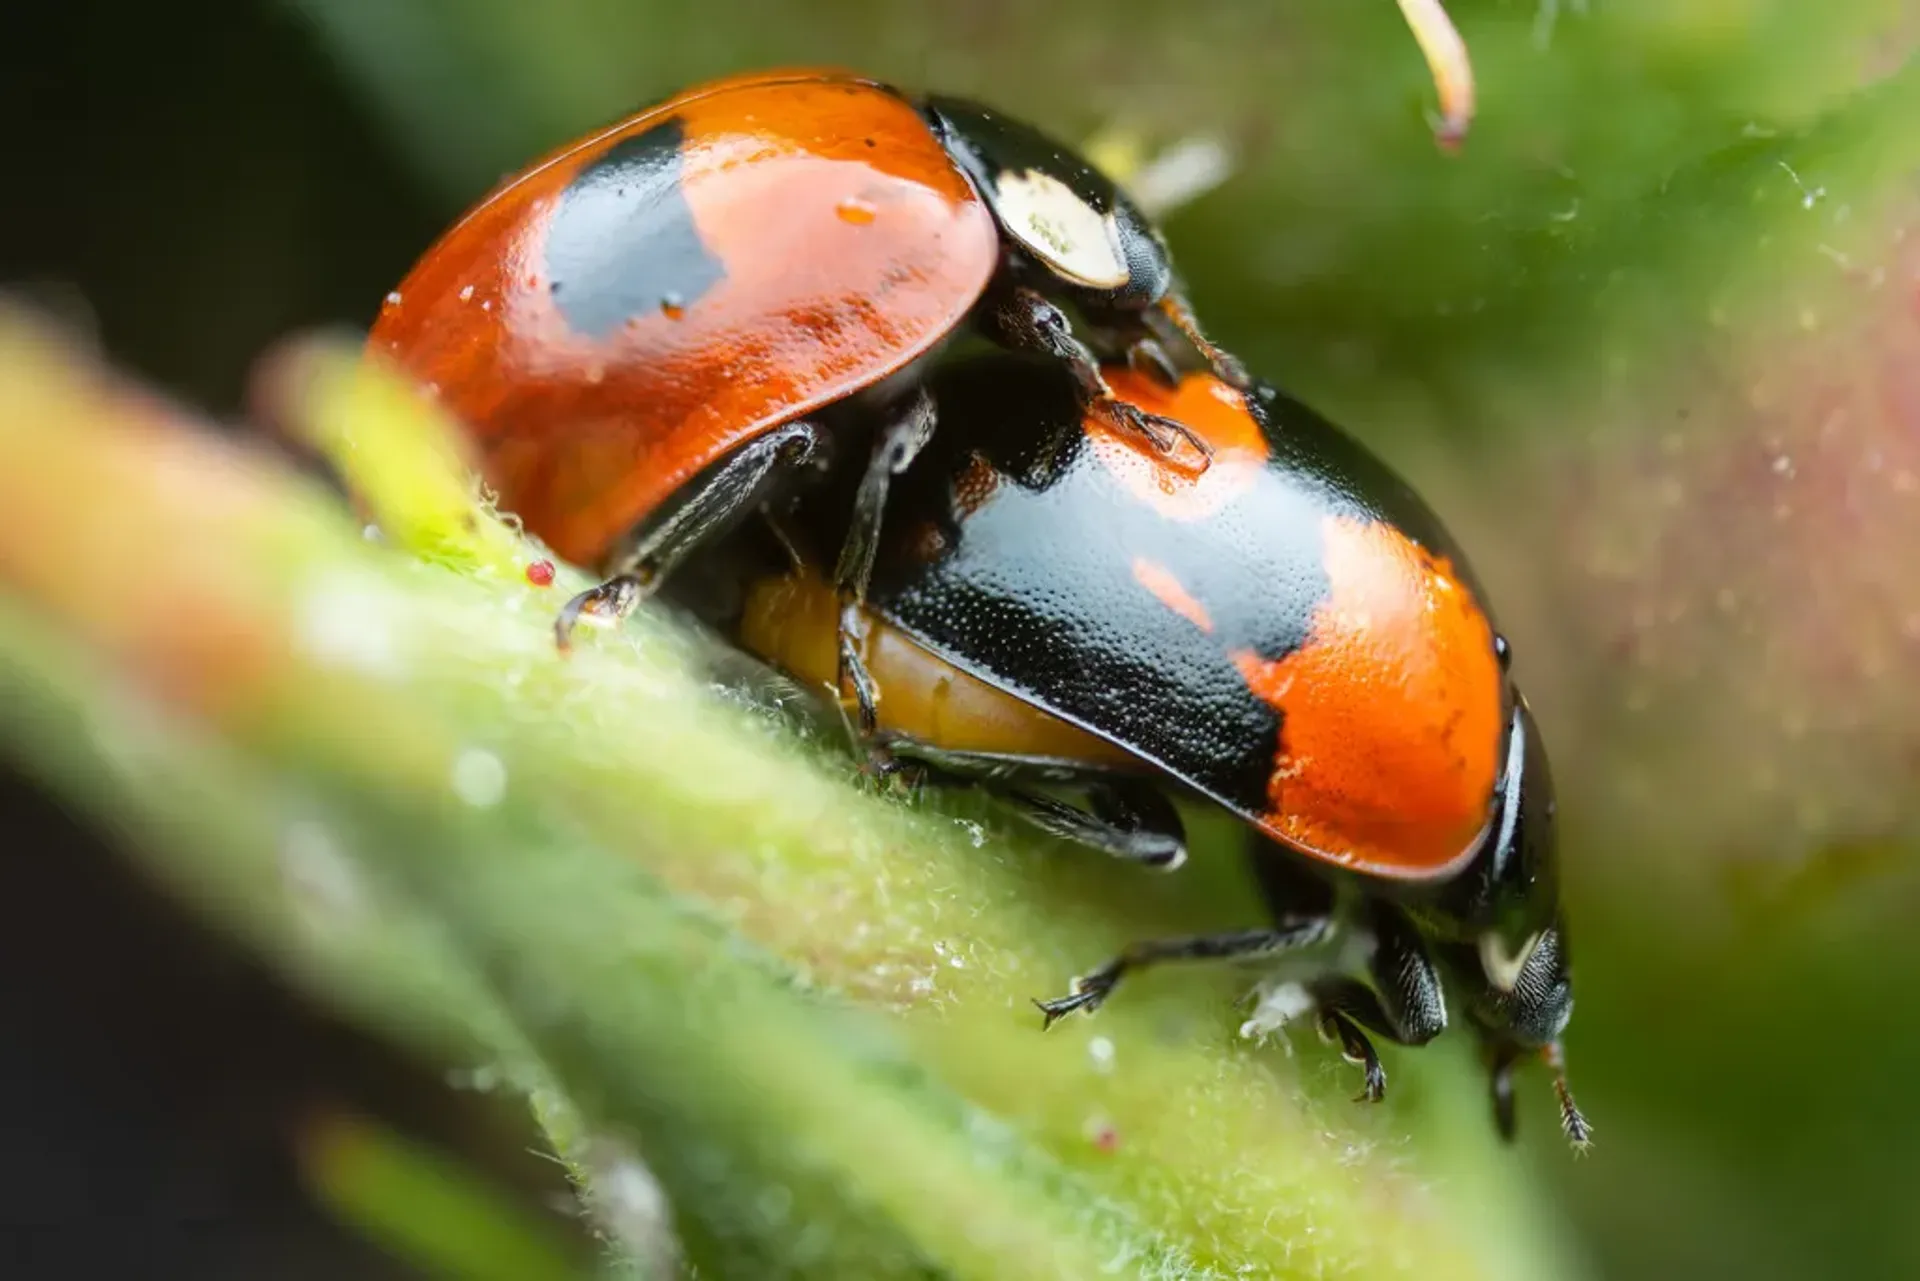
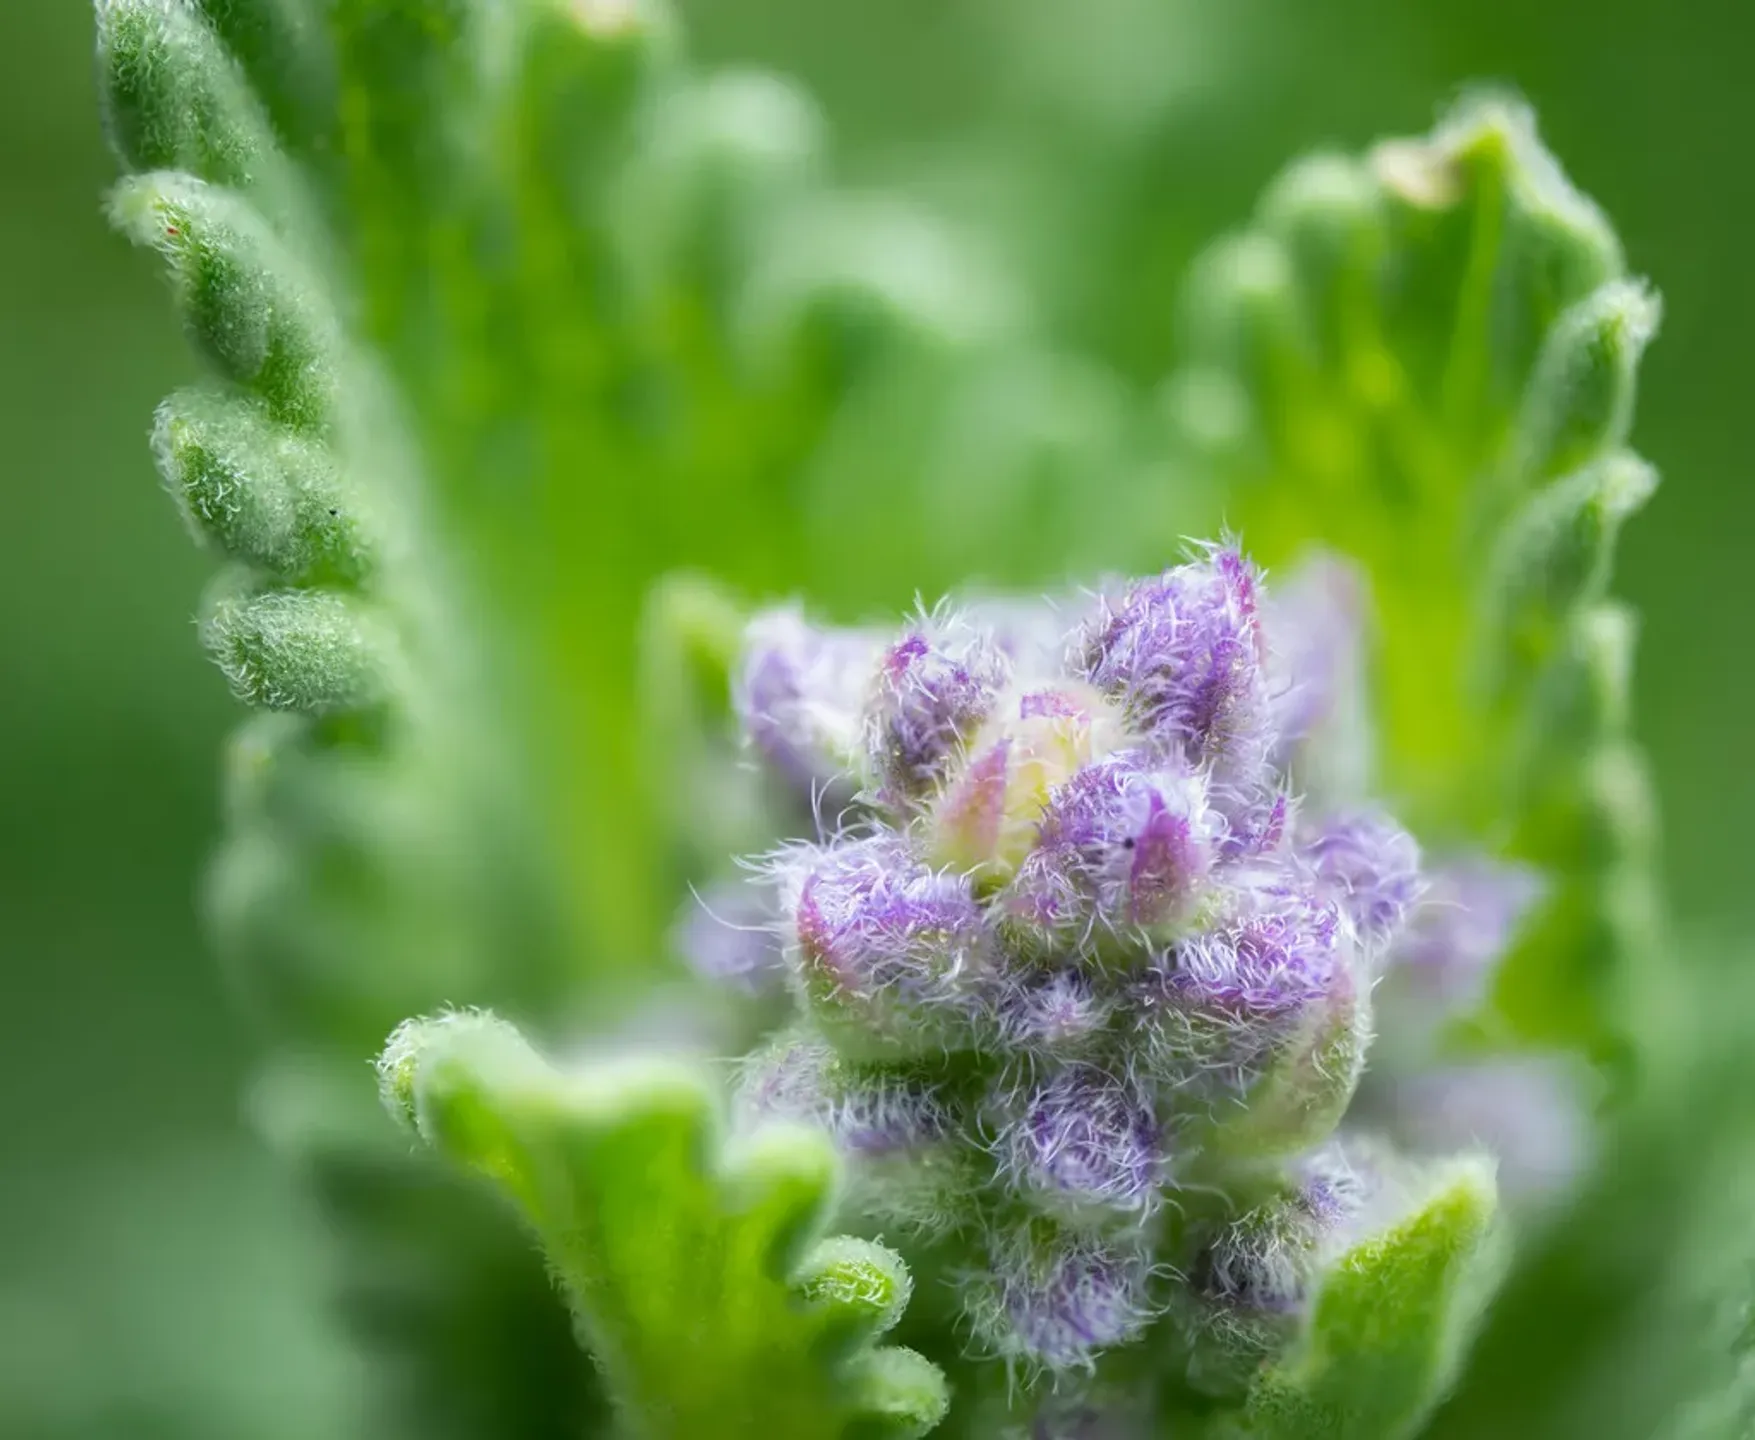
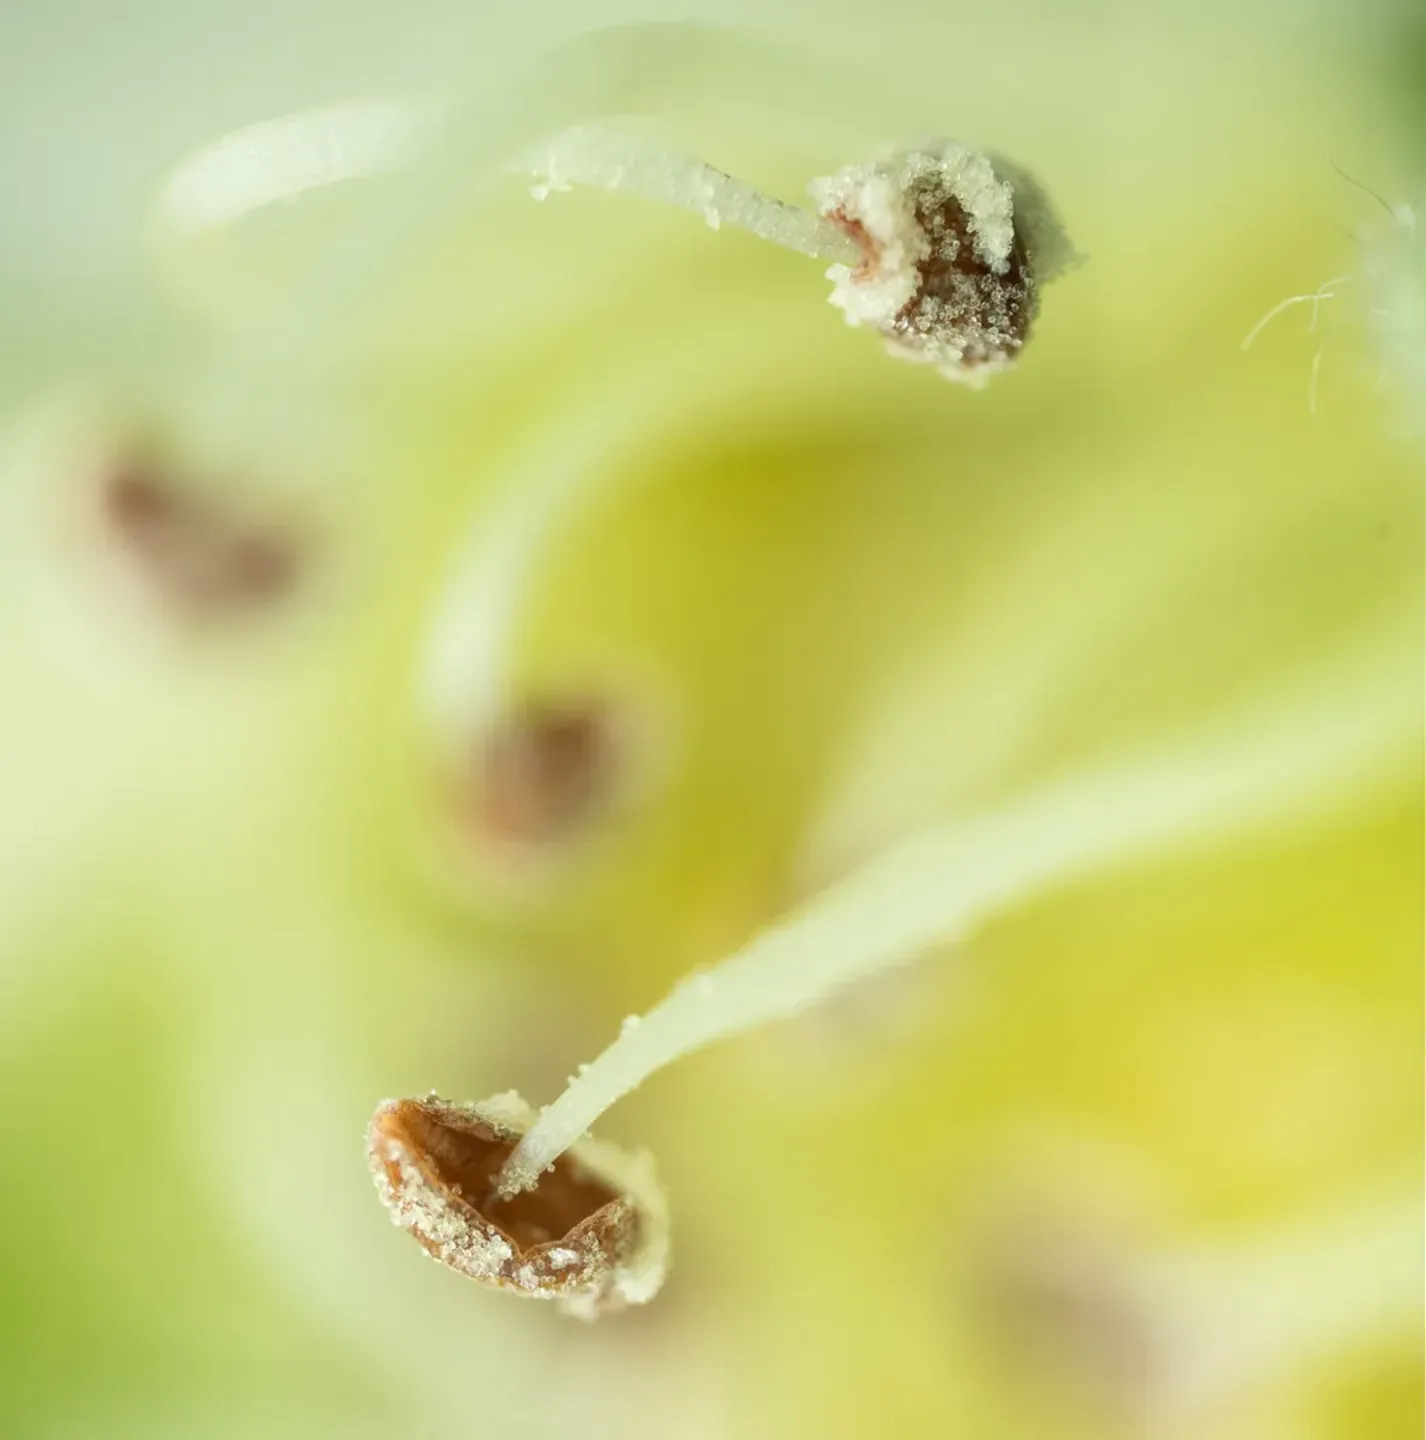
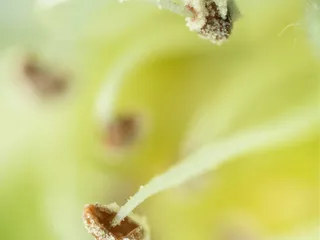
Most photos above have been created from handheld image stacks. You can combine together all the photos you took where you missed focus using Photoshop to extend the depth of field :).
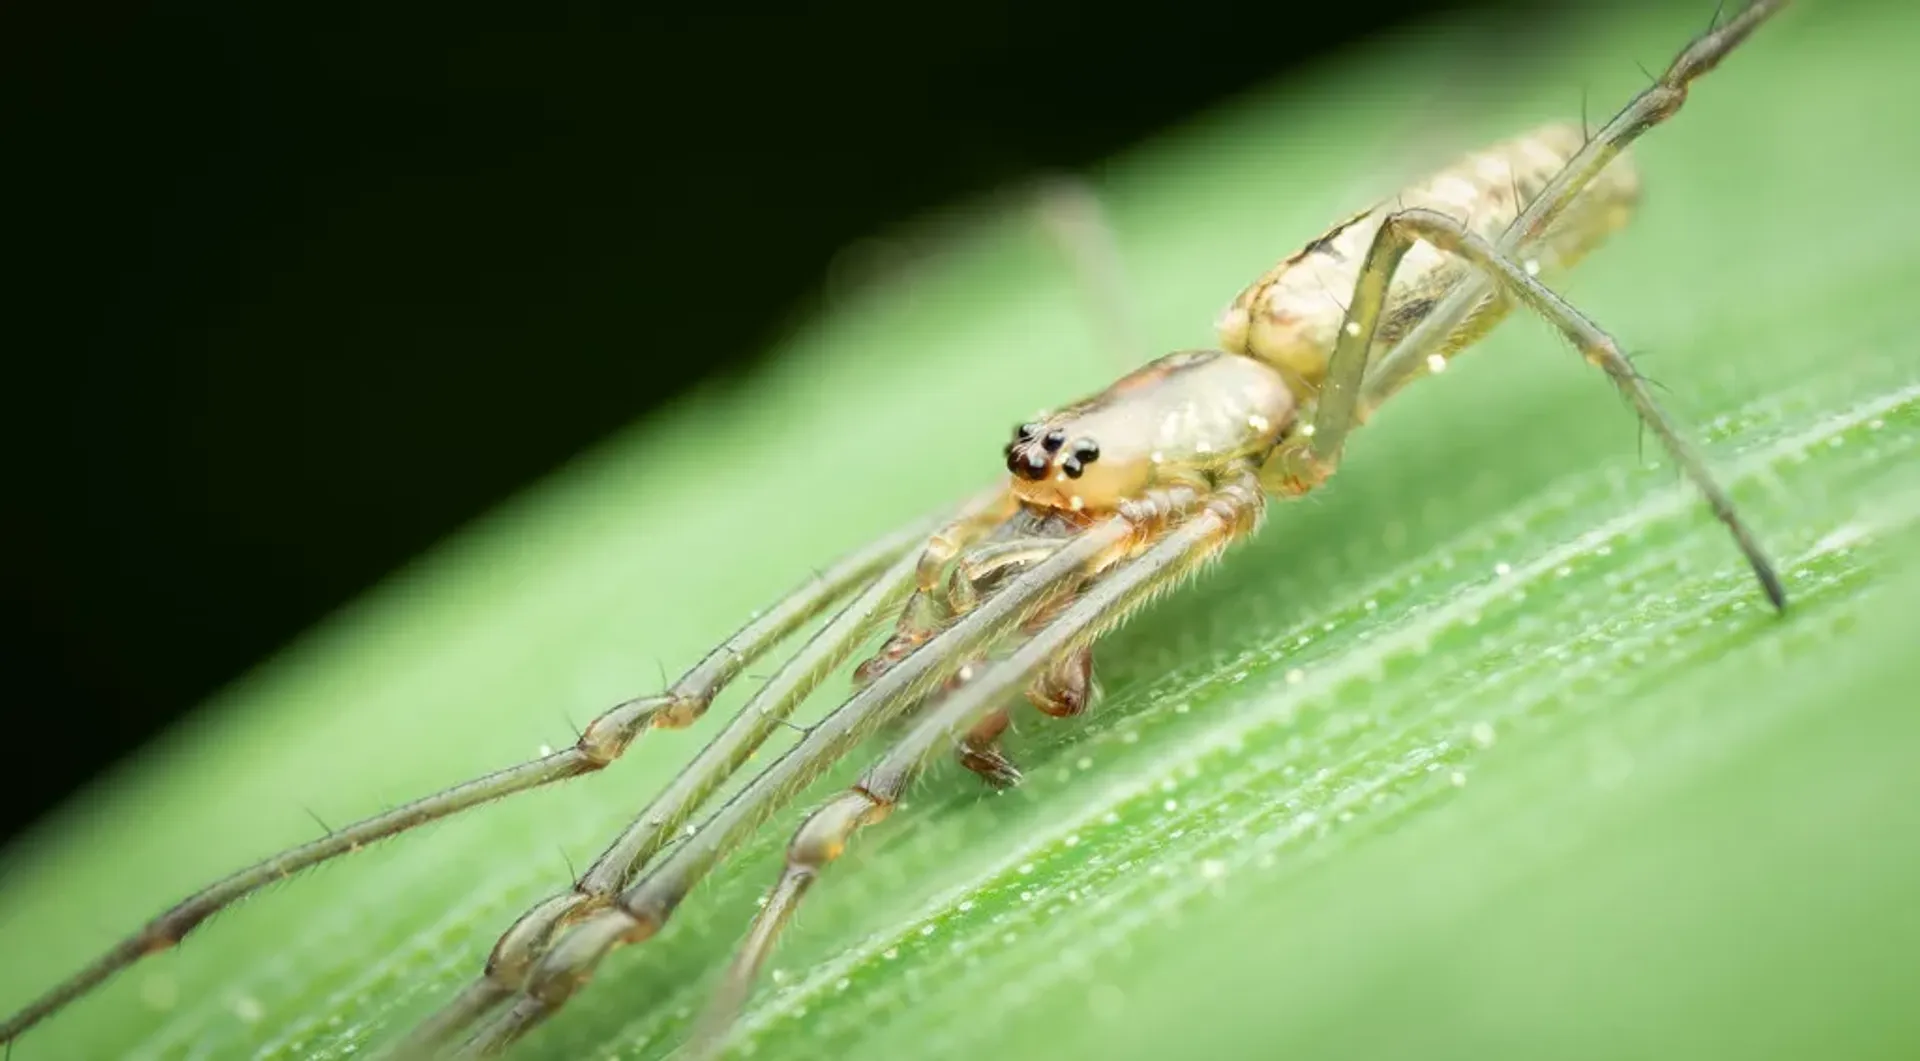
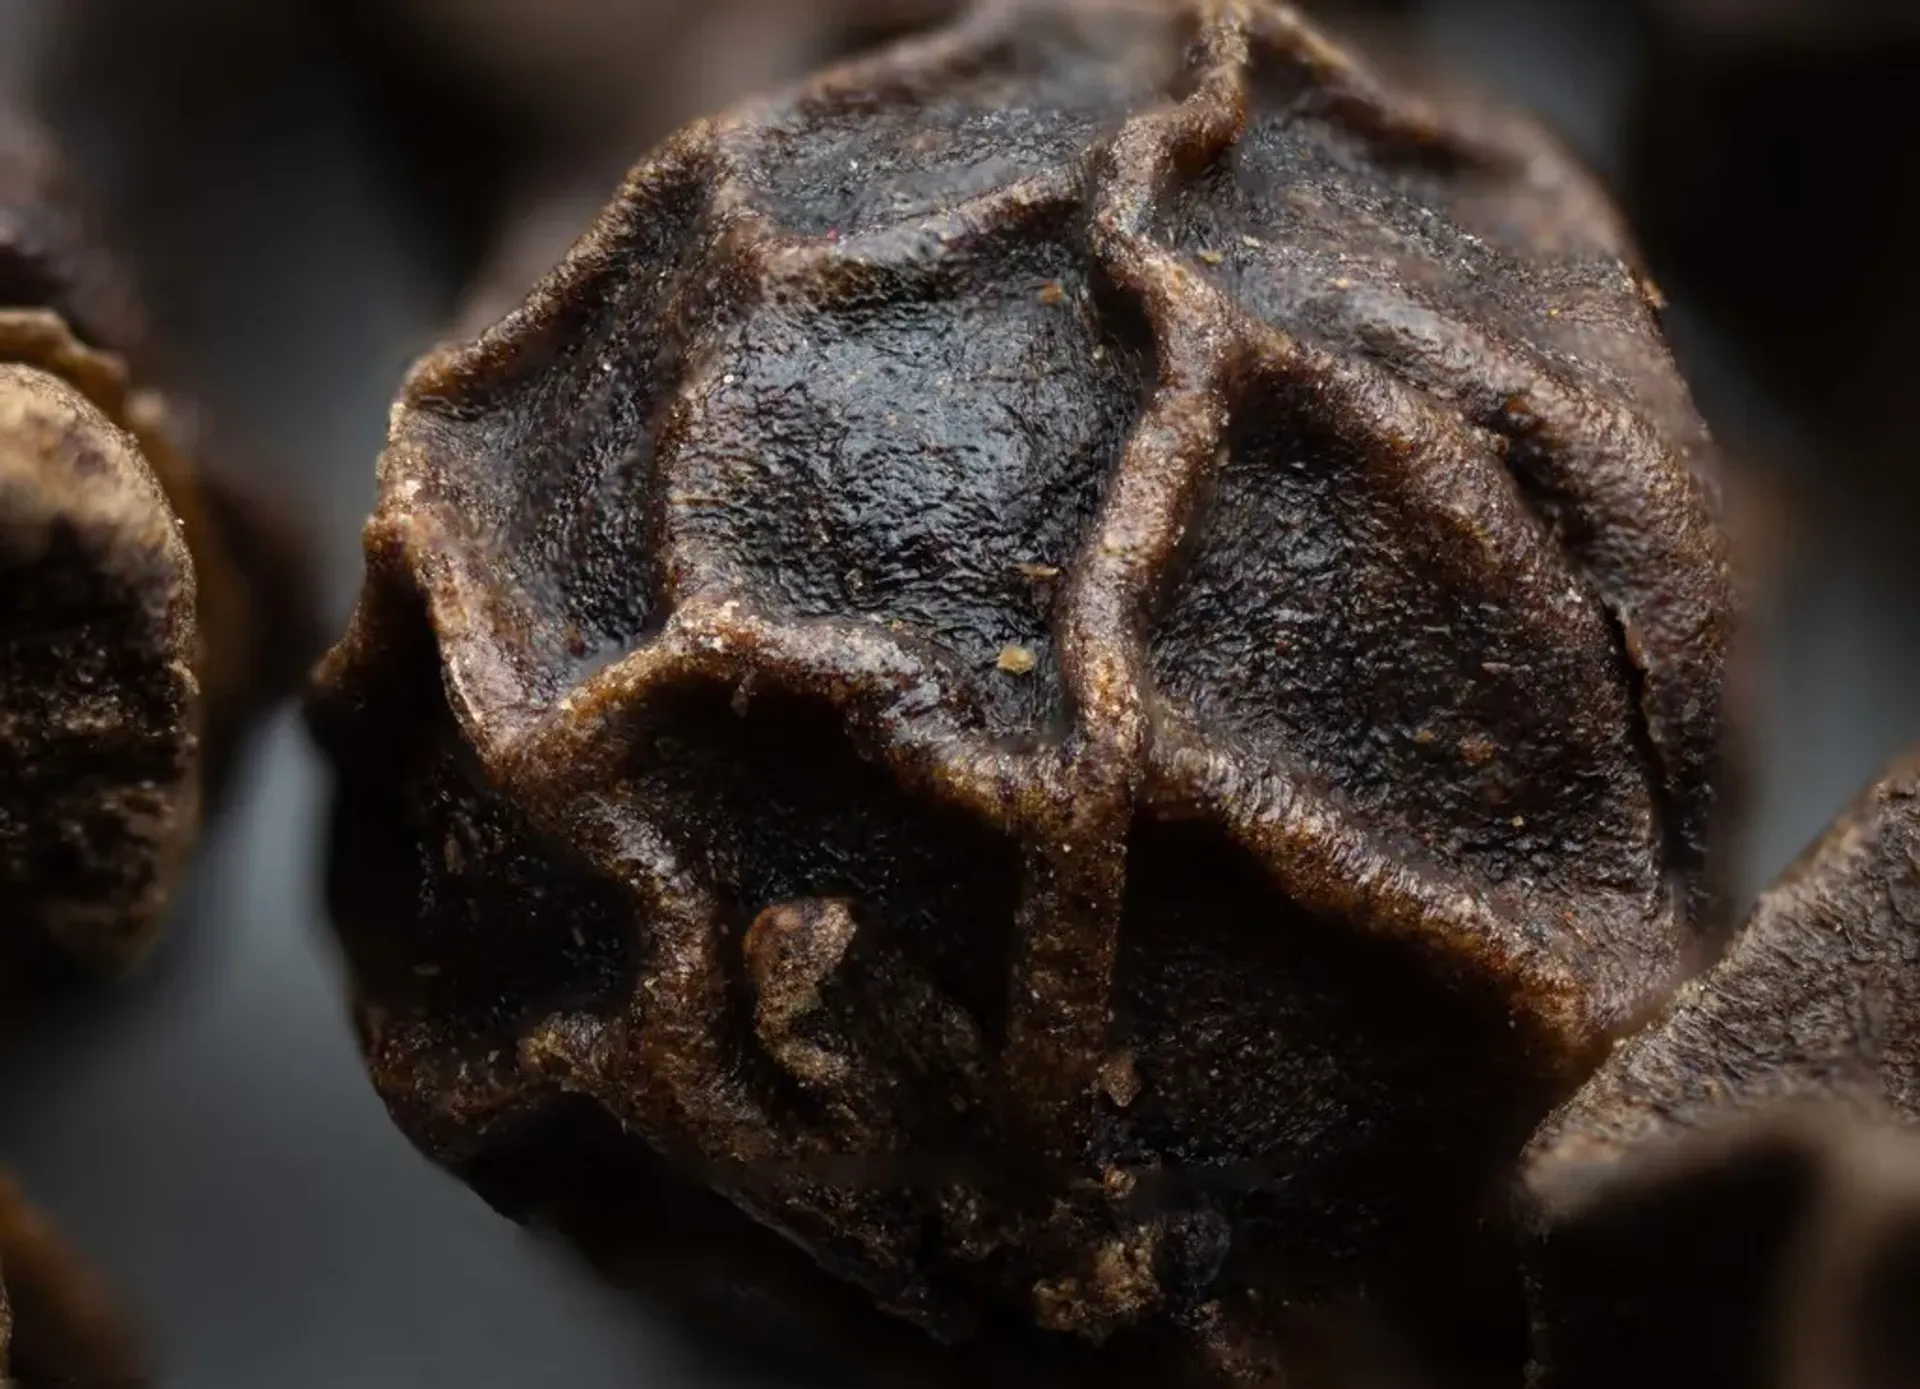
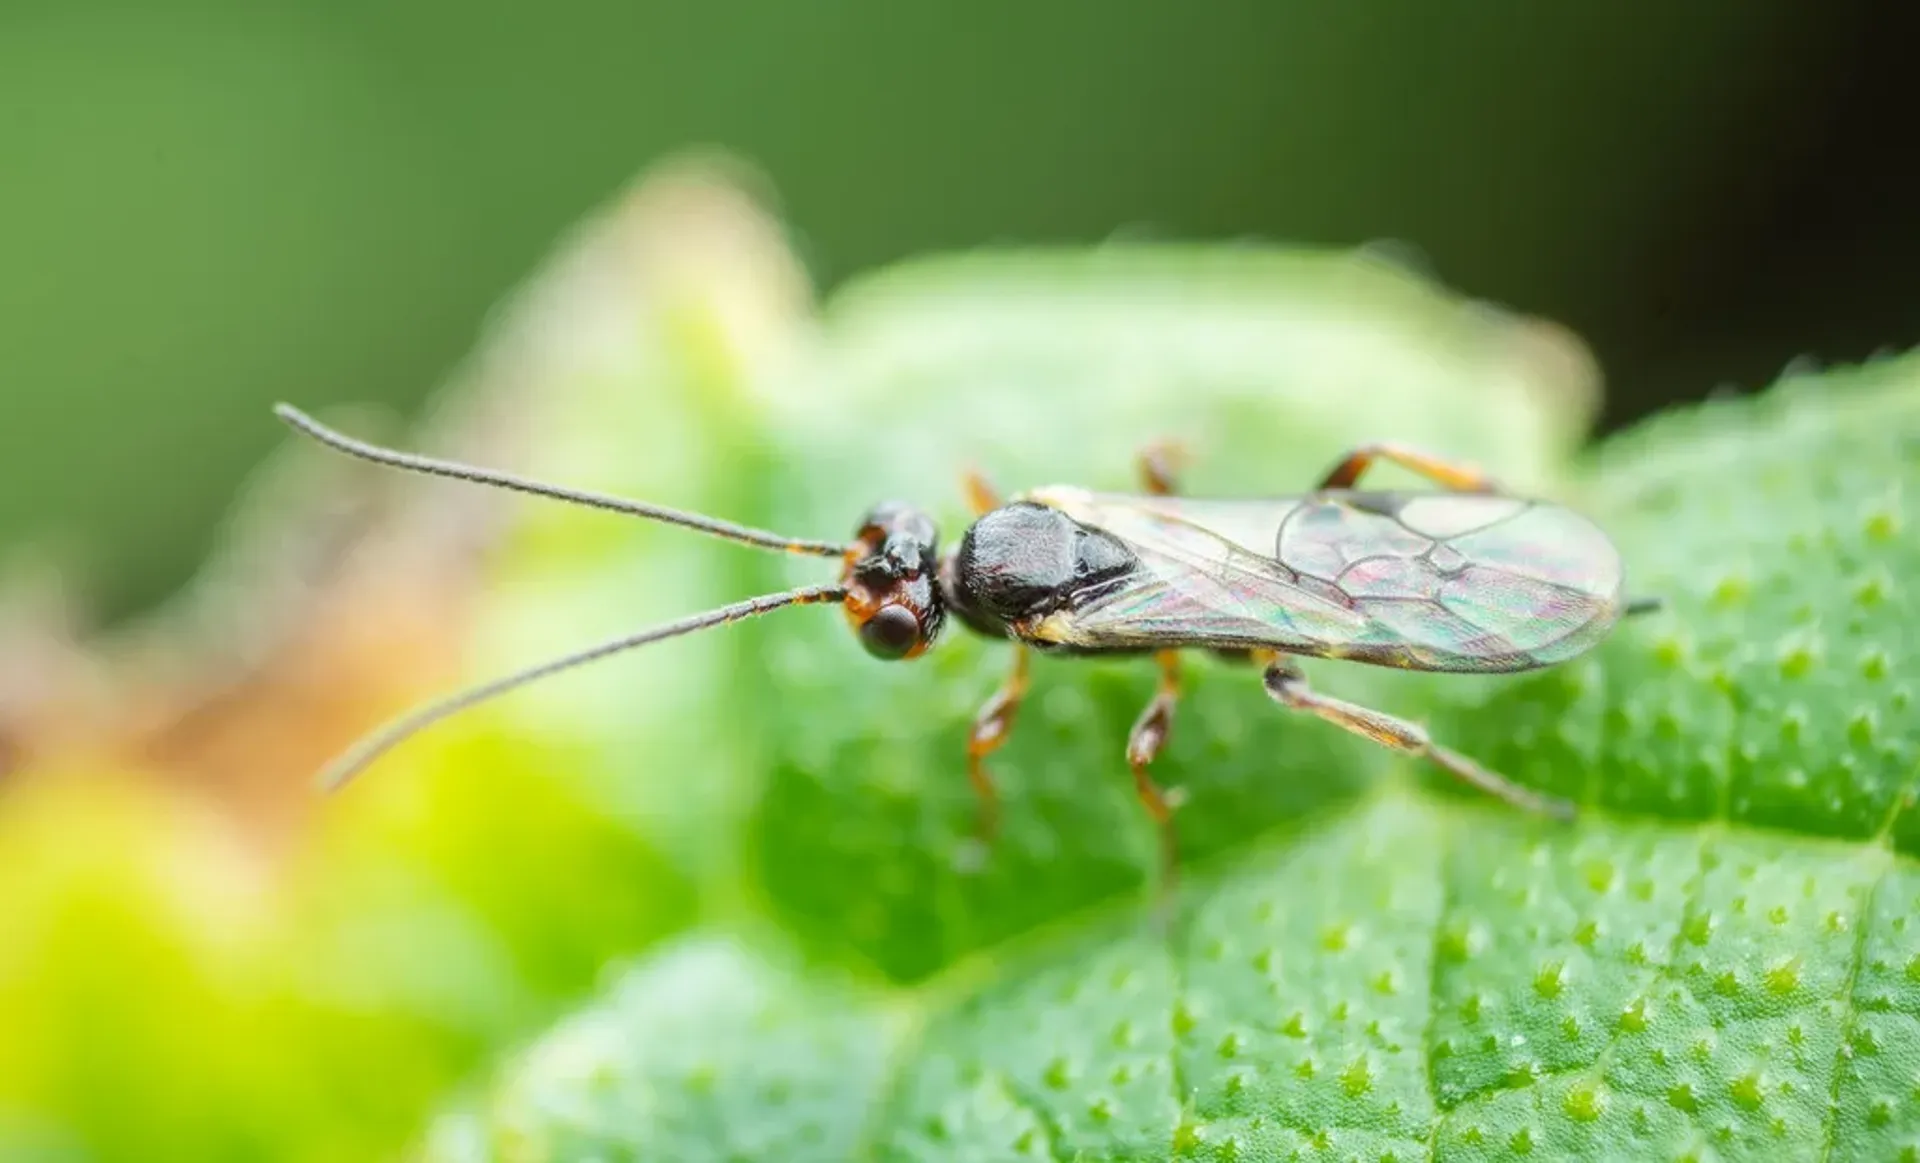
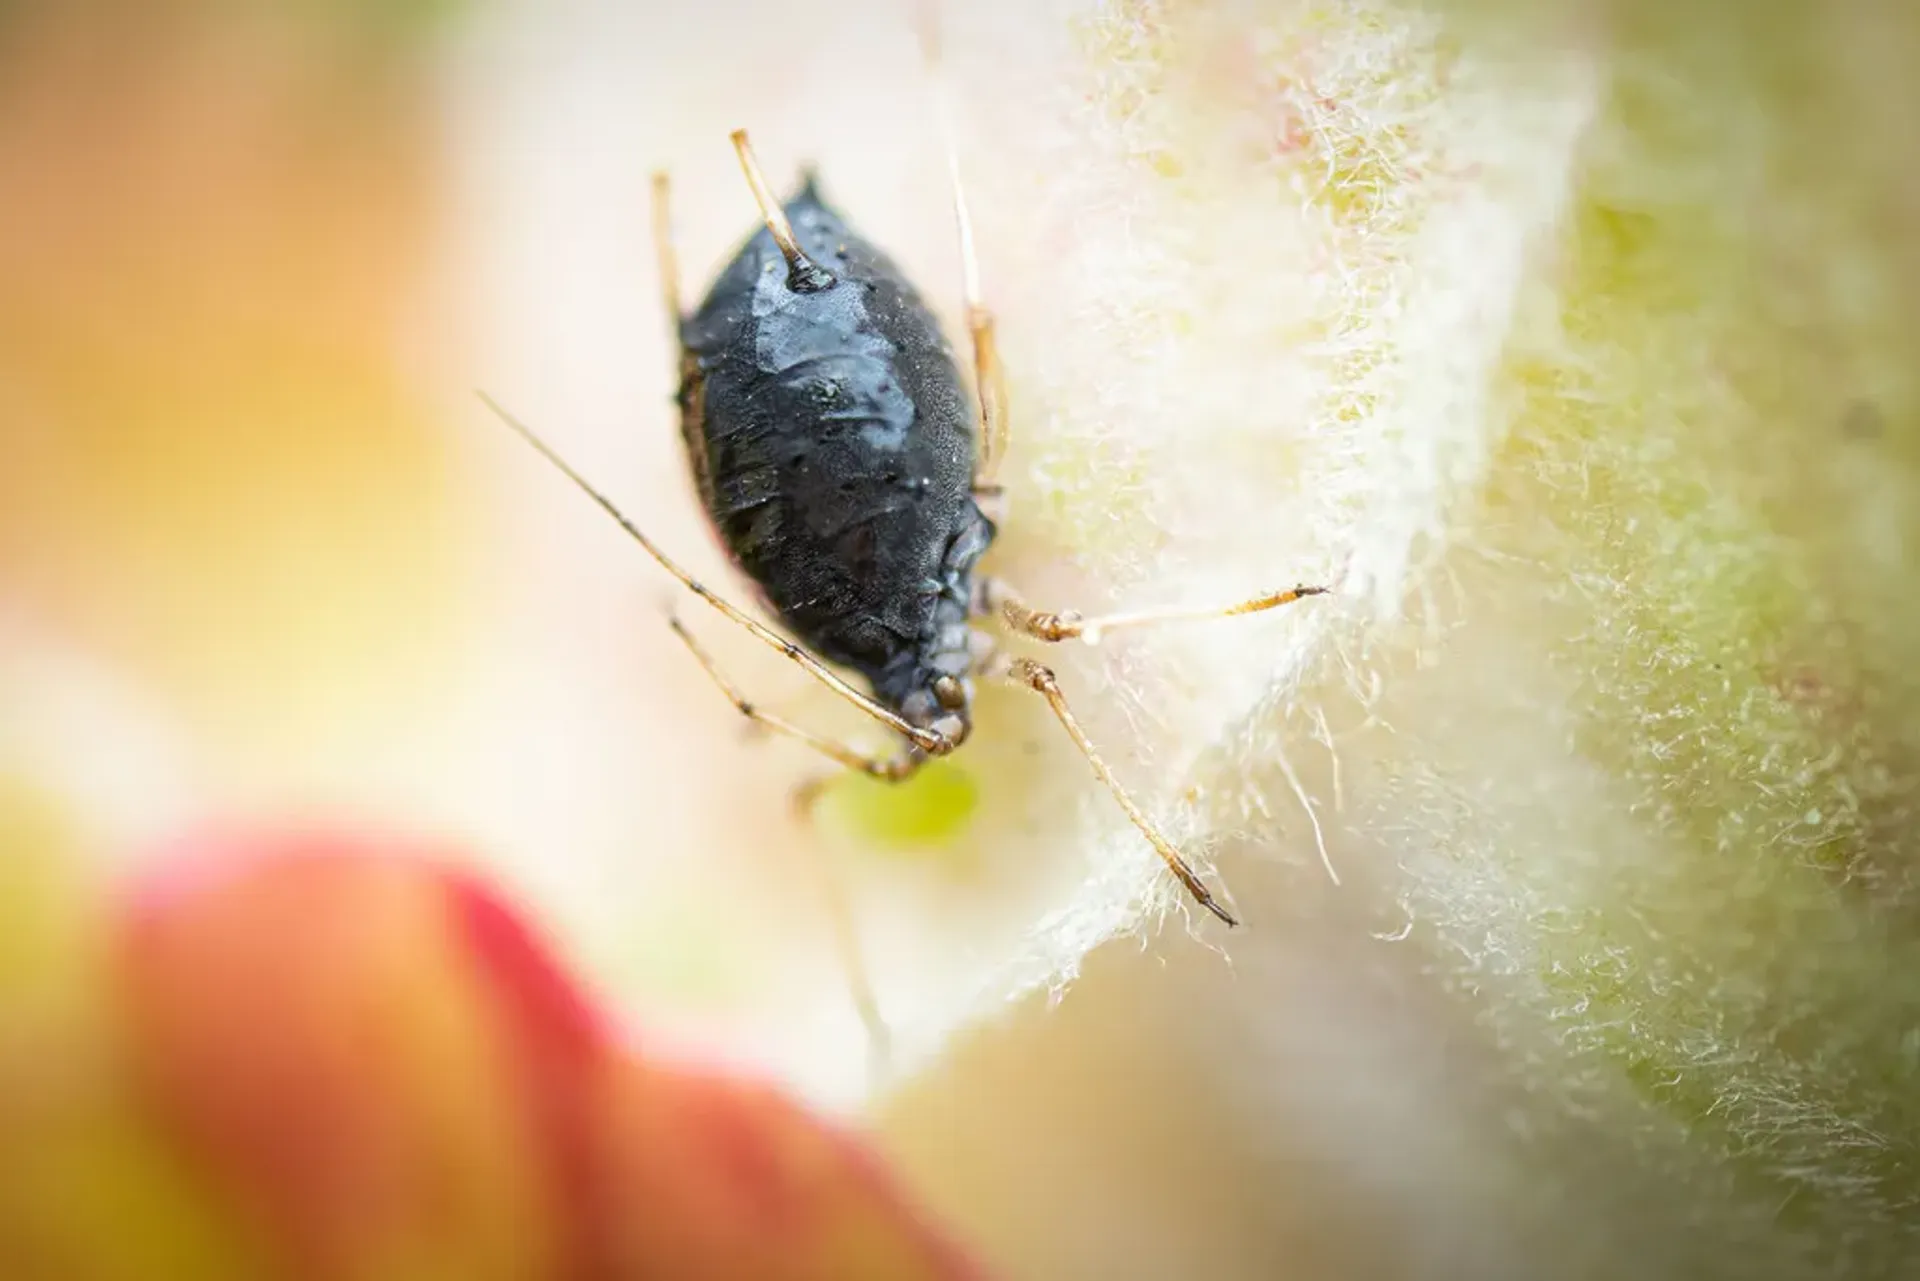
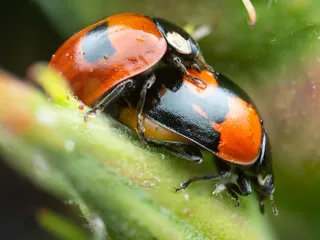
It is barely possible to shoot using natural light, but only in bright outdoor conditions using high ISOs like 1600-3200. This is a stack of 7 photos taken handheld at ISO 3200, 1/320th second:

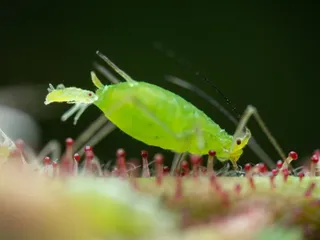
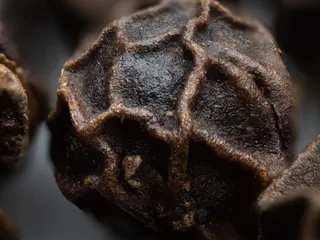
A magnification of 4x means that the field of view at the focal plane is 9x6mm on a full-frame camera and 6x4mm on a 1.5x crop camera, so you'll need to find some really small subjects!
By removing the middle segment to shorten the extension tube you drop to 2.75x magnification on a crop camera, which gives a field of view of 9x6mm, and so matches the field of view of using 4x on full-frame.
This video shows what the view through the viewfinder is like when hand-holding at these magnifications:
You can also check out Micael Widell's introduction to this adapter, with a demonstration of shooting insects with it in the field! See his video below:
Tags
Model origin
The author marked this model as their own original creation. Imported from Thingiverse.


