Overengineered Bottle Opener and Cap Thrower (OBOCT)


Description
PDFChristmas 2022 Update
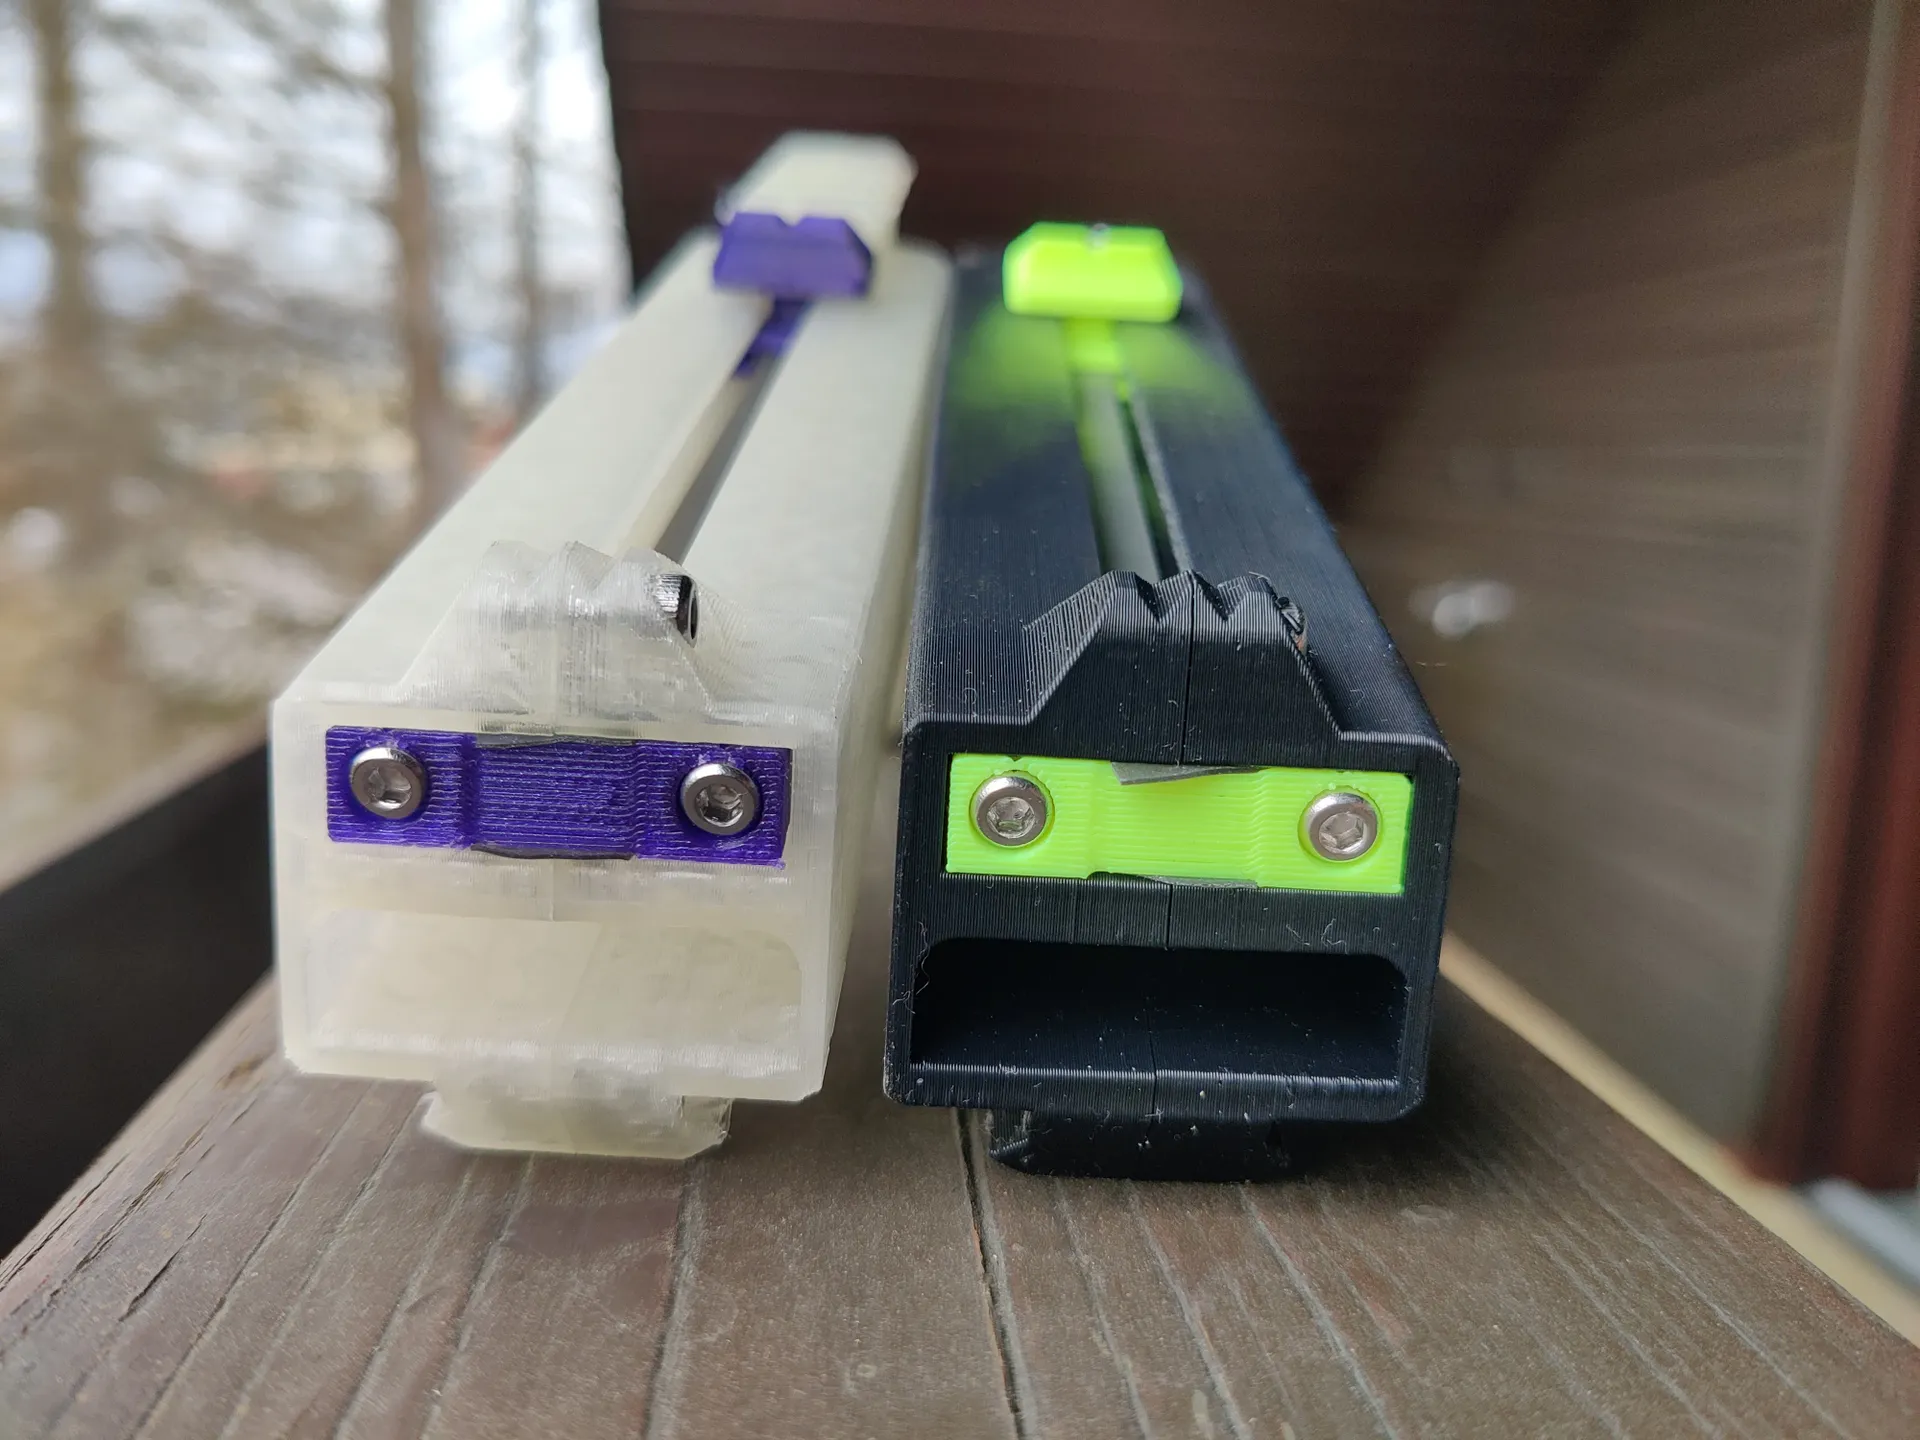
I changed the corners of the picatinnies to radii so they would print better. Also I adjusted the angle of the infill in order to get ultra smooth glide surfaces for the slider.
Have fun!
Watch the Beer Bottle Gun in action, Video:
Reinventing the Wheel
I heard this years ago at a Perl Conference:
There's nothing wrong with reinventing the wheel if you invent a better wheel.
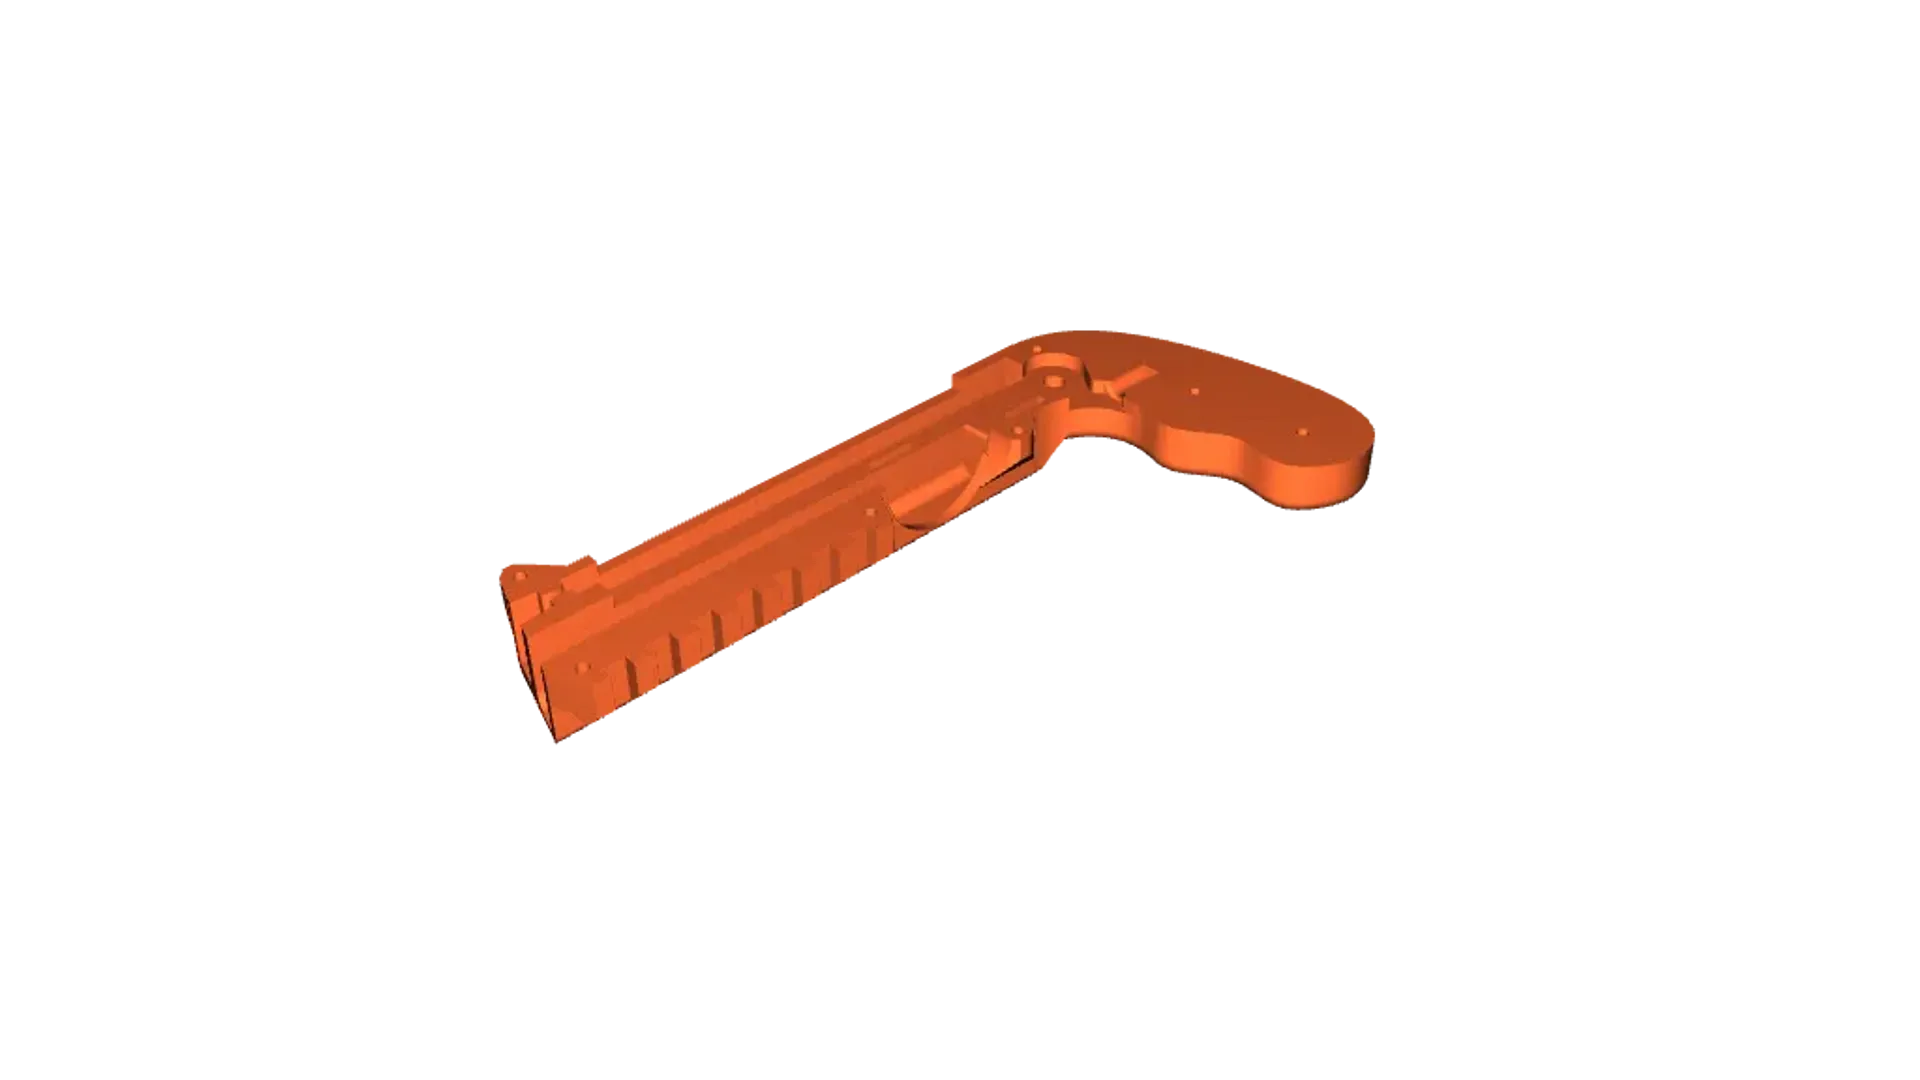
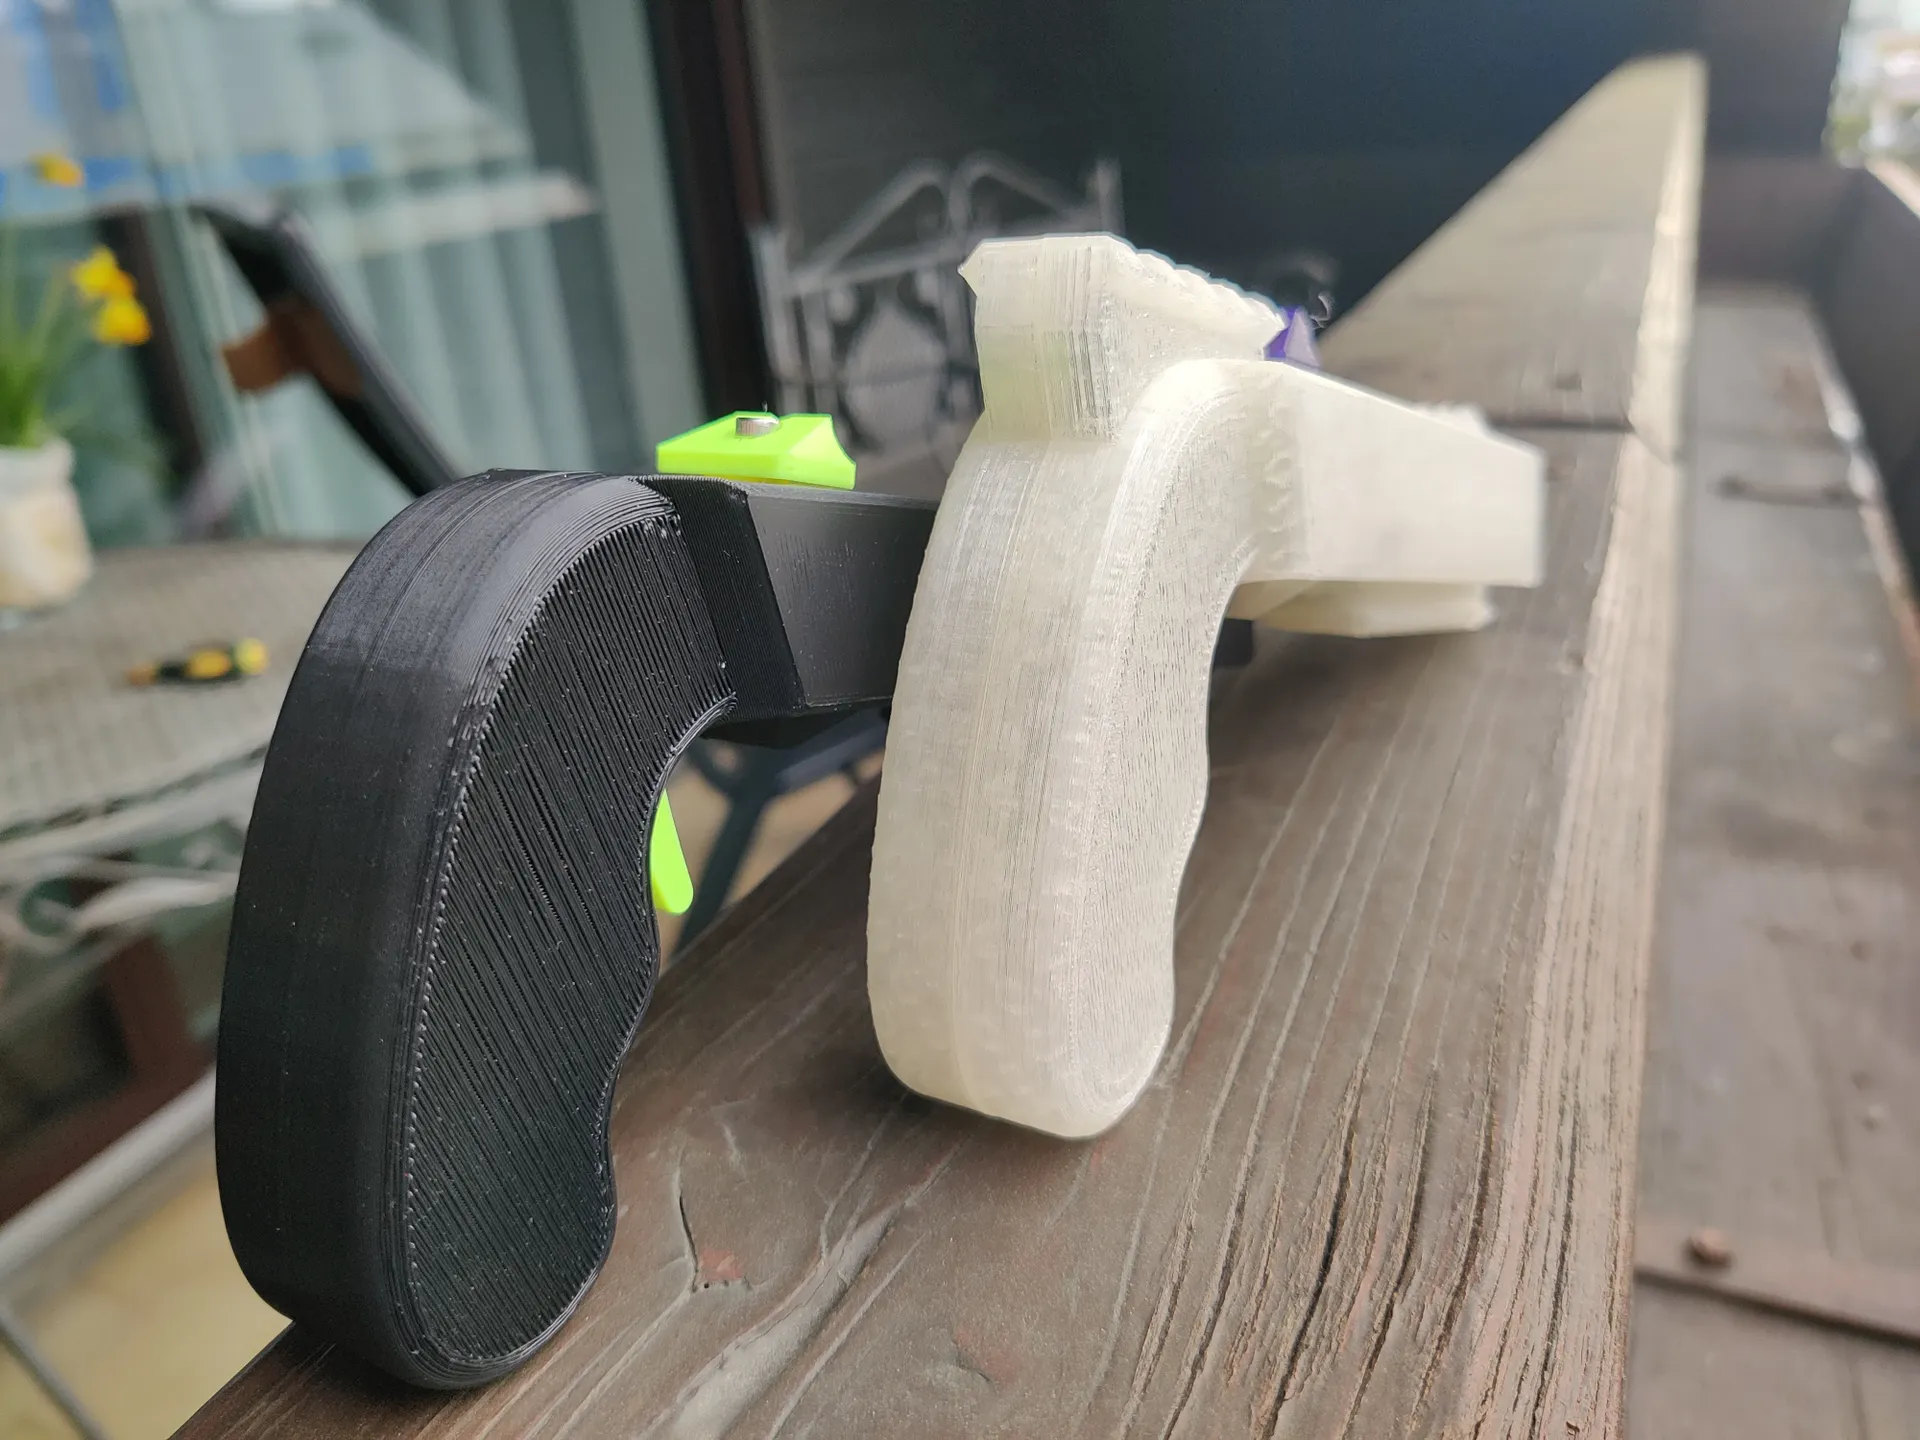
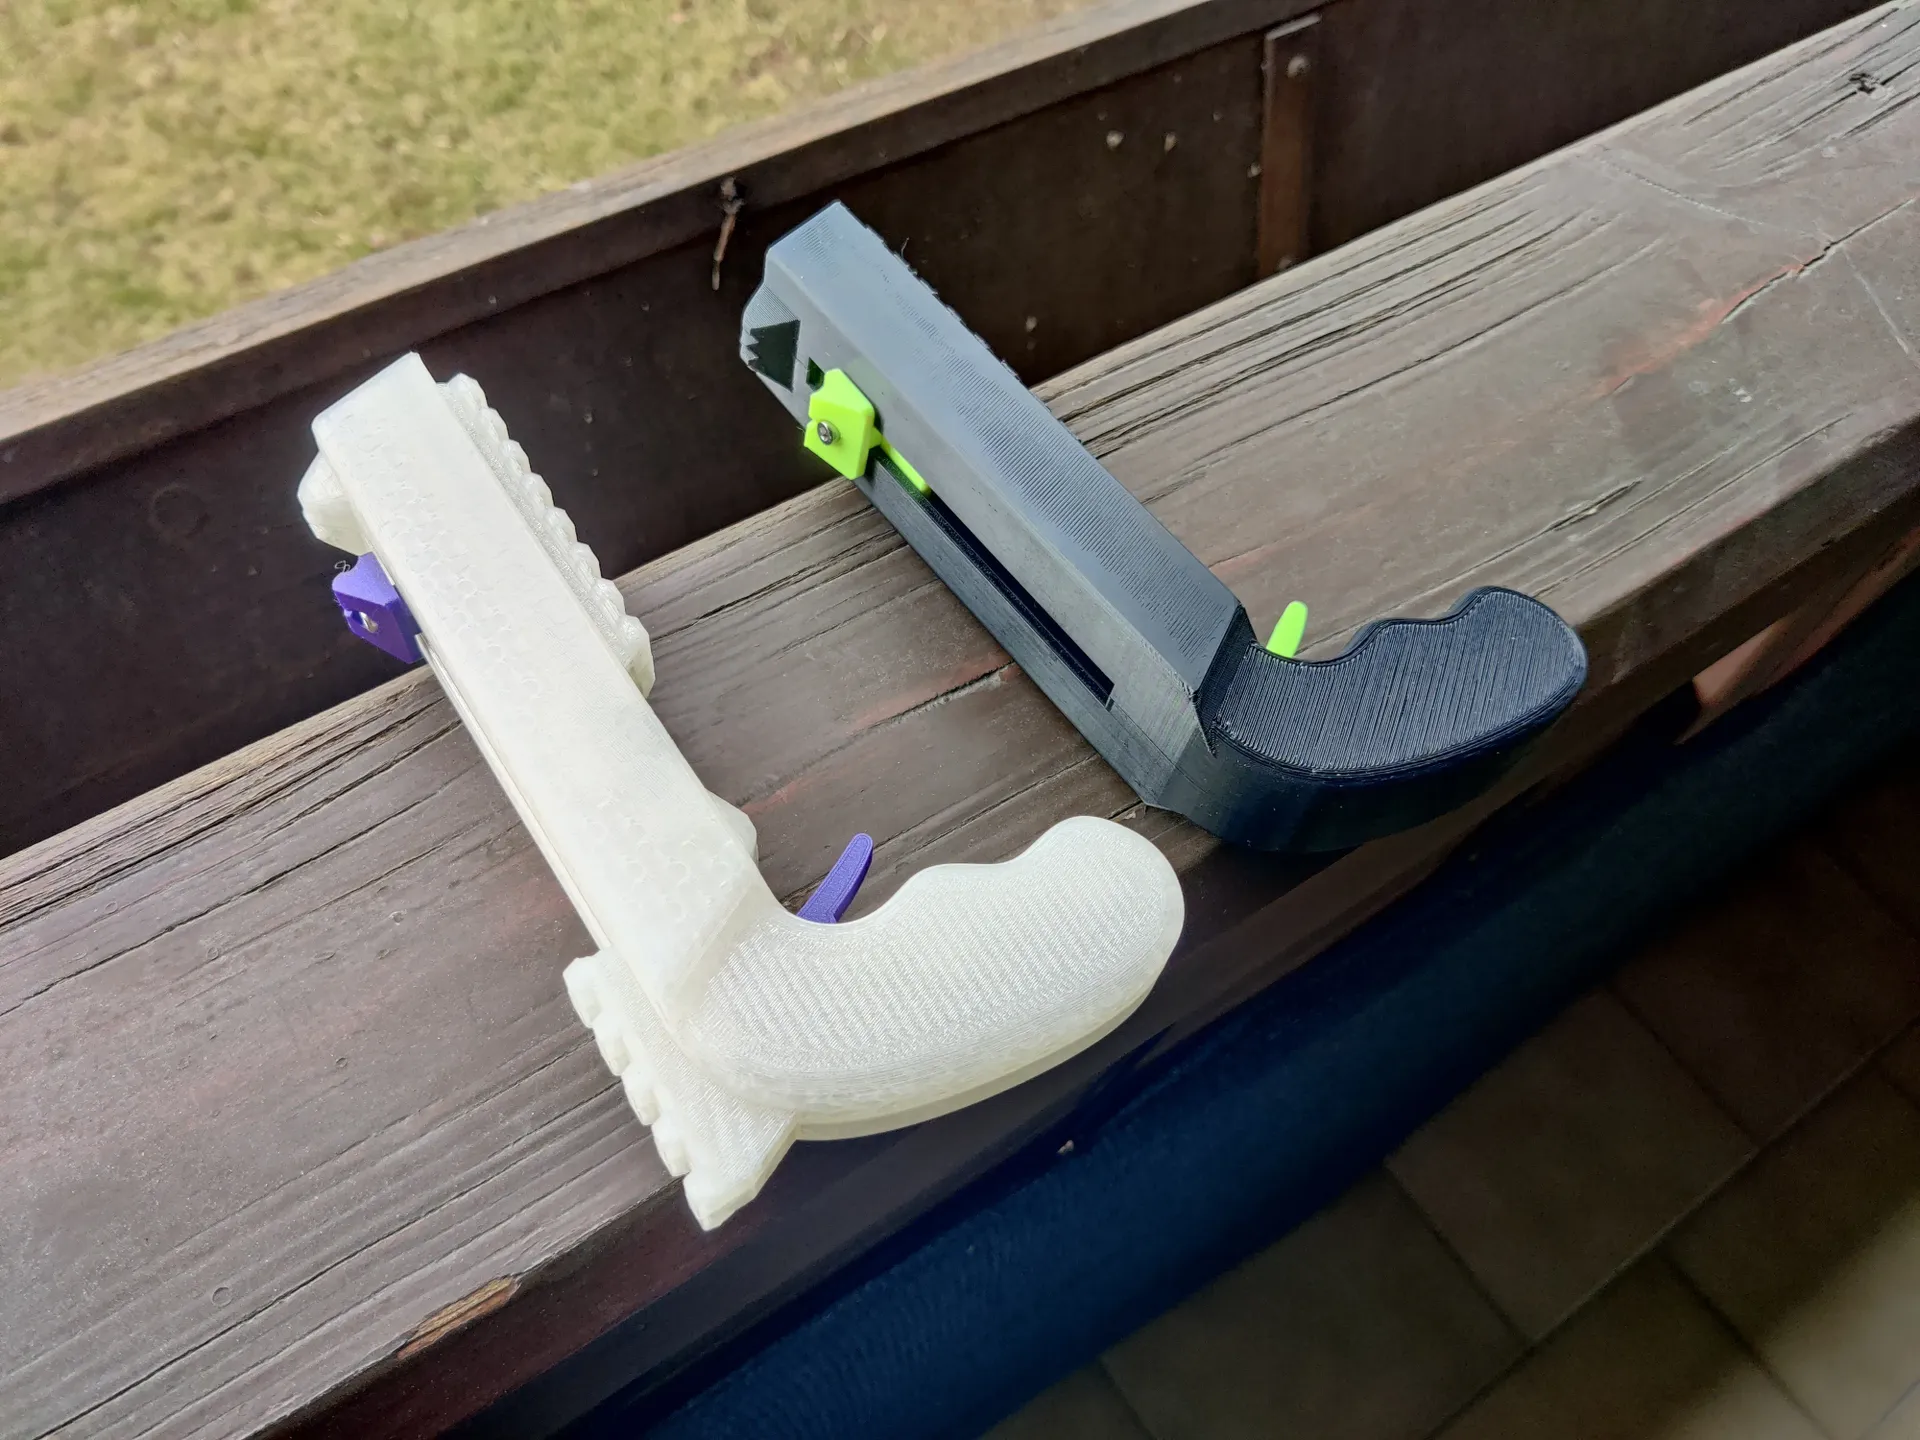
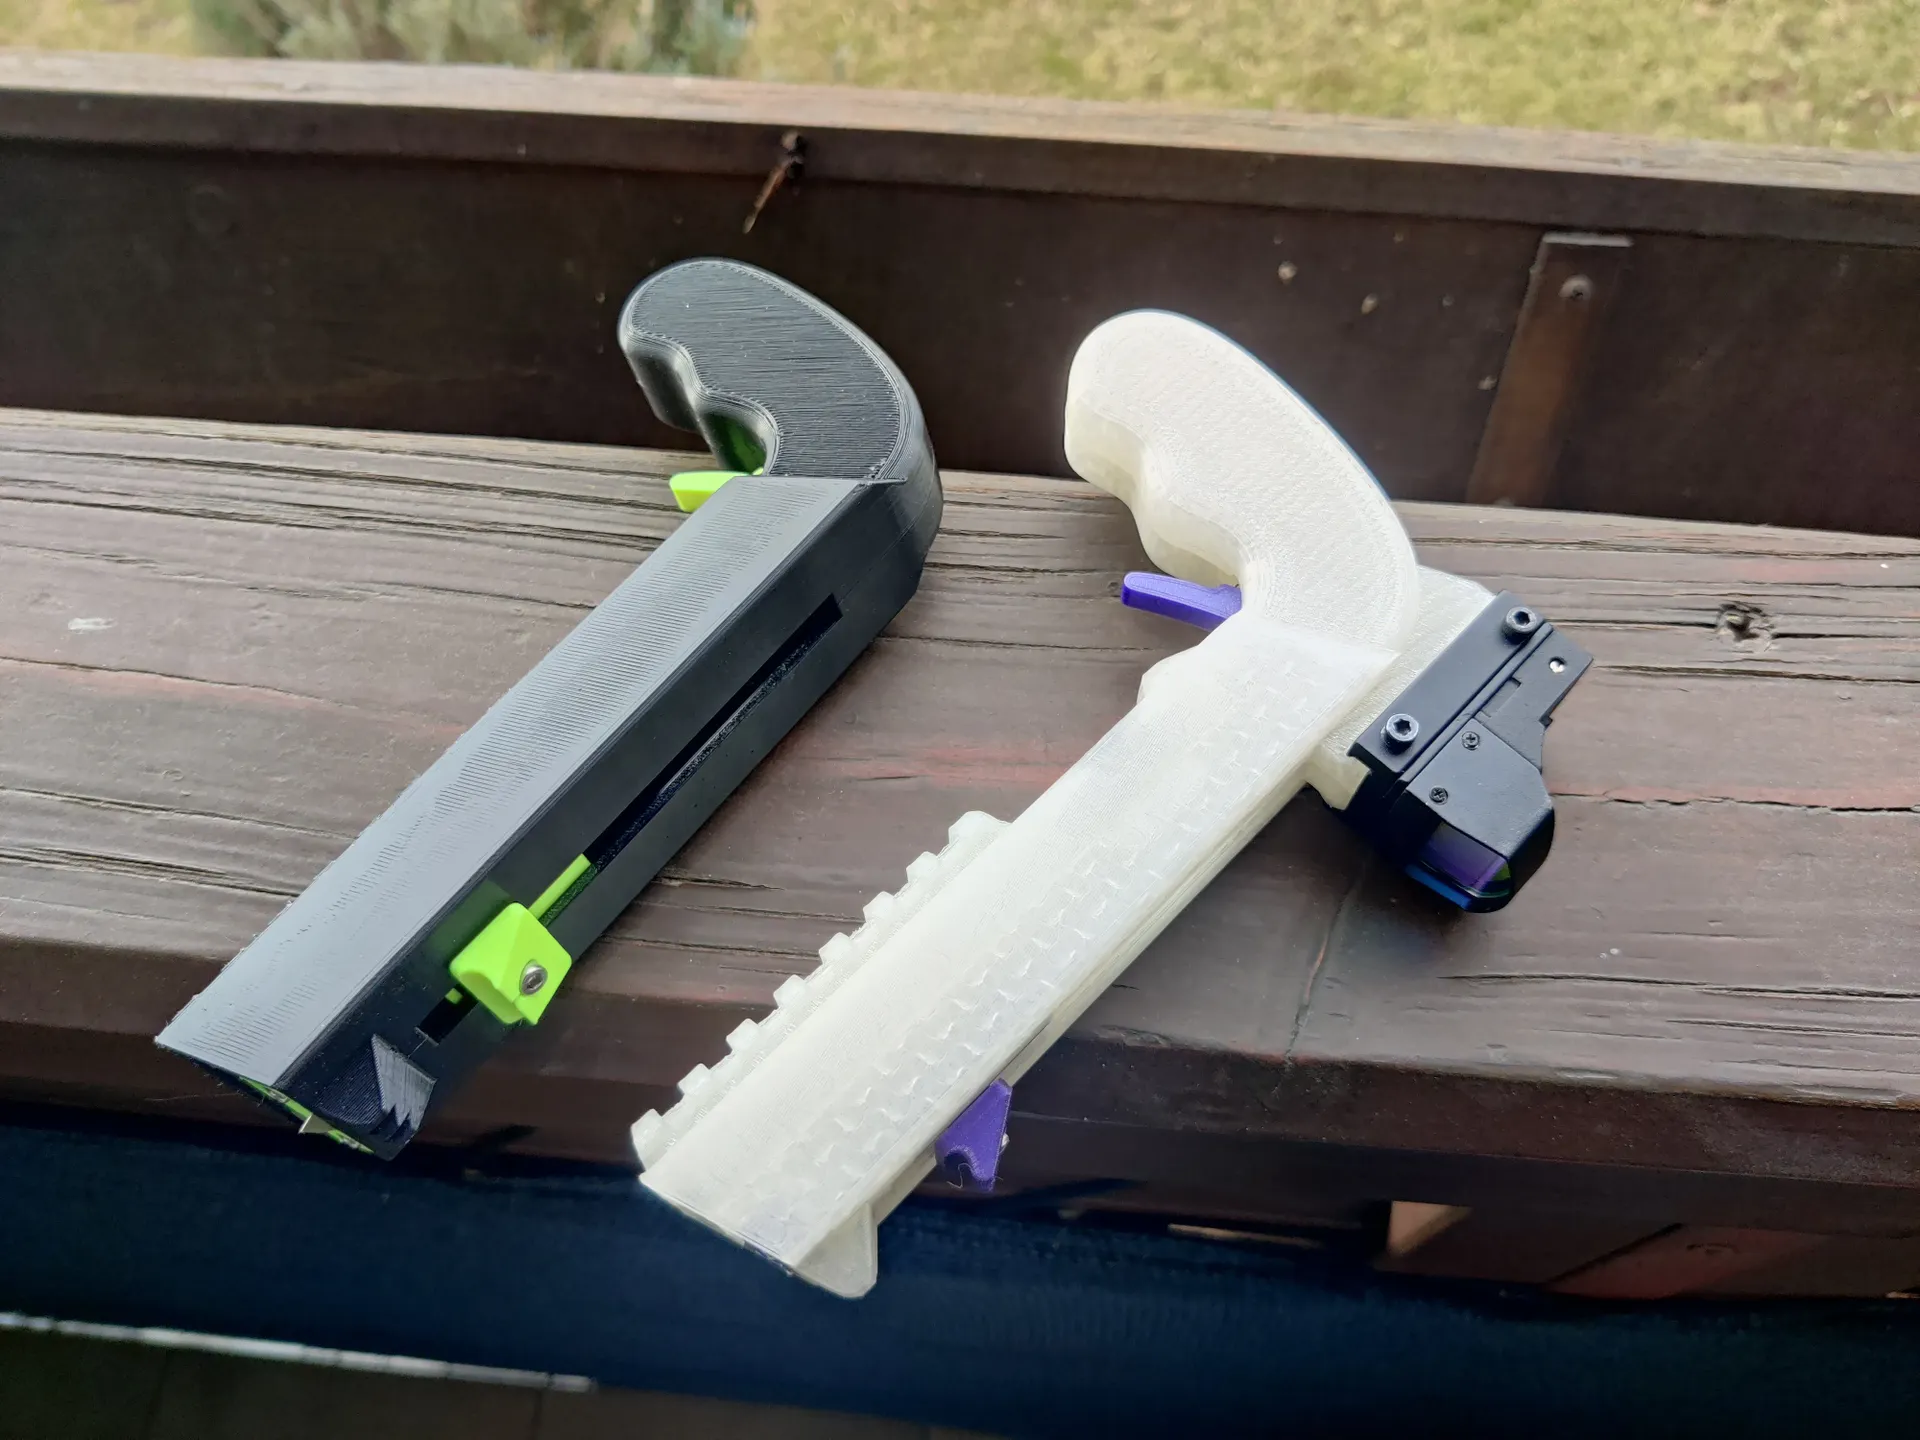
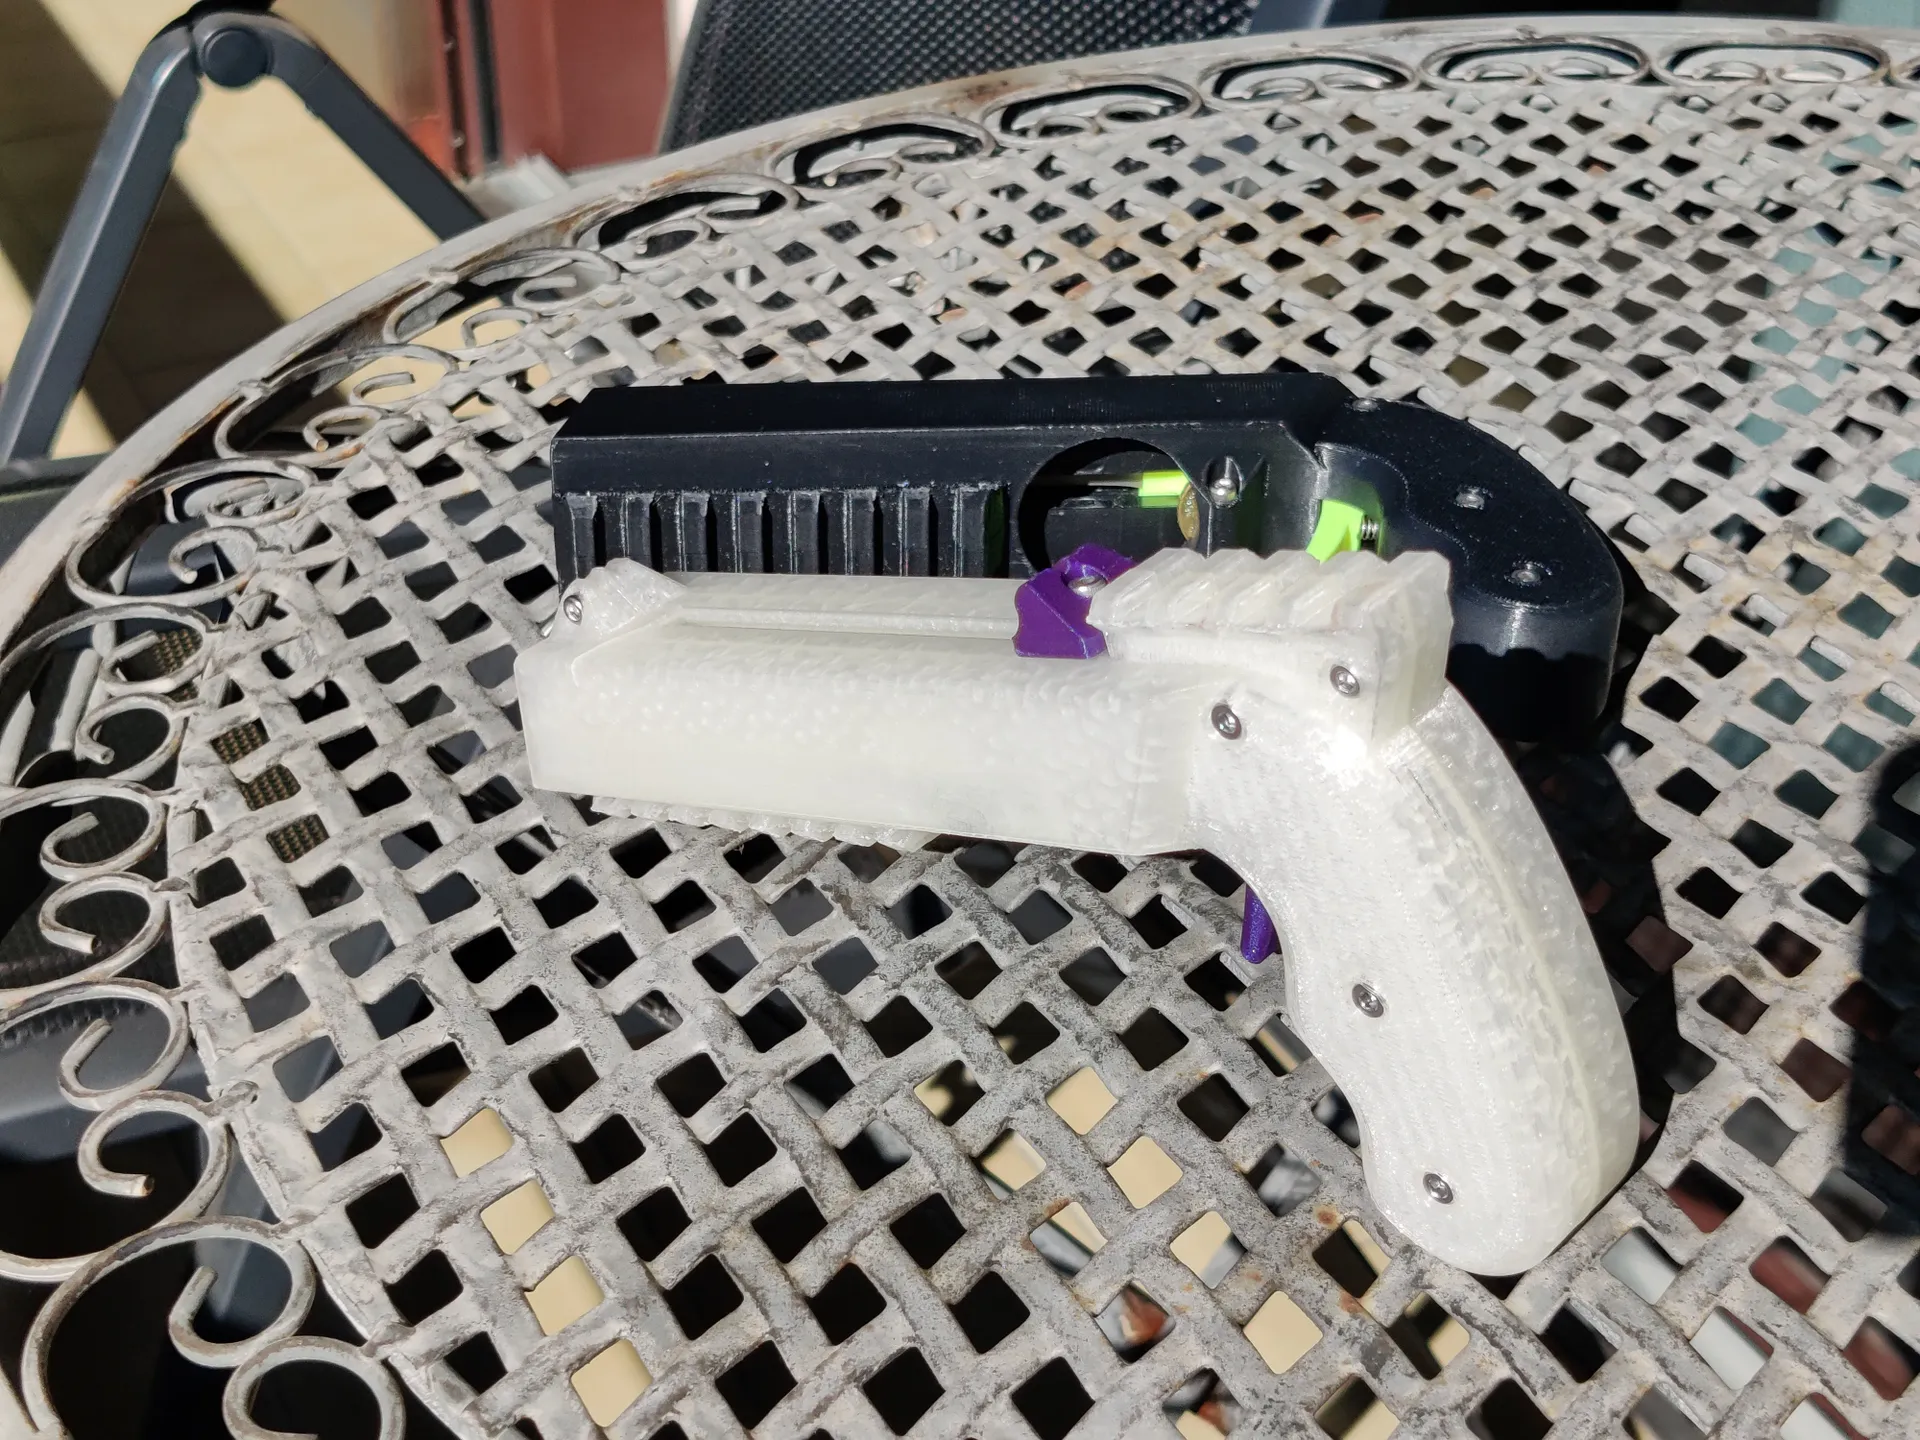
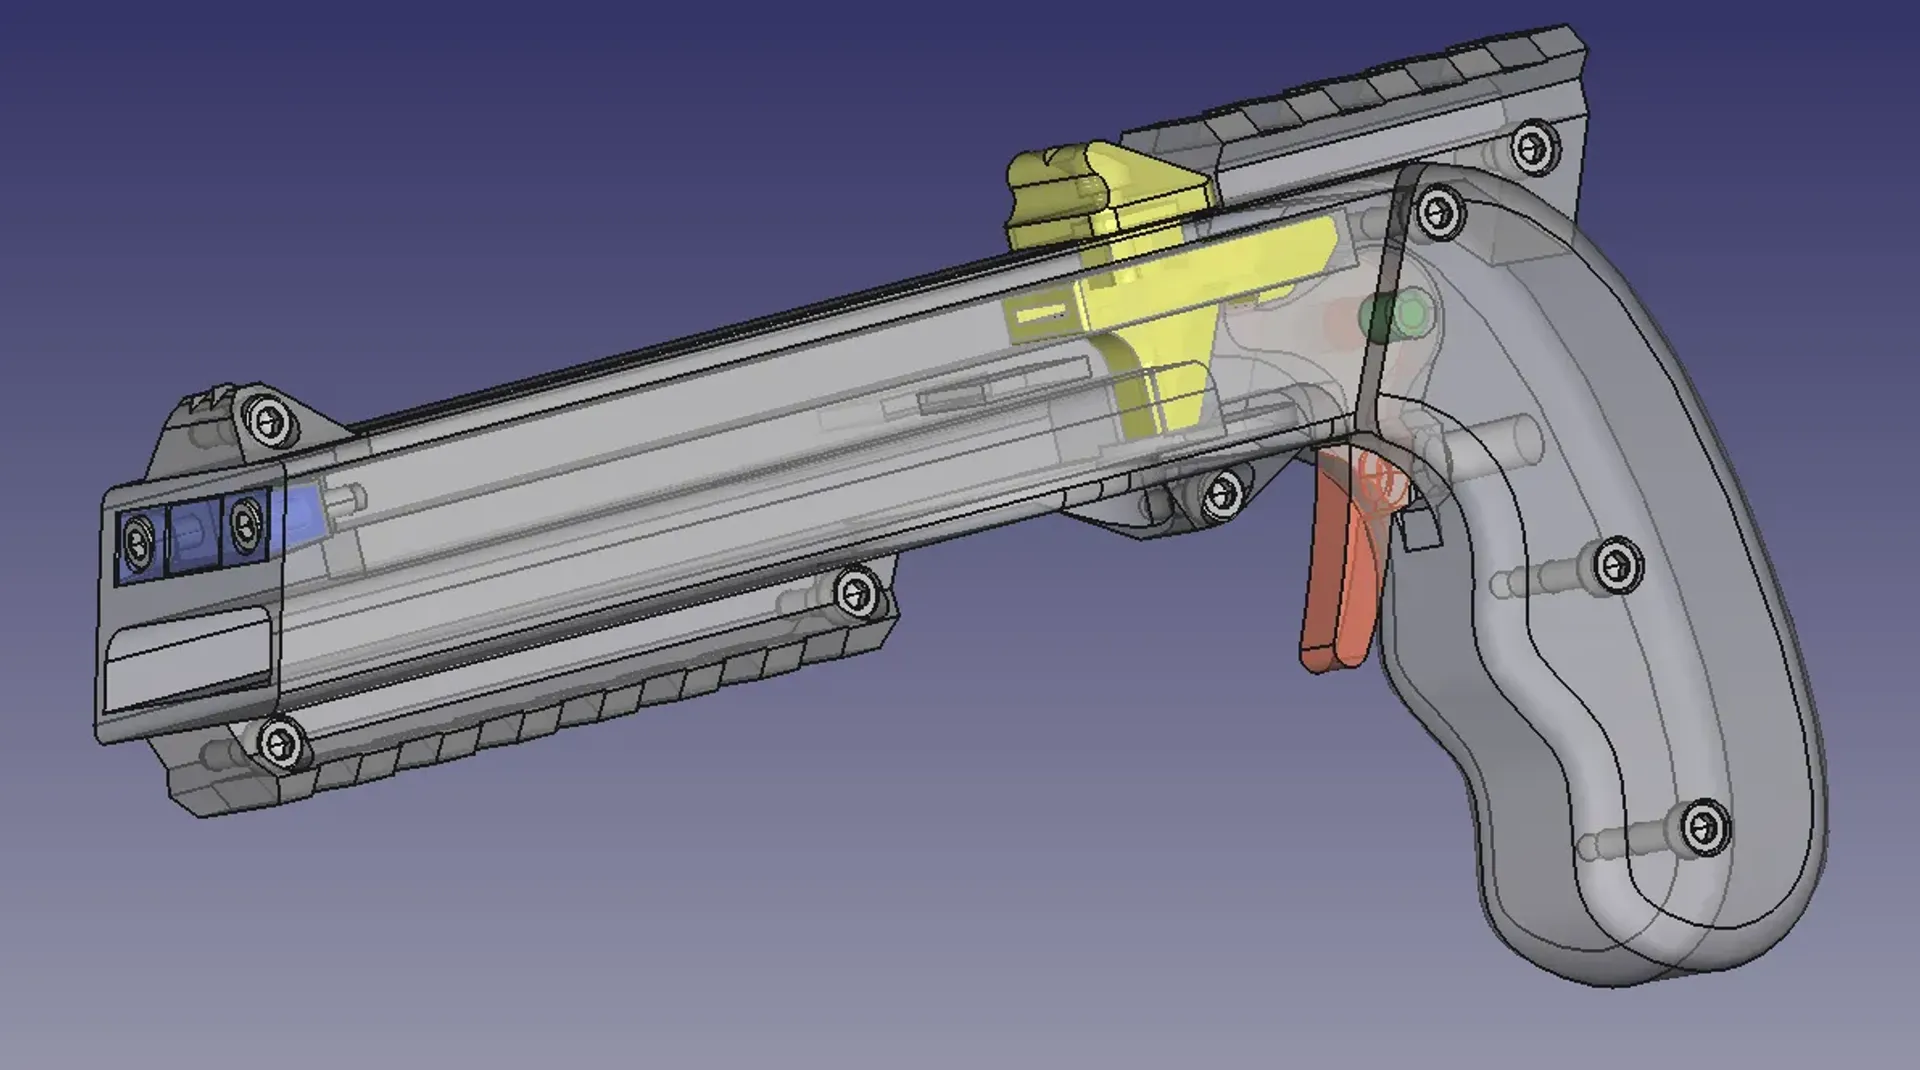
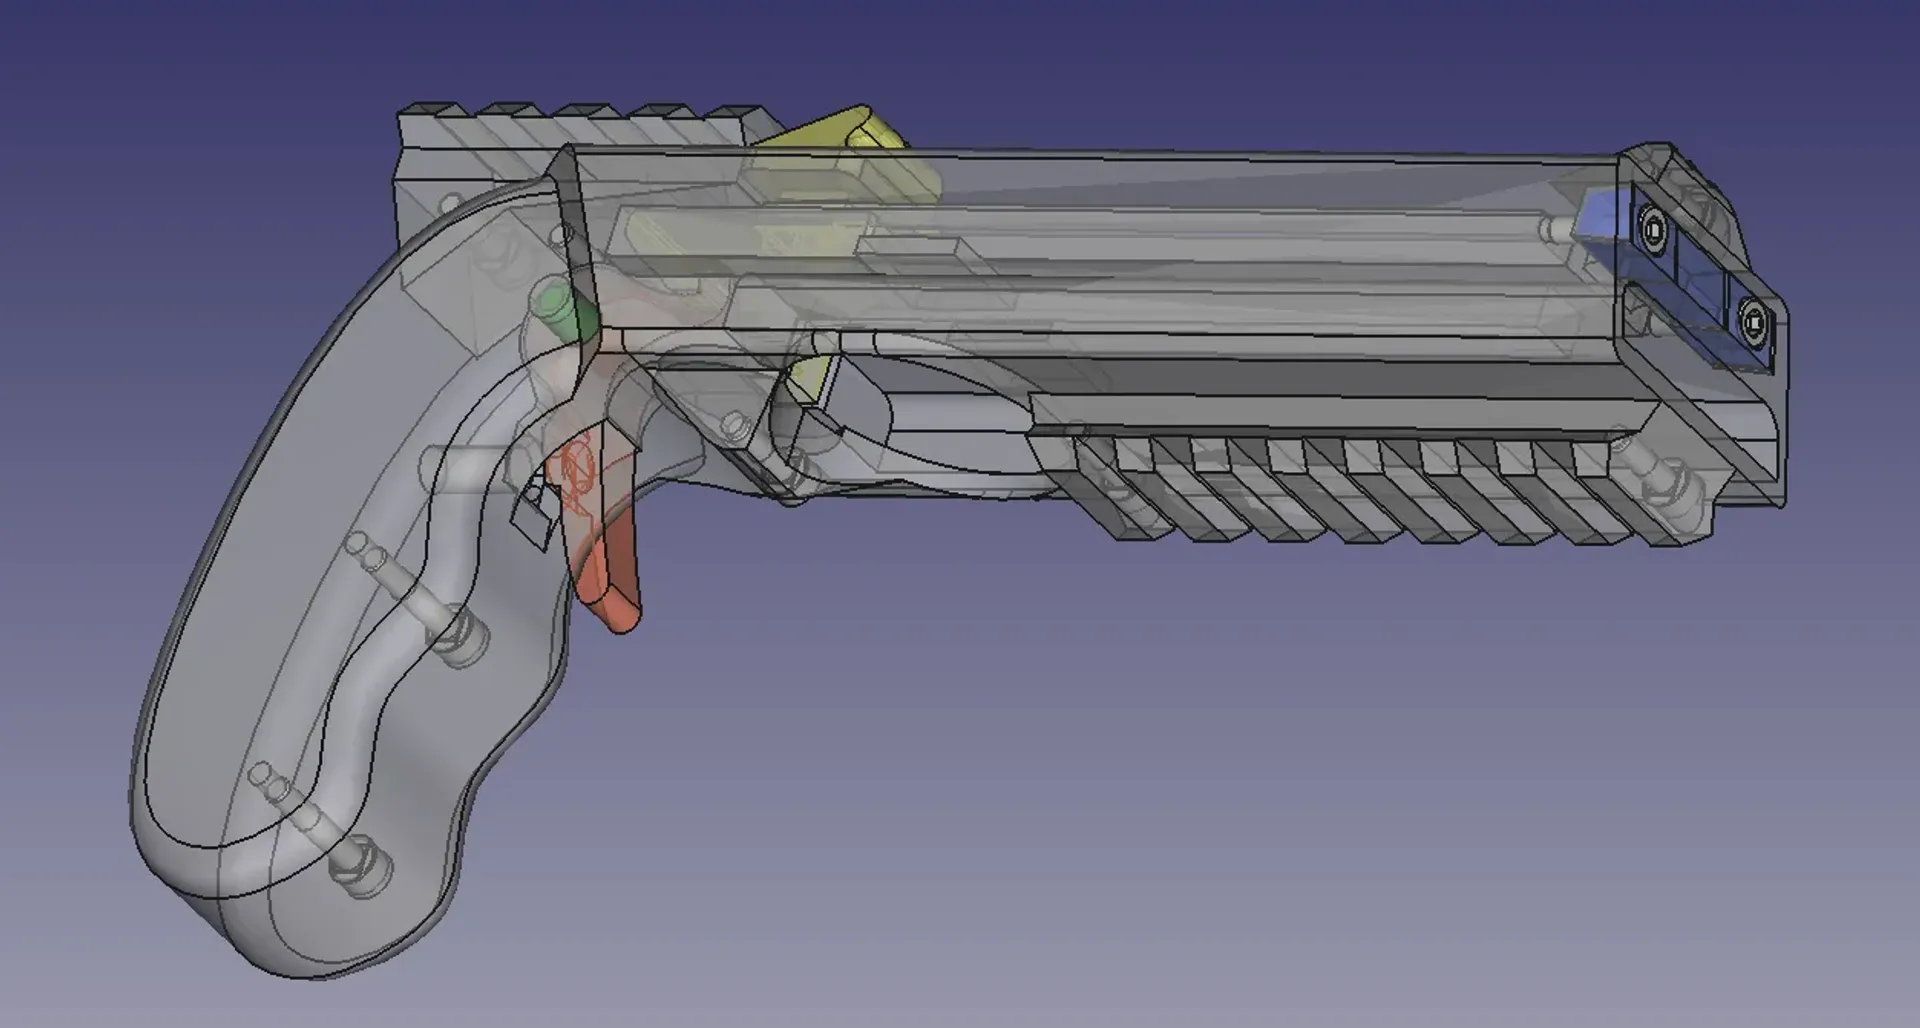
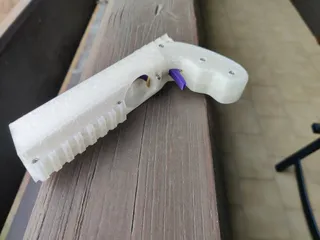
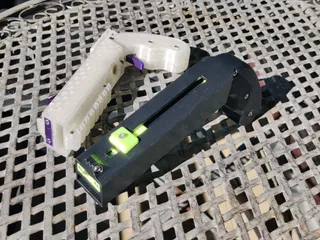
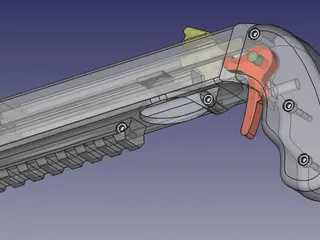
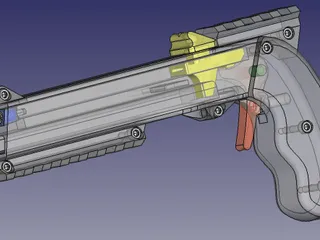
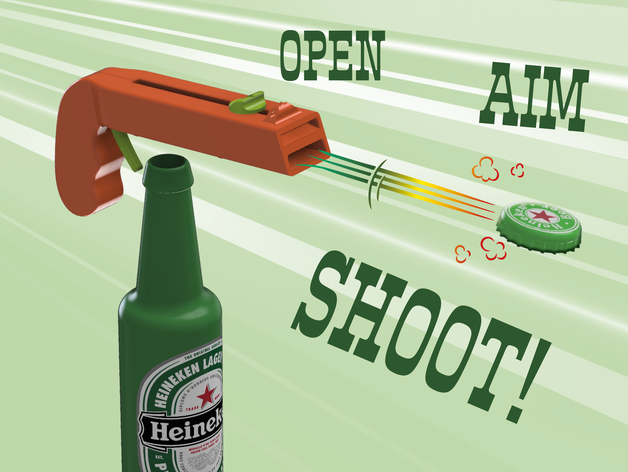
This is a complete redesign of the famous "Bottle Opener and Cap GUN" by 3Deddy uploaded to Thingiverse on October 15, 2019. Link to original
It is my first big FreeCAD project and I learned a lot about not doing things in FreeCAD. I spent months designing this but I learned so much while doing so. The design is pretty screwed up now and I have to do it again the right way if I want to change things because of the dependency hell I put myself in. I have included the FreeCAD file but beware, it is messy.
Accessories
Here is a growing list of accessories
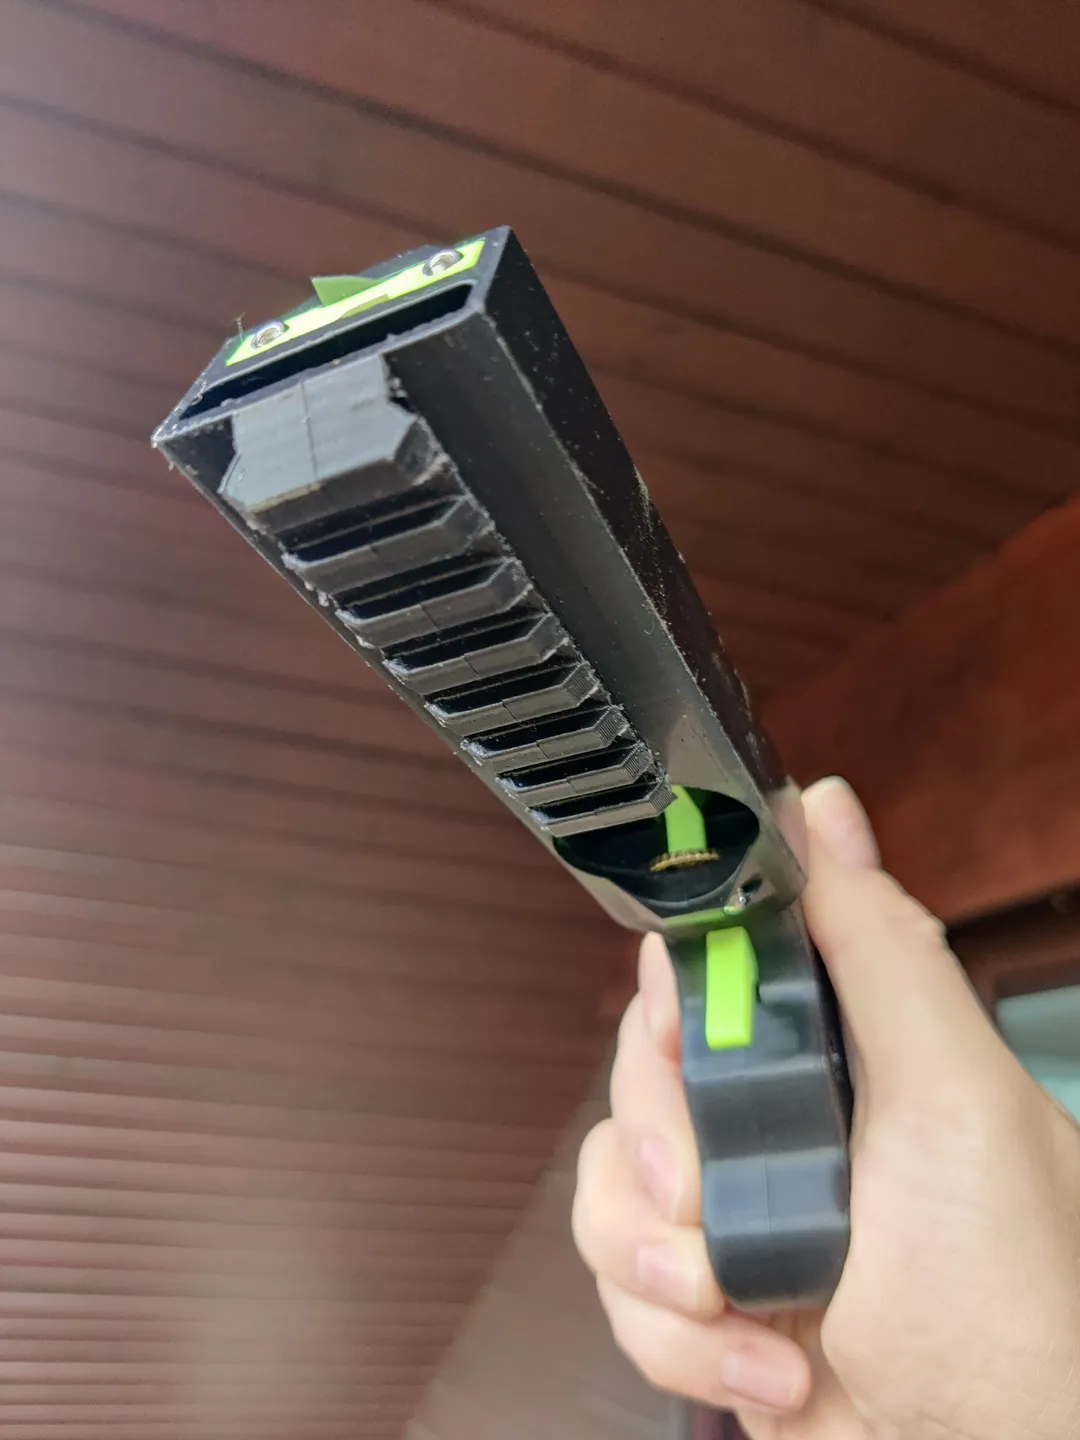
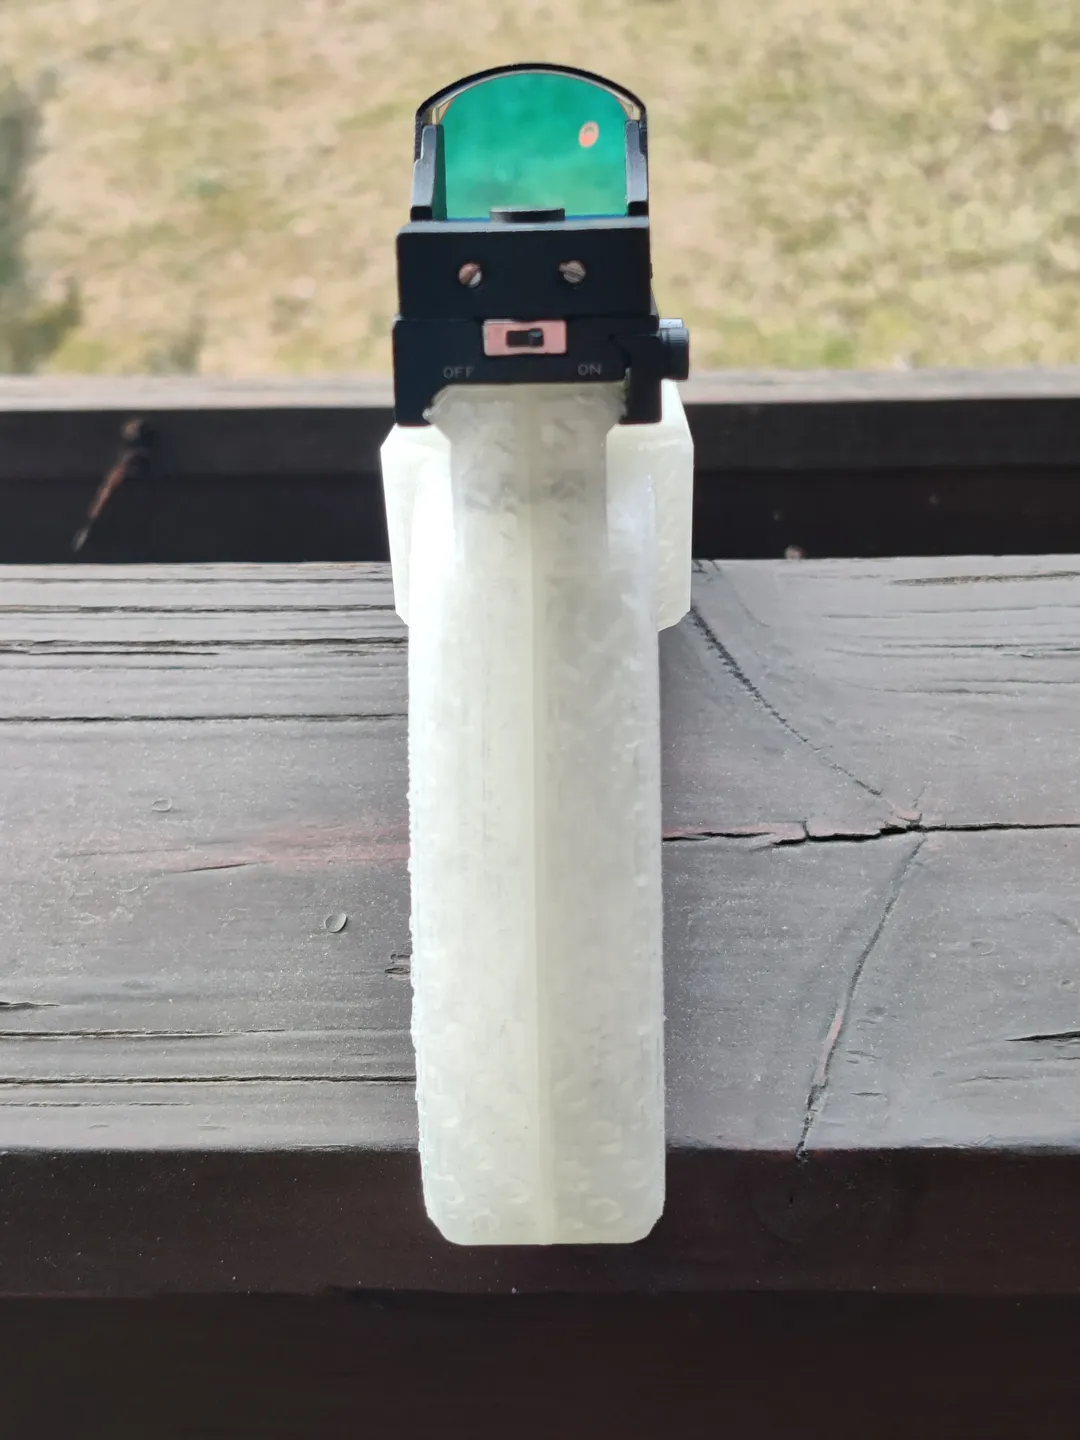
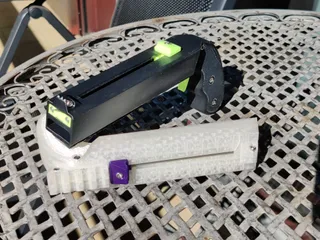
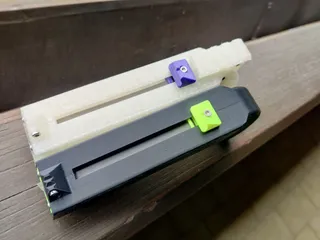
- Flashlight / Laser Mount
- Grip Covers (in case your surface turns out not so nice)
Motivation
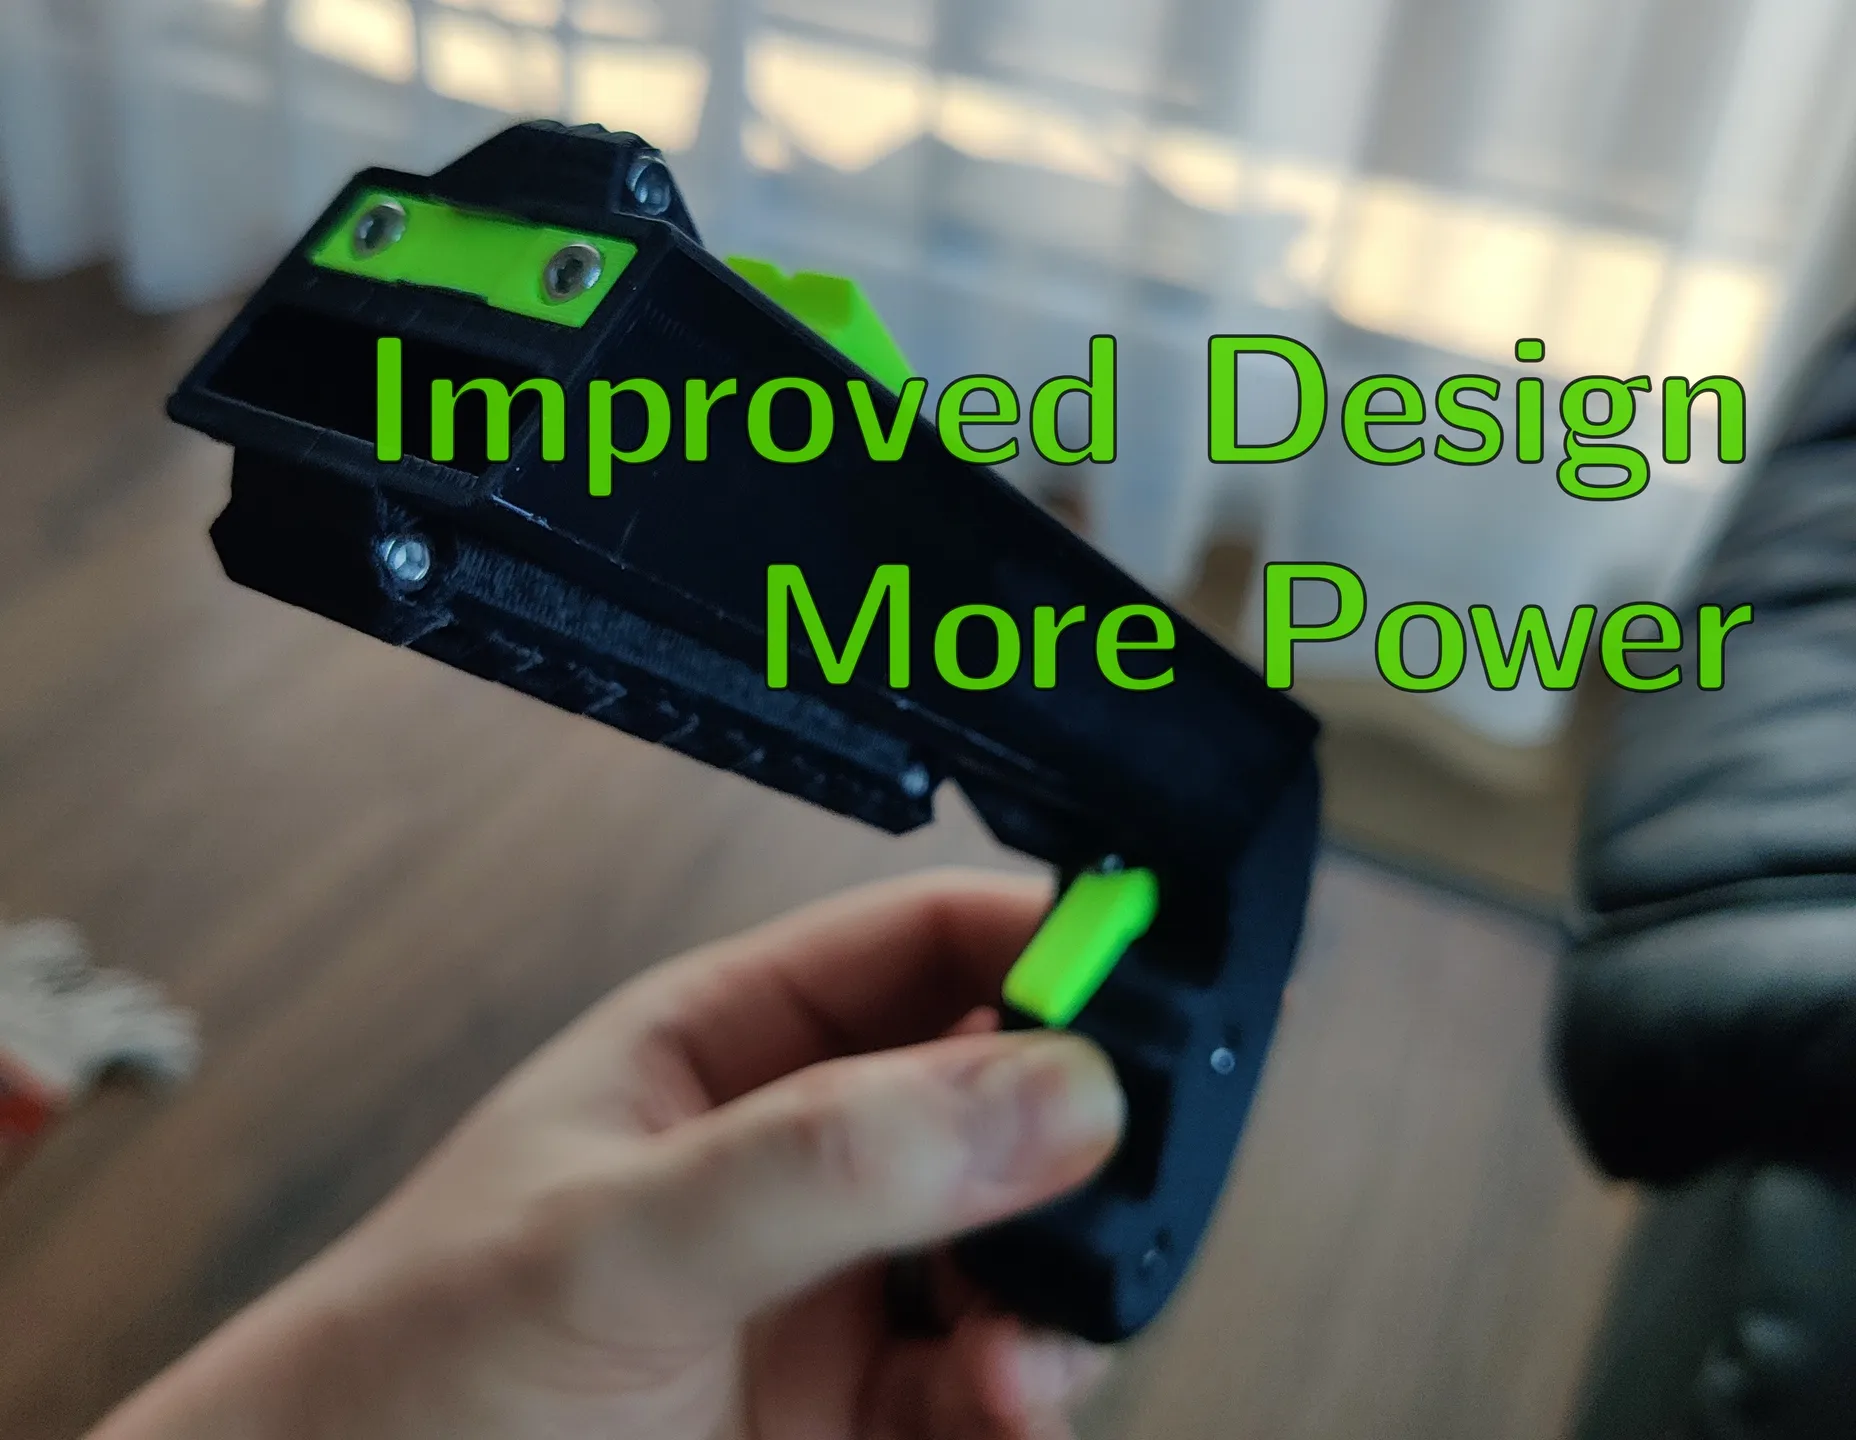
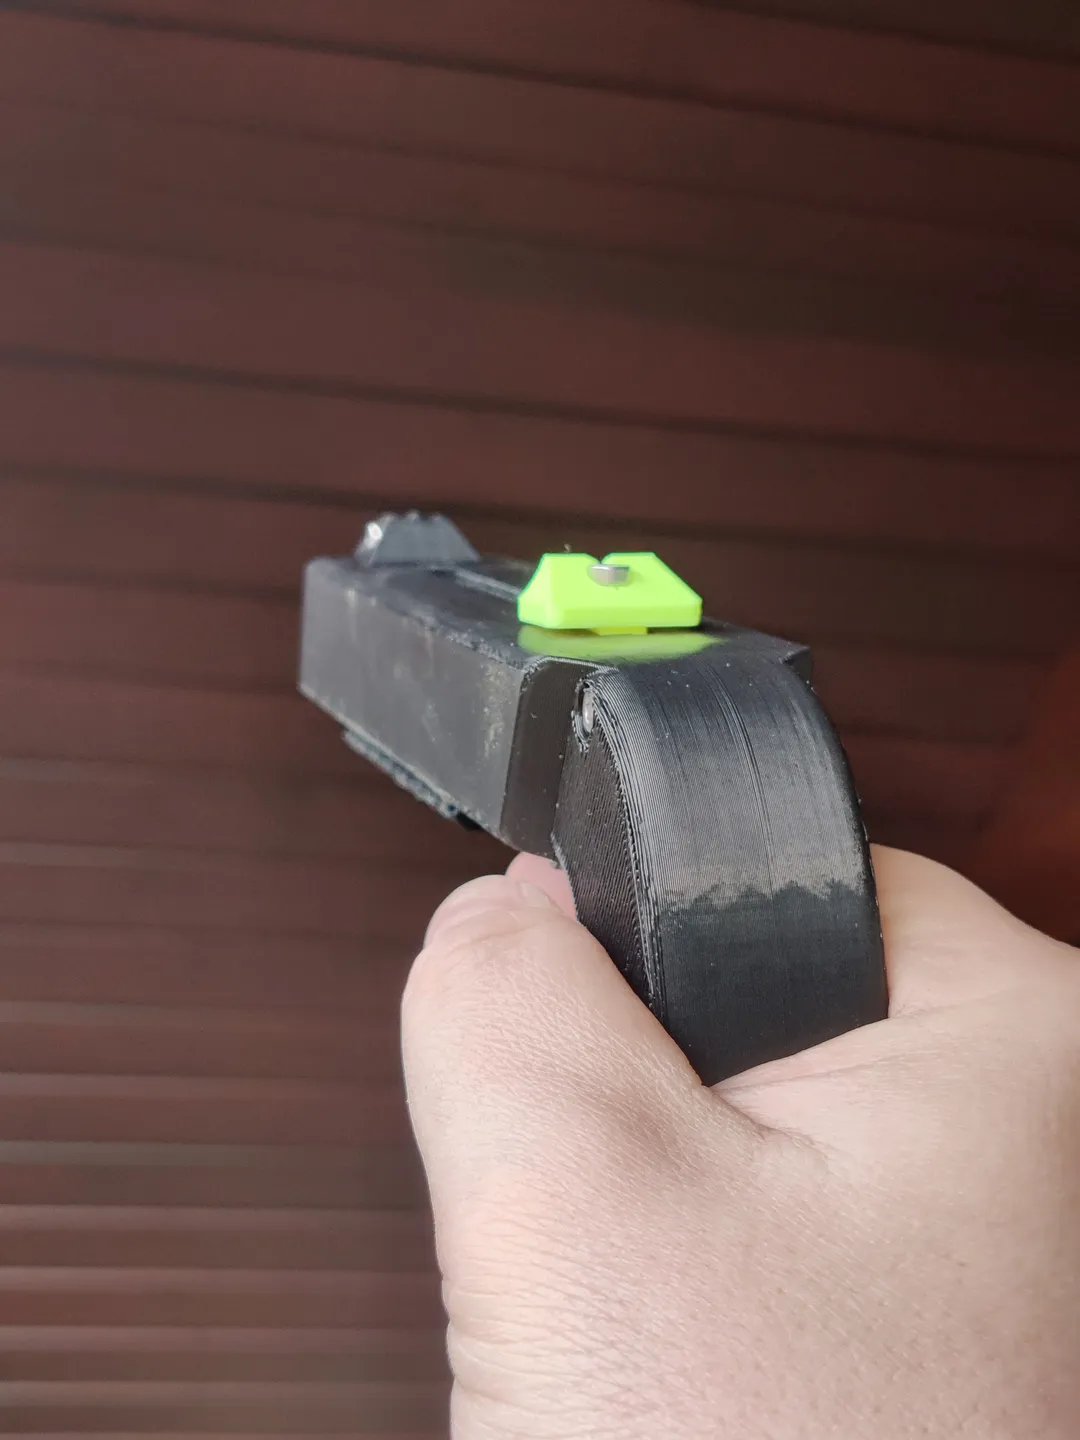
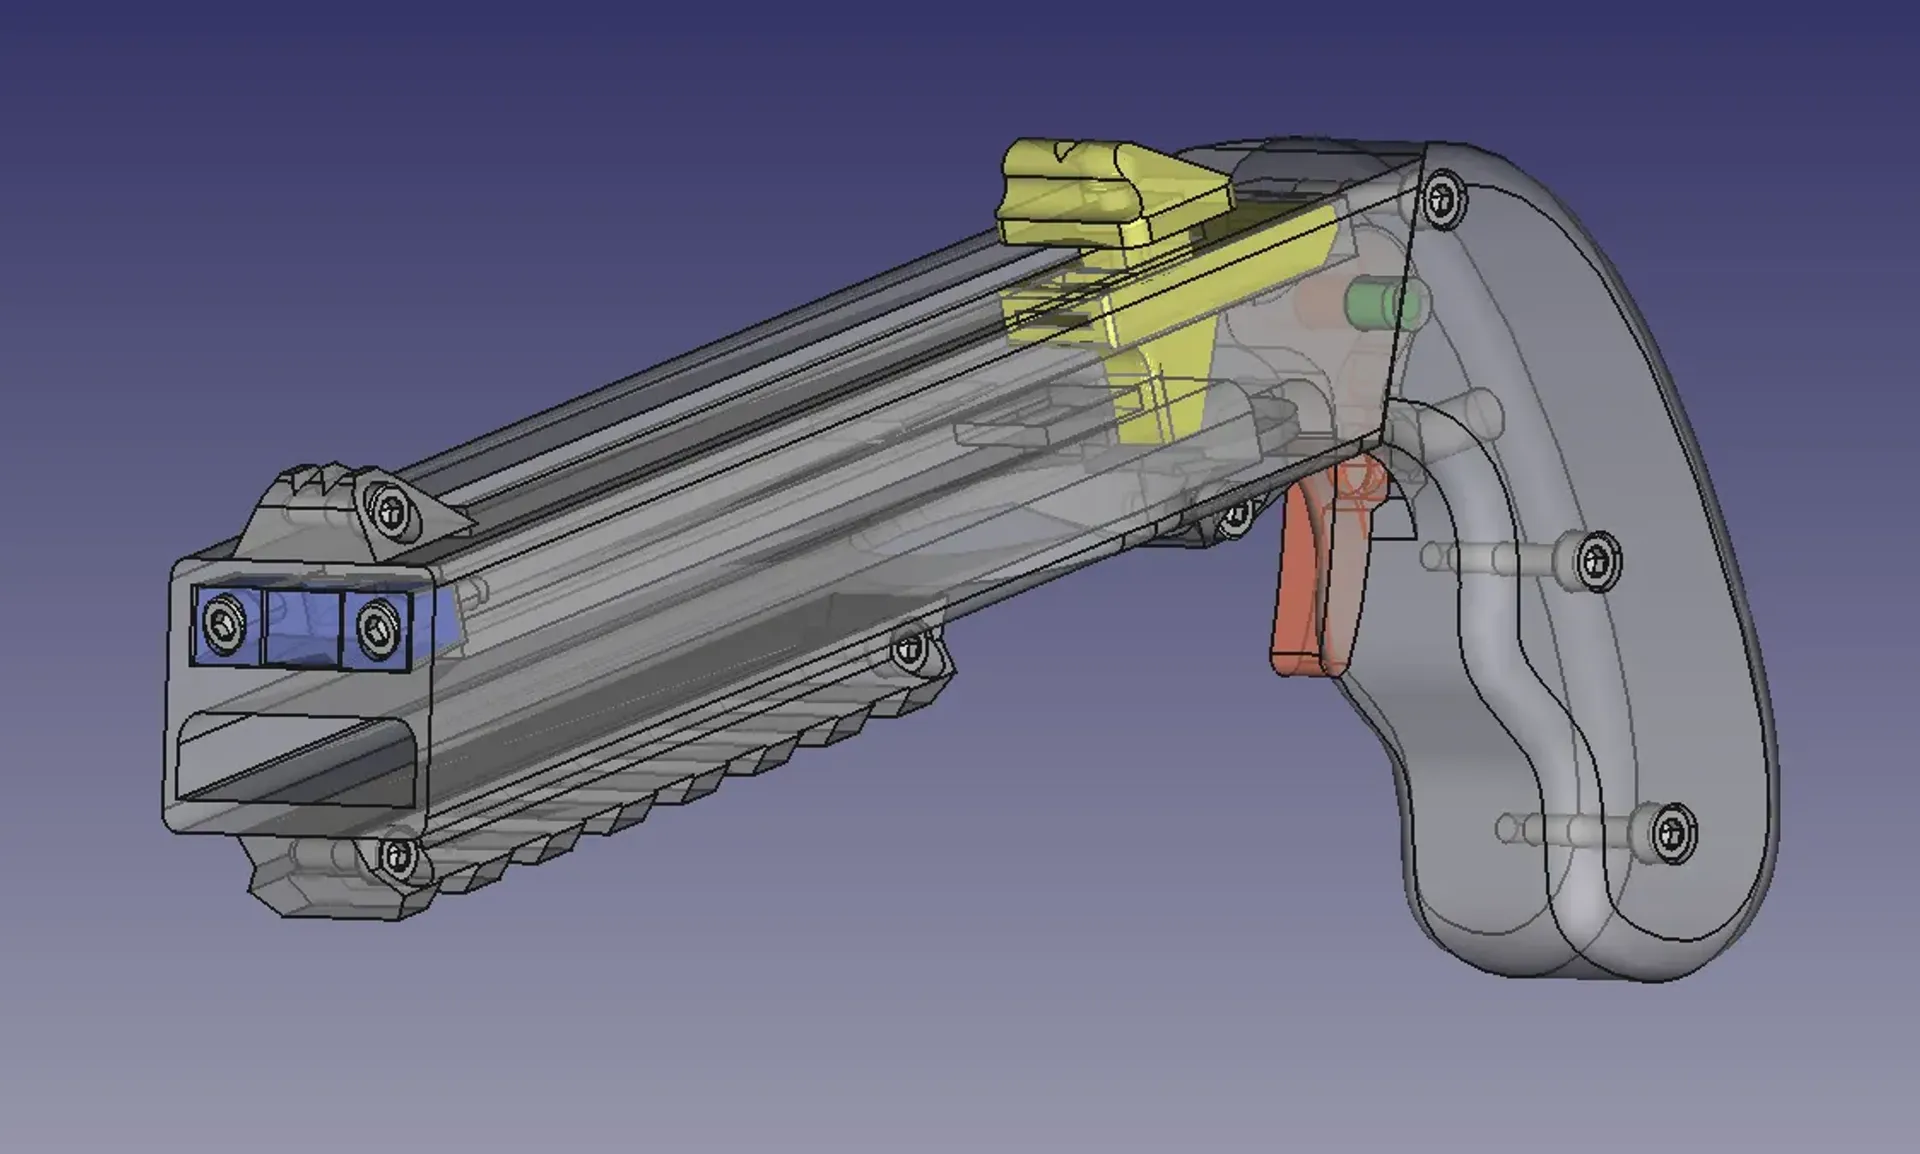
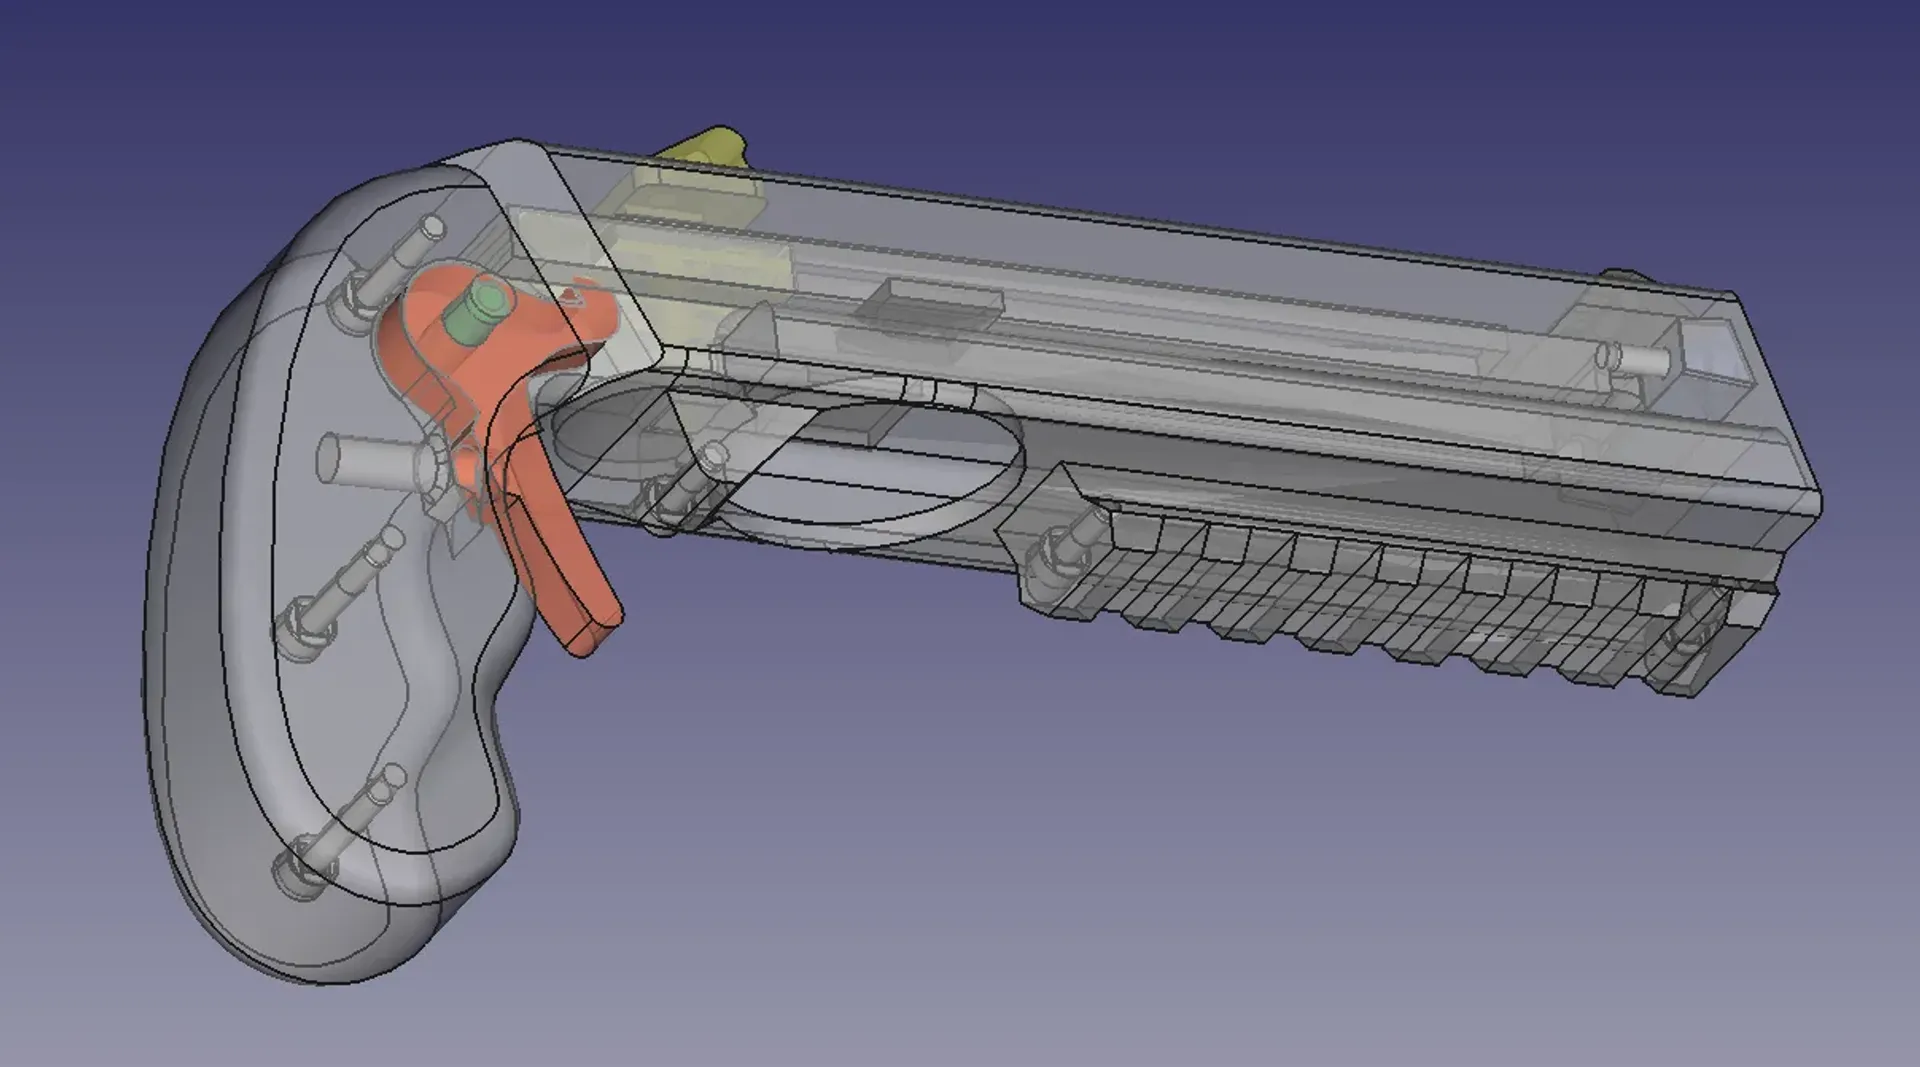
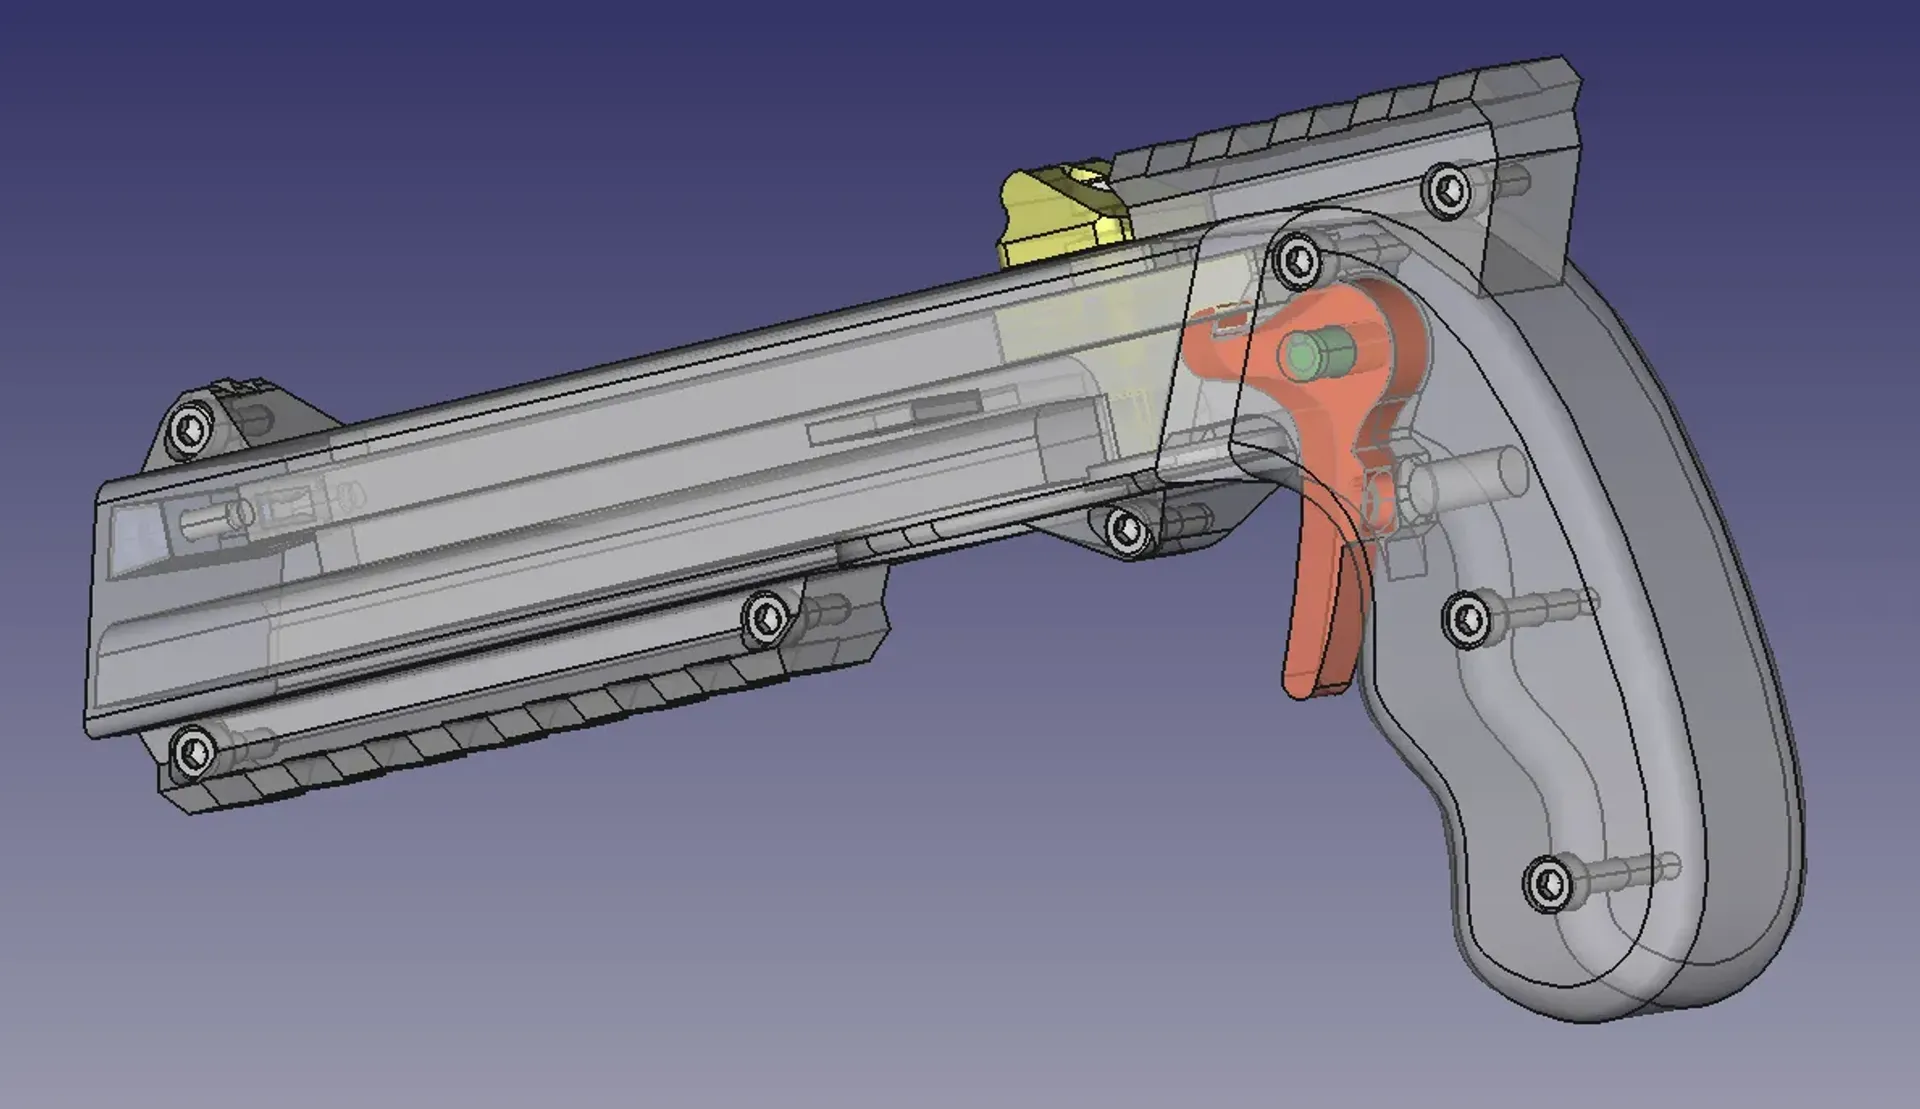
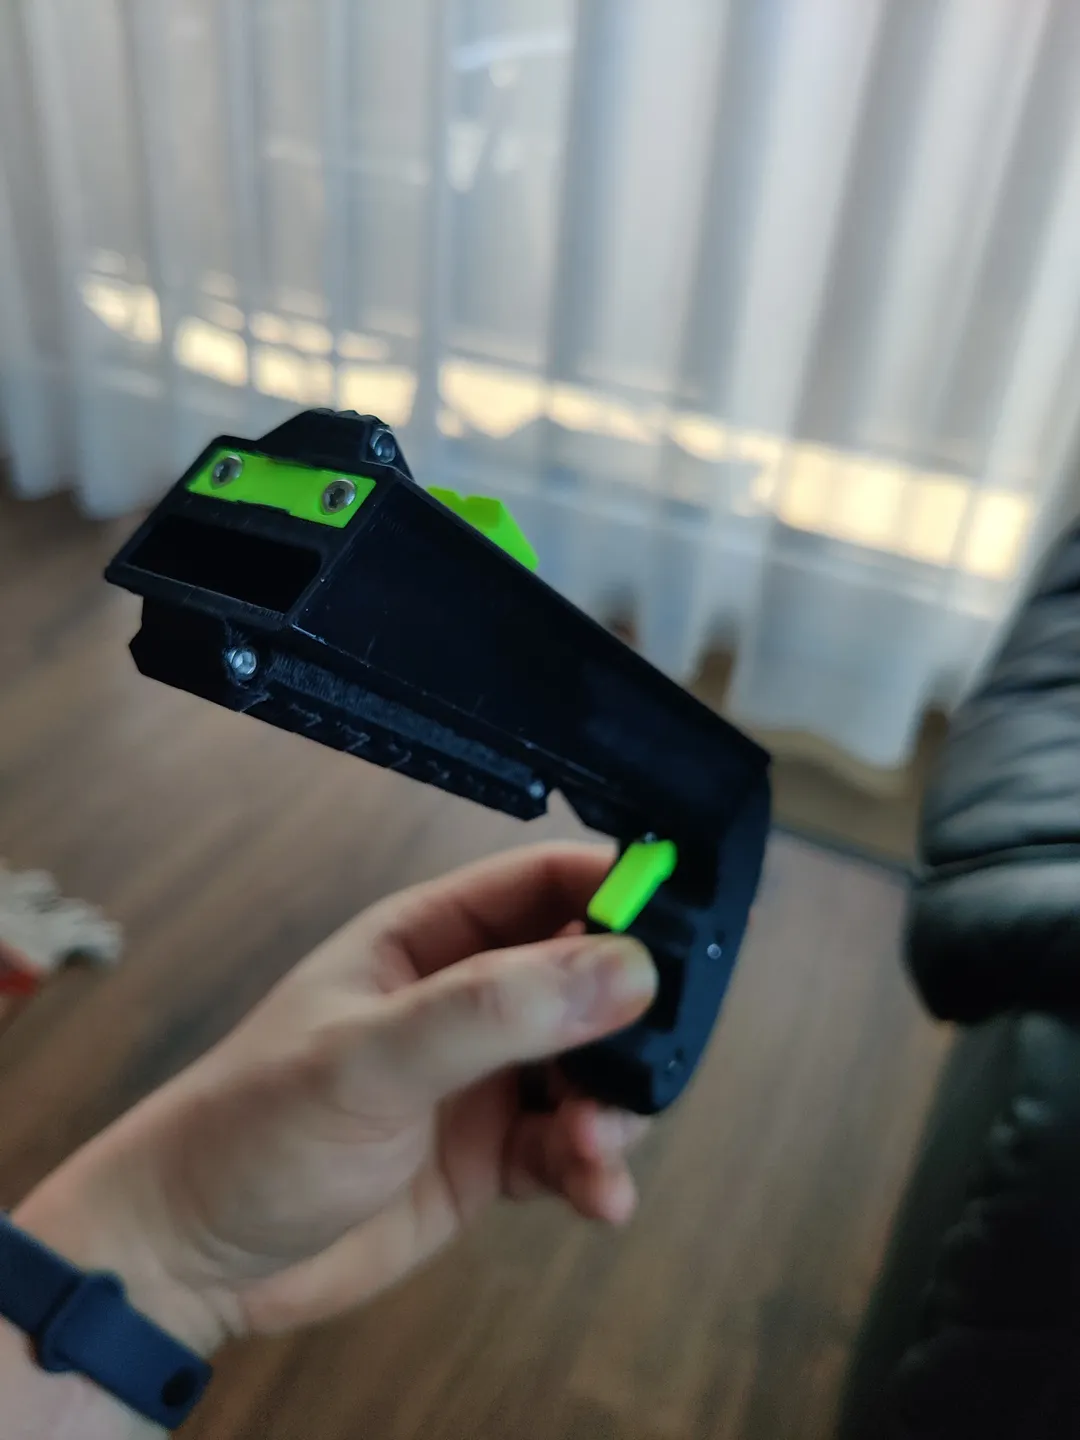
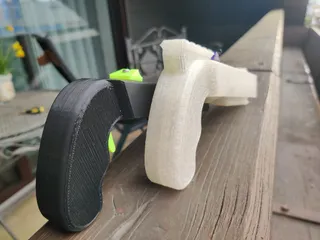
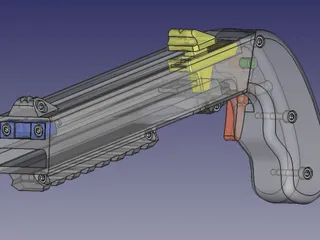
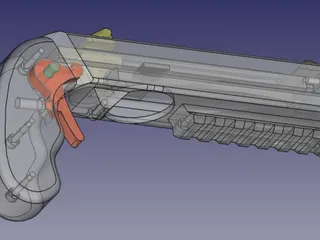
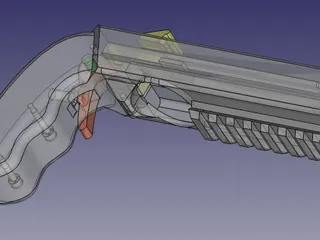
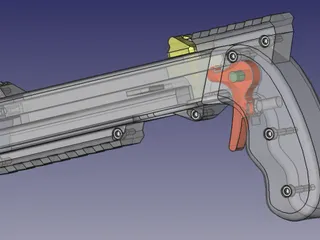
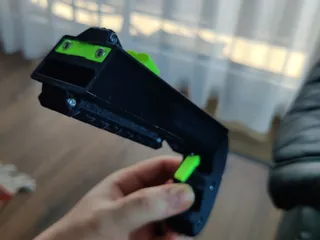
Why did I do this? There were some things in the original design that bothered me. For example: the long trigger. When I press it with my index finger it gets stuck on my middle finger so I shortened it. This was but the first step in a month-long effort which resulted in a complete redesign, there are no reused parts.
The only two things that stayed the same are: the overall form (it is perfect as it is) and the location of the trigger axle (this might change in the future to make room for new features).
Please refer to the remix section for a list of key changes.
Additional parts you need:
| Qty | Part | Notes |
|---|---|---|
| 1 | M3x20mm screw | Slider, 16mm may work too |
| 3 | M3x16mm screws | Handle |
| 4 | M3x10mm screws | Latches |
| 2 | M3x10mm screws | Optional Theraband version retainer |
| 1 | M3x10mm screw | Optional upper picatinny version |
| 1 | 5mm x 20-30mm coil spring | e.g. from a pen |
| 1 | rubber band or Theraband | I used the black one |
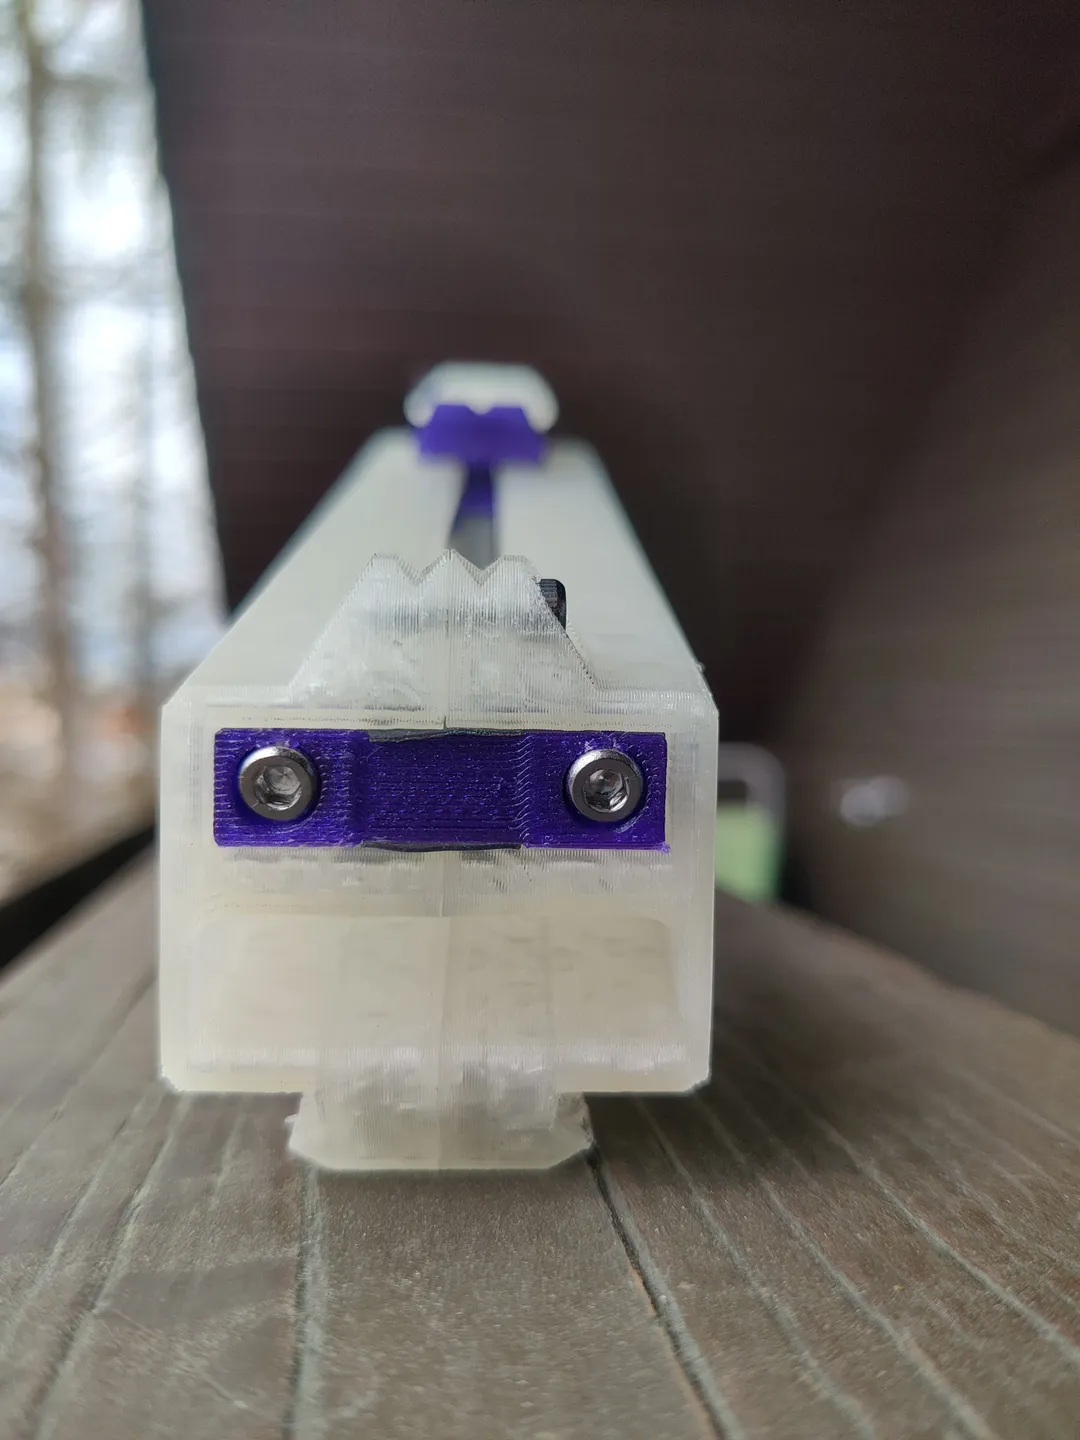
| 1-2 | 12x2mm magnets | One will do, or use two smaller ones |
| 1 | coin 20x2mm | e.g. European 10ct coin, US Cent coin |
| 10mm | filament | for securing the rubber band |
| CA glue | Loctite, Superglue, etc. for the magnet |
Printing
I've included 3mf files for the MINI but any printer will do.
All Parts
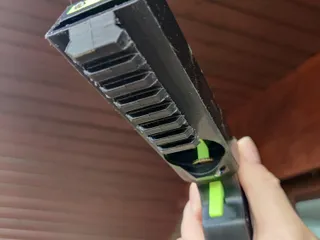
Make sure that “Thin wall detection” is on for every print. I tried PLA and PETG, short answer: Only use PLA for the barrel! PETG cracked quickly :-(.
Long story: I printed and just finished a gun in PETG. A gorgeous looking combination of green and blue Prusament PETG. However, it broke on the first shot. The impact of the slider at the front produced a crack on both sides of the barrel. I was not aware that PETG is so vulnerable to shock.
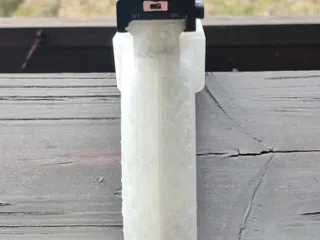
Outer shells
Use 0.20mm layer height, it saves a lot of time and the “invisible supports” are tuned for that. Use variable layer height to make the fillet on the barrel look nice. Use supports to support the handle and the picatinny. Don't use supports for the holes for the screw heads, they come with their own “invisible supports”. Srsly, check out the sliced data, Łukasz's method is engenius.
Inner parts
Use 0.15mm layer height and use adaptive variable layer height for the trigger so that the spring rest prints nicely.
Everything is set in the 3MF files. If you have a MINI like me, just open, choose filament (if you use any other than Prusament) and export the gcode.
Assembly
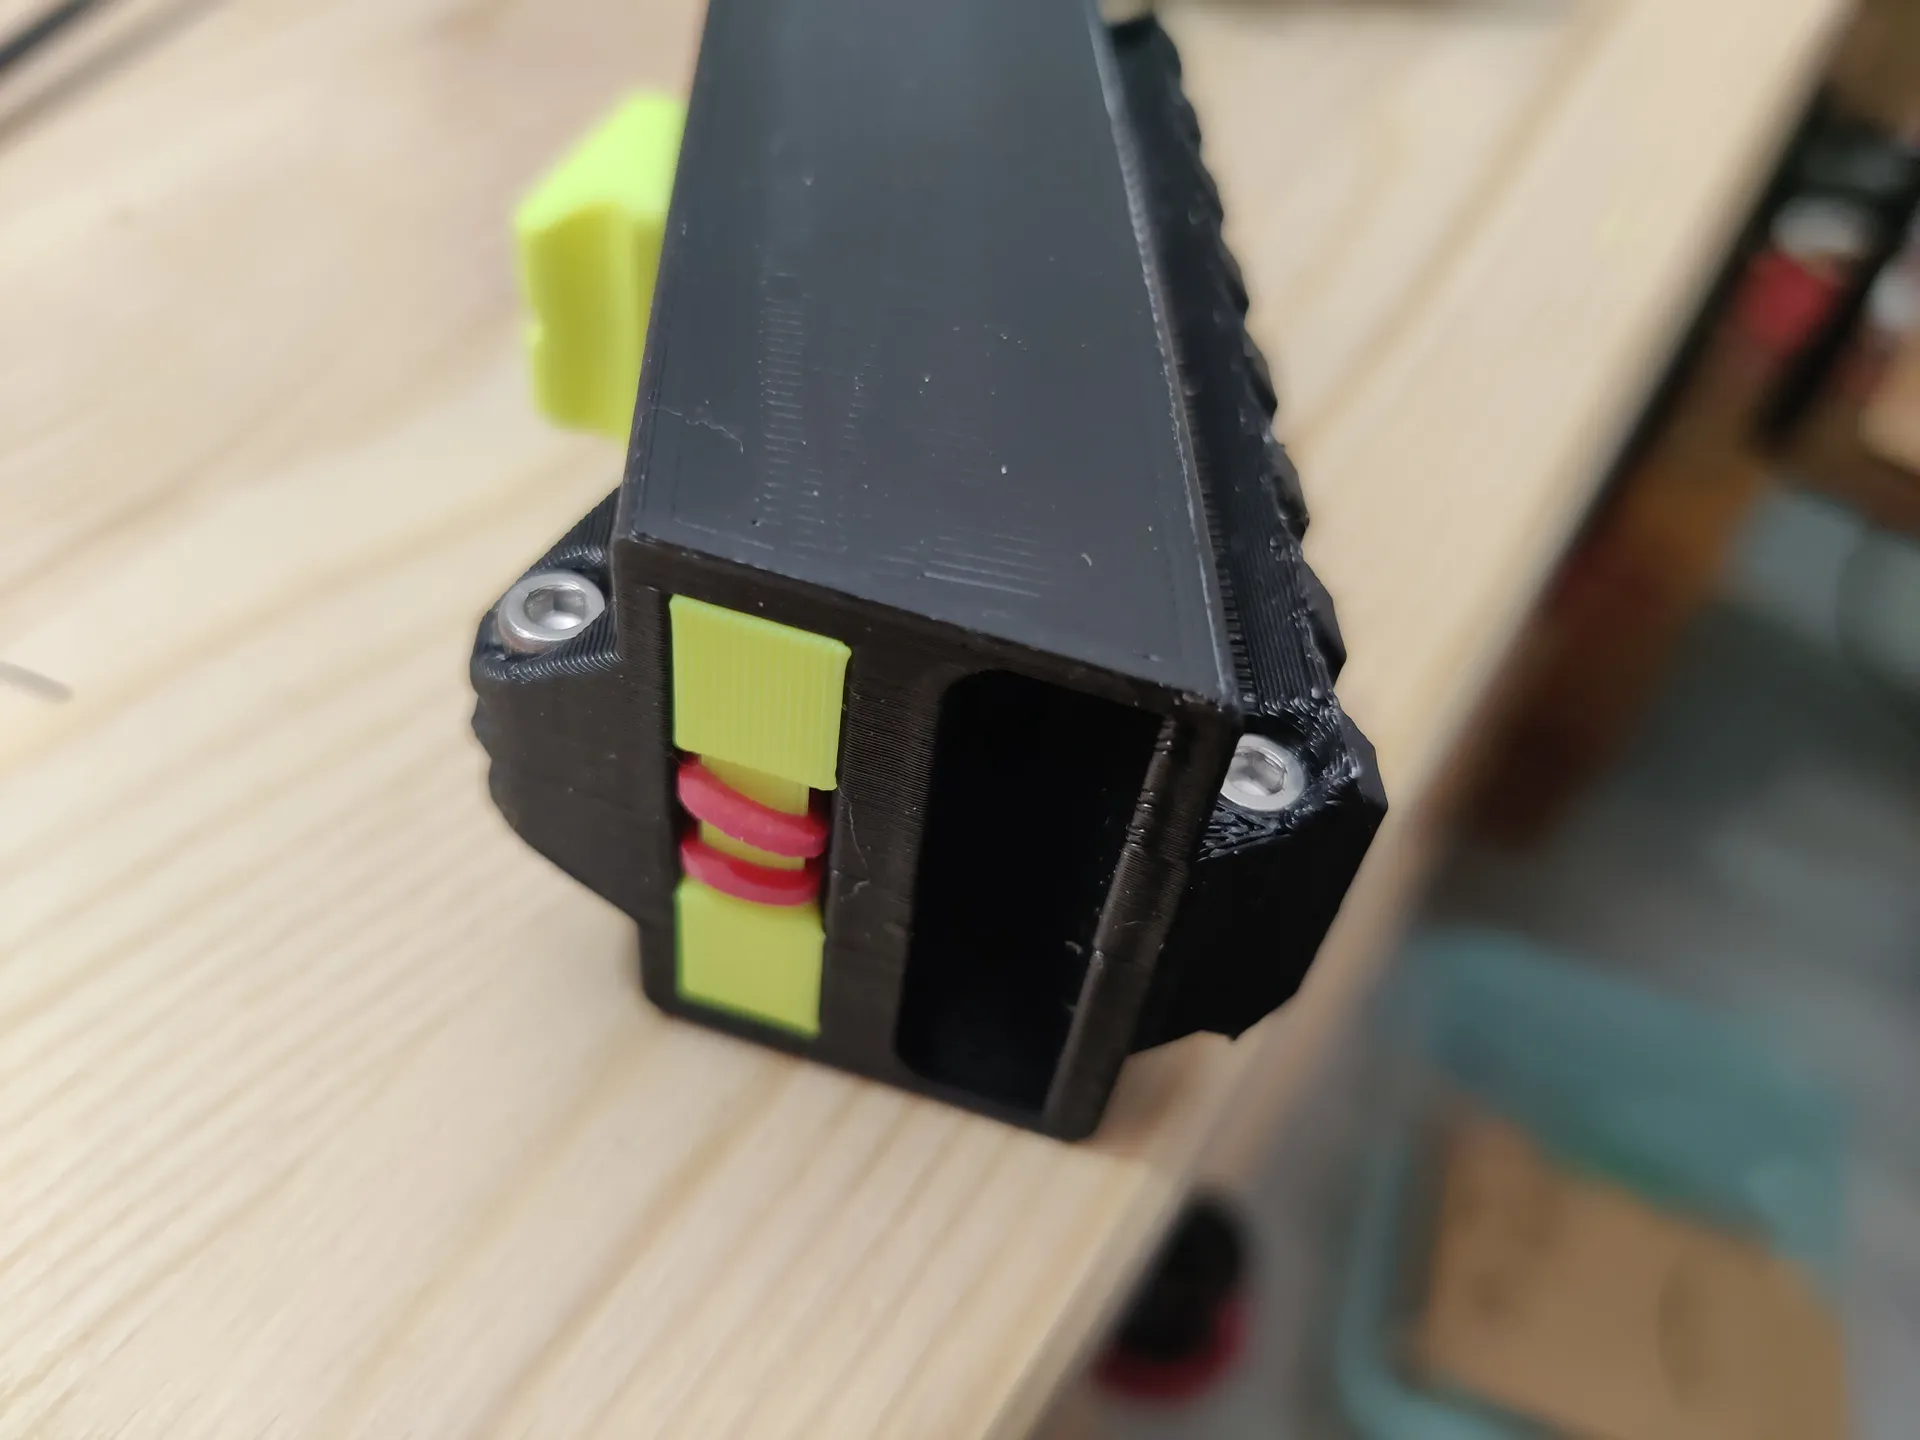
Insert one or two magnets into their compartments and secure them with CA glue.
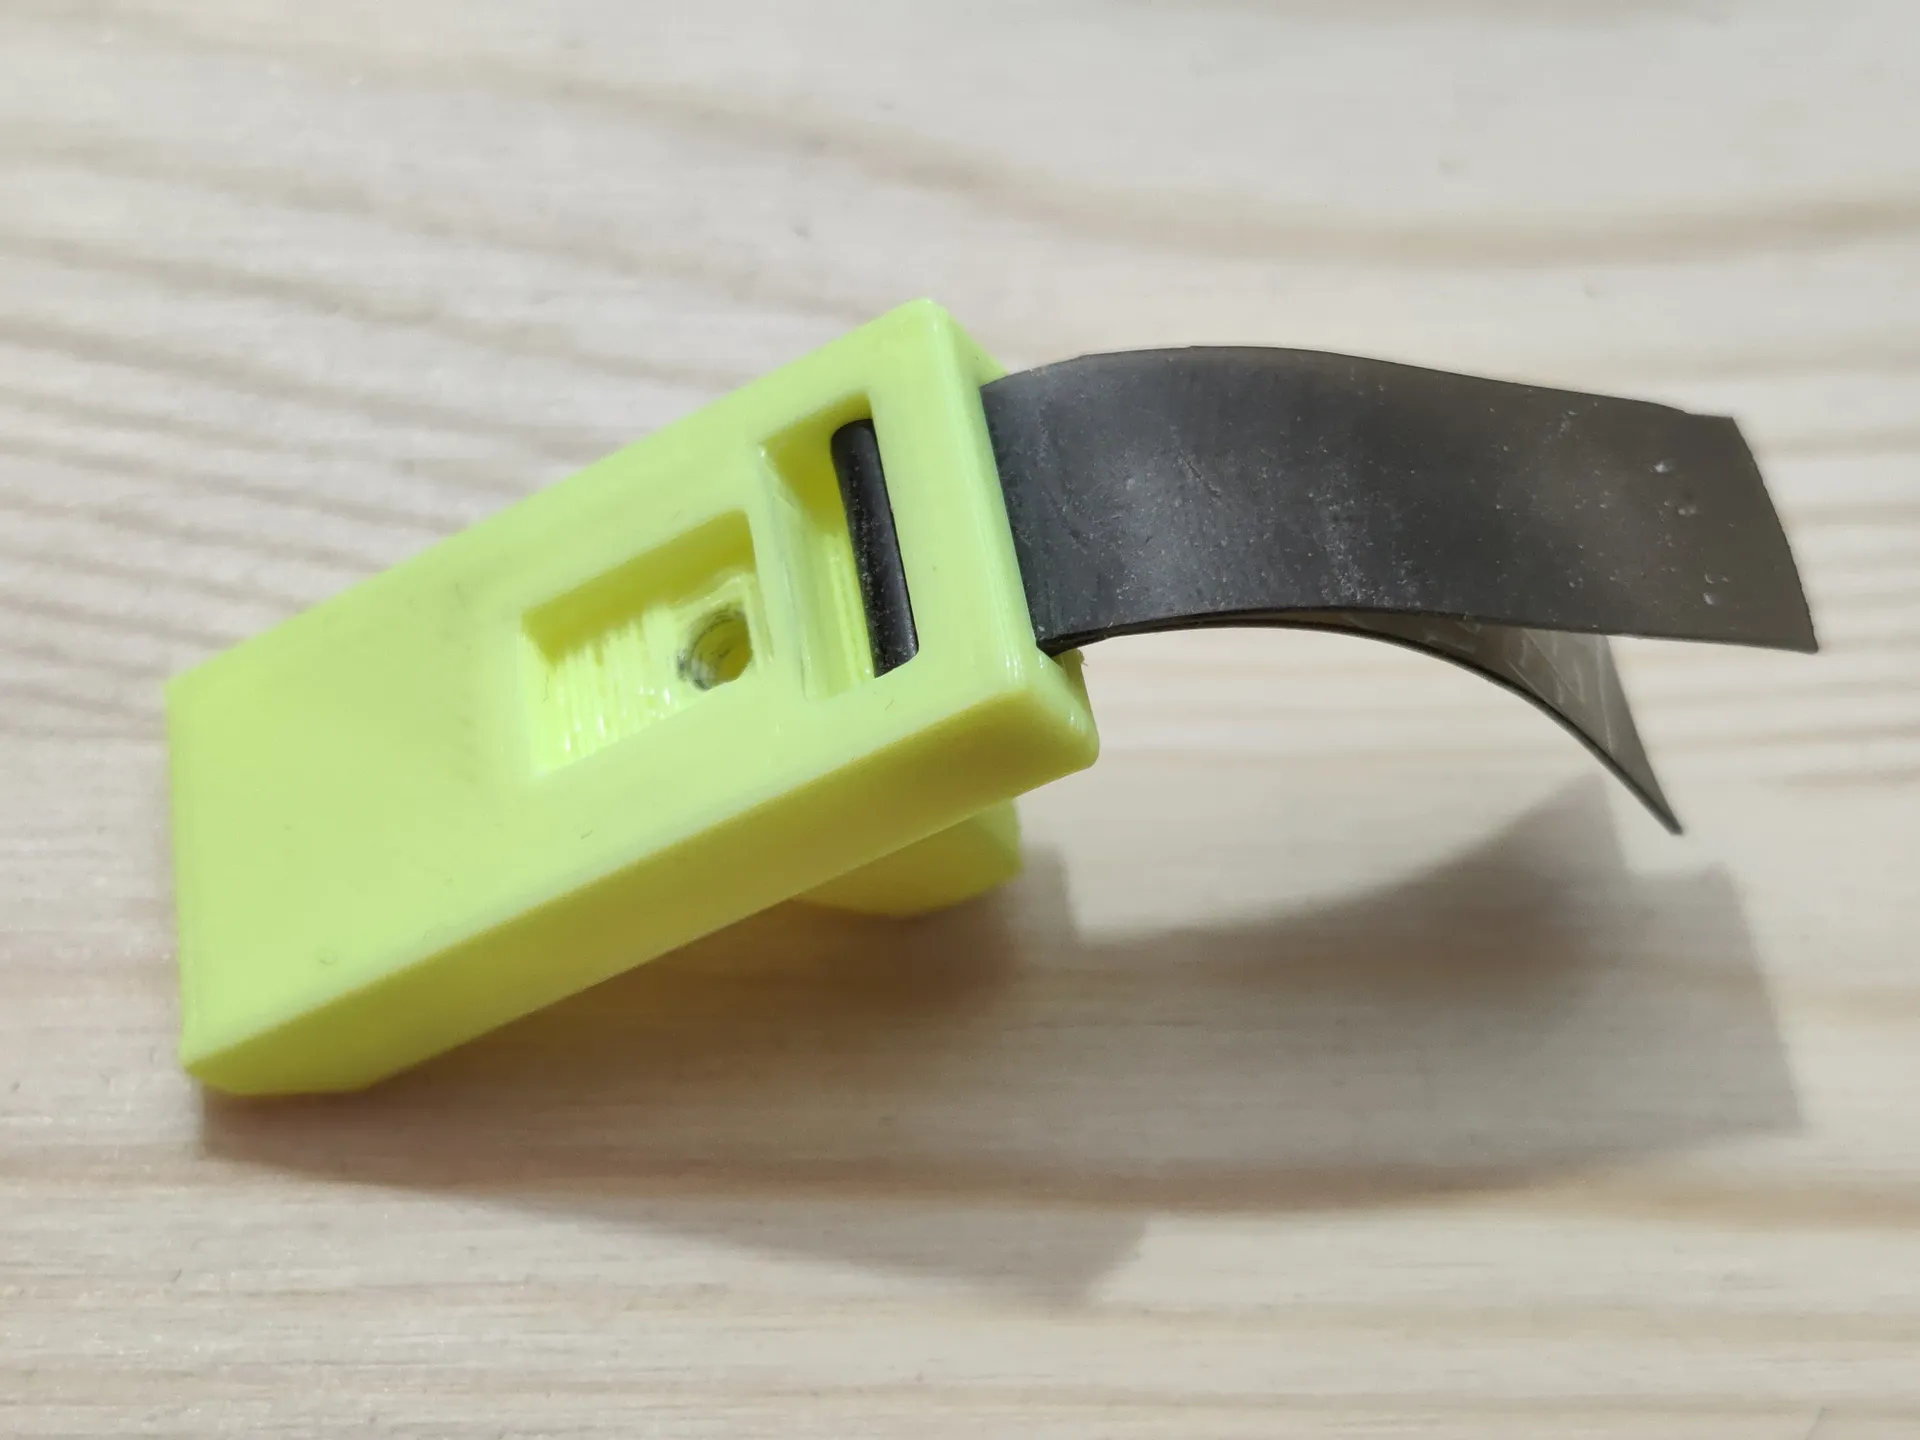
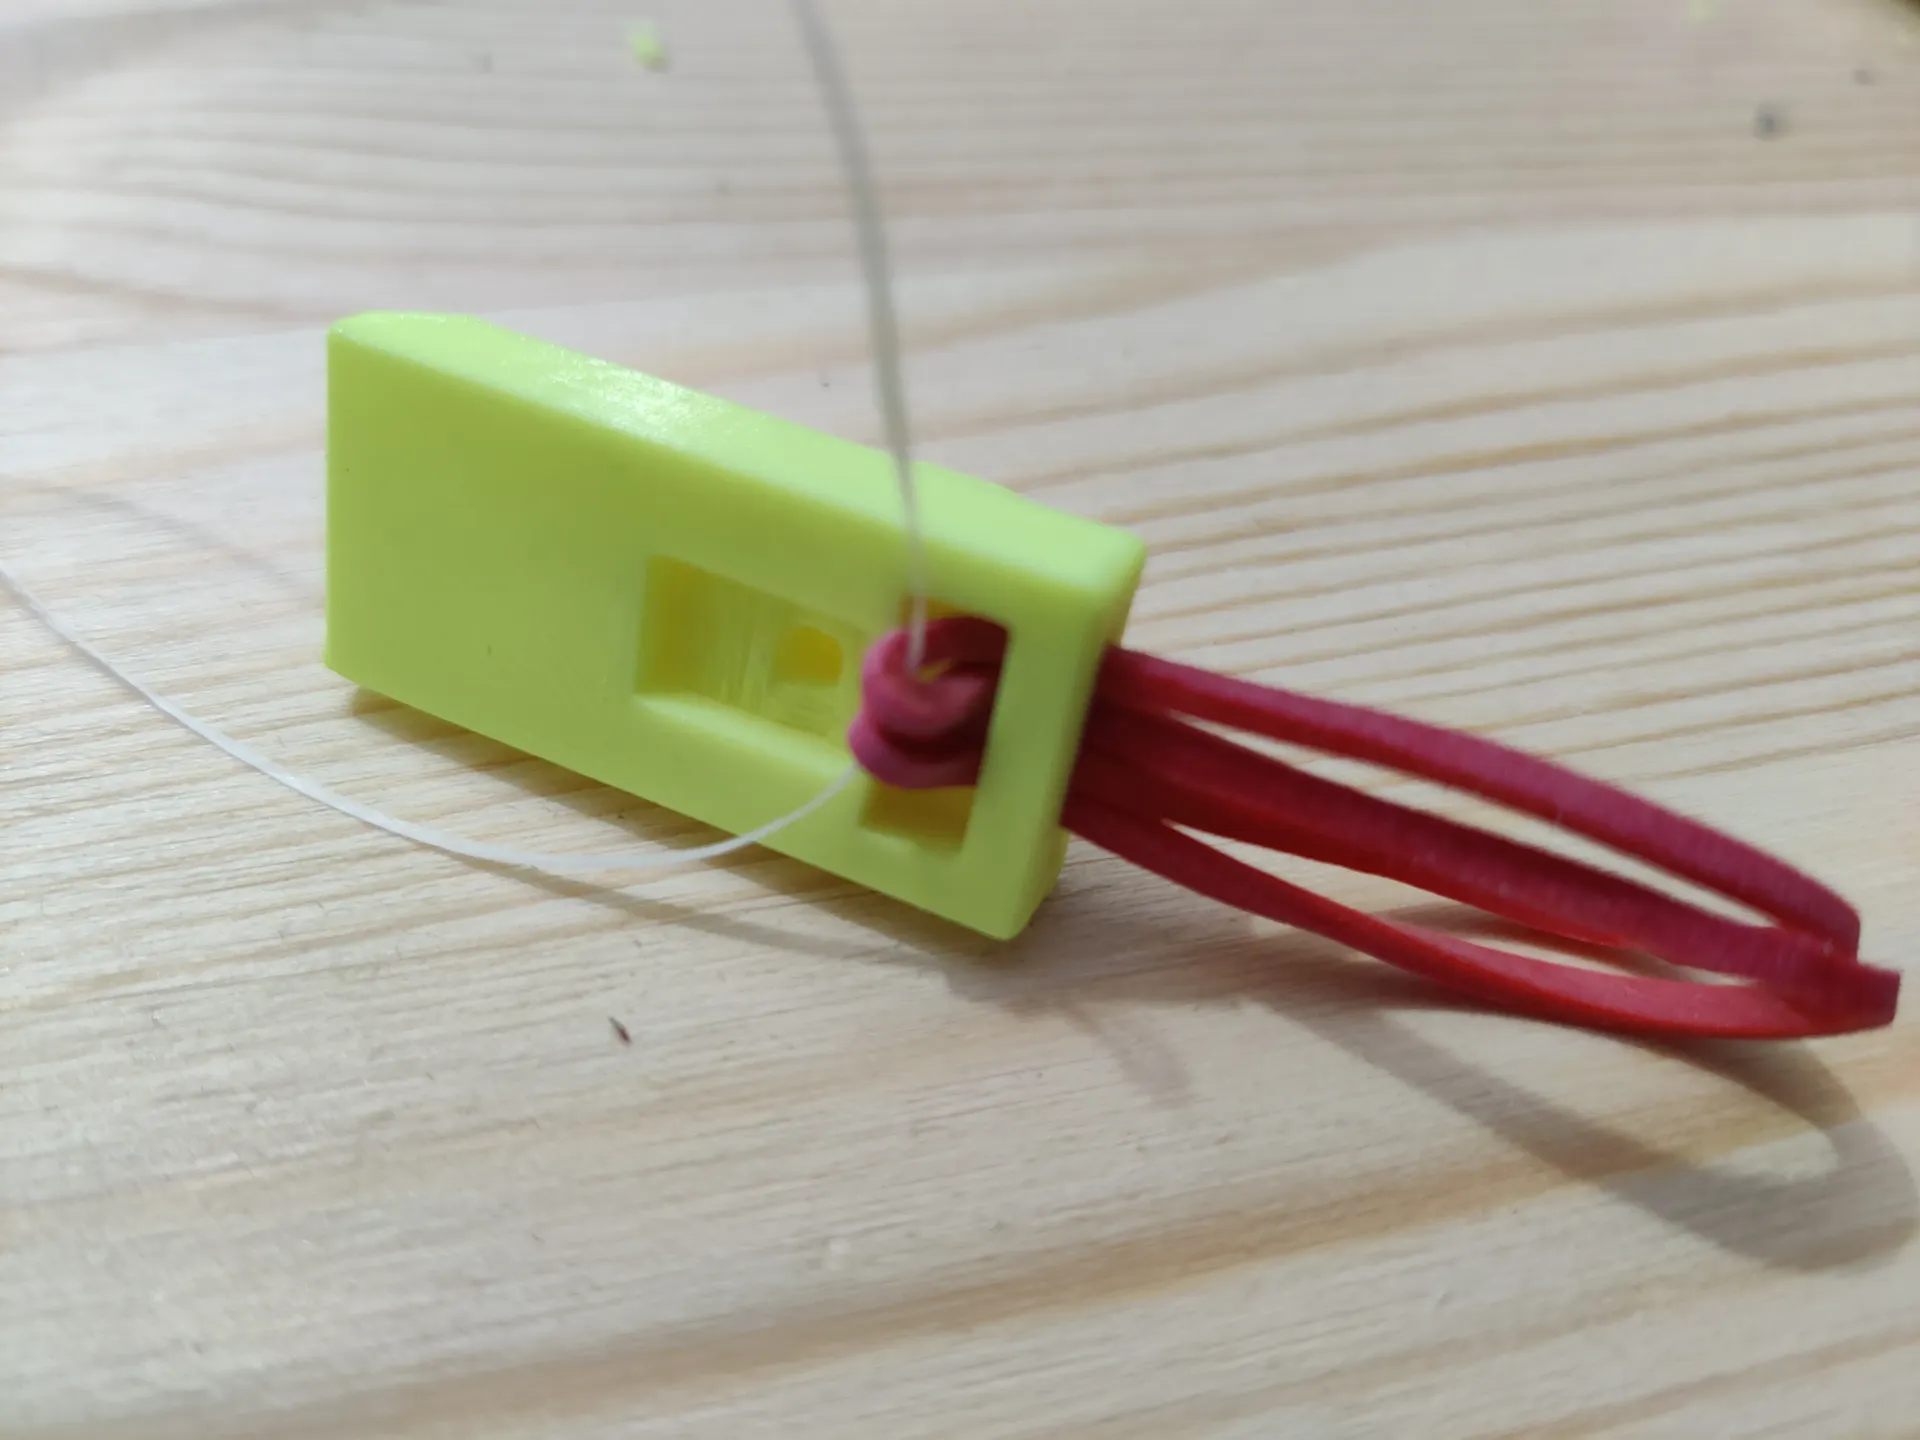
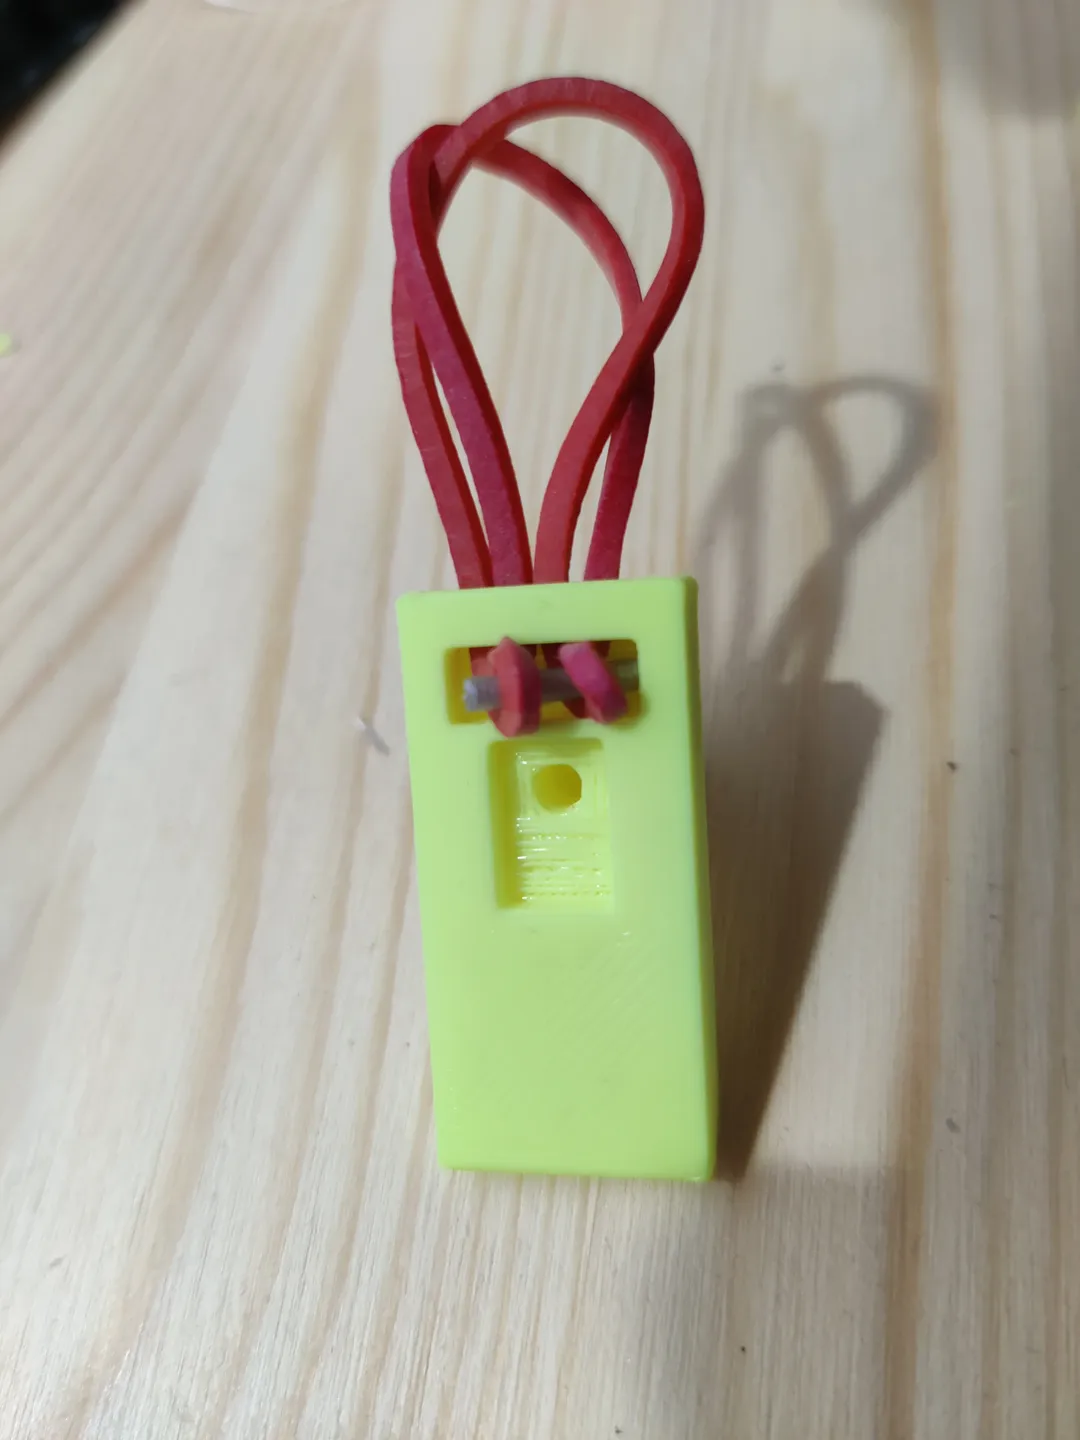
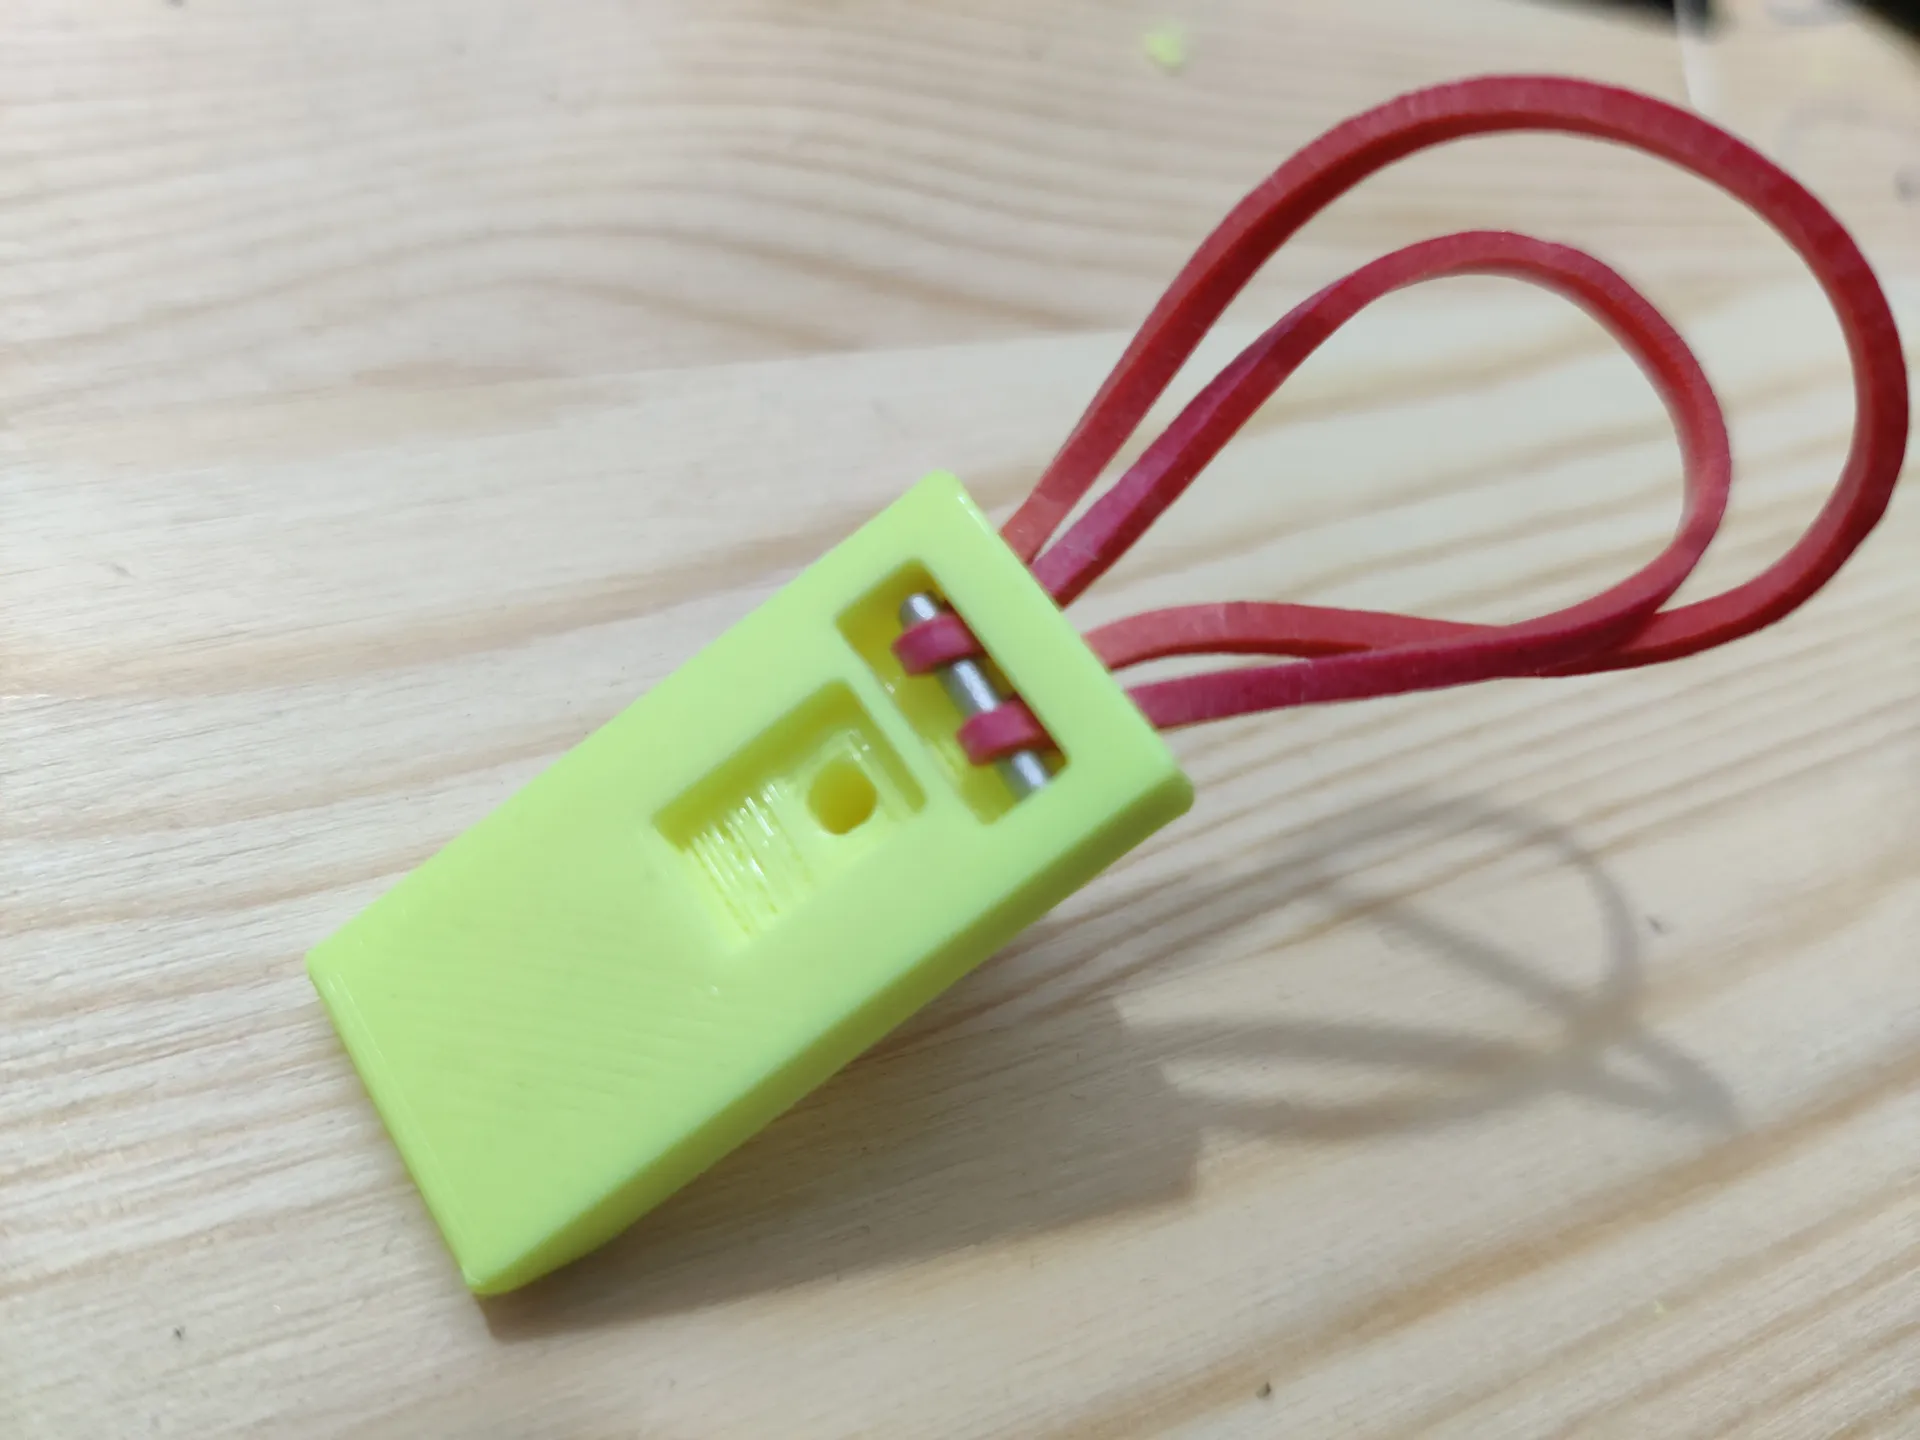
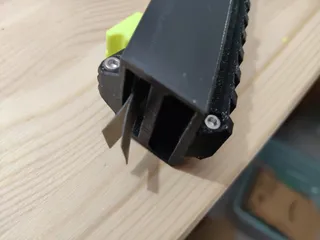
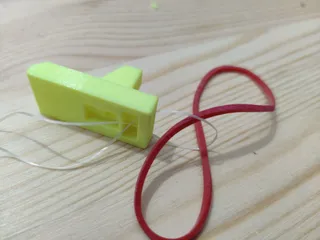
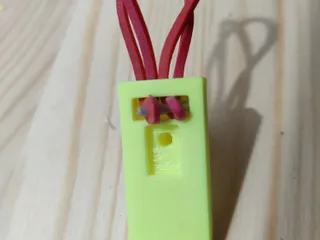
Thread the rubber band into the slider and secure it with the 10mm piece of filament.


For the Theraband version: cut off a 10mm wide band with a length of at least 65mm and let the lower flap be 2mm longer than the upper one. Secure it with a 10mm piece of filament.


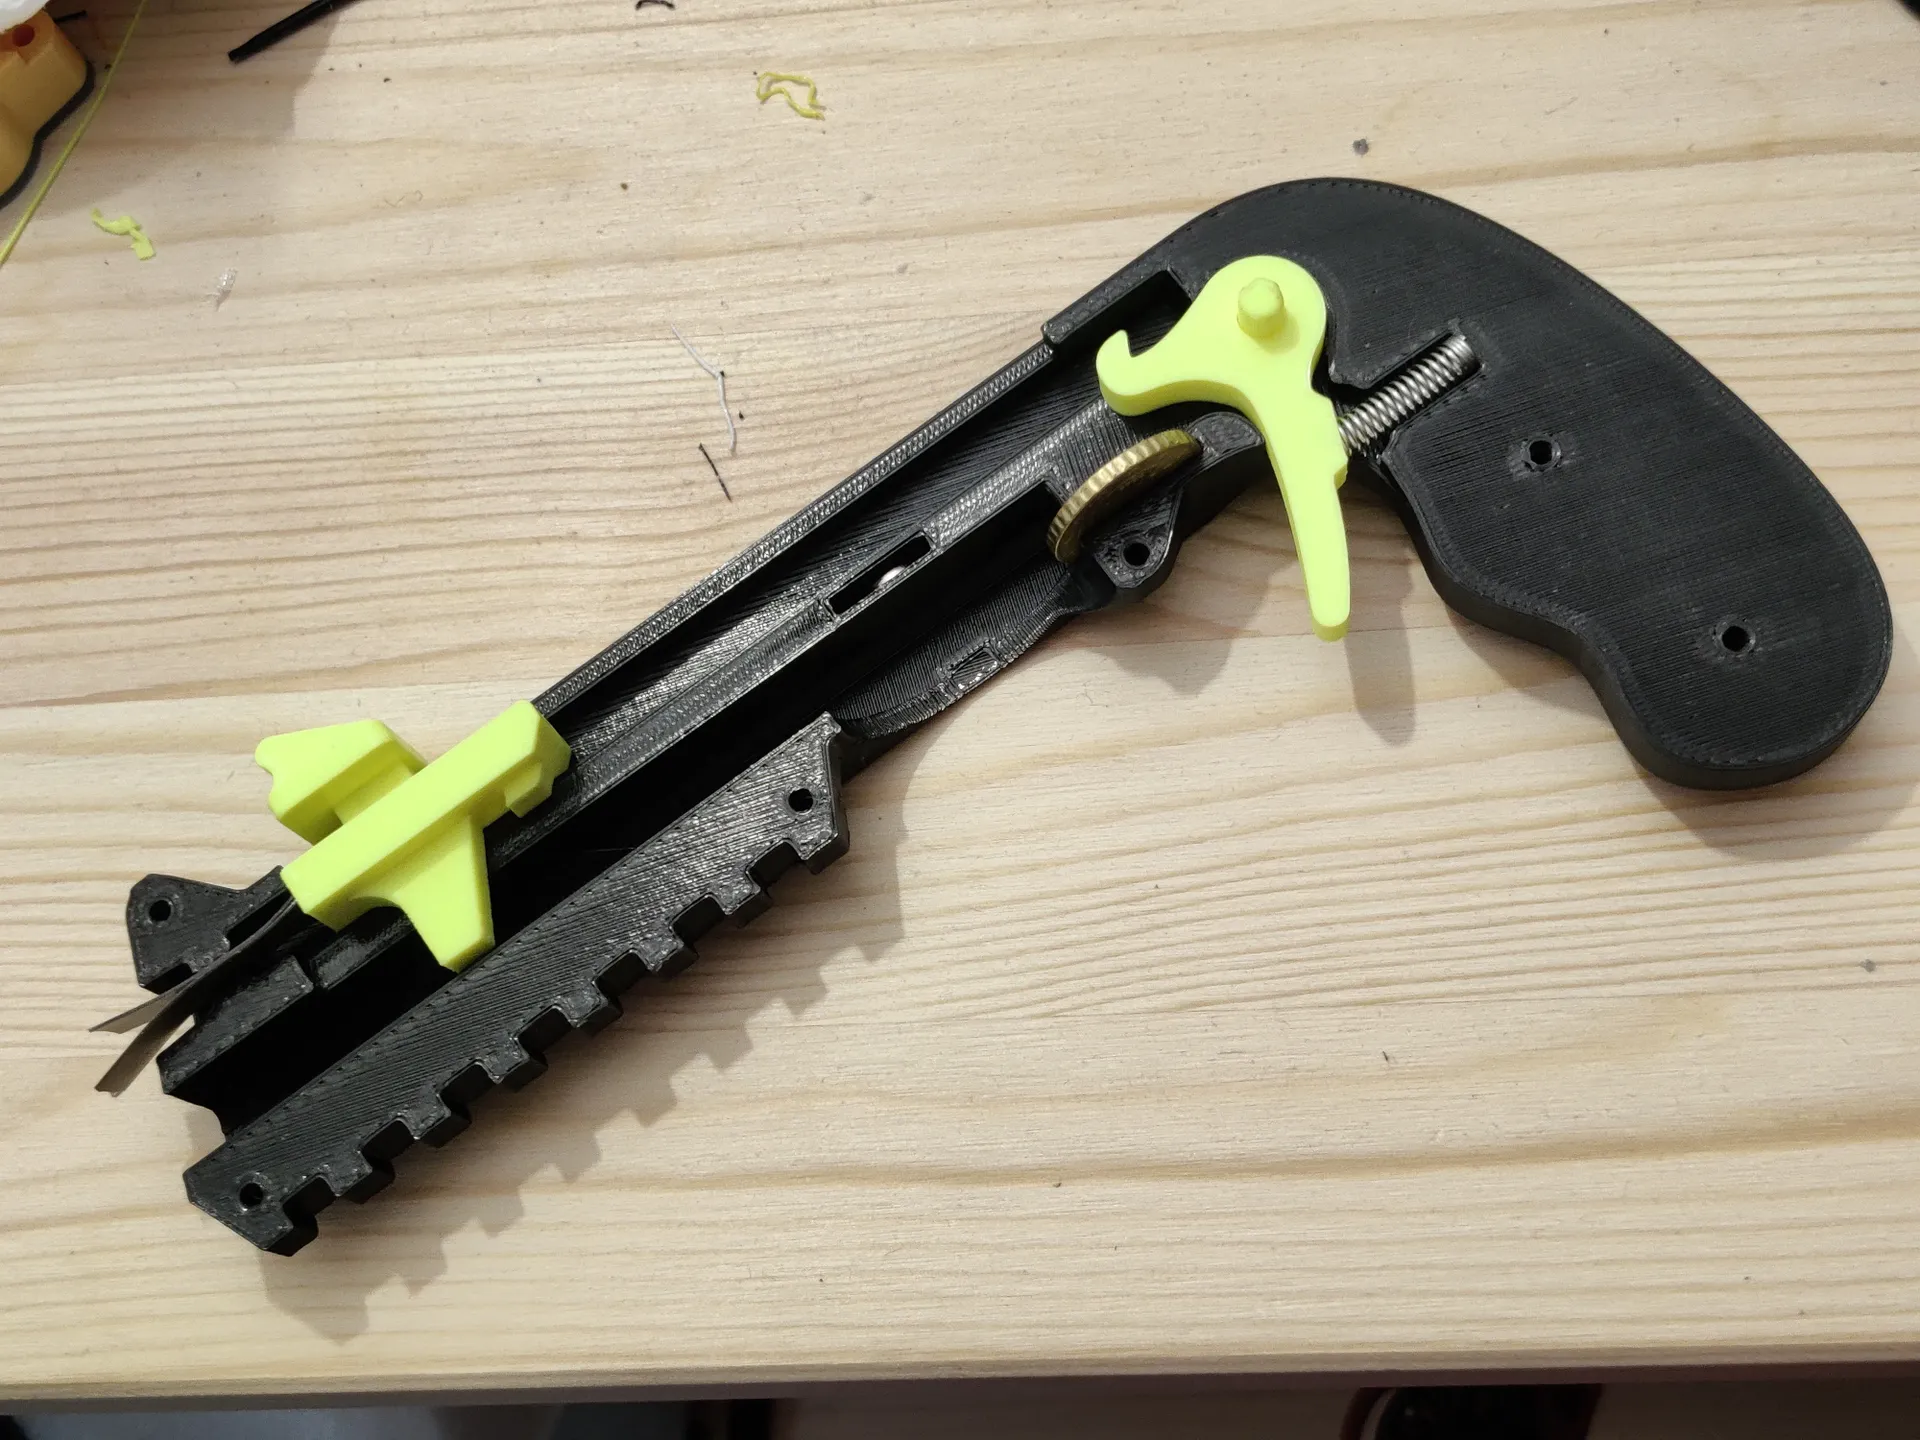
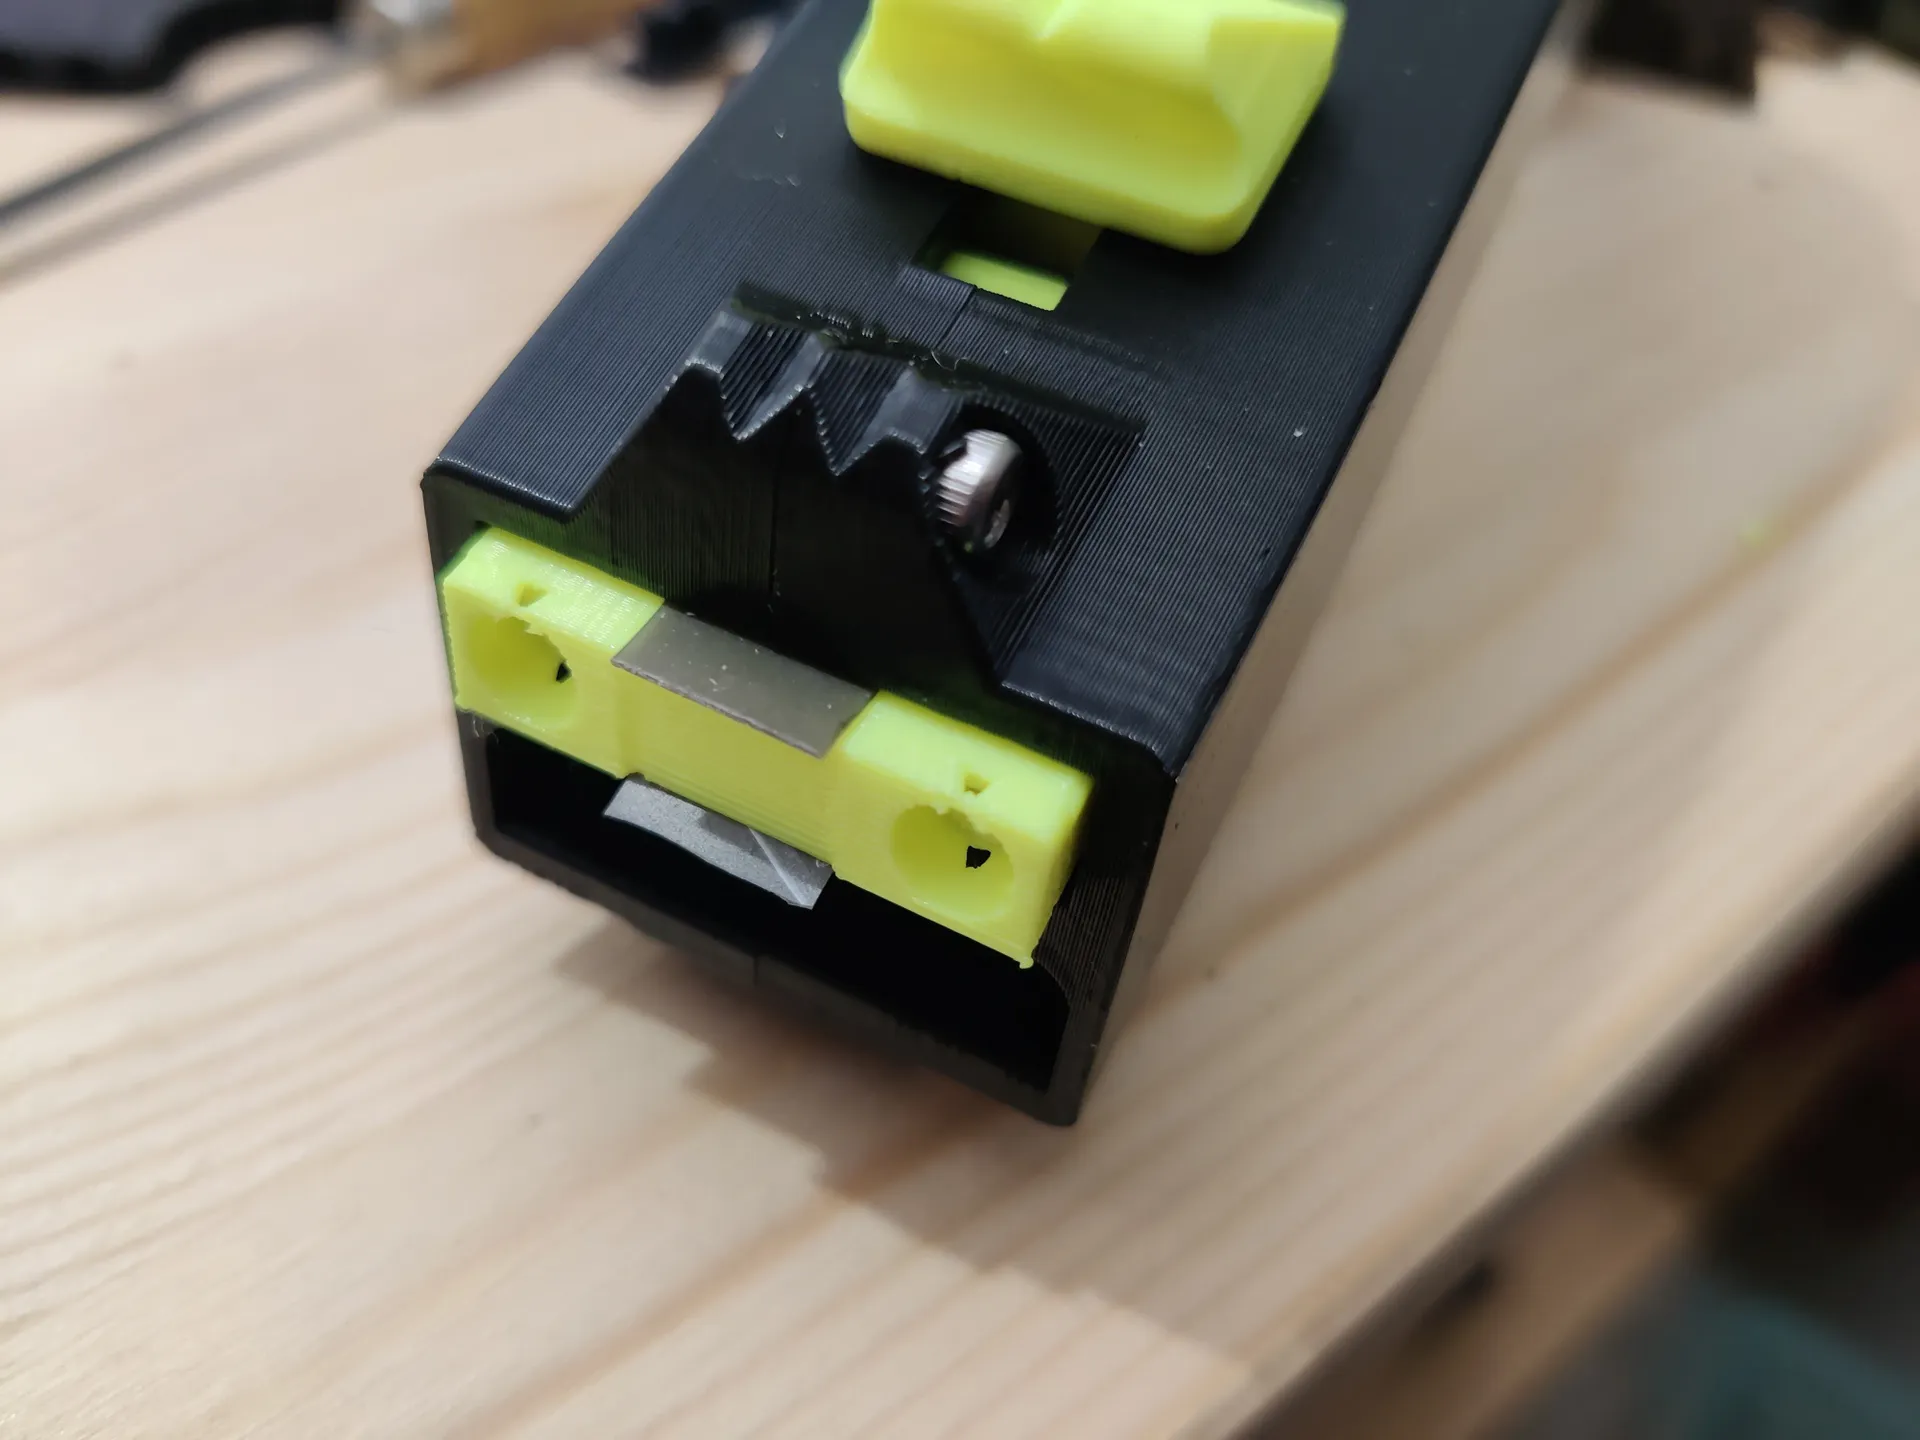
Put the slider block (mind the orientation, it is no longer symmetrical!) in and the spanner on top of that. Use the 20mm screw to secure the parts in place.


If you are using the rubber band version you may want to file or sand the area that holds the band. The reason for this is that the layer lines are parallel to the pull of the band and the band may slip. It happened to me once in a while especially if I got some PTFE lubricant on there. Roughing this area up a little bit fixes this issue permanently.

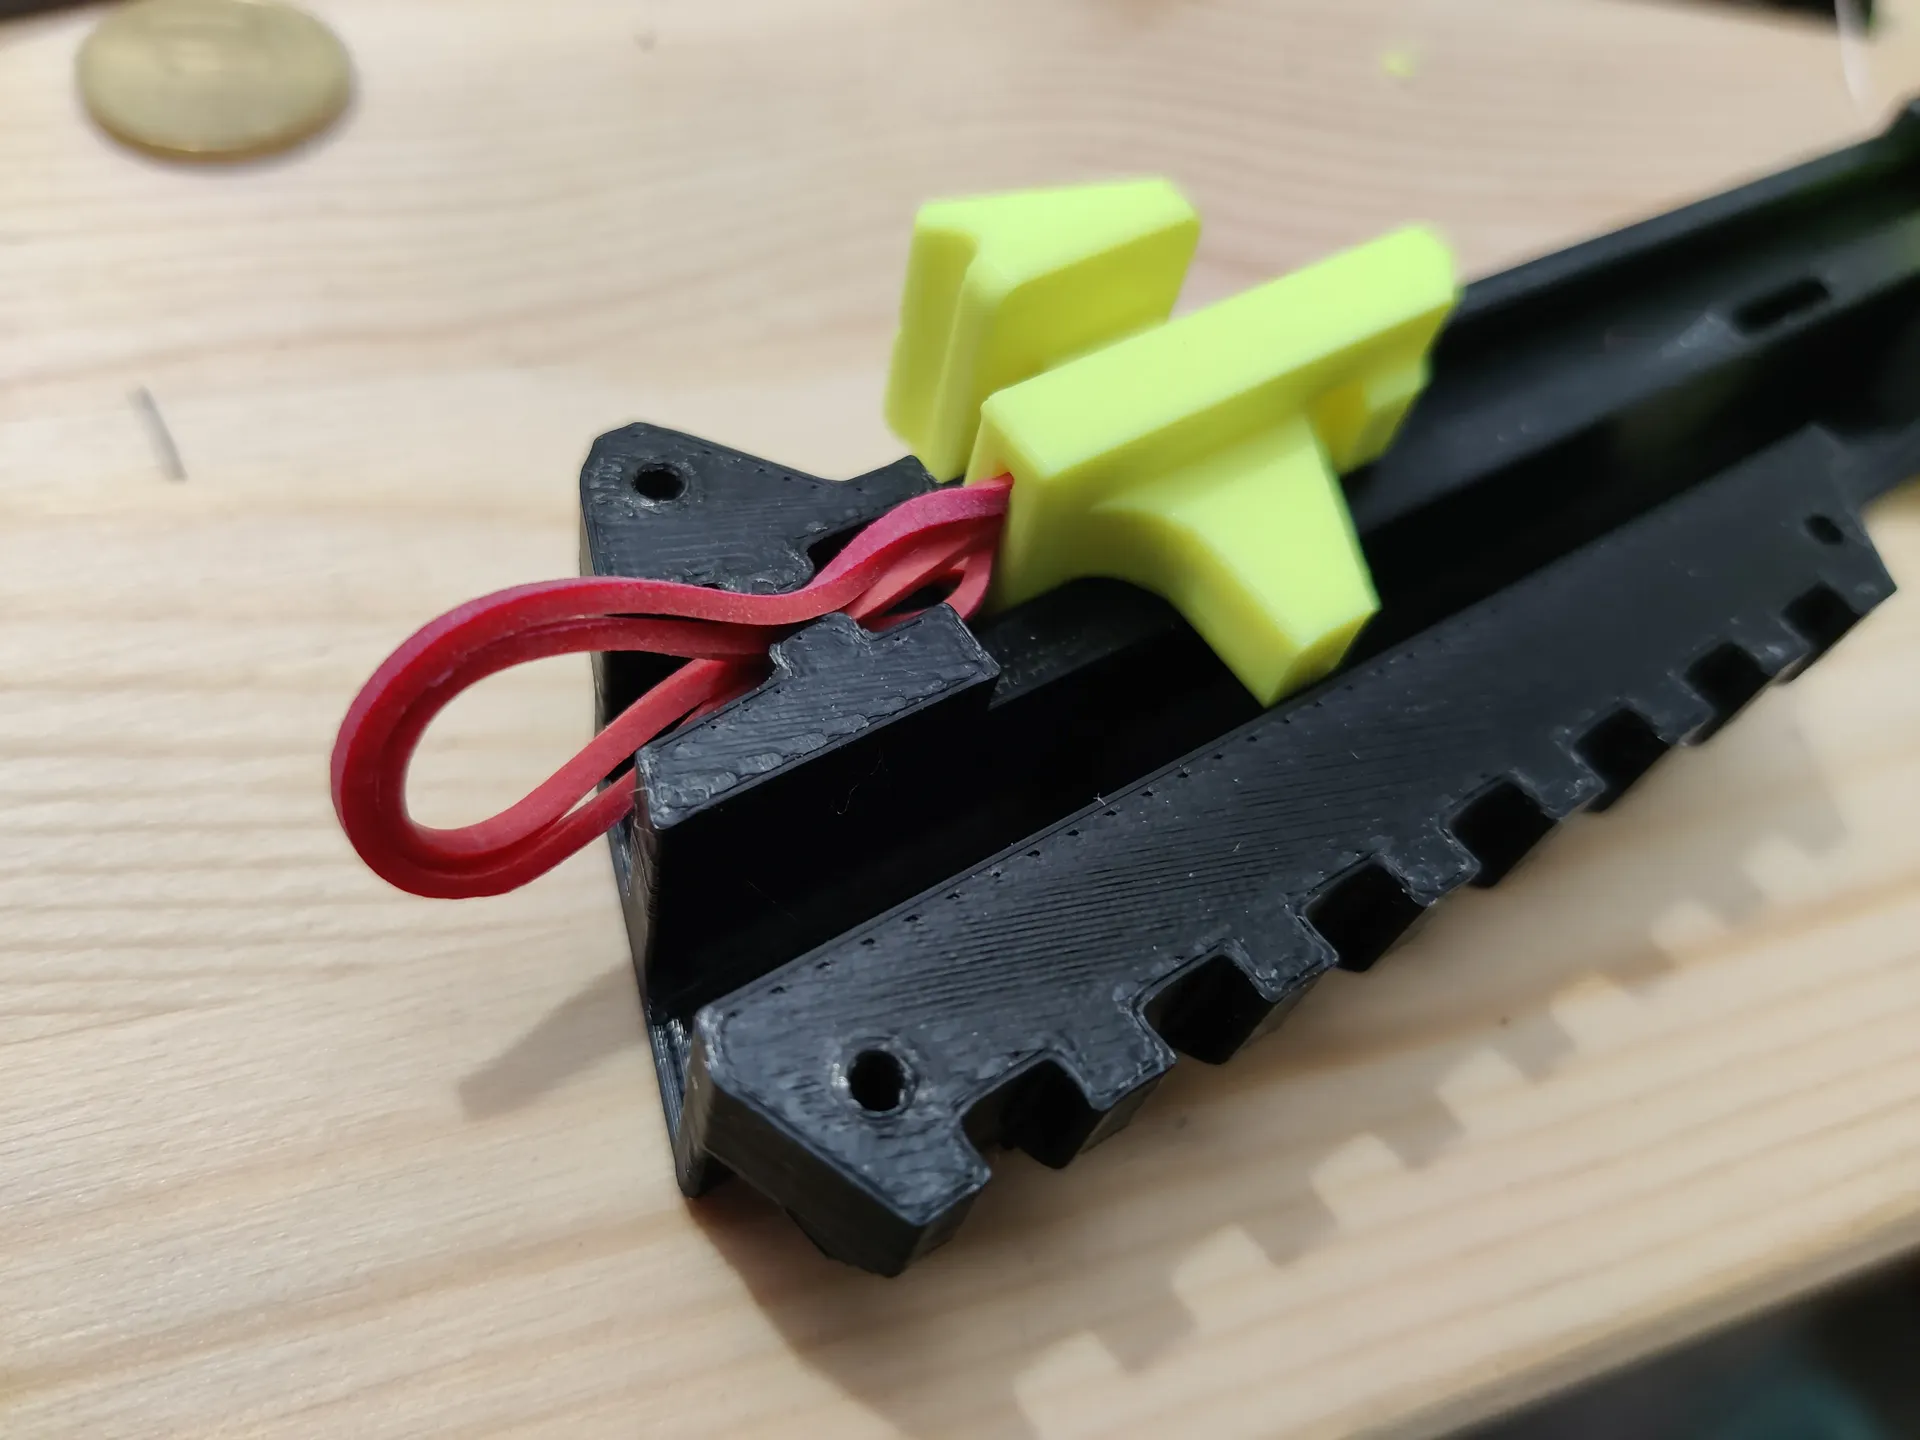
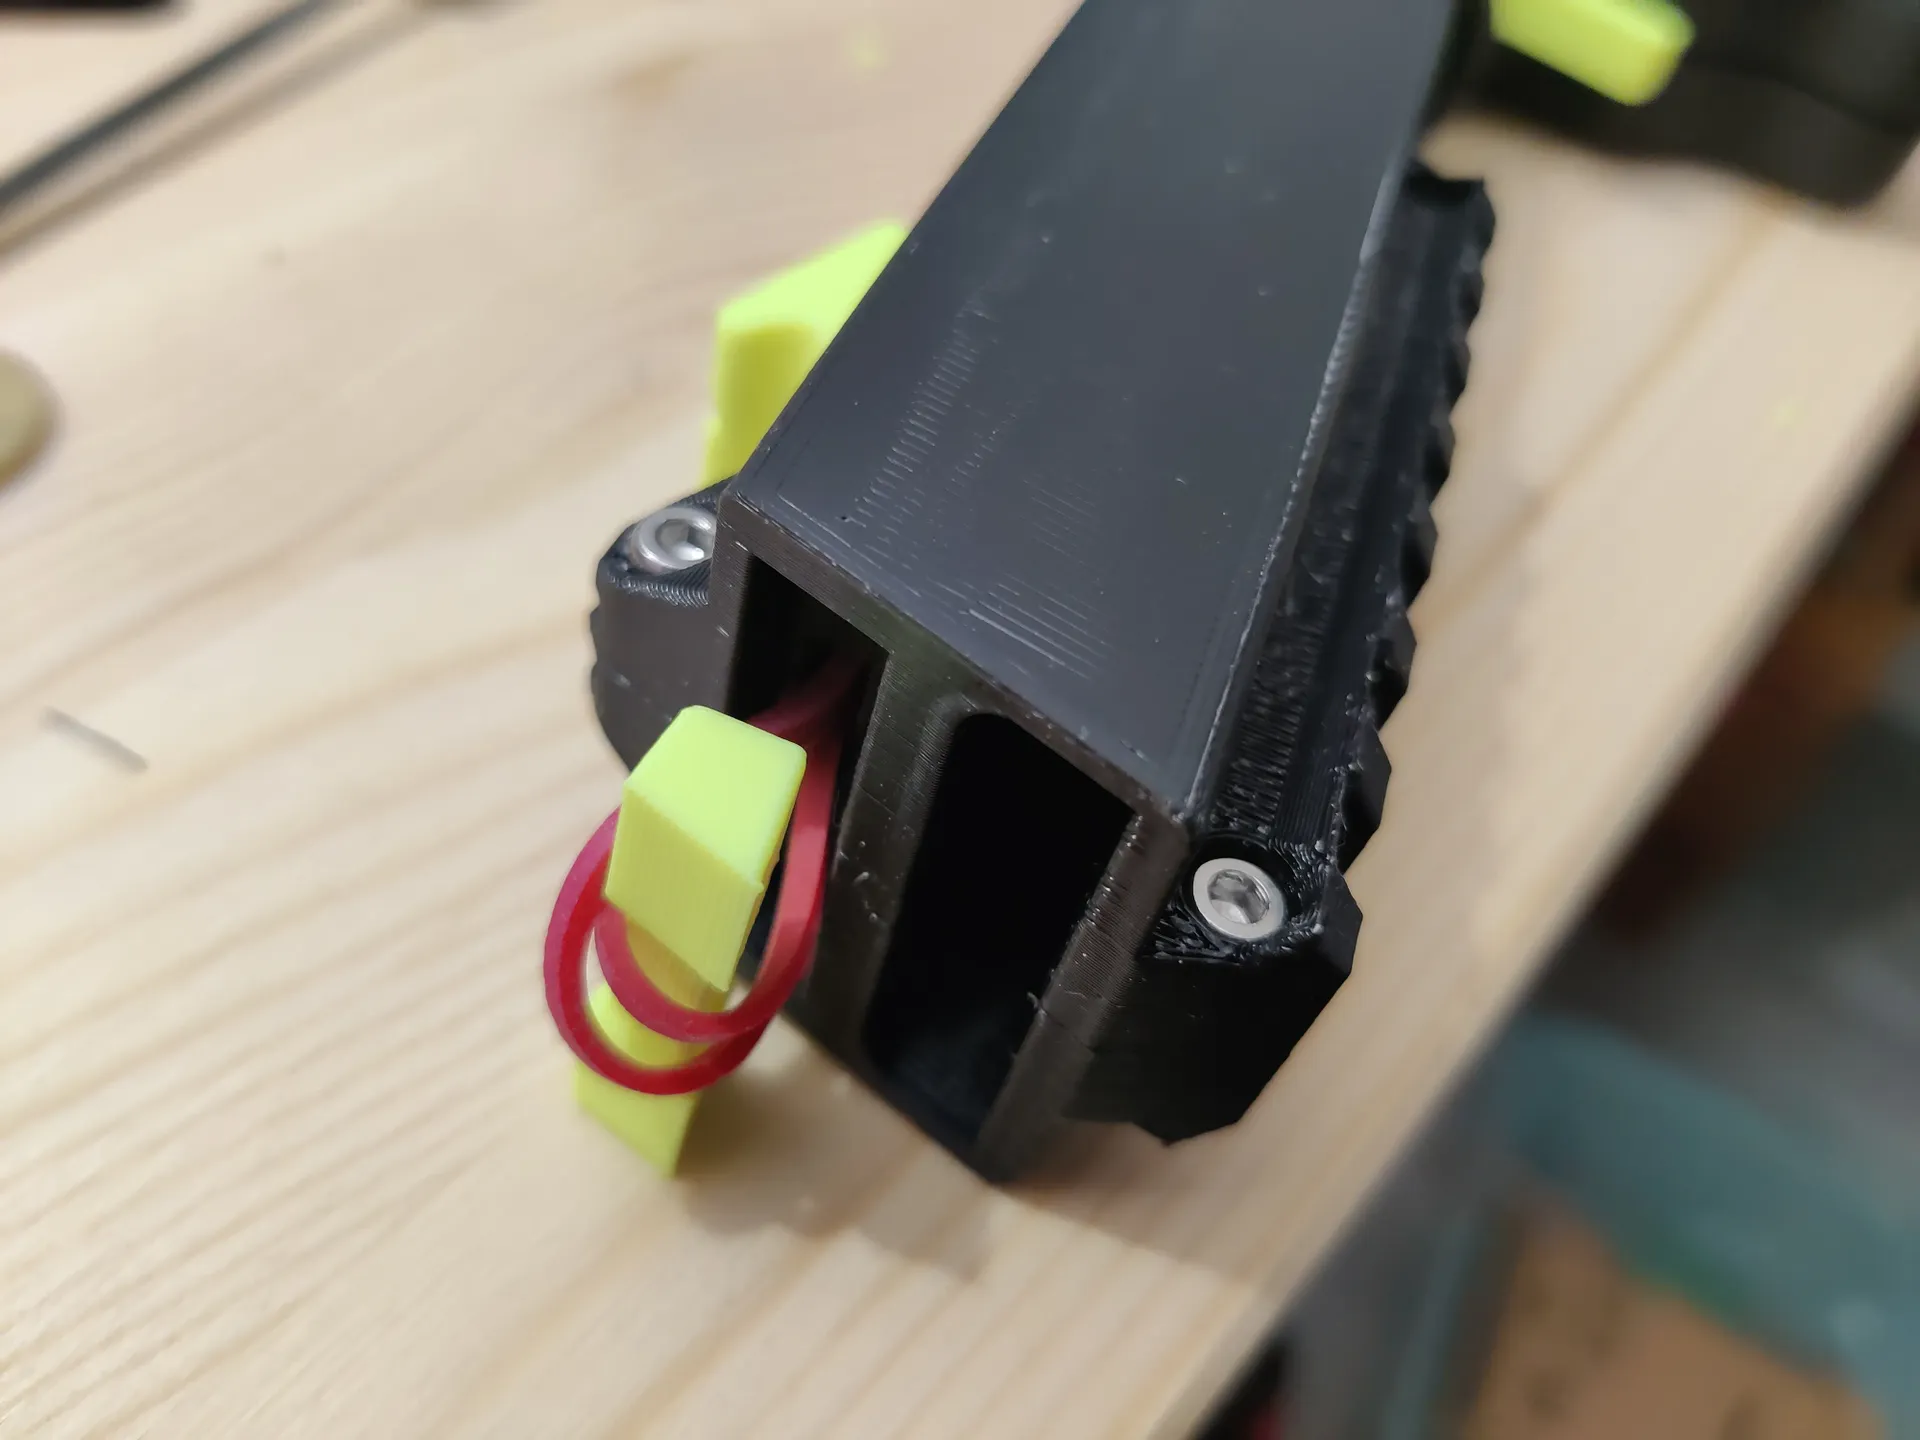
Put the slider assembly into the right halve and move it all the way to the front ensuring that the rubber passes through the canal and dangles out of the retainer compartment.


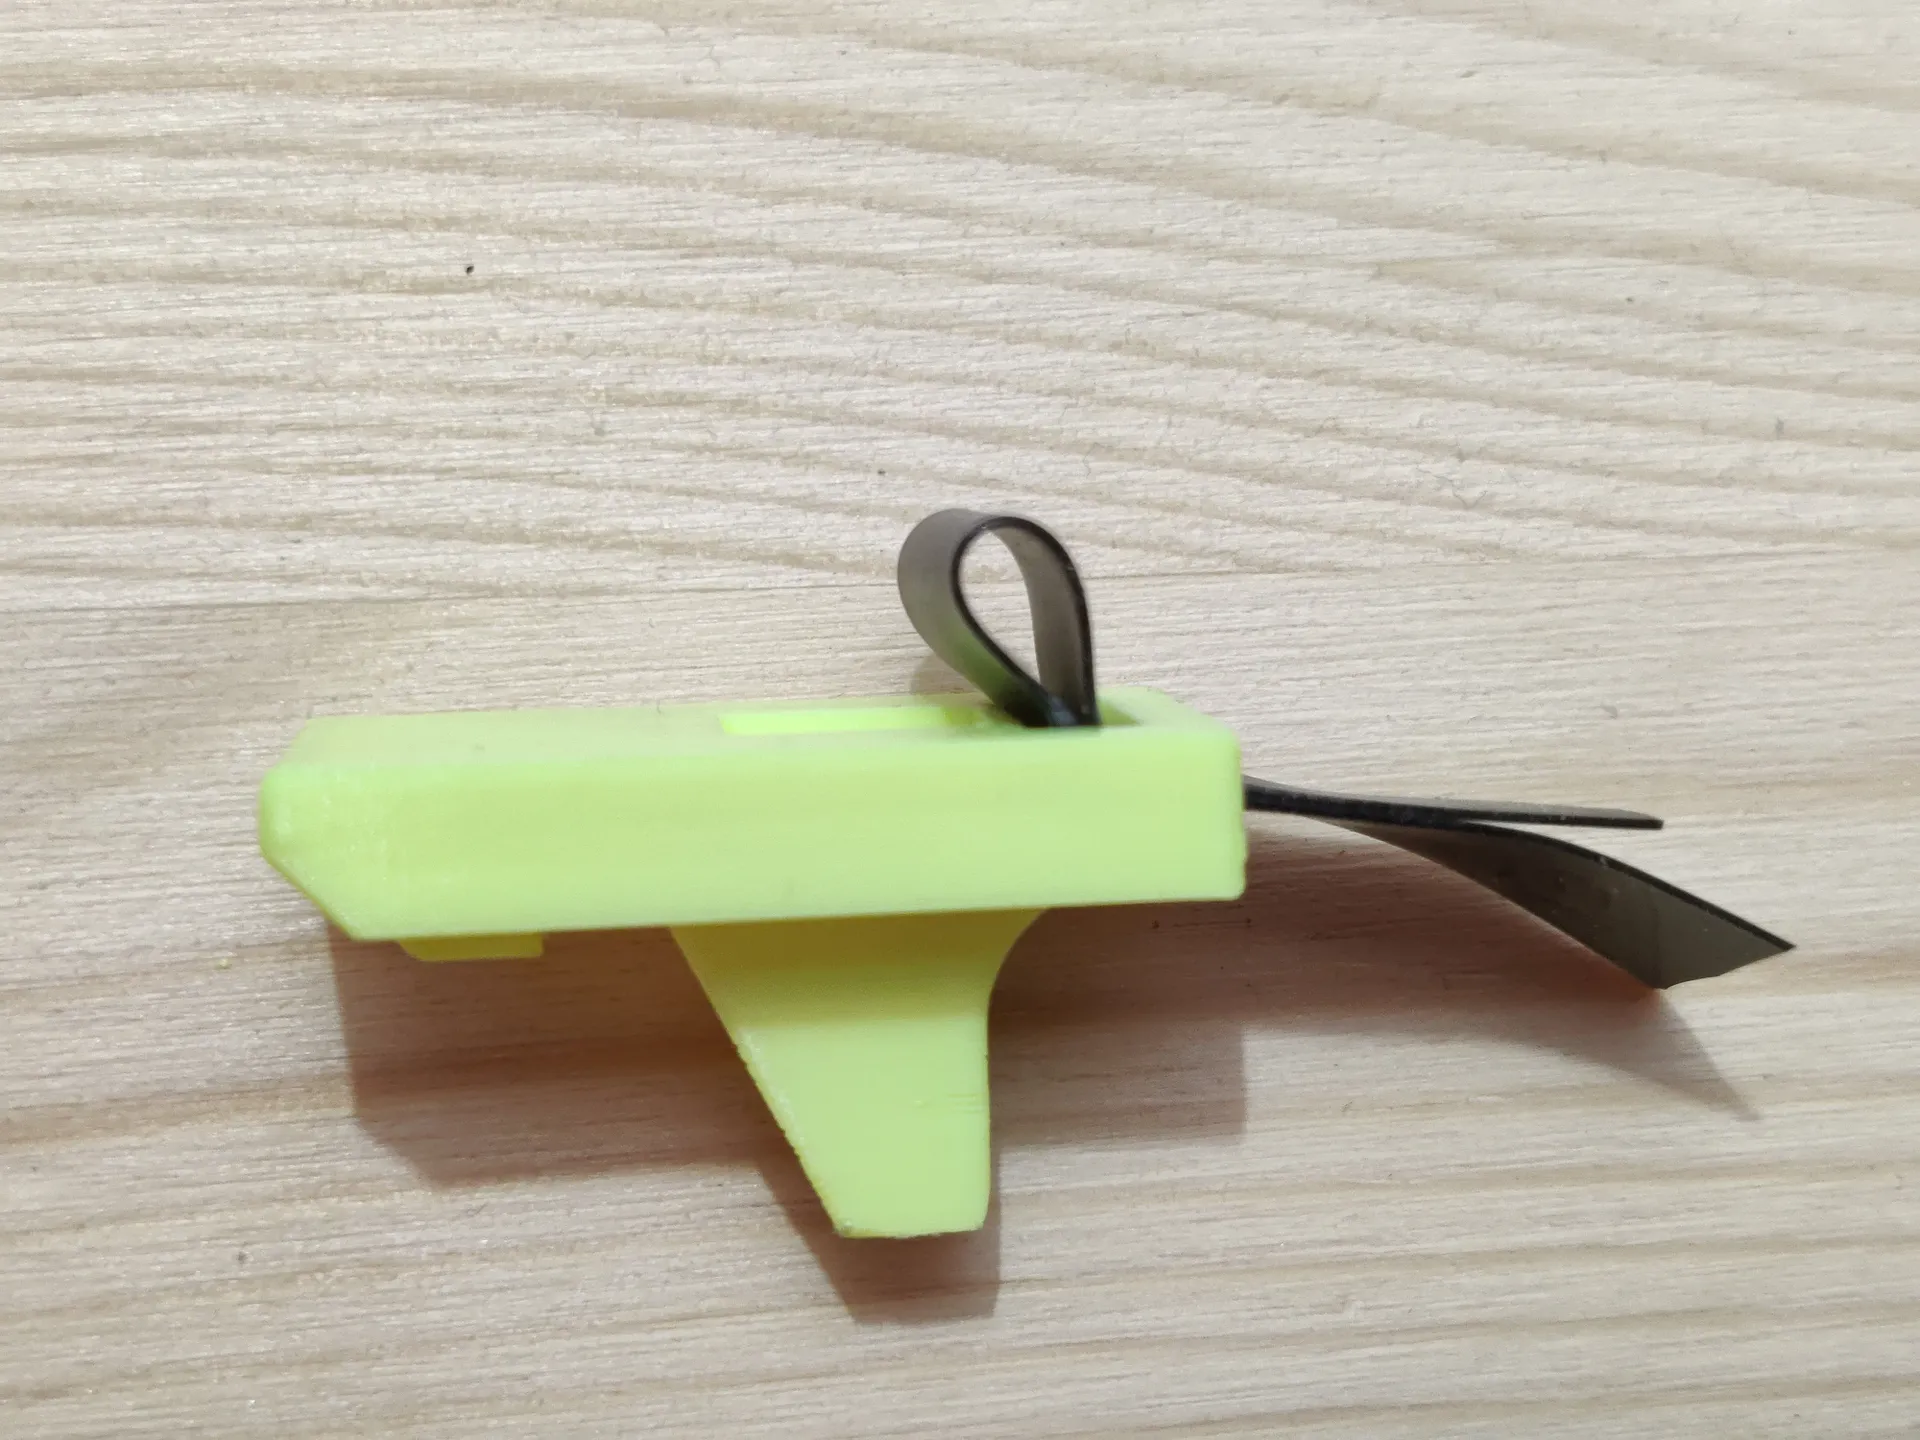
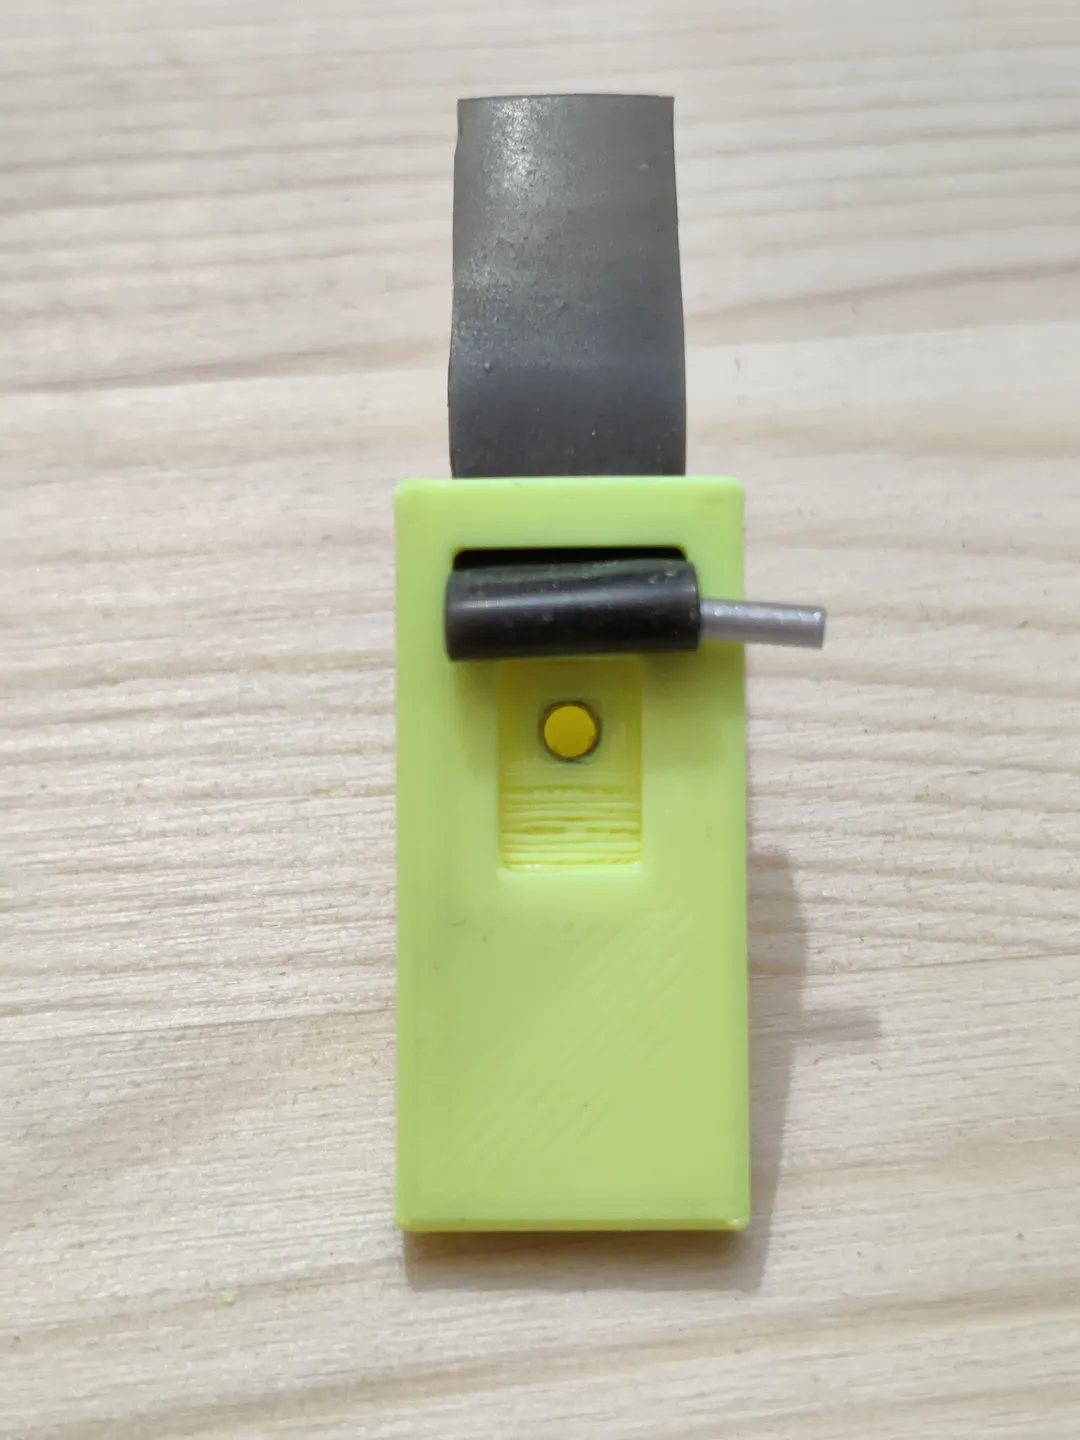
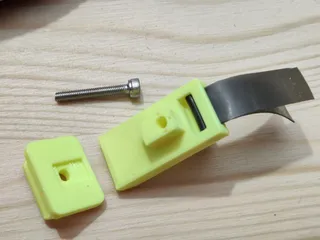
Put the coin in its slot. Put the trigger on its axle and ensure it moves freely then out the trigger with its axle into the right half. Insert the spring into its place behind the trigger (can be tricky).

Put the left halve on and ensure nothing is squished while doing so. Screw the halves together using the 3x 16mm screws in the handle and the 10mm screws everywhere else.
In case the spring refuses to stay in place try this: Put a toothpick through the relaxed spring and make sure one end rests in its cutout in the trigger and the rest of the spring points in the same direction as the groove. Don't compress the spring yet! Put the two halves together, the won't fit completely because the spring is between them. Use a piece of thin cardboard or a credit card to push the spring along the toothpick until it is short enough to rest in its groove. The two halves will now get closer together but there is still a gap because of the toothpick. While holding the halves together, pull out the toothpick ant the halves will finally fit together.
For rubber bands, just push the rubber band retainer through the loops and pull the slider back and you are done.


The Theraband version is trickier: pull the slider back carefully until the ends are flush with the opening. Put the theraband retainer between the flaps and carefully push it in. If everything is nice and tight, put in the 2x 10mm screws.


With stronger rubber bands or a black Theraband I advise against firing the gun without a bottle cap loaded. It may get damaged since the stored energy has nowhere to go.
Suggestions for games to play:
Here are some ideas for games to play with this toy. You have a great idea for a game? Let me know in the comments!
Quotes
Whenever one fires the gun, one has to recite a movie quote while doing so. We started out with quotes from someone holding a gun e.g. "Come with me if you want to live!" but eventually we ran out of those since they cannot be repeated.
The Duel
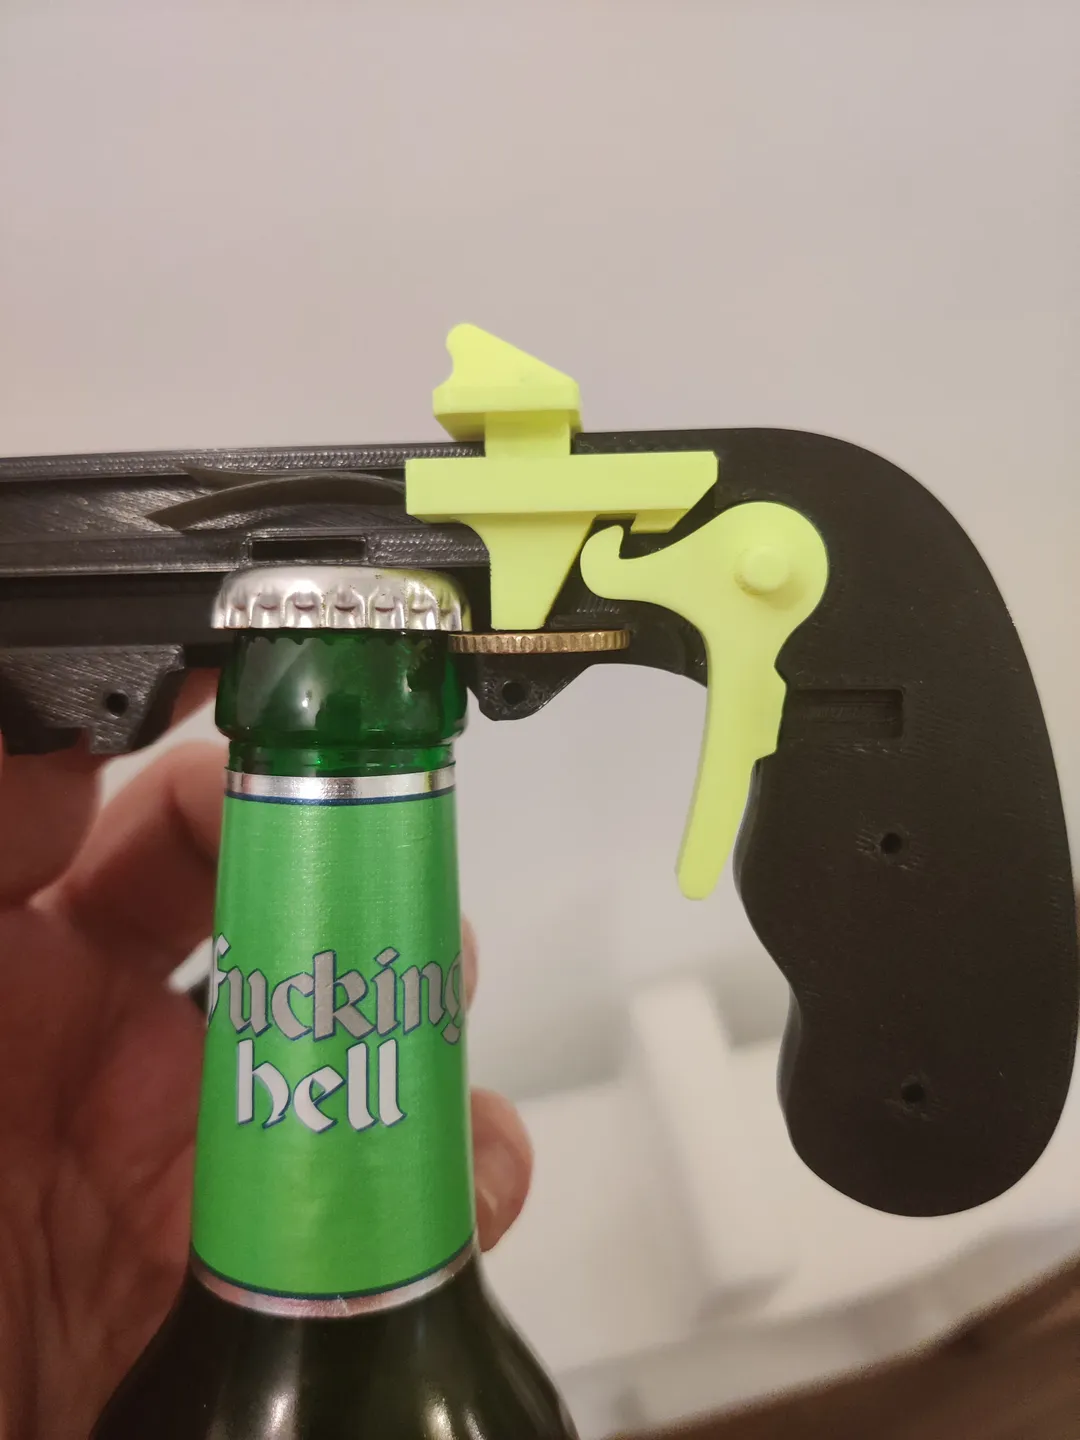
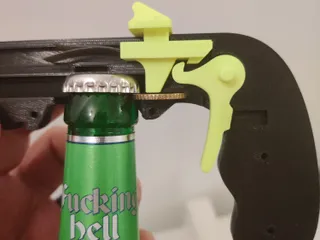
Two contestants, unopened bottle of beer in the left hand, loaded gun in the right hand standing together back to back. Both take 5 steps so that they are 10 steps apart. Upon a signal (from a third person) they turn around facing each other, open their beers with the gun and start drinking the beer. Once the beer is finished and not a second earlier the bottle cap may be fired at the opponent. If the shot misses another bottle may be opened, drunk and then the cap fired at the opponent again. The one who gets hit first loses and has to bring new beers.
The Bucket
Put a bucket in the corner and everyone has to shoot their bottle cap into the bucket. Everyone who misses has to finish their freshly opened beer at once and try again with a new one.
Design Process
It all begun in summer 2021 when I stumbled upon the original design. I printed it and it was awesome but soon the very long trigger began to annoy me. I had to move my middle finger out of the way to press it. So I imported it in FreeCAD and made it shorter. Then, the slider jammed a little bit while pulling it back. Also, every now and then the gun jammed because the cap wasn't aligned properly. I never had the type of rubber band that was intended to be used and I did not like how the front with the knot looked. Then I began to redesign the slider in FreeCAD (being on linux, there is no easy way to get Fusion360 or any other fancy windows tools) and it was hell. Every time I changes something a little bit further up the dependency tree, everything below that got messed up and in most cases had to be redone completely. This is mostly my fault for building one feature on top of another. I did not know better and the tutorials all did it too.
Eventually I got it done and even the first prototype was fully functional. The new trigger mechanism felt so awesome. However.. I will have to remake the body from scratch if I am going to add more features. When I started to pack things up for publishing on PrusaPrinters I saw the Bottle Opener Contest. What a coincidence? :-)
Now I have Spent 3 days printing more prototypes and making pictures to make it match the quality Josef was tweeting about.
About the Contest
I'm aware that I am handing in work that is not entirely original. I hope this is ok. I'm very lucky that I finished the work just as this contest started.
Tags
Model origin
The author remixed this model.


Bottle opener gun
Differences of the remix compared to the original
- Shorter trigger -> no longer blocked by middle finger
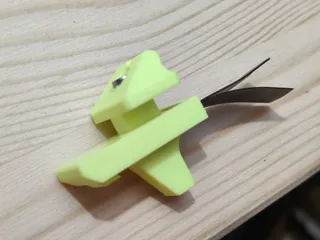
- Metal trigger spring -> way better feel and it won't get fatigued like all PLA springs do
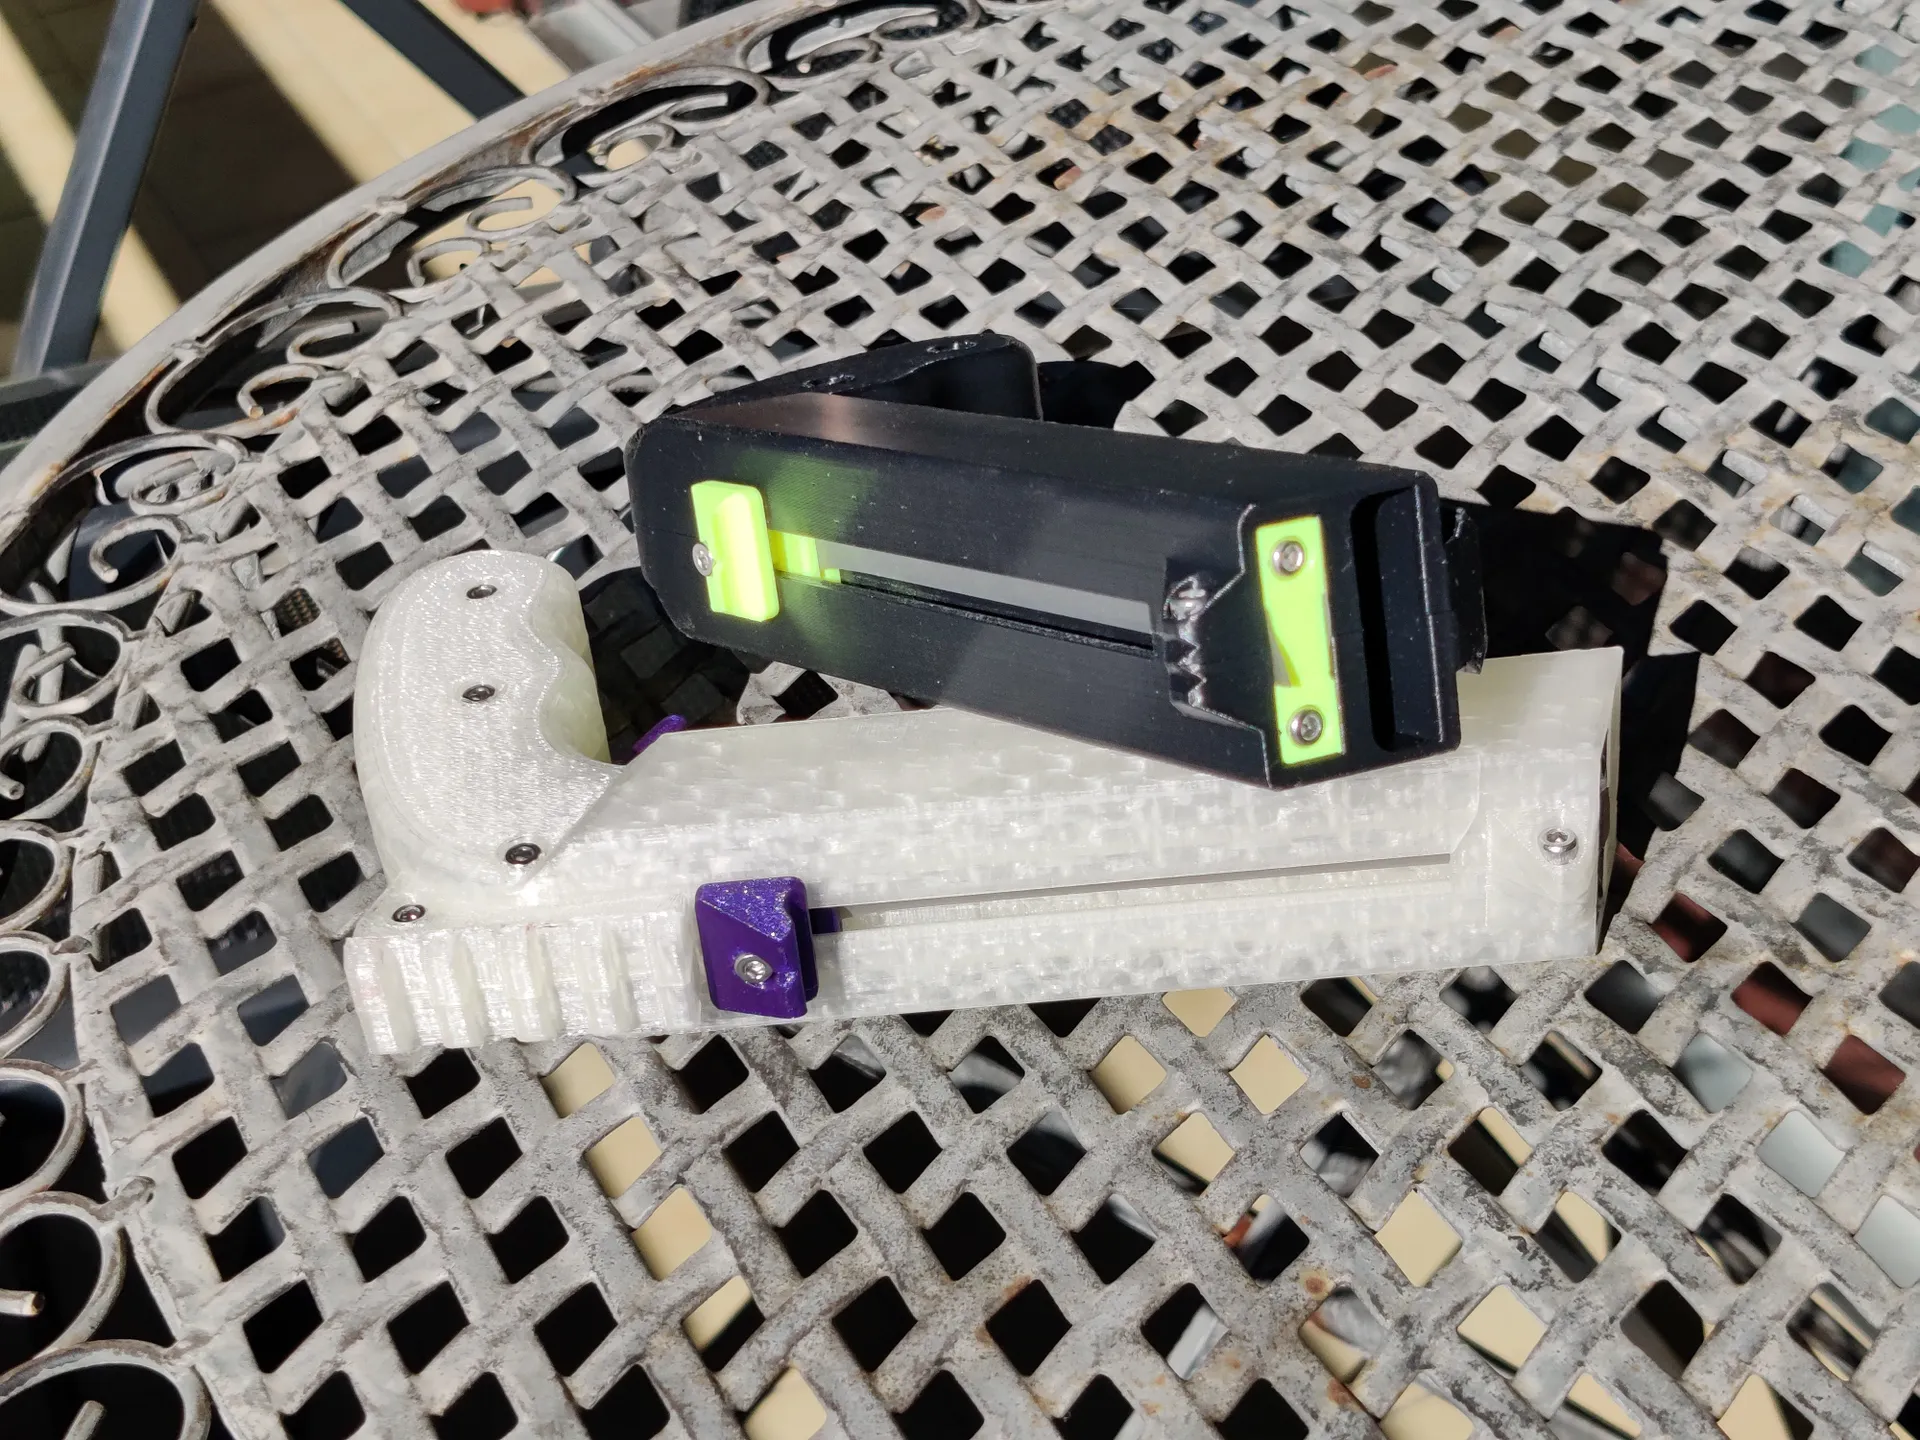
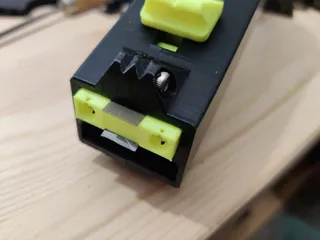
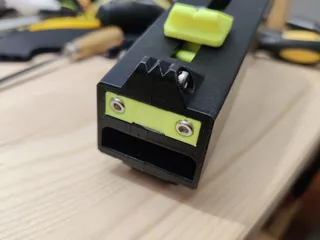
- Retainer for rubber bands/loops -> easier to put together, looks cool
- Optional retainer for Theraband rubber bands -> way more punch, looks even cooler with those screws
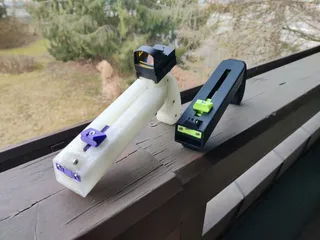
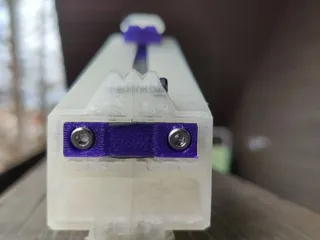
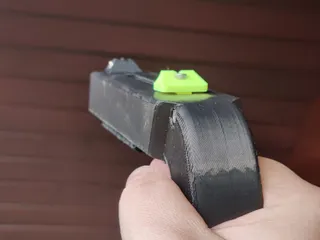
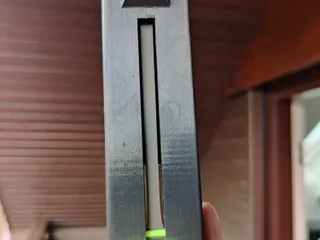
- Lower picatinny rail -> for you gun nerds out there, get tactical with lasers and flashlights, also looks cool and perfectly hides two screws. This is actually the main reason for it being there.
- Optional upper picatinny rail -> for you gun enthusiasts out there. A scope would look ridiculous up there but how about a small red dot sight?
- 5mm trigger axle -> the built in axle was fine but I broke one while taking apart an assembled gun thus ruining a part taking 4-5h to print. A steel axle would be overkill but a 3D printed one is replaced in minutes and you can use anything with a diameter of 5mm as an axle.
- Tighter construction -> less wiggling of the parts. Feels sturdy.
- No need for support in those screw holes due to a neat trick I learned from Łukasz Janikowski (the Legonini guy). https://www.thingiverse.com/jaaanik None of the small Parts require any supports.
- More room for magnets and you can use 2 of them -> flexibility & symmetry