Tru Pointer Replica
Description
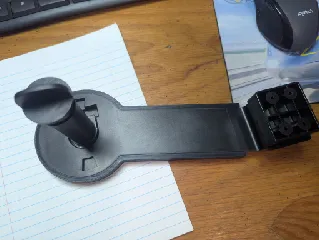
PDFFor anyone who owns a 2.0mm lead holder and loved (or wants to experience) the design and feel of the long since discontinued Tru-Pointer, I hope this model suits you well!
I tried purchasing the Staedtler rotary lead pointer, but it does not fit all my pencils that I have and it makes that pointer semi useless depending on my pencil. I have always liked the feel and aesthetic of a chunky rotary lead pointer, but the convenience of a razor sharpener, so I combined them.
You will need a uni 2.0mm lead pointer and two 608 bearings (22mm OD, 8mmID, 7mm height).
The base of this sharpener is modeled to be hollow so it can be filled with rice, sand, or mortar in order to achieve the weight that you desire. The Uni sharpener slot has a slight taper to it and it snugly fits all 3 of my uni sharpeners I bought for this project, so it should fit yours.
Use some superglue to glue Mating Plug 1, Mating Plug 2, Top Lid, and Lid Bearing Race together, and a clamp. Always need more clamps.
Happy Drafting!
PRINT CALIBRATION RECOMMENDATIONS!!
This model is made to semi tight tolerances, so a bit of tuning might be in order if your printer does not obtain +/- 0.1mm of modeled dimensions. Please follow the steps below to ensure the print goes well and all interfaces are correct. This process worked perfectly for my two printers, hopefully it solves all your frustrations with getting parts to fit together. If you print this and follow this procedure, I would appreciate your comments because I am going to start including print tuning recommendations in my future projects.
Print a single “Mating Plug 1” and measure it, it should be 8.5mm, adjust “X-Y Contour Compensation” or equivalent setting and reprint if needed.
Once “Mating Plug 1” is within acceptance of 8.5mm, proceed to print “Lid Bearing Race”, measure the inner circle, modeled dimension is 22.1mm or test fit with your bearings, you want a lightly snug fit. Adjust “X-Y Hole Compensation” or equivalent setting and reprint if needed.
Now that those two parts are calibrated, the rest of the model can be printed using the same settings and all should fit quite well.
Tags
Model origin
The author marked this model as their own original creation.


