Hello Kitty Clone Hero Controller
Description
PDFGeneral
This was designed to be as large as I could fit on my print bed. So depending on your print bed size, there may be an issue printing it as one piece. The body pieces come out to be ~241mm x ~169mm.
There are some additional files that you will need:
- Strumbar from GermanDarknes
- Fret Buttons from VladTheInhaler
Printing
Resolution:
- 0.20mm (Body/Neck)
- 0.12mm (Buttons/Strumbar)
I would suggest using a brim on the larger pieces (Body/Neck). I had an issue with the top whisker on both sides wanting to lift up from the bed. Same issue with the tip of the neck.
Body Top:
For the top of the body, import ‘Body_Top_White’, ‘Body_Top_Yellow’, ‘Body_Top_Red’, and ‘Body_Top_Black’ as a single object with multiple parts so everything aligns correctly. Once imported, they can be split into objects so they can be printed one at a time.
I printed in this order:
- White
- Yellow
- Red
- Black
The idea was to go lightest to darkest to hopefully hide any issues caused by stray filament that might pop up from a previous print.
Only the part where the neck is inserted into the body needs supports. I know I could prevent this by making it flush, but I liked the look of the outline having some separation from the neck. I created a cover piece that can be printed and super glued to hide the leftover texture from the supports.
If you're unfamiliar with this method of multi-color printing, here is a video explaining it.
*** Remember to use an outer brim in order to avoid the whiskers lifting from the bed. ***
Neck Cover:
Make sure to check the orientation of this piece so the bed texture is printed on the correct side to match the rest.
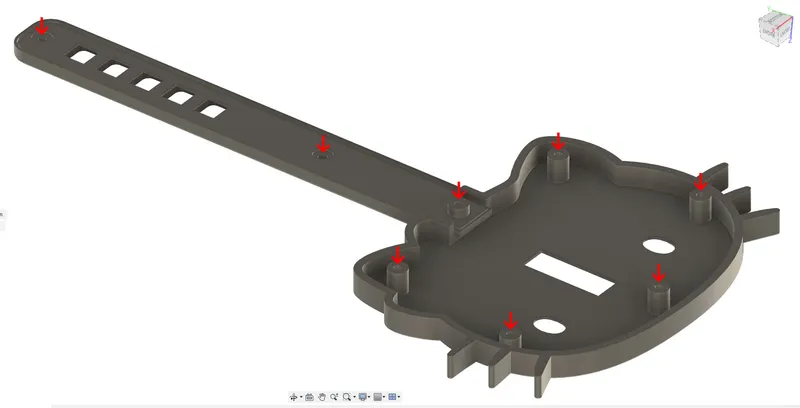
Body Bottom:
* Needs Supports
*** Remember to use an outer brim in order to avoid the whiskers lifting from the bed. ***
Neck Top:
* Needs Supports
I printed this face down to keep the texture consistent across the entire front of the guitar. The supports pop right out of the fret buttons holes.
*** Remember to use an outer brim in order to avoid the neck lifting from the bed. ***
Neck Bottom:
* Needs Supports
*** Remember to use an outer brim in order to avoid the neck lifting from the bed. ***
Assembly
Hardware:
- (8) M3x4x5mm Heat Set Inserts
- (10) M3x20mm Screws
- (2) M3 Nuts
For this build I used:
- Fret Buttons: KS-33 Low Profile Chocolate
- Body Buttons: G Pro 2.0 Brown
- Strumbar: Box Navy
*** The fret button switches should be soldered after they've been inserted into the neck. The switches for the body need to be soldered before they're inserted. Then just feed the wires through the mounts. ***
It's a bit of a tight fit around the screw posts in the neck, but it wasn't really an issue with the small wires I used from an ethernet cable.
Heat set inserts go in the top pieces.
Tags
Model origin
The author remixed this model.


Differences of the remix compared to the original
I used the strumbar and switch mounting system from the ModCaster and then redesigned the neck to be extended.