Stackable IKEA LACK Prusa Enclosure V2

Description
PDFI printed and like the original Prusa Enclosure V2 - MMU2S very much and I wanted to close the lower area with the same design.
So I modified the existing files and combined it with the principal of stackable tables from hagen Naturstein to make installation very easy. Also the uninstallation is very stressless, especially for moving home etc.
It can be also used as an alternative for the original Prusa Enclosure V2 (without MMU2S), if you just like the design and want to make the top table removable.
For installation you just need
- 28x 3,5*30mm wooden screws (4*xx mm should be also possible)
- 4x M3*30mm screws for the door hinges
- 3x 446*475*3mm side walls (wooden, plexiglass, acrylic sheet
- 2x 221*467*3mm door walls (wooden, plexiglass, acrylic sheet
- (option) 8x neodymium magnets 20*6*2mm
Tipp for side and door walls: If you don't want to order expensive precut sheets, you can just buy 2x 600*1200*3mm cabinet backs (white) and cut it by yourself with patience and a cutter knife (as I did). But be warned: this will take a while.
What's different to the original Prusa Enclosure V2?
- Different installation method (stackable).
- Slightly increased wall thickness on critical areas for making printing with 0.6 nozzle easier
- Much lower amount of filament and support usage.
What's different to the stackable tables / Lack bracket?
- moving installation holes out of the middle for usage on bottom and top.
- used and the modified design from the original Prusa Enclosure V2 as stackable solution with walls and doors.
If you want to use my PSU mounting method and cover, check out my PSU mount on https://www.printables.com/model/1182865-black-power-supply-unit-psu-holder-mk3s-mk4s
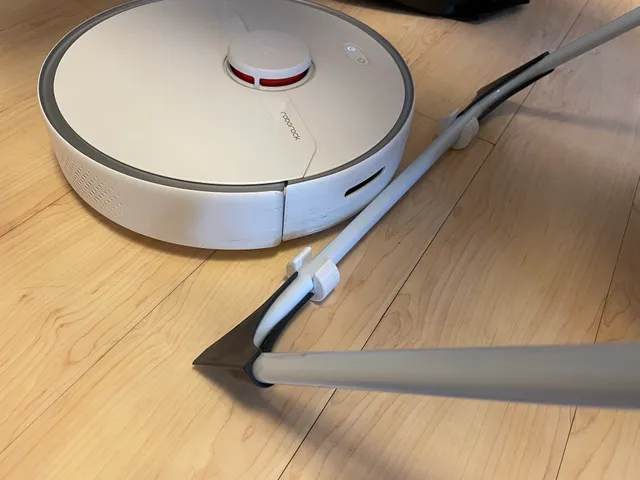
If you want to use my wheel lift (for vacuum robot), check out https://www.printables.com/model/1137064-ikea-lack-enclosure-wheel-lift-for-vacuum-robot
Printing instructions:
- PLA or PETG
- Supports as defined in .3mf files
- 0,3 mm layer height
- 10% infill
- 0.6 nozzle recommended for faster printing
Would be great if you post some makes and give feedback.
Happy printing!
Tags
Model origin
The author remixed this model.


Differences of the remix compared to the original
What's different to the original Prusa Enclosure V2?
- Different installation method (stackable).
- Slightly increased wall thickness on critical areas for making printing with 0.6 nozzle easier
- Much lower amount of filament and support usage.
What's different to the stackable tables / Lack bracket?
- moving installation holes out of the middle for usage on bottom and top.
- used and the modified design from the original Prusa Enclosure V2 as stackable solution with walls and doors.