Third party camera mod for Creality K1 series (IMX179 or OV5640)

Description
PDFThe original Creality K1 series camera is widely known for its unreliability and mediocre video quality.
This model is a remix of the AngryCam camera mount that allows to install a much better third party camera, either IMX179 or OV5640, on Creality K1 series printers. I've used IMX179, which has wider FOV (120 degrees), very good video quality, and comes at a lower price than the original Creality camera. Also, it works without issues at chamber temperatures over 62°C without any additional heatsinks.
In addition, the rear mounted camera provides a better view of the parts being printed and allows you to see the hotend and nozzle (in case something goes wrong there).
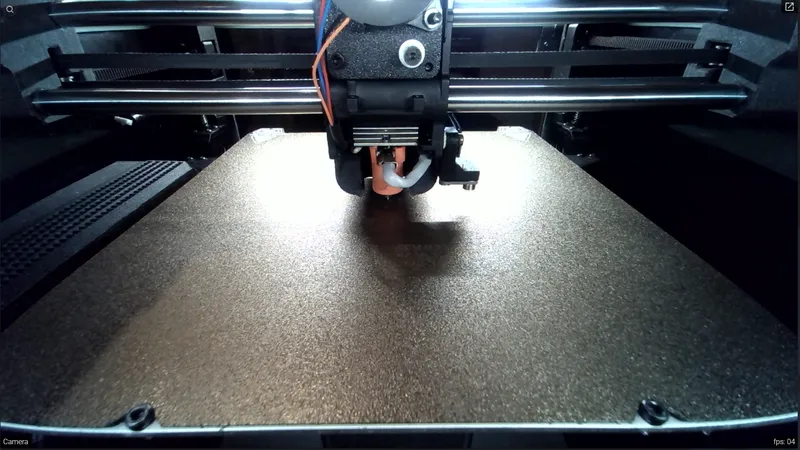
An example photo from the IMX179 camera in 1920x1080 resolution is attached above.
BOM:
- For K1(C, SE): IMX179 camera with 120 degree FOV
- For K1 Max: IMX179 camera with 120 degree FOV, or OV5640 camera with 160 degree FOV
- Strong, high temp VHB tape.
Printed parts:
- Two camera mounts in the attached STEP file
- Original AngryCam V2 cylindrical camera housing
- For OV5640: original AngryCam V2 front and rear covers
- For IMX179: remixed AngryCam V2 front and rear covers
Build instructions:
- Print all the necessary parts.
- Assemble the AngryCam as shown on the original model page.
- Put some VHB tape on the camera mounts (photo below).
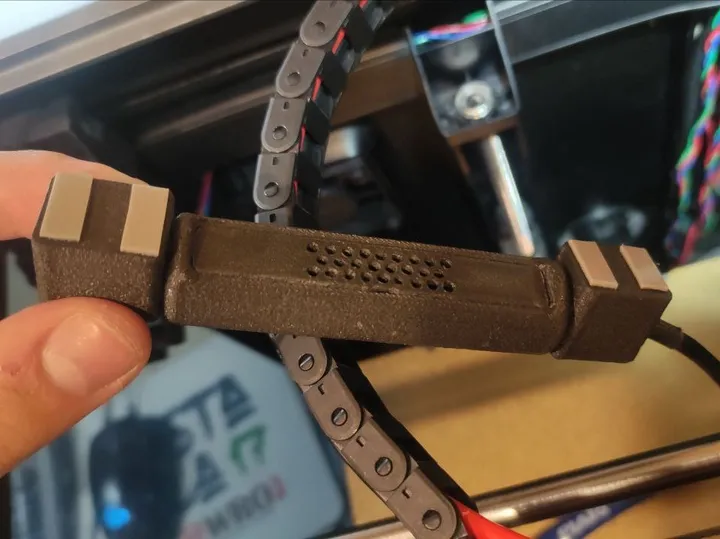
- Attach the camera to the printer's top rear frame piece (photo below).
- Secure the camera cable with a cable tie to prevent it from rubbing against the XY axis belts.
- Remove the printer's bottom panel.
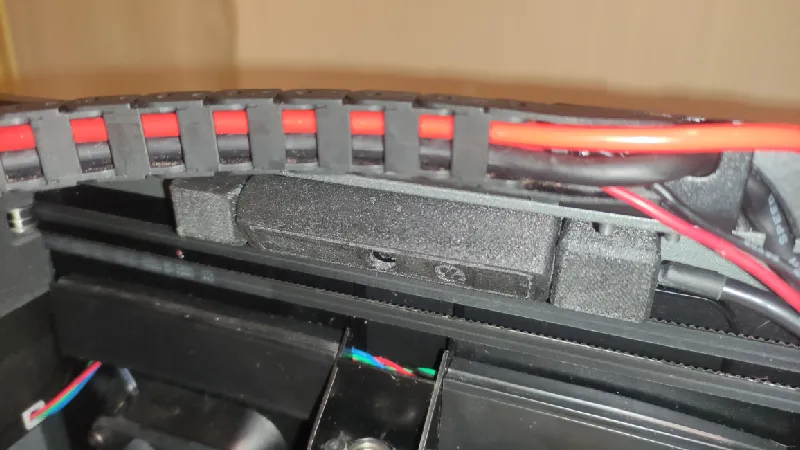
- Guide the camera cable along the other cables into the electronics compartment.
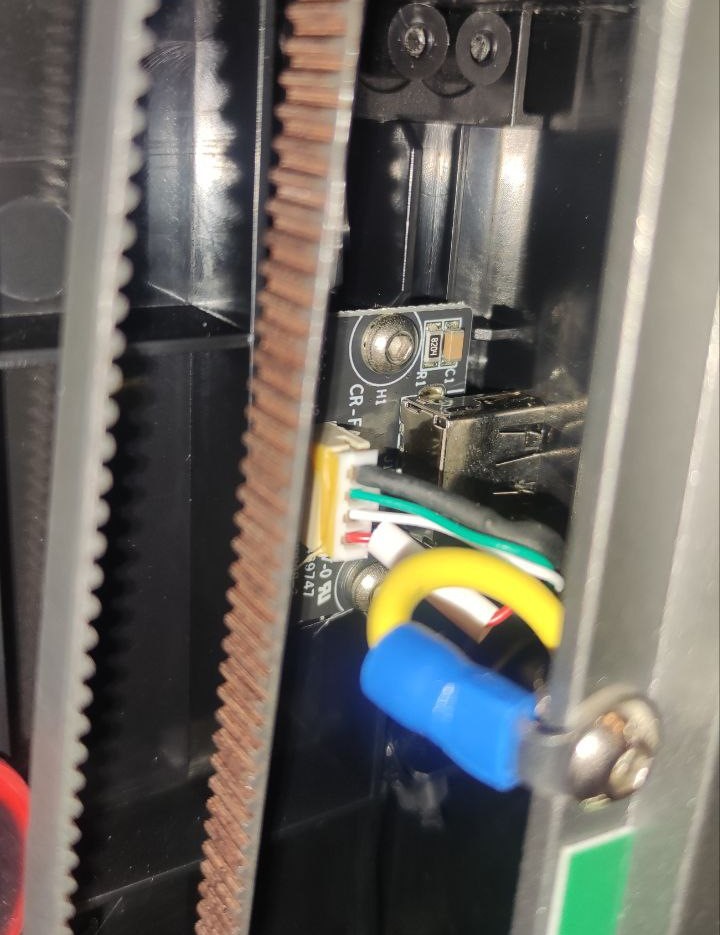
- Find the printer's front USB port PCB and remove the screws holding it (photo below). Also remove the screw holding its ground wire to the frame.
- Insert the camera cable into the USB port and secure the assembly somewhere in the electronics compartment, rerouting wires where necessary and staying clear of the Z axis belt (example below).
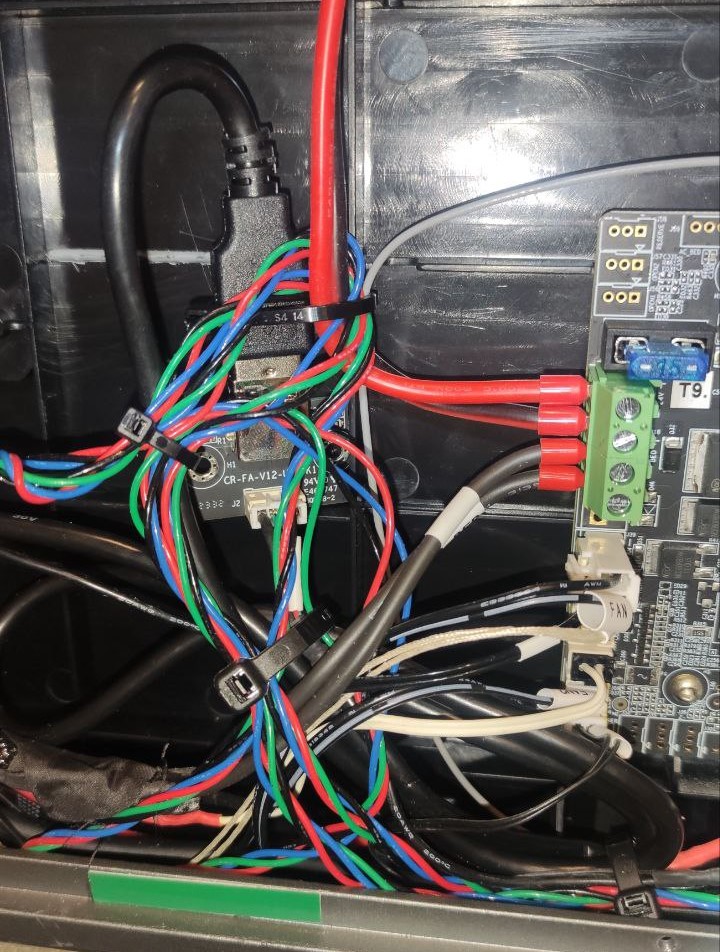
- Reattach the USB ground wire to the printer frame. Make it longer if necessary.
- Secure all the loose cables and wires.
- Reassemble the printer.
- Turn on the printer, connect via SSH, and start the helper script.
- Install the “USB Camera Support” feature through the helper script. Reboot the printer if necessary.
- Open your web interface. You should now see the camera image in 1280x720 resolution.
- If the image is upside down, go to the camera settings and rotate it by 180 degrees.
- Home all axis.
- Adjust the camera, so that the entire bed fits in its field of view (photo below). This will ensure you will see the entire top surface of your model, however big it is.
- To disable autofocus (which is necessary to do), establish a SSH connection, and execute the following line in the SSH terminal:
sudo v4l2-ctl -d /dev/video4 -c focus_auto=0 - Now you need to set up your focus distance manually. To do this, execute the following line:
sudo v4l2-ctl -d /dev/video4 -c focus_absolute=260, where 260 is replaced by your focus value in the 0-1023 range. Higher value corresponds to closer focus. Move the toolhead to the center of the bed, and keep changing the value and executing the line until the camera is focused on the nozzle. - To save the values, go to
/etc/init.d/S50usb_cameraand add two lines as shown below, with your resulting focus value. You can also increase camera resolution to 1920x1080 there. Here's myS50usb_camerafile with changes highlighted.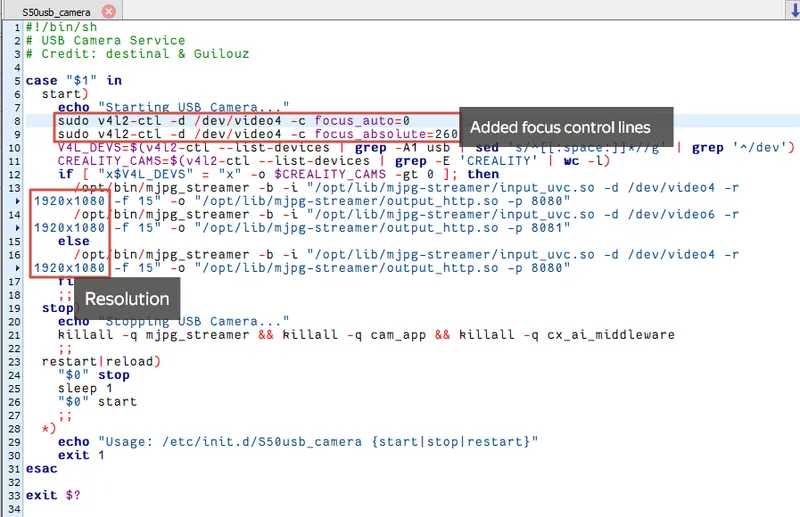
- Set up timelapse and other camera features, if necessary.
Tags
Model origin
The author remixed this model.


Differences of the remix compared to the original
The camera mounts were modified to use VHB tape instead of screws, and made narrower to fit the K1 frame.