Coffee container compatible with AeroPress Go

Description
PDFAs someone who enjoys the convenience of AeroPress Go and loves the taste of coffee it makes, I wanted a simple way to carry my favorite coffee along with it. I created this coffee grounds container designed to fit neatly into the handle of the AeroPress Go, keeping everything compact and easy to carry.
If you're like me and prefer not to lug around a grinder or scale, this container might be helpful. It features three compartments, each able to hold 16-20 grams of ground coffee, depending on the roast and grind. You can portion out your coffee at home and have it ready to brew wherever you are, without any extra equipment. The container is also sturdy and tight enough to carry it on its own.
Please note:
- This is not an AeroPress product and is not affiliated with or endorsed by AeroPress, Inc in any way.
- Typical of most FDM 3D-printed items, it's not food-safe. While I find it works well for dry coffee, it's good to be aware of the risks or consider applying a food-safe coating to the inside of the container.
- This is compatible with at least my AeroPrass Go. It may not be compatible with your specific version of it, as I do not have other versions to test compatibility. It is definitely not compatible with the full size AeroPress (non-Go version) - the handle on the full AeroPress is a bit more narrow and this container does not fit inside it.
I hope this little project adds a touch of ease to your coffee moments!
Printing Notes
- The project includes a second plate with a small optional funnel printed in vase mode to help with getting coffee into the container.
- All parts can be printed on both textured and smooth PEI plates. The cap looks neater printed on textured plate. If you have both, consider printing the flap separately on a smooth plate, as then it will be a little bit smoother to turn.
- Some people reported that the tolerances on the lid and the flap are too tight.
- I had no issues printing the container in PLA (basic and matte) and PETG.
- For PETG specifically you might want to very slightly increase XY contour compensation if your slicer allows it for better tactile feedback when rotating the flap. It is intended to lightly snap into position when one section is open completely, but I found that the feel is quite different between PLA and PETG prints.
- I use 0.12mm layers due to better feel of the cap thread and nicer surface finish of the container. Alternatively you could use variable layer height with 0.12mm layers only for the threaded sections (do not forget the cap as well) and thicker layers for most of the height for faster print.
Assembly Guide
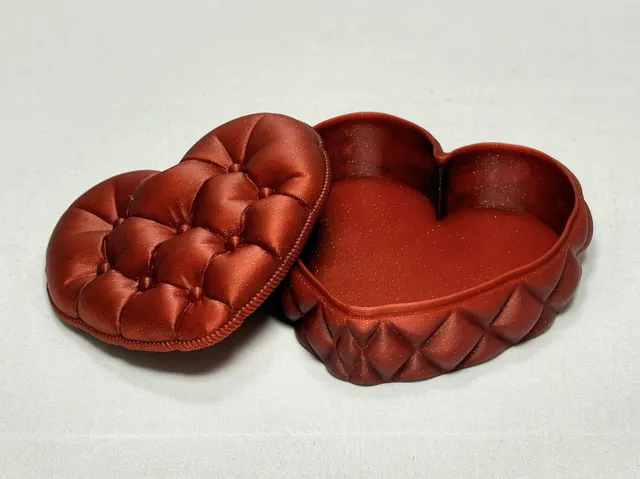
The only thing you need to do to assemble the model is to insert the flap into the body, but this can be a bit tricky. The flap is held by three retaining clips, and the flap must be inserted under them.
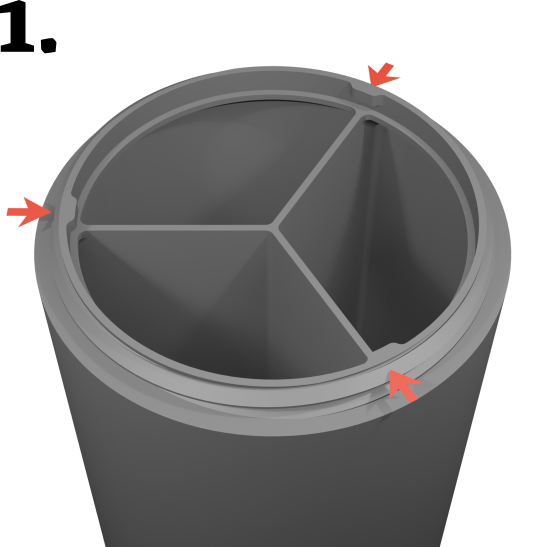 | Find the three retaining clips on the body. | 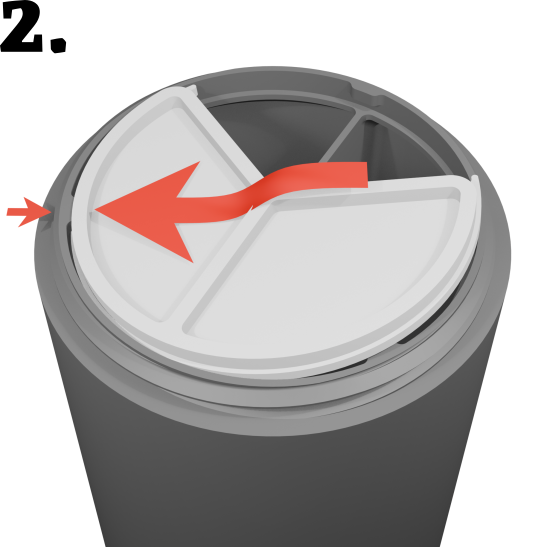 | Insert the flap with its flat side down under one of the retaining clips. |
 | Rotate the flap while pressing on the leading corner so it goes under the second retaining clip. |  | Keep rotating the flap until the trailing corner clears the third retaining clip. Press it down so that the flap sits flush with the top of the body. |
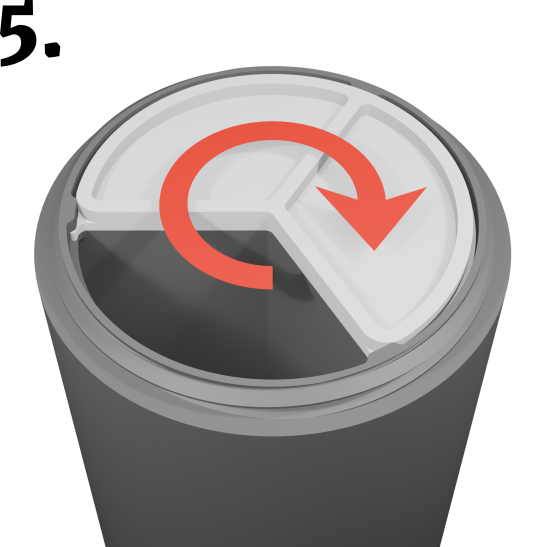 | Keep rotating the flap until it is completely aligned with one of the body sections. | 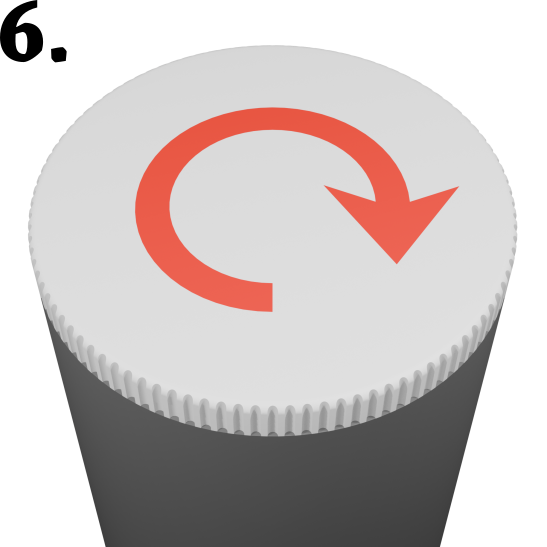 | Screw the cap on top of the body. |
Tags
Model origin
The author marked this model as their own original creation.