3D printable rack | 10-inch and 6-inch

Description
PDFA fully 3D printable rack for your home lab! Can be configured in 10-inch and 6-inch.
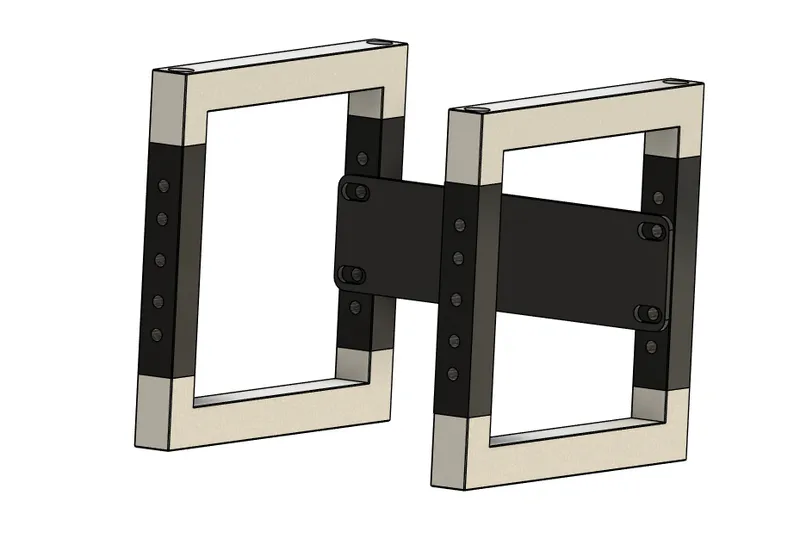
To use this system, you need to print at least 4 rails in a chosen size between 2U and 7U, and 4 joints, with a chosen depth between 150mm and 200mm.
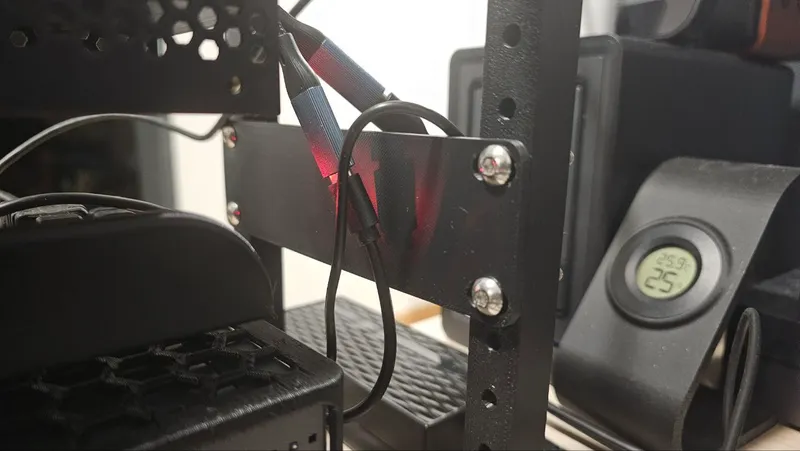
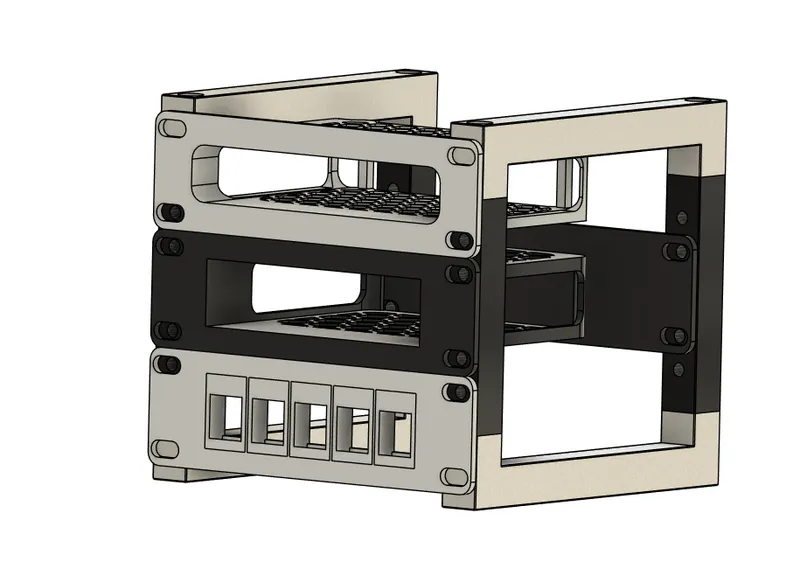
This system will accept any 10-inch or 60inch rack mount. And you can see some options in the collections below:
3mf and step files included!
Do you like my projects? Then please consider donating a coffee ;)

Required parts
To assemble this system, some hardware is required.
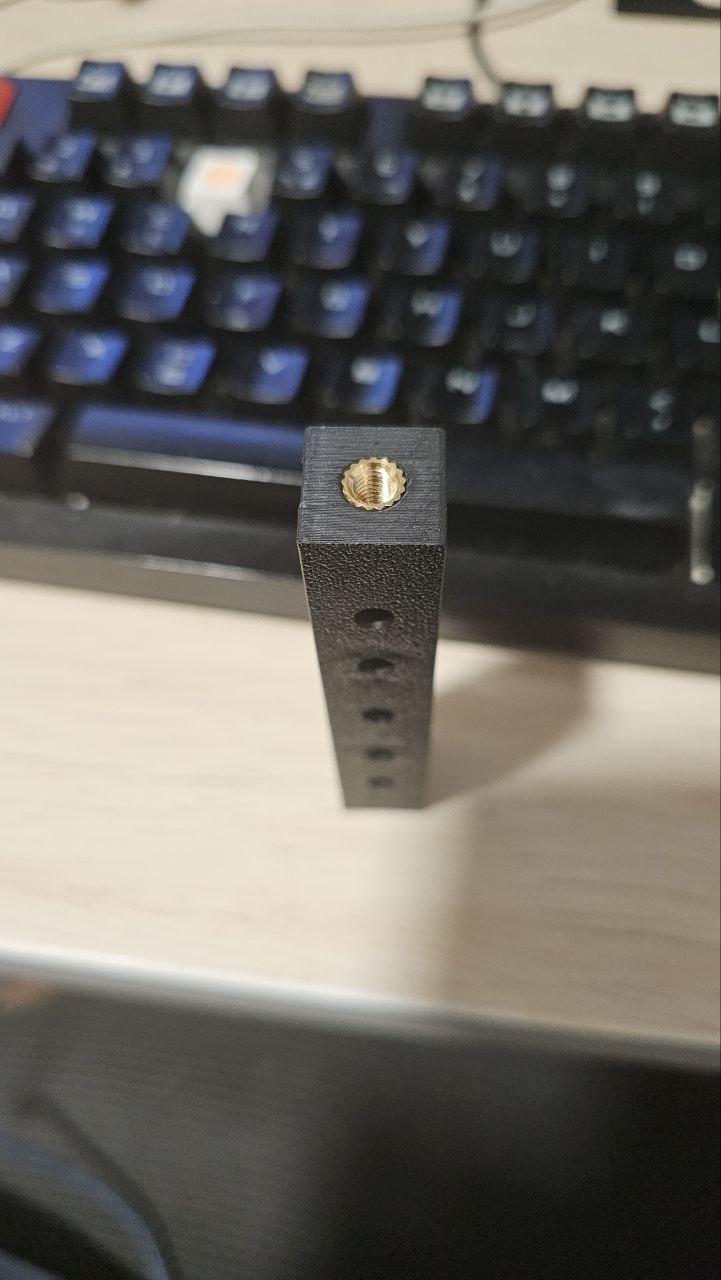
- 8x M5 thread inserts.
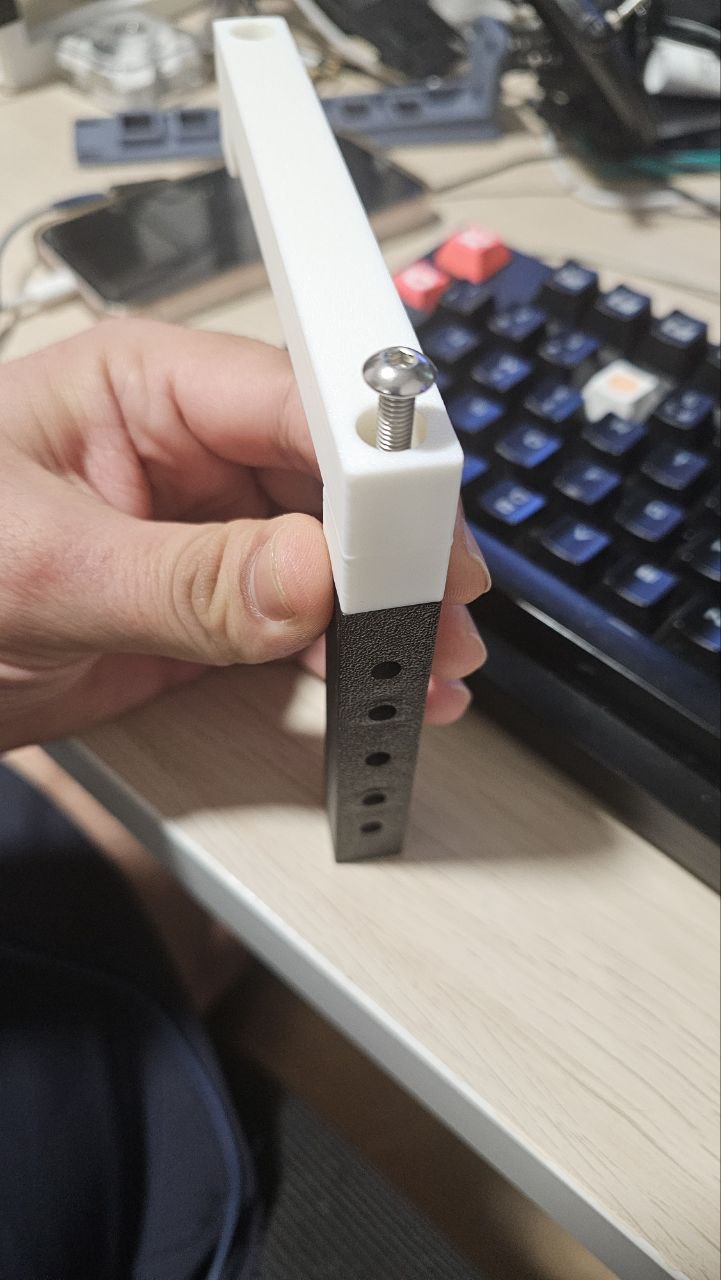
- For the joints: 8x M5x20mm screws.
- For the mounts: M5 screws. Min length: 20mm.
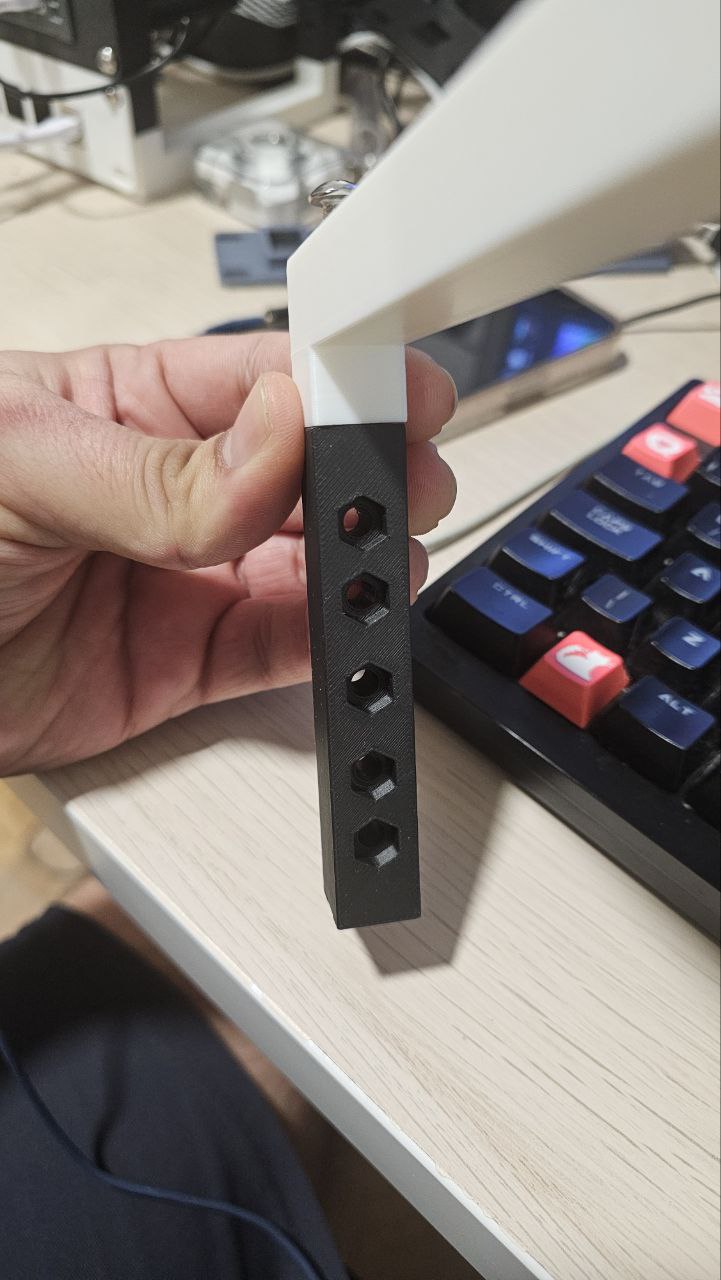
- M5 Hex nuts for the mounts. At least 2 per mount.
Rack assembly
After you have printed your rack parts, you must use the thread inserts and screws to assemble it.
OBS.: The rail and joint sizes used in this tutorial are only for illustration purposes, you may choose a size to your liking.
Please, follow the steps below:
- Insert the 8x M5 thread inserts into your rails.
- Attach one of the joints to your rail. The hex nut part of the rail must be facing back, as in the pictures below.
- Attach the second rail on the other side of the joint.


- Attach the second joint to both rails.
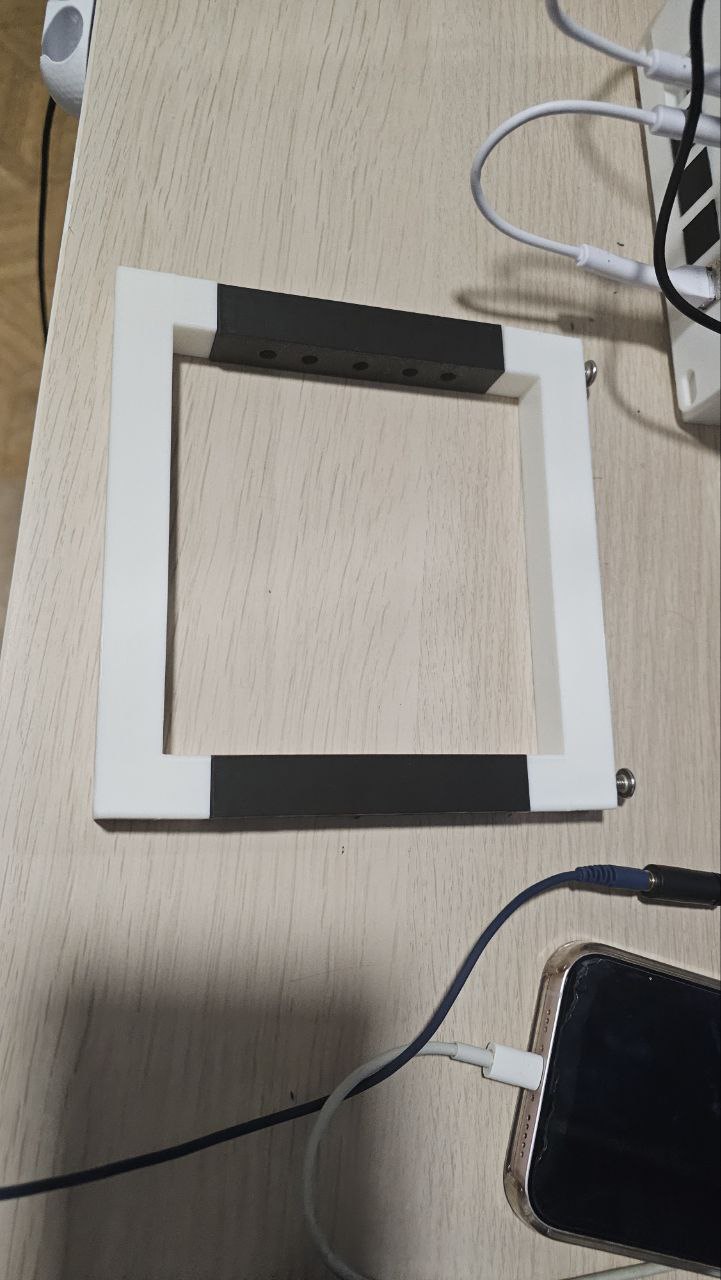
- Tighten all 4 screws. But do not over tighten them.
- Repeat the steps above to make the other side of the rack.
- Now, I recommend printing one of the blanks, either 10-inch or 6-inch, to use as a guide in the back of the rack. This will help you to get the correct size.
- Now you're done! Your rack is ready to install other mounts.
Print Settings
Supports:
No.
Resolution:
0.2 or 0.24
Walls/Perimeters:
At least 3.
Infill:
25% or more.
Filament:
PLA+/PETG/ABS/ASA/PC/Nylon
Tags
Model origin
The author marked this model as their own original creation.


