FC Barcelona 2D Art Logo
Description
PDFIt is recommended that when designing a 2D Art Project such as this, you work with a partner who is also designing a 2D Art Piece. When I was working on this project, having a partner to collaborate with helped both of us a lot because we could rely on each other for help if we ran into problems while designing on SolidWorks.
About this project:
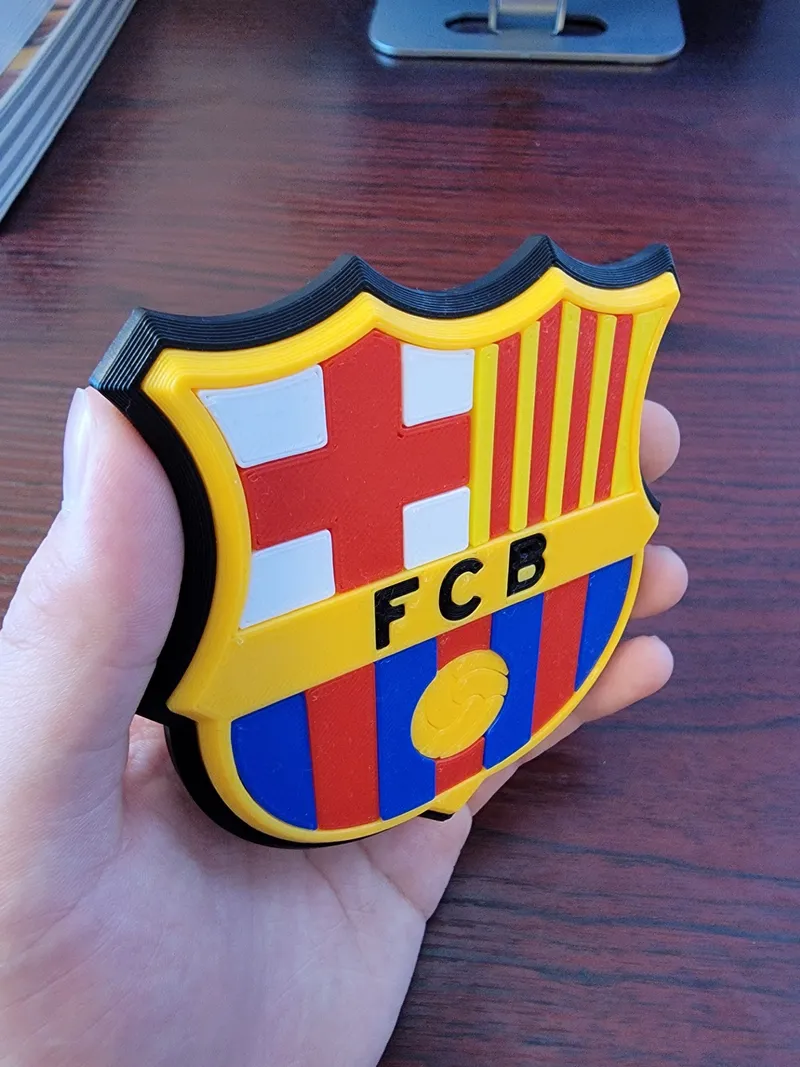
- Size of logo just about fits in an adult sized hand when holding by one of the faces
- Pieces are separated by color and require assembly after printing
Design Statement
With a partner, you will design a “2D” placard using SolidWorks. You and your partner will have the same design which meets the constraints below, and you will EACH use SolidWorks to create your design.
Constraints
- Should have a flat back; detail will be on the front side
- Should fit inside a box that is no bigger than 225 cm^2 in area with no dimension longer than 25 cm
- When assembled, should be no more than 1 cm in total thickness
- Sketch must begin with a constraint box, center-rectangle created from the origin
- Dimensions should be detailed but efficient
Steps to make a 2D Art logo:
Note: Make sure to use the correct colors for each part of the logo when printing
- Create a square, circle, or rectangle to be used as the platform for your logo.
- Extrude the shape to the desired thickness of your logo design.
- Copy and paste your logo onto the front face of your shape (instructions for how to copy and paste a logo into SolidWorks can be found on the internet).
- Trace the outline of your logo and create a new sketch on the face of the outline.
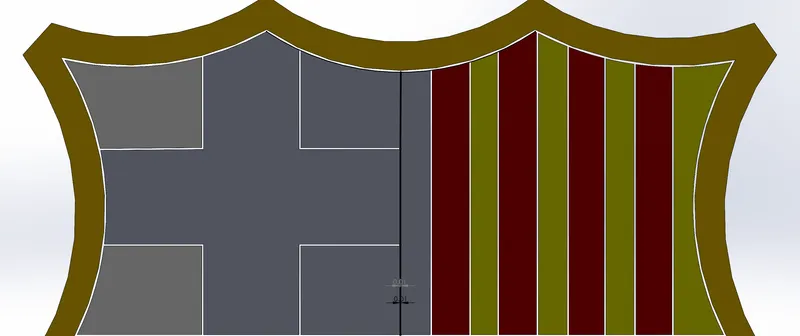
- Trace a line/arc on each part of your logo where there is a division of two colors.
- Separate your logo into pieces and create a new sketch on the face of each piece.
- On each sketch, convert each line/arc. Then, offset each line/arc in both directions by 0.01 to 0.02 cm.
- Extrude Cut ("Through All" option) the region that you created using the offset feature. Do this after you have finished offsetting your lines and arcs on each piece/sketch of the logo.
- Create a dish on the back of your logo at an appropriate thickness.
- As an option, add chamfers or fillets around the edges of your logo to decorate it.
Design Choices
For our Genius Hour project, we were given the choice to make anything we wanted. As someone who's been a fan of FC Barcelona for more than seven years, I had no choice but to make an amazing 2D Art logo of the greatest team in the world.
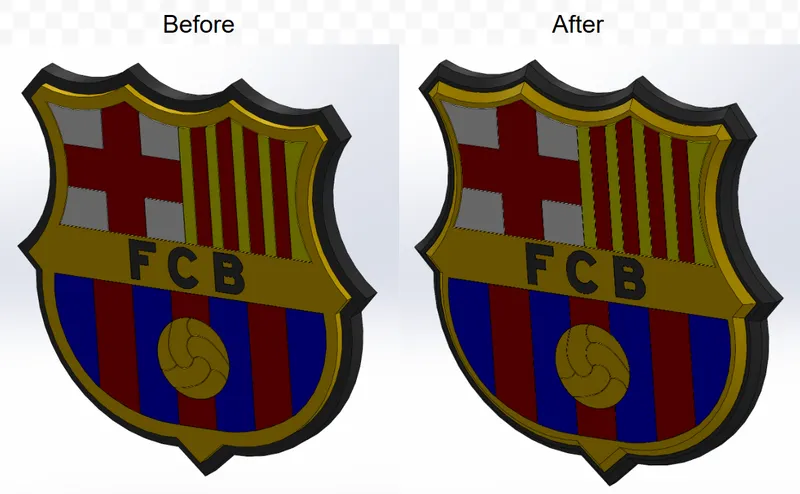
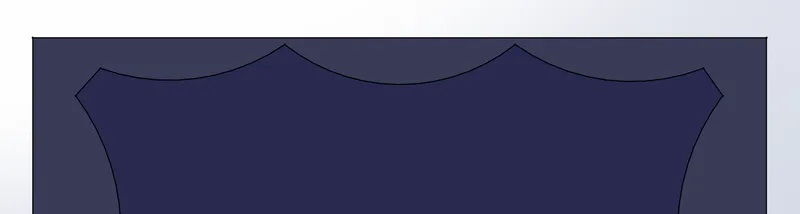
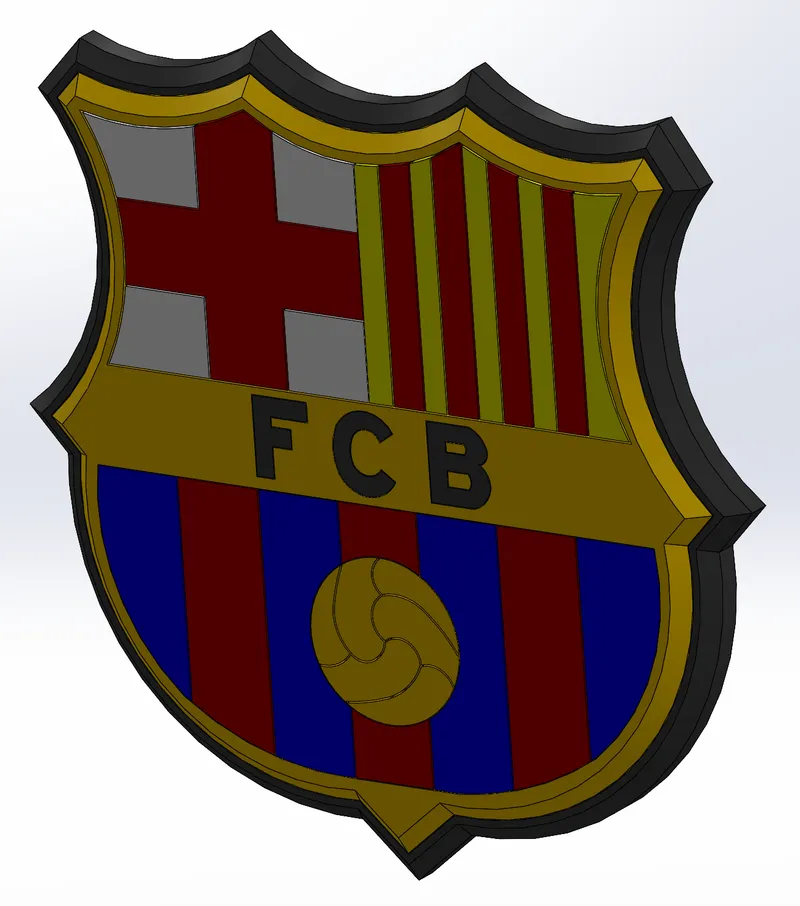
The first change in my design process that I made from my original design was adding chamfers onto the edges of my design. Compared to the “before” image below, adding chamfers onto the edges of the logo makes it look better as a whole to the eye.
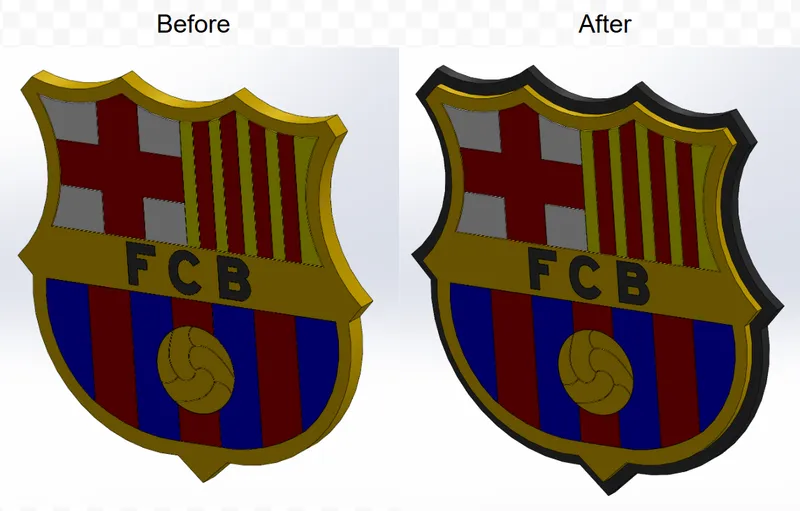
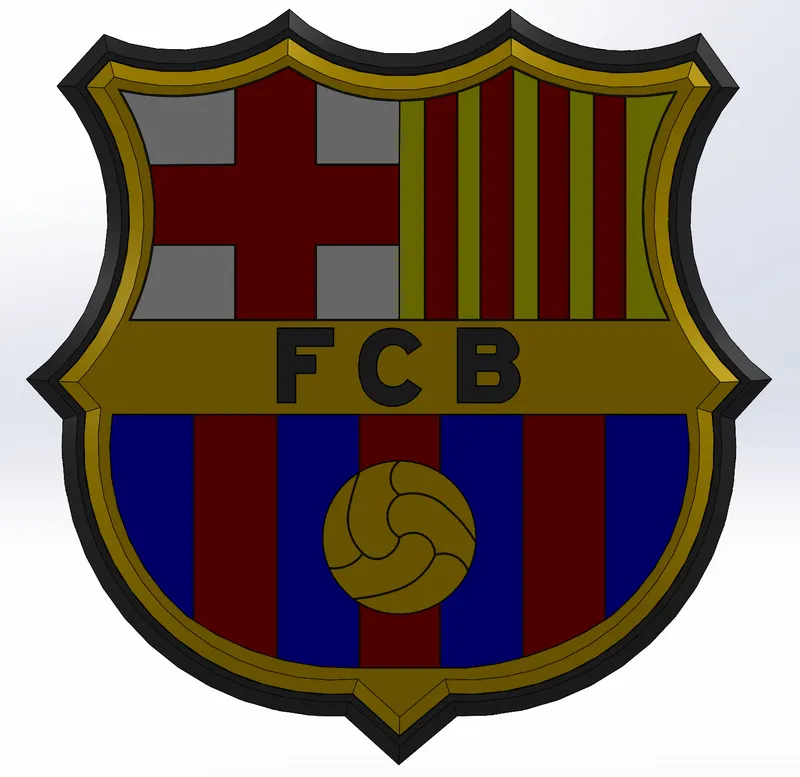
Another change I made to my design was choosing to add a dish to my logo. Originally, I had planned to leave the logo as the “below” image, but after seeing how it looked without a dish, I decided to add a dish that outlined the logo pattern and had a nice color contrast with the face of the logo.
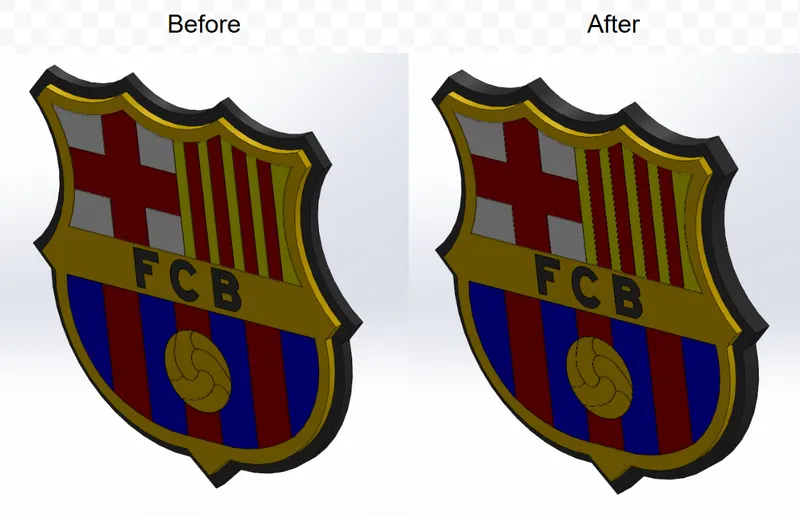
Speaking of the dish, I also played around with the thickness of the dish. When I first added the dish onto my logo, it was very thin and did not look fitting in comparison to the length and width of the logo. A simple adjustment to the thickness of the dish fixed all issues.
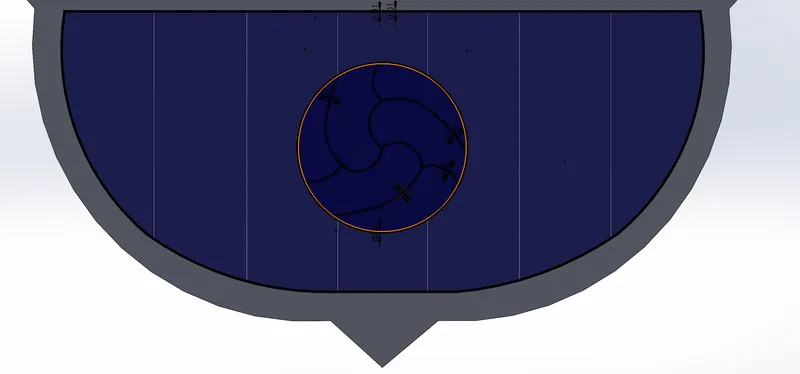
The biggest challenge I faced in my design process when designing my logo was offsetting the lines. Specifically, the arc patterns on the ball at the bottom of the logo presented a challenge, as I had to offset at least two arcs at a time while making sure another arc is not cut off from the rest as a result.
Another challenge I faced when offsetting the lines on my logo was when I came across a problem with the line that divided the two top pieces of my logo. Because the line was right in between two different sketches, SolidWorks did something weird and I had to create and offset the line there after finishing the offset on every other line of my project.
Tracing the arcs of my logo was also one of the biggest challenges in my design process. This is because the arcs on the logo were hard to trace to the point where it lined up exactly with the logo picture, specifically the longer arcs at the top of the logo. I overcame this challenge by using two arcs in SolidWorks to trace one arc on the logo picture when necessary.
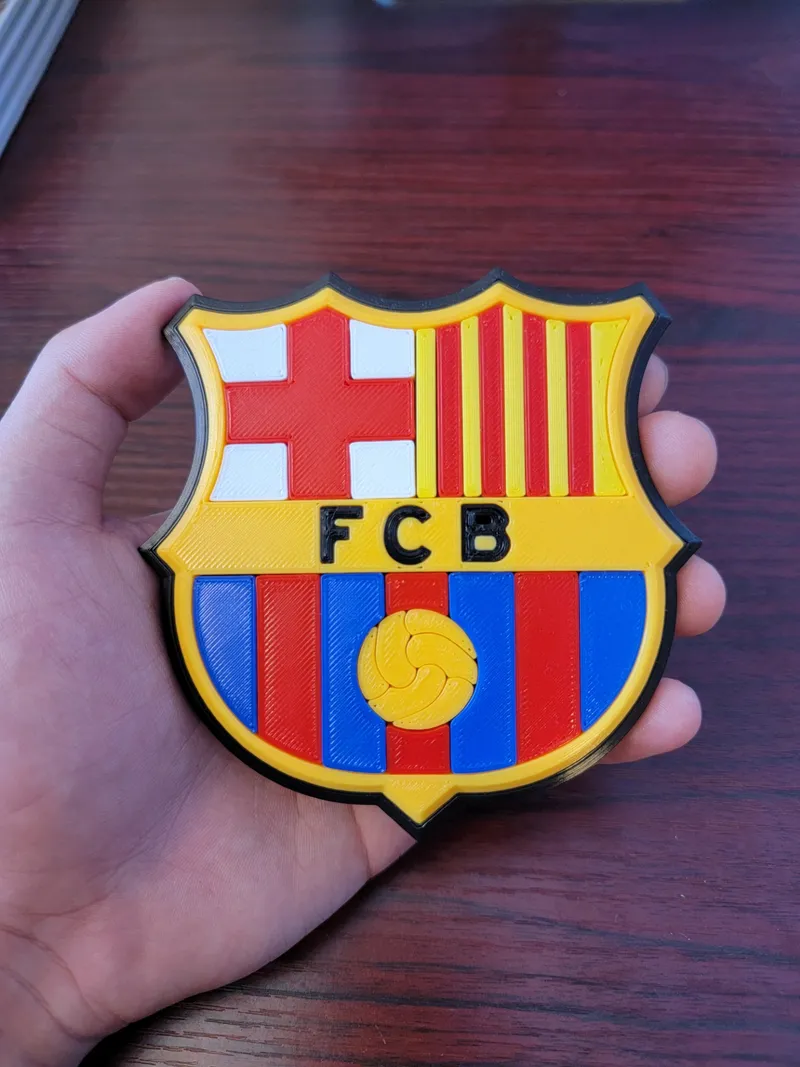
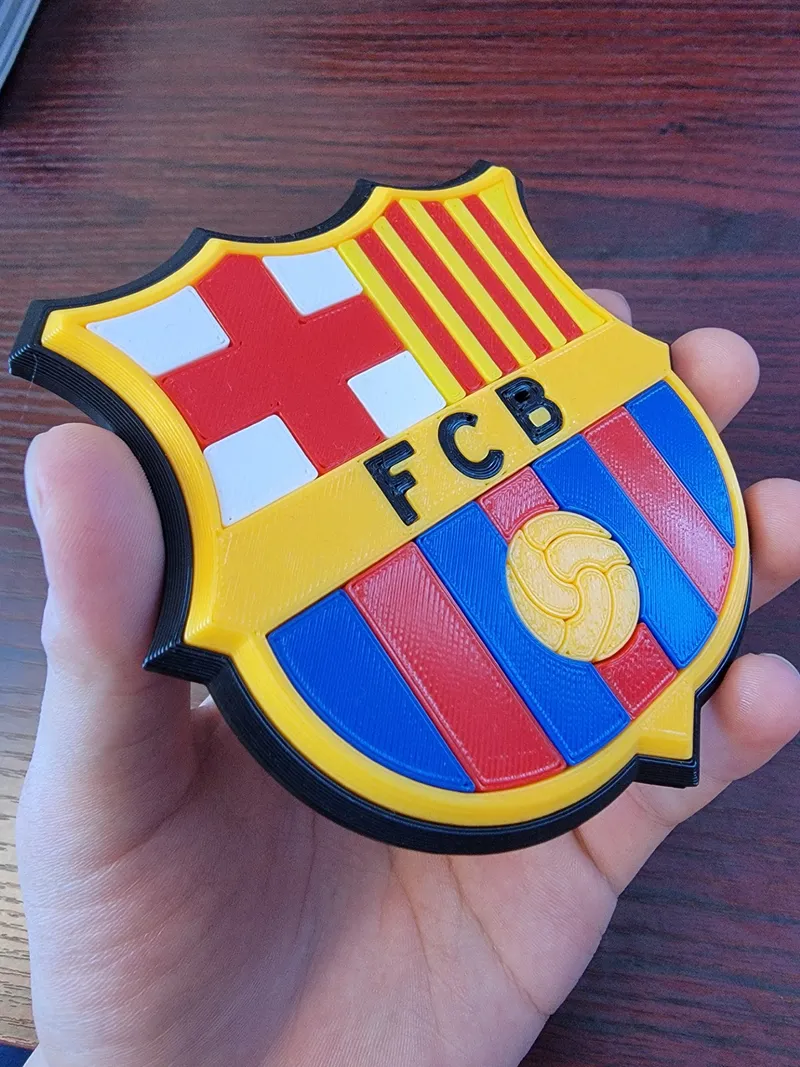
Final Design Images
Model origin
The author marked this model as their own original creation.


