The Shark Filament Buffer and Drybox System (V6)


Description
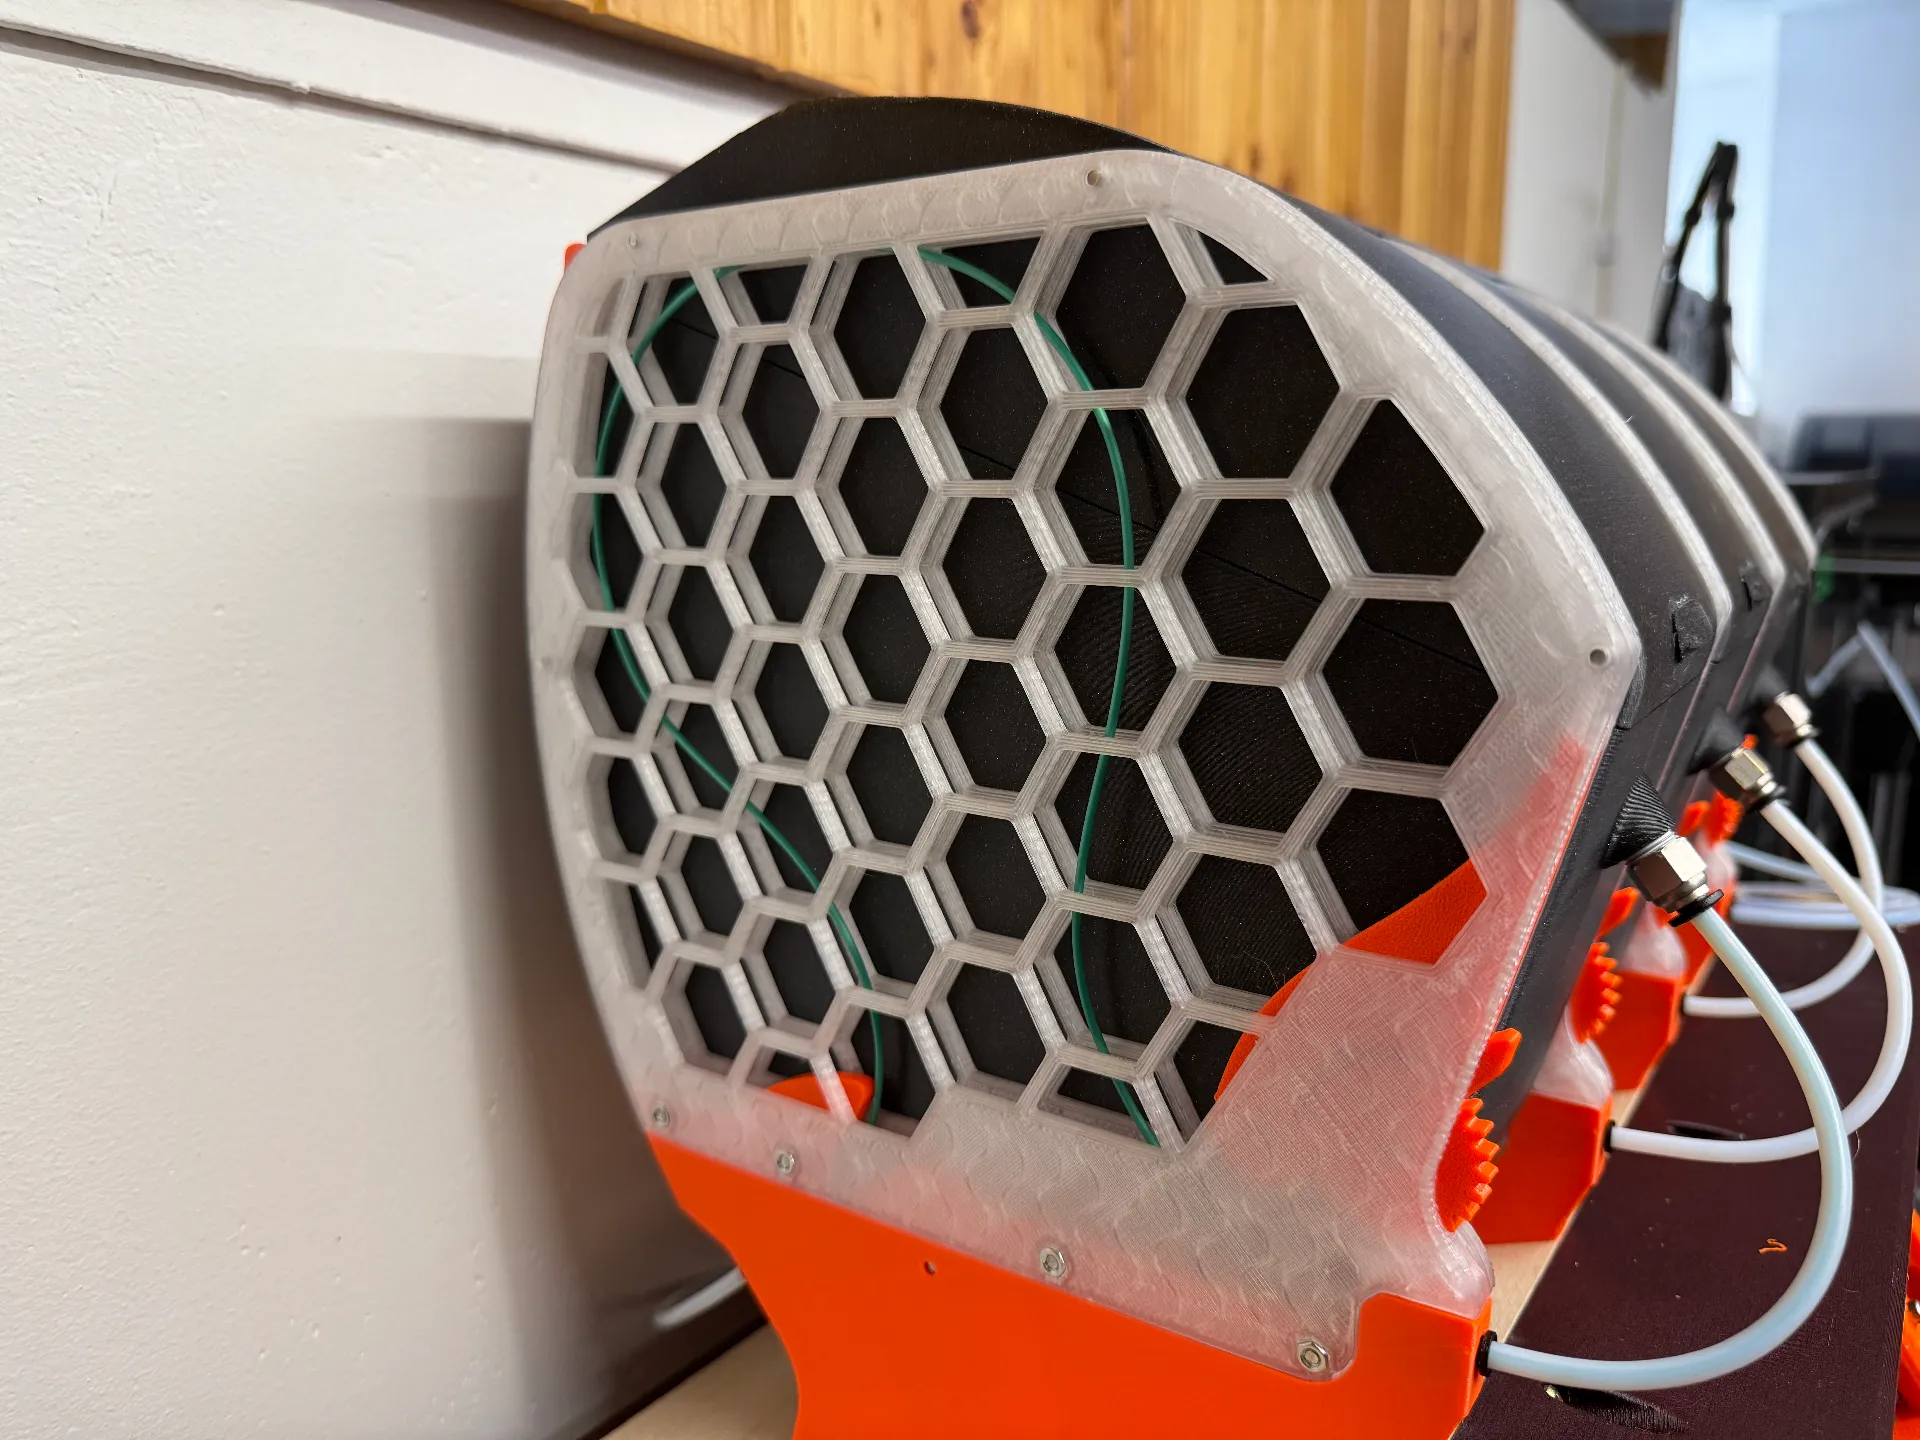
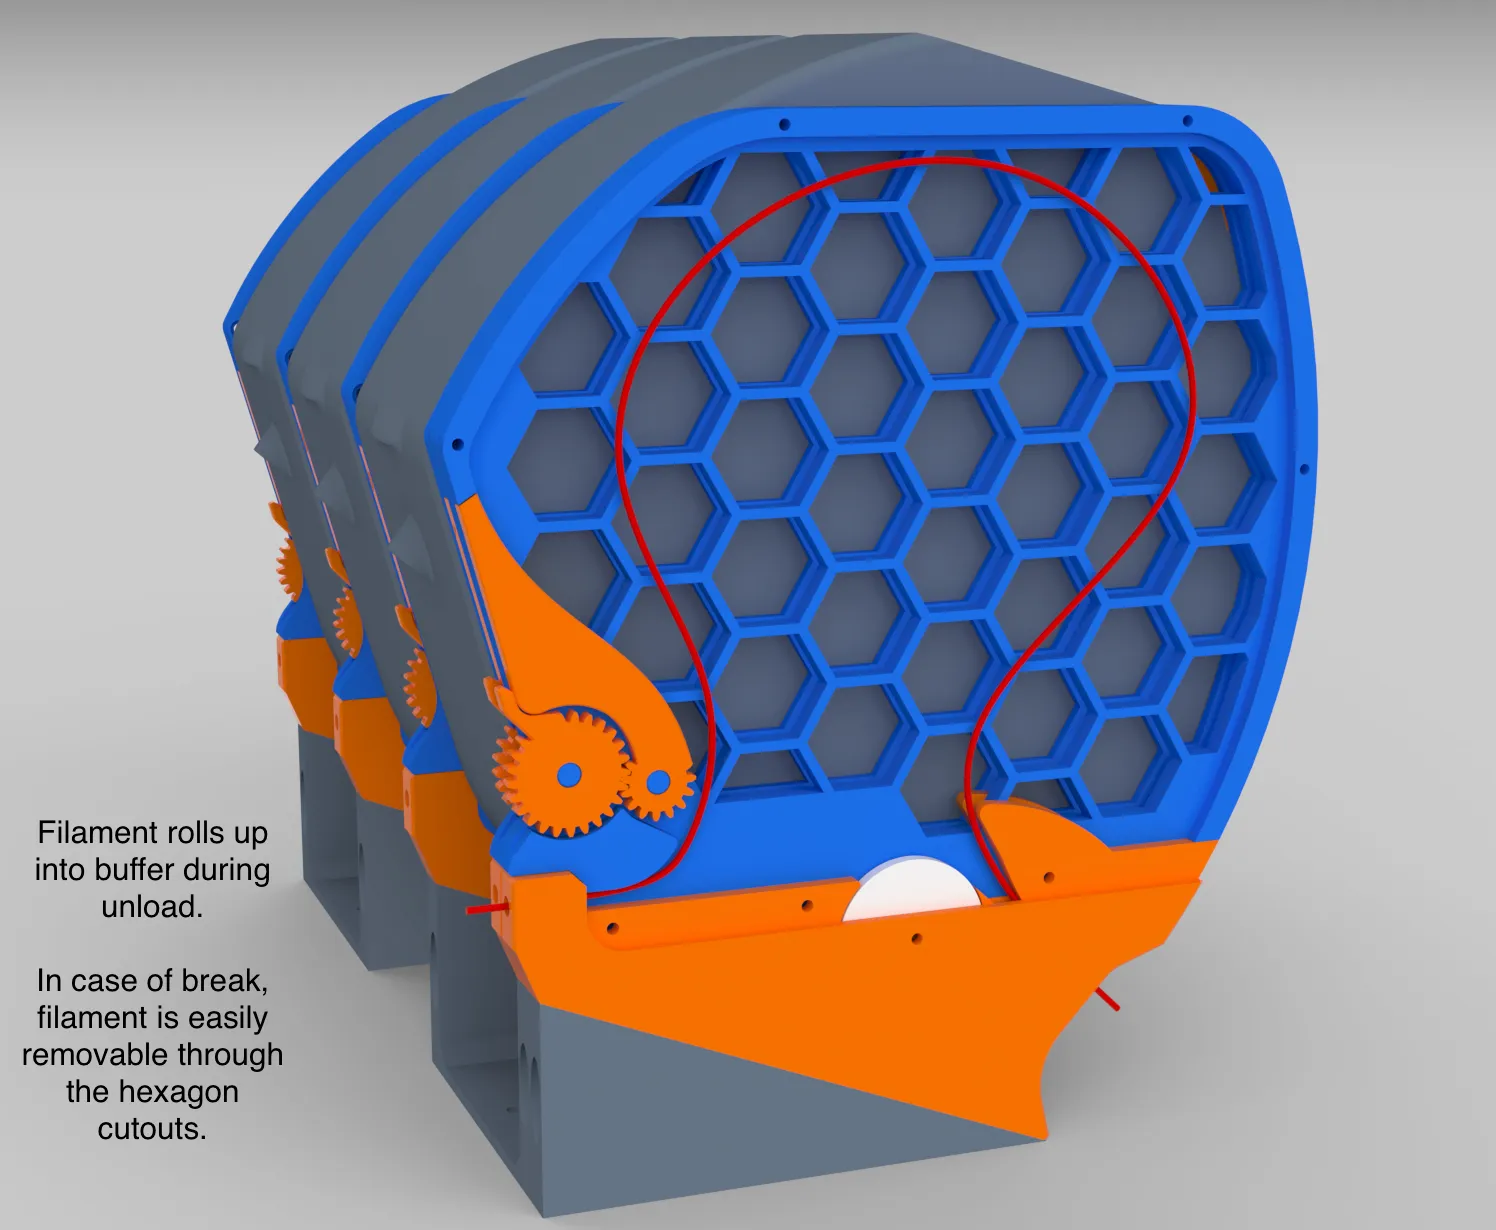
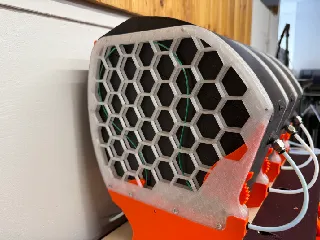
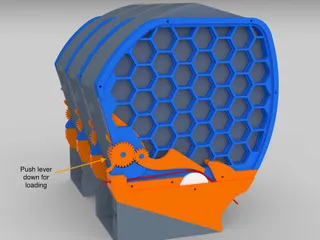
PDFThe Shark filament dry box system has been through many iterations, and is finally at a a stage I'd say is “finished”. It's named because of the shark fin shaped filament guide that makes it possible to load filament easily.
The main design principles were:
- Had to have a very clean filament path, with as few turns and as short a length as possible
- Had to be very easy to load
- Had to be mountable above the printer on top of a very compact enclosure
- Had to be modular
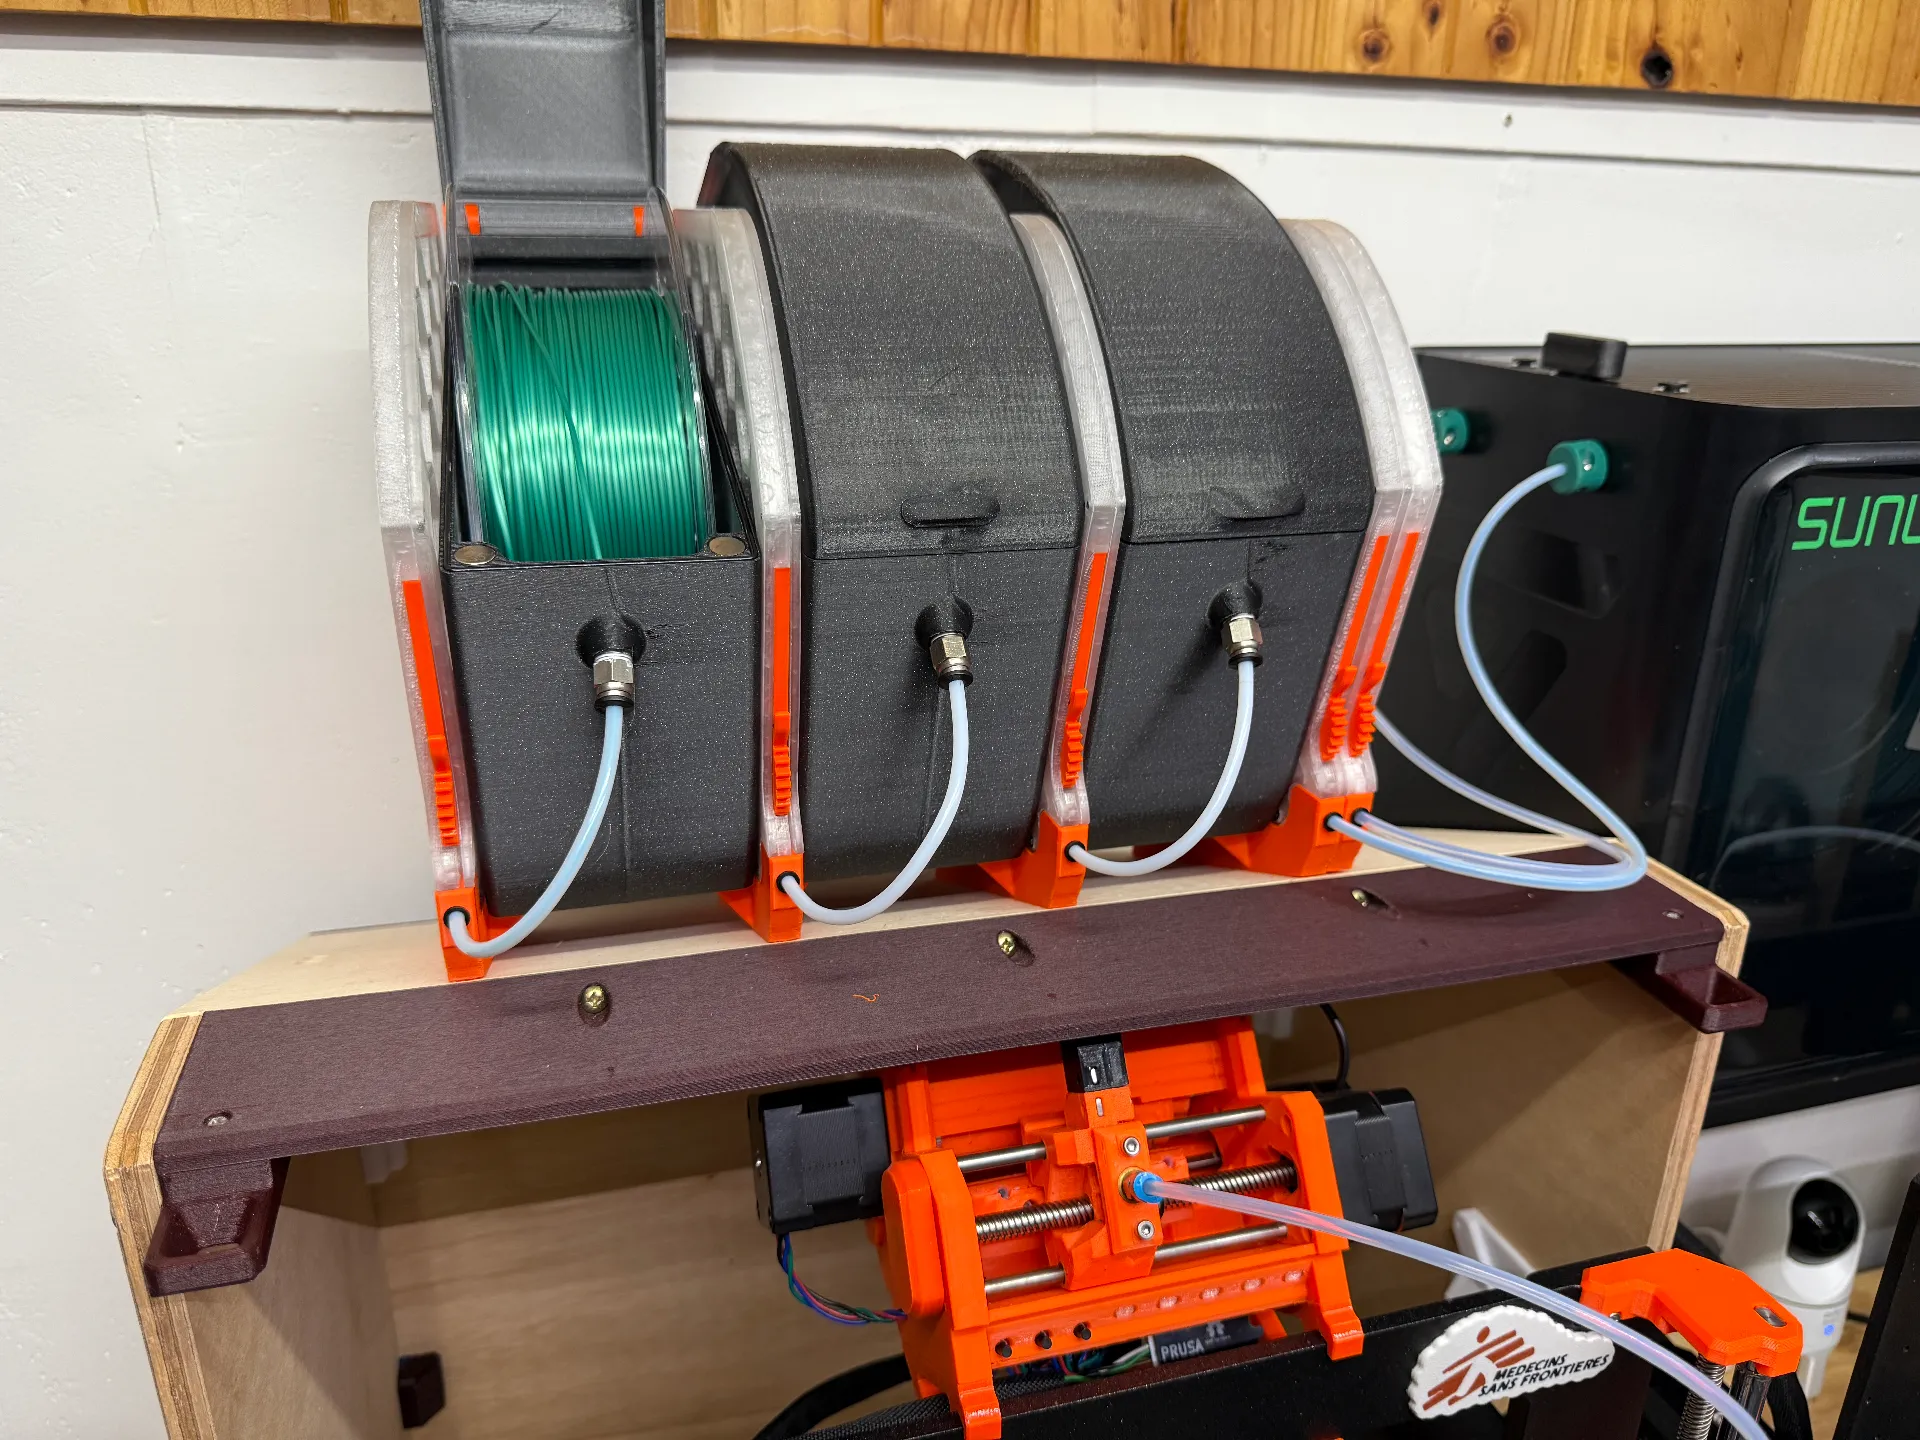
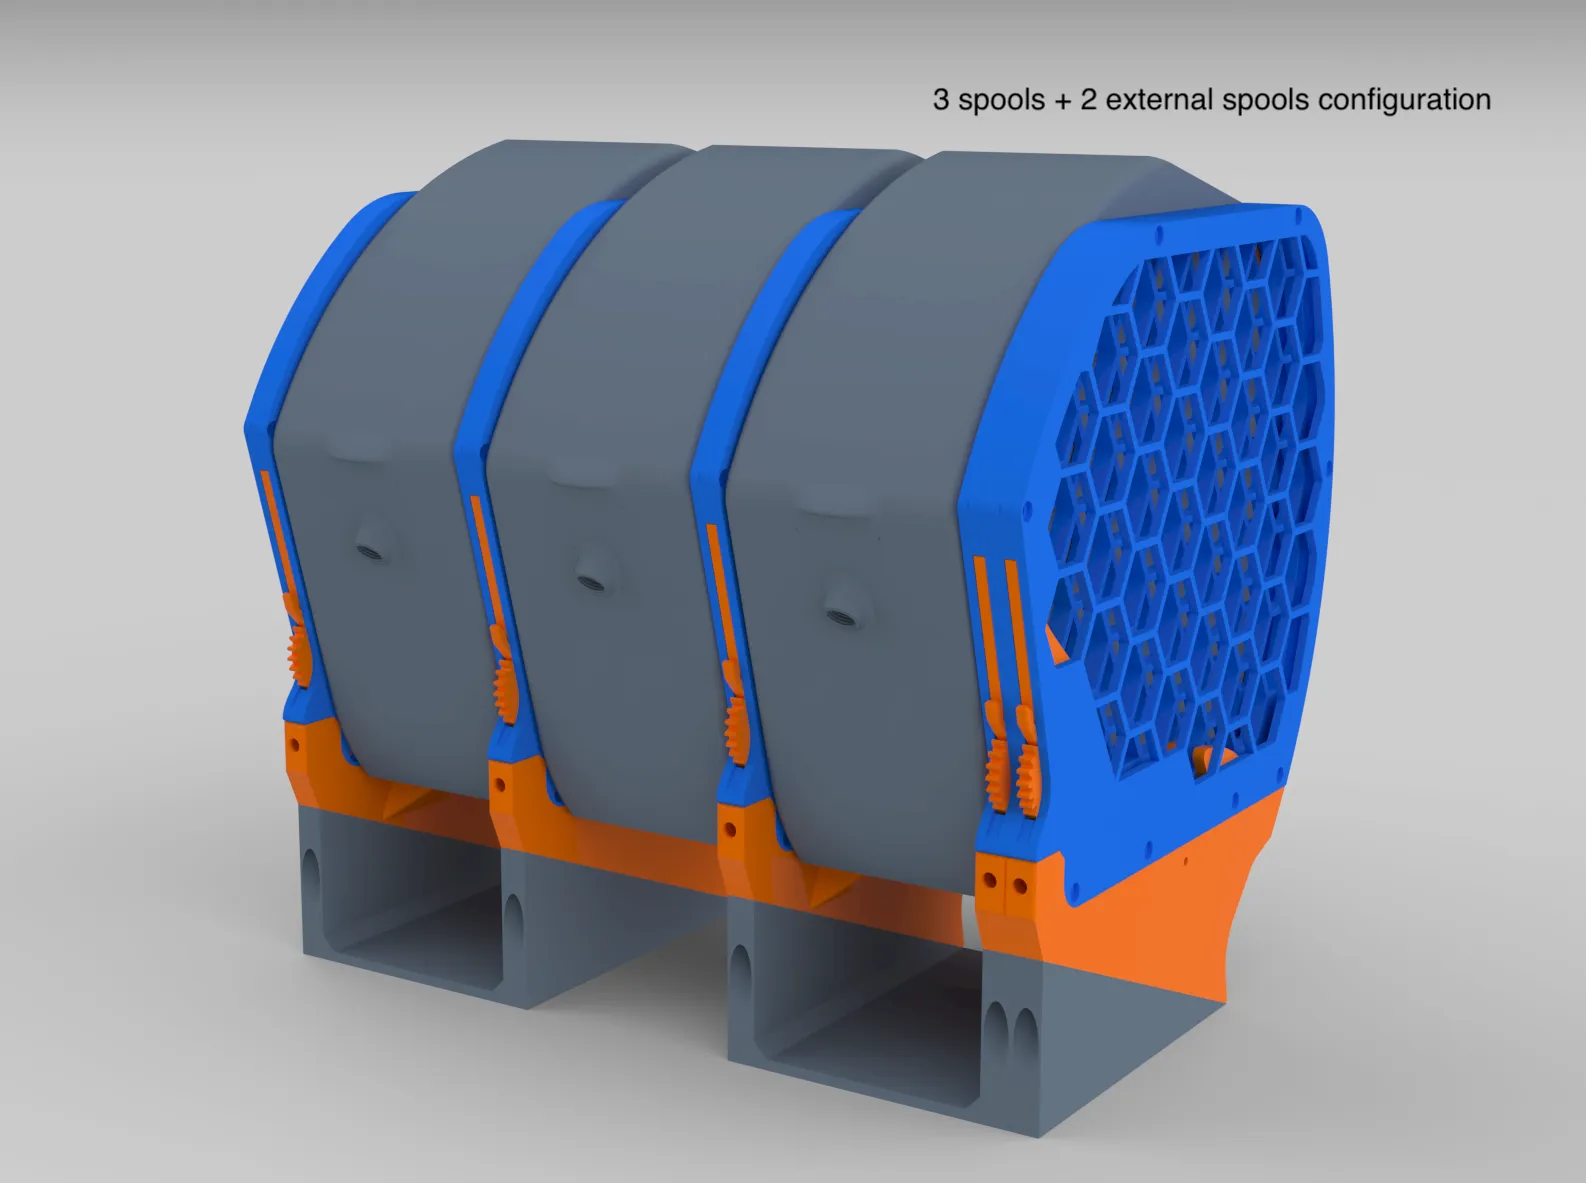
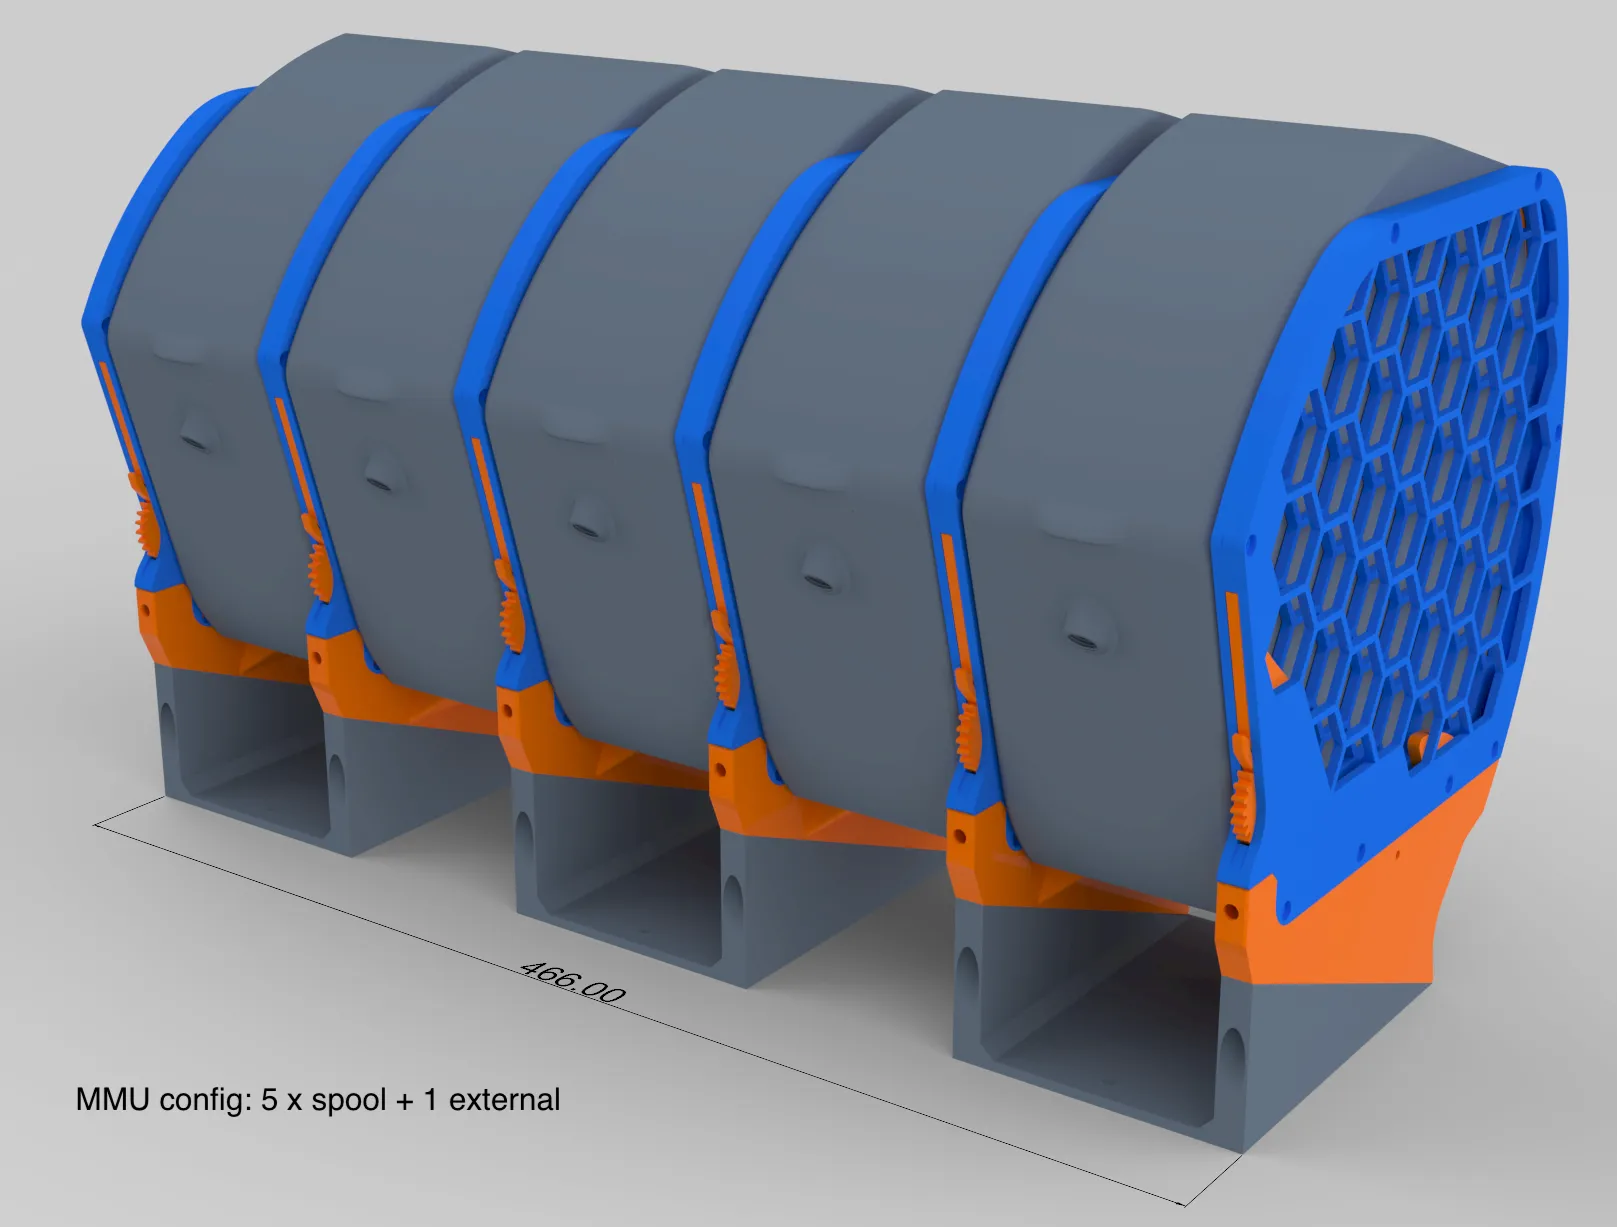
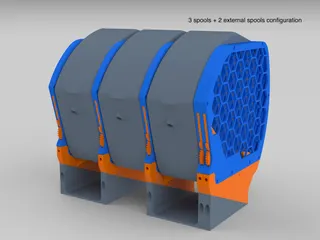
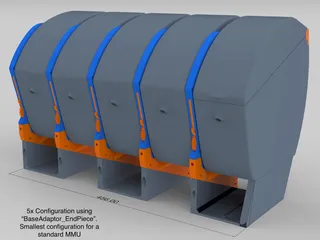
The Shark is designed to take up very little space so it can be stacked above the printer. In a 5x1 configuration with 5 MMU spools it is still only 456mm across. I usually run it in a 3 x 2 configuration with feeds 1 and 2 coming from a filament dryer and 3,4, and 5 using the dry boxes.
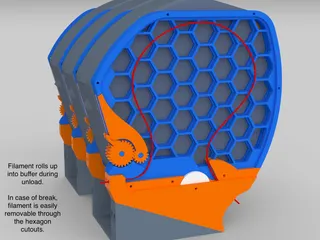
It has a lever system to enable easy loading. All you need to do is push the lever down and feed the filament through. No need to remove any buffers,
The main base unit is designed to sit on my enclosure with a 22º angle, so I've added adaptors that allow the system to be screwed or bolted down to a surface.
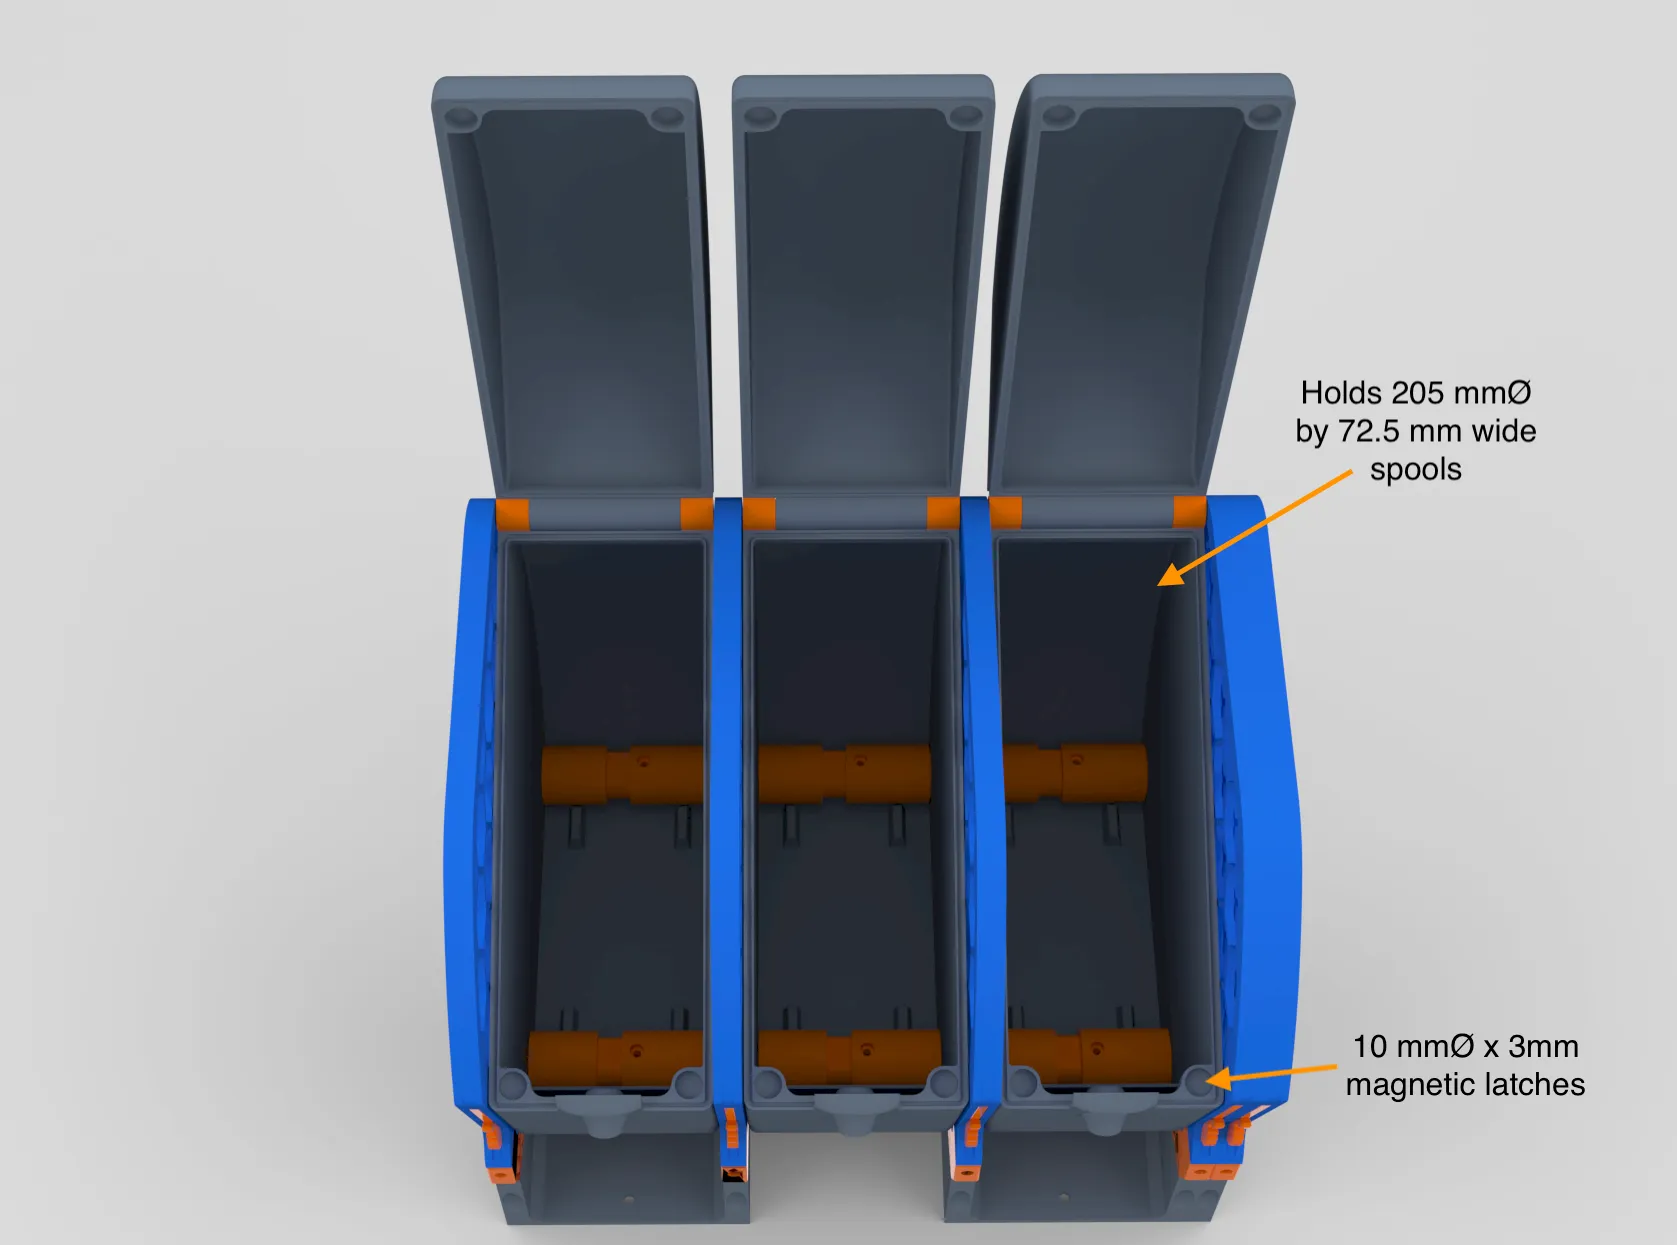
The dry boxes can be sealed using 1.75mm TPU filament. Each dry box will hold a 205 x 72.5mm spool.
There are three variants. The recommended one for most people uses the 3mm pin and bearings from the Prusa buffer as well as M3 bolts and square nuts (denoted with M3 bolts in the names). Most parts should be common in the Prusa ecosystem. The other variants use either the 3mm pin and bearings from the Prusa buffer and M4 bolts and inserts for mounting, or 5mm bearing pins and 10x5x4mm bearings and M4 bolts and inserts.
Each panel set uses:
- 8 x 8mm low profile M3 screws
- 4 x 3mm thick M3 brass inserts (though there are a panel options that use either M3 nuts, or just screw directly into the plastic).
Each base uses
- 2 x 4mm inserts and 2 x M4 low profile bolts, or 2 x M3 Prusa square nuts and 2 x M3 12mm bolts.
- Screws or tape to hold the adaptors down to a surface
- 2 x PTFE connectors from the Prusa buffer
- 3mm pins and bearings from the Prusa buffer (or 10x5x4mm bearings)
The spool holders use
- Pair of m3 x 20mm nuts and bolts (Note: LarGriff has developed some clips that can be used instead of the nuts and bolts. See comments and makes)
- Pair of m3 x 12 bolts
- Four 10mmx3mm magnets.
- A M10 PTFE pass through adapter
- Some PFTE tubes
- 4 x 608 bearings.
Printing the lids is a bit tricky. There's quite a steep overhang to start. I'd suggest using support for the first few layers and slow down. I'll probably rework the lids at some stage to cut down on that overhang.
Update: 29/12/24 - fixed a problem with the spool holders.
Update: 2/1/25 - Added an Adaptor_Endpiece so that the sixth buffer isn't required.
Update: 21/01/25 - Updated the BOM.
Tags
Model origin
The author marked this model as their own original creation.